
Clearing a plugged Washer tube.
 05-26-2017, 01:14 PM
#1
Melting Slicks

Thread Starter
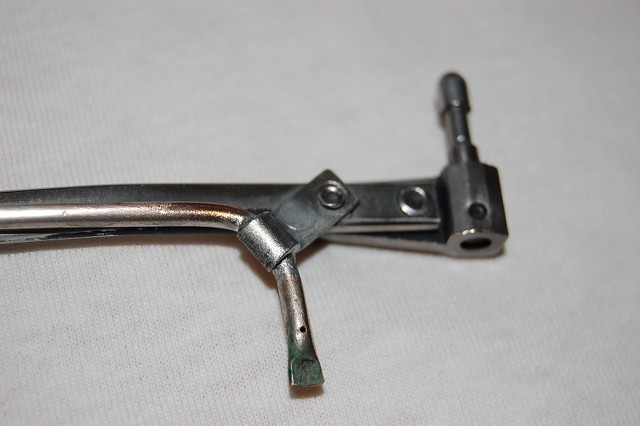
I discovered a Windshield Wiper Arm's Washer Hardline is plugged.

If anyone out there has had this condition, how did you clear it?
Thanks.
Steve

If anyone out there has had this condition, how did you clear it?
Thanks.
Steve
 05-26-2017, 01:30 PM
#2

Pucker up!
05-26-2017, 03:27 PM
#3
Team Owner

Member Since: Sep 2006
Location: Westminster Maryland
Posts: 30,173
Likes: 0
Received 2,878 Likes
on
2,515 Posts

Hi Steve,
I'd start with a sewing needle at end with the tiny holes. Typically 2 (?) holes per tube.
If that's not it then perhaps a long piece of very fine music wire from the other end.
Good Luck!
Regards,
Alan
I'd start with a sewing needle at end with the tiny holes. Typically 2 (?) holes per tube.
If that's not it then perhaps a long piece of very fine music wire from the other end.
Good Luck!
Regards,
Alan
The following users liked this post:
Cavu2u (05-26-2017)

The following users liked this post:
Cavu2u (05-26-2017)
05-26-2017, 03:49 PM
#5
Melting Slicks
Thread Starter
Thank you folks.
Alan, thanks for enlightening me on where the holes were even located!
And 69FR, a chemical way to go is a good slant to try too.
I wanted to remove the Wiper Arm from it's pivot mount, but was unsure how to remove it's cover.
I didn't want to break it. Does it just pry off from the bottom outward?
Steve
Alan, thanks for enlightening me on where the holes were even located!
And 69FR, a chemical way to go is a good slant to try too.
I wanted to remove the Wiper Arm from it's pivot mount, but was unsure how to remove it's cover.

I didn't want to break it. Does it just pry off from the bottom outward?
Steve
05-26-2017, 04:01 PM
#6
Team Owner
Member Since: Sep 2006
Location: Westminster Maryland
Posts: 30,173
Likes: 0
Received 2,878 Likes
on
2,515 Posts
Hi Steve,
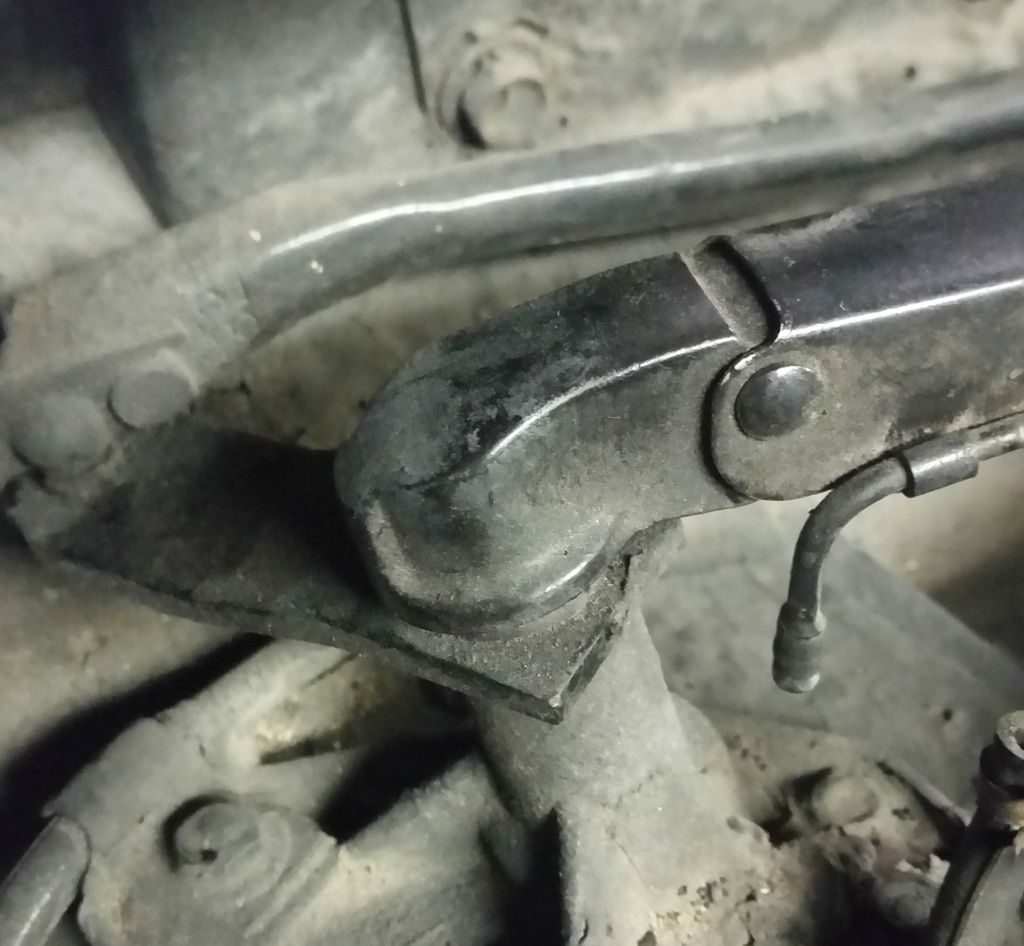
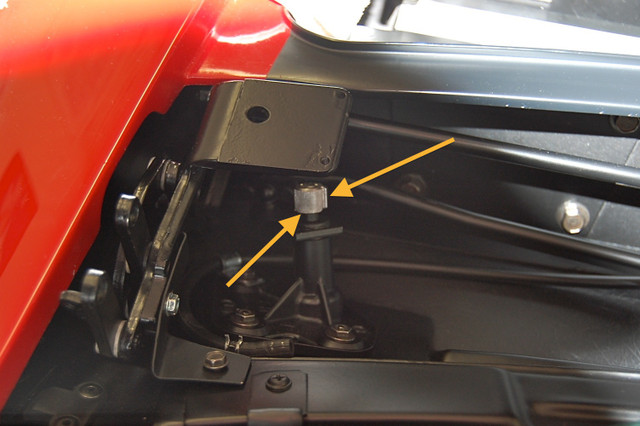
The wiper arm is held in place on the transmission shaft by a key in the shaft and a keyway in the arm.
In addition, there's a small spring clip that must be depressed to remove the arm from the shaft.
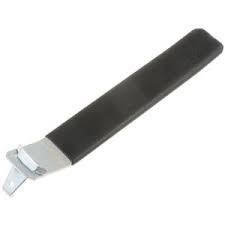
There's a special little tool that makes it quite easy. Sometime the spring clips are broken because people have just forced the arm off the shaft.
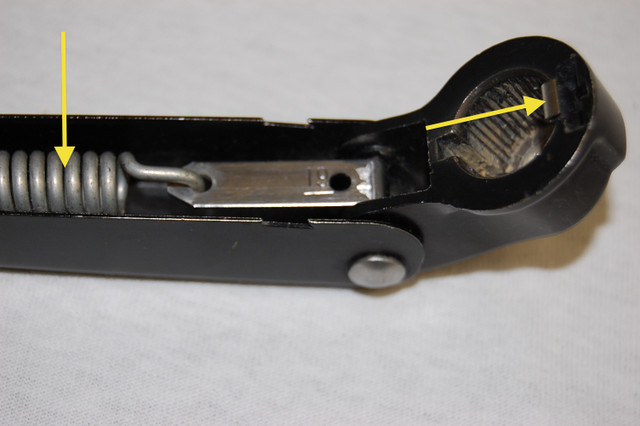
The spring tension that holds the arm against the windshield must be defeated by holding the arm away from the glass a few inches. (The other arrow points to the spring that's being defeated. when you lift the arm.
Regards,
Alan
The wiper arm is held in place on the transmission shaft by a key in the shaft and a keyway in the arm.
In addition, there's a small spring clip that must be depressed to remove the arm from the shaft.
There's a special little tool that makes it quite easy. Sometime the spring clips are broken because people have just forced the arm off the shaft.
The spring tension that holds the arm against the windshield must be defeated by holding the arm away from the glass a few inches. (The other arrow points to the spring that's being defeated. when you lift the arm.
Regards,
Alan
Last edited by Alan 71; 05-26-2017 at 04:03 PM.
The following users liked this post:
Cavu2u (05-26-2017)
05-26-2017, 04:21 PM
#7
Melting Slicks
Thread Starter
Thanks very much for the info Alan.
Just to be clear....
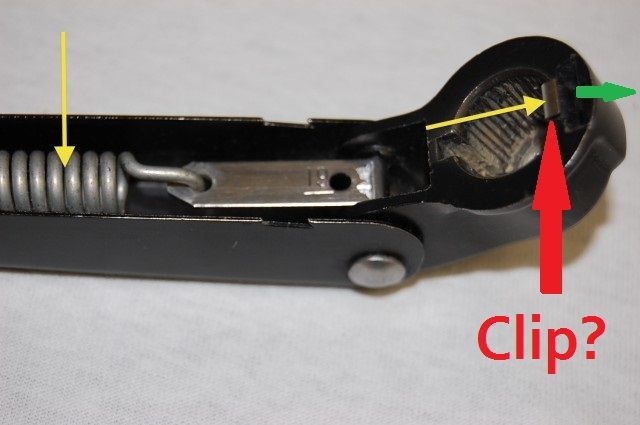
..., the red arrow is the clip that has to be depressed in the Green Arrow's direction for the Arm to release from it's shaft. Correct?
Steve
Just to be clear....

..., the red arrow is the clip that has to be depressed in the Green Arrow's direction for the Arm to release from it's shaft. Correct?
Steve
05-26-2017, 04:28 PM
#8
Team Owner
Member Since: Sep 2006
Location: Westminster Maryland
Posts: 30,173
Likes: 0
Received 2,878 Likes
on
2,515 Posts
Hi Steve,
Yes!
Regards,
Alan
Upper arrow�key on grooved shaft
Lower arrow� point where clip 'seats'.
Yes!
Regards,
Alan
Upper arrow�key on grooved shaft
Lower arrow� point where clip 'seats'.
Last edited by Alan 71; 05-26-2017 at 04:39 PM.
The following users liked this post:
Cavu2u (05-26-2017)

The following users liked this post:
Cavu2u (05-26-2017)
05-26-2017, 05:26 PM
#11
Team Owner
Member Since: Sep 2006
Location: Westminster Maryland
Posts: 30,173
Likes: 0
Received 2,878 Likes
on
2,515 Posts
Hi Steve,
I think it's a pretty common 'auto store' type tool.
Regards,
Alan
I think it's a pretty common 'auto store' type tool.
Regards,
Alan
The following users liked this post:
Cavu2u (05-26-2017)
 05-26-2017, 07:57 PM
#13
Melting Slicks
Thread Starter
Got it off it's shaft (probably the first time ever) and discovered PO painted the thing, and poorly done at that too.
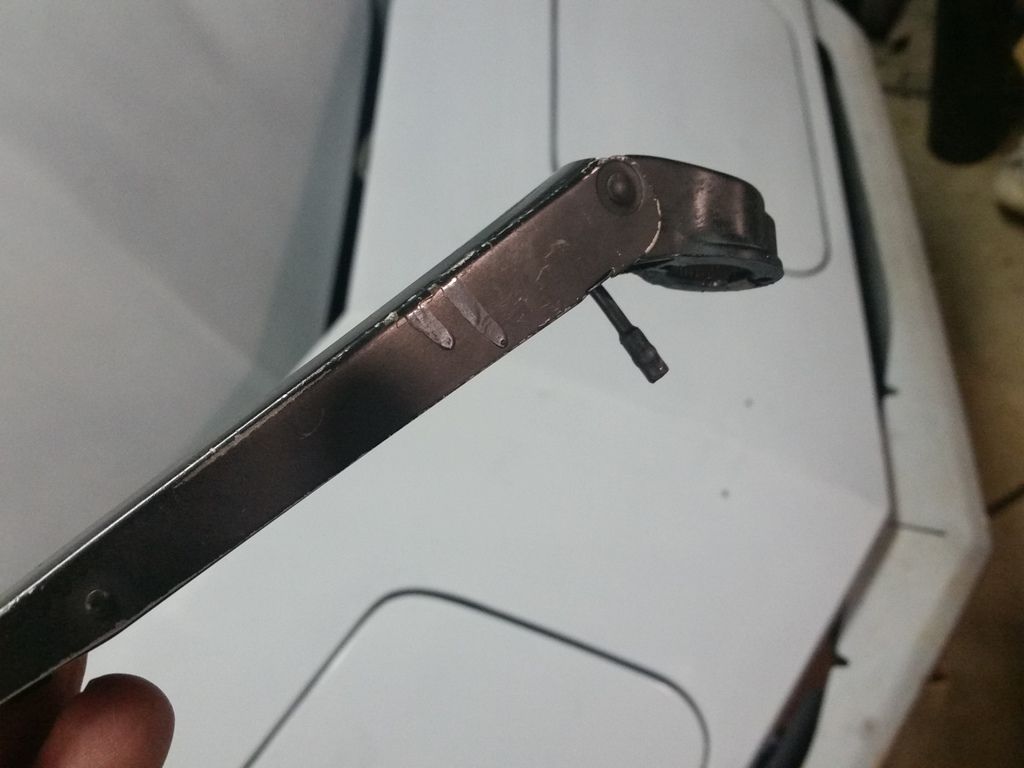
Cleared the discharge holes with a cheap mini-drill bit set I had and got some crusty white crap removed.
But the line still isn't clear. Discovered .065 WeedEater line is too big. Gonna try the CLR thing next.
I had a product on hand named Lime-A-Way. Basically does the same thing as CLR. Dripped it down the hose end of the tube. That took a while, as a few drops took a long time to work all the way down, then repeat, over and over. After about 10 times of this, I put an air nozzle to it, and VIOLA!, it came flyin out the tube's nozzles.
Then I start looking at the paint (once started, I can't stop), and used an orange paint stripper on it.
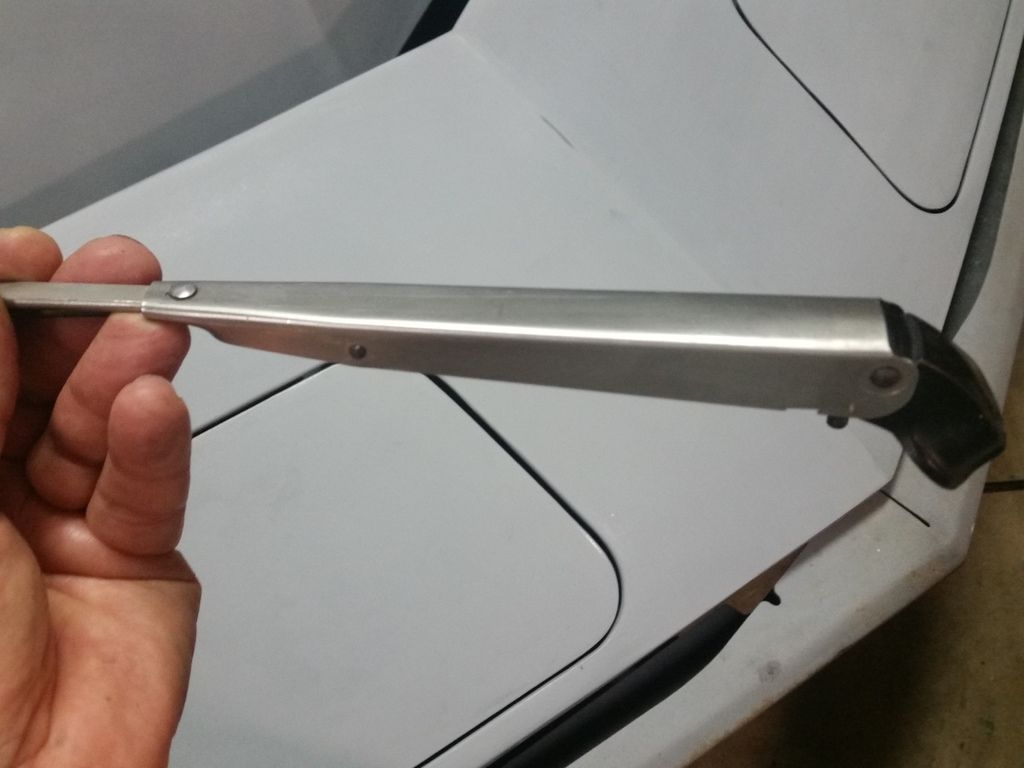
Am I wrong in sayin' this ain't Stainless Steel? Looks like stainless to me anyway.
I saw the TRICO logo stamped on a cover plate on Arm's bottom, thinking this is a replacement. But then next to it, I see what looked like a GM number; 3378874. It's GM alright.
Steve
Last edited by Cavu2u; 05-26-2017 at 11:26 PM.
05-28-2017, 08:50 AM
#14
Melting Slicks
Thread Starter
One last question.
Do they just push on to their shafts, or does that flex tab have to be held?
Sorry for the simple question, but I honestly don't know, never having done this before.
Thanks.
Steve

Do they just push on to their shafts, or does that flex tab have to be held?
Sorry for the simple question, but I honestly don't know, never having done this before.
Thanks.
Steve
Last edited by Cavu2u; 05-28-2017 at 08:50 AM.
05-28-2017, 09:19 AM
#15
Burning Brakes


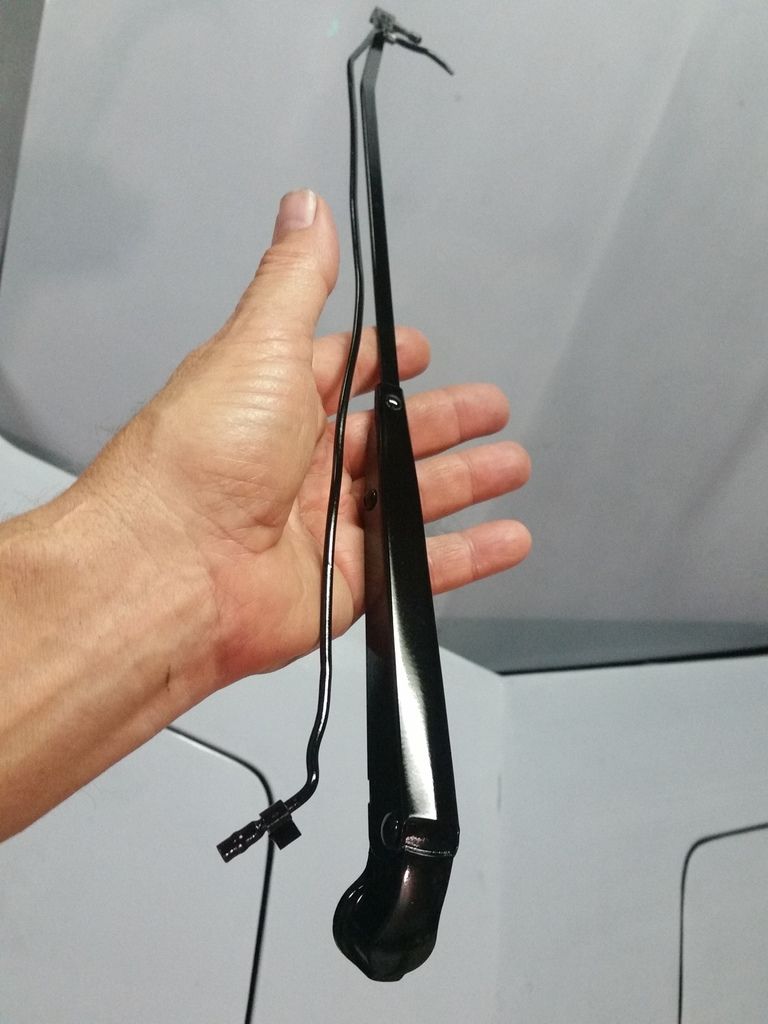
You really did a nice job restoring them. All you need to do to reinstall them is to make sure you have them in their correct park position and just push them back on. You'll know when they are on. I notice one thing though, the paint seems pretty glossy, maybe it's just the camera or lighting. If you want them correct they should be flat black or softer satin.
In case you want to change before you put them back on.
The driver's side goes on first and parks on the metal stop, then the passenger side .
Regards,
Tooch
Last edited by Tooch1; 05-28-2017 at 09:22 AM.
The following users liked this post:
Cavu2u (05-28-2017)
05-28-2017, 09:39 AM
#16
Team Owner
Member Since: Sep 2006
Location: Westminster Maryland
Posts: 30,173
Likes: 0
Received 2,878 Likes
on
2,515 Posts
Hi,
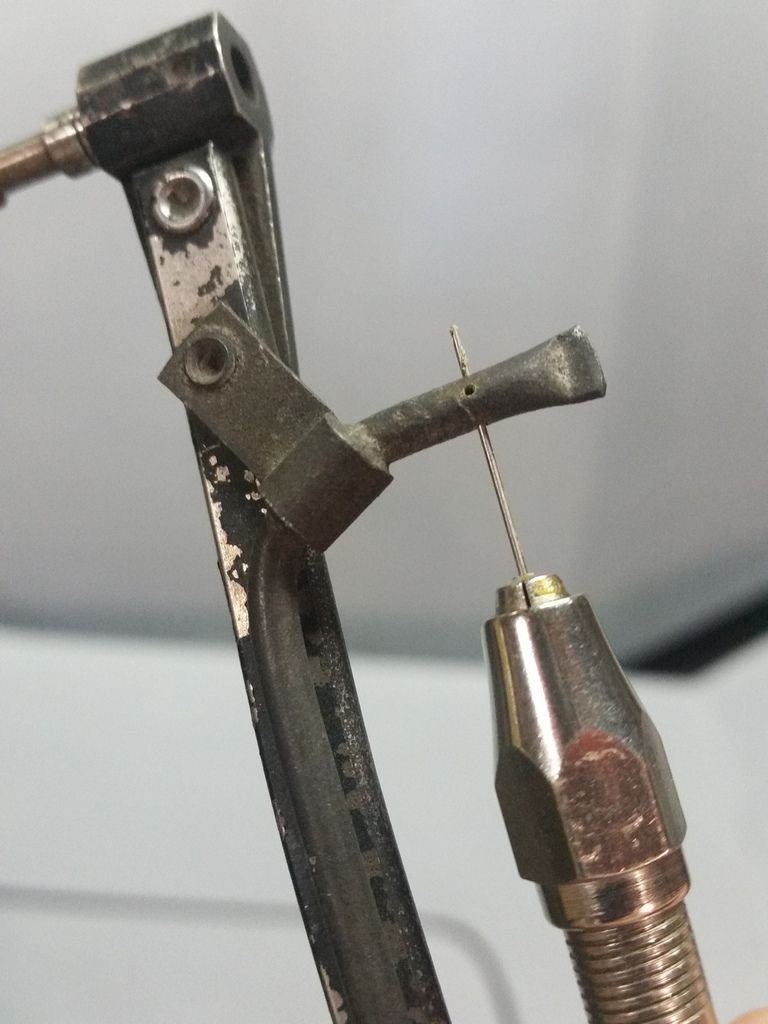
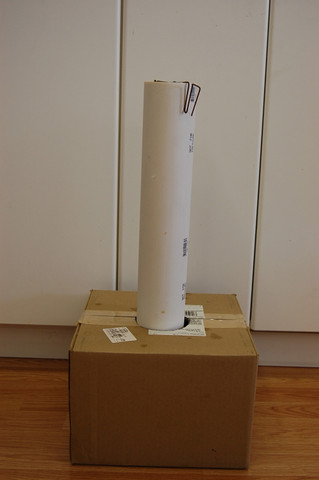
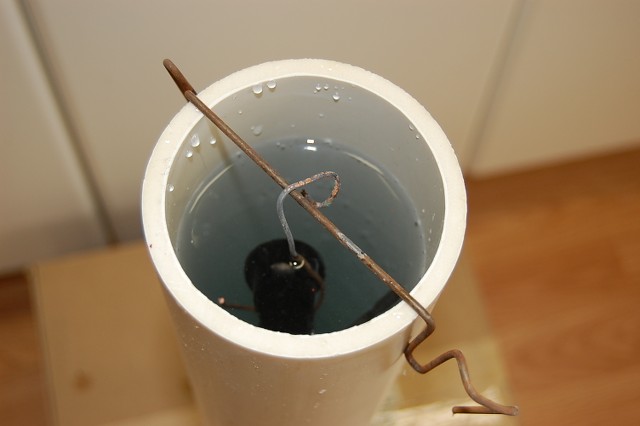
For amusement purposes only:
The original arm/ tubes seem to have a dark finish on them that wasn't paint.
(I don't think the holders/arms had 'paint' on them. The original print for the 68 arms describes the finish on the die-cast part as Black Chromium and on the stainless steel parts as Black Sodium Dechromate.)
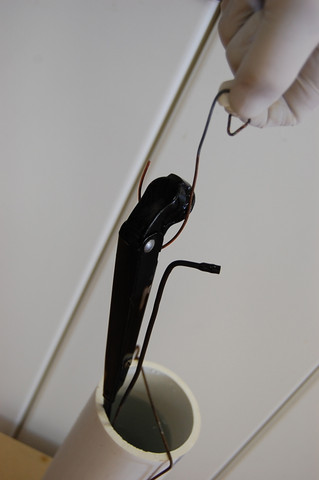
I came up with this piece of 'equipment' to use in putting a black oxide coating on the tubes.
Regards,
Alan
The box is to hold the pipe vertical.
For amusement purposes only:
The original arm/ tubes seem to have a dark finish on them that wasn't paint.
(I don't think the holders/arms had 'paint' on them. The original print for the 68 arms describes the finish on the die-cast part as Black Chromium and on the stainless steel parts as Black Sodium Dechromate.)
I came up with this piece of 'equipment' to use in putting a black oxide coating on the tubes.
Regards,
Alan
The box is to hold the pipe vertical.
Last edited by Alan 71; 05-28-2017 at 09:45 AM.
The following users liked this post:
Cavu2u (05-28-2017)
05-28-2017, 11:43 AM
#17
Melting Slicks
Thread Starter
Hi Steve,
You really did a nice job restoring them. All you need to do to reinstall them is to make sure you have them in their correct park position and just push them back on. You'll know when they are on. I notice one thing though, the paint seems pretty glossy, maybe it's just the camera or lighting. If you want them correct they should be flat black or softer satin.
In case you want to change before you put them back on.
The driver's side goes on first and parks on the metal stop, then the passenger side .
Regards,
Tooch
I'll attempt to get them indexed/aligned properly when started, LH wiper first, and push 'em on.
No, you're right Tooch. I glossed 'em good. I figured they are hid pretty well, especially when driving into the sun when they might be the most bothersome. Therefore, I figured the bling factor would Trump the OEM correctness thing.
Maybe not.
Steve
05-28-2017, 11:48 AM
#18
Melting Slicks
Thread Starter
Hi,
For amusement purposes only:
The original arm/ tubes seem to have a dark finish on them that wasn't paint.
(I don't think the holders/arms had 'paint' on them. The original print for the 68 arms describes the finish on the die-cast part as Black Chromium and on the stainless steel parts as Black Sodium Dechromate.)
I came up with this piece of 'equipment' to use in putting a black oxide coating on the tubes.
Regards,
Alan
The box is to hold the pipe vertical.
That's a lot more slick than amusing.
And making things correct as well!

Excellent Tip!
Steve
05-28-2017, 12:49 PM
#19
Team Owner
Member Since: Sep 2006
Location: Westminster Maryland
Posts: 30,173
Likes: 0
Received 2,878 Likes
on
2,515 Posts
Hi Steve,
That's a highly technical piece of equipment and should only be built and operated by someone who has completed an exhaustive training course.
Regards,
Alan
That's a highly technical piece of equipment and should only be built and operated by someone who has completed an exhaustive training course.
Regards,
Alan
Last edited by Alan 71; 05-28-2017 at 12:50 PM.

