When you click on links to various merchants on this site and make a purchase, this can result in this site earning a commission. Affiliate programs and affiliations include, but are not limited to, the eBay Partner Network.
What sandpaper grits should be used to sand car down for a repaint? Can a palm sander be used? Could it be sanded down with 400 dry an then 600 wet then seal an repaint or does it need primed first. This is a driver.Thanks
I would suggest to ask this question under the 'Paint/Body' section under 'General Corvette Topics' (and be prepared for lots of opinions, but listen to Dub if he offers any advice). Maybe a mod could move this thread there...
Personally I would recommend NOT using a palm sander. Mine required lots of sanding due to the previous owner butchering it with a sanding pad in a drill (as far as I could tell), so I used an Ingersoll Rand DA sander (dry), and some hand sanding with sanding blocks. I think I used 80 thru 400 grit if I remember correctly. Primed it with some 2K primer, wet sanded it, and shot the paint. A friend/ex-bodyshop guy who helped me thru my re-paint mentioned that if the current paint was original, and in fairly good shape, he would have just lightly sanded it and painted over it (for a driver quality paint job).
P.S. The color you're painting will also dictate how good the prep has to be. Black is going to be the most labor-intensive, and hardest to make look good. White will hide more flaws...
The car is metallic blue now an was originally Silver and want to repaint back to silver.Dont want to strip it as it�s just a driver. Was hoping to knock down the last blue repaint down to original Silver an apply sealer an repaint with new Silver. Just don�t want to get carried away with like 80 grit due to scratches. I�ve kinda read a regular DA will gouge more an create waves to as palm sander is less, it will be block sanded before painted. Just want to get it down enough because of material build.
from what i can tell, depends on if you have
stress crack/spider crack type areas.
these will require some heavy sanding and repair for strength.
i am only a reader and watcher of vette painting.
seen serious paint removal and stuff from carbon fiber filler to new
mat installation and of course some kind of sealer to keep the fber strands from wicking moister.
one thing that is common to all is a surface condition as smooth as possible
before color.
what untill you start thinking about color only and the 2 stage color clear.
The body on this car is near perfect, no cracks, spiders ect. Just want it Silver again.Ive painted many cars in my day with great success. Just this corvette thing is probably slowing me down because it�s a corvette. It is a 1980 by the way.Just don�t see how it be different than a metal car as process goes. Get down to Original material an nothing past original an start normal process.
The body on this car is near perfect, no cracks, spiders ect. Just want it Silver again.Ive painted many cars in my day with great success. Just this corvette thing is probably slowing me down because it�s a corvette. It is a 1980 by the way.Just don�t see how it be different than a metal car as process goes. Get down to Original material an nothing past original an start normal process.
i hear ya.
repainting a vette has seemed to get really involved and really expensive.
then the "clear" everything seems to be the normal.
Worst thing you can do is round off any of the crisp edges with an inappropriate sander. You can never get them back. I used flexible long block sanders on my car. Stay as far away from the machinery as possible. Do not use a palm sander. Also, guide coat is your friend.
Have you thought about using a chemical stripper. When I painted my 74 I stripped it with Captain Lee's stripper. It did no damage to the fiberglass and took off about 3 previous paint jobs. A little messy but a good alternative.
Worst thing you can do is round off any of the crisp edges with an inappropriate sander. You can never get them back. I used flexible long block sanders on my car. Stay as far away from the machinery as possible. Do not use a palm sander. Also, guide coat is your friend.
Wouldn�t a palm sander be better than a standard da? Why no to air sanders, I get u can make panels wavy from a da, but that�s why I would wet block sand to take those out.cant see why it�s differnt than a metal car process an remember this is a driver.Couldn�t it be blocked with 600 after 400 then seal it?
Have you thought about using a chemical stripper. When I painted my 74 I stripped it with Captain Lee's stripper. It did no damage to the fiberglass and took off about 3 previous paint jobs. A little messy but a good alternative.
I just can�t see why it would need stripped the base is already good just need to change color.
Wouldn’t a palm sander be better than a standard da? Why no to air sanders, I get u can make panels wavy from a da, but that’s why I would wet block sand to take those out.cant see why it’s differnt than a metal car process an remember this is a driver.Couldn’t it be blocked with 600 after 400 then seal it?
I recommend instead of proceeding one question at a time from people with varying experiences on various projects, you go buy this
read it and if you disagree with something or feel something has been left out, go to the paint forum and ask there. The book has, to my mind, an excellent couple of sections on painting a Corvette as well as other useful info. You are going to spend a s*load of money on materials, this is well worth it.
_____________
Update - I went and reviewed this book and there is less there in particular about prepping fiberglass than I remember. There may be better references elsewhere. For me it was good stuff as everything was covered as well as quickie to showplace finishes. You said you've painted other cars but they were metal so it sounds like you're looking for what's different about prepping f'glass. All I can say is what I said earlier, once you've ground something away it is hell to get it back, edges or waviness or whatever.
In going by your description of the base you are working with, I can share 2 cases of my 'vette painting experience with you.
The first was a 1987 that was originally white, but had one repaint and was repainted red. I wanted the car white again but did not want to strip it as I has a base finish similar to the description of yours. For that car I scuffed the red with 80 grit, applied a coat of epoxy primer, another coat of 2k, wet sanded with 600 grit then shot the BC/CC. Here is that car after the repaint:
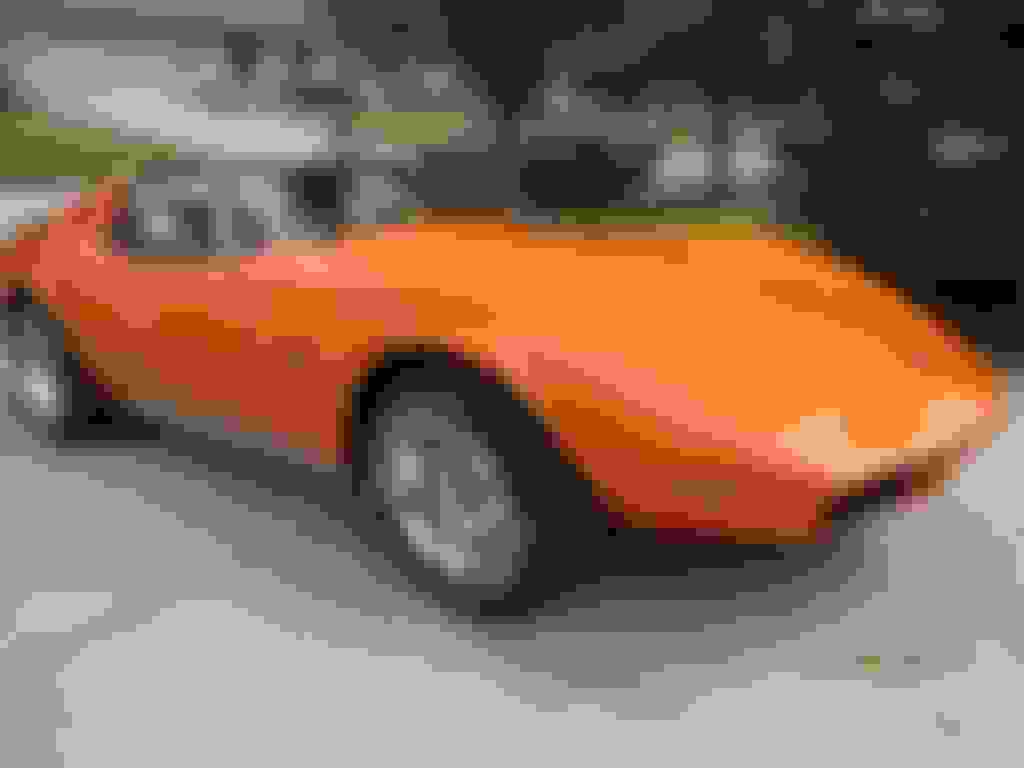
Next was a 1974 that I just finished last year. That car was originally orange, and again, repainted red...go figure, right? With that car I completely stripped the car using Zinsser paint stripper...it had 5 coats on it and the surface was less than desirable with all that material. After stripping I scuffed with 80 grit, shot 2 coats of epoxy to seal, 1 coat of 2K, sanded with 600 grit, then shot the BC/CC. Here is that car before and after:
I hope this helps to answer your questions. You should be able to dothe same on your '80 as I did on my '87.
Best of luck to you on the repaint. Once you start, post some pics of your progress!
In going by your description of the base you are working with, I can share 2 cases of my 'vette painting experience with you.
The first was a 1987 that was originally white, but had one repaint and was repainted red. I wanted the car white again but did not want to strip it as I has a base finish similar to the description of yours. For that car I scuffed the red with 80 grit, applied a coat of epoxy primer, another coat of 2k, wet sanded with 600 grit then shot the BC/CC. Here is that car after the repaint:
Next was a 1974 that I just finished last year. That car was originally orange, and again, repainted red...go figure, right? With that car I completely stripped the car using Zinsser paint stripper...it had 5 coats on it and the surface was less than desirable with all that material. After stripping I scuffed with 80 grit, shot 2 coats of epoxy to seal, 1 coat of 2K, sanded with 600 grit, then shot the BC/CC. Here is that car before and after:
I hope this helps to answer your questions. You should be able to dothe same on your '80 as I did on my '87.
Best of luck to you on the repaint. Once you start, post some pics of your progress!
I had to laugh after I read your post title because my bride said the same thing after reading my reply -- it made the whole job sound "easy" the way it was written. The fact is, painting these cars is a lot more involved than what I outlined above. The OP was inquiring about which sandpapers to use and also touched on priming, so that was all I touched on.
I posted examples of of the finished products to show the results that can be achieved using the various grits and primers I used on the last two 'vettes I painted.
I use a jitterbug and inline sanders. Most of the areas are done by hand with sanding sponges , my hand and paper or block sander. 400 then seal and 600 Urethane Primer, 800 then paint. I like Acrylic Urethane for my daily driver and race cars.
You will get tons of opinions on this subject for sure. It IS a huge project if you do it yourself and you need to take your time doing it even if its only a driver, unless you dont care what the out come looks like.
First, I'd have to ask what your level of competency is? If you have never done any bodywork or painted before you would need to go easy on the paint removal with sandpaper. For a Noob at this task I would NOT recommend starting with 80 grit. If you make a mistake with 80, you can have a mess on your hands rather quickly and then be in big trouble.
It's almost the same type of thing as when detailing a car. You start with the least aggressive compound you can to do the job, not the most aggressive.
I have painted numerous cars to include my 82. I would definitely use a sealer on it since you have no idea how or who painted it last and with what. Sealer will keep bad things from coming through at some point and totally screwing up your paintwork.
I guess you could use a palm sander, if you felt VERY comfortable with doing that. I would opt for more of a long air-board sander if you could and go with the lightest sandpaper you can to get the job done efficiently, maybe 220-320. Also, stay with one paint system, don't mix and match products together, it can be disastrous. I always use PPG products, but that's just me. Other's WILL have their option on that and what they feel comfortable with and like. I have also used a lot of Sikkens products that I like as well... but NOT cheap BTW.
Do a cut and buff after and it will look awesome. I always use 3M products for that task, works great for me. The final detail I use my Flex which always turns out very nice.
My 82 in my sig was taken right after I painted it, that was four years ago. Good luck with your project and take your time. Post pics.

 01-18-2018, 10:43 PM