
C3 Vintage Air Installation Tips.
 03-06-2018, 09:09 PM
#1
Former Vendor
Thread Starter
Member Since: Aug 2006
Location: Jeffersonville Indiana 812-288-7103
Posts: 76,656
Received 1,813 Likes
on
1,458 Posts
St. Jude Donor '08-'09-'10-'11-'12-'13-'14-'15

Hey guys.. we just finished a vintage air installation on a 1974 car...
Here are my thoughts and your questions are welcome.
1) This kit causes some issues with installing the shift console. On our car we had to move the power window relay because the added control accessories interfered with it.
The simple solution was to move the relay out of the way and run a jumper wire from from the relay to the forward console bracket. (ground wire)
2) The shift console and center dash bezel was a beast to get in place... I highly suggest you pre-crush the hoses behind the center dash so this limits the amount of pressure required to install the center dash bezel and it really takes two people to push the center shift console where it belongs.
3) While we were only the finisher of this job (the customer started it), make darn sure you use the correct connection on the blower speed connector. There are two different connectors, one for no air cars and one for air cars. Our customer hooked up the non ac car connector to the switch and when we did the testing the blower motor would not quit running... We switched it to the correct connector and everything worked fine. We got a tech on the phone that figured out the connection issue.
4) The add on controllers for the heater control wheels was a bit of a pain... they are hard to fit into the console but once done they worked like a champ. It's just a hard fit to get it all inside the console...
5) This kit will out perform any stock AC kit for a 1968-1982 car... after we vacuumed the system down, added the correct amount of 134.... we had this thing blowing at 39 degree's out the ducts....
My overall thoughts on this system...
Awesome... While a bit of a pain to finish a job someone else started, I'd have to say this new Vintage Air system very nice and is a great upgrade for those wanting C3 AC that actually works this is your kit.
Willcox
Last edited by Willcox Corvette; 07-31-2019 at 04:41 PM.

The following 10 users liked this post by Willcox Corvette:
73racevette (03-26-2018),
caskiguy (03-07-2018),
Denpo (05-01-2018),
DR'76 (03-10-2018),
gleninsandiego (03-26-2018),
and 5 others liked this post.
03-06-2018, 10:29 PM
#2
Racer


I agree with all of the above. I installed a Hotrod Air system back in 2007 and recently replaced it with a Vintage Air System about 6 months ago. I will add that I did not have factory air and did not want to give up the �Corvette� wiper switch plate for the center vents so I basically routed the center vent lines to dump in the footwell. With this setup the Hotrod Air system never really impressed (but was better than nothing) whereas the VA system can still freeze me out. Another plus of this method is that I didn�t have to jam everything back together.
One great advantage of the VA system I found was the lack of a capillary style gas tube thermostat which ran from the controls to the evaporator coils. My HRA system seemed to always freeze up if I ran it full cold for >30min. - I was worried I crushed the tube at first, but still had the issue after pulling everything apart / replacing the thermostat / and putting it all back together.
Long story short is that I�m very happy with the VA system. The tech support from HRA was second to none when they were up and running though - at least when I installed it. I did make one call to VA and found them very helpful as well.
 03-06-2018, 11:30 PM
#4
Racer
Glad to hear you had the same experience with the shift console. On my 69 I had to have one person push it forward while I put in the bolt. I never was sure what was making it so difficult.
03-08-2018, 02:02 PM
#5
Intermediate
Just got my Vintage Air system serviced yesterday after installing it in my 73. Had the same issue with the window relay, other than that it install steps were right on. The system works great. Now I have room behind the right front fender to install the Edelbrock EFI fuel system to go with the Holley Sniper.
03-08-2018, 02:41 PM
#6
Le Mans Master


Just got my Vintage Air system serviced yesterday after installing it in my 73. Had the same issue with the window relay, other than that it install steps were right on. The system works great. Now I have room behind the right front fender to install the Edelbrock EFI fuel system to go with the Holley Sniper.
 03-09-2018, 01:00 PM
#7
Intermediate
The panel comes painted a gloss black. When you install it you put a bead of seal around the edge. You do some minor trimming to the fire wall for hose clearance, but not so much you couldn't put it back to stock if you were so inclined in the future. I have all my fittings wrapped with the sticky black A/C insulating tape after we leak checked everything. I still have to fair in all the panel edges and paint the firewall and the panel with a texture application.
03-09-2018, 02:03 PM
#8
Le Mans Master
The panel comes painted a gloss black. When you install it you put a bead of seal around the edge. You do some minor trimming to the fire wall for hose clearance, but not so much you couldn't put it back to stock if you were so inclined in the future. I have all my fittings wrapped with the sticky black A/C insulating tape after we leak checked everything. I still have to fair in all the panel edges and paint the firewall and the panel with a texture application.
03-09-2018, 05:31 PM
#10
Former Vendor
Thread Starter
Member Since: Aug 2006
Location: Jeffersonville Indiana 812-288-7103
Posts: 76,656
Received 1,813 Likes
on
1,458 Posts
St. Jude Donor '08-'09-'10-'11-'12-'13-'14-'15
See.. look at all the info from one simple post... I'm glad this has helped you guys..
Ernie
Ernie
 03-10-2018, 07:41 AM
#12
Drifting

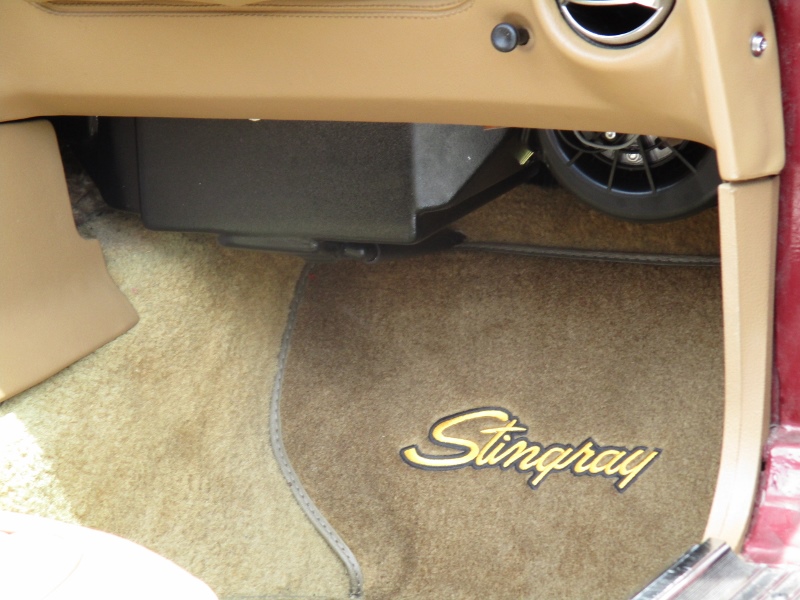
Can someone post a finished picture of the evaporator inside. Looking to see how it intrudes on the inside.
Thanks
Thanks
03-10-2018, 01:01 PM
#13

My Hot Rod Air worked great for about a dozen years. Recently it started freezing up so I think that I will evacuate and recharge before modifying anything. It initially cooled to like 37�F and it will still do that before it freezes up.
My plan is to evacuate it well and recharge it..... to see how it does. That's a fairly inexpensive check to see how it does, what with the price of R-134a being reasonable enough to blow through a couple of cans.
The whole thing fits quite well and I'd hate to go replace everything if I can fix the "freeze up" issue. (I did have to fabricate my own ducting for the center air outlet...just FYI about fit).
I agree with all of the above. I installed a Hotrod Air system back in 2007 and recently replaced it with a Vintage Air System about 6 months ago. I will add that I did not have factory air and did not want to give up the �Corvette� wiper switch plate for the center vents so I basically routed the center vent lines to dump in the footwell. With this setup the Hotrod Air system never really impressed (but was better than nothing) whereas the VA system can still freeze me out. Another plus of this method is that I didn�t have to jam everything back together.
One great advantage of the VA system I found was the lack of a capillary style gas tube thermostat which ran from the controls to the evaporator coils. My HRA system seemed to always freeze up if I ran it full cold for >30min. - I was worried I crushed the tube at first, but still had the issue after pulling everything apart / replacing the thermostat / and putting it all back together.
Long story short is that I�m very happy with the VA system. The tech support from HRA was second to none when they were up and running though - at least when I installed it. I did make one call to VA and found them very helpful as well.
One great advantage of the VA system I found was the lack of a capillary style gas tube thermostat which ran from the controls to the evaporator coils. My HRA system seemed to always freeze up if I ran it full cold for >30min. - I was worried I crushed the tube at first, but still had the issue after pulling everything apart / replacing the thermostat / and putting it all back together.
Long story short is that I�m very happy with the VA system. The tech support from HRA was second to none when they were up and running though - at least when I installed it. I did make one call to VA and found them very helpful as well.


 03-25-2018, 08:49 AM
#17
Racer

The following users liked this post:
MrNatural (10-25-2018)
03-25-2018, 10:10 PM
#19
Former Vendor
Thread Starter
Member Since: Aug 2006
Location: Jeffersonville Indiana 812-288-7103
Posts: 76,656
Received 1,813 Likes
on
1,458 Posts
St. Jude Donor '08-'09-'10-'11-'12-'13-'14-'15
My Hot Rod Air worked great for about a dozen years. Recently it started freezing up so I think that I will evacuate and recharge before modifying anything. It initially cooled to like 37�F and it will still do that before it freezes up.
My plan is to evacuate it well and recharge it..... to see how it does. That's a fairly inexpensive check to see how it does, what with the price of R-134a being reasonable enough to blow through a couple of cans.
The whole thing fits quite well and I'd hate to go replace everything if I can fix the "freeze up" issue. (I did have to fabricate my own ducting for the center air outlet...just FYI about fit).
My plan is to evacuate it well and recharge it..... to see how it does. That's a fairly inexpensive check to see how it does, what with the price of R-134a being reasonable enough to blow through a couple of cans.
The whole thing fits quite well and I'd hate to go replace everything if I can fix the "freeze up" issue. (I did have to fabricate my own ducting for the center air outlet...just FYI about fit).
Honestly, the Vintage air system worked better..
Moving the relay is not a huge deal as long as you run a jumper wire for the ground.
Willcox
Last edited by Willcox Corvette; 07-31-2019 at 04:44 PM.
The following users liked this post:
carriljc (05-04-2018)
03-26-2018, 02:46 AM
#20
Safety Car

I have a 69 without a/c
Does the vintage air system replace all the stock ducting ./ box just inside the firewall?
Does it replace the heater core?
Thanks
Glenn in San Diego
Does the vintage air system replace all the stock ducting ./ box just inside the firewall?
Does it replace the heater core?
Thanks
Glenn in San Diego
Last edited by gleninsandiego; 03-26-2018 at 02:47 AM.