
High Beam lights off & on ???


 04-17-2018, 12:04 PM
#22
Pro

Thread Starter


Daniel stern makes a relay kit to fix that
I did mine. Works great. Lights now get 14 v. Off of the alternator
https://www.danielsternlighting.com/...ys/relays.html
I did mine. Works great. Lights now get 14 v. Off of the alternator
https://www.danielsternlighting.com/...ys/relays.html
Sounds good: What was the cost, If I may ask??
04-17-2018, 06:17 PM
#23
Race Director


Not that this matters,
But hopefully the company you buy this kit form is offering a relay that can be a sealed unit and protected from water, dirt,etc. IF you plan on installing these relays under the hood.
And YES...I am aware that many of the relays and electrical components connectors on your car are not protected from dirt and moisture....but that was how it was done back then. On today's cars...they are basically all protected due to GM learned their lesson.
I have done this on several cars and I use the GM relays that have the weatherpac connectors that have silicone seals on them to prevent water from getting into these relays and connections. I use GM part # 14089936 relay. This relay can handle the current load due to it is the relay GM went to and it also powers up the cooling fans ...which take a lot more current than headlights.
And not that is matters...but I splice into the wiring harness right near the back edge of the left inner skirt so I can mount these relays on the back wall of the left inner skirt and keep them protected even more and yet still accessible for service if needed.
DUB
04-17-2018, 07:52 PM
#24
Pro
Thread Starter
Not that this matters,
But hopefully the company you buy this kit form is offering a relay that can be a sealed unit and protected from water, dirt,etc. IF you plan on installing these relays under the hood.
And YES...I am aware that many of the relays and electrical components connectors on your car are not protected from dirt and moisture....but that was how it was done back then. On today's cars...they are basically all protected due to GM learned their lesson.
I have done this on several cars and I use the GM relays that have the weatherpac connectors that have silicone seals on them to prevent water from getting into these relays and connections. I use GM part # 14089936 relay. This relay can handle the current load due to it is the relay GM went to and it also powers up the cooling fans ...which take a lot more current than headlights.
And not that is matters...but I splice into the wiring harness right near the back edge of the left inner skirt so I can mount these relays on the back wall of the left inner skirt and keep them protected even more and yet still accessible for service if needed.
DUB
But hopefully the company you buy this kit form is offering a relay that can be a sealed unit and protected from water, dirt,etc. IF you plan on installing these relays under the hood.
And YES...I am aware that many of the relays and electrical components connectors on your car are not protected from dirt and moisture....but that was how it was done back then. On today's cars...they are basically all protected due to GM learned their lesson.
I have done this on several cars and I use the GM relays that have the weatherpac connectors that have silicone seals on them to prevent water from getting into these relays and connections. I use GM part # 14089936 relay. This relay can handle the current load due to it is the relay GM went to and it also powers up the cooling fans ...which take a lot more current than headlights.
And not that is matters...but I splice into the wiring harness right near the back edge of the left inner skirt so I can mount these relays on the back wall of the left inner skirt and keep them protected even more and yet still accessible for service if needed.
DUB
04-17-2018, 08:40 PM
#25
Team Owner


Good suggestion on waterproof connectors but not really necessary if the relays are placed in the appropriate location.
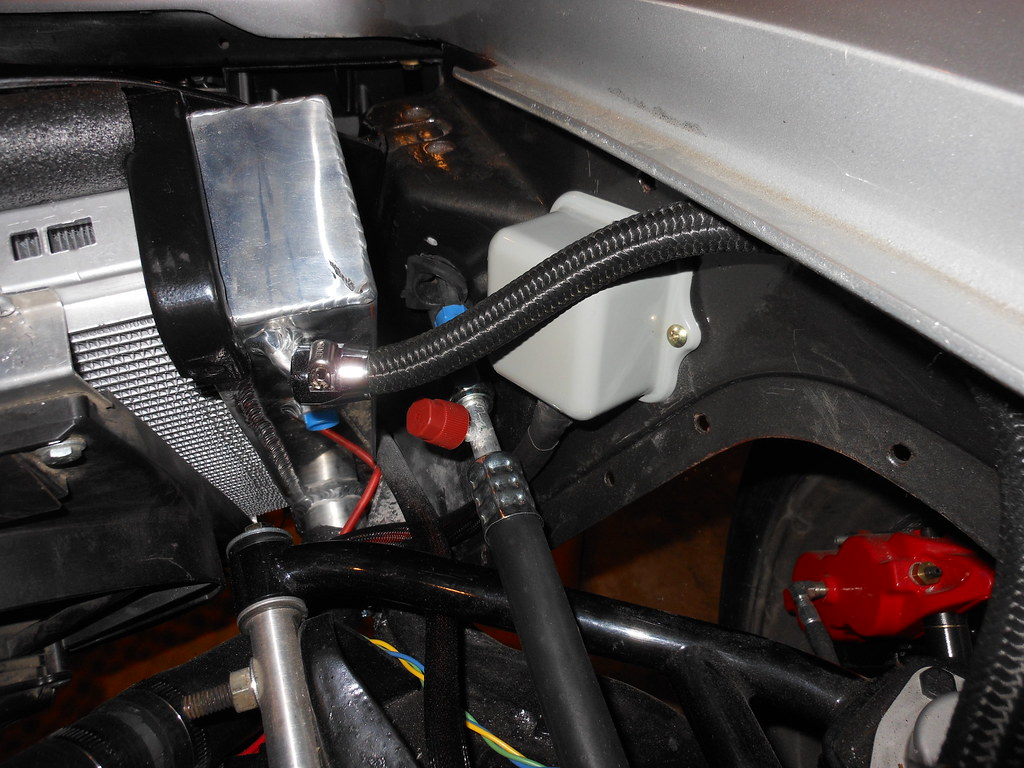
I installed my relays (Bosh style) at the same level and in front of the horn rely way up on the wheel well and I can tell you it NEVER gets wet there.
My car is my daily driver so it sees a lot of rain. Just the other day I drove home from work in a storm that dropped 6 inches of rain in less that 24 hours so that was a gusher (my new rainproof car cover worked GREAT!).
Just solder and shrink wrap the connections and it will be fine under the hood without water proof connections. If you are really worried about it you could splooge (technical term) some RTV on the bottom side of the relay base.
EDTI - DUB I'm not trying to start anything as your insight to our cars is invaluable.
Last edited by theandies; 04-17-2018 at 08:43 PM.
04-17-2018, 09:45 PM
#26
Le Mans Master

Member Since: May 2003
Location: Fernandina Beach FL
Posts: 8,481
Received 3,220 Likes
on
1,732 Posts
2023 Restomod of the Year finalist
2020 C3 of the Year Winner - Modified

I used a Voltage regulator box- to hide and waterproof them-
Or one of these could work out really well-about $40
I'd use better relays... blade sized circuit breaker as well


Or one of these could work out really well-about $40
I'd use better relays... blade sized circuit breaker as well
The following users liked this post:
DUB (04-18-2018)
04-18-2018, 09:15 PM
#27
Pro
Thread Starter
Good suggestion on waterproof connectors but not really necessary if the relays are placed in the appropriate location.
I installed my relays (Bosh style) at the same level and in front of the horn rely way up on the wheel well and I can tell you it NEVER gets wet there.
My car is my daily driver so it sees a lot of rain. Just the other day I drove home from work in a storm that dropped 6 inches of rain in less that 24 hours so that was a gusher (my new rainproof car cover worked GREAT!).
Just solder and shrink wrap the connections and it will be fine under the hood without water proof connections. If you are really worried about it you could splooge (technical term) some RTV on the bottom side of the relay base.
EDTI - DUB I'm not trying to start anything as your insight to our cars is invaluable.
That includes snow water content.
I guess I am a fair weather driver. I like the Splooge idea. I will be tapping into the power (Bat term at Alt.) mounted the pair of relays on fender well opposite alt. Will be tying into the light wires tomorrow.
Thanks for the help
04-18-2018, 09:17 PM
#28
Pro
Thread Starter
That is some fancy equipment there. Have not seen anything like that here....Some times I miss Las Vegas and all the shops to forage through.
04-19-2018, 02:24 PM
#29
Pro
Thread Starter
Here is what I have come to under stand about the problem
The Switch as sold is rated 15 amps breaker inside to protect the circuit.
(which by the way is what showed, burned and repaired, when I got the car. It burned all the wire harness ,bumper to bumper)
I have "WAGNER 2C1 H5006 & 1C1 H5001" lights
The Low/High beam 2C1 on low is designed to draw 2.73 amps. x 2 lights = 5.46 amps.
will not effect the switch breaker.
The HIGH beam circuit affects the 2C1 low/high and 1C1 high beam bulbs.
The 1C1 draws 3.91 amps x 2 bulbs = 7.82 amps AND the High side of the 2C1 low/high bulb also draws 3.91 amps x 2 bulbs = 7.82 amps
This results in a total of 15.64 amps draw on a 15 amps breaker.
I have asked around for the old style sealed beam headlights and I am told can not get them. Maybe from special vendors at about say $25. ea.
Just about finished with the install, it's not pretty, just has to work.
04-19-2018, 06:31 PM
#30
Race Director
Good suggestion on waterproof connectors but not really necessary if the relays are placed in the appropriate location.
I installed my relays (Bosh style) at the same level and in front of the horn rely way up on the wheel well and I can tell you it NEVER gets wet there.
My car is my daily driver so it sees a lot of rain. Just the other day I drove home from work in a storm that dropped 6 inches of rain in less that 24 hours so that was a gusher (my new rainproof car cover worked GREAT!).
Just solder and shrink wrap the connections and it will be fine under the hood without water proof connections. If you are really worried about it you could splooge (technical term) some RTV on the bottom side of the relay base.
EDTI - DUB I'm not trying to start anything as your insight to our cars is invaluable.
I installed my relays (Bosh style) at the same level and in front of the horn rely way up on the wheel well and I can tell you it NEVER gets wet there.
My car is my daily driver so it sees a lot of rain. Just the other day I drove home from work in a storm that dropped 6 inches of rain in less that 24 hours so that was a gusher (my new rainproof car cover worked GREAT!).
Just solder and shrink wrap the connections and it will be fine under the hood without water proof connections. If you are really worried about it you could splooge (technical term) some RTV on the bottom side of the relay base.
EDTI - DUB I'm not trying to start anything as your insight to our cars is invaluable.
I have seen people repair their Corvette using wire nuts for a house and taping them with electrical tape. I do not pass judgement on how a person repairs their own Corvette...I may comment on how I feel about it...but in the end...it is always up to the person doing the work. But I do hold myself to a standard that I MUST not waver on due to I have to fix it if it fails...and I do not have the time to do something over again when I know i can do it the best way possible the first time due to seeing the progression on what GM has a done to improve the way components last in areas where they can be effected by dirt, moisture, heat etc..
DUB
04-20-2018, 05:27 PM
#31
Just another Corvette guy

I can't tell you how many Corvette dash panels I have removed and found that semi-melted headlight connector. I know you've seen them too. Seems to be VERY common. My current car had the same condition when I was reassembling it. I installed a new headlight switch and found as soon as I used the high beams, I would start to get the "flicker" in about 5 minutes.
I decided to add the relays last night. They are only 7 or 8 bucks at the parts store, two in-line 30 amp fuses (also very cheap), a couple feet of wire and less than one hour to install. I took power right from the alternator and it was very close to the headlamp harness to tap in to the switch as well.
Flicker is gone but the best part, my headlights are NOTICEABLY brighter!
I highly recommend this easy and affordable upgrade to every owner here. Could save you from a real melt-down later.
04-21-2018, 04:21 PM
#32
Team Owner
I suggest not using fuse but inline blade type circuit breakers. And check your state regulations regarding using fuses on headlights. Some only allow self resetting CB's
This is what I use:

After some calculations I determined 20Amp leaves enough margin and not too close to may running current with all 4 lamps lit. I'm running halogens at all 4 spots.
This is what I use:
After some calculations I determined 20Amp leaves enough margin and not too close to may running current with all 4 lamps lit. I'm running halogens at all 4 spots.
04-21-2018, 04:54 PM
#33
Le Mans Master
Member Since: Aug 2006
Location: mount holly NC
Posts: 6,989
Received 1,246 Likes
on
966 Posts
C3 of Year Finalist (appearance mods) 2019

The cradles must be installed this way only:
Looking at the front of your Corvette they are C B D A
Looking at the front of your Corvette they are C B D A
Good info thanks.
I plan to pull that light today, will post results.
DB
Well..Removed low beam lights. When I originally replaced them I did not pay attention to the metal/cradle, light holder, not did I notice the way the notches in the holder were positioned and how the lights set in them. So I found where the light bulbs set 90 deg. off of where they should be. the tabs on the light that set in the notches when lined up have the beam of light vertical to the road.
The high beams are fitted correct.
So either the lights are made wrong or the cradle is wrong or I bought the wrong stuff???? Will go look at some lights.
these are Wagner H5006 DOT 12V 02 13
OH ..yea ..the high beam light did not blink with these lights unplugged.
Checked light bulbs, same..cradle is wrong.
04-28-2018, 02:13 PM
#34
Pro
Thread Starter
I suggest not using fuse but inline blade type circuit breakers. And check your state regulations regarding using fuses on headlights. Some only allow self resetting CB's
This is what I use:
After some calculations I determined 20Amp leaves enough margin and not too close to may running current with all 4 lamps lit. I'm running halogens at all 4 spots.
This is what I use:
After some calculations I determined 20Amp leaves enough margin and not too close to may running current with all 4 lamps lit. I'm running halogens at all 4 spots.
Thanks.
04-28-2018, 02:14 PM
#35
Pro
Thread Starter
05-22-2018, 11:02 PM
#36
I went with speeddirect wiring harness, I had to order some suspension parts also, the hard part was taking off the hood I have 13.8 volts at the lights with car at idle and no lights going off and on. summer is good and I can stay out after dark
05-23-2018, 06:45 AM
#37

Have a similar problem to what was noted in the first post of this thread. Sometimes when I turn the hi-beams on they don't light. If I lightly bang on the headlight housing they come on and stay on. The problem only seems to occur when the lights are first turned on which of course includes them opening. I am guessing this is a ground issue somewhere. Since banging on one of the housings, driver's side I believe, fixes this I assume it has to be in there somewhere and common to both hi-beams. Any guidance as to where to look?
05-23-2018, 08:42 AM
#38
Race Director
Have a similar problem to what was noted in the first post of this thread. Sometimes when I turn the hi-beams on they don't light. If I lightly bang on the headlight housing they come on and stay on. The problem only seems to occur when the lights are first turned on which of course includes them opening. I am guessing this is a ground issue somewhere. Since banging on one of the housings, driver's side I believe, fixes this I assume it has to be in there somewhere and common to both hi-beams. Any guidance as to where to look?
And when you switch to high beams...I am assuming ALL of the headlights are out.
I would remove the headlight switch and check it . You may have a bad terminal. Or an internal problem in the switch.
DUB
05-23-2018, 11:55 AM
#39
You did not state that when you turn your headlights on...IF the low beams are coming on.
And when you switch to high beams...I am assuming ALL of the headlights are out.
I would remove the headlight switch and check it . You may have a bad terminal. Or an internal problem in the switch.
DUB
And when you switch to high beams...I am assuming ALL of the headlights are out.
I would remove the headlight switch and check it . You may have a bad terminal. Or an internal problem in the switch.
DUB
05-23-2018, 06:57 PM
#40
Race Director
My fault. I thought I read you hit the headlight switch. Sometimes my eyes read the words but my brain has a fart.
I would say that if you are having to hit the headlight door..you have a problem in the connection a the headlight or wiring..
That is now something that you are going to have to find...but at least you know where to kinda start looking.
DUB
I would say that if you are having to hit the headlight door..you have a problem in the connection a the headlight or wiring..
That is now something that you are going to have to find...but at least you know where to kinda start looking.
DUB