When you click on links to various merchants on this site and make a purchase, this can result in this site earning a commission. Affiliate programs and affiliations include, but are not limited to, the eBay Partner Network.
Rear toe is set by shims on either side of the trailing arm bushing.
I thought you were replacing the strut rod bushings, which hold the camber adjustment.
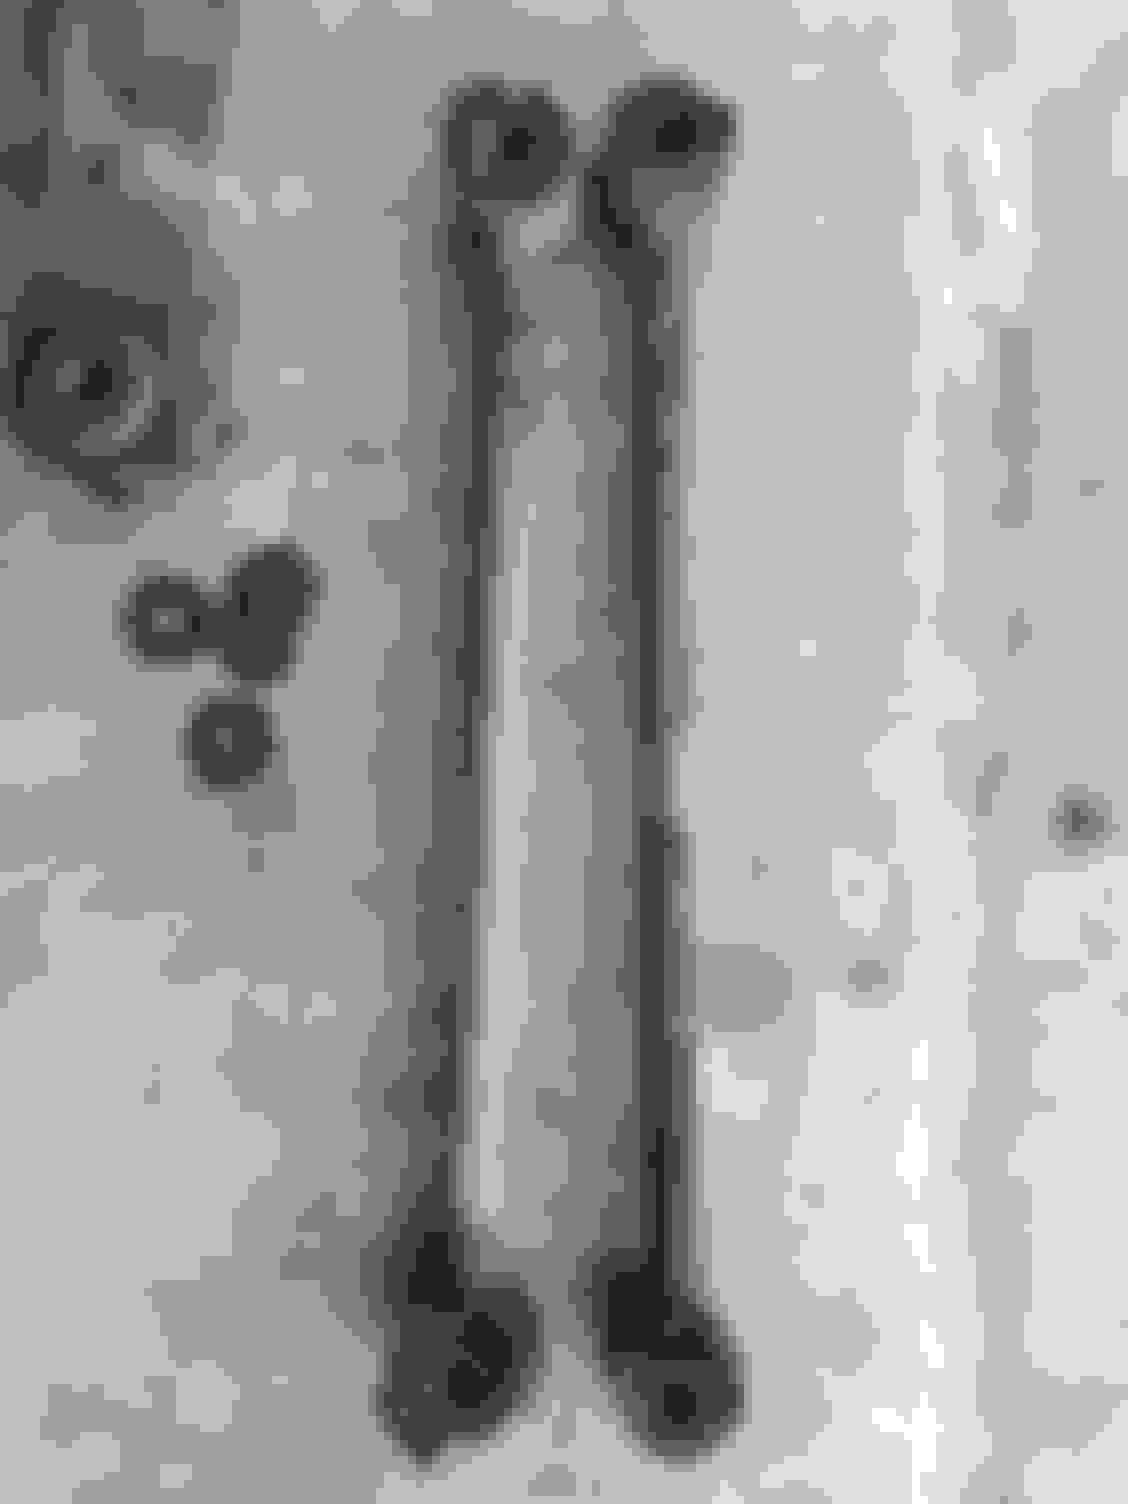
I am replacing both the strut rod bushings and the trailing arm bushings as both are showing signs of deterioration. The shims I received in my kit seem to be used to adjust something in the bushing stack itself. Here is a pic of the kit I received.
The line of shims across the bottom are the ones in question....what are they used for?
I have the first trailing arm off. Texas car so very little rust and it came apart pretty easy. Bushings are shot but surprisingly the bushing on the strut rods were not as bad as I expected. Makes me wonder if this is going to fix my problem.
The inboard strut rod bolts are inserted from the rear and it looks like they won�t come out with the spring in place. Is that normal?
Long day today but I have the differential out of the car. When the converter was removed at some point in its life a pipe was welded in place so the exhaust is now one solid piece and had to come out from the manifolds back in 1 piece...that was fun. The worst part was that someone at some point use the wrong socket on the drive shaft u-joint bolts at the differential and stripped the heads so I could not separate the diff from the drive shaft. I had to drop the diff and pull it back until I could get to the bolts with vice grips and walk them out 1/32 of a turn at a time...that was fun...not! Also, with the driveshaft in place I could not get a wrench on the top side of the front diff mount bolt so I almost could not get the car apart but with a little tenacity I finally got it done.
On closer examination the strut rods are worse than I first thought and I'm sure those are the root cause of my camber issues. I bought new bushings but they are polyurethane so they are not going to have any give to them at all. Seeing the angles those rods hit when the suspension moves, I'm thinking that is not a good idea. Has anyone used those before and do they work okay?
I plan to service the rear wheel bearings while I have them out and I'll replace at least both axle yoke seals but I'm not sure I want to do the pinion shaft seal. I think there is a crush sleeve that is supposed to be replaced anytime you take the yoke off and the pinion nut has to be tightened correctly. Is that right and is that crush sleeve available? Does the crush sleeve need to be replaced if I remove the yoke? The pinion seal does not seem to be leaking right now and I don't want to introduce any new issues on the car but at the same time I don't what to have to pull the diff again. Any guidance you can give would be appreciated.
After reading the horror stories about people trying to service the rear bearings I've elected not to mess with them...lol. I attempted to press the spindle out of one of the trailing arms but no luck and it started to deform the trailing arm. Seems the preferred method of removal is to beat the spindle out with a small sledge hammer which destroys the bearings and then requires a full replacement and end play setup? I called a local Corvette shop here in Dallas and they want $1200 just for the labor to service the bearings and they say that they bearings cannot be reused. The rear bearings feel very good so for now I'm just going to leave them and will address the problem if/when they actually need service.
After reading the horror stories about people trying to service the rear bearings I've elected not to mess with them...lol. I attempted to press the spindle out of one of the trailing arms but no luck and it started to deform the trailing arm. Seems the preferred method of removal is to beat the spindle out with a small sledge hammer which destroys the bearings and then requires a full replacement and end play setup? I called a local Corvette shop here in Dallas and they want $1200 just for the labor to service the bearings and they say that they bearings cannot be reused. The rear bearings feel very good so for now I'm just going to leave them and will address the problem if/when they actually need service.
This is your car and you can certainly address issues as you choose. However from personal experience, I recommend that you do it from an informed standpoint. Sometimes a rear wheel bearing will give warning before it fails. When it does it is a sure indication that damage to the bearings or spindle has already occurred. But from that point until total failure is a complete unknown. Total failure can occur in many ways and will always result in a greater expense to repair/service than if it hadn't failed. The cost and damage done will of course vary wildly.
I bought my '63 Corvette in 1969 with under 30k miles on it. Being completely unfamiliar with the Corvette IRS at that point I took it to our local Chevrolet dealer to have the car serviced and asked that they look into the unfamiliar noise I was hearing from the rear of the car. A couple days later I picked up the car and specifically asked about the noise coming from the rear. "Not a problem" they said, "everything is good to go." I proceeded to put about a hundred miles on the car that evening before heading home.
The next morning on my way to work, about 5 miles from home, the left rear wheel bearing seized and I slid the tire for about 100 feet. I contacted the dealer and they sent a rollback to get the car. The bill (in '69 dollars) was almost half of what I paid for the car. New spindle, new bearings, hub and of course the labor. Since they had failed to diagnose the problem, they were kind enough to not charge me for the tow! Being a drum brake car, if the spindle had broken the tire and wheel would have left the car and probably damaged the quarter panel.
If you do not know when or by whom the rear wheel bearings were serviced and since you already have the trailing arms out of the car, I recommend you have them serviced now. It will save you money in the long run and certainly give you peace of mind.
Get in touch with the folks at Vansteelin Clearwater Florida and discuss the cost or need (with the given mileage), to have the bearings serviced. They won't steer you wrong. You can also send a PM to Gary Ramadi (GTR1999) and I'm sure he'll be happy to advise you on what should be done and when. At least you will be able to make an informed decision.
I pulled the diff apart and replaced the side axle seals yesterday but it looks like I have the wrong diff cover gasket so I can't quite go back together with it yet. It was a bear to get the yokes to come out of the carrier. I suspect that the splines at the snap ring groove had raised some burrs making the yokes not want to slide out. With very little room to work from the inside it was frustrating trying to get them to come out but with a little persuasion I was finally able to get them to come out. I also ordered the Moog strut rods from my local auto parts store but they have not been able to actually get their hands on them yet so I had to cancel that order and place an order myself via ebay. Still a long way to go but at least I'm starting to go back together with it instead of further apart....lol.
Motogotro- I have just gone thru replacing all of the bushings on the rear suspension on my 68 convert, so I know what you are going thru. " a local Corvette shop here in Dallas and they want $1200 just for the labor to service the bearings"This is an inflated price, considering you have done all of the work to disassemble the rear end.. I sent my bearing assembly to Eckler's rebuild service in FL and their base cost is about $250 for each side. While you have the cover off your differential, check the gap between the end of the half shaft and the large pin that is between the shaft and the shaft on the other side. Lars gave what he uses as the specs. You can get a replacement half shaft from Eckler's or one of the reputable Corvette parts places that has the hardened ends if you need them. Just a comment about the front bushing kit for your trailing arm. That bolt with the chrome lug nut to peen the sleeve that goes thru the bushing is probably not going to work well to fully spread the metal and anchor the sleeve. It may actually bend the metal the wrong way. Find a ball peen hammer with a large enough rounded side to spread the metal end. With the TA on a firm support and a piece of steel under the opposite side, place the rounded side of the BP hammer on the end of the sleeve and hit it with another large hammer. Check if the metal is bending out correctly and keep hitting until it is spread properly. Good luck getting this job done. It will not need to be done again for another 100k miles.
Motogotro- I have just gone thru replacing all of the bushings on the rear suspension on my 68 convert, so I know what you are going thru. " a local Corvette shop here in Dallas and they want $1200 just for the labor to service the bearings"This is an inflated price, considering you have done all of the work to disassemble the rear end.. I sent my bearing assembly to Eckler's rebuild service in FL and their base cost is about $250 for each side. While you have the cover off your differential, check the gap between the end of the half shaft and the large pin that is between the shaft and the shaft on the other side. Lars gave what he uses as the specs. You can get a replacement half shaft from Eckler's or one of the reputable Corvette parts places that has the hardened ends if you need them. Just a comment about the front bushing kit for your trailing arm. That bolt with the chrome lug nut to peen the sleeve that goes thru the bushing is probably not going to work well to fully spread the metal and anchor the sleeve. It may actually bend the metal the wrong way. Find a ball peen hammer with a large enough rounded side to spread the metal end. With the TA on a firm support and a piece of steel under the opposite side, place the rounded side of the BP hammer on the end of the sleeve and hit it with another large hammer. Check if the metal is bending out correctly and keep hitting until it is spread properly. Good luck getting this job done. It will not need to be done again for another 100k miles.
Same thing here in Dallas, $1200 labor and they guarantee that the bearings will have to be replaced so I suspect they are driving the spindles out with a hammer. I have already checked the end play on my yokes and I am good there. My camber problem was due to the strut rod bushings but I had a leaking seal on the differential so I went ahead and pulled it all apart. I am not going to service my rear wheel bearings at this time. My bearings feel very good so it's not worth what it will cost to service them right now. I'm going to fix the leaking seal, replace the half shaft u-joints, replace the strut rods and put the car back on the road. If the rear wheel bearings need service later, I'll deal with it then. Looking through the service manual the rear spindles are supposed to be pressed out with a tool that bolts to the caliper mounts and the strut rod mount. Using this tool the trailing arms do not need to be removed from the car to service the bearings Has anyone seen this tool or have one they might loan/rent out?
Same thing here in Dallas, $1200 labor and they guarantee that the bearings will have to be replaced so I suspect they are driving the spindles out with a hammer. I have already checked the end play on my yokes and I am good there. My camber problem was due to the strut rod bushings but I had a leaking seal on the differential so I went ahead and pulled it all apart. I am not going to service my rear wheel bearings at this time. My bearings feel very good so it's not worth what it will cost to service them right now. I'm going to fix the leaking seal, replace the half shaft u-joints, replace the strut rods and put the car back on the road. If the rear wheel bearings need service later, I'll deal with it then. Looking through the service manual the rear spindles are supposed to be pressed out with a tool that bolts to the caliper mounts and the strut rod mount. Using this tool the trailing arms do not need to be removed from the car to service the bearings Has anyone seen this tool or have one they might loan/rent out?
I fully understand you do not want to service the rear wheel bearings at this time, and time may show that you didn't need to, but here are a couple of points of interest to contemplate...
Most folks discover that their rear wheel bearings needed to be serviced after they fail or are damaged to the point that the spindle as well as the bearings must be replaced. The lucky ones may hear squealing noises and take steps to correct the problem before too much damage occurs. If they're lucky they may only need to replace the bearings. If the bearings fail and seize however, major surgery and expense will likely be the result and the car will leave you on the side of the road.
At the least, the bearing carrier assembly will need to be removed from the control arm to service the bearings. The rotor will need to be removed from the hub to access the bolts that hold the carrier assembly to the control arm. If you talk to Gary Ramadi mentioned above, he can tell you what all needs to be done to remove the carrier assembly.
As for the 'tool that bolts to the caliper mounts and the strut rod mount'... When I serviced the rear wheel bearings in my 1973, shortly after buying it with about 40k on it, I had access to my Fathers hydraulic press that could exert more than 50,000# of pressure. I used it to press the spindles from my carrier assemblies and then to remove the bearings from the spindles. One side required 10 tons of pressure to press the spindle out and the other side required 20 tons of pressure to remove it. We bent a 1" steel plate my Dad used on his press in the process. (We flipped the plate over and used the press to flatten it out when done.) The tool you speak of could never have pressed my spindles out without breaking or damaging the carrier assembly.) Your bearings may come apart easier than mine, however, the amount of lubrication left in the assy's would probably have resulted in failure within 5 - 10 thousand miles. Also, while my bearings were fine, I went ahead and replaced them anyway.
You can certainly wait until you are ready to do this job, it's your car and your call. I am not an expert on the IRS in the C2 - C3, but I do have 45+ years of experience with them and have long recognized that the rear wheel bearing's in these cars are a bit of an 'Achilles Heel' for the simple reason that they are difficult to service. It is also not a job you want to do over, so it is best to leave it to someone that does it regularly and is familiar with the steps necessary to do it right. When done correctly, they will provider thousands of trouble free miles. If not, you will be doing the job again, soon.
You have access to some real experts here, Gary is just one, but do take advantage of their expertise and it may save you some money and aggravation.
GUSTO14 said "One side required 10 tons of pressure to press the spindle out and the other side required 20 tons of pressure to remove it." I sent my bearing assembly to Eckler's rebuild service. They called to get my authorization to replace some parts that were bent by the PO. They also reported their 20 ton shop press could not press out the spindle and they had to heat it to break it free. Depending on how badly seized your assembly is, the clamp-on tool might not work.
I installed the front trailing arm bushings last night. I went back with the original rubber bushings which were an interesting chore to install. I had ordered a set of polyurethane bushings but they did not come with the outer steel sleeve that fits into the opening of the trailing arm and mine were ruined when I removed the old bushings so I could not reuse them. The original sleeves were in bad shape anyway from rubbing on parts they were not supposed to rub on...lol. I see now that you can order the poly kits with or without those sleeves but of course I had ordered the wrong kit not knowing any better. I used a Harbor Freight 20-ton press and some parts from a 2-jaw puller to install the bushings and I think they went in quite nicely. I'm hoping to make some significant progress putting the car back together this weekend if the weather holds and the strut rods finally get here.
Differential is back in the car and the drive shaft is installed. Ran into an interesting issue with the u-joints for the drive shaft. Autozone listed the same u-joint for the front and rear with manual transmission but my car takes two different sizes. The front u-joint has the same diameter caps but the span between the caps is longer. I didn't notice it was the wrong size until after I had the caps pressed into the driveshaft and found that the center piece was sloppy loose. I went back to Autozone and confirmed that all manufacturers they had all listed the same u-joint for front and rear with MT but we pulled one or an AT and it was the right size. By comparison to the front u-joint and the half-shaft u-joints, the rear driveshaft u-joint is puny. There isn't a lot of clearance between the rear joke and the front differential mount so I can only assume they could not use a larger u-joint in the rear. Not sure but a chain is only as strong as its weakest link and I think the rear u-joint is the weak link in the drive chain.
Differential is back in the car and the drive shaft is installed. Ran into an interesting issue with the u-joints for the drive shaft. Autozone listed the same u-joint for the front and rear with manual transmission but my car takes two different sizes. The front u-joint has the same diameter caps but the span between the caps is longer. I didn't notice it was the wrong size until after I had the caps pressed into the driveshaft and found that the center piece was sloppy loose. I went back to Autozone and confirmed that all manufacturers they had all listed the same u-joint for front and rear with MT but we pulled one or an AT and it was the right size. By comparison to the front u-joint and the half-shaft u-joints, the rear driveshaft u-joint is puny. There isn't a lot of clearance between the rear joke and the front differential mount so I can only assume they could not use a larger u-joint in the rear. Not sure but a chain is only as strong as its weakest link and I think the rear u-joint is the weak link in the drive chain.
I'm glad to hear you are making progress! It will be very rewarding to drive the car. Do you have any install photos to share, and did the strut rods work out for you?
As to the U-Joint issue in the driveshaft, if you had to pick the weakest link in the chain, that is the one to use. All others would still have wheel motion whipping something around, or the front driveshaft dropping could jack the car up in the air. The rear is only driven by the engine, leaving the rest of the drivetrain to coast safely to a stop.
I finished up the car a few days ago and the rear wheels look good now. I just set them up using a level and by eyesight for now. I will take it in to a shop somewhere to have the rear wheel alignment checked in a few days. I've been given the name of a different shop in my town that has a better reputation than the first one I used so I'll try them this time. The right side wheel set up really good with the eccentric bolt just about at the mid point which is where I would think it should be. The left side has the rod pulled way inboard for some reason, not sure what is going on there but I'm going to give it a closer examination when I can. The toe-in shim stacks originally had 2 thick shims inboard and 2 thick shims along with a couple of very thin ones outboard. With the new trailing arm bushings I was barely able to get the thick shims to install and had to leave the thin ones out but they were very thin and I don't think they will make a significant difference in the toe. I've driven the car about 40 miles and it seems to be working good once again.
Thanks to everyone on the list for the tips, suggestions and encouragement.
You can get pretty close with your telephone and a straight edge as to the camber settings. My setup only requires about .54 negative camber for even rear tire temps and ware.
Thanks for the update! I'm glad it seems to be working out. The inboard shims set the rear toe, then the outboard shims fill the gap. The gap won't be the same, nor the shim count, because the new bushing will always be different (and likely wider). You can set the rear toe yourself, too.
Please post some photos, and enjoy the Spring driving season!
You can get pretty close with your telephone and a straight edge as to the camber settings. My setup only requires about .54 negative camber for even rear tire temps and ware.
Toe is a lot more involved on the rear
I do my own alignments and found you can get very accurate measurements with an iPhone that has one straight side without buttons like an i5 as you use the edge or side of the phone to measure. It's good down to 1/10th of a degree and we compared it with the numbers while on an alignment machine at a local GM dealer shop. They were the same as on the machine and that was compared while on the ramps. You can do camber on the rear and both camber and caster on the front with an app called Tremec Tool Box. You download it for free then start the app and select "driveline angle finder".
The "straight edge" used below is a piece of granite countertop that is flat and I had it on hand so, also free. I cut the length on the granite to rest on the lips without touching the tire. Rear on my 69 is below. The app is also great for finding angles on anything and some other good stuff. It looks hokey but is dead on accurate. The only real trick to doing this is your garage floor has to be level.
Last edited by CanadaGrant; 03-13-2019 at 11:23 AM.

 01-31-2019, 11:50 AM


 I do my own alignments and found you can get very accurate measurements with an iPhone that has one straight side without buttons like an i5 as you use the edge or side of the phone to measure. It's good down to 1/10th of a degree and we compared it with the numbers while on an alignment machine at a local GM dealer shop. They were the same as on the machine and that was compared while on the ramps. You can do camber on the rear and both camber and caster on the front with an app called Tremec Tool Box. You download it for free then start the app and select "driveline angle finder".