When you click on links to various merchants on this site and make a purchase, this can result in this site earning a commission. Affiliate programs and affiliations include, but are not limited to, the eBay Partner Network.
All in all it took me about two hours of playing around to put this together and I realize that an entire spreader bar kit is not terribly expensive. I just enjoy making things myself and it was a fun way to spend my morning. To be fair, the cost is just for the materials used...I already have a MIG welder, drill press, and powder coating setup that really helped to put this together. Anyway, without further adieu...
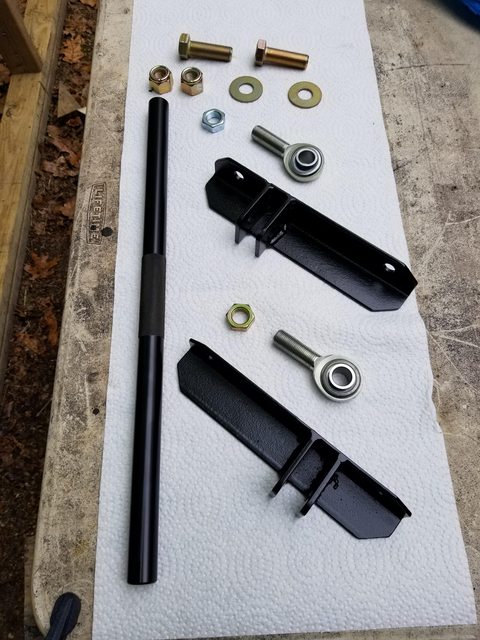
Parts list
Speedway motors
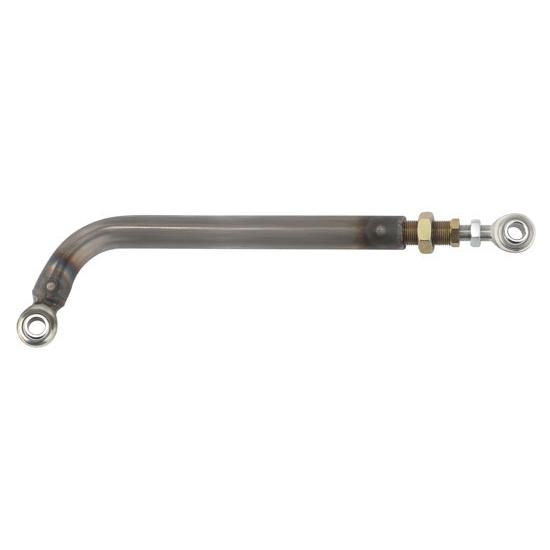
1750306 Heim Joint LH
1750106 Heim Joint RH
91034158-18 Aluminum sleeve 7/8" OD x 18" long
1750246 Jam Nut RH
1750446 Jam Nut LH
Total cost: $30
Hardware Store
5/8"x2" Gr8 Bolt x2
5/8" Gr8 Nylock Nut x2
Total Cost: $4
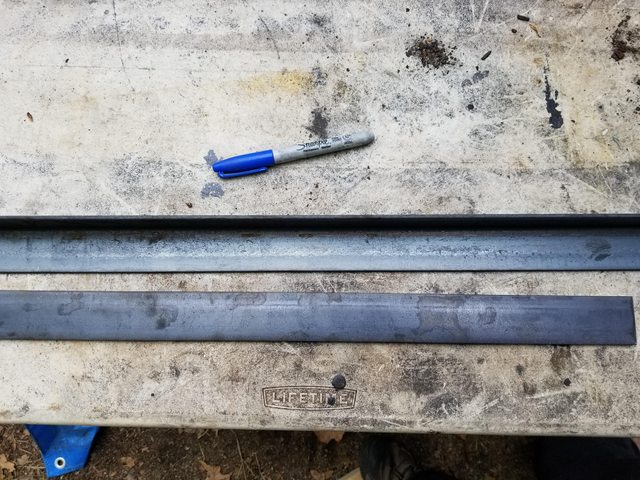
I also used some scrap 3/16"x1 1/2" angle iron and 3/16"x1 1/2" flat bar stock that I had lying around.
Starting out with some bar
Cut the angle into two 8" lengths. Mark the center of the studs on one face and drill two 1/2" holes to allow for mounting. I also cut some angles at the corners to give the bracket a more finished appearance but it isn't necessary. Test fit to be sure you drilled in the right spot.
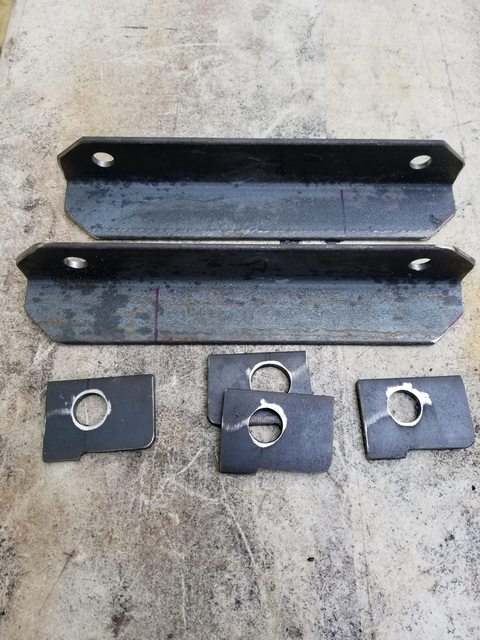
Cut the flat bar into four 2" lengths. Notch the flat bar stock to allow it to rest flat on the angle iron as shown. Also radius the inside corner with an angle grinder to make it seat flush. Mark the location for the mounting holes and drill them using an 11/16" bit in a drill press. Do not try to do this by hand.
Weld the tabs to the angle iron. I wanted my spreader to have a little more clearance from the engine and since I am using an electric fan I opted to place them off-center. Put them wherever you like =). Use a square to ensure that the tabs are flush and square. Weld one tab in place, then use the heim joint as a spacer to set the second one up. Using a welding magnet here helps a lot. Once you are sure you have the spacing correct and that everything is square, weld the second tab in place. Clean up the welds with an angle grinder and knock off the sharp edges. I also radiused the corners to give it a more finished appearance.
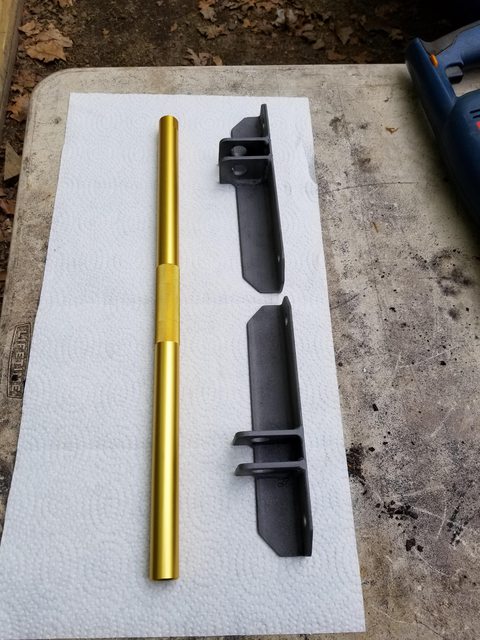
After that it was off to the blast cabinet to clean everything up and then, like I always do with ferrous metals, I sprayed it down with Eastwood's afterblast as a cleaner and also applies a phosphate coating which prevents rust. Here are the finished brackets and the aluminum tube from Speedway just waiting for my powder coating oven to come up to temp.
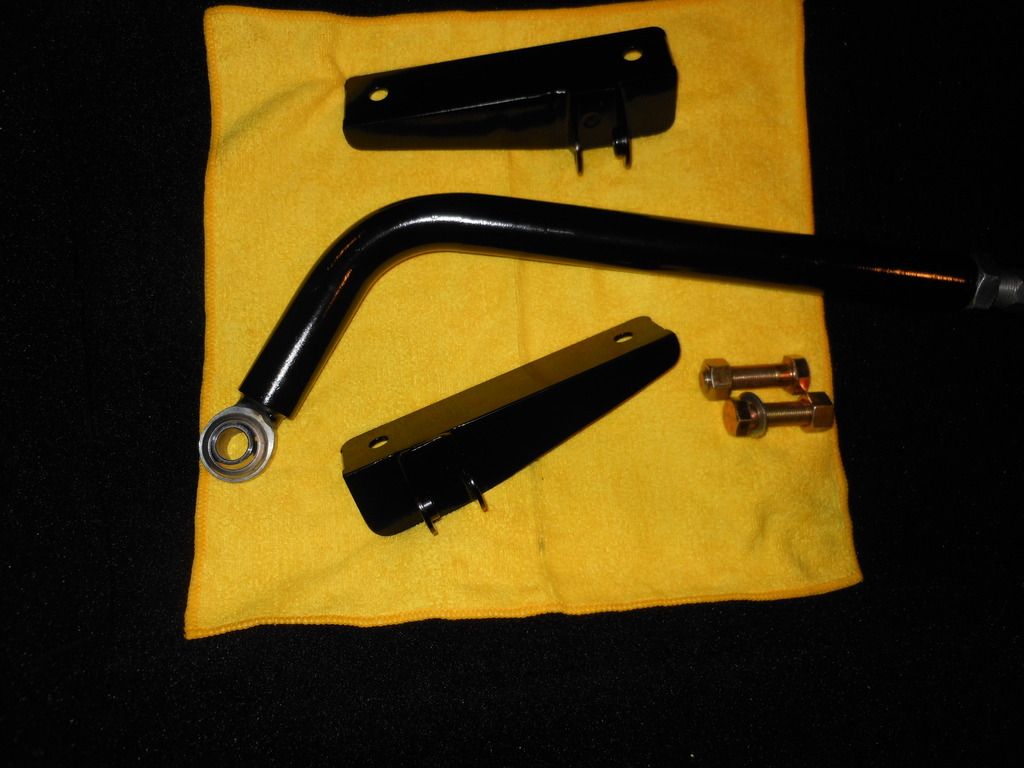
and here is the finished powder coated project along with everything else used in the build.
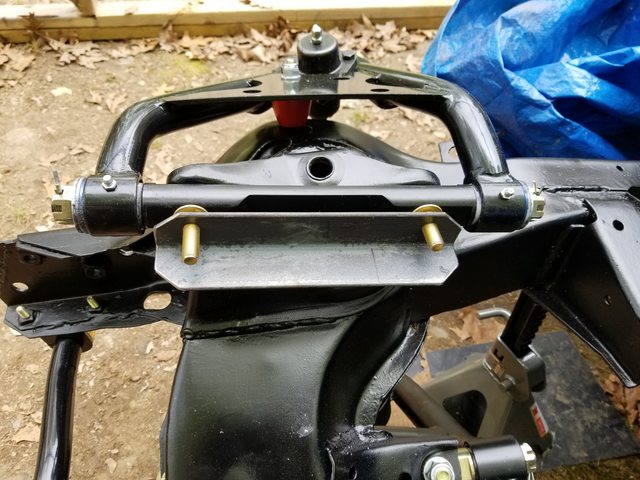
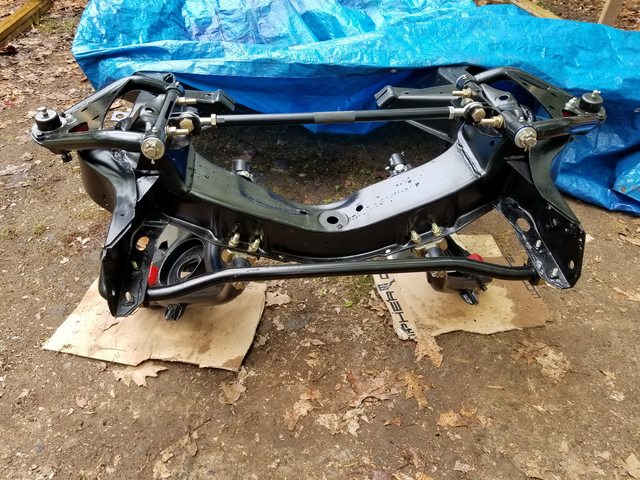
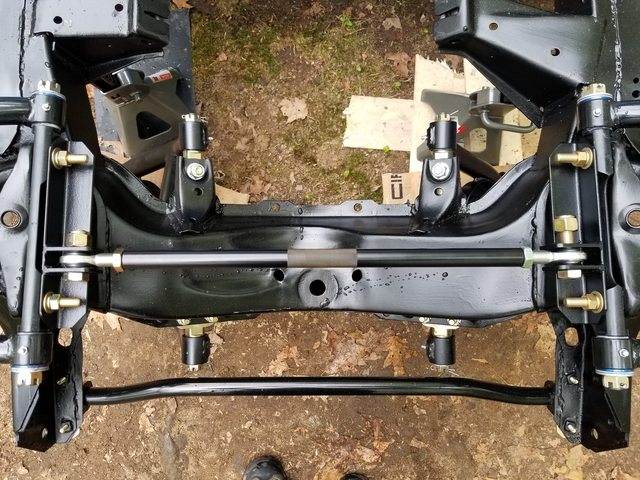
All that is left is the installation. Install the brackets on your upper control arm mounting studs. Thread the jam nuts onto the heim joints, and then the joints onto the aluminum rod. Remember that one of these is reverse threaded. Use the 5/8" bolt/nut to secure the heim joints into your new brackets and then turn the rod until the opposite heim joint lines up with the mounting holes. Put the second 5/8" bolt through and secure it with the nut. Twist the rod until you have proper tension and then use the jam nuts to lock everything in place. Then go sit back, have a beer, and admire your handiwork.
And this place is AWESOME! got a bunch of stuff from them especially hard to find stuff like shim stock. Plus they are right here in GA. https://www.mcmaster.com/#
You may know about them already but figure posting the link helps others also.
Closed on 2 houses for my friend today after working on them for last 5 months.
Now I have time and funds to get back to my projects.
I'll update them soon.
Take care and keep it up......
Really want to hear how you made out with caster/camber on the front suspension now that your modified pieces are in......??????
Thanks for the suggestions on the vendors. I am a long time user of McMaster-Carr but Ruff Stuff is new to me so I will check them out. I am fortunate to also have a Fastenal near me so that is another great source of hardware.
Congrats on the house closings! That has to be a huge relief and just in time for good Corvette weather
As for the caster/camber...it is going to be a bit before I get to that point but I will be sure to update as soon as I know.
Originally Posted by Richard454
Nice work-
Alright...Alright- you beat me by about $20....
I used a Panhard bar from Speedway Motor's Garage sale. Worked prefect for me as it cleared my Dry Sump Pump-
The 2" angle iron- I flipped over to get a little more clearance - Clarence!!!
Prettied up w/ some black paint...cut the angle iron- made it look a little better and welded on the mounts
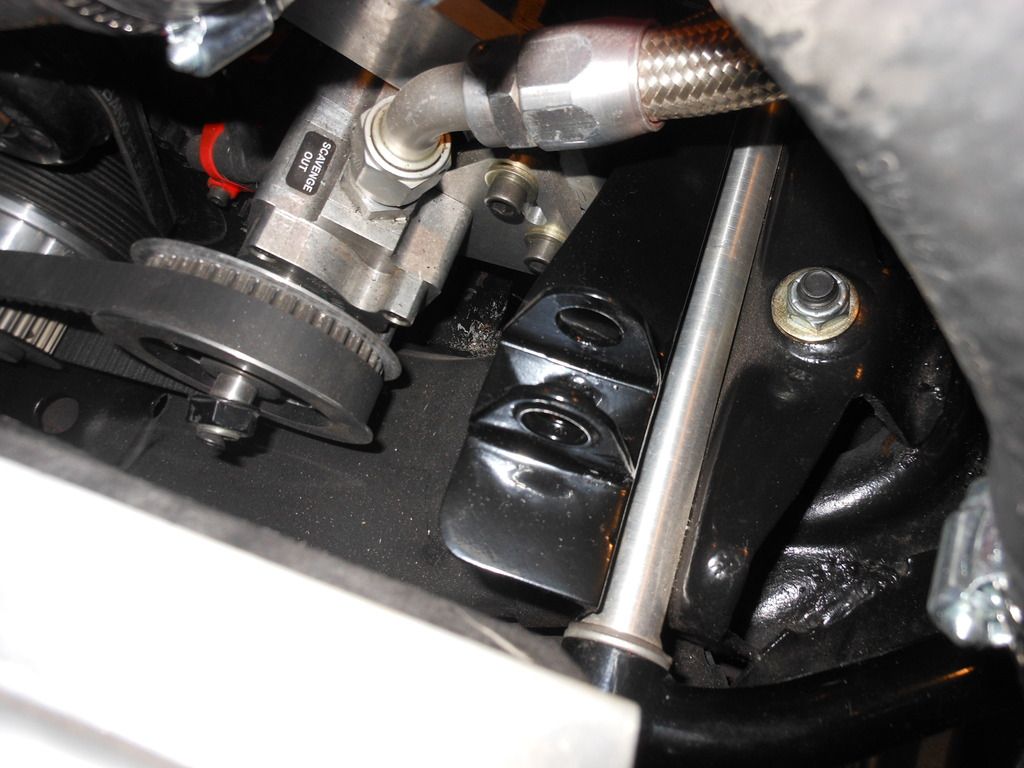
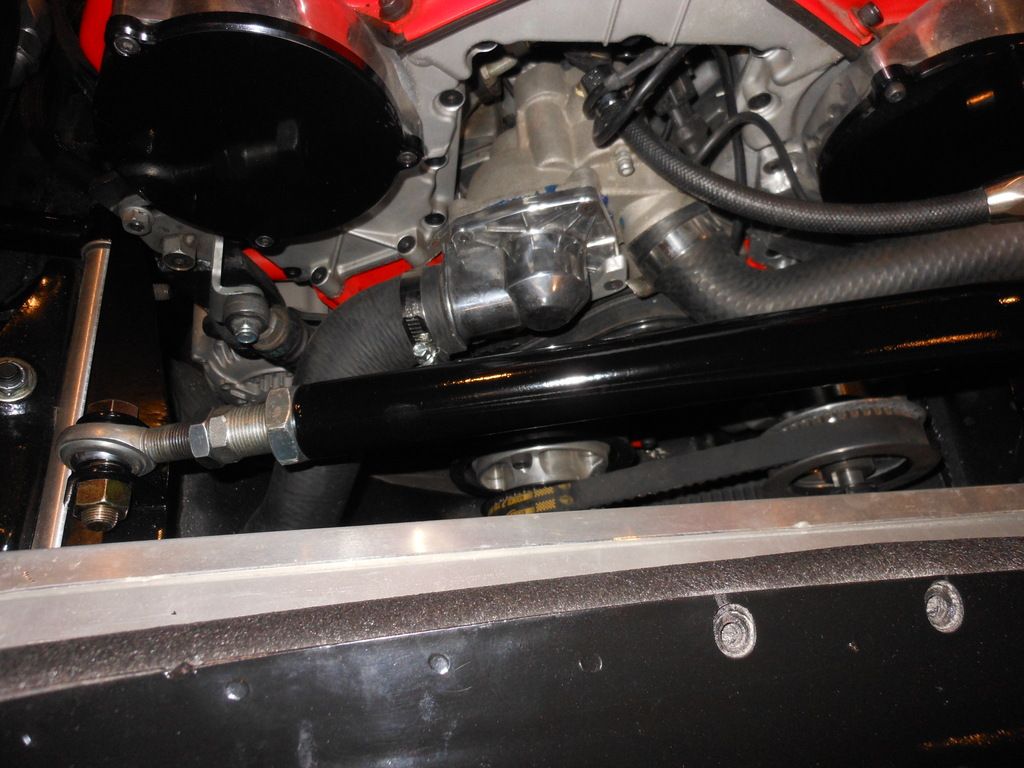
Bolted it on -drivers side-Yep, I know the bolt on the pump is not tight- making a correct size spacer for the HTD gear...
Pass side-
Bolted in the Bar-
Adjusted it till snug-
As with all things you do, that looks brilliant and with all that wacky (in a good way) stuff you have crammed into that engine compartment I think we can allow you an extra $20 in your budget for clearance. Fantastic work!
Last edited by PainfullySlow; 05-18-2019 at 07:38 AM.
Just a question here. Why do you have to weld in the vertical brackets. Seeing the angle iron should be stiff enough why can’t you just bolt the Heim joint to the horizontal part of the angle iron.
Just a question here. Why do you have to weld in the vertical brackets. Seeing the angle iron should be stiff enough why can�t you just bolt the Heim joint to the horizontal part of the angle iron.
Considering I have no idea what the forces are that are at work here I chose to err on the side of caution. With a bolt going through a single piece of steel, you are left with one shear point. I was not comfortable with that so I opted for two, especially since all of the spreader brackets that I have seen from professional companies have two anchor points
2020 Corvette of the Year Finalist (performance mods)
2019 C3 of Year Winner (performance mods)
2016 C3 of Year Finalist
Originally Posted by PainfullySlow
All in all it took me about two hours of playing around to put this together and I realize that an entire spreader bar kit is not terribly expensive. I just enjoy making things myself and it was a fun way to spend my morning. To be fair, the cost is just for the materials used...I already have a MIG welder, drill press, and powder coating setup that really helped to put this together. Anyway, without further adieu...
Parts list
Speedway motors
1750306 Heim Joint LH
1750106 Heim Joint RH
91034158-18 Aluminum sleeve 7/8" OD x 18" long
1750246 Jam Nut RH
1750446 Jam Nut LH
Total cost: $30
Hardware Store
5/8"x2" Gr8 Bolt x2
5/8" Gr8 Nylock Nut x2
Total Cost: $4
I also used some scrap 3/16"x1 1/2" angle iron and 3/16"x1 1/2" flat bar stock that I had lying around.
Starting out with some bar
Cut the angle into two 8" lengths. Mark the center of the studs on one face and drill two 1/2" holes to allow for mounting. I also cut some angles at the corners to give the bracket a more finished appearance but it isn't necessary. Test fit to be sure you drilled in the right spot.
Cut the flat bar into four 2" lengths. Notch the flat bar stock to allow it to rest flat on the angle iron as shown. Also radius the inside corner with an angle grinder to make it seat flush. Mark the location for the mounting holes and drill them using an 11/16" bit in a drill press. Do not try to do this by hand.
Weld the tabs to the angle iron. I wanted my spreader to have a little more clearance from the engine and since I am using an electric fan I opted to place them off-center. Put them wherever you like =). Use a square to ensure that the tabs are flush and square. Weld one tab in place, then use the heim joint as a spacer to set the second one up. Using a welding magnet here helps a lot. Once you are sure you have the spacing correct and that everything is square, weld the second tab in place. Clean up the welds with an angle grinder and knock off the sharp edges. I also radiused the corners to give it a more finished appearance.
After that it was off to the blast cabinet to clean everything up and then, like I always do with ferrous metals, I sprayed it down with Eastwood's afterblast as a cleaner and also applies a phosphate coating which prevents rust. Here are the finished brackets and the aluminum tube from Speedway just waiting for my powder coating oven to come up to temp.
and here is the finished powder coated project along with everything else used in the build.
All that is left is the installation. Install the brackets on your upper control arm mounting studs. Thread the jam nuts onto the heim joints, and then the joints onto the aluminum rod. Remember that one of these is reverse threaded. Use the 5/8" bolt/nut to secure the heim joints into your new brackets and then turn the rod until the opposite heim joint lines up with the mounting holes. Put the second 5/8" bolt through and secure it with the nut. Twist the rod until you have proper tension and then use the jam nuts to lock everything in place. Then go sit back, have a beer, and admire your handiwork.
great job!. I did the same thing because the VBP kit I bought used a couple of years ago had a spreader bar included but no mounting bracket'
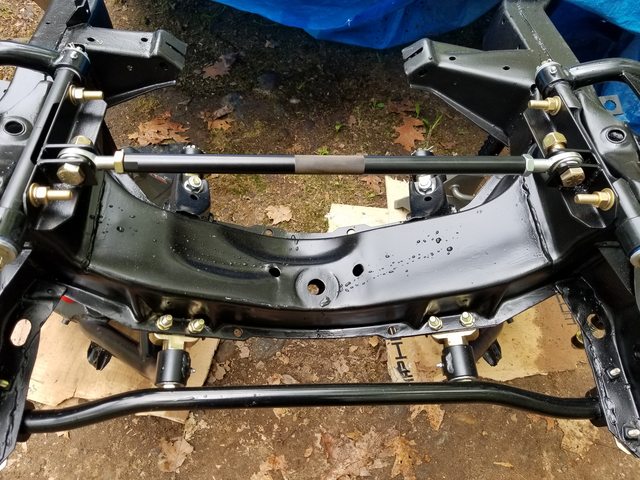
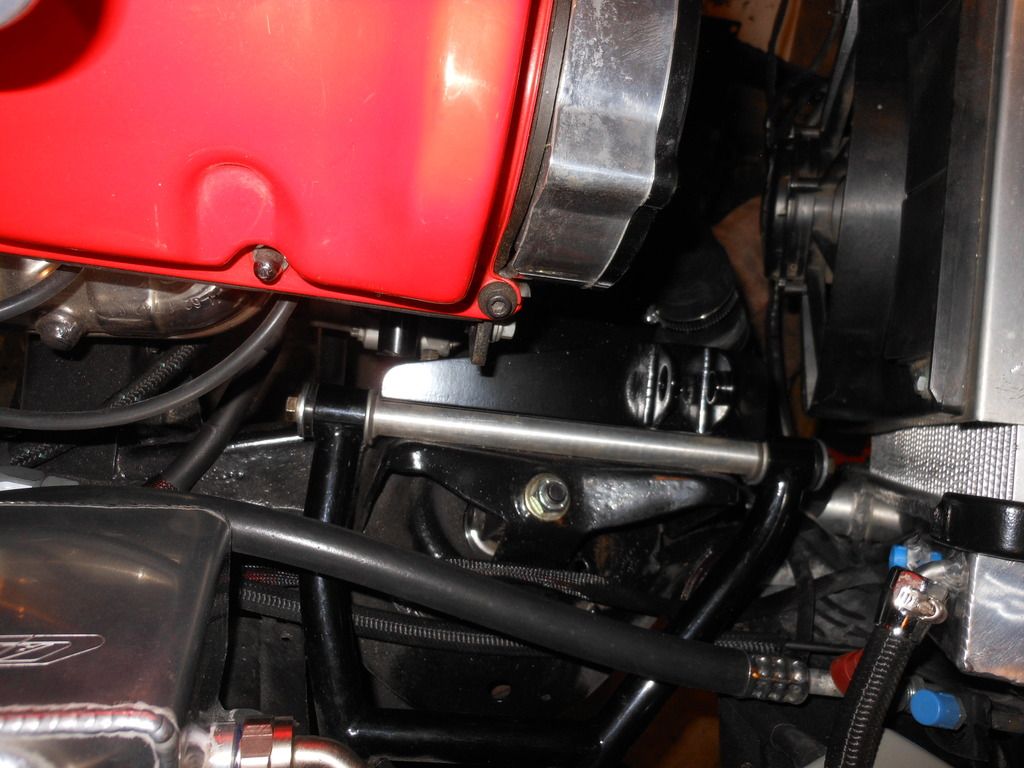
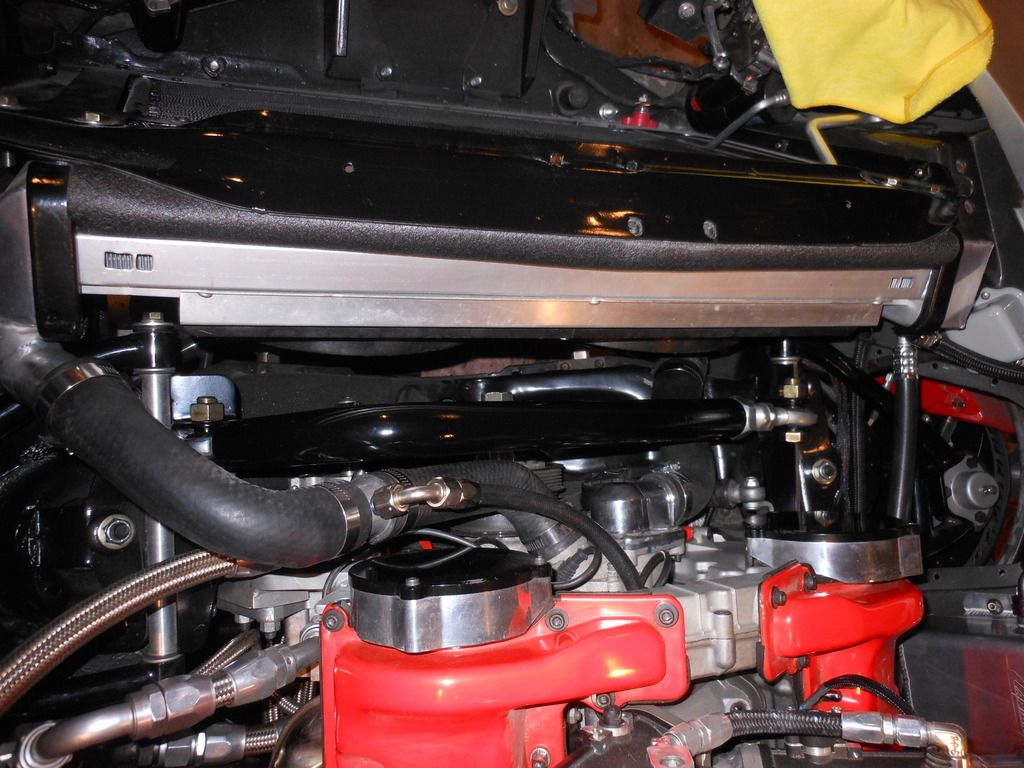
test fitting installed and loving it
Last edited by Rescue Rogers; 05-18-2019 at 09:14 PM.
I bought some 1/4� aluminum stock off Ebay enough to do 2 sets, 1 for me and 1 to sell and drew up a template and took it to my Machinist Buddy and had him cut out both sets and then spent hours polishing them. Both have Vette Brakes Aarm[font] Monospring, [/font]like how He mounted h[font]is Bar underneath on his C2.[/font]
I bought some 1/4� aluminum stock off Ebay enough to do 2 sets, 1 for me and 1 to sell and drew up a template and took it to my Machinist Buddy and had him cut out both sets and then spent hours polishing them. Both have Vette Brakes Aarm Monospring, like how He mounted his Bar underneath on his C2.
Mine C2
Looks very well done for sure! I like that you can reverse any of these to have the heim joints on top or bottom to suit your personal preference. I enjoy being able to see the assembly so I have them visible from the top.
Just a question here. Why do you have to weld in the vertical brackets. Seeing the angle iron should be stiff enough why can�t you just bolt the Heim joint to the horizontal part of the angle iron.
I�d imagine over time, without anything supporting the bolt head, the bolt hole would work loose from leverage.
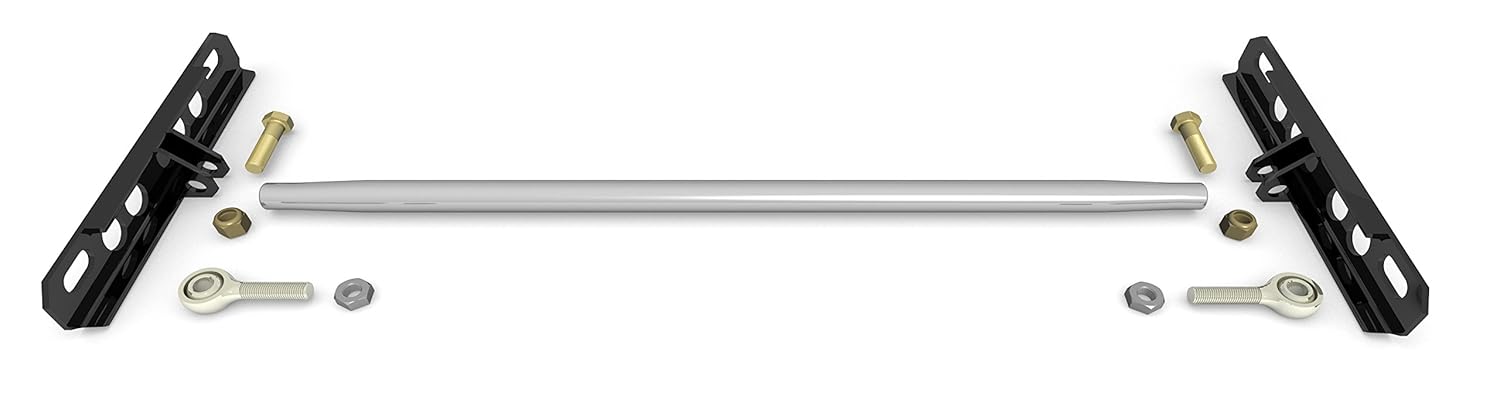
Googling around I found this Ridetech bracket which could mount on either the horizontal or vertical surface (not sure if it�s proper size but they make many brackets)
I�d imagine over time, without anything supporting the bolt head, the bolt hole would work loose from leverage.
Googling around I found this Ridetech bracket which could mount on either the horizontal or vertical surface (not sure if it�s proper size but they make many brackets)
That's basically what I used- Speedway Motors has them -very inexpensive.
Painfully Slow: Who's tubular A-Arms are you running? (VB&P or someone else?)
Adam
Michael is over in this thread with that info.
Check in around post #424 and you will see his contribution.
Good thread also in general. Lots of good info and lots of trial and error.

 05-17-2019, 09:42 PM