1984 Wide Body "RestoMod" C4
 11-02-2012, 11:36 PM
#41
Advanced

Thread Starter
Member Since: Oct 2012
Location: Fayetteville NC
Posts: 91
Likes: 0
Received 0 Likes
on
0 Posts
Update: waiting on 3 inch wheel adapters to arrive for the rear, I have the front fender peaks all evened out and mostly smoothed out. Ive been pre-occupied with replacing rear wheel bearings with taper roller bearings. mine were completely shot.
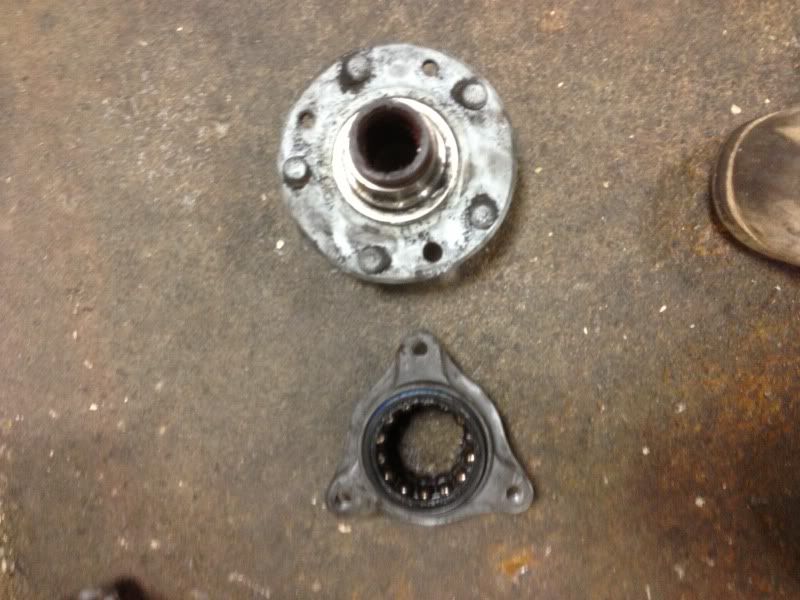
when I released the left rear wheel bearing from the knuckle it litterally just fell apart like this, no pulling, nothing. I got both the rears replaced and got to do a little reconnaisance in the U joint and bushing area. luckily all of them had recently been replaced by a previous owner with polyurethane bushings and new high quality u joints sometime ago.
once I get the wheel adapters im going to cut out the curent fender flares, mount the wheels with the adapters on. make 2 standing molds in the shape I want out of MDF board and secure them level to the faces of the wheels, lay down some plastic over the wheels and ground. tape on a large sheet of fiberglass cloth to the top of the quarter panel and drape it over my standing mold, tape the other side of cloth to the mold. brush down some resin let it cure, trim it then reinforce the back with some fiberglass mat, some body filler and alot of sanding then I can get to work shaping the flare into the rear end. Then the side skirts which im dreading. stay posted!
 11-03-2012, 12:03 PM
#42
Le Mans Master

Member Since: Oct 2004
Location: South-central Missouri
Posts: 6,314
Received 500 Likes
on
395 Posts

Hats off to all you guys that can mold and shape your cars to suit you! There is "fixin stuff", and then there's you artists, and a world of difference between the two.
Good luck and can't wait to see how it turn out!
P.
Good luck and can't wait to see how it turn out!
P.
11-10-2012, 05:05 PM
#43
Advanced
Thread Starter
Member Since: Oct 2012
Location: Fayetteville NC
Posts: 91
Likes: 0
Received 0 Likes
on
0 Posts
How's it going fellas?! a little update on the project, I was able to squeeze in some work today and yesterday. We just started work again at the hanger so its been a little hectic, hence the late update.

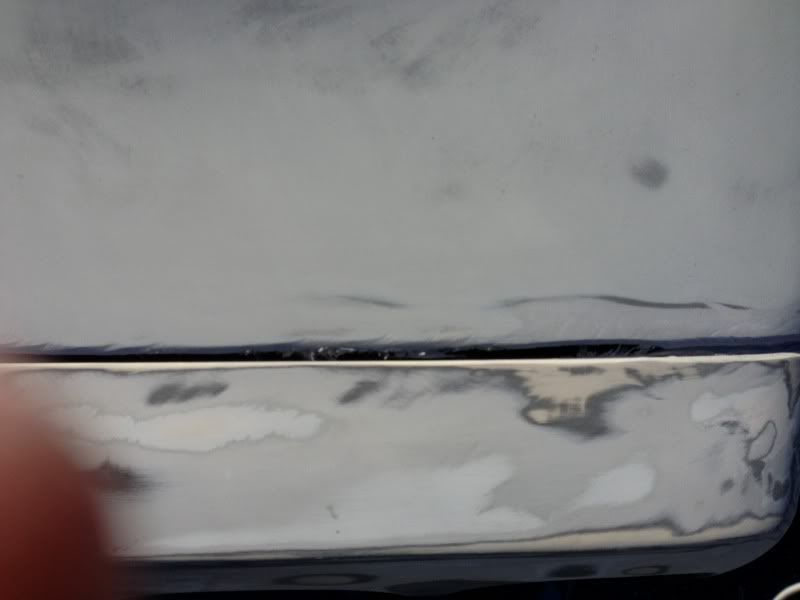
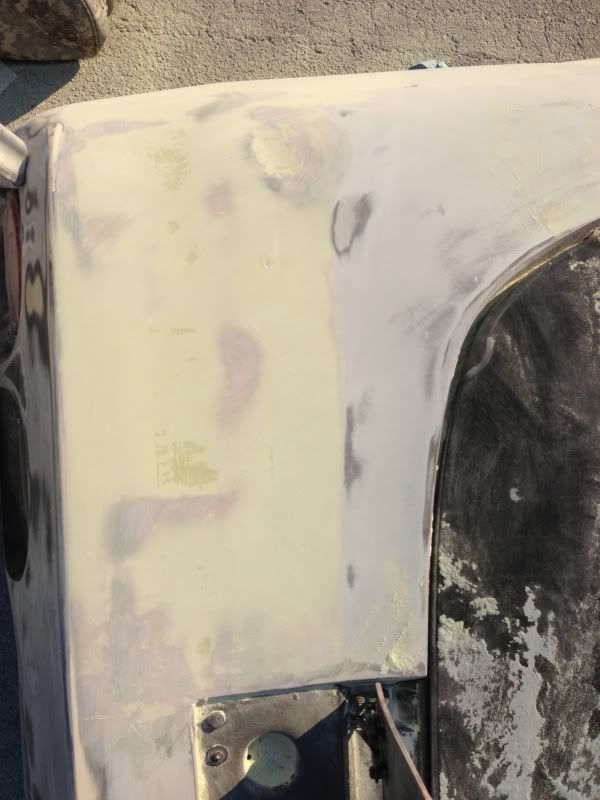
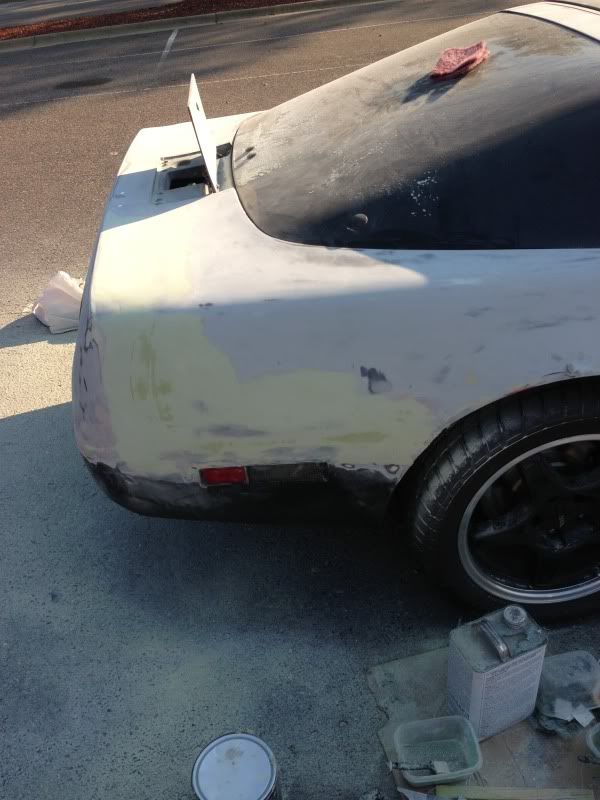
This is how I get my straight lines for the fender peaks. after i have a base line (like on the front of where the curve begins) I took a long strip of flat wood, about the thickness of two paint sticks (I cut the strips down and use them for that too) I then line them up with my good edge then tape it to the surface from the bottom so it can still flap around. so if the edge is a little shallow or curves into the body youll see a seam tapering out of empty space. I take my short strand fiberglass filler and layer it up on the shallow part until theres a little more then I need. Then pressing the taped strip of wood back into the surface level with the base line that I was happy with, the extra fiberglass filler pushes out the top. with a little adjusting to make sure the stick is straight, ill then take a spreader and scrape the top edge smooth and remove the excess that squeezed out. when the fiberglass filler sets up just enough not to move I peel the strip of wood off and it leaves a straight line like below.
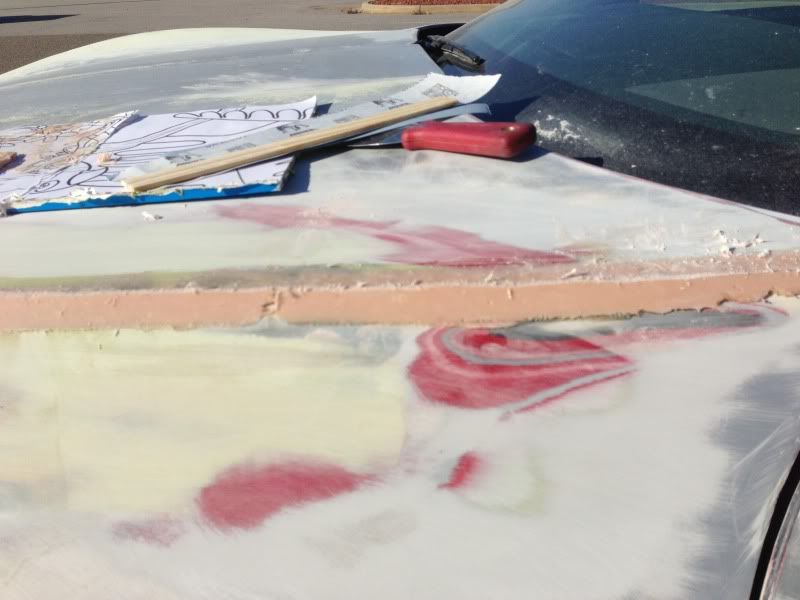
I then taper a "V" into the rough bottom edge sand out the little air bubbles that might have arisen then hit it with the fiberglass filler again to smooth it back into the body.
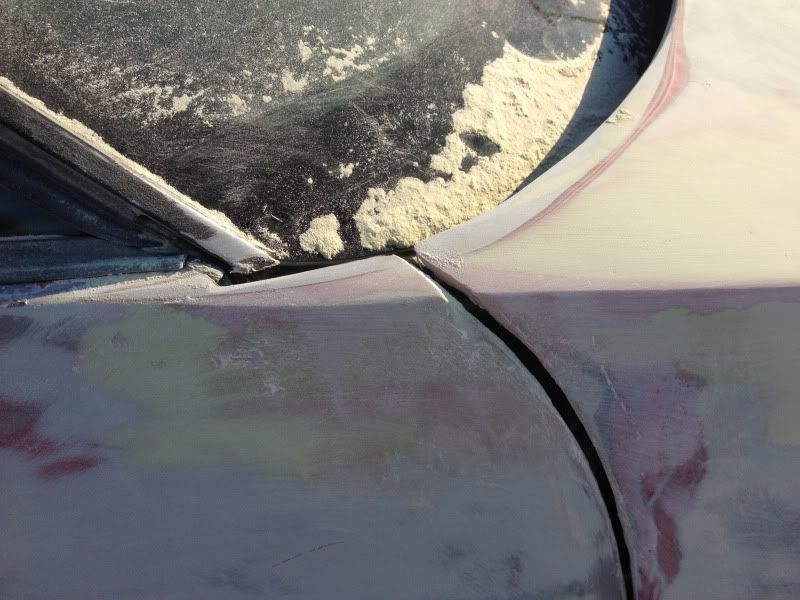
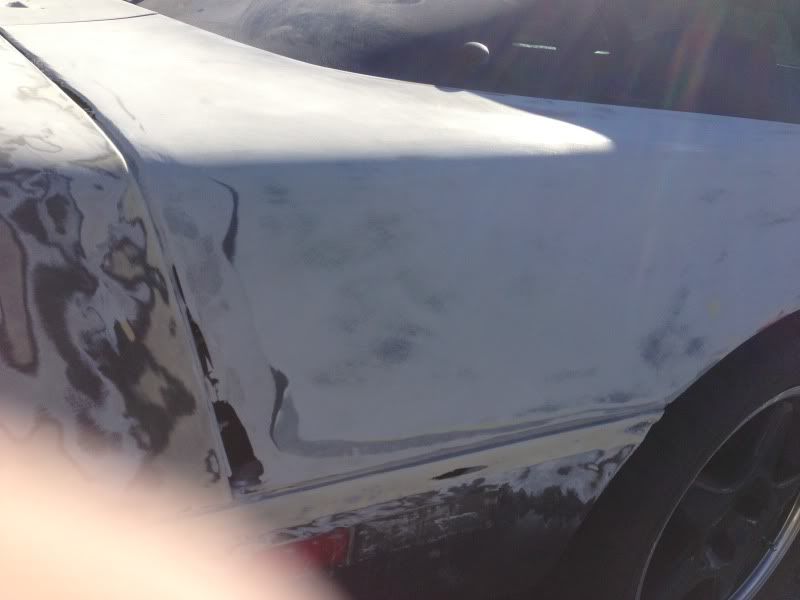
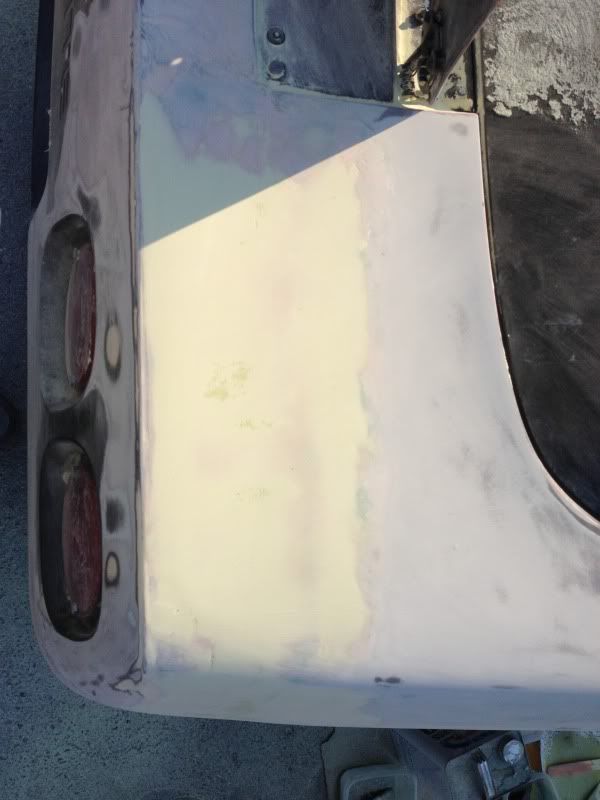
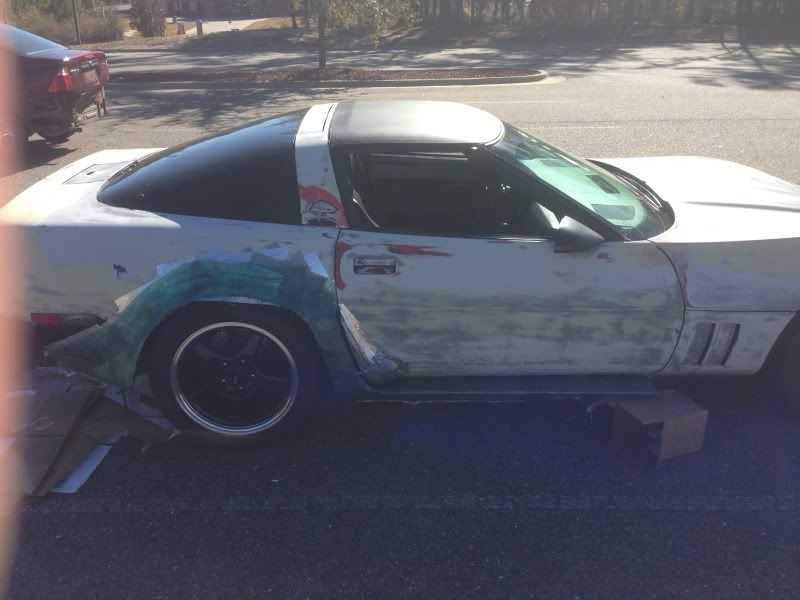
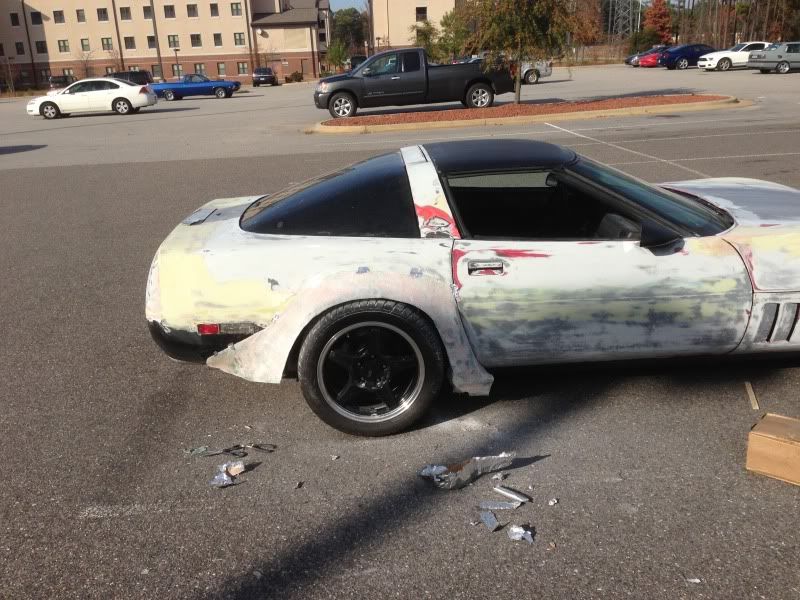
heres a rough version of the end of the body line im continuing. it still needs some tweaking. I made the line go into the door then disappear right before the mirror. I also sanded down the top edge of the hood where it goes around the windshield, I broke through the fiberglass up there so im going to have to go back through and patch it from the back with mat.
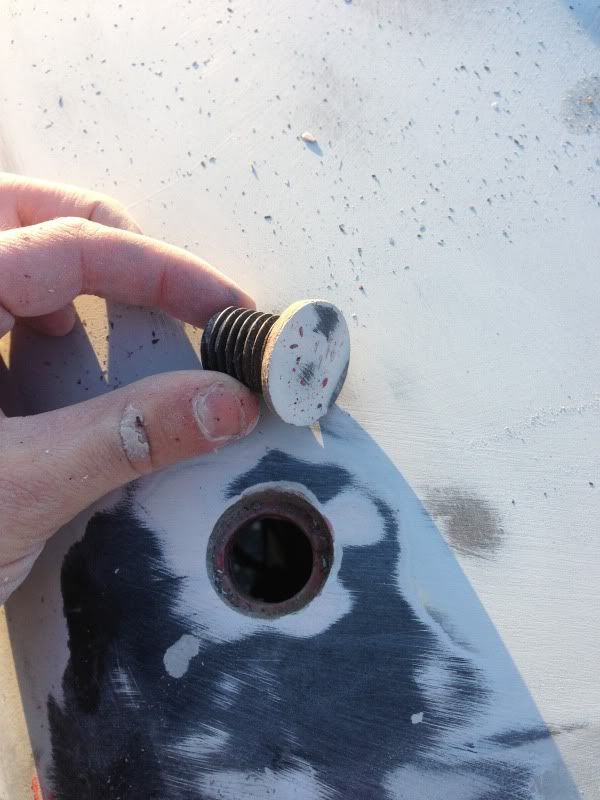
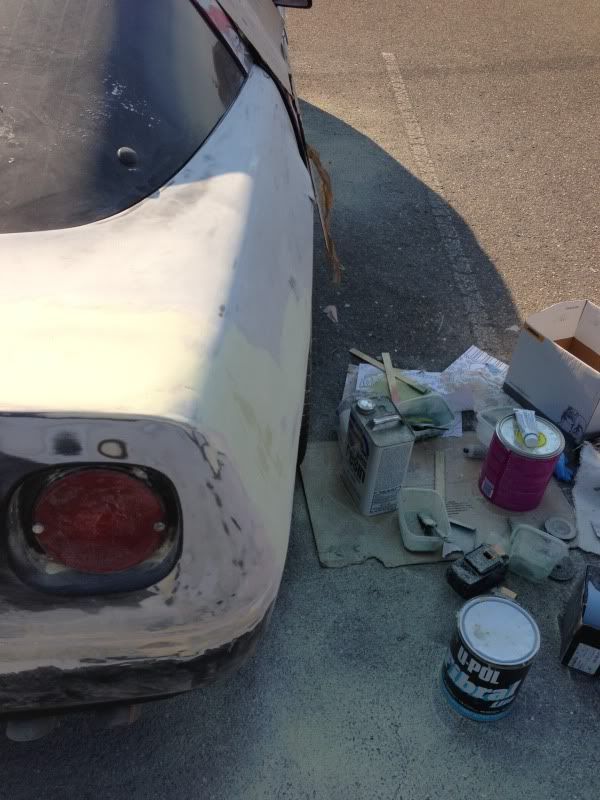
the bondo was shrinking out of the attena hole where the previous owner "deleted" it, after a little sanding this thing just popped out.
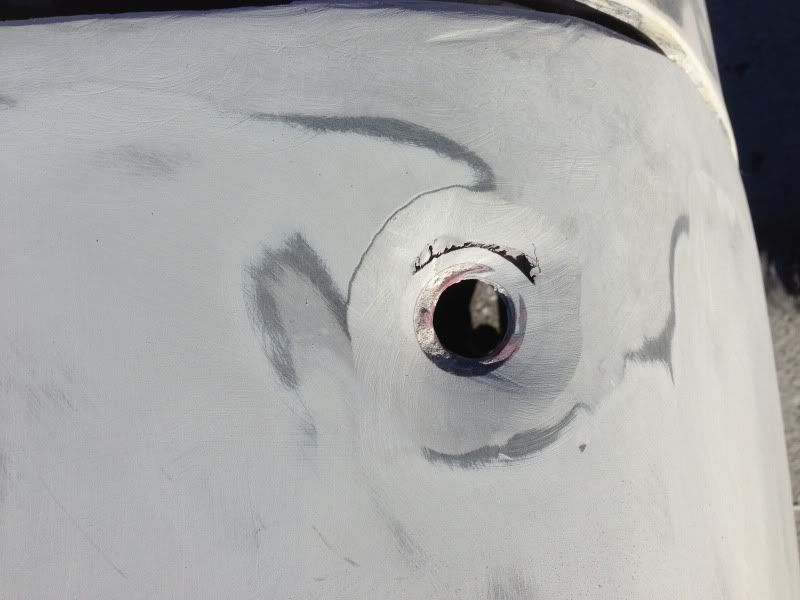
tapered out the hole for the antenna so I can glass it
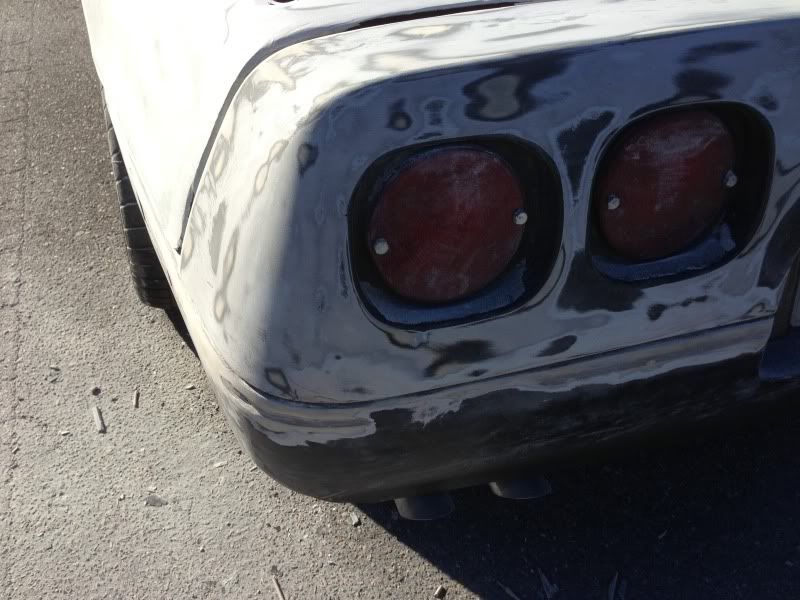
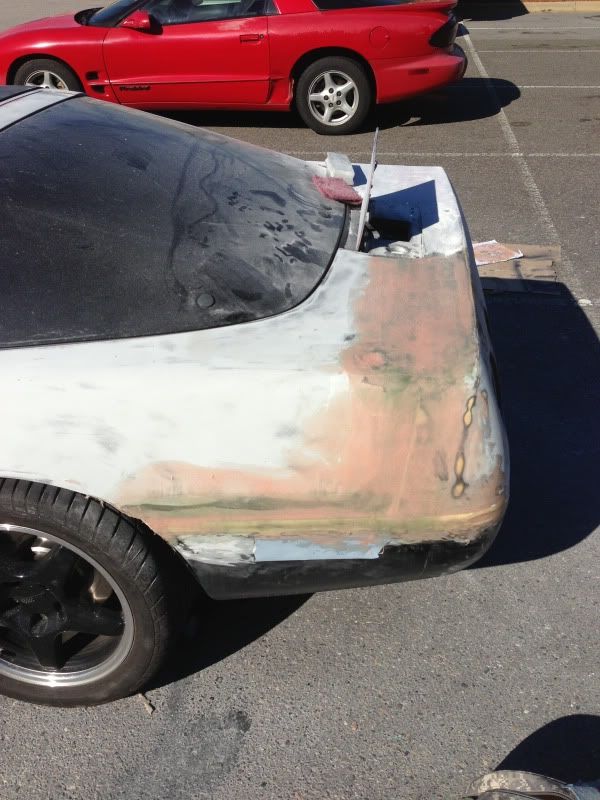
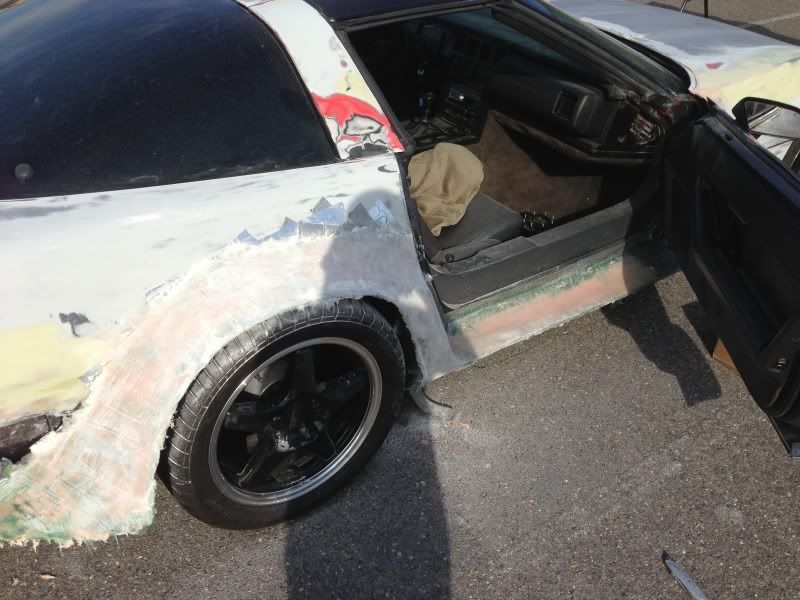
I stripped the top half of the bumper and removed the crap bondo work I had done on it. I also noticed the line that the bumper mated to had bondo showing. I got to work investigating that via a sanding disk. come to find out the mounting edge for the bumper had been removed and re added on somehow and had bondo filling the gap. I dug it out completely around where the bumper meets the quarter panel. Luckily my original plan was to glass the bumper into the quarter panels anyways so the flares can sculpt into the bumper.
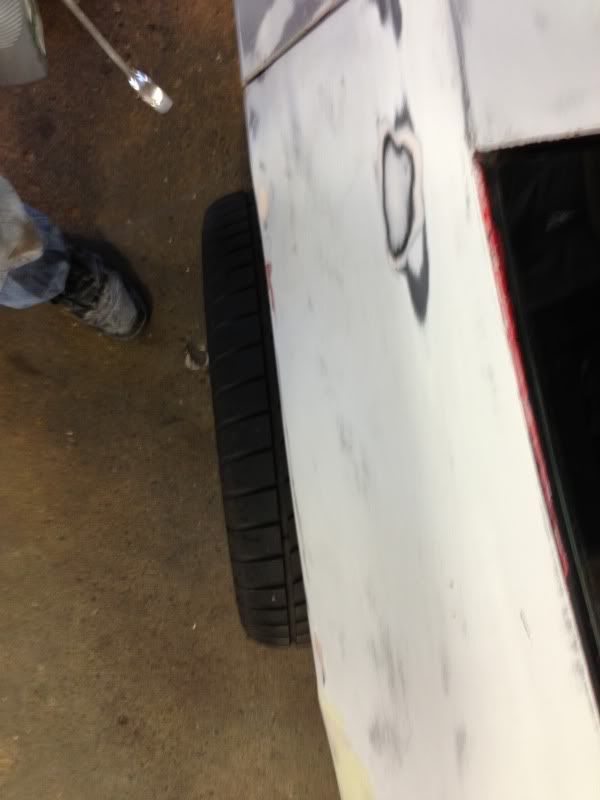
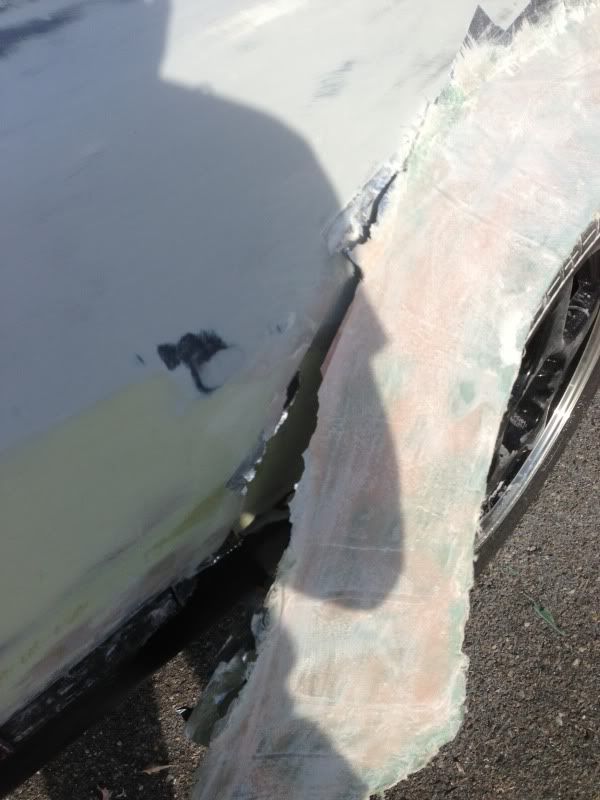
woopsy, finger got in the way, but you can also notice the little misshap I had. I was sainding everything level when I broke through on the corner of the quarter panel (happened on both sides and wasn't to suprised) ohh well its all getting glassed over anyways.
I had laid down quite a few layers of mat and cloth before this stage, I was in the zone and forgot to take pics. I started off sanding the urethane with 36 grit sanding disks making sure to put little divets in the surface for better adhesion. Then I took a little hand blow torch and went over the surface of the urethane real quick to allow the resin to have better adhesion to the plastic. Layed down some resin and fiberglass, after the resin had cured I sanded it feathered the edges. Fiberglass filler to take out the lows and build up the surface a little more to where I wanted it. I also used the fiberglass filler to fill the body line I deleted.

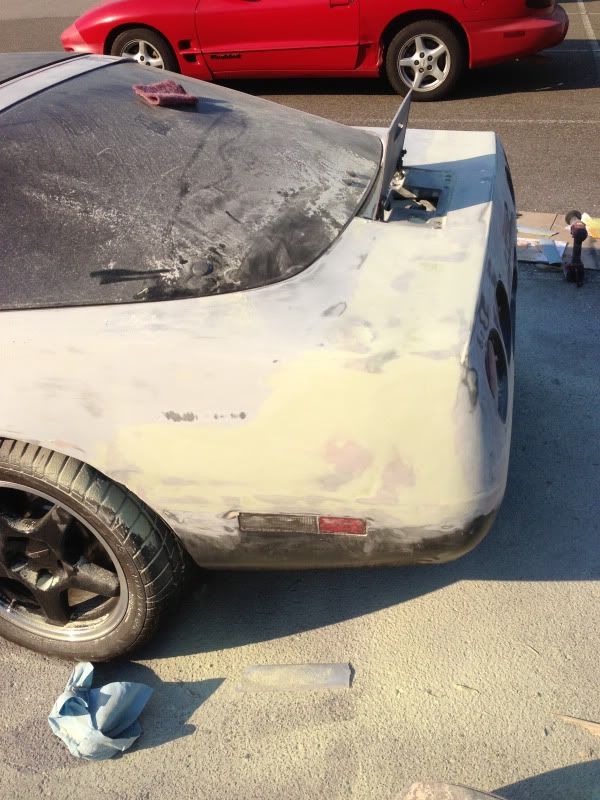
Sanded the fiberglass filler smooth (Have I mentioned I freaking love this stuff?)
A little rage gold sanded smooth, i still have quite a bit of filler to add in a few places because of the noticable lows. im going to dread the time when I have to guide coat the whole damn car and tackle all the lows.
then I got bored sanding the rear end and decided to go at the front end a little more.
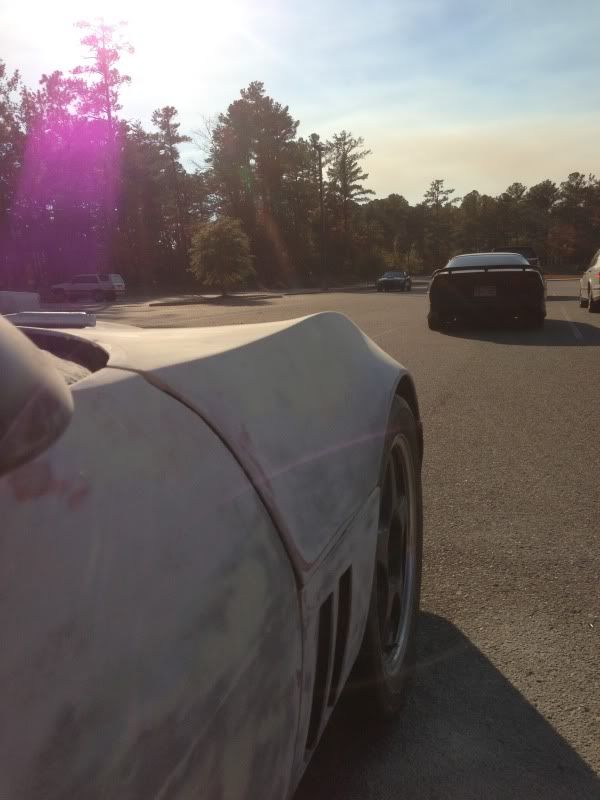
noticeable peak and sharp body line, but not to over the top in my opinion. the hood doesnt line up exactly on this side with the lower vent panel and door, itll be adressed when I do the front flares.
I'm still waiting on my 3 inch wheel adapters for the rear so I can get to work on the flares. I need to go pick up some MDF board for the fender flare bucks, and a jig, and a very large compass raising the cowl on the hood is also on my to do's. Im toying with the idea of slicing two lines on each side of where the cowl starts in the center of the hood, making the line follow that contour (or a new contour, haven't decided yet) of the cowl down to where I want the cowl to end and slope back into the hood, but make the cut go through the top edge of the hood where it meets the widshield. Looking at the original hood the fiberglass seems fairly thin, maybe an 1/8th of an inch based on the flexibility when you push on the hood. so having these two cuts in the hood makes the middle of the cowl in theory able to flap around. i'd bend it up and stack a 2 by 4 or some other hard rigid object at the top where it meets the windshield, this would keep the flap elevated so I could add in a sheet of fiberglass sheeting behind the gap that was made. then mat the sheet into the surface. remove the wood blocks because the fiberglass will hold the shape from there. finishing glassing where the block of wood was, reinforce the back of the structure with more mat then cut my gills/vents ect. Still waiting for things to calm down at work so I can bring it in there and work, but out in the parking lot will work for now
  everything sanded by hand with paitence comes out better anyways.
I know what some of you guys are thinking "bondo wagon", I think "fiberglass filler wagon." But ya I was thinking that too, I think the plan is to finish the whole thing so that it will last, make it strong. but Im going to make molds of all the panels then lay up carbon fiber and make myself another set and put them onto a later model vette, and then sell this one probably to fund that vette my material costs and some upgrades. I could keep this one and make it awesome, but its an 84, it has a dana 36 and a 4+3 and its naturally going to be a little heavier because of all the solid modification rather then making hollow castings. sure the plan is to replace the crapfire engine in the future. But I might as well start with something that has a ZF 6 speed and a dana 44 to start. I also kind of want a convertible one with this body on it. Plus Carbon fiber would make this car stupid light, id paint the carbon fiber of course.
And yes I know how to do carbon fiber if anyone is going to try to hate haha
cheers!
This is how I get my straight lines for the fender peaks. after i have a base line (like on the front of where the curve begins) I took a long strip of flat wood, about the thickness of two paint sticks (I cut the strips down and use them for that too) I then line them up with my good edge then tape it to the surface from the bottom so it can still flap around. so if the edge is a little shallow or curves into the body youll see a seam tapering out of empty space. I take my short strand fiberglass filler and layer it up on the shallow part until theres a little more then I need. Then pressing the taped strip of wood back into the surface level with the base line that I was happy with, the extra fiberglass filler pushes out the top. with a little adjusting to make sure the stick is straight, ill then take a spreader and scrape the top edge smooth and remove the excess that squeezed out. when the fiberglass filler sets up just enough not to move I peel the strip of wood off and it leaves a straight line like below.
I then taper a "V" into the rough bottom edge sand out the little air bubbles that might have arisen then hit it with the fiberglass filler again to smooth it back into the body.
heres a rough version of the end of the body line im continuing. it still needs some tweaking. I made the line go into the door then disappear right before the mirror. I also sanded down the top edge of the hood where it goes around the windshield, I broke through the fiberglass up there so im going to have to go back through and patch it from the back with mat.
the bondo was shrinking out of the attena hole where the previous owner "deleted" it, after a little sanding this thing just popped out.
tapered out the hole for the antenna so I can glass it
I stripped the top half of the bumper and removed the crap bondo work I had done on it. I also noticed the line that the bumper mated to had bondo showing. I got to work investigating that via a sanding disk. come to find out the mounting edge for the bumper had been removed and re added on somehow and had bondo filling the gap. I dug it out completely around where the bumper meets the quarter panel. Luckily my original plan was to glass the bumper into the quarter panels anyways so the flares can sculpt into the bumper.
woopsy, finger got in the way, but you can also notice the little misshap I had. I was sainding everything level when I broke through on the corner of the quarter panel (happened on both sides and wasn't to suprised) ohh well its all getting glassed over anyways.
I had laid down quite a few layers of mat and cloth before this stage, I was in the zone and forgot to take pics. I started off sanding the urethane with 36 grit sanding disks making sure to put little divets in the surface for better adhesion. Then I took a little hand blow torch and went over the surface of the urethane real quick to allow the resin to have better adhesion to the plastic. Layed down some resin and fiberglass, after the resin had cured I sanded it feathered the edges. Fiberglass filler to take out the lows and build up the surface a little more to where I wanted it. I also used the fiberglass filler to fill the body line I deleted.
Sanded the fiberglass filler smooth (Have I mentioned I freaking love this stuff?)
A little rage gold sanded smooth, i still have quite a bit of filler to add in a few places because of the noticable lows. im going to dread the time when I have to guide coat the whole damn car and tackle all the lows.
then I got bored sanding the rear end and decided to go at the front end a little more.
noticeable peak and sharp body line, but not to over the top in my opinion. the hood doesnt line up exactly on this side with the lower vent panel and door, itll be adressed when I do the front flares.
I'm still waiting on my 3 inch wheel adapters for the rear so I can get to work on the flares. I need to go pick up some MDF board for the fender flare bucks, and a jig, and a very large compass
raising the cowl on the hood is also on my to do's. Im toying with the idea of slicing two lines on each side of where the cowl starts in the center of the hood, making the line follow that contour (or a new contour, haven't decided yet) of the cowl down to where I want the cowl to end and slope back into the hood, but make the cut go through the top edge of the hood where it meets the widshield. Looking at the original hood the fiberglass seems fairly thin, maybe an 1/8th of an inch based on the flexibility when you push on the hood. so having these two cuts in the hood makes the middle of the cowl in theory able to flap around. i'd bend it up and stack a 2 by 4 or some other hard rigid object at the top where it meets the windshield, this would keep the flap elevated so I could add in a sheet of fiberglass sheeting behind the gap that was made. then mat the sheet into the surface. remove the wood blocks because the fiberglass will hold the shape from there. finishing glassing where the block of wood was, reinforce the back of the structure with more mat then cut my gills/vents ect. Still waiting for things to calm down at work so I can bring it in there and work, but out in the parking lot will work for now everything sanded by hand with paitence comes out better anyways.I know what some of you guys are thinking "bondo wagon", I think "fiberglass filler wagon." But ya I was thinking that too, I think the plan is to finish the whole thing so that it will last, make it strong. but Im going to make molds of all the panels then lay up carbon fiber and make myself another set and put them onto a later model vette, and then sell this one probably to fund that vette my material costs and some upgrades. I could keep this one and make it awesome, but its an 84, it has a dana 36 and a 4+3 and its naturally going to be a little heavier because of all the solid modification rather then making hollow castings. sure the plan is to replace the crapfire engine in the future. But I might as well start with something that has a ZF 6 speed and a dana 44 to start. I also kind of want a convertible one with this body on it. Plus Carbon fiber would make this car stupid light, id paint the carbon fiber of course.
And yes I know how to do carbon fiber if anyone is going to try to hate haha
cheers!
Last edited by VettoVette; 11-10-2012 at 05:43 PM.
 11-10-2012, 05:52 PM
#45
Advanced
Thread Starter
Member Since: Oct 2012
Location: Fayetteville NC
Posts: 91
Likes: 0
Received 0 Likes
on
0 Posts
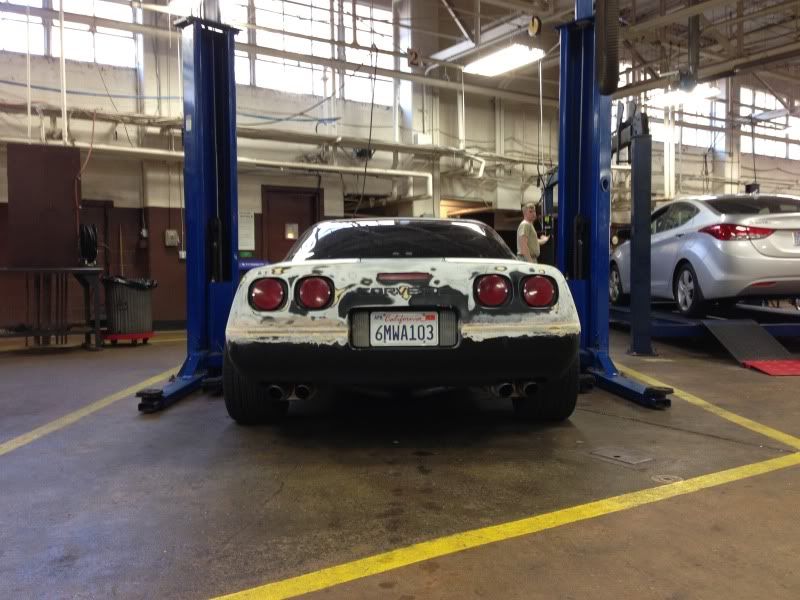
 especially since they think its a 90's vette at first glance. I get that "ohh its an 84......" alot, especially when my commander and one of our pilots saw it for the first time. (one drives a 2007 callaway, and the other a 2006 or 2007 Z06)
Last edited by VettoVette; 11-10-2012 at 06:05 PM.
11-16-2012, 03:58 PM
#46
Advanced
Thread Starter
Member Since: Oct 2012
Location: Fayetteville NC
Posts: 91
Likes: 0
Received 0 Likes
on
0 Posts
Update: I would have done this sooner but i wasnt able to put the adapters on until today. I drove my vette to work the other day, when i went to go home I tried starting it up and it wouldnt start. wasnt getting any fuel, checked it out a couple of days later when I had time, wasnt getting spark, connections were good, figured the ignition module took a dump. went to replace that and realized the cap and rotor had like internally combusted. now that thats fixed i was able to drive it to the shop and put the adapters on. Ill get to work on the flares here this weekend i believe. at least get the fender bucks made.

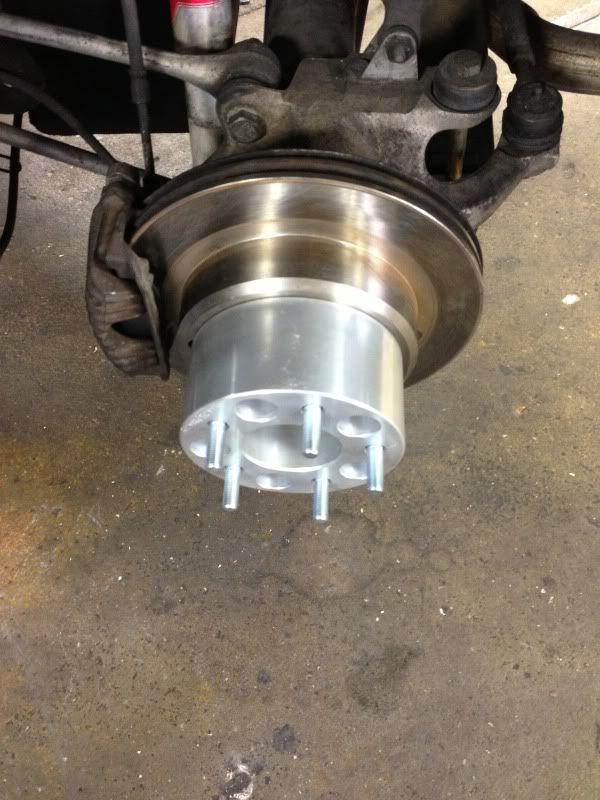
they are soooooo thick lol
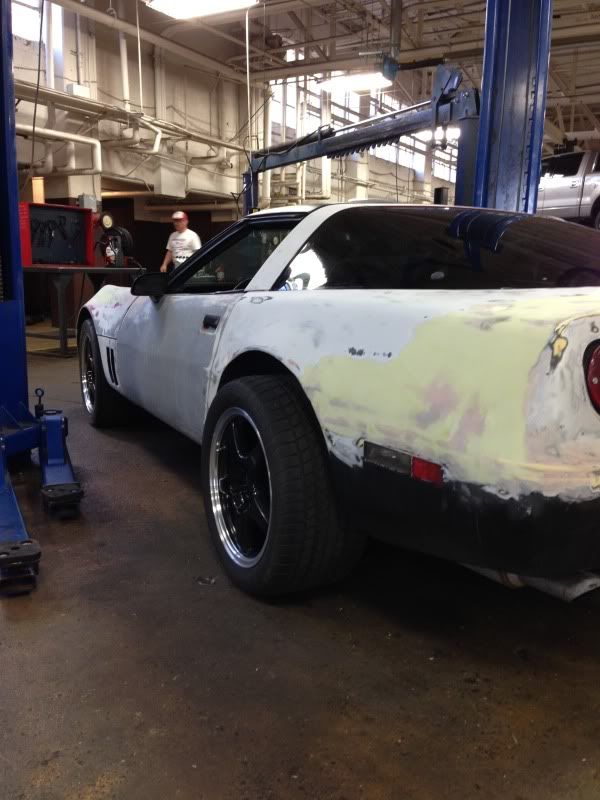


not much to update, ill post another update when I get going on the fender bucks. And we will see how the wheel bearings hold up!
real question is with the flares, do i want to curve it back under the car like the rear bumper does now taper it back and add a mud flap looking trim like the C6's have? or do I want to make it solid??
cheers!
they are soooooo thick lol
not much to update, ill post another update when I get going on the fender bucks. And we will see how the wheel bearings hold up!
real question is with the flares, do i want to curve it back under the car like the rear bumper does now taper it back and add a mud flap looking trim like the C6's have? or do I want to make it solid??
cheers!
Last edited by VettoVette; 11-16-2012 at 04:12 PM.
 keep them coming.
 11-18-2012, 04:34 PM
#50
Advanced
Thread Starter
Member Since: Oct 2012
Location: Fayetteville NC
Posts: 91
Likes: 0
Received 0 Likes
on
0 Posts
Update: its cold as F**K! and dont expect good grammar, spelling, or sentence structure in this post, im tired!
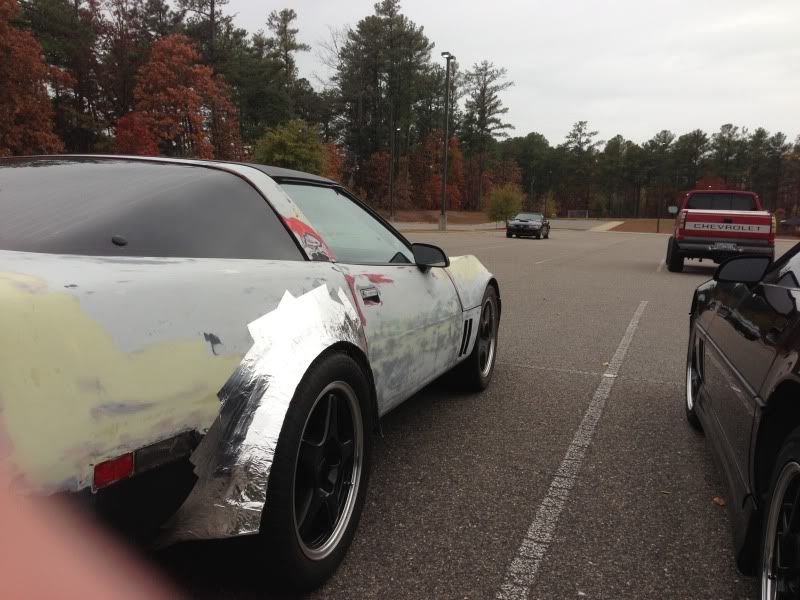
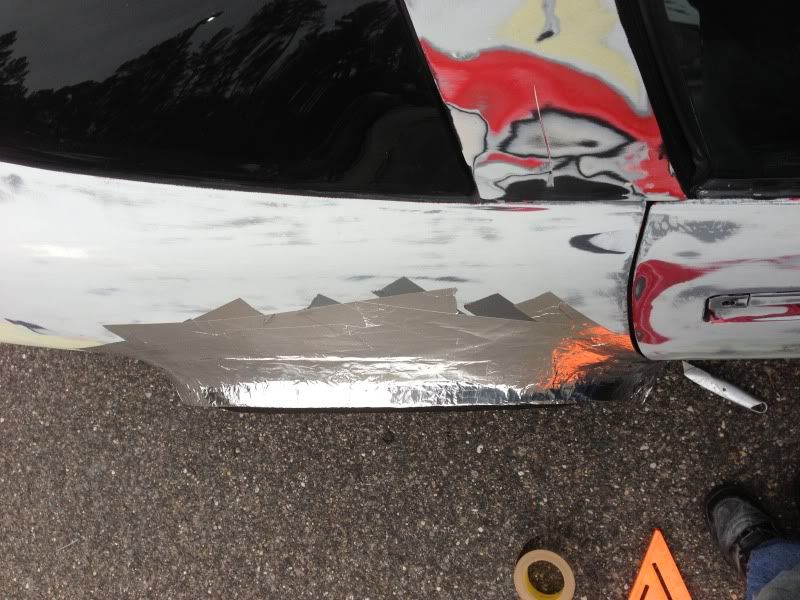
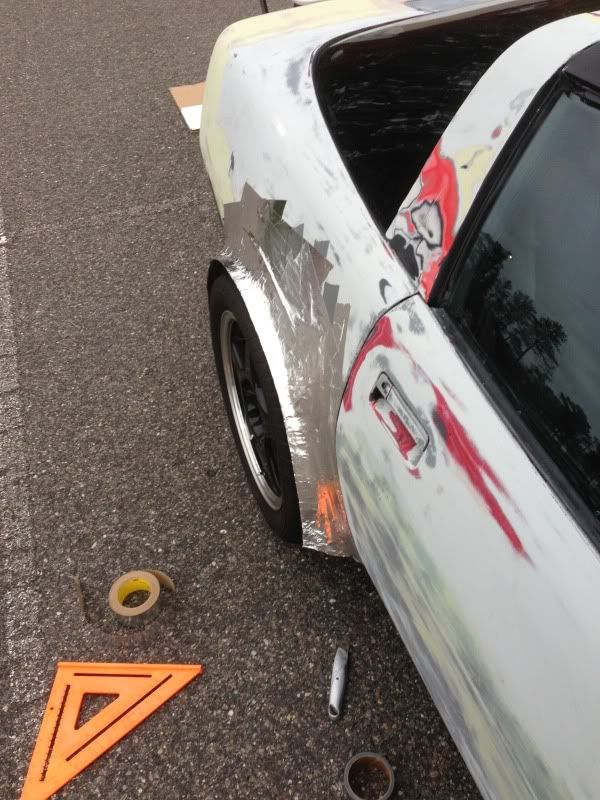
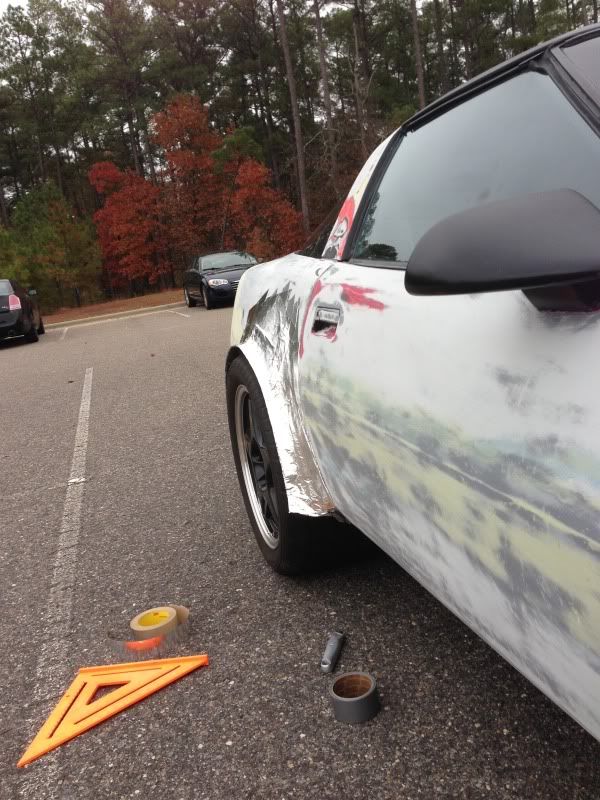
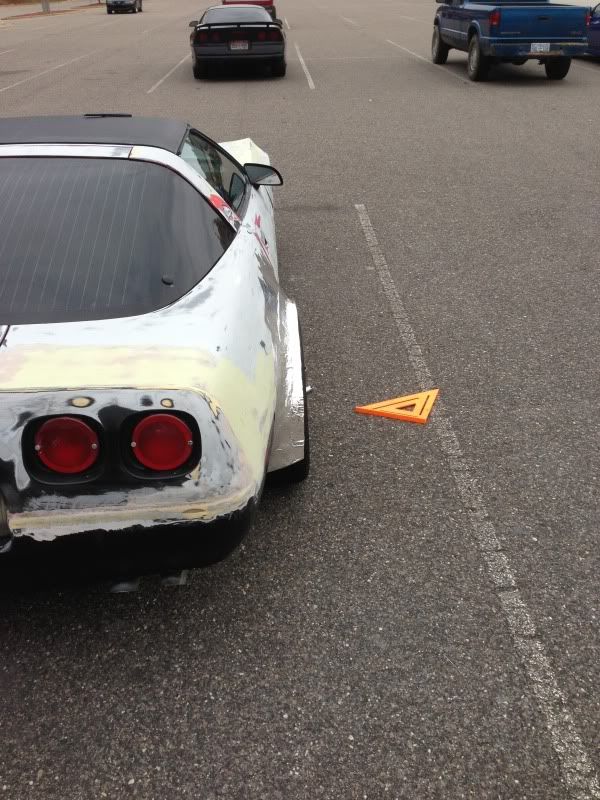
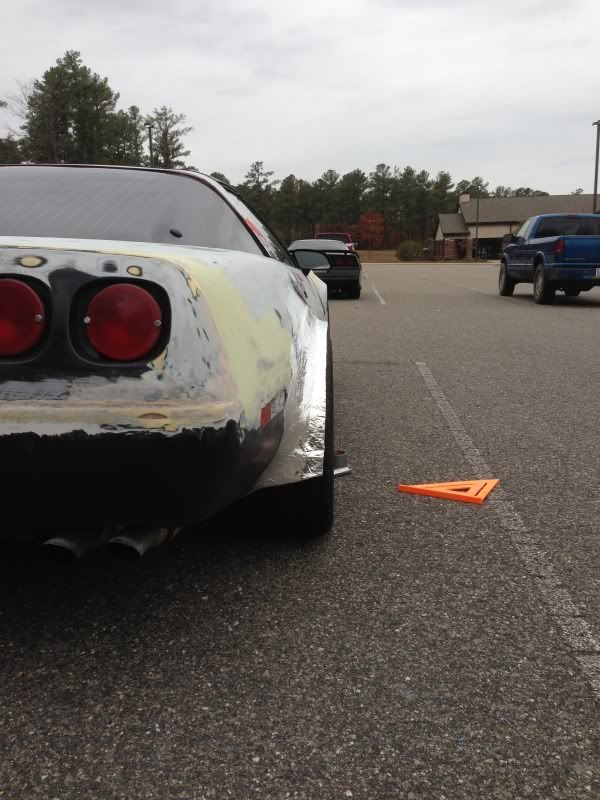
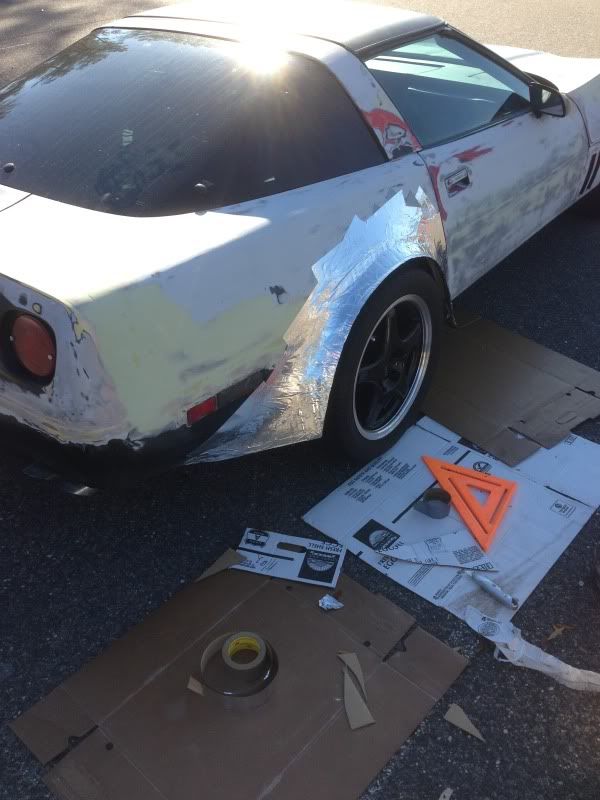
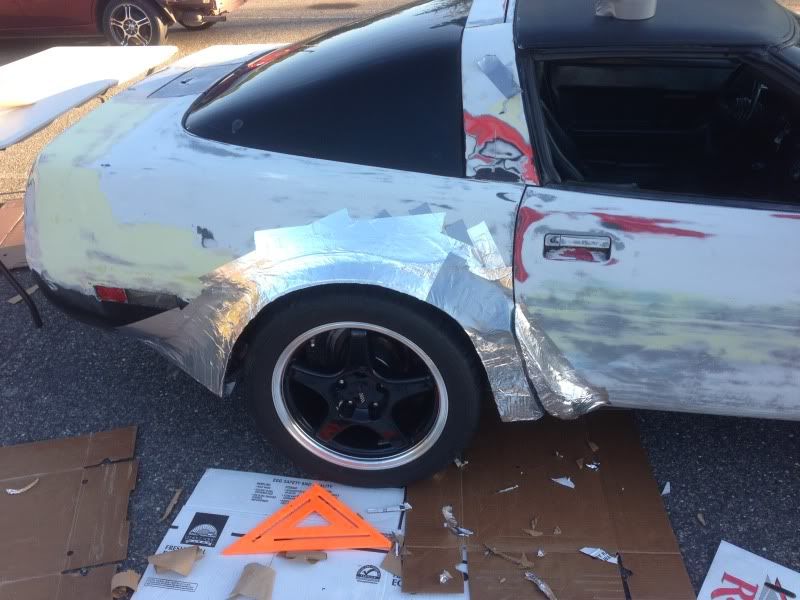
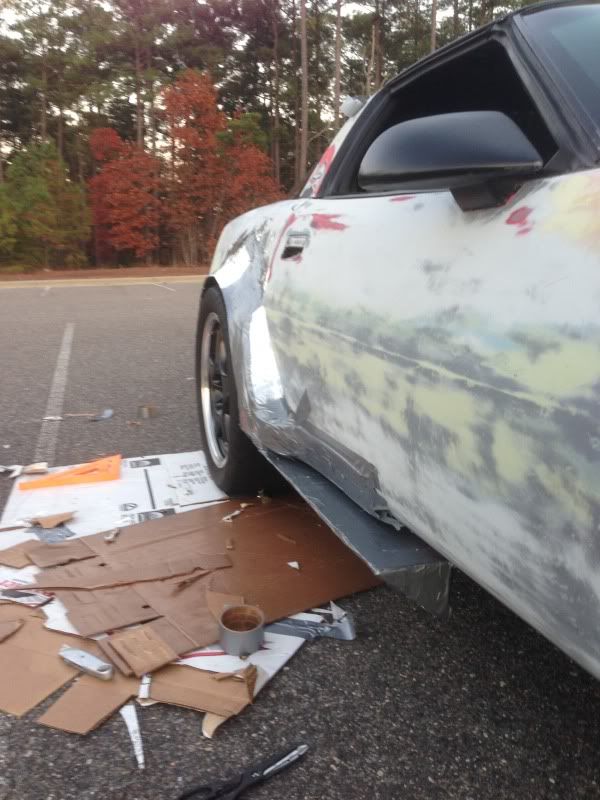
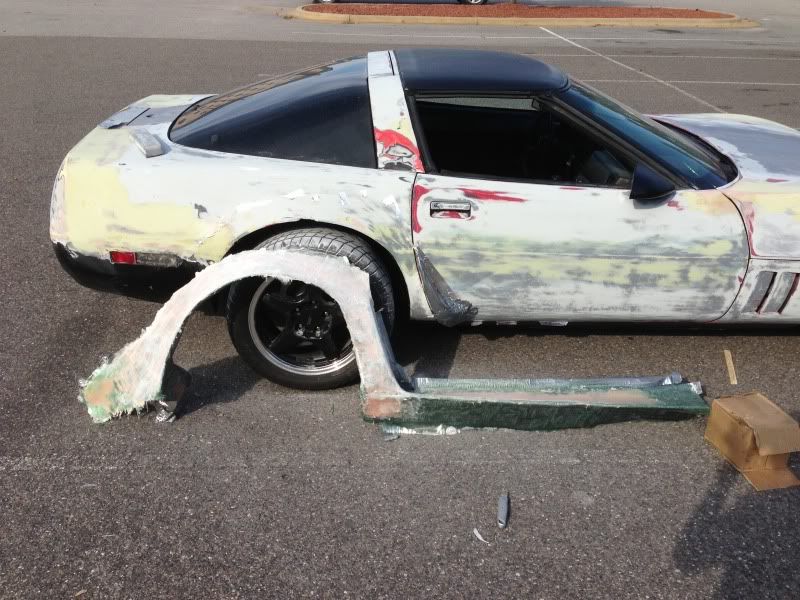
Started on the passenger side rear fender flare, I think the rough version came out pretty good. I left the bottom of the flare towards the door open for modification, I want to make the rocker panel/ledge mold into the flare in one piece, so when I start laying up glass I want it all done at once. the back doesnt taper in much, im going to play around with some more cardboard to see which I like better, the taper or the quick descend into the quarter panel.
the hardest part is going to be getting both sides even, im **** retentive to anything I can measure (my job requires me to be accurate to 1/64th of an inch )
)
i decided to go with an inch and a half clearance to the tire, is that enough considering bumps ect? I can always raise the car up since I have the lowering kit with the extra threads. I want to know so I can change the gap to the left and the right of the tire so its all even.
If you are wondering how I did this ill give a quick explanation since i didnt take pics during the process.
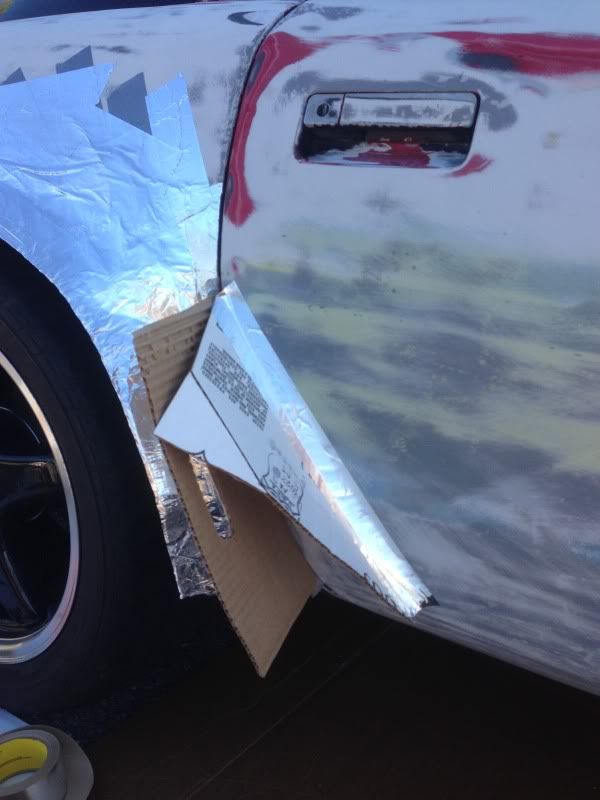
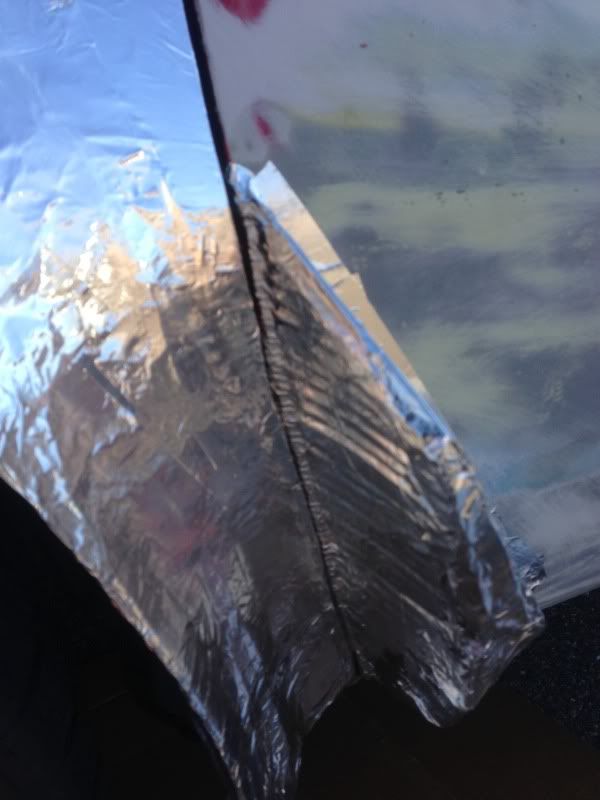
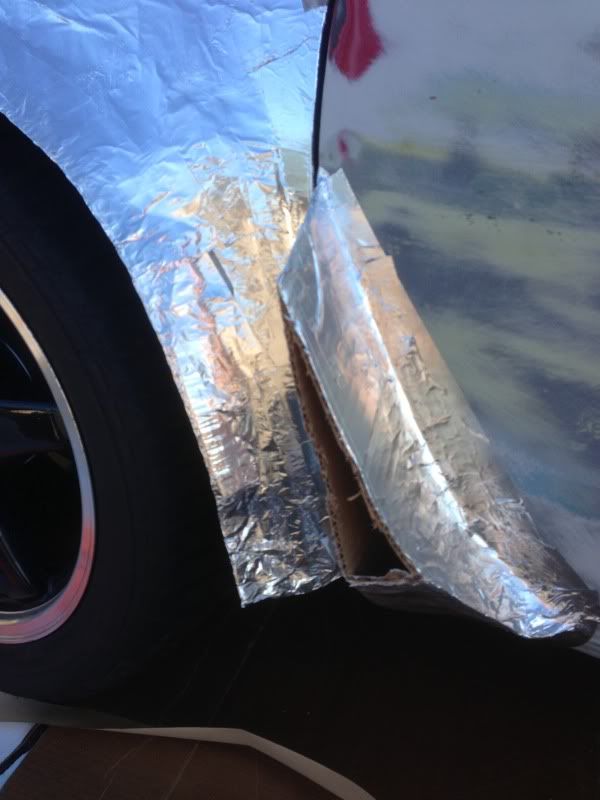
I started with a long sheet of cardboard [with the corrugated (sp?) inside] I then ripped off the top layer on one side to reduce the rigidity of the cardboard. because of the corrugation the cardboard will now roll freely in one direction. I ducktaped that along the existing flare where it over hung the rim. I then eyeballed a rounded line to trim off the excess to make it somewhat in line with the wheel about an inch shallow of meeting the edge. from there I built down towards the door, sealing the modified cardboard down the quarterpanel to the door. when I needed to change the curvature I took a exacto blade and sliced a slit in the cardboard so I could bend it in to spiral the cardboard for example in the front where it curves into the door. I added bits and pieces of cardboard here and there and just taped it in with ducktape. once I had the flare pretty much built in the front and top I needed to do the back and build a lip. I took another long slender piece of the modified cardboard and layed it parallel with the tire and taped it in place to the bottom of the rounded edge I had cut in the beginning, I continued the slender cardboard peice to the back keeping it tight up against the exisiting wheel well and taped it in place. dck taping the hell out of it to make sure it held its shape and then adding some extra cardboard as filler to add a taper in the rear. I took an exacto blade and cut alot of the original piece of cardboard off except for the stuff that needed to be added to make the flare, then taped it all back solid to the quarter panel. After I had the shape I wanted I covered the whole thing in aluminum air duct tape, its basically tin foil tape. It made it a little more malleable and keeps its shape better, but the main purpous is it has a plastic film on the top that resin wont adhere to, im still going to be careful and apply some mold release to it before I glass it, so basically after I lay up fiberglass mat and it all cure the whole thing will just pop off and I can proceed to trimming it, glueing it to the quarter panel and bumper then glassing it into the surface and strengthening the back with more mat.
hardest part like I said is going to be getting both pieces to look the same, i'm still tinkering with the front and the rear of the flares, I think Im going to make the front go into the door and the rear taper into the bumper some more to leave some room for brake vents. Yes I know the tire hangs out a little bit, I did this on purpous, I wasnt able to change my camber to where it should be same with my toe in, im going to do the alignment adjustments before I glass it, the fiberglass will hang over the edge anyways to leave it open for trimming. Also keep in mind the fiberglass will add thickness and height to where the flare sits at the moment, the basic shape and the lip are the only important things, ill be going back in and grinding in the curvature and body line that I want and adding and taking away where I see fit with fiberglass and filler to make it look just right, I plan on the lip being about a half inch thick so it wont break. and it will have a nice really sharp square edge. looking at the 5th picture I think the side skirt/rocker panel if kind of nessecary, it will fully ride the car of that look that puts a bad taste in my mouth from that angle like I mentioned before.
btw to those of you that havent figured it out, this is just a mold form, none of the cardboard and tape and stuff is going to exist in the final structure, thought Id clear that up.


On a side note, If I finish all the body work and modification on this thing in the parking lot before I get to use the airframe shop to do it, im going to print myself an award haha.
cheers!
Started on the passenger side rear fender flare, I think the rough version came out pretty good. I left the bottom of the flare towards the door open for modification, I want to make the rocker panel/ledge mold into the flare in one piece, so when I start laying up glass I want it all done at once. the back doesnt taper in much, im going to play around with some more cardboard to see which I like better, the taper or the quick descend into the quarter panel.
the hardest part is going to be getting both sides even, im **** retentive to anything I can measure (my job requires me to be accurate to 1/64th of an inch
)i decided to go with an inch and a half clearance to the tire, is that enough considering bumps ect? I can always raise the car up since I have the lowering kit with the extra threads. I want to know so I can change the gap to the left and the right of the tire so its all even.
If you are wondering how I did this ill give a quick explanation since i didnt take pics during the process.
I started with a long sheet of cardboard [with the corrugated (sp?) inside] I then ripped off the top layer on one side to reduce the rigidity of the cardboard. because of the corrugation the cardboard will now roll freely in one direction. I ducktaped that along the existing flare where it over hung the rim. I then eyeballed a rounded line to trim off the excess to make it somewhat in line with the wheel about an inch shallow of meeting the edge. from there I built down towards the door, sealing the modified cardboard down the quarterpanel to the door. when I needed to change the curvature I took a exacto blade and sliced a slit in the cardboard so I could bend it in to spiral the cardboard for example in the front where it curves into the door. I added bits and pieces of cardboard here and there and just taped it in with ducktape. once I had the flare pretty much built in the front and top I needed to do the back and build a lip. I took another long slender piece of the modified cardboard and layed it parallel with the tire and taped it in place to the bottom of the rounded edge I had cut in the beginning, I continued the slender cardboard peice to the back keeping it tight up against the exisiting wheel well and taped it in place. dck taping the hell out of it to make sure it held its shape and then adding some extra cardboard as filler to add a taper in the rear. I took an exacto blade and cut alot of the original piece of cardboard off except for the stuff that needed to be added to make the flare, then taped it all back solid to the quarter panel. After I had the shape I wanted I covered the whole thing in aluminum air duct tape, its basically tin foil tape. It made it a little more malleable and keeps its shape better, but the main purpous is it has a plastic film on the top that resin wont adhere to, im still going to be careful and apply some mold release to it before I glass it, so basically after I lay up fiberglass mat and it all cure the whole thing will just pop off and I can proceed to trimming it, glueing it to the quarter panel and bumper then glassing it into the surface and strengthening the back with more mat.
hardest part like I said is going to be getting both pieces to look the same, i'm still tinkering with the front and the rear of the flares, I think Im going to make the front go into the door and the rear taper into the bumper some more to leave some room for brake vents. Yes I know the tire hangs out a little bit, I did this on purpous, I wasnt able to change my camber to where it should be same with my toe in, im going to do the alignment adjustments before I glass it, the fiberglass will hang over the edge anyways to leave it open for trimming. Also keep in mind the fiberglass will add thickness and height to where the flare sits at the moment, the basic shape and the lip are the only important things, ill be going back in and grinding in the curvature and body line that I want and adding and taking away where I see fit with fiberglass and filler to make it look just right, I plan on the lip being about a half inch thick so it wont break. and it will have a nice really sharp square edge. looking at the 5th picture I think the side skirt/rocker panel if kind of nessecary, it will fully ride the car of that look that puts a bad taste in my mouth from that angle like I mentioned before.
btw to those of you that havent figured it out, this is just a mold form, none of the cardboard and tape and stuff is going to exist in the final structure, thought Id clear that up.
On a side note, If I finish all the body work and modification on this thing in the parking lot before I get to use the airframe shop to do it, im going to print myself an award haha.
cheers!
Last edited by VettoVette; 11-18-2012 at 05:04 PM.

 11-19-2012, 08:09 AM
#52
Advanced
Thread Starter
Member Since: Oct 2012
Location: Fayetteville NC
Posts: 91
Likes: 0
Received 0 Likes
on
0 Posts
yup, these fenders on the back arent final, they are more of a starting point like the front was with the foam, i built and shaped alot more on the front then what the original foam would have made.
 11-19-2012, 06:08 PM
#54
Race Director


On a side note, If I finish all the body work and modification on this thing in the parking lot before I get to use the airframe shop to do it, im going to print myself an award haha.
cheers![/QUOTE]
I was in the Air Force and my son was in the Navy so we both know what it's like to work on a car in the base parking lot. I was telling him about your project and he was amazed you under took a job like this without a shop. When you finish you deserver a award for just seeing this through under these conditions.
cheers!
[/QUOTE]I was in the Air Force and my son was in the Navy so we both know what it's like to work on a car in the base parking lot. I was telling him about your project and he was amazed you under took a job like this without a shop. When you finish you deserver a award for just seeing this through under these conditions.
11-19-2012, 06:13 PM
#55
Advanced
Thread Starter
Member Since: Oct 2012
Location: Fayetteville NC
Posts: 91
Likes: 0
Received 0 Likes
on
0 Posts
i could also remove the one on it and sculpt a new one like i did the flares and glass that, probably a better solution looking at it now. mount points would be my only concern. I absolutley HATE the c4 front end btw.
fender vents are going to form the fender flares for the front, im going to create a couple aluminum slender plates that have a hole at the end of each side, id then loosen up the orignal rear mounting points of the fender vents and swing it out, add the aluminum plates to the front mounting points to extend the mounting points in the front, then shape my flares from there.
Last edited by VettoVette; 11-19-2012 at 08:48 PM.
11-21-2012, 05:44 PM
#57
Advanced
Thread Starter
Member Since: Oct 2012
Location: Fayetteville NC
Posts: 91
Likes: 0
Received 0 Likes
on
0 Posts
Update: i got another 3 hours in today and thought id share my progress on the passenger side. i have 4 days to work on this thing un- interupted! so i should get at least the passenger rear half and the rocker done this weekend. I cant start the front until I get my adapters and finish the rear so I can drive it around. I have NO clue how im going to replicate all this on the drivers side, im just going to have to be very meticulous I suppose. im moving pretty fast to say the least! im very suprised at where im at.
tapered back farther into the rear fascia.
bit the bullet and decided to go into the door for the brake vents. heres the start
back with the indent so when I layer up the glass it doesnt run itn othe other side makingthe door not close.
had to trim it to line up with the flare.
widened out the front part of the quarter panel where it meets the door to line up with the brake vent housing on the door.
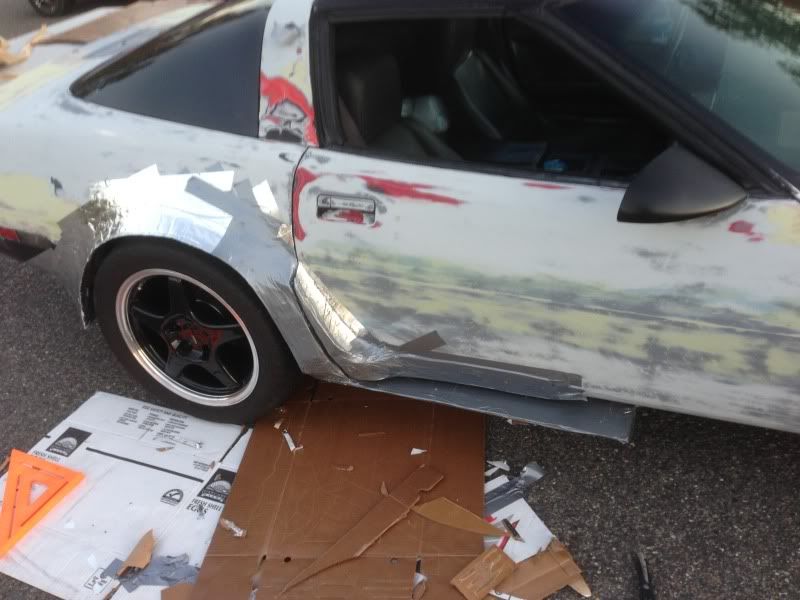
went half way with the rocker panel because of time, im going to bring it to where the fender vent starts right after the door, I then i leveled the door down square to make it meet the rocker panel in a more asthetically pleasing way., its very rough at the moment, it was the last thing i tackled before the sun started going down, and I ran out of alluminum ducting tape and only had duct tape so that sucked.
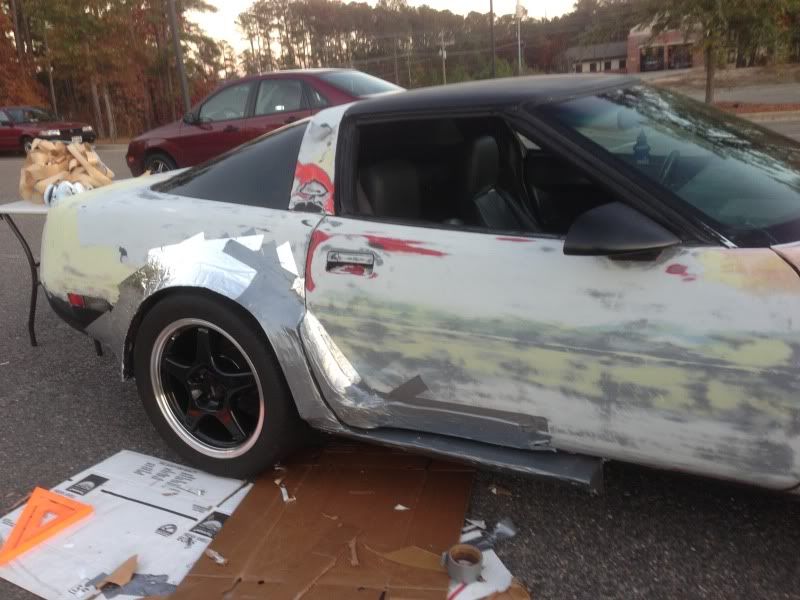
well thats where im at folks, im going to make the part where it went into the door a little prettier, if I cant get it the way I want Ill just rip all that off and do just the quarter panel. I think the reason it looks kind of funny is the very sharp curve it takes from the brake vent part on the door into the door, ill try to taper it in more. my reasoning for wanting it to go into the doors is I want it to looks more like it came out of the factory then some body kit you can just buy off the shelf, plus i think it could look sharp.
and for those of you wondering where the brake vents are, ill cut holes, make a template and mold those later out of clay after these are molded in fiberglass.
cheers! and happy thanksgiving, especially to those left overseas!
tapered back farther into the rear fascia.
bit the bullet and decided to go into the door for the brake vents. heres the start
back with the indent so when I layer up the glass it doesnt run itn othe other side makingthe door not close.
had to trim it to line up with the flare.
widened out the front part of the quarter panel where it meets the door to line up with the brake vent housing on the door.
went half way with the rocker panel because of time, im going to bring it to where the fender vent starts right after the door, I then i leveled the door down square to make it meet the rocker panel in a more asthetically pleasing way., its very rough at the moment, it was the last thing i tackled before the sun started going down, and I ran out of alluminum ducting tape and only had duct tape so that sucked.
well thats where im at folks, im going to make the part where it went into the door a little prettier, if I cant get it the way I want Ill just rip all that off and do just the quarter panel. I think the reason it looks kind of funny is the very sharp curve it takes from the brake vent part on the door into the door, ill try to taper it in more. my reasoning for wanting it to go into the doors is I want it to looks more like it came out of the factory then some body kit you can just buy off the shelf, plus i think it could look sharp.
and for those of you wondering where the brake vents are, ill cut holes, make a template and mold those later out of clay after these are molded in fiberglass.
cheers! and happy thanksgiving, especially to those left overseas!
Last edited by VettoVette; 11-21-2012 at 07:01 PM.
11-22-2012, 06:58 PM
#58
Advanced
Thread Starter
Member Since: Oct 2012
Location: Fayetteville NC
Posts: 91
Likes: 0
Received 0 Likes
on
0 Posts
Update: I got another 2 hours in today.
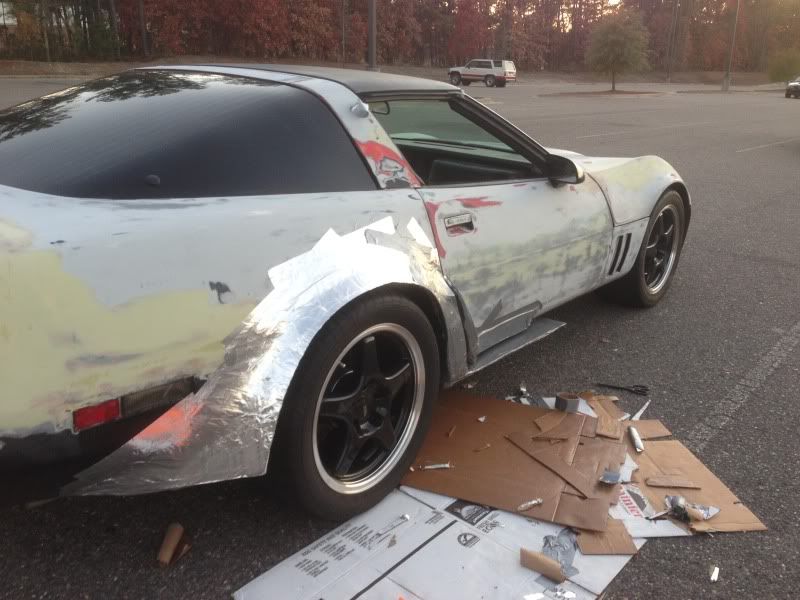
I finished the rest of the rocker panel and layed down the first layer of glass.
I used mat on everything except for the rocker panel I used cloth since it was a flat edge.
This is all setup so tomorrow im going to put some fiberglass filler on the top to smooth it out and add some more rigidity. then im going to pop it all off trim it and glue it down to the surface. back mat it into the structure and then proceed to sculpting it all smooth.
Im holding off on the part that goes into the door for now im not sure about it.
cheers, happy t-day!
Last edited by VettoVette; 11-22-2012 at 07:00 PM.
11-23-2012, 03:28 PM
#60
Advanced
Thread Starter
Member Since: Oct 2012
Location: Fayetteville NC
Posts: 91
Likes: 0
Received 0 Likes
on
0 Posts
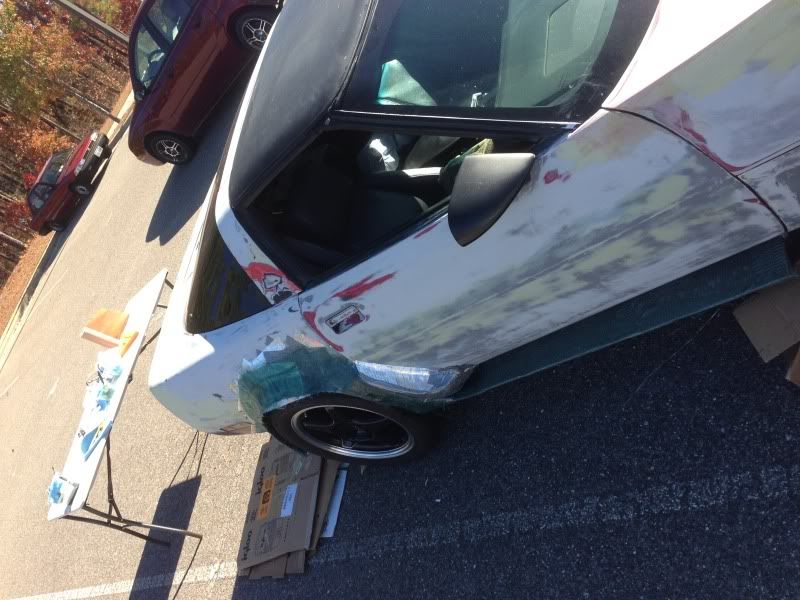
Update, the first layer of glass cured and I proceeded to strengthen it up a little more so I could pull it off.
I roughed up the fender and side skirt making sure that the fiberglass filler would adhere, applied a good amount of the fiberglass filler to eliminate alot of the lows and give it a little more rigidity.
started peeling off the whole structure
the rocker is kind of soft so it looks warped with weight resting on it
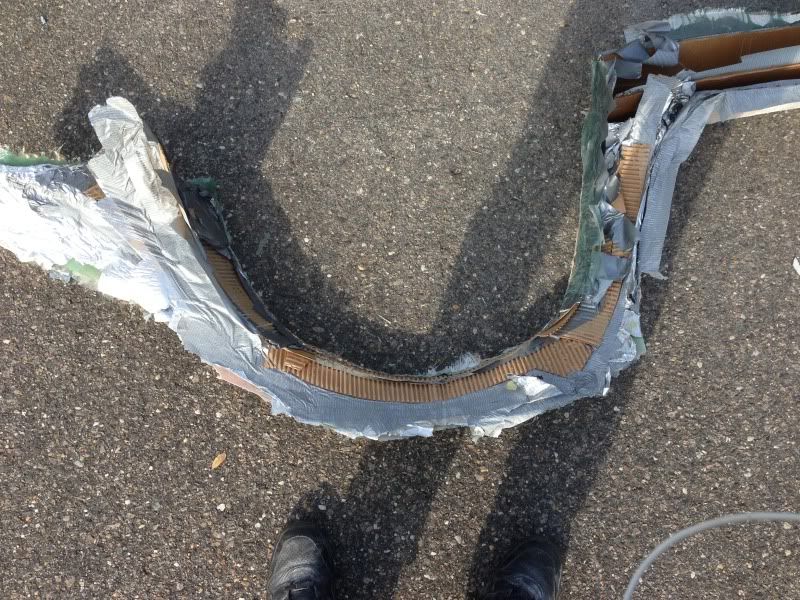
rear of it
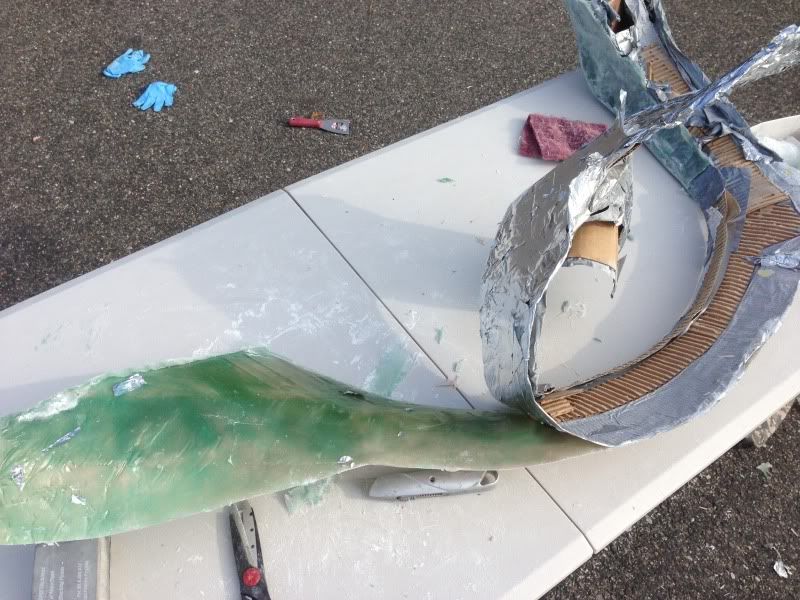
after trimming and some tweaking i started peeling off the mold
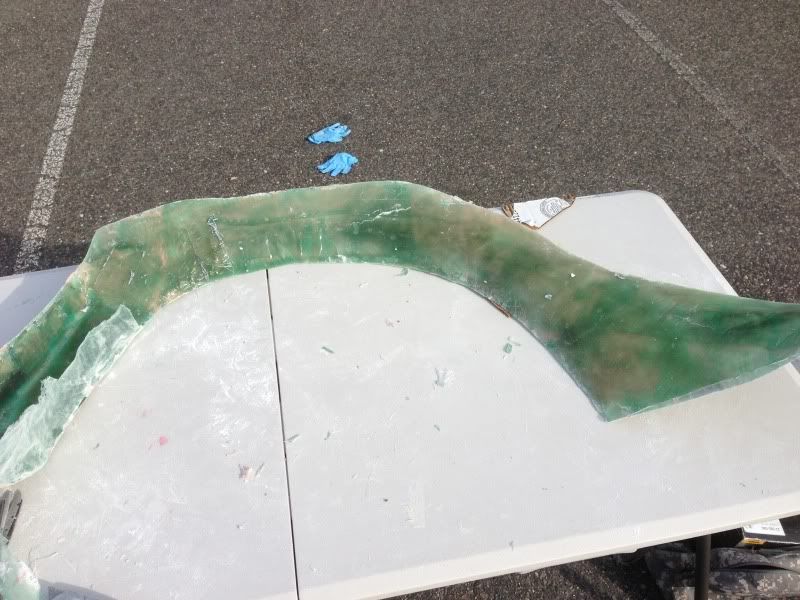
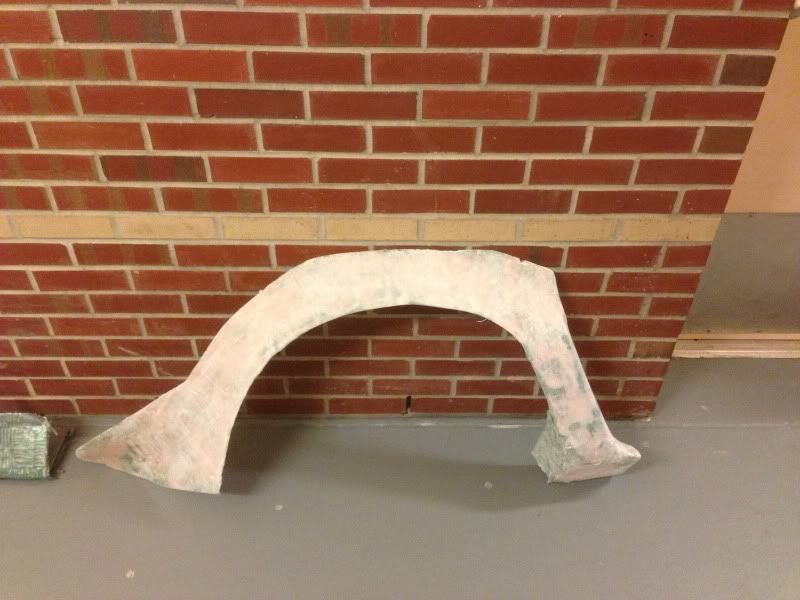
the casting
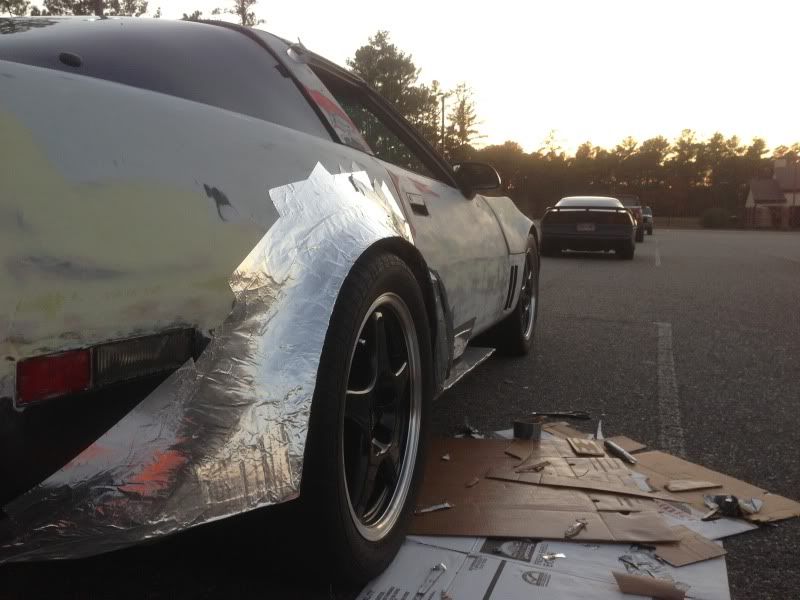
trimmed up and roughed out, ready to be glassed into the body, notice I cut the rocker panel off, it wasnt agreeing with me and was so flexy, so im going to try to work with it seperately, wors comes to worse I just make the rocker panel again and make it a seperate piece.
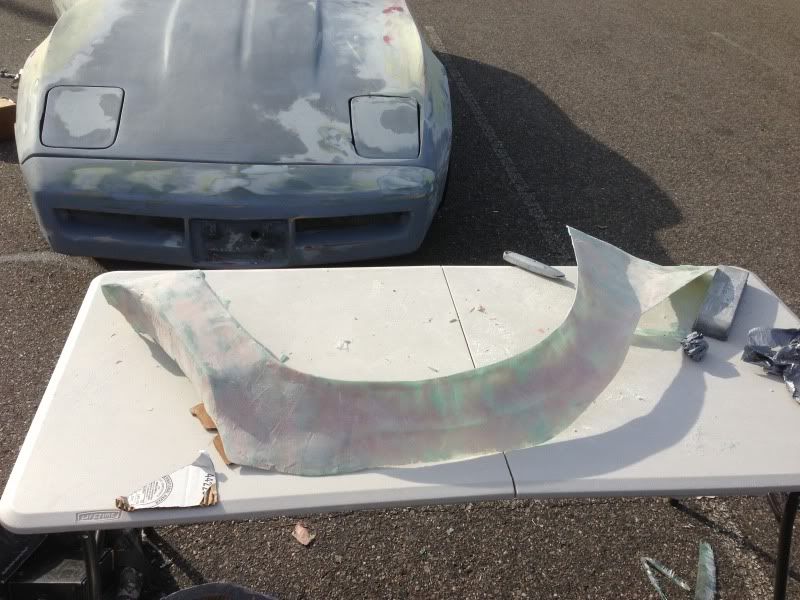
i need to add and subtract a littlehere and there on the rim of the flare to make it all even around the wheel but here it is mocked up held in place with some tape.
there it is, ill mount it tommorrow, or keep it off till i finish the otherside, ill sleep on the idea. i need to get a jack so I can take off the wheel to glass it in from the backside, thats gonna be a b**ch! Now I can drive to go get more autobody supplies without fear of loosing my flare!!
cheers!
I roughed up the fender and side skirt making sure that the fiberglass filler would adhere, applied a good amount of the fiberglass filler to eliminate alot of the lows and give it a little more rigidity.
started peeling off the whole structure
the rocker is kind of soft so it looks warped with weight resting on it
rear of it
after trimming and some tweaking i started peeling off the mold
the casting
trimmed up and roughed out, ready to be glassed into the body, notice I cut the rocker panel off, it wasnt agreeing with me and was so flexy, so im going to try to work with it seperately, wors comes to worse I just make the rocker panel again and make it a seperate piece.
i need to add and subtract a littlehere and there on the rim of the flare to make it all even around the wheel but here it is mocked up held in place with some tape.
there it is, ill mount it tommorrow, or keep it off till i finish the otherside, ill sleep on the idea. i need to get a jack so I can take off the wheel to glass it in from the backside, thats gonna be a b**ch! Now I can drive to go get more autobody supplies without fear of loosing my flare!!
cheers!
Last edited by VettoVette; 11-23-2012 at 03:30 PM.