Upgrading underhood lights to led - Howto
 11-17-2015, 05:59 PM
#1
Melting Slicks

Thread Starter

Today I got around to fixing my under hood lights.
Both haven't worked since I bought the car and figured the bulbs were just blown.
After removing the covers I found out light #1 had no bulb at all and light #2 had a blown bulb.
Now the nice part of the corvette c4's under the hood lights as most know is that the lenses are actually glass. This meant after a few seconds with zep window cleaner both lenses looked like new again. If they had of been plastic Id of replaced them since under hood heat + plastic + grime and dirt = toast.
I'm getting ahead of myself.
Ok first remove the 2 screws that go thru the glass lenses. Be careful removing theses as its an indention into the ends of each lens and not a hole thru them. So its easy to have the lens get away from you if you aren't careful and dropped glass isn't a good thing.
After removing the 2 screws and sitting the lens aside your now faced with either a missing bulb or a toasted bulb.
Here's my toasted one

The following users liked this post:
85Vetteman (07-24-2020)
11-17-2015, 06:01 PM
#2
Melting Slicks
Thread Starter
Next we need a new bulb. You can of course go back with the stock bulbs but the led ones are brighter than the stock bulbs and last forever practically plus wont be near as likely to run your battery down. Think about it, no more having to unplug the lights or pulls a fuse under most circumstances.
This is the led bulb I went with.
This is the led bulb I went with.
11-17-2015, 06:03 PM
#3
Melting Slicks
Thread Starter
Installing the bulb isn't straight forward. Be very careful since the plastic housing is no doubt weakened from years of the stock bulbs roasting them. Also as strong as the clips are that hold the bulb they can easily break the plastic they are mounted in.
Here's the new bulb in the socket.
Here's the new bulb in the socket.
11-17-2015, 06:07 PM
#4
Melting Slicks
Thread Starter
Now we have the bulb in. Since this is an led bulb you will need to test it before you put it in. Should of mentioned that in the last post
Basically if you put the bulb in place and it doesn't come on then try turning the bulb the other direction. If the bulb still doesn't come on then remember this. The post that's toward the bottom (engine side) is positive and the mercury capsule and post going skyward is negative. Test the bulb with the battery or a few pieces of spare wire to make sure you have the polarity right.
Next install the bulb (even if it doesn't work while making sure you have the polarity right) correctly.
If the bulb doesn't come on and you have it installed right then you need to test everything.
First jumper the socket part that is around the mercury switch to the end of the bulb on that side. If the light comes on then you need to sand the end of the mercury switch.
I used an emery board from my wife for this one.
Heres how to do it.
Last edited by crowz; 11-17-2015 at 06:14 PM.
The following users liked this post:
KYC4 (11-27-2015)
11-17-2015, 06:08 PM
#5
Melting Slicks
Thread Starter
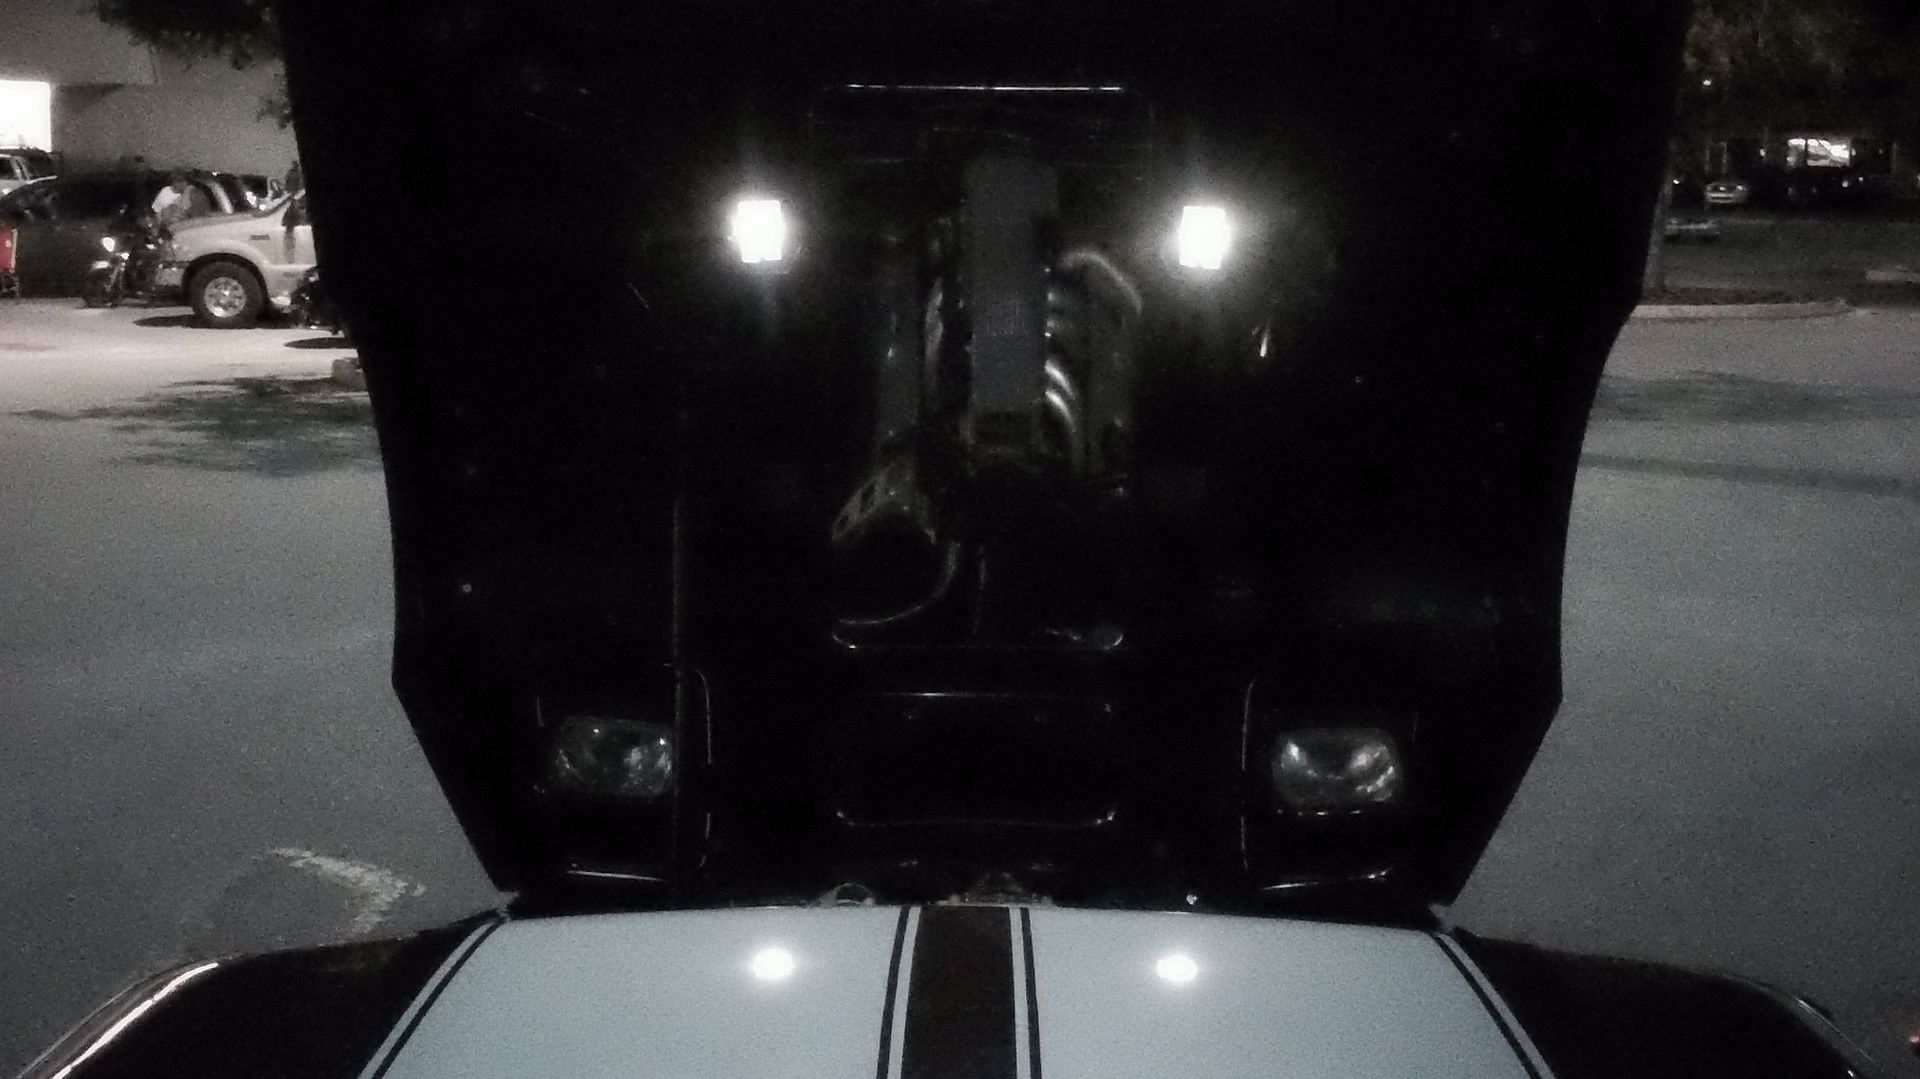
After sanding the tip of the mercury switch both of my lights worked. Neither would work at first.
Also on the drivers side I found that the plug down by the headlight for the under the hood light had corrosion on its contacts and had to be cleaned.
After getting the light to work this is how it looked.
Also on the drivers side I found that the plug down by the headlight for the under the hood light had corrosion on its contacts and had to be cleaned.
After getting the light to work this is how it looked.
The following users liked this post:
KYC4 (11-27-2015)
11-17-2015, 06:10 PM
#7
Melting Slicks
Thread Starter
Of course you have to put the lenses back after words.
The bulbs I used are :
JDM ASTAR Extremely Bright 48-EX Chipsets 569 578 211-2 212-2 1.72" LED Bulbs, Xenon White
Which I bought from amazon for $9.95 each.
The bulbs I used are :
JDM ASTAR Extremely Bright 48-EX Chipsets 569 578 211-2 212-2 1.72" LED Bulbs, Xenon White
Which I bought from amazon for $9.95 each.
Last edited by crowz; 11-17-2015 at 06:15 PM.
The following 4 users liked this post by crowz:
 11-17-2015, 06:52 PM
#9
Melting Slicks
Thread Starter
Was fairly surprised how bright they were. Had nothing to go by since they weren't working when I bought the car. Its bright enough to actually be useful if I need to work on something at night.
11-17-2015, 08:05 PM
#10
Melting Slicks
Good job crowz.
I switched all my interior lights on my 88 to leds plus the fogs last summer. Now that day light saving time is gone I can see the results of my work. Bought mine from superbrightleds.com
I switched all my interior lights on my 88 to leds plus the fogs last summer. Now that day light saving time is gone I can see the results of my work. Bought mine from superbrightleds.com
11-23-2015, 12:29 AM
#11
Advanced


Thanks for taking the time to write it up. When my stock bulbs go out I'm going to give your LED replacement a try.
Today I got around to fixing my under hood lights.
Both haven't worked since I bought the car and figured the bulbs were just blown.
After removing the covers I found out light #1 had no bulb at all and light #2 had a blown bulb.
Now the nice part of the corvette c4's under the hood lights as most know is that the lenses are actually glass. This meant after a few seconds with zep window cleaner both lenses looked like new again. If they had of been plastic Id of replaced them since under hood heat + plastic + grime and dirt = toast.
I'm getting ahead of myself.
Ok first remove the 2 screws that go thru the glass lenses. Be careful removing theses as its an indention into the ends of each lens and not a hole thru them. So its easy to have the lens get away from you if you aren't careful and dropped glass isn't a good thing.
After removing the 2 screws and sitting the lens aside your now faced with either a missing bulb or a toasted bulb.
Here's my toasted one
Both haven't worked since I bought the car and figured the bulbs were just blown.
After removing the covers I found out light #1 had no bulb at all and light #2 had a blown bulb.
Now the nice part of the corvette c4's under the hood lights as most know is that the lenses are actually glass. This meant after a few seconds with zep window cleaner both lenses looked like new again. If they had of been plastic Id of replaced them since under hood heat + plastic + grime and dirt = toast.
I'm getting ahead of myself.
Ok first remove the 2 screws that go thru the glass lenses. Be careful removing theses as its an indention into the ends of each lens and not a hole thru them. So its easy to have the lens get away from you if you aren't careful and dropped glass isn't a good thing.
After removing the 2 screws and sitting the lens aside your now faced with either a missing bulb or a toasted bulb.
Here's my toasted one

 11-25-2015, 08:24 PM
#13
Safety Car

Nice job. I like the bright white for under the hood. Another great place to go LED is the center console, that bulb gets hot if the top is left open for any duration.
11-25-2015, 08:47 PM
#14
Melting Slicks
Thread Starter
I did the console and other interior lights earlier in another post.
The only lights left to convert to led now are 2 of the small running lights on the side and the brake lights.
I'll try top get around to those soon.
Next project is cutting a bit off the corsa exhaust pipes to get a bit more ground clearance out of them.
The only lights left to convert to led now are 2 of the small running lights on the side and the brake lights.
I'll try top get around to those soon.
Next project is cutting a bit off the corsa exhaust pipes to get a bit more ground clearance out of them.
11-25-2015, 08:51 PM
#15


Awesome!
I know you have done several threads on these now.
I wonder if there is a chance there could be a sticky thread with all of the part numbers for each LED light for these cars?
I know you have done several threads on these now.
I wonder if there is a chance there could be a sticky thread with all of the part numbers for each LED light for these cars?


 11-25-2015, 11:02 PM
#18
Advanced
