When you click on links to various merchants on this site and make a purchase, this can result in this site earning a commission. Affiliate programs and affiliations include, but are not limited to, the eBay Partner Network.
I finally got around to the Coil Install last weekend. I bought it on ebay new for $31.50 including shipping. I have MSD 8.5 wires and new plugs. The only thing left to change for the ignition system is the optispark and cap but the factory unit still seems to work ok for now. When it does go bad I will be replacing with the newly released MSD Opti. It took less than two hours to change the coil. I had to search for some tools and clean things up a bit during the install. I did the install at a different location so I didn't have all the usual tools from my garage. I still have plenty of cleaning but first I need to replace what seems to be some leaking valve cover gaskets.
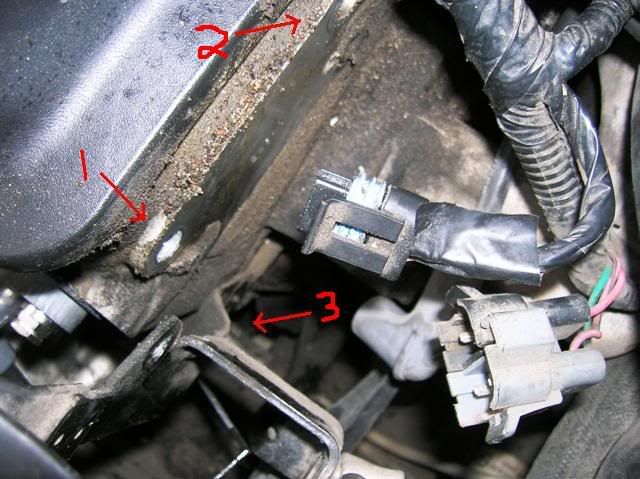
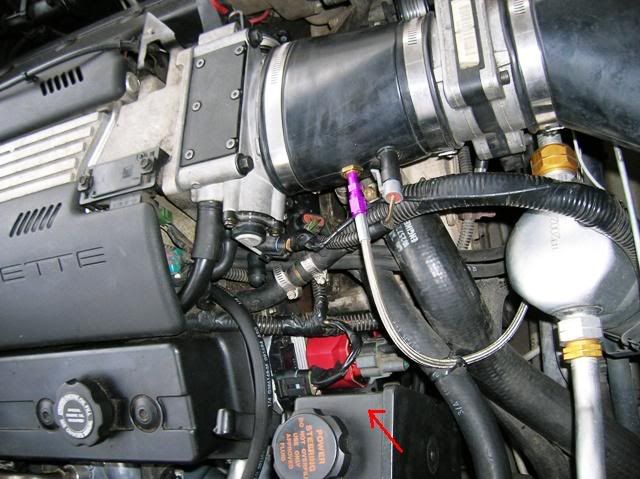
This is a picture of the front of the passenger side head after I removed the old coil. After disconnecting the battery I removed the three connectors shown in the picture. There are three bolts holding the factory coil in. The first one (1) is easier to remove if you first remove the black sensor that is attached to the coil mounting plate. The second bolt (2) was also fairly easy to remove. The third arrow is pointing to the bottom bolt that can not really be seen in this picture. This bolt (3) also holds the bracket that the steering fluid reservoir is attached to. This was the hardest bolt to get to. After a few colorful words and some throwing of tools I figured it out. I reached my right arm down in front of and around the fluid reservoir and attacked the bolt from underneath with a socket wrench. It's an awkward angle but it did the job to get it started. I thought about removing the power steering box from the bracket but I wasn't sure how and didn't want to force it and chance braking something. It hung to the side and was not necessary once the bolt was out.
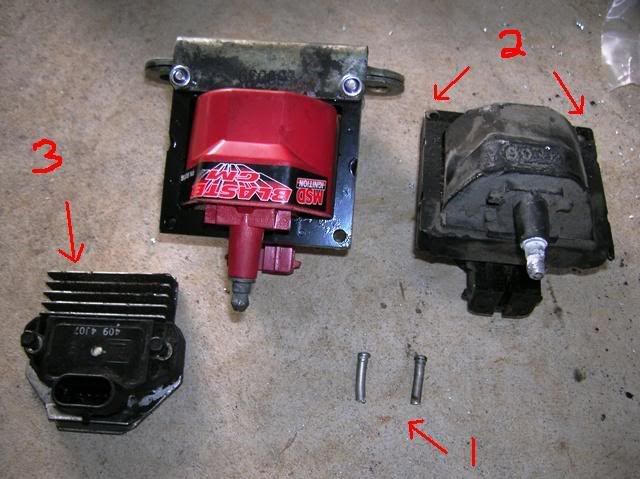
This picture shows the new MSD coil left and old factory coil right. The two metal pieces (1) had to be drilled out of the square housing of the factory coil (2). I drilled the side with the fatter head and they slid out with a little help from a nail and light tapping with a hammer. The metal brackets came off and I attached them to the MSD coil with the supplied bolts as shown in the picture. I am not sure what the black sensor (3) does. Maybe someone else could explain. I am guessing it is some type of temp sensor for the coil. This is the piece that when removed made it easier to remove the first bolt in the above photo. I cleaned all the grease from the heat sink fins with a brush I had. The sensor (3) requires thermal paste between it and the metal bracket it mounts to. I recommend buying some before attempting this swap. I did not know it was needed and had to reuse the old stuff that was left.
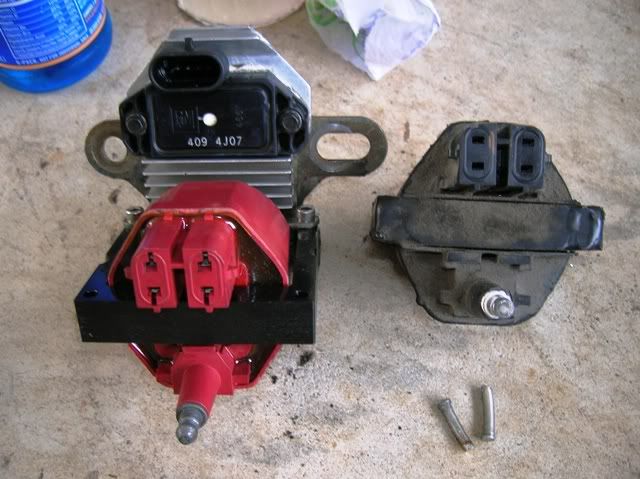
This is a picture of the MSD coil with everything cleaned and assembled. I forgot about the sensor being in the way of the bolts for reinstalling and had to remove it again.
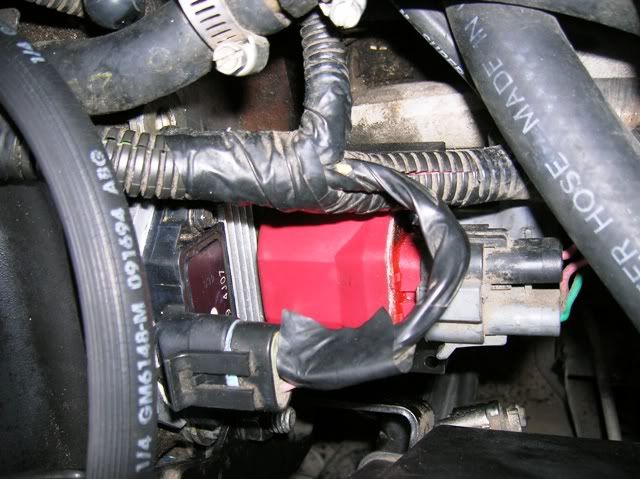
This is a picture of the new coil installed with all the wires connected and only one bolt left. I was cautious not to over tighten the bolts. I didn't have torque specs and I figured with aluminum heads they would not be that difficult to strip.
Here is another photo of the coil installed.
Overall this was a fairly easy job. I know there are many critics around here of the MSD coil. Some have had them in a long time with zero issues. It has been a week for me and no problems so far. Has anyone had problems with the MSD causing the opti to crap out sooner. I thought I read that somewhere? I hope this thread will help someone else who plans on doing this install. Tune in next time for valve cover gasket replacement.
Last edited by rickneworleansla; 06-05-2010 at 03:46 PM.
not an msd, but a new coil lead to the death of the cap in my fiancés vette. the cap had started arcing internally due to high resistance(arcing wires, wrong gap and sea foam), i put on a new coil, 200 miles later the cap went bye bye, took 2 weeks to figure it out.
all is well now. just be prepared!
Nice write up Rick. Glad you took the time to write this post.
Couple of questions. Have you noticed any driveability improvements
since the coil swap? And what is thermal paste please?
Thanks
Nice write up Rick. Glad you took the time to write this post.
Couple of questions. Have you noticed any driveability improvements
since the coil swap? And what is thermal paste please?
Thanks
I can't say that I have noticed any improvement. It ran good before and still does. I think the plugs, wires, and coil together helped freshen it up some. My local shop that I trust to do the bigger projects found a wire that was arching and causing a little rough idle. I plan on taking care of it real quick after reading Merolts comments (Thanks). I think it started after my header install though. I'm looking for some wire looms that will work with my MSD 8.5 wires. I think summit has some, just not sure of how/where to mount them yet. I don't remember if the stock wires were mounted to exhaust manifolds or not. I have aftermarket headers now anyway. If anyone has some pictures of an aftermarket setup that would be great. Thermal paste is a paste substance that is sandwiched between chips or sensors that get hot and a heat sink. It helps the heat transfer from the chip to the heat sink to lower temperatures. We use it between processors and heat sinks in the IT industry especially if overclocking the chips. The cooler the processor is the better it will perform and less chance it has of failing.
I modified my stock looms to use with my headers and MSD 8.5 wires. Some are a tight fit and need to be held closed with a zip-tie, but they seem to be working well for me.
I installed a MSD coil just after replacing the Opti-spark in my 92 LT1. WOW! What a big difference in performance. It fires up at a touch of the key. I haven�t had any problems with it in over a year. Knock on wood
Hello ,everybody I have one 93 Corvette ,180,000 miles.After installing one Petris opti sparrk,ventilated ,now my engine crank ,after so many tests ,finally I have done defauts codes resetings,,with all different procedures ,for CCM ,ECM, ABS/AZSR,and I get ,now , C12---1--- 4 --- 9 --- .As soon as it was done , engine crank .....now as before ,when everything was ok .As except opti ,I have not replace nothing more ,so I decide to renew ,coil and ICM.And now ,I just start, for me I have not succeed yet to remove coil and ICM ..With RICK NEWORLEANSLA thread ,I cannot read pictures,,if somebody ,can show pictures ,for 1 st ,2 nd ,and mainly 3 rd ,this step is horrible .
you should look at the dates of the thread, it is 11 yrs old and the original poster has not been active on the site for 8 months. the photo hosting site changed its terms and people are not going to pay the outlandish fees they want just to share photos on a forum.
expand your search more and see if you can find photos in other places that you need,
Anyone know if you are supposed to remove the two studs/bolts that hold the coil bracket to the head? When I removed the passenger side one, motor oil started weeping out from it. I got worried and immediately put it back / tightened it up
I know I'm reviving a super old post, but I'm trying to take out my coil and it appears that the bracket for my Power steering fluid area is preventing the bolt form coming back out all the way? See video below:
 08-26-2006, 04:26 PM


 After a few colorful words and some throwing of tools I figured it out. I reached my right arm down in front of and around the fluid reservoir and attacked the bolt from underneath with a socket wrench. It's an awkward angle but it did the job to get it started. I thought about removing the power steering box from the bracket but I wasn't sure how and didn't want to force it and chance braking something. It hung to the side and was not necessary once the bolt was out.