Finally took the plunge
 03-31-2009, 09:38 AM
#41
Team Owner

Thread Starter
Member Since: Mar 2001
Location: Boston, Dallas, Detroit, SoCal, back to Boston MA
Posts: 30,606
Received 239 Likes
on
167 Posts

I got some pics from my machinist of the block being worked on.


-----Original Message-----
From: brad <brad@qmpracing.com>
To: swiftwood@aol.com
Sent: Mon, 30 Mar 2009 3:46 pm
Subject: Re: LT1 383 shortblock for a blower
Hey brian
i am working on a new program for the main caps on your block
instead of using a stepped cap like everyone else
i want to use a flat cap that way you would get a better register in the block
its taking a little longer than i expected but the result will be far greater
Thanks
Brad


 04-20-2009, 08:08 PM
#46
Team Owner
Thread Starter
Member Since: Mar 2001
Location: Boston, Dallas, Detroit, SoCal, back to Boston MA
Posts: 30,606
Received 239 Likes
on
167 Posts
More info
-----Original Message-----
From: Brad Lagman <brad@qmpracing.com>
To: swiftwood@aol.com
Sent: Mon, 20 Apr 2009 6:38 pm
Subject: RE: They want to know how long to build a motor
Hey Brian
I decided to machine another 3/16 key in the crank 180 deg from the orig
This way you have 2 keys holding that hub
That will be much stonger that way especially in a boost situation
Thanks
Brad
04-26-2009, 12:30 PM
#47
Team Owner
Thread Starter
Member Since: Mar 2001
Location: Boston, Dallas, Detroit, SoCal, back to Boston MA
Posts: 30,606
Received 239 Likes
on
167 Posts
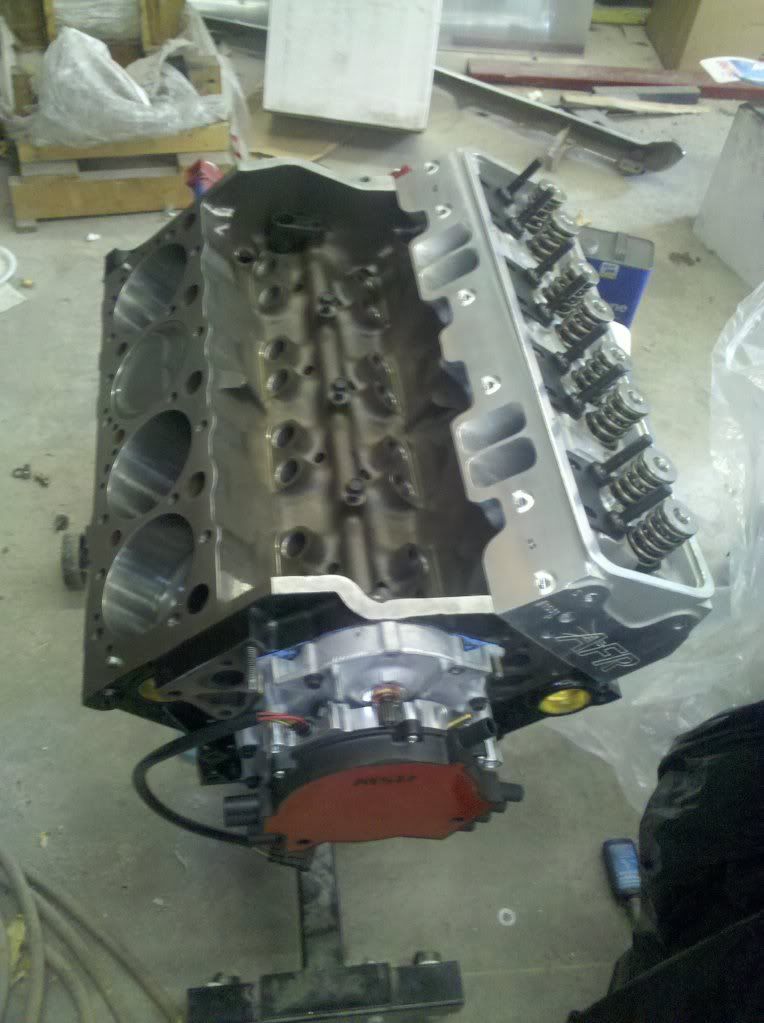
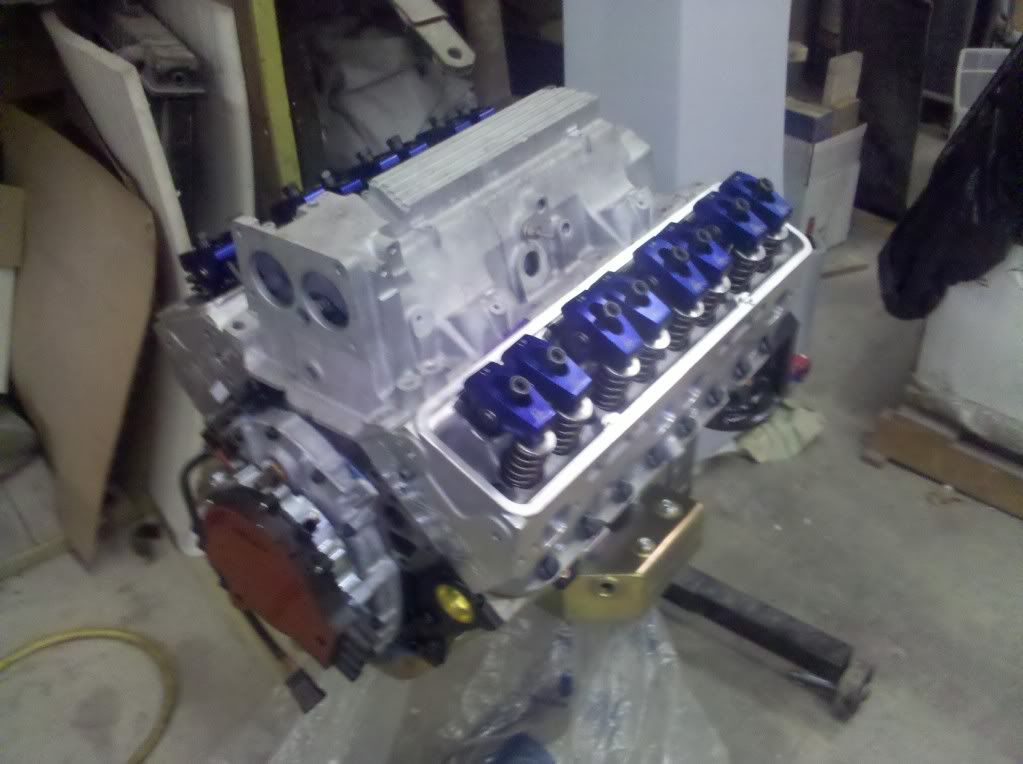
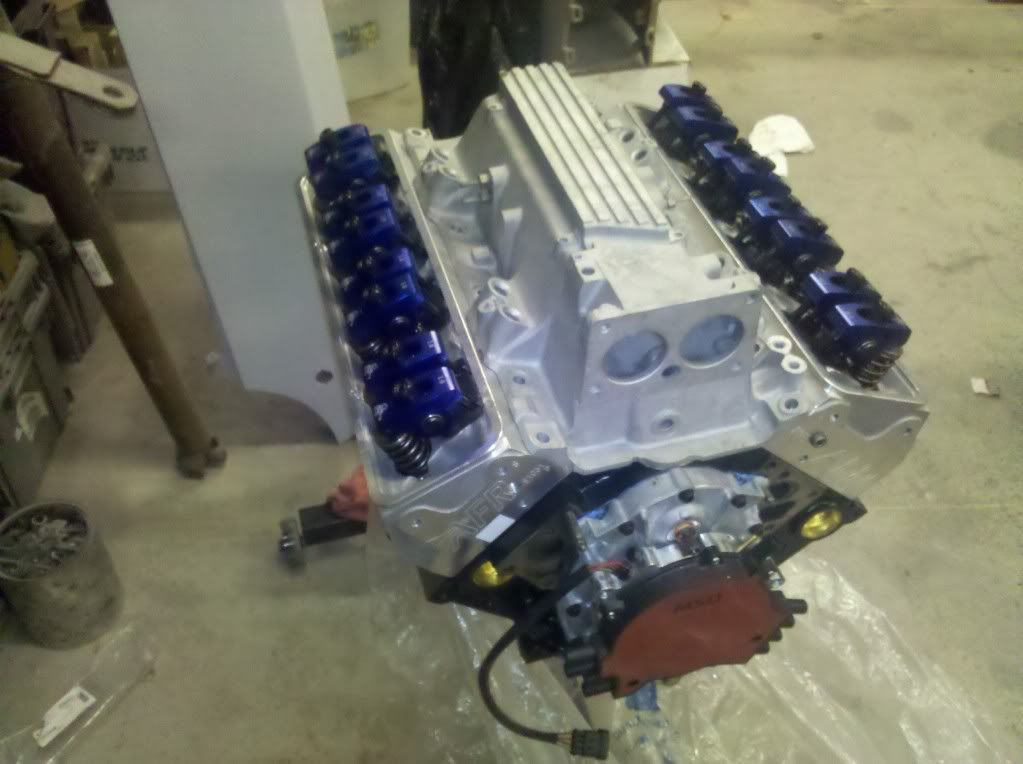
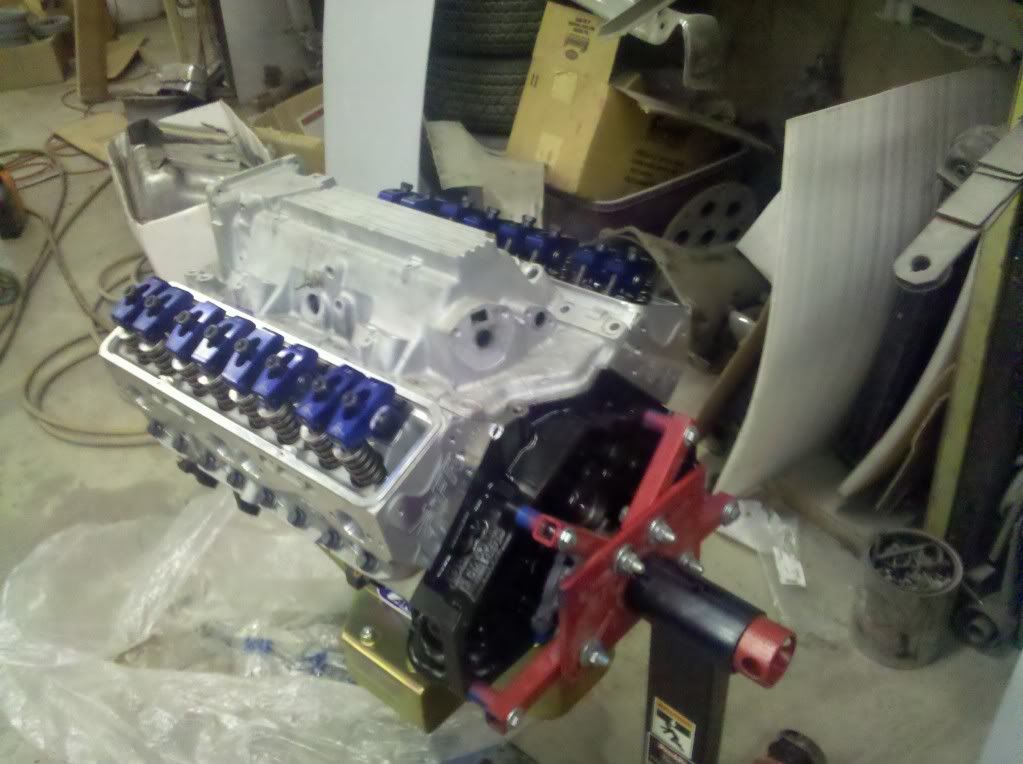
Shortblock's done!
BTW normally you hit the water jackets when you do his he didn't
Drainbacks for the AFR's


EDIT:
BTW He couldn't make the S.C.A.T. crank balance with the 5.7 rods so he went ahead an upgraded me to a Lunati crank no charge.
You can see the heavy metal it took to balance it.
-----Original Message-----
From: Brad Lagman <brad@qmpracing.com>
To: swiftwood@aol.com
Sent: Sat, 25 Apr 2009 5:17 pm
Subject: Engine
Hey Brian
Thanks for your business!
This engine came out really good I think you will like it
I was explaining the whole main cap issue with you
When people normally convert a 2-bolt block to a 4-bolt they normally use a stepped cap to fit in the stock 2-bolt registers
The problem with that is you have to have a .002-.005 air gap under the ends where the extra bolts go through so you are definitely
Flexing the cap the way we do it is that we machine a whole new register in the block so you have the bottom of the main cap completely flat now you have full contact with the block not just the step.
This way is harder to do (if you do not have a cnc machine) that’s why most shops use the step cap they just bolt them on and drill it with a drill bushing and tap it. I am not knocking that way, hell I used to do the same thing. Now we have a better way of doing it so we pass that on to our customers. Our shop is outfitted with the latest in machinery. I pride myself in having the best equipment available. So we can build a better engine for you.
Thanks again
Brad
Drainbacks for the AFR's
EDIT:
BTW He couldn't make the S.C.A.T. crank balance with the 5.7 rods so he went ahead an upgraded me to a Lunati crank no charge.
You can see the heavy metal it took to balance it.
Last edited by BrianCunningham; 04-26-2009 at 11:07 PM.
05-28-2009, 09:57 AM
#48
Team Owner
Thread Starter
Member Since: Mar 2001
Location: Boston, Dallas, Detroit, SoCal, back to Boston MA
Posts: 30,606
Received 239 Likes
on
167 Posts
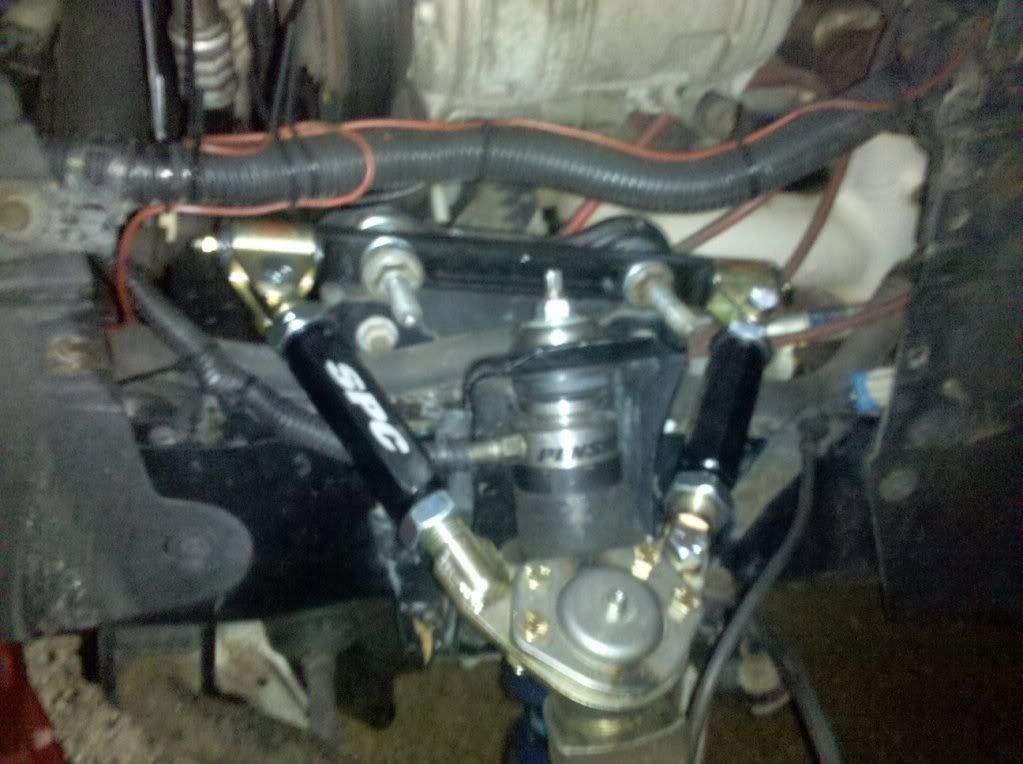
more toys for the car
I'm buying some Penske double adjustables off another forum member.
I know their good shocks as they used to be on Gary's (Hardbar) car.
http://forums.corvetteforum.com/auto...post1570239963
I'm buying some Penske double adjustables off another forum member.
I know their good shocks as they used to be on Gary's (Hardbar) car.
http://forums.corvetteforum.com/auto...post1570239963
For sale are a car set of HardbarUSA/LEMD Penske 8100 double adjustable shocks. I bought these shocks from Gary Hoffman @ HardbarUSA directly off his C6Z. They are suitable for all C5 and C6 applications. I am asking $2500 (plus shipping) for the entire set up.
They have recently been back to HardbarUSA/LEMD for a checkup on the dyno and to have a couple of seals replaced (preventive maintenance).
Pic of complete set up:

Pic of the rears, note the Mallett upper plate:

Pic of the fronts:

Pic of rear bump & rebound adjusters:

Pic of front rebound adjusters:

These are a steal at this price. 39% off what the new equivalent (Penske 8300s) would cost you! This package works great, street or track. If you've been on this forum any length of time you've seen numerous people rave about them!
They have recently been back to HardbarUSA/LEMD for a checkup on the dyno and to have a couple of seals replaced (preventive maintenance).
Pic of complete set up:
Pic of the rears, note the Mallett upper plate:
Pic of the fronts:
Pic of rear bump & rebound adjusters:
Pic of front rebound adjusters:
These are a steal at this price. 39% off what the new equivalent (Penske 8300s) would cost you! This package works great, street or track. If you've been on this forum any length of time you've seen numerous people rave about them!
11-16-2009, 09:38 AM
#49
Team Owner
Thread Starter
Member Since: Mar 2001
Location: Boston, Dallas, Detroit, SoCal, back to Boston MA
Posts: 30,606
Received 239 Likes
on
167 Posts
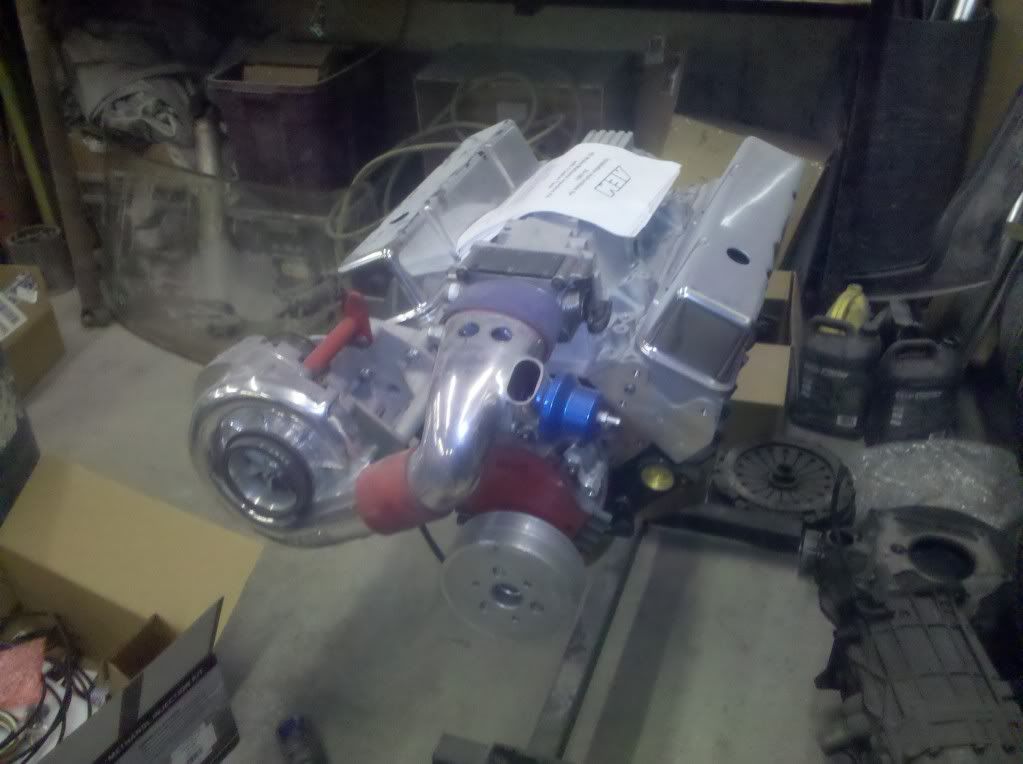
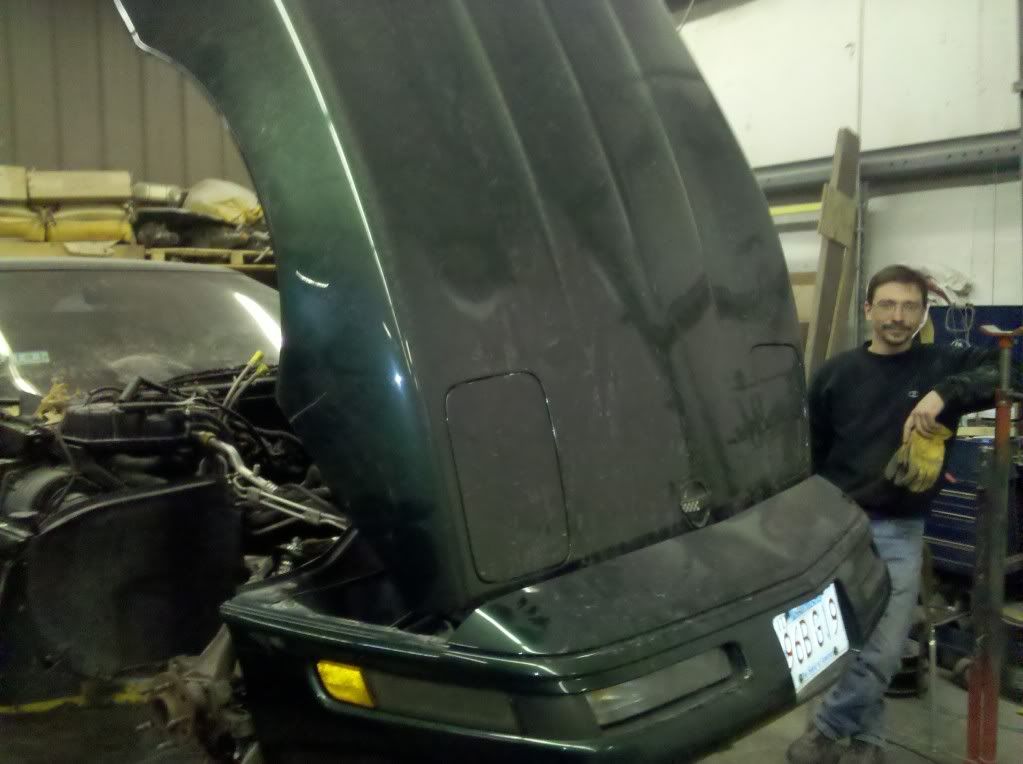
Now that I have a truck for a DD my buildup has started 
He's going to port match the intake to the AFR's
BTW the stock LT1 intake gasket fit the AFR's
He's going to port match the intake to the AFR's
BTW the stock LT1 intake gasket fit the AFR's
08-18-2010, 08:14 PM
#50
Team Owner
Thread Starter
Member Since: Mar 2001
Location: Boston, Dallas, Detroit, SoCal, back to Boston MA
Posts: 30,606
Received 239 Likes
on
167 Posts
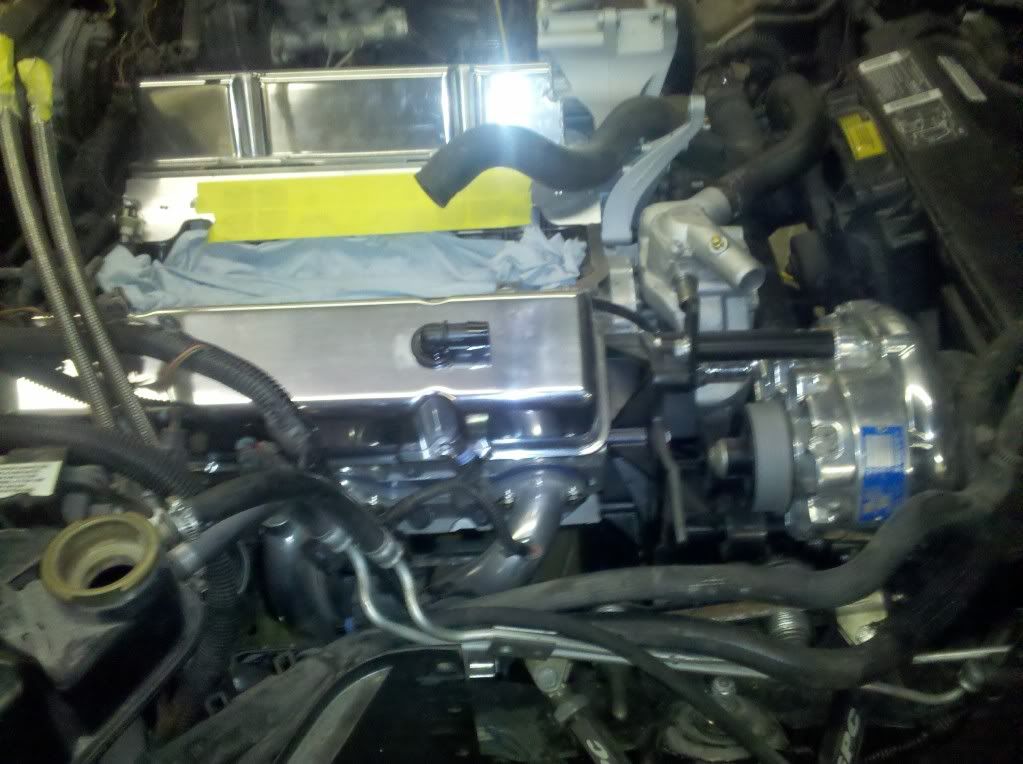
thought I'd update this thread
(need to go back and fix the pics)
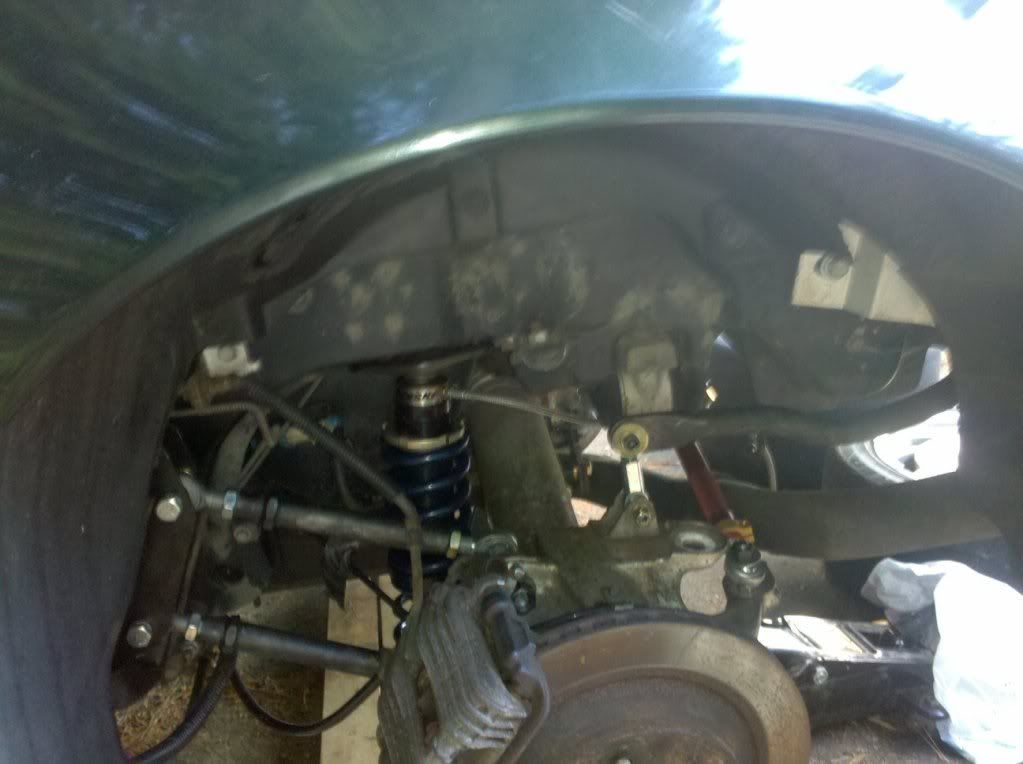
engine progress
BTW the suspension upgrades are complete
Penske coilovers & Hardbar dual rate springs, rodends suspension.
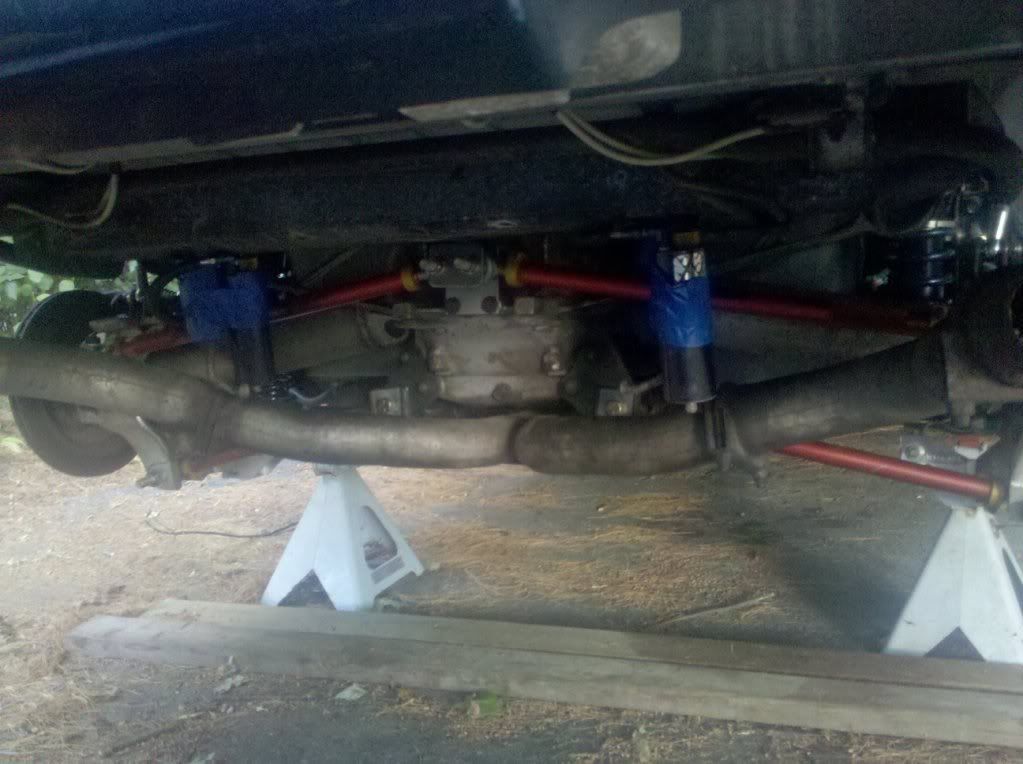
more...
http://s242.photobucket.com/albums/f...te/Suspension/
(need to go back and fix the pics)
engine progress
BTW the suspension upgrades are complete
Penske coilovers & Hardbar dual rate springs, rodends suspension.
more...
http://s242.photobucket.com/albums/f...te/Suspension/


 09-08-2010, 10:09 PM
#53
Melting Slicks


Brian-
I'm sure you've pointed this out somewhere else, but can you tell me the compression with those pistons? And your combustion chamber volume?
edit-
also cam specs
I'm sure you've pointed this out somewhere else, but can you tell me the compression with those pistons? And your combustion chamber volume?
edit-
also cam specs
09-08-2010, 10:27 PM
#54
Team Owner
Thread Starter
Member Since: Mar 2001
Location: Boston, Dallas, Detroit, SoCal, back to Boston MA
Posts: 30,606
Received 239 Likes
on
167 Posts
We lowered the compression to 9:1, I may bump it to a T-trim
65cc combustion
cam? we'll it's a custom grind done by my builder
65cc combustion
cam? we'll it's a custom grind done by my builder
09-08-2010, 10:33 PM
#55
Melting Slicks
The pistons (in the pictures) look to be flat-tops with valve reliefs. I figured with 65cc chambers, you'd be lookin' at closer to 10:1... I could be wrong!
Did you have Tony grind the cam for you to match the heads?
edit-
opps... took another look at those pictures, I think I can see a little dish to them!
09-09-2010, 12:53 PM
#56
Team Owner
Thread Starter
Member Since: Mar 2001
Location: Boston, Dallas, Detroit, SoCal, back to Boston MA
Posts: 30,606
Received 239 Likes
on
167 Posts
Bolts, if you use studs you can't pull the heads with the engine in the car
The more I talked to my builder the more I was convinced to leave details like which head gssket to use up to him.
The more I talked to my builder the more I was convinced to leave details like which head gssket to use up to him.
11-19-2010, 04:21 PM
#57
Team Owner
Thread Starter
Member Since: Mar 2001
Location: Boston, Dallas, Detroit, SoCal, back to Boston MA
Posts: 30,606
Received 239 Likes
on
167 Posts
Hi people, reports of my demise have been greatly exaggerated.
I working at a startup company downtown.
Things are going good, just a lot of hours.
When I get home turning the computer on is the last thing on my mind.
the car is coming along.
I told my tuner racing season is over, so to take his time.
I'm going to take care of some cosmetic issues while it's in there, as well as put at least a 4pt bar in it. So I can make more than one pass

 05-30-2011, 05:50 PM
#60
Team Owner
Thread Starter
Member Since: Mar 2001
Location: Boston, Dallas, Detroit, SoCal, back to Boston MA
Posts: 30,606
Received 239 Likes
on
167 Posts
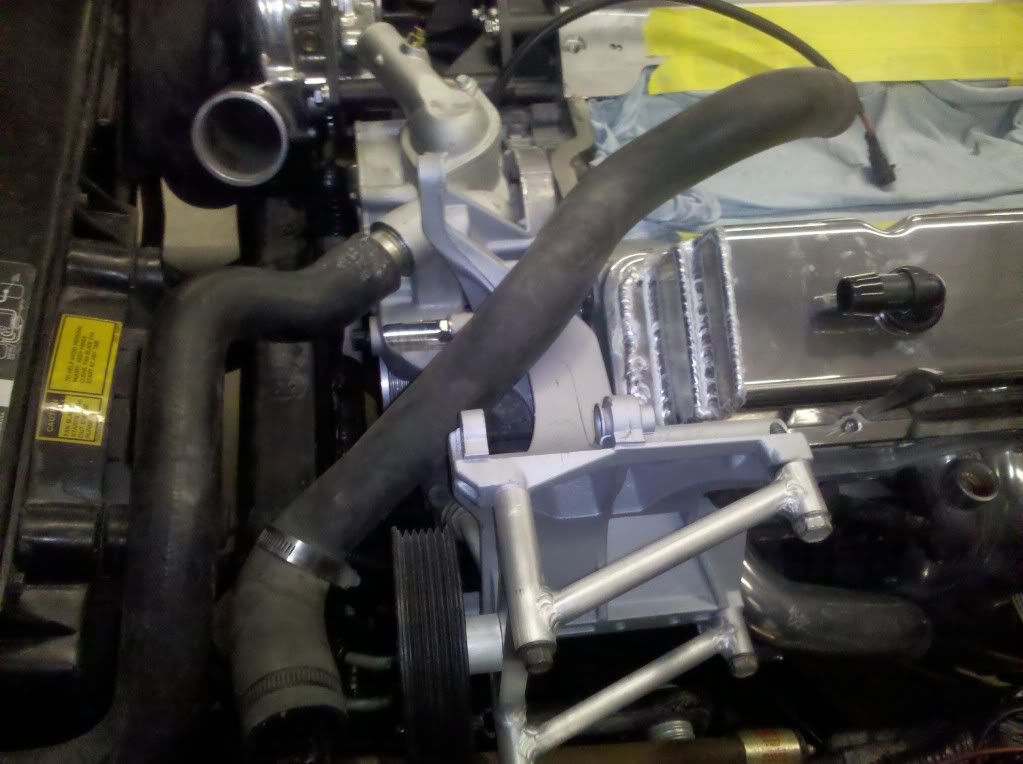
oil cooler accusump & filter where the spare used to be

installed w fan and LARGE filter


radiator needed to come back out.
4in intake blocked one of the radiator opennings


new neck welded on an reinstalled

Exotic Muscle long tube headers fit no problem


installed w fan and LARGE filter
radiator needed to come back out.
4in intake blocked one of the radiator opennings
new neck welded on an reinstalled
Exotic Muscle long tube headers fit no problem