LT-4 Suspension Rebuild "LOTS of Pictures"


 06-14-2008, 04:38 PM
#43
Le Mans Master


Member Since: Feb 1999
Location: Hawaii
Posts: 8,522
Likes: 0
Received 3 Likes
on
3 Posts
St. Jude Donor '03 & '05


Nolan, I just did the lowering. If you need any help please ask. I broke a few things
 , Dont I always.
When doing the lowering, the key to not breaking the aluminum retainer is to exactly measure how much needs to be taken off to allow proper quench of the new urethane wedge. Its about a 1/4 inch. Mine didnt lower enough, so the aluminum spacer above the rubber you are going to cut off did not go back in. Also, the rubber/metal tips on the end of the spring that protect the control arm from the spring are another area that assists in lowering. Every year is different, as these items are different sizes. I cut some Delrin bushings for the tips and expoxied them to the spring, as my new ZO7 spring didnt have anything on the ends. I think they were 3/8 inch thick and the factory one was 5/8 inch thick. Lowered it a little bit more, which I like 26 inches from ground to center of fender.
06-15-2008, 05:29 PM
#44
Drifting

Thread Starter
So I open up and take a closer look at my Energy suspension kit only to find out that there's something missing and just not right.
Here's this particular part of the kit with that should be a complete front end kit minus the bushing for the sway bar.
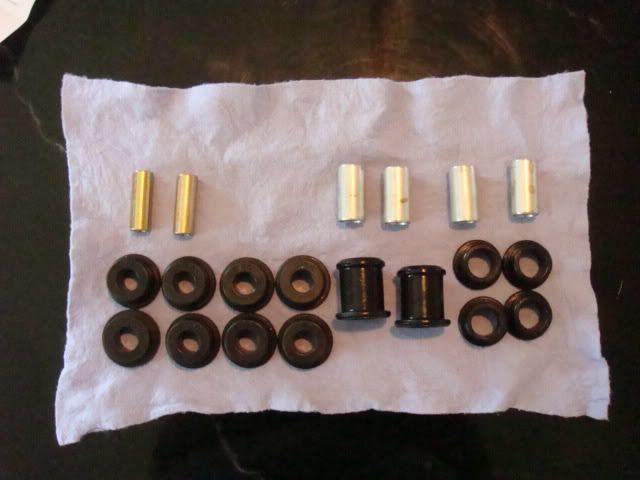
The first thing I noticed was there there were only two sleves for the lower control arm ES Part# 15.10.126.39, vice 4 as called out on the master list.
Then I noticed that I only had seven ES Part # 3130 lower control arm bushings and one 3068-3. I tried to look on ES's website and there is no listing for a 3068-3, but that's exactly what I recieved in this kit.
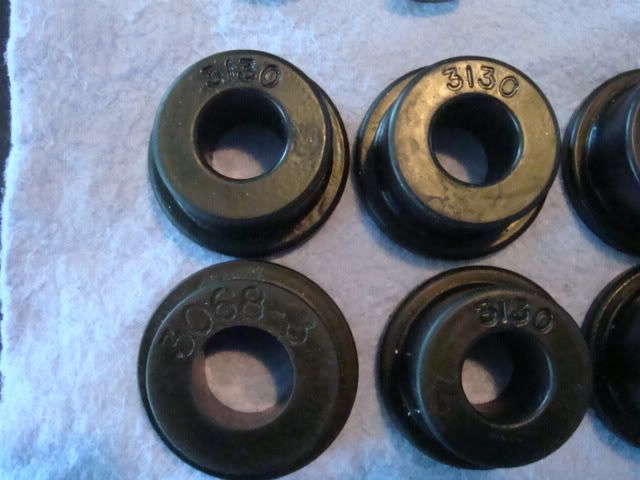
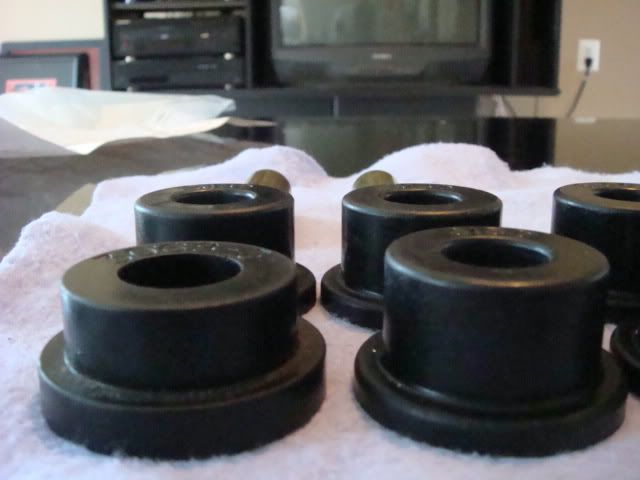
Here's a closer shot of the unique bushing so that you can see the difference from the 3130's.
I'll call tomorrow and straighten this FUBAR out! The good news is that all the other components are just as ES stated except for my rear strut rod set came with all of the components of the Set number 3-7107 plus four of the 7024's from the 3-7108 set. This basically gives me both the 3-7107 and 3-7108 in one package. I'm sure this is to cover all of the bases on the 95-96 Corvette. That maybe due to this set only listed good up to 95, and there is no number for the 96.
Here's this particular part of the kit with that should be a complete front end kit minus the bushing for the sway bar.
The first thing I noticed was there there were only two sleves for the lower control arm ES Part# 15.10.126.39, vice 4 as called out on the master list.
Then I noticed that I only had seven ES Part # 3130 lower control arm bushings and one 3068-3. I tried to look on ES's website and there is no listing for a 3068-3, but that's exactly what I recieved in this kit.
Here's a closer shot of the unique bushing so that you can see the difference from the 3130's.
I'll call tomorrow and straighten this FUBAR out! The good news is that all the other components are just as ES stated except for my rear strut rod set came with all of the components of the Set number 3-7107 plus four of the 7024's from the 3-7108 set. This basically gives me both the 3-7107 and 3-7108 in one package. I'm sure this is to cover all of the bases on the 95-96 Corvette. That maybe due to this set only listed good up to 95, and there is no number for the 96.
06-15-2008, 06:47 PM
#45
Le Mans Master
Member Since: Feb 1999
Location: Hawaii
Posts: 8,522
Likes: 0
Received 3 Likes
on
3 Posts
St. Jude Donor '03 & '05
VB&P did the same thing to me with the bushings, LCA, as they were the standards vice the offsets. They corrected it quickly and let me keep the standard urethanes. So, I have a set for the lower in my garage, uhmm shed . SO, if anyone wants them, LMK. No sleeves though, just the bushings. PM me.
. SO, if anyone wants them, LMK. No sleeves though, just the bushings. PM me.
06-16-2008, 01:38 PM
#46
Drifting
Thread Starter
I contacted Summit today and they said "No Problem" and I should have the replacement parts in from ES by the end of the week. Now THAT'S Service!.........If ONLY these Ball Joints were going so smoothly!
N
N
06-16-2008, 07:54 PM
#47
Burning Brakes

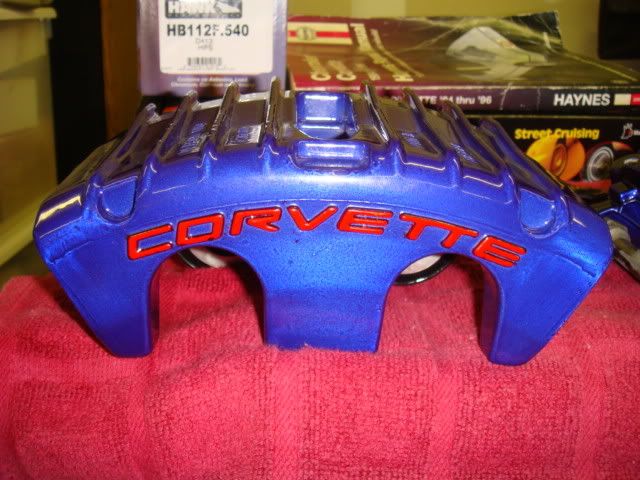
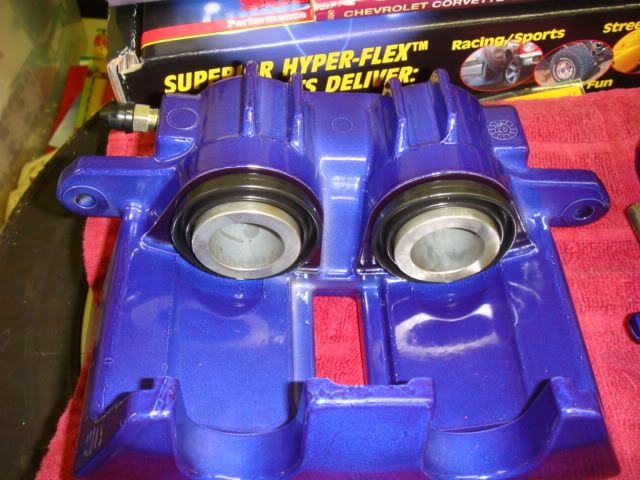
I also found a VERY good powder coater in my area that I have these Red Z-06 calipers to, and ordered new brackets for this build. The rears are the ones off of my 91, but since I didn't want to wait, I had him powder coat all of these peices for me. Oh yeah, did I say it was going to be a Grand Sport Replica?......LOL
Front
Front
Jonathan
06-16-2008, 08:24 PM
#48
Drifting
Thread Starter
Thanks for the heads up, but I am aware of the J55 type Grand Sport Calipers that came on all of the GS's. The 96 came with the J55�s minus the wording �Corvette� in White, but I wanted to take the GS colors and theme a little bit further in conjunction with a very decent C5/6 brake caliper upgrade. SO, I do agree, it's not the calipers that the GS's came with, but it does carry the colors of the GS through the wheel and the theme of the car. Thanks a ton!
Noland
06-16-2008, 08:36 PM
#49
Burning Brakes
Jonathan,
Thanks for the heads up, but I am aware of the J55 type Grand Sport Calipers that came on all of the GS's. The 96 came with the J55�s minus the wording �Corvette� in White, but I wanted to take the GS colors and theme a little bit further in conjunction with a very decent C5/6 brake caliper upgrade. SO, I do agree, it's not the calipers that the GS's came with, but it does carry the colors of the GS through the wheel and the theme of the car. Thanks a ton!
Noland
Jonathan
06-18-2008, 09:00 AM
#50
Drifting
Thread Starter
Noland
Last edited by BlackHarleyMan; 06-22-2008 at 11:17 PM.
06-22-2008, 10:16 AM
#51
Drifting
Thread Starter
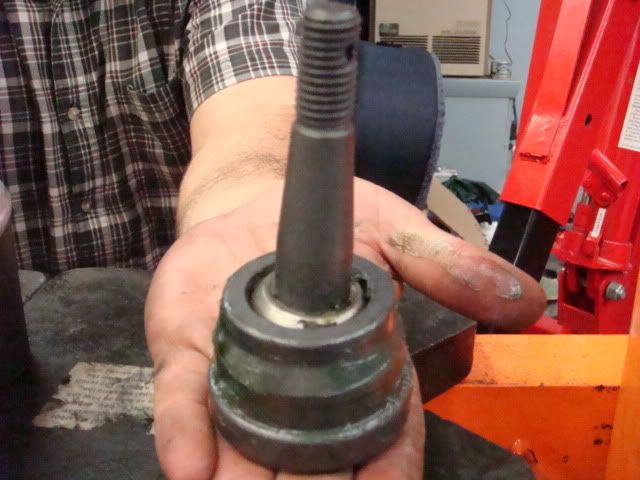
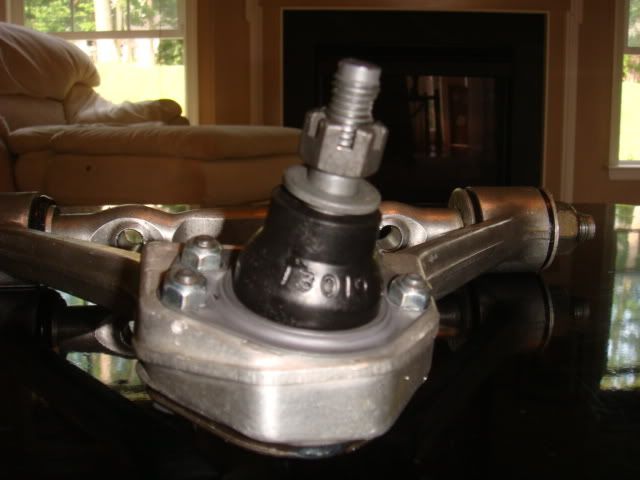
So after the problems with the previous ball joints from Corvette America, I was looking to order all MOOG units, but decided to call around to the parts stores in my area first. I wanted to find something close and stumbled upon TRW brand ball joints and tie rod ends. Since I already had close to $200 on a store gift card, AND the TRW's come with a limited lifetime warranty it was pretty much a no-brainer. So I paid the difference for the TRW upper, lower ball joints and inner tie rods. One of the first thing I noticed about them is that they look very similar to the MOOG units, and completely different than the ones I received from Corvette America. I know understand how I can use the rubber boots from my Energy Suspension kit with these heavy duty, well constructed units. So I sent up the Wasp Signal and setup an emergency meeting at the Wasp Cave!......This is what the TRW ball joint looks like for the lower.
So we started the process again, I was very leery about how it was going to go, but these units went into the lower A-arms like butter.
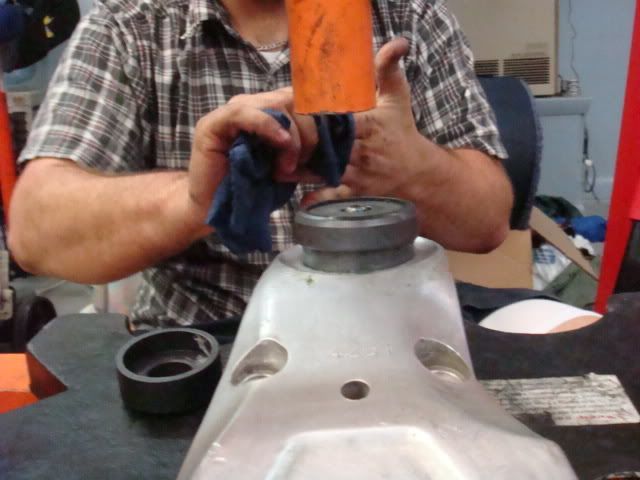
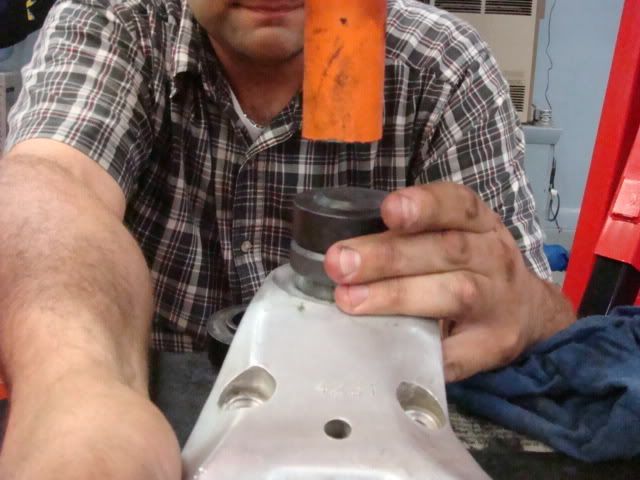
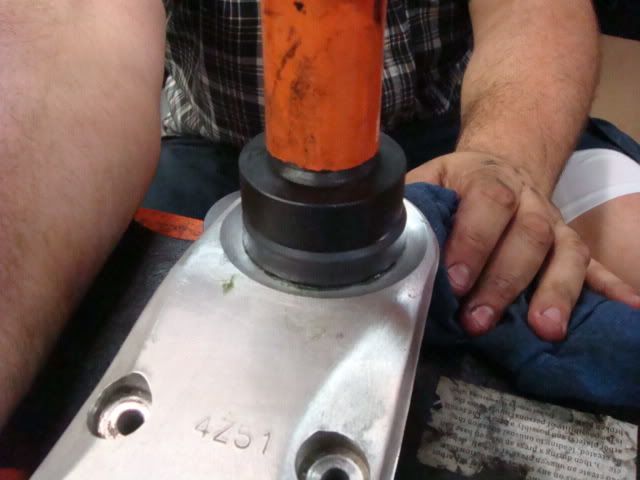
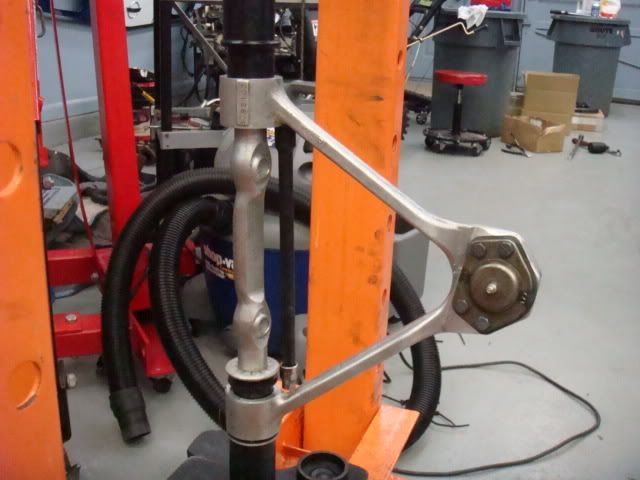
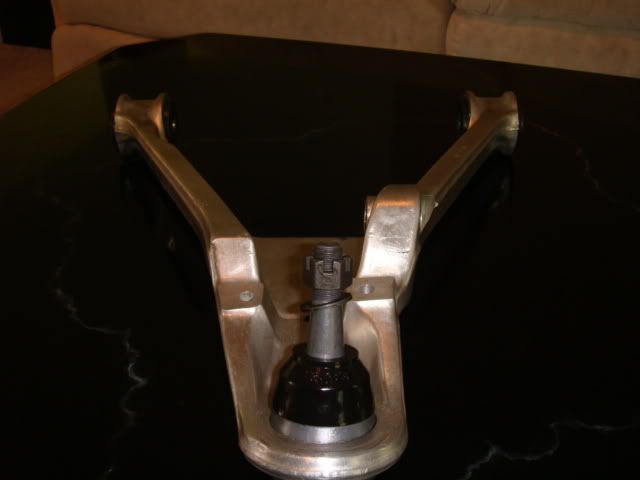
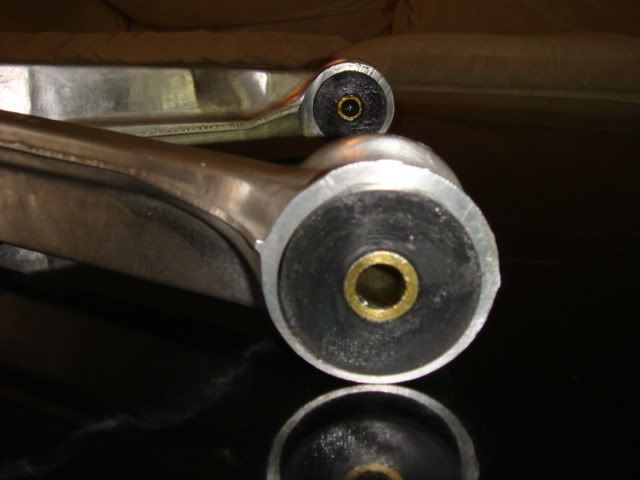
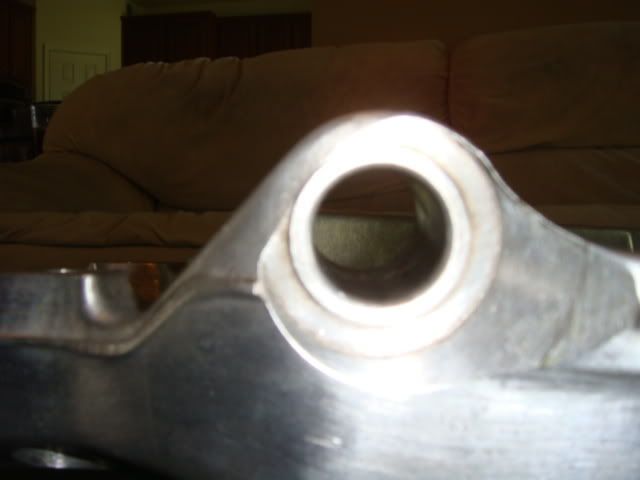
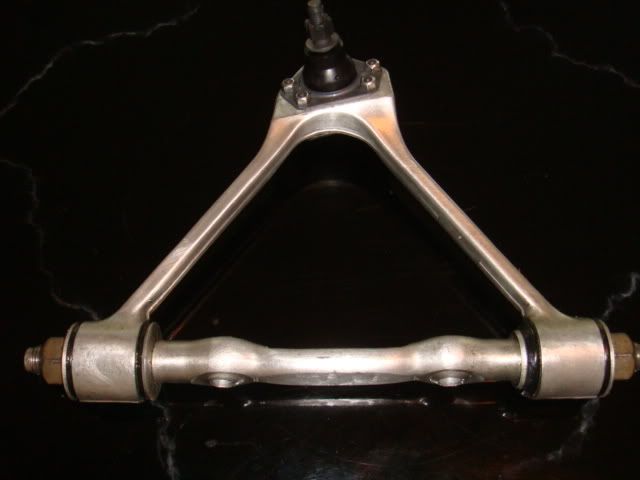
The upper A-arm ball joints were well constructed by TRW as well. The holes were slightly elongated in order to facilitate proper alignment during installation. I used red loctite and the new ES urethane boots on these. The tricky part with the upper A-arms is the installation of the new bushings. In the instructions it tells the installer to use a brace to keep the arm from flexing during the bushing installation. We used a 3/8th socket extension and a small metric socket in order to get the proper length and it worked like a champ. The installation of these bushings were the most difficult, because of the finessing required in order to have all the right bushings just in the proper location and to get all the planets and stars lined up in order to get the bearing press event to go smoothly. Either way, here's the setup with the support rod.

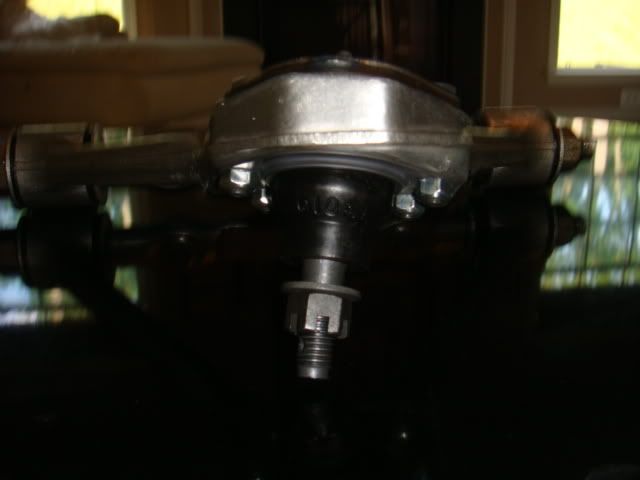
And finally, here's a few pictures of the finished product, new ball joints, bushing, sleeves, cleaned and all greased up and ready to be re-installed back on the 96.
Lower
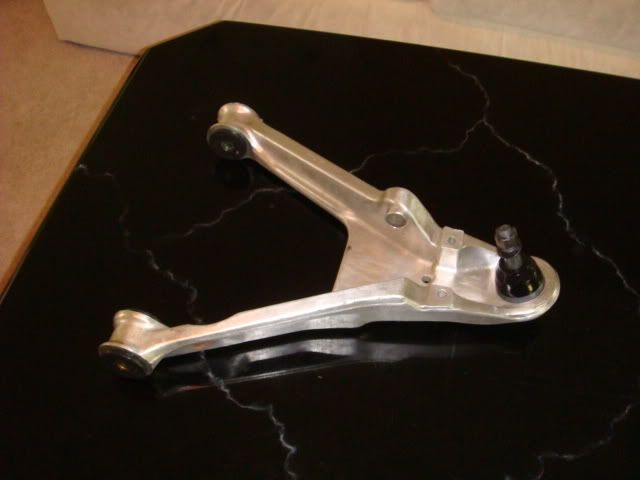


I'm waiting for my ES swaybar bushing set, but as you see the old dried out and cracked OEM pieces have been removed with this area cleaned and prepped......ready to go.
Upper
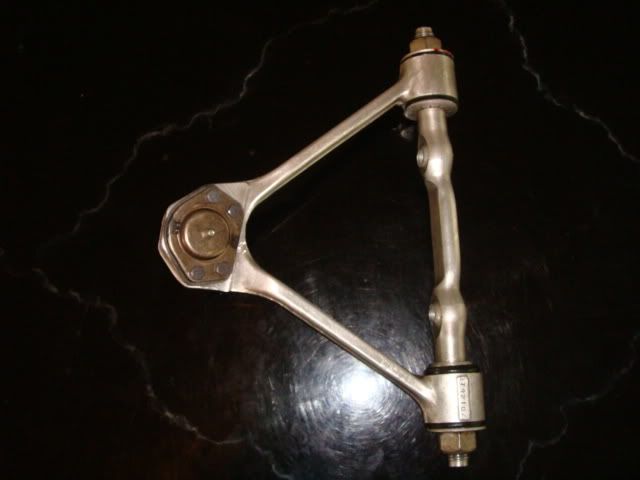
You'll notice that I installed the upper ball joints with the nuts towards the bottom, not the top of the a-arm as described in the service manual and instructions for the upper ball joints themselves. I took BlueWasp's advice on this, as he's been down this road before.
Complete with new fresh red loctite
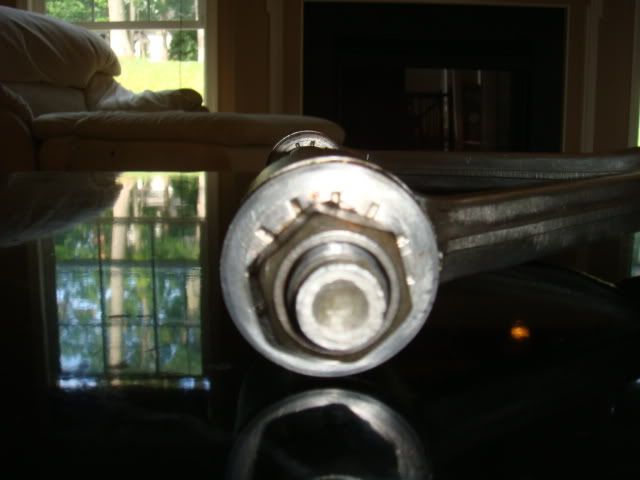
The slight discoloration on these nuts are from the torch used to remove them due to the factory red loctite (not sure exactly what, but similar) used during factory installation.
I'm currently working on removing the bushings and inner tie rod's from the steering rack, and cutting the rubber off of and installing new lowering wedges on the front spring this week. I also began the disassembly of the rear suspension as well. I did notice something that I'm going to have to take care of, and that's new seals for my D44.
In this picture, if you look closely you will see, just slightly right and lower of the yoke (rusty orange).
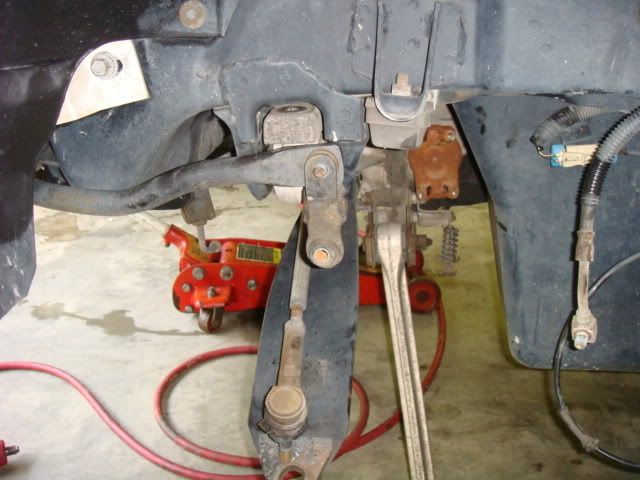
This is who knows how many years of gear oil leakage from the diff. Since I'm this far into it, it is not going to be much of a problem to replace all of the diff seals and it's a fairly easy job to do.
So we started the process again, I was very leery about how it was going to go, but these units went into the lower A-arms like butter.
The upper A-arm ball joints were well constructed by TRW as well. The holes were slightly elongated in order to facilitate proper alignment during installation. I used red loctite and the new ES urethane boots on these. The tricky part with the upper A-arms is the installation of the new bushings. In the instructions it tells the installer to use a brace to keep the arm from flexing during the bushing installation. We used a 3/8th socket extension and a small metric socket in order to get the proper length and it worked like a champ. The installation of these bushings were the most difficult, because of the finessing required in order to have all the right bushings just in the proper location and to get all the planets and stars lined up in order to get the bearing press event to go smoothly. Either way, here's the setup with the support rod.
And finally, here's a few pictures of the finished product, new ball joints, bushing, sleeves, cleaned and all greased up and ready to be re-installed back on the 96.
Lower
I'm waiting for my ES swaybar bushing set, but as you see the old dried out and cracked OEM pieces have been removed with this area cleaned and prepped......ready to go.
Upper
You'll notice that I installed the upper ball joints with the nuts towards the bottom, not the top of the a-arm as described in the service manual and instructions for the upper ball joints themselves. I took BlueWasp's advice on this, as he's been down this road before.
Complete with new fresh red loctite
The slight discoloration on these nuts are from the torch used to remove them due to the factory red loctite (not sure exactly what, but similar) used during factory installation.
I'm currently working on removing the bushings and inner tie rod's from the steering rack, and cutting the rubber off of and installing new lowering wedges on the front spring this week. I also began the disassembly of the rear suspension as well. I did notice something that I'm going to have to take care of, and that's new seals for my D44.
In this picture, if you look closely you will see, just slightly right and lower of the yoke (rusty orange).
This is who knows how many years of gear oil leakage from the diff. Since I'm this far into it, it is not going to be much of a problem to replace all of the diff seals and it's a fairly easy job to do.
06-22-2008, 11:51 AM
#52
Melting Slicks

This is a great write up. I am impressed with the photo documentation and the narrative. Interesting about the TRW stuff. I may have missed it? But how did the TRW cost compare with the MOOG?
I wish I lived close to you and Rob. I could probably get my "to do" list done!
Great job Noland!
I wish I lived close to you and Rob. I could probably get my "to do" list done!
Great job Noland!
06-22-2008, 12:23 PM
#53
Drifting
Thread Starter
This is a great write up. I am impressed with the photo documentation and the narrative. Interesting about the TRW stuff. I may have missed it? But how did the TRW cost compare with the MOOG?
I wish I lived close to you and Rob. I could probably get my "to do" list done!
Great job Noland!
I wish I lived close to you and Rob. I could probably get my "to do" list done!
Great job Noland!
1. TRW ball joints run anywhere from $20 to $30 a piece lower than the MOOG.....PER BALL JOINT! (~$80.00 and up for a full set of ball joints)
2. The TRW's came with a warranty, and I did not get the full skinny on the MOOG's (I was under the impression that upon my purchase from RockAuto, I was on my own), but they may or may not have the same fine print.
3. The TRW's were right around the corner from my house, in stock. I would have had to wait two to three days for the MOOG.
4. I've done some homework, and I have yet to hear many negative comments about the TRW. Their manufacturing spec is very close to that of the MOOG, and better yet THEY Have a spec!.....LOL.
5. I�ve been looking for a ways to shave some of the cost on this project, yet keep quality parts. I went the TRW route and I believe that with the LL warranty, I'll be OK!
Thanks for the support there Jeff, and since I am working 3rd shift this week, I'll have time to get those bearings shipped off to you.
R/Noland
P.S. Oh yeah and #6. They allowed me to be able to use those slick-nifty urethane ball joint boots that came in my kit for my upper and lower ball joints!.....I LIKE THAT!

 Nice informative posts and good pics.
  06-23-2008, 04:25 PM
#55
Drifting
Thread Starter
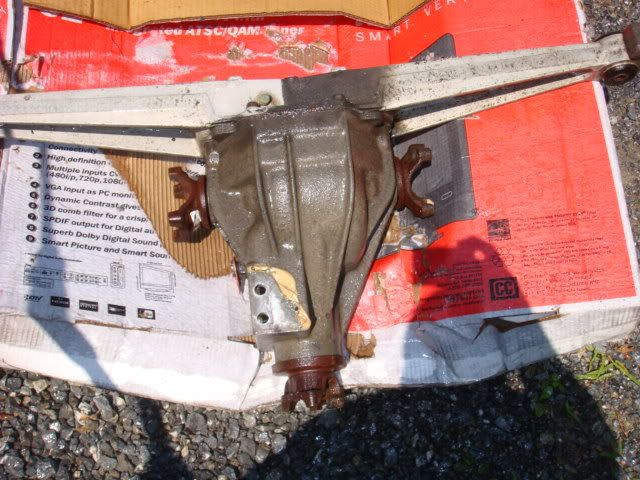
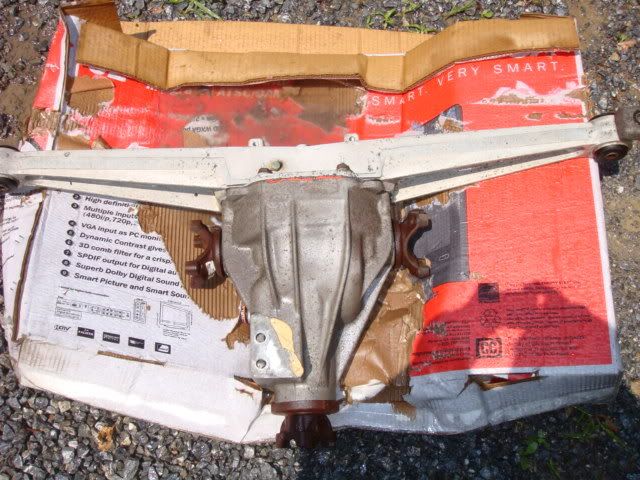
I was able to get the Pumpkin and Batwing out of the car today. This is the last of the suspension disassembly, so after I get all of the old bushing pressed out this week, this weekend should be re-installation of the suspension. I discovered that I have a leaking seal on the passengers side-yoke of my D44, so I'm going to replace all of the seals and be done with it. I also discovered that my rear tie rod assembly is crap so I'll need to get a new one of those as well. I can't find one for a 92-96, but I was under the impression that they were all the same. I have more investigating to do on that issue.
Here's what the D44 looked like after I removed the rear spring, there was gear oil and crap all over this. I had just started to clean it with a power washer as you can tell by the left side of the batwing as compared to the right, which is still dirty.
Just another shot after cleaning part of the right batwing
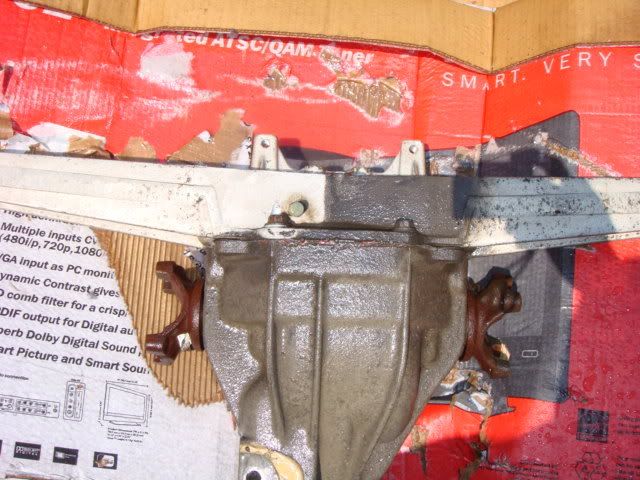
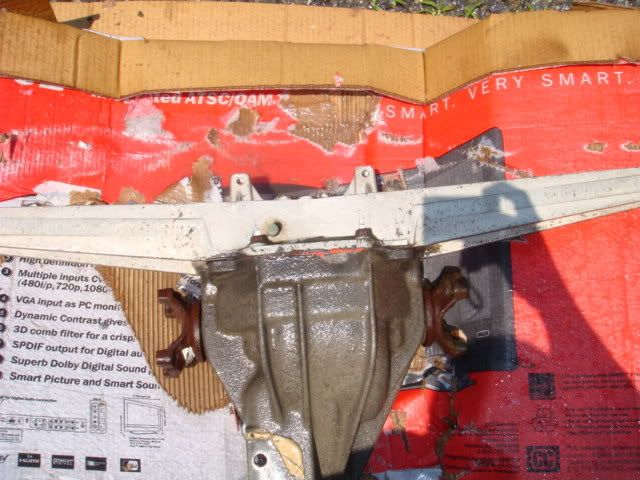
Here's the clean batwing
And finally the pumpkin after I hit it with the Power washer
So now that I got most of the junk off of it, I have pulled the Batwing cover so that I can press out the bushings and I have to break out my steel wool pads and brake cleaner to make these pieces look the way that they should.
Thanks for looking, more to come.
Here's what the D44 looked like after I removed the rear spring, there was gear oil and crap all over this. I had just started to clean it with a power washer as you can tell by the left side of the batwing as compared to the right, which is still dirty.
Just another shot after cleaning part of the right batwing
Here's the clean batwing
And finally the pumpkin after I hit it with the Power washer
So now that I got most of the junk off of it, I have pulled the Batwing cover so that I can press out the bushings and I have to break out my steel wool pads and brake cleaner to make these pieces look the way that they should.
Thanks for looking, more to come.
 I am exhausted just thinking about all that work...
  Looks great!
06-23-2008, 08:04 PM
Looks great!
06-23-2008, 08:04 PM
#57
Burning Brakes
Awesome work Noland! All of this work will be WELL worth it when you see/feel the final difference.
Just curious, what are you going to use to reattach the pumpkin to the c-beam? See the old yellowish adhesive in some of your photos?
I read the FSM when I took my transmission out and it says to use some sort of silicone adhesive with a specific GM part number. My trans is hopefully going back in tonight and I'm just wondering what type of adhesive I should use. I have a similarily colored construction adhesive that comes in a bright yellow tube from Home Depot and Lowes - do you think that would work? It glued a brick back onto my concrete pavers border and it has withstood Florida weather for over a year.
TIA,
Jonathan
06-23-2008, 11:39 PM
#58
Drifting
Thread Starter
Awesome work Noland! All of this work will be WELL worth it when you see/feel the final difference.
Just curious, what are you going to use to reattach the pumpkin to the c-beam? See the old yellowish adhesive in some of your photos?
I read the FSM when I took my transmission out and it says to use some sort of silicone adhesive with a specific GM part number. My trans is hopefully going back in tonight and I'm just wondering what type of adhesive I should use. I have a similarily colored construction adhesive that comes in a bright yellow tube from Home Depot and Lowes - do you think that would work? It glued a brick back onto my concrete pavers border and it has withstood Florida weather for over a year.
TIA,
Jonathan
Just curious, what are you going to use to reattach the pumpkin to the c-beam? See the old yellowish adhesive in some of your photos?
I read the FSM when I took my transmission out and it says to use some sort of silicone adhesive with a specific GM part number. My trans is hopefully going back in tonight and I'm just wondering what type of adhesive I should use. I have a similarily colored construction adhesive that comes in a bright yellow tube from Home Depot and Lowes - do you think that would work? It glued a brick back onto my concrete pavers border and it has withstood Florida weather for over a year.
TIA,
Jonathan
R/Noland
P.S. Jeff, it seems like the more I took apart the more crap I found wrong!.......LOL. BUT The cool part is that now everything is off and I can start putting things back together now!
N
06-24-2008, 10:21 AM
#59
Melting Slicks
Thanks Jonathan, as far as the Gobba-Goop goes, when I replaced the seals on my 91 D44, I didn't put more G-G on it. I just bolted the Pumpkin back in and used loctite on the nuts. I"ll check my FSM tomorrow and see what it says about the stuff, I'm not sure about the specifics, but it may have been used to either prevent rattling, or to hold the C-beam in place during the torque and assembly at the plant. If anyone knows, please feel free to chime in! I know that you can get C-Beam plates to put in and I don't remember that CF member that was selling them saying anything about the G-G during installation. My 91 is still doing well after three years of me replacing the seals in it.
R/Noland
P.S. Jeff, it seems like the more I took apart the more crap I found wrong!.......LOL. BUT The cool part is that now everything is off and I can start putting things back together now!
N
R/Noland
P.S. Jeff, it seems like the more I took apart the more crap I found wrong!.......LOL. BUT The cool part is that now everything is off and I can start putting things back together now!
N

