Brian's Blinker Fix - Floppy Stick Syndrome
 08-23-2008, 10:22 AM
#1
Melting Slicks

Thread Starter

I'm sure other people have come up with this fix before, but I haven't heard anything about it.
It seems that every once in a while the blinkers in our C4's break, I'm not sure about the early C4's but definately in the late C4's. Its an internal steering column break that lets the blinker turn on to the left but not to the right. This is because of a weak link in the part of the piece that the blinker stick plugs into. I'm not 100% sure of this parts name, but I believe its called a multifuntional switch or something like that. I was quoted $299.99 from the dealer for this part. I wasn't about to pay that much just for the part to have my blinkers fixed. You can possibly find a used switch from somewhere, but most people want to sell the steering column as a whole. So I came up with the following fix.
I applogize now for the bad spelling and blurry pictures, but you should be able to get the general idea of it all.
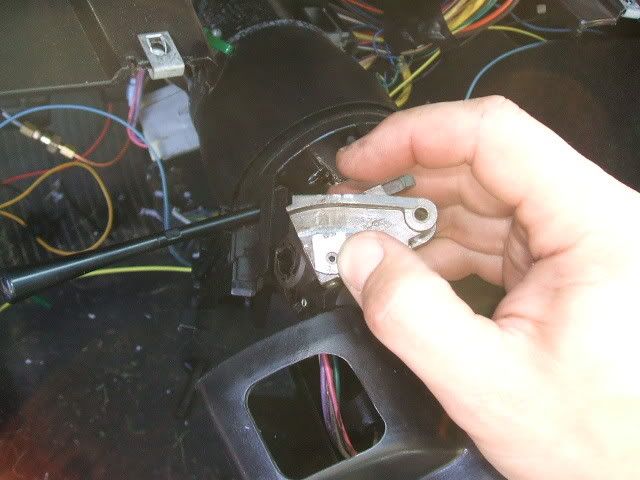
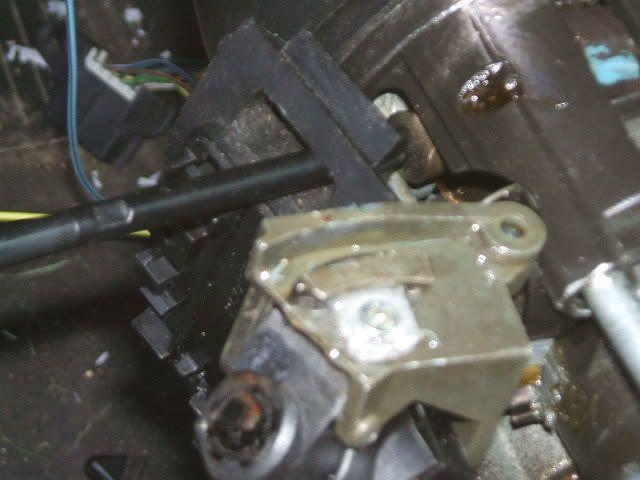
1.) Pull apart the steering column until you get to the multifunctional switch. (Detailed below)
You should be able to see the switch and hopefully locate the part that has broken off.

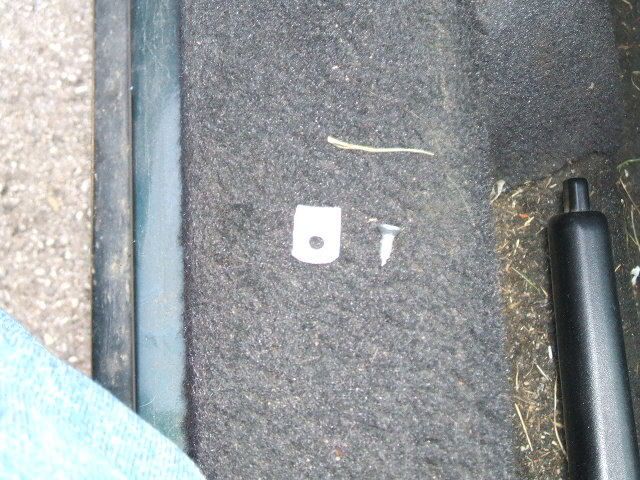
2.) Obtain a piece of 1/8" aluminum plate from your local hardware store (Home Depot, Lowes, etc....) You can use different thicknesses, but make sure that it is not thicker than the piect that has broken off. Cut this piece so that it is just wide enough to fit between the edges of the broke off piece. You'll want to make this piece about 1/2" long, just enough to keep it on the surface of the multifunctional switch.
3.) Next you want to find a short screw with a tapered head that will be just long enough to go through the aluminum and the multifunctional switch. I suggest a 1/4-3/8" screw depending on the aluminum size used. Next drill the hole in the center of the aluminum, but make it just wide enough for the tapered head not to go through at the top. You want the screw to be as flush as possible with the aluminum.
4.) The next step is to place the aluminum on the multifunctional switch and drill the pilot hole for the screw. The aluminum doesn't have to be exactly against the broken off piece, but should be very close. It helps to place the broken off piece on the multifunctional switch and "feel" where it goes. The break marks should line up and should feel snug.
5.) Screw the aluminum piece to the multifunctional switch.

6.) Now obviously this isn't going to hold by itself so here's the secret, take some appoxy and saturate the back of the broken piece and the area that the broken piece and the aluminum touch. The more the better, just make sure that you do not get a large glob above the broken piece. The appoxy will fill the gaps between the broken piece and the aluminum giving the piece more strength than it had before.
7.) I would let the appoxy dry according to the instructions on the box and then put it all back together.
I've been using this fix for several weeks and it is working great for me. Hopefully it will help some people avoid having to pay the huge cost of a new switch, or buy a new steering column because its cheaper.
If you were unable to find the broken piece you may be able to recreate it with a piece of aluminum long enough to take the place of the broken piece. I would suggest mounting two screws across the plate to give it more stability.
Now for the fun part, how to rip apart the steering column, sorry I don't have any pics and am doing this from memory. This is for my '93 so it may be slightly different from other years.
1.) Using a T-27 torx bit find the two holes behind the steering wheel and undo the airbag screws. These screws will not come out, just loosen and the airbag should be able to be lifted off of the wheel. Then unplug the harness connector and set the airbag aside. DISCLAIMER: In all the manuals it says to disconnect the battery before removing the airbag to make sure that it will not go off, I have never done this, but have always been extra careful when handling this piece. I'll let you decide which is the best choice for you.
2.) Remove the Giant nut holding the steering wheel to the column. See the wire that goes to the horn buttons, the part that is going into the steering colun, push it in and turn to the left. Once this is out you can then get a harmonic balancer puller and some 4"x5/16" bolts to pull the steering wheel off. Thread the airbag wire through the steering wheel and set it off to the side.
3.) Using a pair of ring clip pliars, or several flat head screwdrivers, remove the ring clip that holds the yellow module on the steering column. Once the ring clip is off pull/pry the yellow module out and around the steering column nub and let it hang. You may have to pull prettyhard to get the wire to come with, do this carefully. There should be a small spacer ring, pull that off as well.
4.) You should be at the column lock mechanism. Get out a steering wheel installer tool and place it on the steering column. Depress the column lock mechanism. There is a big spring behind it so that should be possible to move it a bit. On the shaft you should see a small ring in a groove. Using a few flat head screw drivers get this ring off. I suggest using one screw driver to hold one end of the ring in place(pry it against the column lock mechanism), and using a second screw driver to pop the other end out. Then work the ring out the rest of the way. Remove the steering lock mechanism and the white slider plate behind it.
5.) Now you should be at the turn signal mechanism. Unscrew the one or two screws(depending on model) that hold the little black extension on the left and remove. Next take out the the three screws that hold in the turn signal mechanism. You will have to move the mechanism to get the upper right screw. It is easiest if you put the screw driver into the hole that the screw is in and push downward on the mechanism to get it to rotate. Pull this mechanism outward and let it hang out of the way.
6.) Remove the turn signal stick by grabbing it at its base, pushing it in slightly and rotating it counter clockwise. It took me several attempts to get this correct, but this is the method.
7.) From here you may be able to take out the multifunctional swith, but I continued dissassmbling. Remove the screw holding in the key lock. This screw does not have many turn on it, but will just sit there after a while, pull the screw out. Slide the key mechanism out and let it hang by the wires. You can tape it up somewhere if you feel uncomfortable about letting it hang.
8.) Remove the 3 Torx screws that hold the housing on. You should then be able to pull the column housing off and at this point you will definately be able to get the multifunctional switch out.
9.) On the multifunctional switch you will see a pin on which it rotates. Push this pin with a nail and it should slide out. Once you have good access to this switch then you should be able to make the proper modifications.
It seems that every once in a while the blinkers in our C4's break, I'm not sure about the early C4's but definately in the late C4's. Its an internal steering column break that lets the blinker turn on to the left but not to the right. This is because of a weak link in the part of the piece that the blinker stick plugs into. I'm not 100% sure of this parts name, but I believe its called a multifuntional switch or something like that. I was quoted $299.99 from the dealer for this part. I wasn't about to pay that much just for the part to have my blinkers fixed. You can possibly find a used switch from somewhere, but most people want to sell the steering column as a whole. So I came up with the following fix.
I applogize now for the bad spelling and blurry pictures, but you should be able to get the general idea of it all.
1.) Pull apart the steering column until you get to the multifunctional switch. (Detailed below)
You should be able to see the switch and hopefully locate the part that has broken off.
2.) Obtain a piece of 1/8" aluminum plate from your local hardware store (Home Depot, Lowes, etc....) You can use different thicknesses, but make sure that it is not thicker than the piect that has broken off. Cut this piece so that it is just wide enough to fit between the edges of the broke off piece. You'll want to make this piece about 1/2" long, just enough to keep it on the surface of the multifunctional switch.
3.) Next you want to find a short screw with a tapered head that will be just long enough to go through the aluminum and the multifunctional switch. I suggest a 1/4-3/8" screw depending on the aluminum size used. Next drill the hole in the center of the aluminum, but make it just wide enough for the tapered head not to go through at the top. You want the screw to be as flush as possible with the aluminum.
4.) The next step is to place the aluminum on the multifunctional switch and drill the pilot hole for the screw. The aluminum doesn't have to be exactly against the broken off piece, but should be very close. It helps to place the broken off piece on the multifunctional switch and "feel" where it goes. The break marks should line up and should feel snug.
5.) Screw the aluminum piece to the multifunctional switch.
6.) Now obviously this isn't going to hold by itself so here's the secret, take some appoxy and saturate the back of the broken piece and the area that the broken piece and the aluminum touch. The more the better, just make sure that you do not get a large glob above the broken piece. The appoxy will fill the gaps between the broken piece and the aluminum giving the piece more strength than it had before.
7.) I would let the appoxy dry according to the instructions on the box and then put it all back together.
I've been using this fix for several weeks and it is working great for me. Hopefully it will help some people avoid having to pay the huge cost of a new switch, or buy a new steering column because its cheaper.
If you were unable to find the broken piece you may be able to recreate it with a piece of aluminum long enough to take the place of the broken piece. I would suggest mounting two screws across the plate to give it more stability.
Now for the fun part, how to rip apart the steering column, sorry I don't have any pics and am doing this from memory. This is for my '93 so it may be slightly different from other years.
1.) Using a T-27 torx bit find the two holes behind the steering wheel and undo the airbag screws. These screws will not come out, just loosen and the airbag should be able to be lifted off of the wheel. Then unplug the harness connector and set the airbag aside. DISCLAIMER: In all the manuals it says to disconnect the battery before removing the airbag to make sure that it will not go off, I have never done this, but have always been extra careful when handling this piece. I'll let you decide which is the best choice for you.
2.) Remove the Giant nut holding the steering wheel to the column. See the wire that goes to the horn buttons, the part that is going into the steering colun, push it in and turn to the left. Once this is out you can then get a harmonic balancer puller and some 4"x5/16" bolts to pull the steering wheel off. Thread the airbag wire through the steering wheel and set it off to the side.
3.) Using a pair of ring clip pliars, or several flat head screwdrivers, remove the ring clip that holds the yellow module on the steering column. Once the ring clip is off pull/pry the yellow module out and around the steering column nub and let it hang. You may have to pull prettyhard to get the wire to come with, do this carefully. There should be a small spacer ring, pull that off as well.
4.) You should be at the column lock mechanism. Get out a steering wheel installer tool and place it on the steering column. Depress the column lock mechanism. There is a big spring behind it so that should be possible to move it a bit. On the shaft you should see a small ring in a groove. Using a few flat head screw drivers get this ring off. I suggest using one screw driver to hold one end of the ring in place(pry it against the column lock mechanism), and using a second screw driver to pop the other end out. Then work the ring out the rest of the way. Remove the steering lock mechanism and the white slider plate behind it.
5.) Now you should be at the turn signal mechanism. Unscrew the one or two screws(depending on model) that hold the little black extension on the left and remove. Next take out the the three screws that hold in the turn signal mechanism. You will have to move the mechanism to get the upper right screw. It is easiest if you put the screw driver into the hole that the screw is in and push downward on the mechanism to get it to rotate. Pull this mechanism outward and let it hang out of the way.
6.) Remove the turn signal stick by grabbing it at its base, pushing it in slightly and rotating it counter clockwise. It took me several attempts to get this correct, but this is the method.
7.) From here you may be able to take out the multifunctional swith, but I continued dissassmbling. Remove the screw holding in the key lock. This screw does not have many turn on it, but will just sit there after a while, pull the screw out. Slide the key mechanism out and let it hang by the wires. You can tape it up somewhere if you feel uncomfortable about letting it hang.
8.) Remove the 3 Torx screws that hold the housing on. You should then be able to pull the column housing off and at this point you will definately be able to get the multifunctional switch out.
9.) On the multifunctional switch you will see a pin on which it rotates. Push this pin with a nail and it should slide out. Once you have good access to this switch then you should be able to make the proper modifications.
 06-25-2012, 04:15 PM
#2


First off, I'd like to thank Brian for his work putting up this fix. I've gone through the process twice now and found it to be very helpful. I'd like to add a couple of things that might make things easier for anyone else making this modification. The first time I did it, I used tape to hold the broken piece in place while the glue dried. Unfortunately, when applying the tape, I move the broken piece so that it wasn't sitting flush at a 90 degree angle, so the glue job didn't hold very long when I put everything back together.
Also, the first time I did the job, I had a part fall out that transmits the motion at the end of the stalk to the high beam switch rod and it took me awhile to figure out how it fit back in the car and then a few hours of putting it in place over and over again, only to have it move while trying to put everything back together. This plastic piece is black and has a **** on one end and is curved on the other end. This curve mates to a curved metal rod that comes out of the steering column that is left after you take everything apart as described above. The rod can drop down and twist around pretty freely, so it is hard to get the rod and the plastic transmission to mate properly. Add to that the cover that has the two wire connecter attached to it that keeps the metal rod and plastic transmission piece from coming apart that has to go under the column as you put everything back together and you have a recipe for endless frustration. Use as much grease as you can to try to hold this plastic piece and metal rod in place while you maneuver the cover and column into position. Sorry, that's the best I could come up with. The second time around, it was much easier to get this right.
I couldn't get the turn signal stalk to come loose the second time, and managed to effect the repair with the stalk in place in case you have the same difficulty. You can take the gauge shroud off (two screws on either side of the steering wheel, one up top and one on the bottom) to gain more room around the base of the stalk. Just remember to put it back before you put the column back together or there won't be room to get it back into place.
I decided to make the second attempt a permanent repair without having to rely on the epoxy. I cut the aluminum tab as before except I made it resemble a T with the cross on the top of the T the same length and width as the piece that broke off. I then put the tab end in the vise and hit the cross at the top with a hammer to get it started bending over. As I hammered, I also moved the piece up in the vise until I got the desired 90degree bend. Then I hammered on the ends of the T until I very closely approximated the curve on the original piece. One thing that Brian didn't mention was that on my car, there was a piece of spring steel that went on the broken piece to give the rod that actuates the turn signal something to ride on besides the pot metal. I put this piece over the aluminum piece that I made and then added some epoxy after I screwed it onto the multifunction switch to hopefully keep it in place. The original piece had a 90 degree flange on top to keep the spring from coming off the top. I couldn't figure out a way to get a double 90 degree bend on the aluminum piece I made, so hopefully the epoxy will work to keep it from moving up enough to come off.
Everything else was pretty much the same. However, my shortest screw was still too long to fit where I needed it, so I ground the end off. I also scratched the pot metal surfaces under the new part and put a liberal amount of glue under it before I screwed it down. My guess is that this will continue to work as long as the original did.
I also took the plastic and metal underdash covers off to allow me to pull and push the wires from the bottom of the column to help with moving the various wired components out of the way. Good luck!