where to buy new C68 heater/ac control for 88
 01-18-2009, 05:00 PM
#1
Racer

Thread Starter
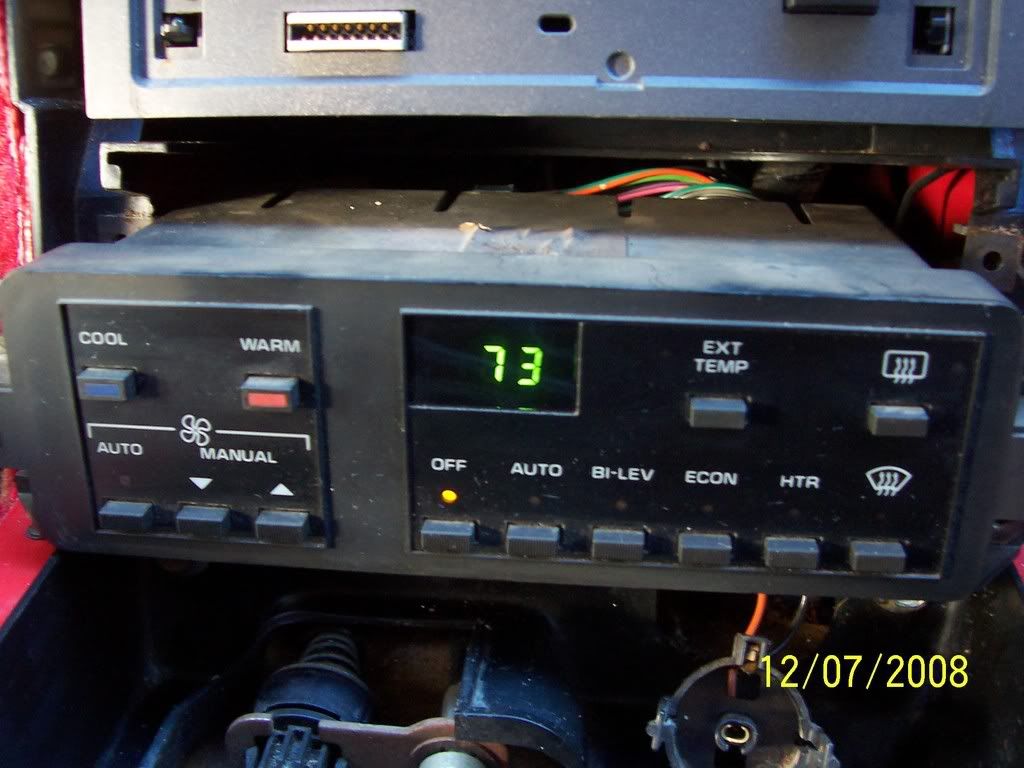
My heater controller on my dash (1988 C68) has finally gotten on my last nerve and I want to replace it. I took it out today with hopes of being able to take it apart and fix it. It turns out there aren't too many serviceable parts in these things. I suspect my problems are with the front controls because if I tap on them real hard the things sometimes start working again. What were the symptoms? The lights, leds, readout, etc would just go plain nuts. They would flash like disco lights and the digital display would show all manner of strange characters. Anyway, I probably took it a little too far apart and broke all the tiny little plastic points that hold the front buttons to the front circuit card.
I searched several of the common parts sites and see corvette america has the complete unit for $539 and Ecklers has a "face kit" for $99. I don't know if the face kit contains all the face parts since the one picture they have only shows the face and not the back.
Anyway, I don't want to pay $500 if I can get away with it, and I don't entirely trust Ecklers (bad history).
Any suggestions?
Thanks,
Ron
 01-18-2009, 09:05 PM
#2
Racer


I purchased a remanufactured unit from my local GM parts several years ago. For my 89, which I am pretty sure is the same as a 88, part #1228824. Price was about $100.00. Has worked perfectly.
Joel
Joel
01-18-2009, 09:19 PM
#3
Le Mans Master


When the head unit starts to drop/blink in and out usually there is a bad connection between the main PCB card to control head. Good news you might still be able to fix it yourself. Here are some repairs that I have performed in the past myself maybe they will help.
There are a few options that I know of for getting the C68 unit back on its feet again:
A Buy a "new" control unit for ~ $500 (GM stealership)
B Buy a "good used" control unit for ~ $200 (salvage yard/Fleabay)
C Fix your "old" unit yourself (~free -- if own a soldering iron already)
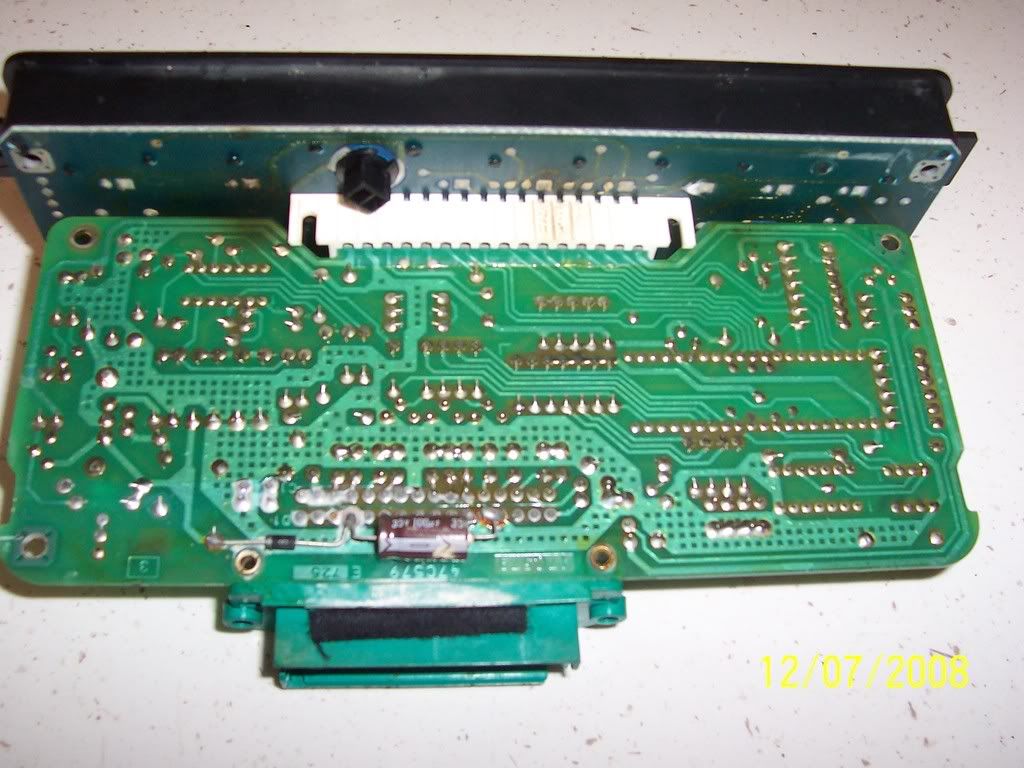
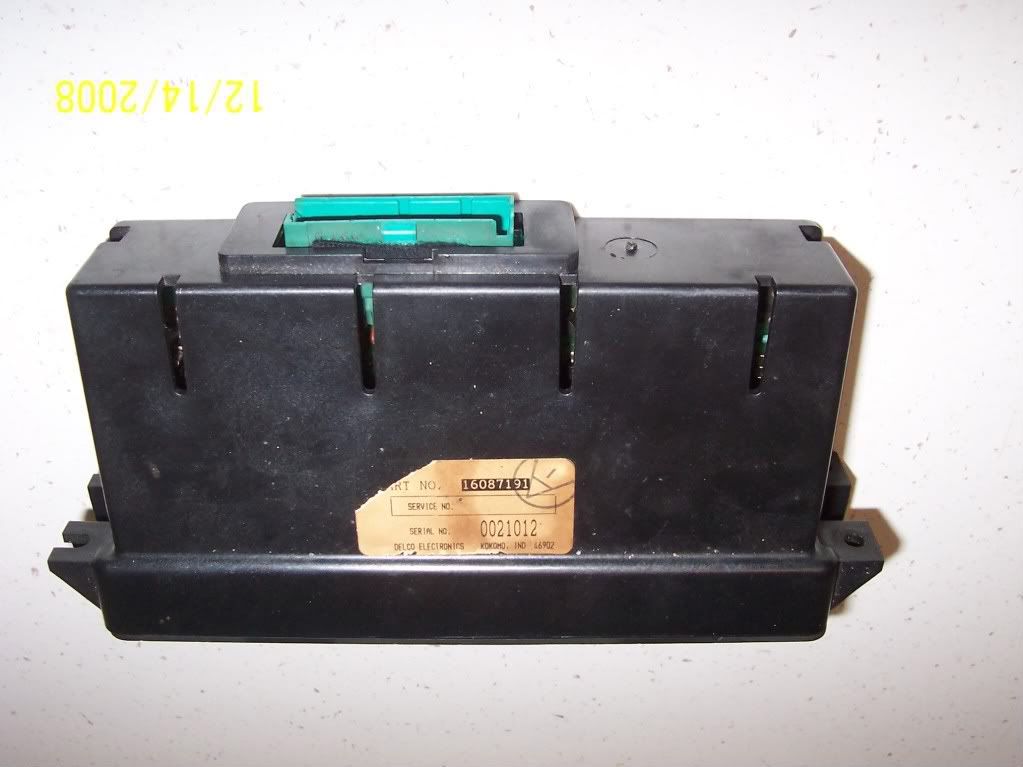
The C68 control heads have a problematic connector which is the main connection point for the biger PCB contact strip....the finger contacts inside big (white) connector is where your problem is most likely to be found. The unit directly below has been removed from the housing but is unmodified.
Unit breakdown/repair: It is always a good idea to use a ground strap or ground work station while working on electronic devices this is done to prevent damage from static electricity.
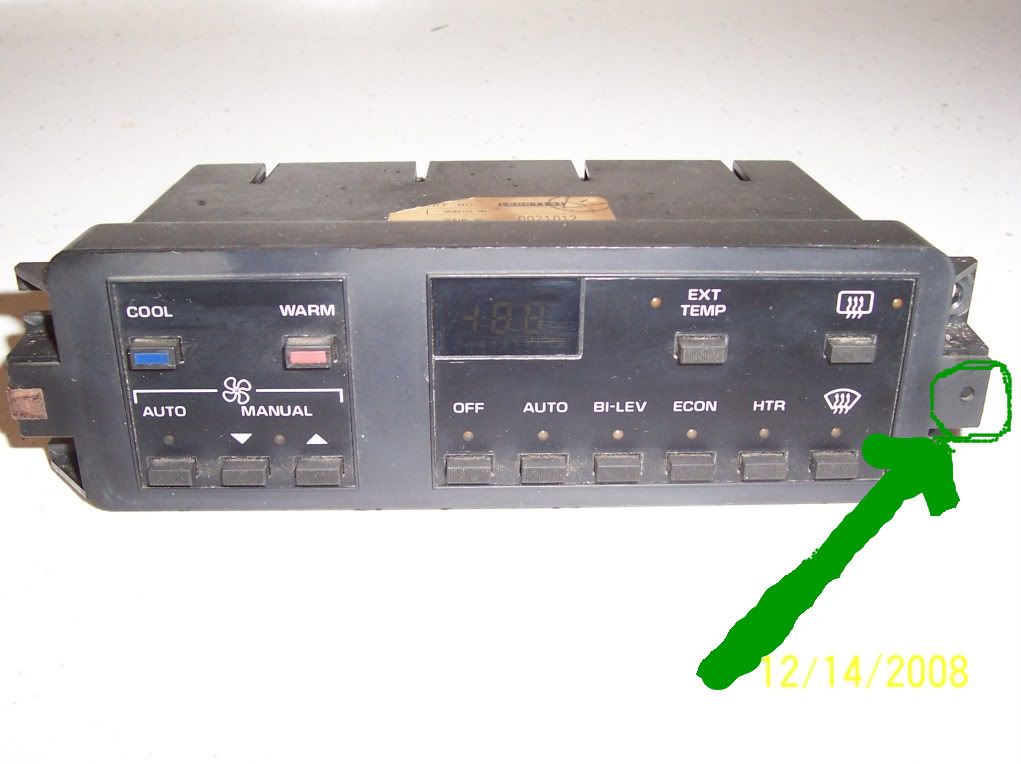
Remove the 2 clips from the sides of unit (leave the faceplate connected at this point)by prying them off with a small screwdriver.
Now slightly pull the plastic tabs (black) away on each side of the case while pushing the (green) connector in the direction of the faceplate and the main PCB card will slide out the front of the case.
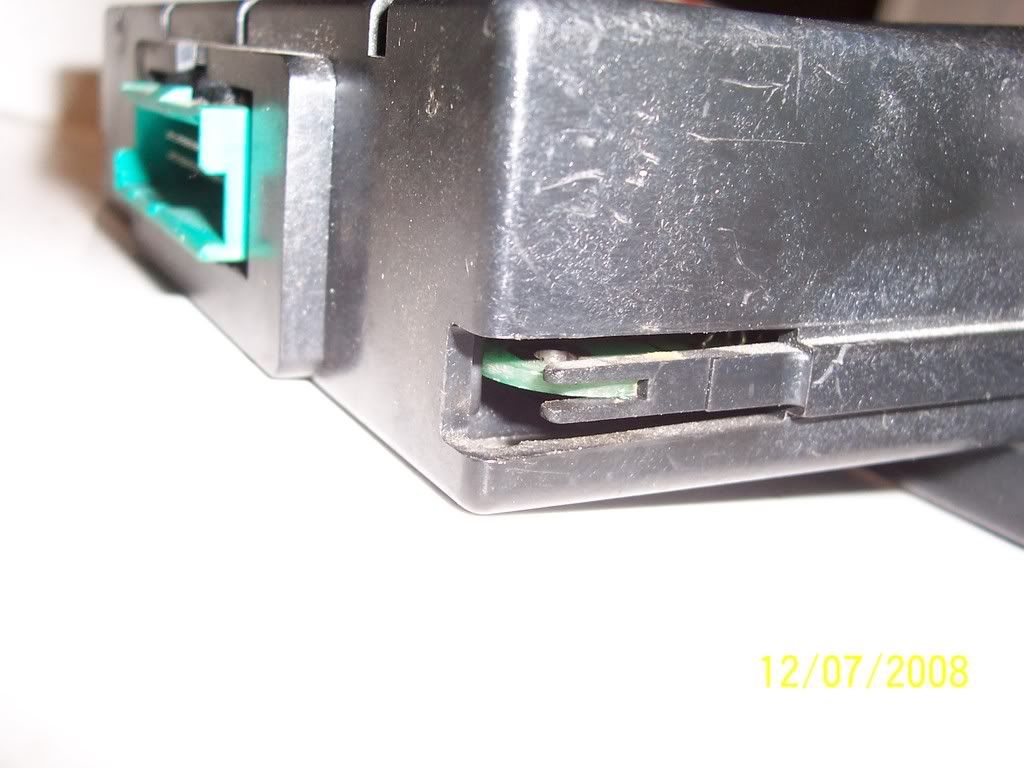
Seperate the head from the main PCB card pull the card away from the back of control head.
Now for the repair:
You have a couple methods which you can choose from. Choose the method you feel most comfortable with.
Method #1: Clean the contact points on the PCB card with an appropriate cleaner or pencil eraser (see pic below)
Method #2: Tin each contact point on the PCB card using a minimal amont of solder (see pic below). The added solder will provide a little extra pressure at the contact points.

Method #3: Remove the (white) connector cover from head unit and solder the connectors directly to the PCB card. Note: before removing/cutting off the white connector cover measure the gap between the PCB and the head's PCB. You will need to reproduce this gap before you solder the connector to the PCB card...the gap allows the unit's back green connector to be exposed enough to that you can plug the harness connector back into the unit. The white connector cover can be remove with little trouble if you attack it at each end it is held in place by black plastic pins. Now the contact fingers can be soldered to the PCB directly see pics below. Position the connector and card where you want them to be and heat up the connector pins and flow some solder between them to form a joint. Note: There are 2 different units pictured here one is an '88 (all stock no mods) and one is and '89 - the unit without the white clip is soldered to the PCB card this unit is an '89. This '89 unit has had no issues what-so-ever and performs as it should since my origional repair over 8 years ago.

Final thought....if you have the unit broken down to this level go ahead and replace the 3 light bulbs for the back lighting. Reassemble the unit.
Don't worry if all the button pieces fell out when you to took the face plate off you can just put all the parts back in there and it will be fine.....the clips on the sides of the unit will hold all the loose stuff in place.
Shoot me a PM if you have questions.

There are a few options that I know of for getting the C68 unit back on its feet again:
A Buy a "new" control unit for ~ $500 (GM stealership)
B Buy a "good used" control unit for ~ $200 (salvage yard/Fleabay)
C Fix your "old" unit yourself (~free -- if own a soldering iron already)
The C68 control heads have a problematic connector which is the main connection point for the biger PCB contact strip....the finger contacts inside big (white) connector is where your problem is most likely to be found. The unit directly below has been removed from the housing but is unmodified.
Unit breakdown/repair: It is always a good idea to use a ground strap or ground work station while working on electronic devices this is done to prevent damage from static electricity.
Remove the 2 clips from the sides of unit (leave the faceplate connected at this point)by prying them off with a small screwdriver.
Now slightly pull the plastic tabs (black) away on each side of the case while pushing the (green) connector in the direction of the faceplate and the main PCB card will slide out the front of the case.
Seperate the head from the main PCB card pull the card away from the back of control head.
Now for the repair:
You have a couple methods which you can choose from. Choose the method you feel most comfortable with.
Method #1: Clean the contact points on the PCB card with an appropriate cleaner or pencil eraser (see pic below)
Method #2: Tin each contact point on the PCB card using a minimal amont of solder (see pic below). The added solder will provide a little extra pressure at the contact points.
Method #3: Remove the (white) connector cover from head unit and solder the connectors directly to the PCB card. Note: before removing/cutting off the white connector cover measure the gap between the PCB and the head's PCB. You will need to reproduce this gap before you solder the connector to the PCB card...the gap allows the unit's back green connector to be exposed enough to that you can plug the harness connector back into the unit. The white connector cover can be remove with little trouble if you attack it at each end it is held in place by black plastic pins. Now the contact fingers can be soldered to the PCB directly see pics below. Position the connector and card where you want them to be and heat up the connector pins and flow some solder between them to form a joint. Note: There are 2 different units pictured here one is an '88 (all stock no mods) and one is and '89 - the unit without the white clip is soldered to the PCB card this unit is an '89. This '89 unit has had no issues what-so-ever and performs as it should since my origional repair over 8 years ago.
Final thought....if you have the unit broken down to this level go ahead and replace the 3 light bulbs for the back lighting. Reassemble the unit.
Don't worry if all the button pieces fell out when you to took the face plate off you can just put all the parts back in there and it will be fine.....the clips on the sides of the unit will hold all the loose stuff in place.
Shoot me a PM if you have questions.
 01-21-2009, 09:11 AM
#5
Le Mans Master
Get a hold of C4 that is being parted out and buy all the parts at once...instead of buy individual components....this would most likely be the cheaper route.


 04-28-2009, 09:20 PM
#8
The PO replaced the head of the controller a couple of years ago.
And when I have it set to Auto, and temp on 75, it blows fine. But when I raise the temp to 90 when in Auto, it goes into defrost. Any ideas?
Has anyone put any vacuum line cleaner into the HVAC lines? I figured that wouldn't hurt.
And when I have it set to Auto, and temp on 75, it blows fine. But when I raise the temp to 90 when in Auto, it goes into defrost. Any ideas?
Has anyone put any vacuum line cleaner into the HVAC lines? I figured that wouldn't hurt.
04-28-2009, 09:45 PM
#9
Le Mans Master
The PO replaced the head of the controller a couple of years ago.
And when I have it set to Auto, and temp on 75, it blows fine. But when I raise the temp to 90 when in Auto, it goes into defrost. Any ideas?
Has anyone put any vacuum line cleaner into the HVAC lines? I figured that wouldn't hurt.
And when I have it set to Auto, and temp on 75, it blows fine. But when I raise the temp to 90 when in Auto, it goes into defrost. Any ideas?
Has anyone put any vacuum line cleaner into the HVAC lines? I figured that wouldn't hurt.
04-28-2009, 10:22 PM
#10
I don't see the need for cleaner in the vacuum lines for the AC. From what your describing it doesn't sounds like the head unit an issue unless one or more of your buttons are stuck in. You might want to take a look a the programer under the driver side hush panel. Sometimes simply cleaning and reseating the connector contacts on the programmer will resolve intermittent issues such as what your experiencing.
I know the controller faceplate has been replaced a few years ago. I've got the controller pulled. I'm gonna clean it again and make sure everything looks okay and put it back in.
04-28-2009, 10:33 PM
#11
Le Mans Master
I did do that a while back. I resoldered some of the contacts on the programmer too. I guess I could pull it again.
I know the controller faceplate has been replaced a few years ago. I've got the controller pulled. I'm gonna clean it again and make sure everything looks okay and put it back in.
I know the controller faceplate has been replaced a few years ago. I've got the controller pulled. I'm gonna clean it again and make sure everything looks okay and put it back in.
04-28-2009, 10:38 PM
#12
04-28-2009, 11:08 PM
#13
Le Mans Master


http://forums.corvetteforum.com/c4-t...-question.html
Nor are all the Years interchangeable and the Coupe and Convertibles can have differences as well as those that have heated mirrors. As suggested, find a donor if you want to tackle this and get a Shop Manual with correct schematics because even the compressor is going to have to be rewired.
09-01-2011, 12:18 PM
#15
Le Mans Master
 09-02-2011, 10:25 AM
#17
Le Mans Master
 that is a pretty fair price and perhaps a good alternative (backed by an established company) for those who are timid to repair their own electronics.
09-03-2011, 01:00 PM
that is a pretty fair price and perhaps a good alternative (backed by an established company) for those who are timid to repair their own electronics.
09-03-2011, 01:00 PM
#18

maybe I missed it... When you work over those contact if you don't solder them reach in there and bend the contact fingers up.
The board warps and the contact are intermittant. The problem had been around for 10 or 15 yrs.
JS
The board warps and the contact are intermittant. The problem had been around for 10 or 15 yrs.
JS
09-09-2011, 06:26 PM
#19
Le Mans Master


Member Since: Mar 2002
Location: Castro Valley Calif.
Posts: 5,884
Likes: 0
Received 2 Likes
on
1 Post
St. Jude Donor '03-'04-'05-'06-'07-'08-'09-'10-'11-'12-'13-'14-'15-'16-'17-'18-'19-'20-'21-'22
'23-'24


I don't see anything about a C68 repair on their website. Do you need to call them or am I just missing something?
09-09-2011, 06:43 PM
#20
Race Director

Glad to see you do like to look for more economical solutions!
FWIW...Are you sure CC doesn't do their repairs onsite? At least in the past, they made more [aftermarket] parts themselves than other Corvette retailers. (Unless it was body parts -- which are specialized elsewhere.)
They also pay more money in advertising and to be a visible member of this forum. That would justify at least part of the price difference.
BTW: I know CC is a forum vendor. Not sure about the repair facility. Though I believe you can reference non-vendor facilities, you're not supposed to link directly to them....
Originally Posted by CorvetteForumRules
Linking to other Corvette sites is not permitted. Neither is linking to non-supporting vendors.
Last edited by GREGGPENN; 09-10-2011 at 08:07 PM.