Del-A-Lum Upper Control Arm Bushing Install w/ Photos
 11-07-2009, 09:57 PM
#1
Drifting

Thread Starter

There are not too many posts of this so I thought I'd oblige 
I performed the assembly and put them in the car today
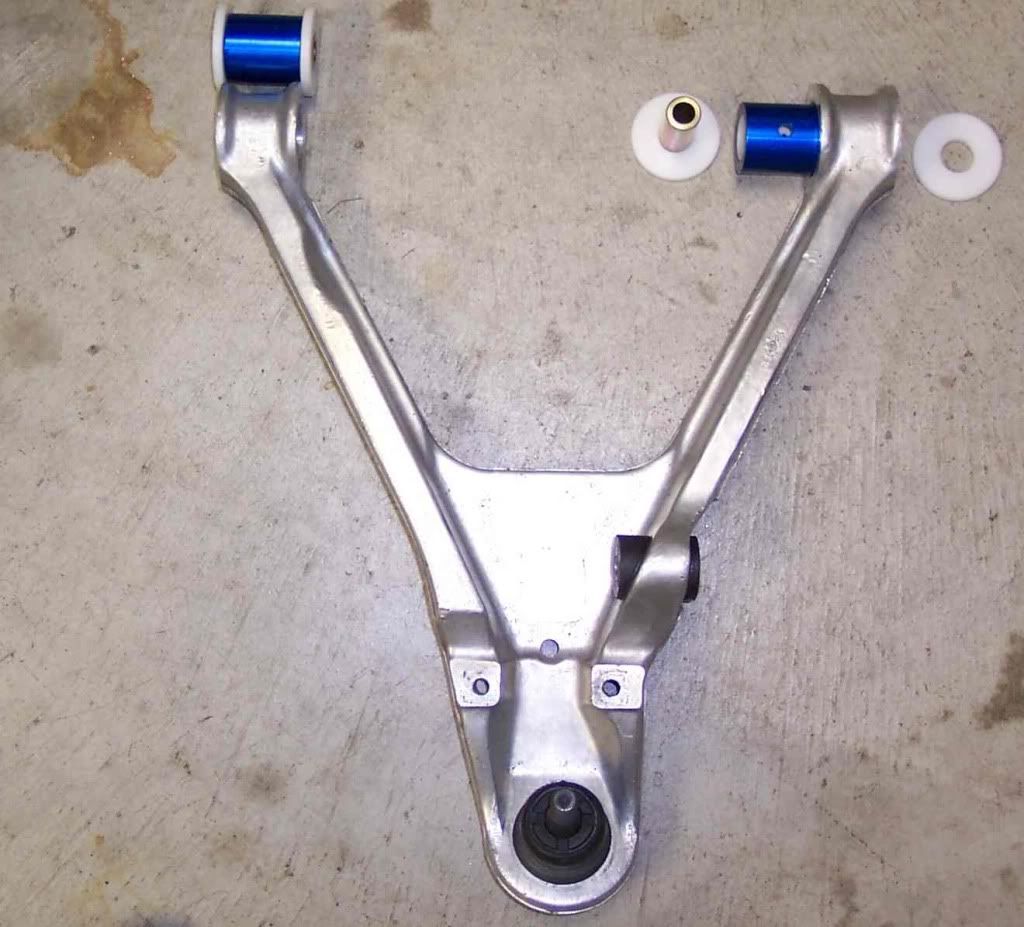
Fitting up the inside bushings...there are an assortment of three different pairs of inside plastic bushings that you mix to get a snug fit. Note the steel washers are on the outside to check fitup.
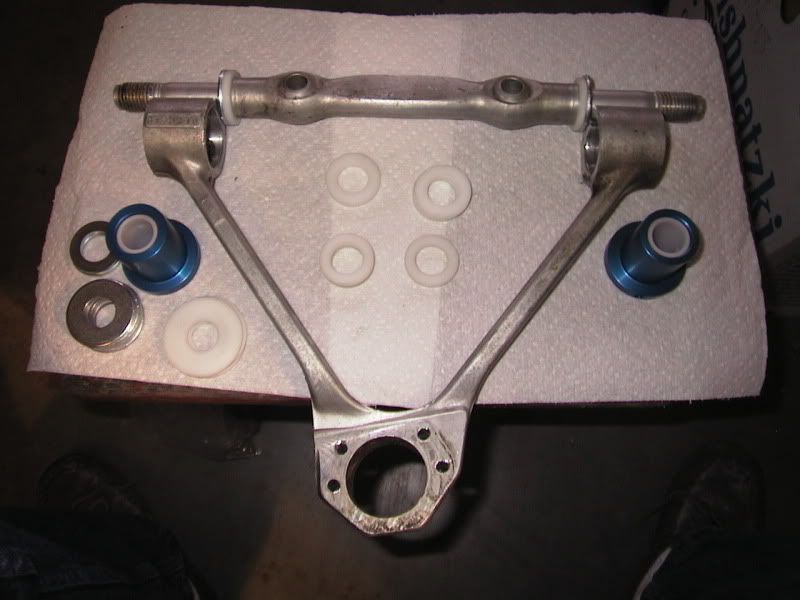
This is a shot to show the difference in the interior bushing thickness supplied.
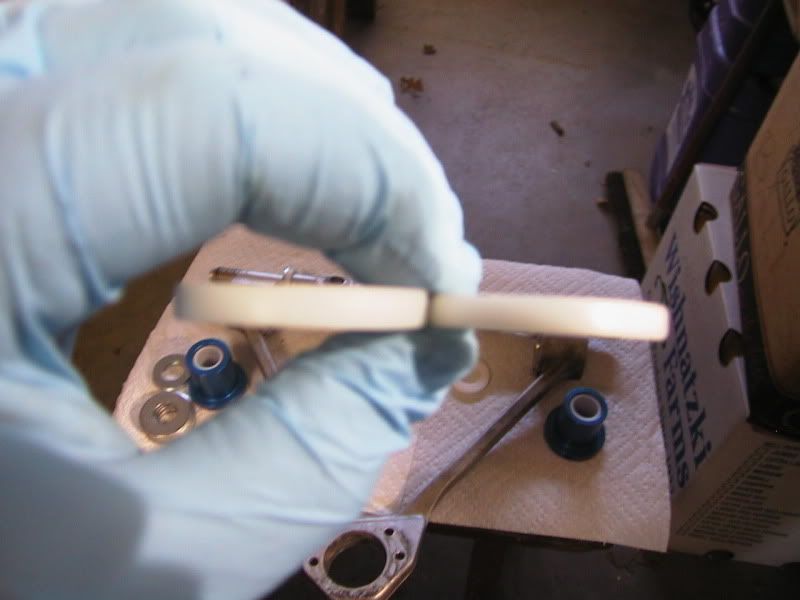
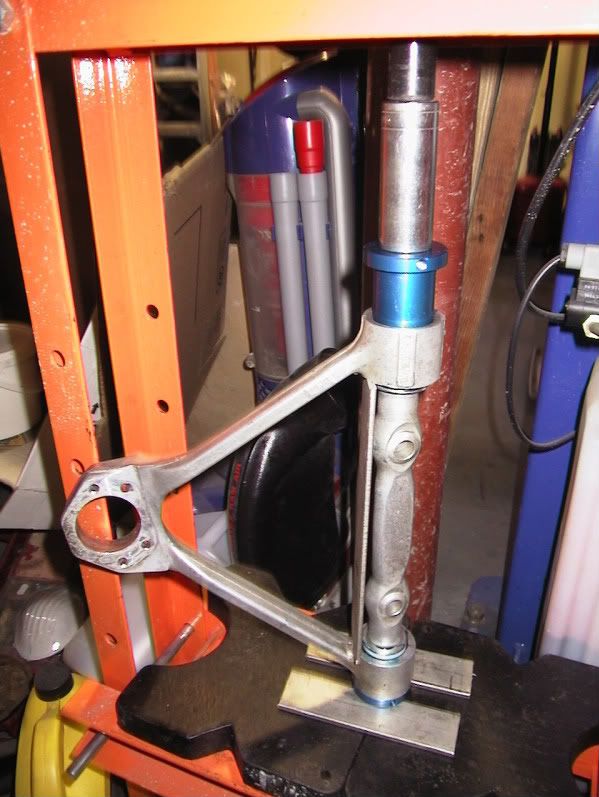
I cut off the ends of the old control arm shaft that was damaged and used it as a pressing tool to press in the small bushing...see the next photo.
You press in the small end bushing first. I lightly greased the inside of the arm and the exterior of the blue aluminum bushing prior to pressing the bushings in. This is the set up ready to press the small bushing in.
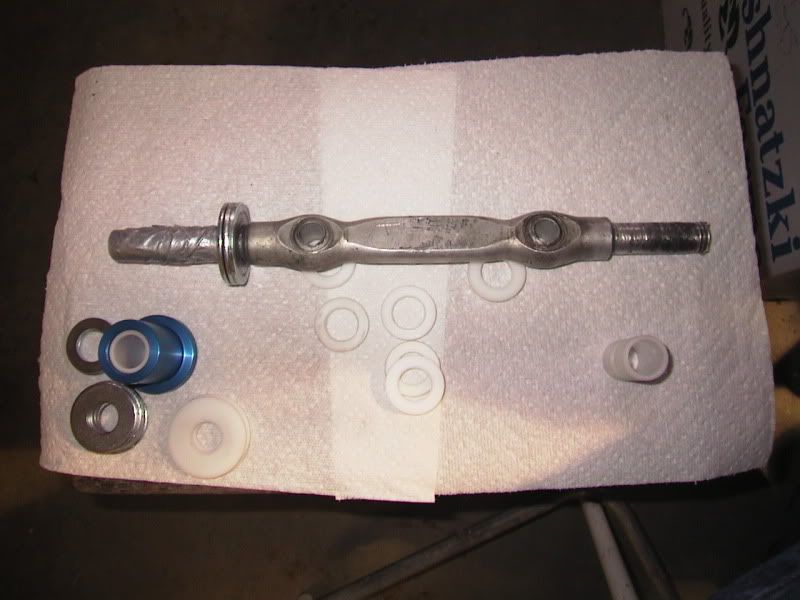
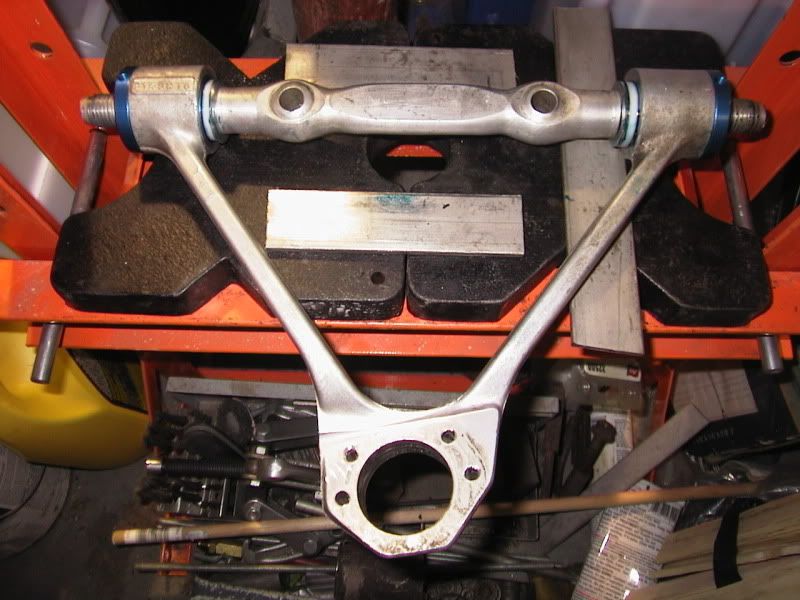
Prior to installing the large bushing, the inner steel and plastic washers must be greased and installed on the new control arm shaft. The steel washers go on the inside and the plastic against the pressed in bushing in the arm. This is the set up ready to press in the large end bushing. Note the SS flat bar adjacent the shaft that is used to prevent the control arm from being compressed.
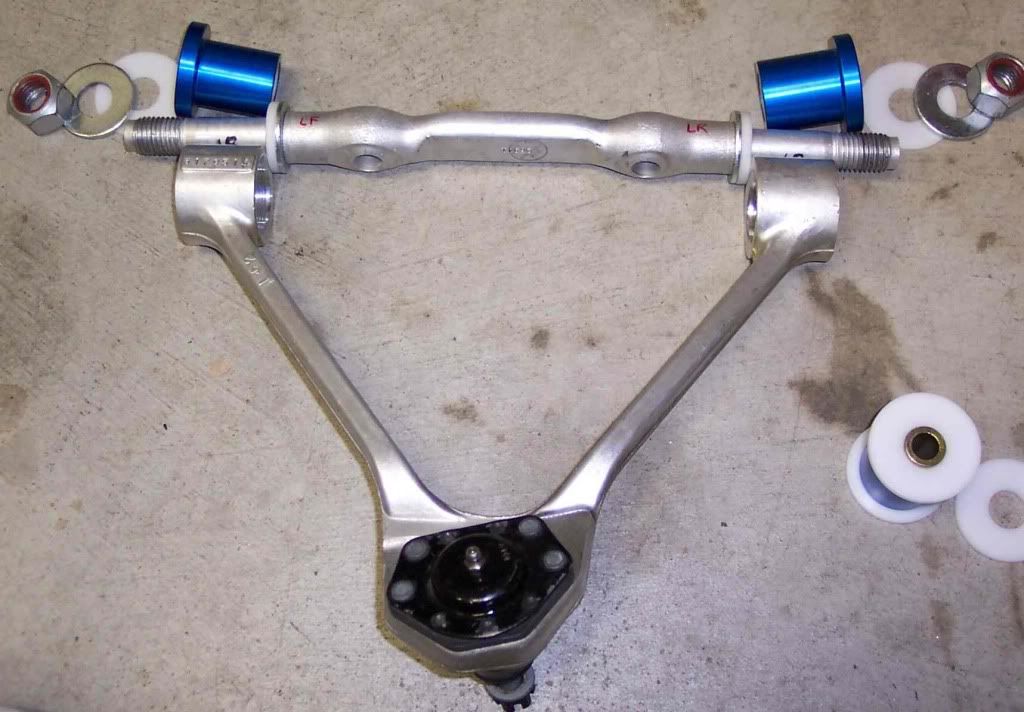
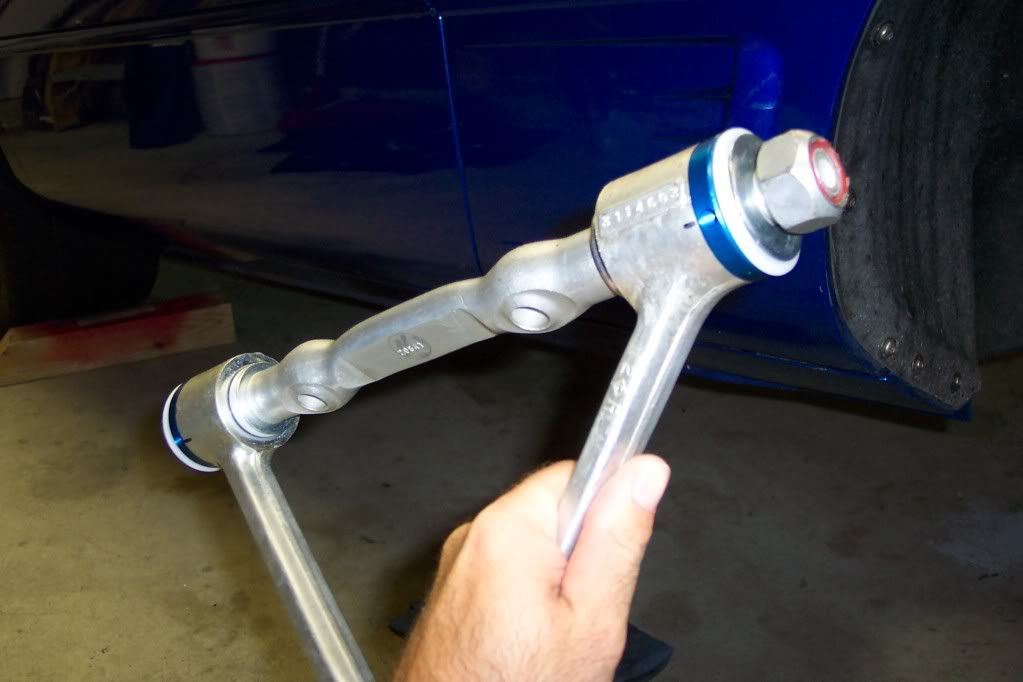
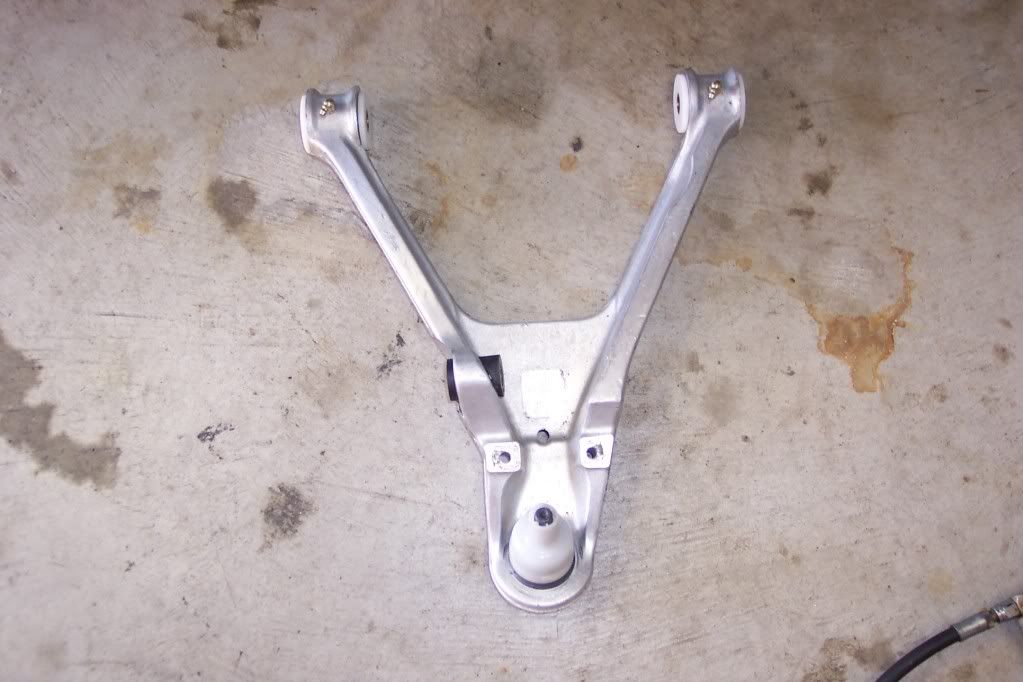
This is the assembled arm just waiting for the outer washers, nuts and grease fittings. Note how the threaded holes for the grease fittings are oriented to be upright when the arms are installed in the car.
I'll post some additional photos of the assembled arms in the car when I get a chance.
I performed the assembly and put them in the car today
Fitting up the inside bushings...there are an assortment of three different pairs of inside plastic bushings that you mix to get a snug fit. Note the steel washers are on the outside to check fitup.
This is a shot to show the difference in the interior bushing thickness supplied.
I cut off the ends of the old control arm shaft that was damaged and used it as a pressing tool to press in the small bushing...see the next photo.
You press in the small end bushing first. I lightly greased the inside of the arm and the exterior of the blue aluminum bushing prior to pressing the bushings in. This is the set up ready to press the small bushing in.
Prior to installing the large bushing, the inner steel and plastic washers must be greased and installed on the new control arm shaft. The steel washers go on the inside and the plastic against the pressed in bushing in the arm. This is the set up ready to press in the large end bushing. Note the SS flat bar adjacent the shaft that is used to prevent the control arm from being compressed.
This is the assembled arm just waiting for the outer washers, nuts and grease fittings. Note how the threaded holes for the grease fittings are oriented to be upright when the arms are installed in the car.
I'll post some additional photos of the assembled arms in the car when I get a chance.


 11-08-2009, 04:12 AM
#4
Melting Slicks

wow, this is great! Who was the supplier for te del-a-lum? Great alternative to the previous nightmare.
You got to fill us in on the feel after install as well!
You got to fill us in on the feel after install as well!


 11-08-2009, 08:25 PM
#7
Drifting
Thread Starter
I'll be doing my 92 mile round trip to Manhattan tomorrow morning....will post the results tomorrow.
Should just be nice and crisp again
Remember, I still have the urethanes on the lowers
Should just be nice and crisp again
Remember, I still have the urethanes on the lowers
11-08-2009, 09:41 PM
#8
Tech Contributor
I have these as well. They're made by Global West. Not sure of the cost these days, used to be around $300 total for the uppers & lowers.
Handling is much improved, as is feel. When I did mine, I also did poly for the sway bars, and a few other things. On a road course, the feel was night and day. The ride is a more harsh but not unreasonable and frankly it never bothered me.
Handling is much improved, as is feel. When I did mine, I also did poly for the sway bars, and a few other things. On a road course, the feel was night and day. The ride is a more harsh but not unreasonable and frankly it never bothered me.
 11-09-2009, 08:28 PM
#10
Drifting
Thread Starter
Drove like a dream
No harshness that I can tell, but it handles very well.
Directional changes are virtually instantaneous, and I have urethanes everywhere else
I purchased my uppers direct from Globalwestperformance.com this is a copy of the actual order:
1984-96 Corvette Front GWS-1059 1 154.99
upper arm Del-a-lum
bushings
Subtotal 154.99
Shipping 25.22 (3 day UPS Saver)
Tax 0.00
Total 180.21
11-09-2009, 10:45 PM
#11
Le Mans Master

Member Since: Oct 2007
Location: Akron Ohio
Posts: 8,849
Received 1,716 Likes
on
928 Posts
2023 C5 of the Year Finalist - Modified
2022 C5 of the Year Finalist - Modified
St. Jude Donor '09-'10-'11

Very nice! I have heard good things about these and will be installing them on mine soon.
96GS#007, I notice the lowers appear to have a hole for a grease fitting that is not in the control arm? Did you have to drill for one?
96GS#007, I notice the lowers appear to have a hole for a grease fitting that is not in the control arm? Did you have to drill for one?
 11-10-2009, 01:55 AM
#13
Tech Contributor

 11-10-2009, 12:24 PM
#16
Tech Contributor
I've had them for many years and don't remember. I'm sure the guys at Global West could answer.

 11-10-2009, 08:35 PM
#18
Drifting
Thread Starter
Look at this link to see a photo of the the bushing kit:
http://ep.yimg.com/ca/I/yhst-5787474..._2076_19573410
Last edited by 95BLKVette; 11-10-2009 at 08:42 PM.
11-28-2009, 09:41 AM
#19
Drifting
Member Since: Sep 2002
Location: Suwanee,Ga
Posts: 1,642
Likes: 0
Received 0 Likes
on
0 Posts
Al a couple questions. I just installed a set, yesterday, uppers only so far.
1. Did you install the Derlin bearings AFTER installing the Al. bushings?
2. How stiff was the fit. I can barely move my upper arm? Haven't fully greased them via the fittings, but the stiction is fierce and I expected the opposite?
TJM
1. Did you install the Derlin bearings AFTER installing the Al. bushings?
2. How stiff was the fit. I can barely move my upper arm? Haven't fully greased them via the fittings, but the stiction is fierce and I expected the opposite?
TJM
11-28-2009, 10:51 AM
#20
Drifting
Thread Starter
I manually greased the delrin inserts and installed them prior to pressing in the aluminum replacement bushing inserts.
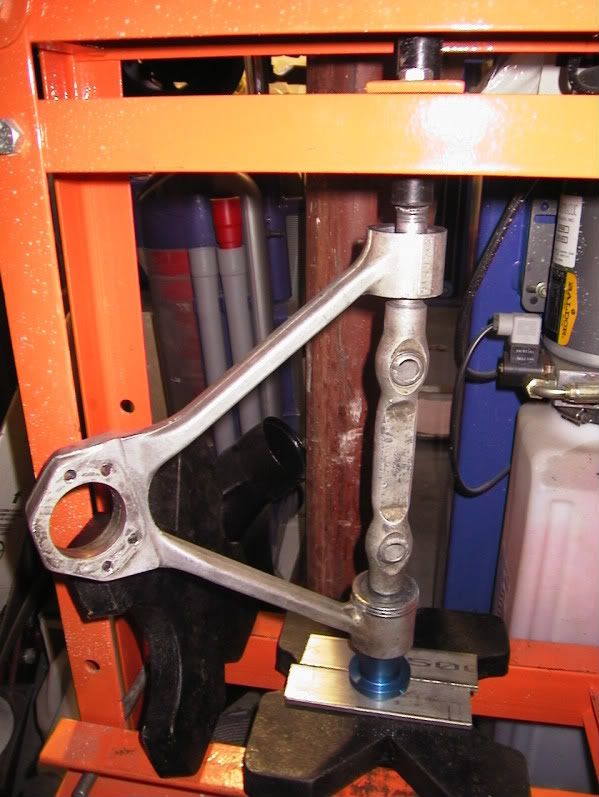
It is very important to also inert a support beteen the arms (see my photo of temporary strut installed between arms) prior to doing the second insert install or you will spring the A arm and cause a permanent misalignment which can cause binding.
Prior to torquing the end nuts to 10 ft-lbs, I made sure everything was well greased. I then worked the arms up and down to loosen them up and get the grease flowing, then retorqued the arms and then drilled the holes for the cotter pin install.
After installing the cotter pins, the arms did have some resistance, but basically were pretty readily moved up and down without excessive force.
Hope this helps.
BTW, just checked how they look in the car and they are a thing of beauty....some of the best $'s I've spent

