Pwnage's 383 Build (Pics!!)
 10-12-2010, 10:06 PM
#41
Safety Car

Thanks! This post is VERY useful. Time to hit the garage!
You do nice work with a grinder btw, holy ****.
Edit: Another thing,
how am I going to be able to tell how much to clearance? If i set the crank in, I can't really mock up the rods because the rods are connected to the pistons and the pistons are .030 over. Would I have to have the pistons removed? A lot of the shops I've called around here don't know about clearancing the oil pan rails or the cylinders so it is something I am going to have to do myself
You COULD remove 1 piston but then you would have to take a bunch of time to hold the rod just at the right angle over and over again and it's a real PITA to do it that way.... Plus you almost always end up grinding too much or not enough because you never have the rod angle correct.
That bulkhead your grinding on down there is not very thick in some places and the last thing you want to do is hit the water jacket and destroy a 4 bolt block.
I've been doing this a very long time. If there is one thing I know - its that there are many ways to accomplish this. My explanation is just the way I feel would be best/safest for you.
Will
Last edited by rklessdriver; 10-12-2010 at 10:09 PM.
 10-12-2010, 11:07 PM
#42
Tech Contributor
Thread Starter
Since this is your first time I would suggest you have the block cleaned and bored/honed. Tell the shop NOT to install the cam brgs. Then do your rod clearance work on the lower bulkhead. Once your all finished have the block final cleaned and the cam brgs installed.
You COULD remove 1 piston but then you would have to take a bunch of time to hold the rod just at the right angle over and over again and it's a real PITA to do it that way.... Plus you almost always end up grinding too much or not enough because you never have the rod angle correct.
That bulkhead your grinding on down there is not very thick in some places and the last thing you want to do is hit the water jacket and destroy a 4 bolt block.
I've been doing this a very long time. If there is one thing I know - its that there are many ways to accomplish this. My explanation is just the way I feel would be best/safest for you.
Will
10-13-2010, 12:46 AM
#43
Tech Contributor
Thread Starter
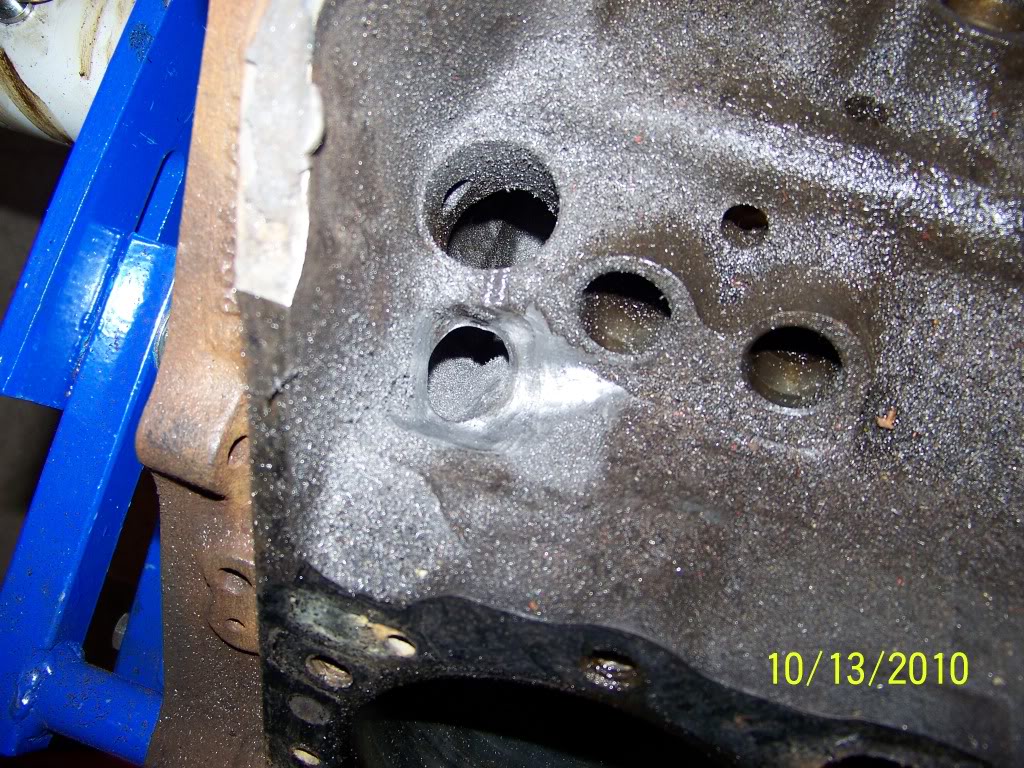
Started blending the rear main cap oil pump feed. Couldn't get much done. Drill died and the air compressor is being used at a job site (dad does ceramic tile), I will finish it tomorrow.
Before: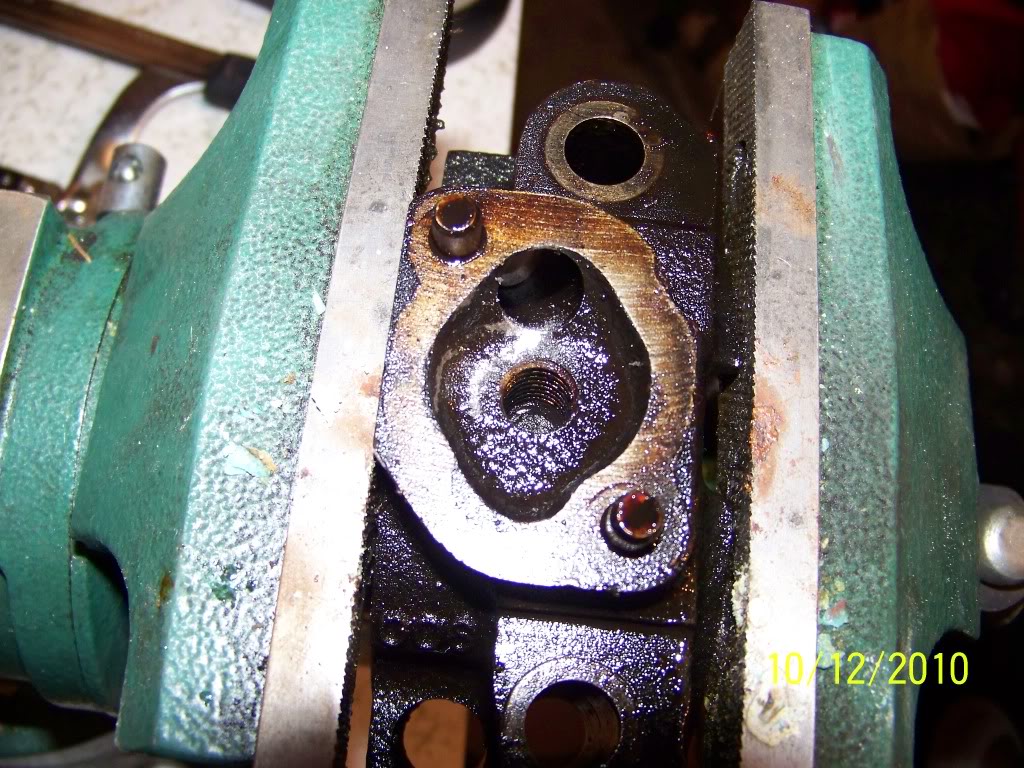
After:
Its hard to snap a good photo of it, but it is much smoother than before, the ridge is gone
Before:
After:
Its hard to snap a good photo of it, but it is much smoother than before, the ridge is gone
10-13-2010, 10:08 AM
#44
Racer


Those pics should help a lot - the oil drainback is a little overkill but what the heck - if you've got time and you're not paying a machine shop to do it 
When mocking up for clearance - see if you can find someone with a stock bore piston/rod that they don't need (or only have 6 of because they threw a rod ) that might get you close enough - remove the rings and even though the piston will come out of the bore because of the longer stroke it will at least place the rod where it will be running when near the pan rail and cylinder skirt - you really don't want to do any grinding on it AFTER it's fully cleaned and if you had to get it back from the machine shop between procedures then I don't know if it's really worth it and might just pay the machine shop.
Since you're having problems locating a good one - Have you gone to the local drag strip or circle track and asked for a machine shop?
When mocking up for clearance - see if you can find someone with a stock bore piston/rod that they don't need (or only have 6 of because they threw a rod
) that might get you close enough - remove the rings and even though the piston will come out of the bore because of the longer stroke it will at least place the rod where it will be running when near the pan rail and cylinder skirt - you really don't want to do any grinding on it AFTER it's fully cleaned and if you had to get it back from the machine shop between procedures then I don't know if it's really worth it and might just pay the machine shop.Since you're having problems locating a good one - Have you gone to the local drag strip or circle track and asked for a machine shop?
10-13-2010, 01:26 PM
#45
Tech Contributor
Thread Starter
Those pics should help a lot - the oil drainback is a little overkill but what the heck - if you've got time and you're not paying a machine shop to do it
When mocking up for clearance - see if you can find someone with a stock bore piston/rod that they don't need (or only have 6 of because they threw a rod ) that might get you close enough - remove the rings and even though the piston will come out of the bore because of the longer stroke it will at least place the rod where it will be running when near the pan rail and cylinder skirt - you really don't want to do any grinding on it AFTER it's fully cleaned and if you had to get it back from the machine shop between procedures then I don't know if it's really worth it and might just pay the machine shop.
Since you're having problems locating a good one - Have you gone to the local drag strip or circle track and asked for a machine shop?
When mocking up for clearance - see if you can find someone with a stock bore piston/rod that they don't need (or only have 6 of because they threw a rod
) that might get you close enough - remove the rings and even though the piston will come out of the bore because of the longer stroke it will at least place the rod where it will be running when near the pan rail and cylinder skirt - you really don't want to do any grinding on it AFTER it's fully cleaned and if you had to get it back from the machine shop between procedures then I don't know if it's really worth it and might just pay the machine shop.Since you're having problems locating a good one - Have you gone to the local drag strip or circle track and asked for a machine shop?
Local dragstrip is in kakauna, which is a good trip. the closest circle track is closed for the season.
 There are a few people around here with a good head on their shoulders about cars, one of them i talked to recommended the first shop i was going to go to. I don't think they like listening to me because I am young and they probably think I am talking out of my *** when i say things to them like "i want to build a stroker"
 10-13-2010, 01:48 PM
#47
Safety Car

I can see you slipped a few times.... Be careful around the lifter bore and dizzy support... Let the carbide burr do the work. You shouldn't have to push too hard.
Will
10-13-2010, 01:51 PM
#48
Team Owner


Member Since: Oct 2004
Location: altered state
Posts: 81,242
Received 3,043 Likes
on
2,602 Posts
St. Jude Donor '05

Like to do that to the heads also dont get too crazy with it though just enough so it pools up under the valve cover less. Do the rear a little more than the front as most runs back there anyway.
 10-13-2010, 02:07 PM
#50
Tech Contributor
Thread Starter
OK thanks for the advice. Its hard not to slip when i am bent over like the hunchback of notre dame for 10 minutes 
Here is a picture of the main cap
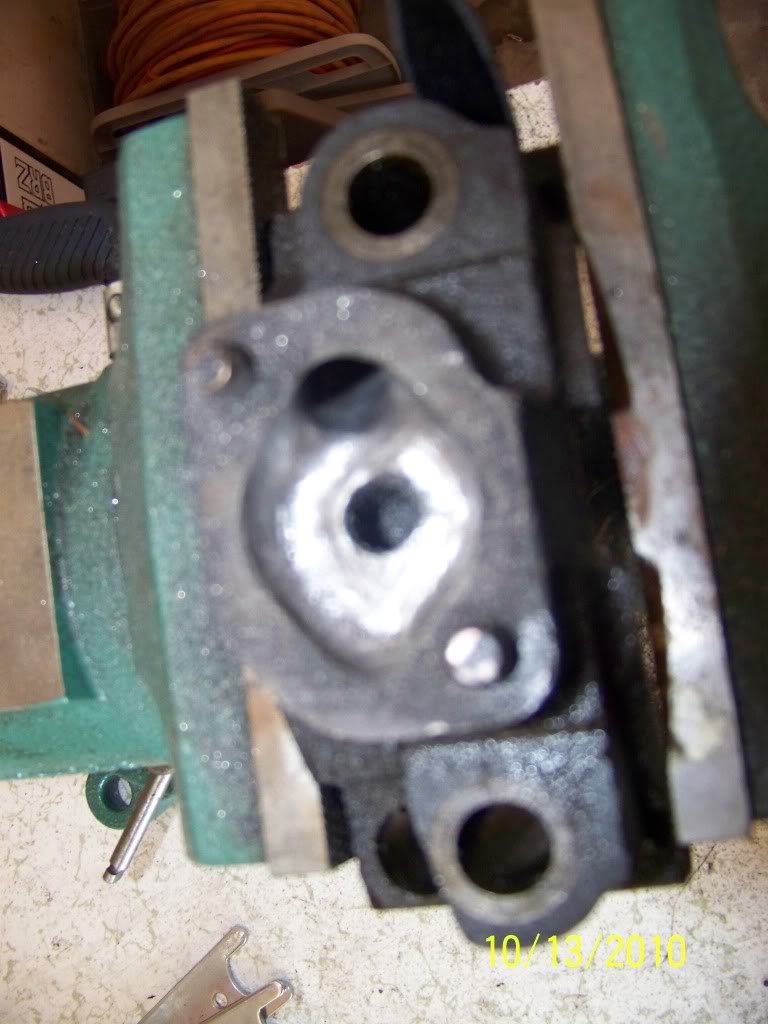
My sister snapped this of me being the hunchback. lol
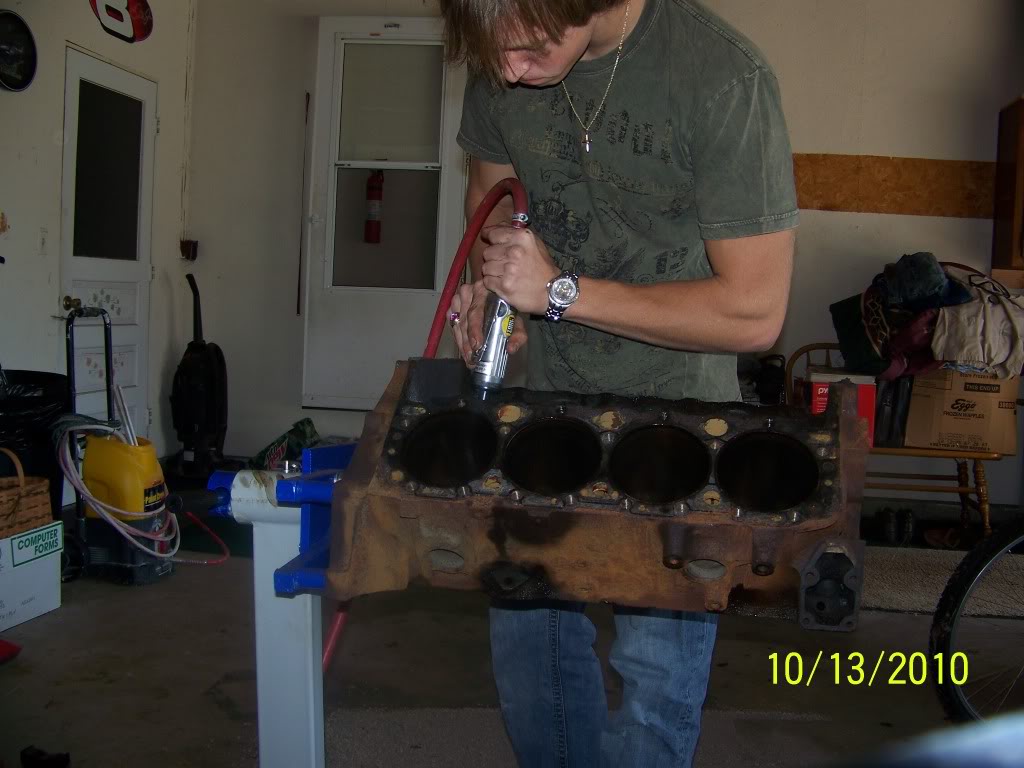
I need a haircut..i am a disgrace to mankind. and so is my garage. kitty litter on the floor from an oil spill
Here is a picture of the main cap
My sister snapped this of me being the hunchback. lol
I need a haircut..i am a disgrace to mankind. and so is my garage. kitty litter on the floor from an oil spill
Last edited by Pwnage1337; 10-14-2010 at 12:08 AM.
10-13-2010, 02:38 PM
#51
Tech Contributor
Thread Starter

i suppose you could use a dremel too
10-13-2010, 02:42 PM
#52
Safety Car
PLEASE - put some safety glasses on.
I have had far too many pieces of metal removed from my eyes over the years... And I use glasses everytime I pick up a grinder. I can't fathom the metal flying around your face and not using a pair.
BTW when a piece gets in there real good - the doctor uses a mini die grinder and cuts a nice divot out of the cornea of your eye. I learned that one about 5yrs ago porting a set of cyl heads for a customers bracket car. I still have a "line" that I can see in my preferial vision when my pupil is fully expanded... Trust me it's not something you want to do; sitting in a chair with your eye propped open while a doctor grinds on your eyeball with a mini carbide burr.....
Now that the safety talk is over.
Main cap looks good.
Will
10-13-2010, 03:43 PM
#53
Race Director

While you're at it, might want to dimple the china walls. And remove the stock oil bypass, then use a high PSI rated bypass filter. Some block the water pump bypass but I left that alone.
Yes to eye protection, I've had slivers as well.
Yes to eye protection, I've had slivers as well.
10-13-2010, 11:09 PM
#54
Tech Contributor
Thread Starter
PLEASE - put some safety glasses on.
I have had far too many pieces of metal removed from my eyes over the years... And I use glasses everytime I pick up a grinder. I can't fathom the metal flying around your face and not using a pair.
BTW when a piece gets in there real good - the doctor uses a mini die grinder and cuts a nice divot out of the cornea of your eye. I learned that one about 5yrs ago porting a set of cyl heads for a customers bracket car. I still have a "line" that I can see in my preferial vision when my pupil is fully expanded... Trust me it's not something you want to do; sitting in a chair with your eye propped open while a doctor grinds on your eyeball with a mini carbide burr.....
Now that the safety talk is over.
Main cap looks good.
Will
I have had far too many pieces of metal removed from my eyes over the years... And I use glasses everytime I pick up a grinder. I can't fathom the metal flying around your face and not using a pair.
BTW when a piece gets in there real good - the doctor uses a mini die grinder and cuts a nice divot out of the cornea of your eye. I learned that one about 5yrs ago porting a set of cyl heads for a customers bracket car. I still have a "line" that I can see in my preferial vision when my pupil is fully expanded... Trust me it's not something you want to do; sitting in a chair with your eye propped open while a doctor grinds on your eyeball with a mini carbide burr.....
Now that the safety talk is over.
Main cap looks good.
Will
What is the oil bypass and how do i remove it? Sorry for the stupid questions I'm sure this is right under my nose lol
10-13-2010, 11:46 PM
#55
Team Owner
Member Since: Oct 2004
Location: altered state
Posts: 81,242
Received 3,043 Likes
on
2,602 Posts
St. Jude Donor '05
BTW when a piece gets in there real good - the doctor uses a mini die grinder and cuts a nice divot out of the cornea of your eye.
Cast iron dust gets everywhere VERY easy to get in your eye and not know. Careful when removing your shirt, wiping eyes washing hair not to get it in there seriously. Nasty stuff.
Ill send your stuff out tomorrow.
10-13-2010, 11:51 PM
#56
Tech Contributor
Thread Starter
Thanks a lot! I love this forum.

Another question for all of the pro's here in C4 tech..
before I take the block to the machinist, can i chase threads or do i do that after? Do you use a tap/die set to chase them? A lot of them have seen better days.
10-14-2010, 12:46 AM
#57
Team Owner
Member Since: Oct 2004
Location: altered state
Posts: 81,242
Received 3,043 Likes
on
2,602 Posts
St. Jude Donor '05
Usually they do that but it sure wont hurt if you do. Id do it before they clean everything out so youre not intoducing debris to a new engine.
10-14-2010, 09:51 AM
#58
Safety Car

It looks like this when your done.

You can also buy a new billet alum oil filter adapter from many aftermatket mfgr's that do not have the bypass.
Will
Last edited by rklessdriver; 10-14-2010 at 09:56 AM.
10-14-2010, 10:14 AM
#59
Racer
I personally don't like plugging the bypass on a daily driver type build since you never know how they're maintained - if you get a crappy /cheap junk filter or don't maintain it well and it sludges up then the filter can plug up and restrict oil flow enough to cause a lot more damage than running dirty oil through the engine....
That said - if YOU know how YOU will maintain it and don't mind springing for the extra cost associated with the better "full flow" filters then go for it. Just keep that in mind when plugging it - I just wouldn't take it to the "quickie lube" places after that unless you're providing the filter to install...
That said - if YOU know how YOU will maintain it and don't mind springing for the extra cost associated with the better "full flow" filters then go for it. Just keep that in mind when plugging it - I just wouldn't take it to the "quickie lube" places after that unless you're providing the filter to install...
10-14-2010, 10:49 AM
#60
Melting Slicks

The oil filter adapter has a bypass built in it. People like to remove the bypass valve and spring. Then tap it so you can install a 1/4" NPT pipe plug in the hole which forces all the oil to go thru the oil filter 100% of the time.
It looks like this when your done.
You can also buy a new billet alum oil filter adapter from many aftermatket mfgr's that do not have the bypass.
Will
It looks like this when your done.
You can also buy a new billet alum oil filter adapter from many aftermatket mfgr's that do not have the bypass.
Will