When you click on links to various merchants on this site and make a purchase, this can result in this site earning a commission. Affiliate programs and affiliations include, but are not limited to, the eBay Partner Network.
So I just wanted to let the forums know I have completed my 700r4 to Black tag zf6 swap. There was a significant amount of work involed with the whole swap but it went over in the end without a hitch. I also swapped the rear gears to 373. Chime that in with the new ZF6 first gear ratio and this car feels like I bolted on 200 Horse haha. If anyone needs and technical info on the swap or is considering doing it for themselves please let me know and I'd be glad to help with any of the parts required or what modifications have to be done to the firewall and the tunel!
So as promised here is my write up on the ZF6 Swap!
So here is my write up on the ZF6 swap into an auto 93 corvette.
Required Parts
1. ZF6 Trans (I chose black tag due to the higher TQ rating). Make sure it has the bell-housing and shift fork with throw-out bearing
2. Dual Mass Flywheel or compatible SMF and bolts
3. Clutch to match the flywheel and alignment tool
4. Slave Cylinder
5. Master Cylinder
6. Clutch Pedal and Bracket (note the 89 and below cars have different pedal brackets due to the change in interior)
7. Brake Pedal from manual car
8. Shorter ZF6 drive shaft ( If retaining Dana 36 then the auto c beam will work, if switching to Dana 44 you also need the shorter c beam)
9. Manual Transmission Tunnel ( atleast the top half with the opening and metal ring bracket)
10. Rear main seal, There is no better time to do it
11. Pilot Bearing from similar year engine car.
12. Manual Trans Center Console
13. Shifter Boot
14. I recommend that you also put new rear gears in the back. I chose 3.73 to swap in. 5th and 6th would be unusable with the stock 2.59s
Expendables Required
1. I chose to use Penzoil Syncromesh for my swap and have no complaints with it you need 3 bottles, it takes about 2.2 QTs.
2. Fiberglass and resin for the tunnel (GET SOME GLOVES)
3. If you are doing the rear main don’t forget the filter and oil for your car. I run Penzoil Platinum 10w-30 and Bosch Filters but to each their own.
Ok now for the fun part, The Job
[B]First Things first, 700 R4 Removal[/B
]1. Get the car up in the air as high as you can supported by jackstands to facilitate removal of the trans
2. Disconnect the battery as with all maintenance.
3. Remove the Exhaust, It can be a pain especially if you have cats or haven’t removed it in a while.
4. Get under the car and remove the trans oil pan to drain the oil so you don’t make a mess when you pull the driveshaft.
5. Be sure to disconnect the shifter cable when pulling the oil pan.
6. Remove the shifter harness and the VSS sensor plug from the trans
7. Remove the dust shield on the front of the trans
8. There are 3 bolt holding the TQ convertor to the flex plate, remove each bolt one at a time then use a large screwdriver or pry bar to rotate the flywheel. Easier done with 2 people.
9. Once removed slide the TQ convertor back towards the aft of the car and away from the flexplate it should move almost 1/2 inch.
10. Remove the 2 bolts going up through the c beam, you may have to use a jack to lift and lower the trans to enable the bolts to freely fall out.
11. Remove the Oil cooler lines from the pass side of the trans followed by the throttle valve cable below them.
12. Support the trans at this point with your trans jack. I STRONGLY RECOMMEND A TRANS JACK FOR SAFETY REASONS.
13. Remove the driveshaft universal loop brackets that hold the D shaft to the rear pinion gear on the front of the differential and slide it forward into the trans to disconnect it from the joint.
14. Remove the driveshaft, I had enough room to slide the driveshaft in between the tunnel and the c beam and pull it out.
15. At this point you can now begin to remove the bell housing bolts.
16. Once all bolts are removed slide the trans back and down. The rear of the trans will have to slide to the drivers side to clear the c beam. Watch for any missed lines as the trans is being lowered
Congratulation on your trans removal. Now its time for the harder part. THE SWAP
1. Start by removing the Flexplate, you may need someone to hold the flywheel while you break TQ on the bolts.
2. Replace the rear main seal. You must first drain the oil from the block then I used a screw driver to pry the seal off. It was really easy and then used the old seal to tap the new one into place. Refill your block after changing your filter.
3. Remove the starter
4. Install the pilot bearing into the crank shaft. You may need to sand the inner part of the crank to get it to slide smoothly. I used and old thick socket to tap it in so it did not get damaged.
5. Install the flywheel, be sure to use thread lock red when TQ’ing the bolts. You should TQ all bolt in a star pattern to 75 FT LBS.
6. Place the clutch on the flywheel using the alignment tool
7. Place the pressure plate on the clutch disc and align with the flywheel ensuring the throw-out bearing is in place on the forward side of the pressure plate. With the Alignment tool in place using red thread lock, TQ all bolts down evenly to 22 Ft Lbs. Then remove the alignment tool.
8. Remove the shift fork from the bell housing and install the bell housing with the shift fork loose on the inside, TQ’d to 35 Ft LBS using again red thread lock. This will allow you to be able to get the fork on to the throw out bearing and then tighten it back down. I was unable to get the fork on the bearing with it tightened down to the bell-housing.
9. This is a good time to install the slave cylinder on the driver’s side of the housing.
This is where I moved to the interior, you can do it in reverse order if you like but this is my step by step. I am not going to go into great detail on interior hardware because there are so many small screws nuts and bolts.
1. Remove both of the Seats
2. Remove the drivers dash kick panel
3. Remove the metal frame brace under the steering column
4. Remove the brake master cylinder rod from the brake pedal
5. Remove the brake pedal and bracket (much easier said than done, Expect to need a few beers and say a few bad words in this process)
6. Remove the hood release latch bolts that secure it to the sidewall.
7. Open the hood, pull the side panel for the battery and remove the battery, there are three star bolts on the front, one bolt in the door frame, and one bolt on the bottom of the panel you can get with a ratcheting wrench.
8. Move the ECM out of the way by taking it off the bracket, then remove the bracket for the ECM so it is not in your way.
9. Just to the driver side of the Booster, there is an indent that goes to the front of the car where the master cylinder goes. There are two indented bolt hole marks that are there from the factory. Drill out those holes. CROSS CHECK THIS WITH YOUR CLUTCH MASTER CYLINDER.
10. Measure the diameter of your clutch rod head and drill that hole in the center of the 2 holes you just drilled through the firewall.
11. Back inside the car install the clutch pedal and bracket in place using the 2 bolts from the hood latch and lining it up with the 2 openings for the master cylinder you just drilled.
12. Install the clutch master cylinder. Ensure the rod hooks around the clutch pedal arm and you put the clip on the end to keep it in place.
13. Install the new brake pedal and bracket
14. Connect the clutch master to the slave cylinder using the lines provided. Do not push the clutch or bleed the clutch without the trans installed, it will let the clutch disc fall and will not allow the trans to go in
15. Now time to remove the radio bezel panel
16. Remove the shifter console
17. Remove the arm rest
18. Remove the armrest center console
19. Remove the shifter assembly
20. Remove the shifter cable.
21. Remove the park cable that runs to the dash
22. Remove the left and right tunnel cover panels. The panels covered in carpet to the inner side of the driver and pass legs.
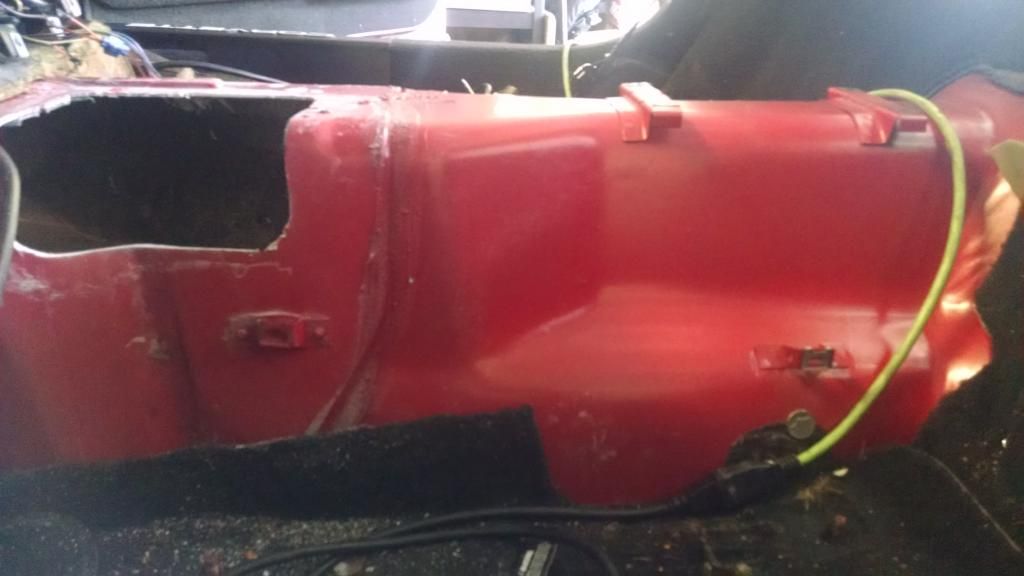
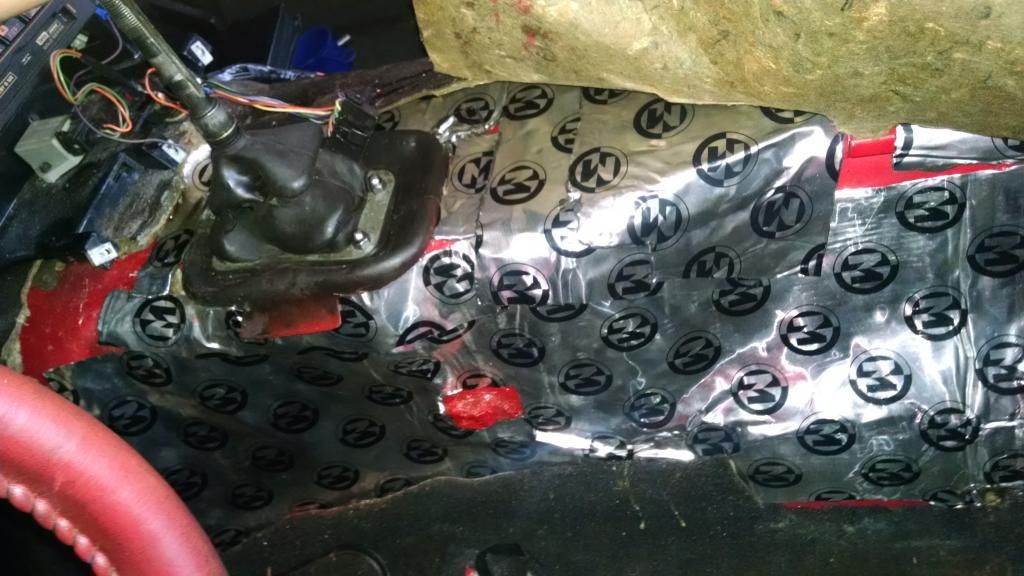
23. Remove the final plastic piece covering the tunnel and then lift and remove the insulation so you can see the bare tunnel.
24. Measure and cut a hole in the tunnel wider than the size of the tunnel piece you are installing. REFER TO MY PICS BELOW TO SEE WHAT I DID.
25. Once you have the hole cut it is time to start to install the trans
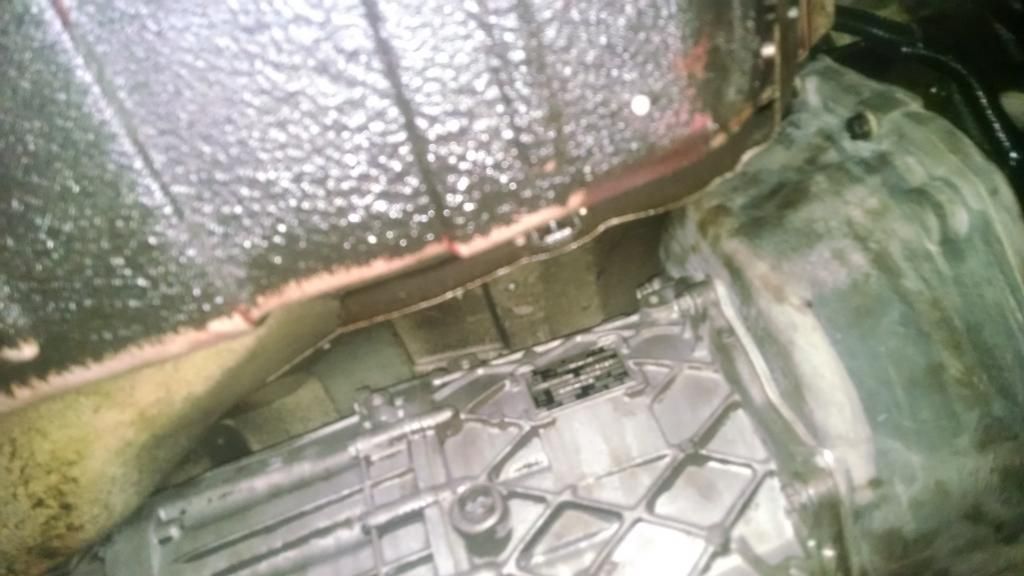
26. Put the trans on the trans jack and raise it into the car. Slide it forward making sure the trans is lined up and level the clutch disc. You can rotate the tail shaft to line up the input shaft if you need to. Once lined up slide it all the way forward into the block while sliding the tail shaft to the right to hook it up into the c beam. Once fully mated with the block, install and tq the bell housing bolts to 35 Ft LBS. I did not use thread lock on the trans bolts.
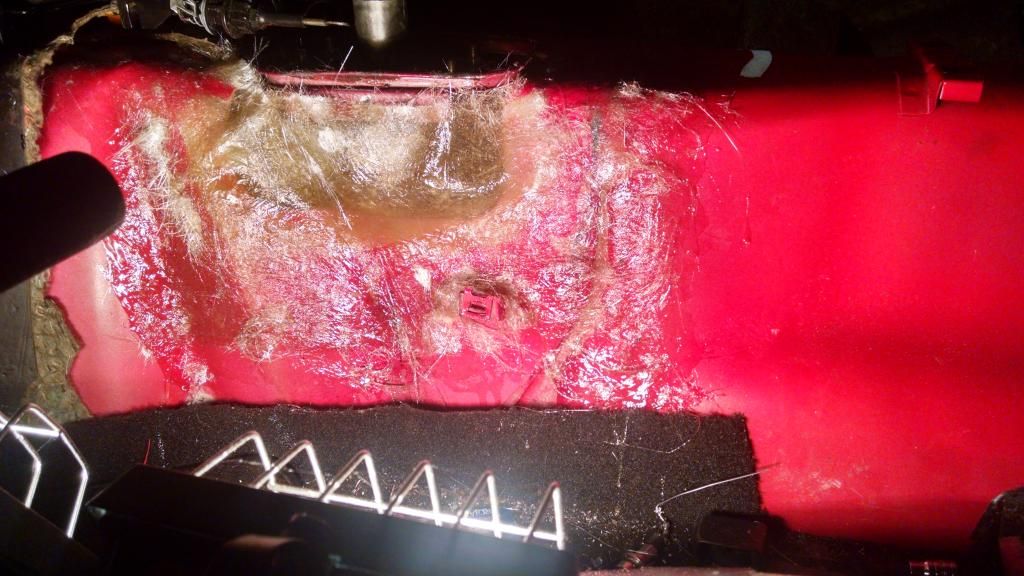
27. Slide the bolts back through the c beam and tighten down.
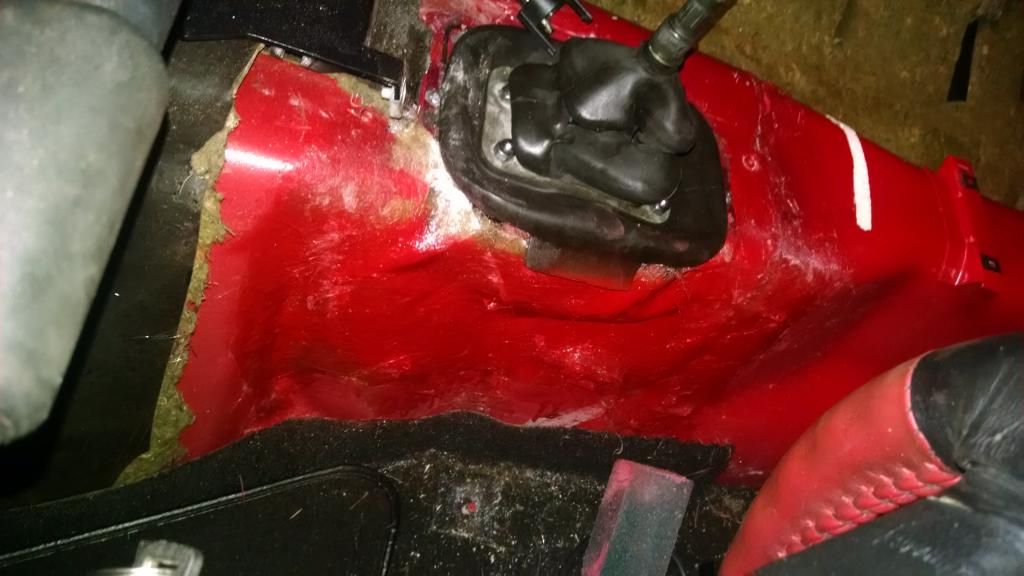
28. Now return to the inside of the car and fiberglass in everything that does not need to be open around the shifter ring. Do not leave any gaps otherwise you will suffer from severe heat soak. AGAIN REFER TO MY PICS FOR WHAT I DID.
29. Once the fiberglass has cured install the upper rubber shift boot onto the shift boot collar.
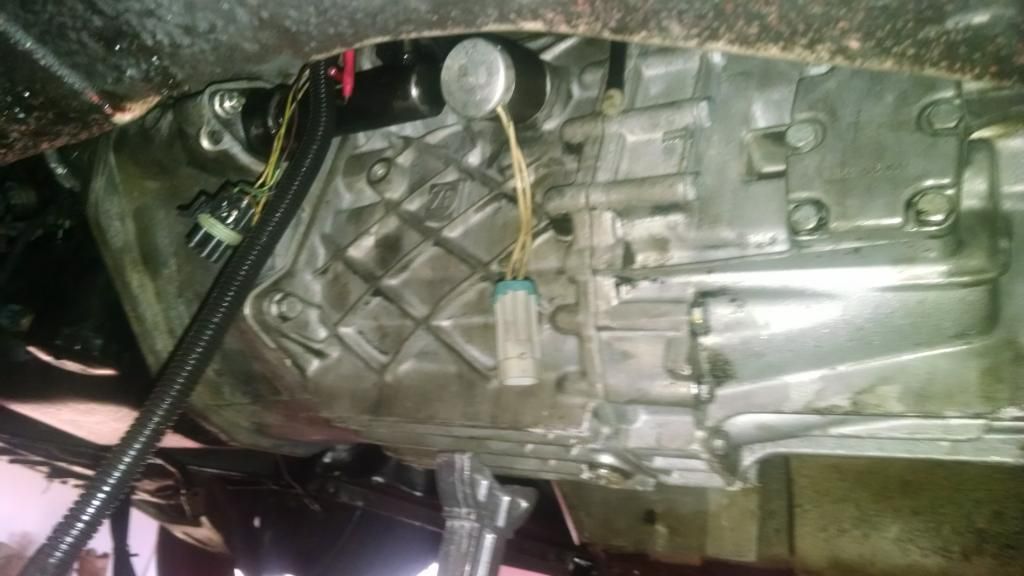
30. You are left with a auto trans shifter harness that you need to cut and splice. The yellow wire and the purple wire will need to go all the way to the clutch interlock switch on the clutch pedal. If you do not want the interlock the just connect them both together ( I don’t suggest that). The black and orange wires need to be connected together to allow the rear hatch switch to work. The blue and the green wires need to run to the trans reverse switch on the forward drivers side of the trans up high, so you have reverse lights.
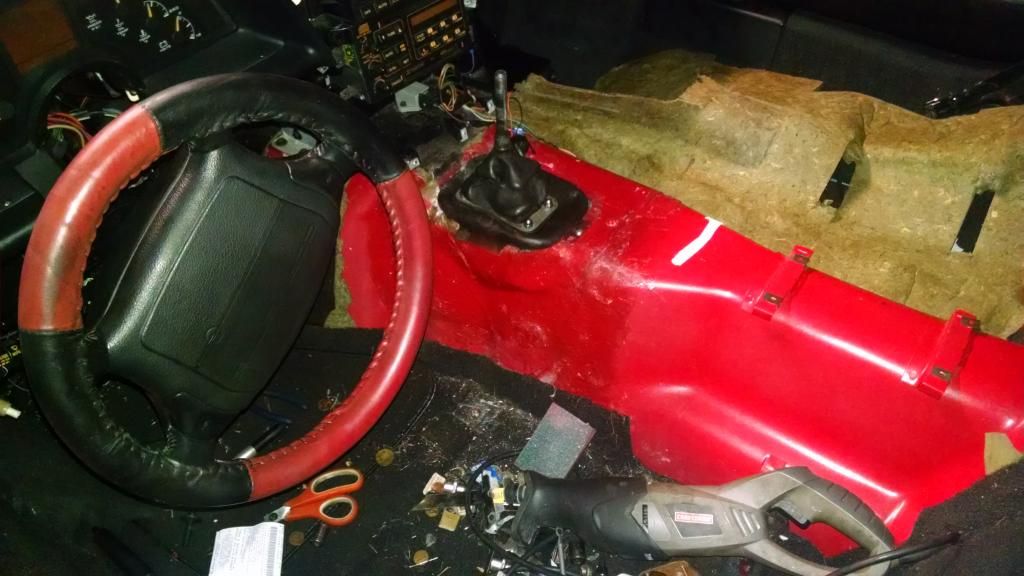
31. After all wires are cut and ran you need to button back up the interior. I strongly suggest that you use dynamat or Memphis mojo mat on the tunnel before laying the insulation down. It helps a ton with road noise and gear chatter and heat issues.
32. Time to reinstall all of the panels on the interior including the ones under the drivers dash. Use the manual trans car center console in place of the auto one with the shift boot installed.
33. Reinstall the seats
34. Now its time to bleed the clutch. While someone is pumping the clutch, have them hold it and loosen the clutch bleed screw ensuring to close it before the stream stops. Once all of the air bubbles have left the stream you have bled the clutch correctly.
35. Fill the trans, I used penzoil syncro mesh and have not issues with it. There are 2 large 17mm hex plugs. The bottom one is for draining the top one on the pass side is for filling. It is a fill to spill style trans and should take about 2.2 qts. Then replace the plug.
36. Reinstall the starter. It has to go through the dust cover on the front of the trans so make sure that is installed first.
37. Reinstall the exhaust
38. Start the Car and ensure that you can shift through all the gears with the clutch fully depressed. If you cannot you need to ensure that your clutch is bled completely.
39. If all is well take her out for a spin!
40. CONGRATULATIONS ON YOUR NEW ZF6 !!!!!
I love my 'new' ZF6-40 (black) with 3.54 rear gears in D36 (cryo hardened).
Mine runs a RAM steel flywheel with organic dual disc clutch, activated by the stock 4+3 clutch pedal and master, via RAM's hydraulic throwout bearing. ZF Doc also added his short throw shifter, which is buttah!
Just did the swap on my 85 Z51 from a 4+3 about 2 months ago. Good job putting up a write-up for others. This is a potent and pretty straightforward project for anyone that can lift the car high enough and has the patience to wiggle an input shaft through a bellhousing.
Btw, I used a larger T56 shift **** too, but used the plastic shift pattern from my ZF6 ;-)
Thanks for the replies! Ya I am pretty fond of that shifter, all though I have the wrong shift pattern plastic in the center. I call it an anti theiving device haha. If they can't back it up they can't go anywhere
The ZF and a 3.73 is a great combo. Should've come from GM like that.
I went through 3 clutches on my 91 and slapped 4:10's in it. If I had to do it over again I would have installed a McLoud twin disk but I had an offset ground crank and it didn't work with my combo. It shook like hell so we took it back out. They closed my track and I was done racing it anyway.
Now I have an auto car, not as fun ?Was there anything that had to be done to the computer?
I did not recalibrate the ecm for a manual and it runs great. Was it the right choice, well as far as I'm concerned it was. The engine does not know what is pushing it. The major difference between the 2 is the ecm no longer sends a signal to the tcc to lock it up since there is no ground in 2nd or 3rd gear. obviously this is due to the plug not being attached. All other wiring for the manual trans has to be split up and routed from the auto gear selector which is outlined above
I did not recalibrate the ecm for a manual and it runs great. Was it the right choice, well as far as I'm concerned it was. The engine does not know what is pushing it. The major difference between the 2 is the ecm no longer sends a signal to the tcc to lock it up since there is no ground in 2nd or 3rd gear. obviously this is due to the plug not being attached. All other wiring for the manual trans has to be split up and routed from the auto gear selector which is outlined above
Actually your decel fuel cut off, throttle follower, ignition table are all different in manual vs automatic calibrations.
A few other logical differences exist between the calibrations that I don't remember, but they are there.
That's not to say that people don't do manual swaps all the time without recalibrating the ECM. Doesn't make it correct.
So I just wanted to let the forums know I have completed my 700r4 to Black tag zf6 swap. There was a significant amount of work involed with the whole swap but it went over in the end without a hitch. I also swapped the rear gears to 373. Chime that in with the new ZF6 first gear ratio and this car feels like I bolted on 200 Horse haha. If anyone needs and technical info on the swap or is considering doing it for themselves please let me know and I'd be glad to help with any of the parts required or what modifications have to be done to the firewall and the tunel!
*** REFER BELOW FOR MY WRITE UP! ***
Di d this same swap to my '87 (just sold)a few years ago, can appreciate the amount of work ..extra heat insulation important. After driving a while I found 36 rear not well suited, even as I changed ratio..swapped that for 44, 3.42 using pre-lapped real Dana gears. This combo worked best. Left ECM alone, stock L98 ran great. Over all it was probably not worth the expense and trouble but who in this hobby does the sensible thing. Anyone doing this should read your post. Nice article.
I already have a ZF-6 in my vert, and like you, I love it!
Here's my question- I have the 3.45 gears in back, and the idea of going to 3.73 sounds appealing. I rarely get to use 6th gear as it is, so I don't think I'd suffer a big hit on gas mileage, and certainly the gears would make the acceleration more lively.
Can you share with us the steps in changing the rear gearing? I saw a 3.73 ring and pinion at one of the supporting vendors' sites for around $500, but it looked like a difficult task requiring carefully measured shims, etc.
Congratulations on the great upgrade to your C4! And thanks for documenting it!
 10-30-2014, 05:36 PM