When you click on links to various merchants on this site and make a purchase, this can result in this site earning a commission. Affiliate programs and affiliations include, but are not limited to, the eBay Partner Network.
parking brake warning light dash only on while lever is in the up position
OK, I'm sorry for spamming the forum these days with my questions about the 86.
im so close!!
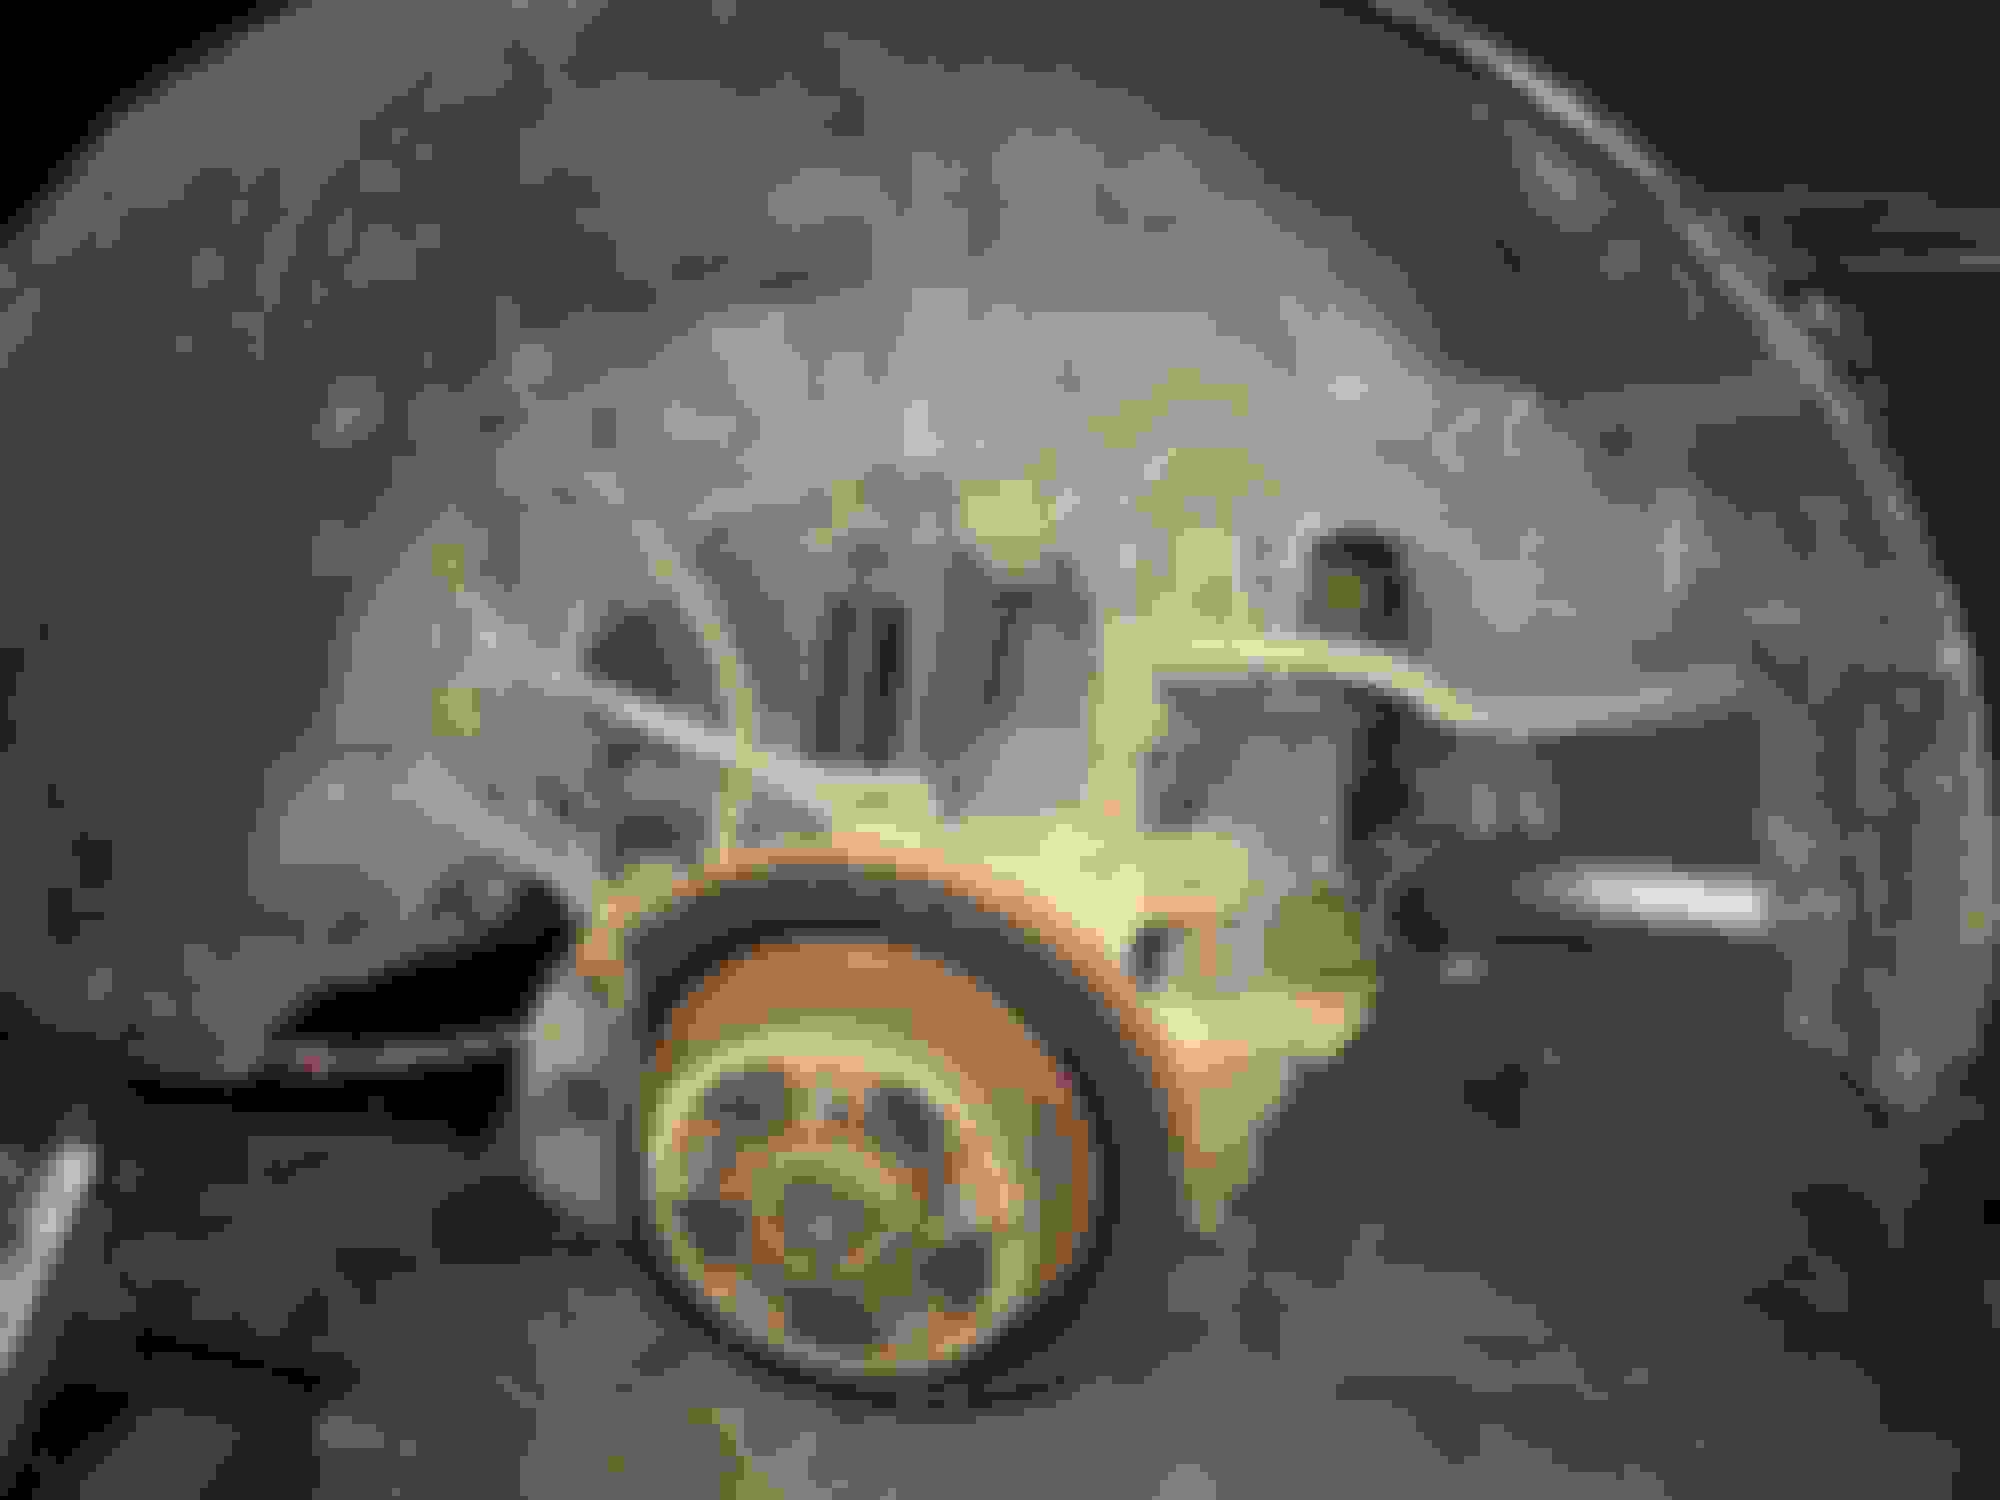
I noticed that the parking brake light warning that comes on the idiot light panel is only illuminated well the parking brake lever is being pulled up. Once you push it down after the break has been set, the light goes off. I have the cover off of the parking brake assembly and I can see why.
The problem is I can't see a way for that switch to remain closed without the arm in the up position. so for example in this manual 4+3, if I parked the car and pull the lever up for safe parking, I then push the lever down so I can exit the vehicle. The light goes off on the dash. Then when I come back to start the car I put the key to the on position and the parking brake light is not on.
this is not how it works in other vehicles I have owned, and I'm wondering if this is the correct function in a Corvette C4?
here are a couple photographs.
The lever is in the down position and the switch is not grounding out therefore no light is on the dash. with the brake lever arm now pulled up, the tang is pressed down which closes the gap and grounds the circuit which causes the light to illuminate on the dash. But of course when I lower the handle, even though the parking brake remains engaged until I lift the lever press the button in and push it down again, the light goes off on the dash! Is this correct or am I missing a component here? My research on the Internet tells me I am not missing any componentry.
Last edited by VikingTrad3r; 06-23-2017 at 03:53 PM.
I can pretty much guarantee that my wife is going to drive away one day with the parking brake on if that is the case. In conversation I'll ask her why she kept driving. shes going to say the parking brake wasnt on lol.
hopefully others will reply. If there is a way to have the parking brake lights stay on well the handle has been pushed down for ingress and egress then I would definitely make that modification.
That switch picture looks wrong from what I remember. The adjuster part that's hooked up to the cable should engage the switch whether the handle is up or down.
No, that is not how it works. You pull up on the handle, the mechanism creates the ground against the tab. And the light stays on as long as the parking brake is engaged.
No, that is not how it works. You pull up on the handle, the mechanism creates the ground against the tab. And the light stays on as long as the parking brake is engaged.
You might want to read the first post again slowly.
Light should stay on if brake is set. Something's wrong.
I've never worked on this function, so I don't have anything useful to offer to fix it. You'll have to figure out how its supposed to work, then you canfigure out why it doesn't, and fix it.
One thing that may help: In my 85, which is also a manual so I too use the hand brake, to release the brake I lift the handel until I have pressure, then push the button to let it down. Sometimes the light stays on, I know the brake is released because I just released it, so all I do is push the button, and the light goes out. So the release button has something to do with the mechanism that keeps the switch closed.
sounds like mine is definitely not operating the way it's intended. I will take what you've written here and see if I can diagnose. Thank you.
First the brake cable is pulled all the way forward. The parking brake should be on and the light will be illuminated no matter where the handle is positioned until the brake is released. So is the brake on or is the cable stuck forward?
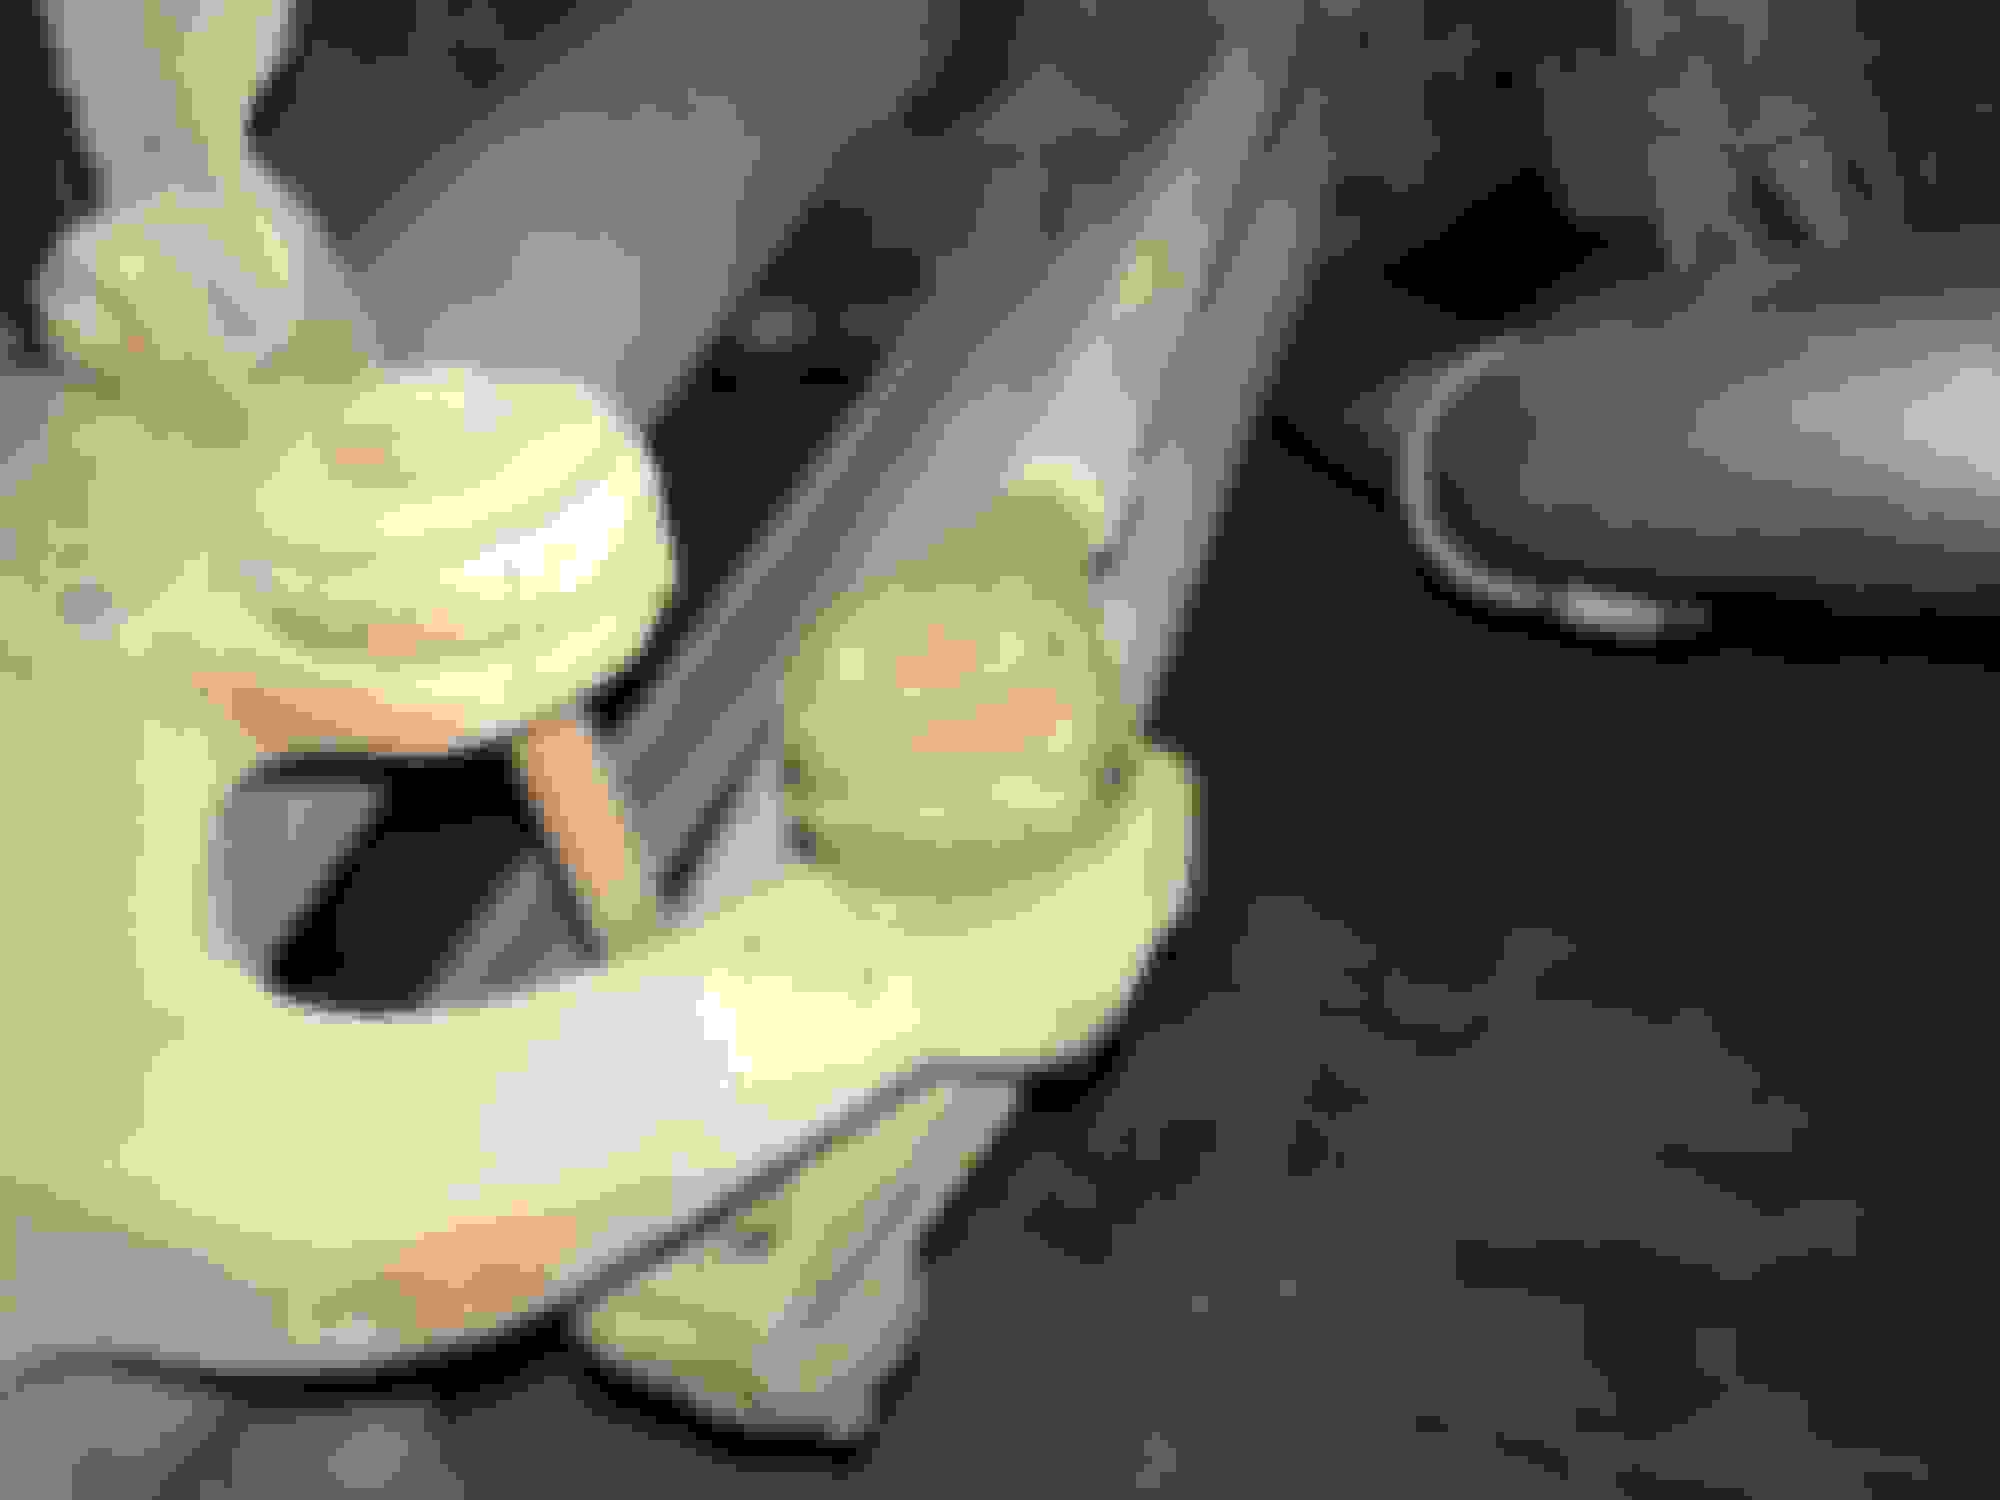
Two, the contact with the little bend in it on the switch looks bend downward to me, it shouldn't come in contact with the handle. That upper contact is what make/breaks the ground to the switch-not contact with the handle.
Three, if you look in your top photo, directly down past the switch contact (where your finger is pointed) is a little "foot". That's what contacts the part with the bend in it on the switch. When it's down like it is here, the brake is on, the contacts are closed on the switch and the light is on.
When the brake is released, the cable pulls back, the "foot" moves up breaking the contact. Light off. Looks like a lot of corrosion there. Maybe pull the handle out clean/lubricate?
Hope this helps the pic in the FSM is useless here.
Last edited by Tod Stiles; 06-23-2017 at 08:21 PM.
Reason: Spelling and stuff
thanks Todd, I think I have it sorted out and it is going to involve removing the unit. I was planning on doing that anyways I'll clean it up in the process.The foot you are speaking of, I believe that is the cam that is supposed to have a resting position higher than where it is. That is the rotating Cam that locks into place when you pull The lever. it releases when you press the button and push down on the lever. i think that cam is supposed tostart out above the tang on the switch.
I am almost 100% certain that is the way the mechanism is supposed to work.Like most things in this car I think it has been removed once before and put back together wrong. I will attempt to fix later tonight.
Last edited by VikingTrad3r; 06-23-2017 at 09:02 PM.
note the full rearward position of the cable catch, which is connected to the rotating cam. it goes all the way back, and the cam-foot rotates clockwise up to the top.
reporting back.
good god was that assembly dirty. the assembly actually wasnt rusty. it was covered in sand and grit.
the suspiscions were correct. that cam-foot is supposed to retract higher back towards the 120clock position and is supposed to be situated above the switch at all times.
the retract force of the parkin brake needs to be high enough to pull that cam around and also there cannot be 30 years of dust/grit/sand in the mechanism.
i will come back and show pics of the unit installed correctly.
here it is cleaned up and lubed with my penetrating fluid of choice: 50/50 acetone/atf.
There ya go! I think you may end up having to bend the tab on the switch, it looked as though it's bent down a little. Just go easy if you have to do that.
i have a good 1.5 inches of slack to soak up in the parking brake line.
i dealt with on an 85 before by soaking up slack near the equalizer and also at the star adjuster in each rear wheel.
question, i do see a large nut at the point where the brake cable drops into the floor. is that nut used to soak up slack as well?
Unfortunately there is no adjustment there. Sounds like you already did this before but 1st you need to make sure the shoes and hardware is all lubricated and moving freely.
2nd adjust the shoes out till they just barely touch the drum (the inside of the rotor).
3rd put the lever up 2-3 notches you should have a bunch of drag. If not, adjust the cable at the equalizer. With the lever 2/3rds to 3/4 of the way up the brake should be on solid. You may want to try it a few times to get everything seated/cable stretch out fully.
With the lever down the cable should retract fully and light off. Sometimes the lever doesn't go that last click or two to put the light out and you just have to get the lever all the way down.
i put the wheel bacl on and im going to start the car and pull it outside, jack it up, pull wheels and get in there with my purple power followed by my acid wash cleaner. (eagle 1).
then ill do the parking brake and do a break flush/bleed while im in there.
i have a set of c6 rims for this car so i will also clear the rotor hats of rust and paint them silver.
ill scuff the pad surfaces with 100 grit sandpaper and then i will have some fun re-bedding the pads.
in the interests of speeding up getting this regard to the road, I actually decided to simply fix the brakes instead of pull it out of the shop and do a full undercarriage cleaning. That will come later. So I focussed on repairing the parking brake assemblies and soaking up the slack.
The entire mechanism parking brake was seized up. Nothing a little homebrew penetrating fluid some sandpaper and a lot of cleaning couldn't fix.
The brake calliper and bracket are so covered in gunk and corrosion. I cleaned the calliper bracket with my acid etching cleaner and most of the surface corrosion came right off. I've never painted callipers and brackets before but I think this will be my first time.
The spindle was so covered in road grime and dirt that for all I knew it could have been made from steel. One shot with the acid cleaner let it sit for one minute and rubbed it with a toothbrush and the aluminum Shone right through.
should have enough time after the kids go to bed to finish off the driver side tonight, it's not as bad as the other side, maybe I'll have it working in functional this evening.
pic of proper parking brake equalizer assembly please!
hey team, pictures of the 1986 parking brake equalizer below.
it was entirely seized in its most slack position.
i had to pry the nut and bolt assembly out of the "cage" in order to heat the nut red hot 3 times with my 50/50 atf/acetone penetrant and it came free pretty easy after three of those cycles.
im hoping somebody has a photo of one that is correctly installed so i can get mine back together.
 06-23-2017, 03:51 PM