When you click on links to various merchants on this site and make a purchase, this can result in this site earning a commission. Affiliate programs and affiliations include, but are not limited to, the eBay Partner Network.
I did but they still looked �stained�. I�m not sure how to put it, in photos it didn�t show up but in person it was...splotchy. It was like that before eagle one as well. The eagle one made it look WORLDS better but not �new�. Does that make sense? Maybe the plenum was just crap on that car lol. I�ll try it again here.
I used carb cleaner on mine and had the same problem if you did not remove the carb cleaner before it dried. The only way I was able to give it a great finish was to go over the whole thing with a wire brush in the end.
I used carb cleaner on mine and had the same problem if you did not remove the carb cleaner before it dried. The only way I was able to give it a great finish was to go over the whole thing with a wire brush in the end.
that�s probably what I need to do, use a wire brush.
I've found the only way to get those castings to look factory new is a quick trip through a (glass) bead blasting cabinet. I follow up with a PPG chem-film bath (keeps the aluminum oxide corrosion at bay). I know, not everyone has these options - just my 2-cents....
I've found the only way to get those castings to look factory new is a quick trip through a (glass) bead blasting cabinet. I follow up with a PPG chem-film bath (keeps the aluminum oxide corrosion at bay). I know, not everyone has these options - just my 2-cents....
Wow-that's what I'm going for Joe. Looks great! I might be able to get access to a sand blaster, would that work? Or does it need to be beads?
I love your gold paint. My 85 is the two-tone light blue/ dark blue metallic. It's still in very good shape except I have a spot of clear coat damage on the top of the rear bumper.
I cleaned my aluminum intake surfaces with a pressure washer and scrubbing with harsh green scrubbing pads and detergent. I think anything harsher will scratch the surface.
Actually, I had removed all the aluminum parts from the car during my rebuild and scrubbed them with the green scrubbing pads. It did a great job of making them look like new. It's just a lot of work.
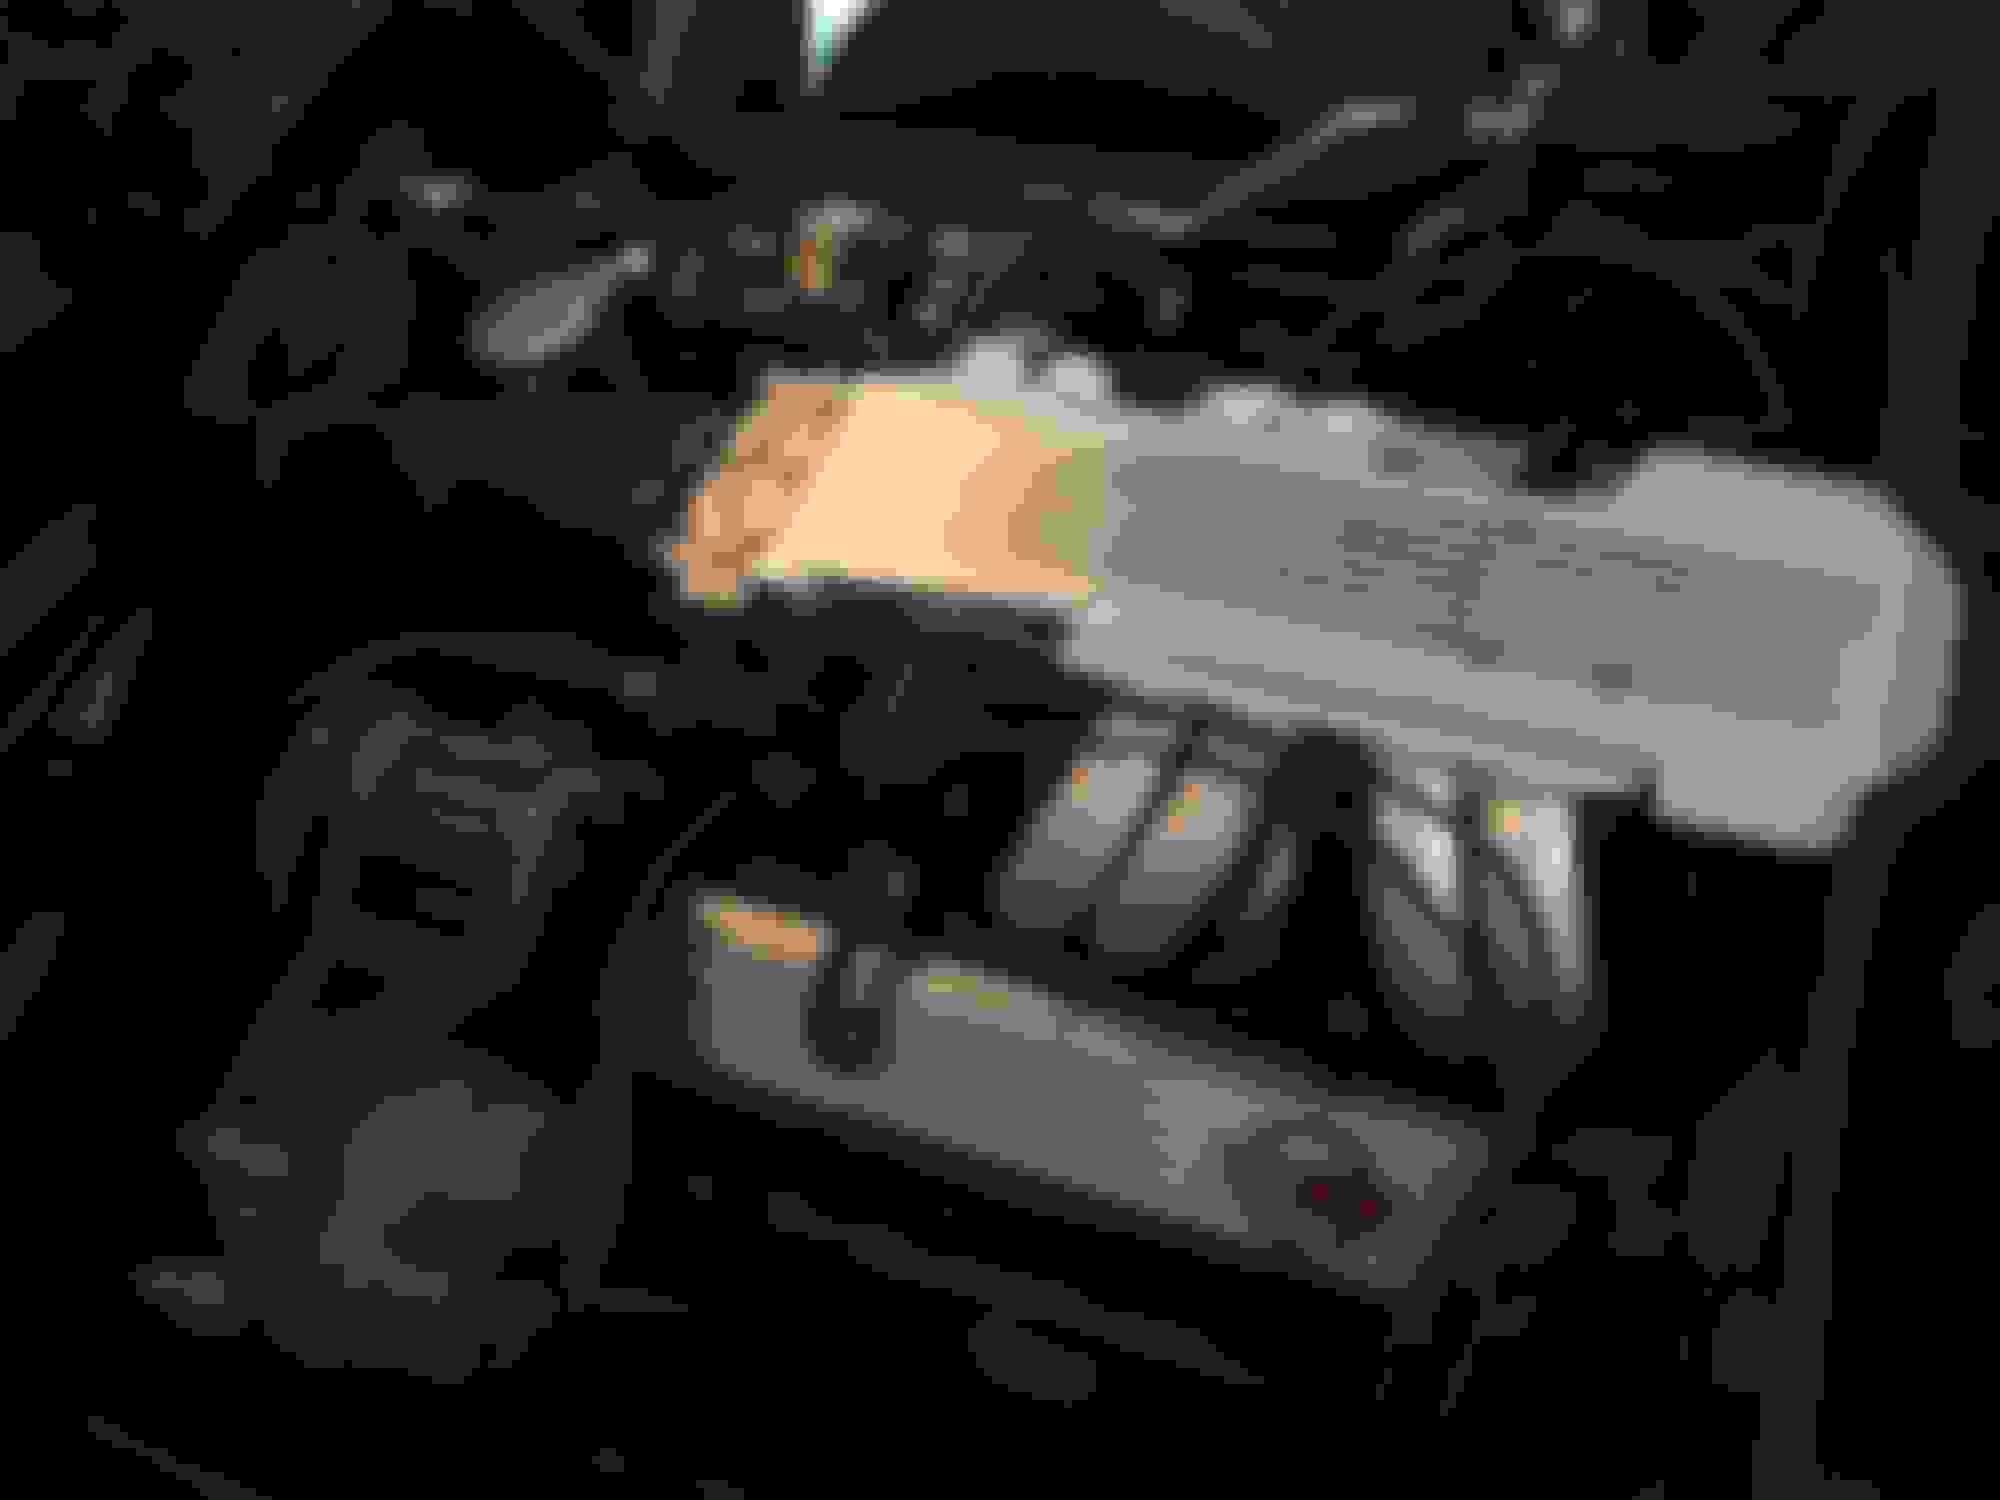
Got my intake back together and the car running again today. Glass blasted the aluminum intake, runners, valve covers and thermostat housing. I'm really happy with how it came out, thank you for the advice everyone! I'll post more as I do more.
SO I am really happy with how this came out. Wanted to post another pic from drivers side.
This is makes me want to do something about the smog pump/alternator as they are much less shiny than the rest...
good job -
as for the smog pump and the alternator - about the best you can do without taking the things apart is to remove them from the engine and use a small brass or stainless steel brush along with maybe some aluminum cleaner. the brackets are easy enough to run through a blasting cabinet. anything you do can be an improvement. so far, looking good - keep at it....
For anyone curious, this is the sand blaster that I used. It's quite cheap from Harbor Freight and did a fine job for me.
This is the blasting media I used. It's glass beads instead of sand. It was a little pricey but not terrible, and is safe for aluminum. I'd be wary of using sand on the aluminum. Whole thing was about 30 minutes of blasting (and half that was figuring out the best way to do it-I've never blasted anything before). You will need a pretty decent air compressor but other than that this was cheap and easy, I'd highly recommend the process to others.
EDIT: Also be sure to clean the parts up well after blasting-don't want sand getting into your engine!
Last edited by Bfenty; 10-23-2017 at 06:31 PM.
Reason: More Info
For anyone curious, this is the sand blaster that I used. It's quite cheap from Harbor Freight and did a fine job for me.
This is the blasting media I used. It's glass beads instead of sand. It was a little pricey but not terrible, and is safe for aluminum. I'd be wary of using sand on the aluminum. Whole thing was about 30 minutes of blasting (and half that was figuring out the best way to do it-I've never blasted anything before). You will need a pretty decent air compressor but other than that this was cheap and easy, I'd highly recommend the process to others.
EDIT: Also be sure to clean the parts up well after blasting-don't want sand getting into your engine!
Clean glass beads is the way to go. One thing about using a bead blasting cabinet is that you don't know what other metals have been blasted in there and you could be imbedding steel particles into aluminum (or vice-versa) ... which WILL likely corrode because of dissimilar metals.
Clean glass beads is the way to go. One thing about using a bead blasting cabinet is that you don't know what other metals have been blasted in there and you could be imbedding steel particles into aluminum (or vice-versa) ... which WILL likely corrode because of dissimilar metals.
Keep up the good work!
- in fact, there's something that somewhat addresses this issue in the tech data sheets for PPG's chem film products. to date, I can't say I've had any issues with this. related item - one thing that did catch me off guard - I had a period where I was getting "fish-eyes" on painted parts that I previously bead blasted in my cabinet. took me months, and drove me nuts figuring out WTF was going on. seems I blasted something that was treated armor-all (or a similar product). long story short - I contaminated the glass, and most likely the inside surfaces of the cabinet with silicone. it doesn't take too much of that stuff to ruin a paint job. I had to disassemble and clean the cabinet, and add new glass blasting media, before that problem went away -
When blasting aluminum I always turn down the pressure if surface texture is a concern. Also, it helps in not embedding media and other contaminants into the part. I also wash everything twice with a thinner, first with scrub pad and/or wire brush and then a good rinse and dry with paper towels. Lastly, I will give it a little dust off with the air gun for any fibers or dust. This is all done as prep to powder coating.
Im a little obsessive about a clean Engine bay. Pretty proud of how this is shaping up. Now I REALLY need to get the alternator and air pump shined up-they stand out quite badly.
we all remember how your last attempt at matching the alternator went!!
no paint this time!
DEFINITELY not. While I want to do something with it, I might just leave it for now. The air pump seems pretty trivial to disassemble so I might take it apart and blast it. Or maybe not. Not sure yet.
DEFINITELY not. While I want to do something with it, I might just leave it for now. The air pump seems pretty trivial to disassemble so I might take it apart and blast it. Or maybe not. Not sure yet.
be extremely careful with the smog pump. there's not a lot of what you can do to disassemble it, and the main body to rear flange alignment can be tricky. a "rebuild type" disassembly, in most cases, will not go well. personally, i'd do a benchtop, cosmetic cleanup, without taking anything apart, and no bead-blasting. taking apart the alternator is another thing - I've had my original apart so many times, it's getting to be second nature. then again, a benchtop cosmetic cleanup may suffice. looks like you're doing a nice job here - keep up the good work -
Hmmm...thanks for the advice Joe. I�ve always read the alternator is quite difficult to disassemble while people take their smog pump apart to mod it. I�ve never done either, and cosmetic cleanup isn�t worth damaging the car to me. I�ll try to bench clean it and shine it up. Do you have recommendations as to how to do it? I know the answer is probably �elbow grease� lol. I�ve seen some alternators with a mirror shine-I really just want to get discoloration off.
Hmmm...thanks for the advice Joe. I�ve always read the alternator is quite difficult to disassemble while people take their smog pump apart to mod it. I�ve never done either, and cosmetic cleanup isn�t worth damaging the car to me. I�ll try to bench clean it and shine it up. Do you have recommendations as to how to do it? I know the answer is probably �elbow grease� lol. I�ve seen some alternators with a mirror shine-I really just want to get discoloration off.
Red Scotchbrite pads and Simple Green go a long way. Also, use the same on your exhaust manifold shields. finish those with 000 steel wool. Your bay is looking better all the time.
 10-12-2017, 04:08 PM


 - in fact, there's something that somewhat addresses this issue in the tech data sheets for PPG's chem film products. to date, I can't say I've had any issues with this. related item - one thing that did catch me off guard - I had a period where I was getting "fish-eyes" on painted parts that I previously bead blasted in my cabinet. took me months, and drove me nuts figuring out WTF was going on. seems I blasted something that was treated armor-all (or a similar product). long story short - I contaminated the glass, and most likely the inside surfaces of the cabinet with silicone. it doesn't take too much of that stuff to ruin a paint job. I had to disassemble and clean the cabinet, and add new glass blasting media, before that problem went away -


