'92 ZR-1 Repair & Restoration
 01-22-2011, 11:17 PM
#1
Drifting

Thread Starter
Member Since: Jun 2007
Location: Prather, California -1990 ZR-1 White/Flame Red- -SOLD!!-
Posts: 1,261
Likes: 0
Received 2 Likes
on
2 Posts

Back in July of 2010, I started an repair/restoration thread on Evan's ZR-1 over at the zr1.net forum. Decided I should have one at this forum too. I've just copied and pasted what's in that thread.
7/23/10:
I've started helping out my buddy Evan (eguyett1985) with the repair and restoration of the 43K mile '92 red/black ZR-1 he bought. He decided to let me do the thread posting and updating on this project.
So now I've got 2 ZR-1 projects to work on!
Here is the link to the initial thread that he posted on CF telling how he acquired this ZR-1:
http://forums.corvetteforum.com/c4-z...-opinions.html
But here is a partial quote of his initial post on CF if you don't want to or can't view the link for some reason:
eguyett1985:
"... The car is Red/Black, 1 owner, both tops, window sticker, etc. Now here's the problem; the car had a minor electrical fire underneath in the trans tunnel, the reverse light switch shorted causing the harness to catch fire briefly which scorched the LH side of the floor next to the transmission and the area of the firewall below the wiper motor. The owner opened the hood right away and put the fire out; the underside of the hood is completely undamaged as is the engine and the interior. The car was fully insured and the body shop and the insurance company were unable to locate a replacement harness over the past year and the car has sat in my friend's shop with a pending lien sale against it until last week when the body shop got title to the car. Unfortunately, the owner sent the insurance company the title he had in his possession 2 weeks earlier and accepted a payout on the car. So now, I have been offered the car with the necessary minor floorpan repair made and the engine and trans on a pallet at a great price; I have located a perfect replacement harness and can put the car back together in short order. ..."
We are not sure exactly how the fire started. Evan mentions in his post in the link above about the reverse light switch causing it (not sure where he got that info), but we are thinking now that it may have started around the VSS sensor since it seems like the fire would have traveled up towards the engine, not back towards the rear (though I guess it could have traveled back along the wire harness a little way). If the fire had started at the reverse switch, I think the shifter/VSS sensor area would not have gotten burned as bad as it did. There was also a patch of something melted onto one of the exhaust pipes near the front by the transmission, so it's also possible that the fire started as a result of the wire harness touching the exhaust.
Now for some pictures!
First, a couple of shots of the exterior. Engine bay area has already been degreased and pressure washed(no pics of that area yet), exterior has also had a quick wash. Overall, this car is in very good condition (other than the dust, dirt & fire-damaged areas )
)
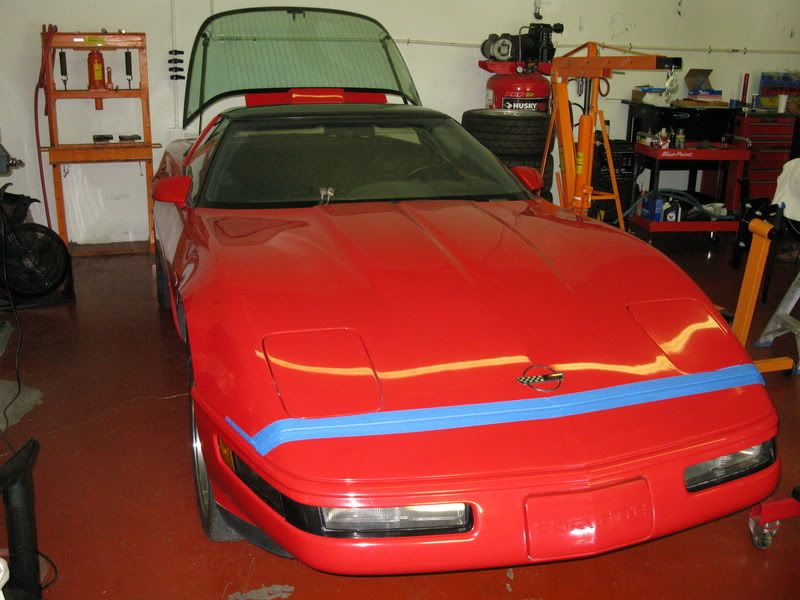
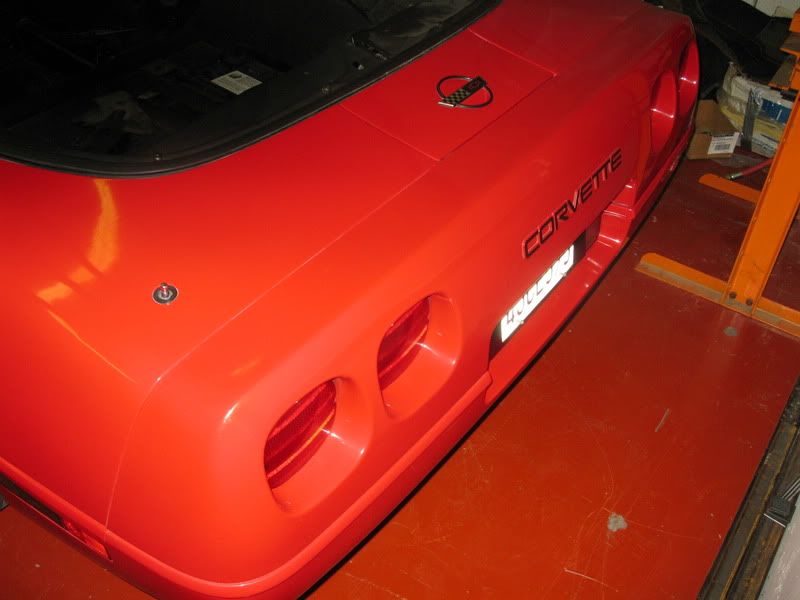
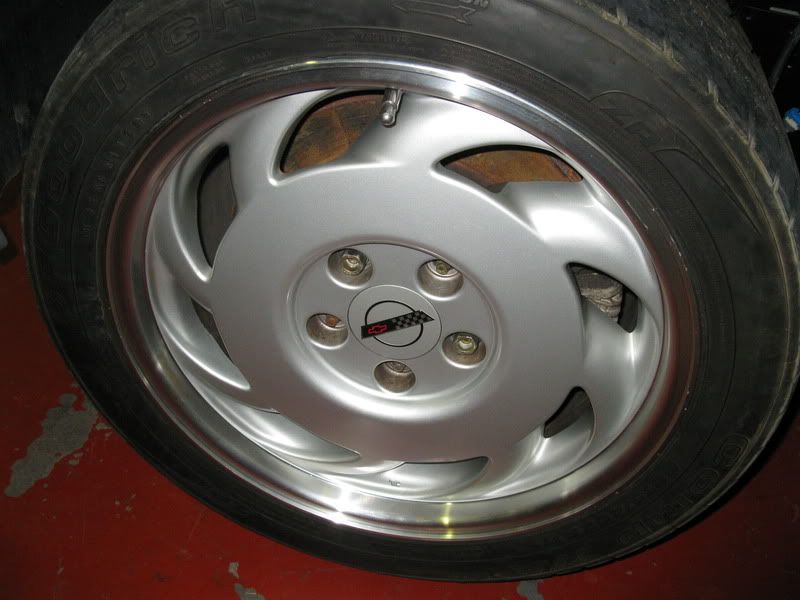
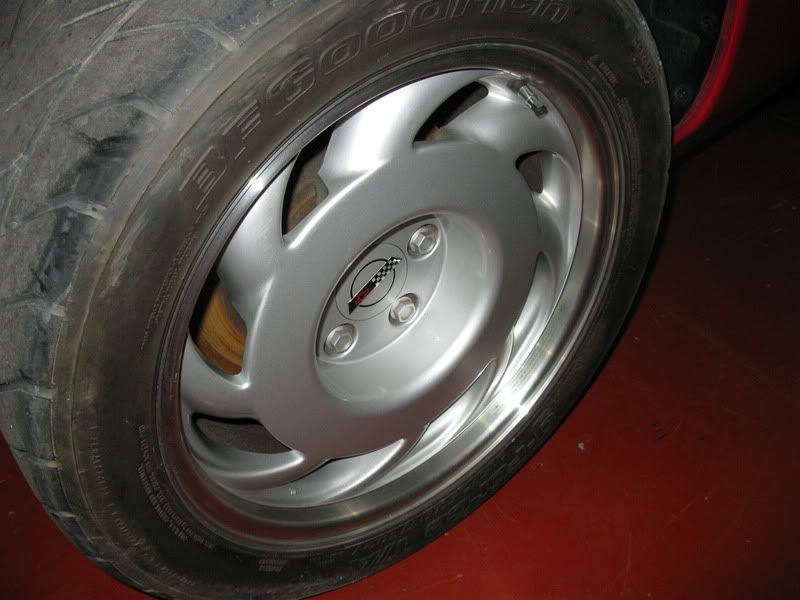
Rims are in very good condition also, no curb-rash at all on any of them.
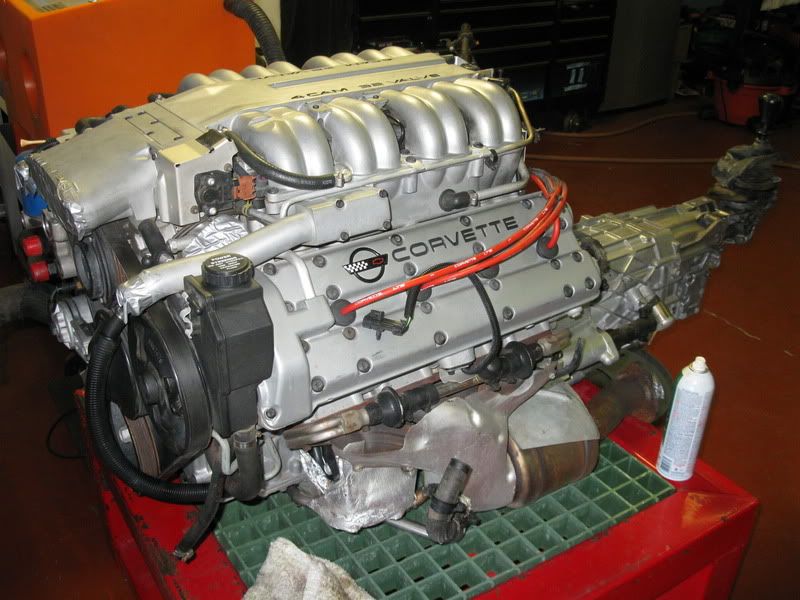
LT5 & ZF6 after being degreased and pressure washed.
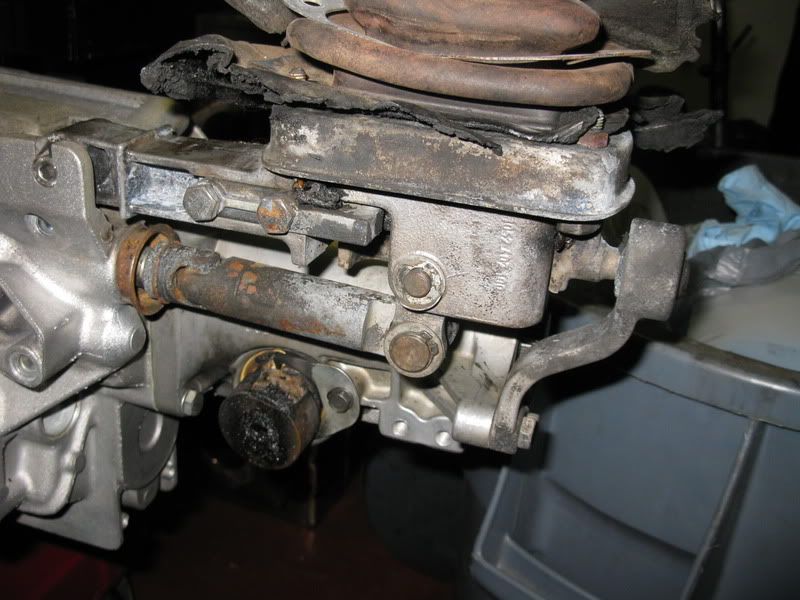
As you can see, the rubber boot that covers the lower part of the shifter linkage got completely burned off.
Rear of the engine got burnt a little also.
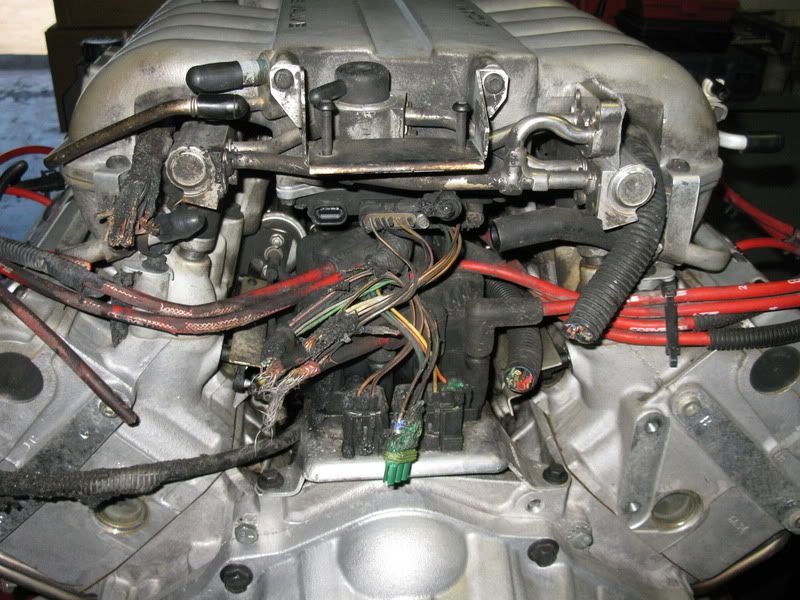
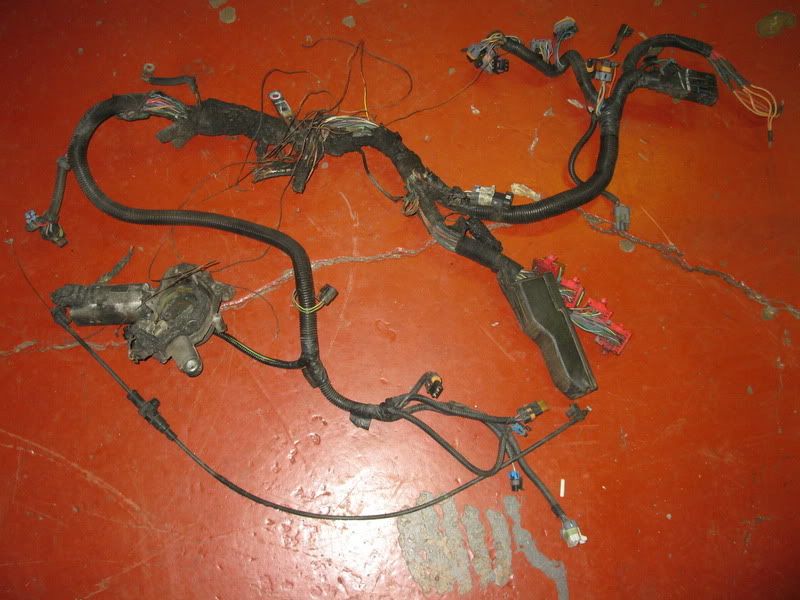
Partially burnt engine harness and wiper motor.
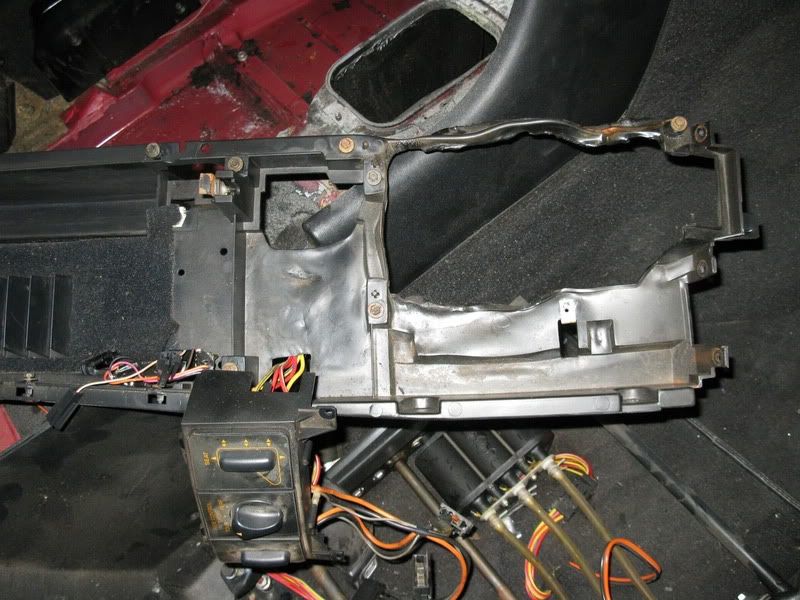
Other than the plastic framework under the console getting some melting/warping from the heat, it doesn't look like the
fire got into the inside of the car.
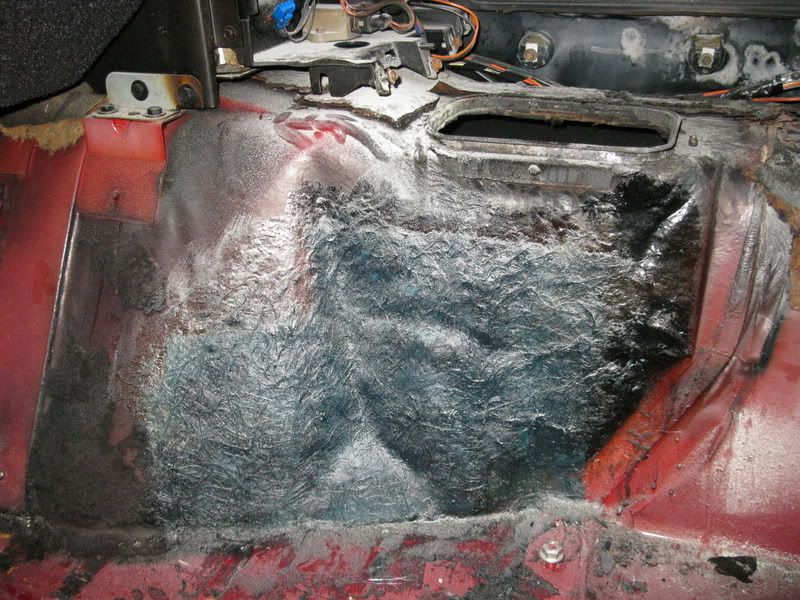
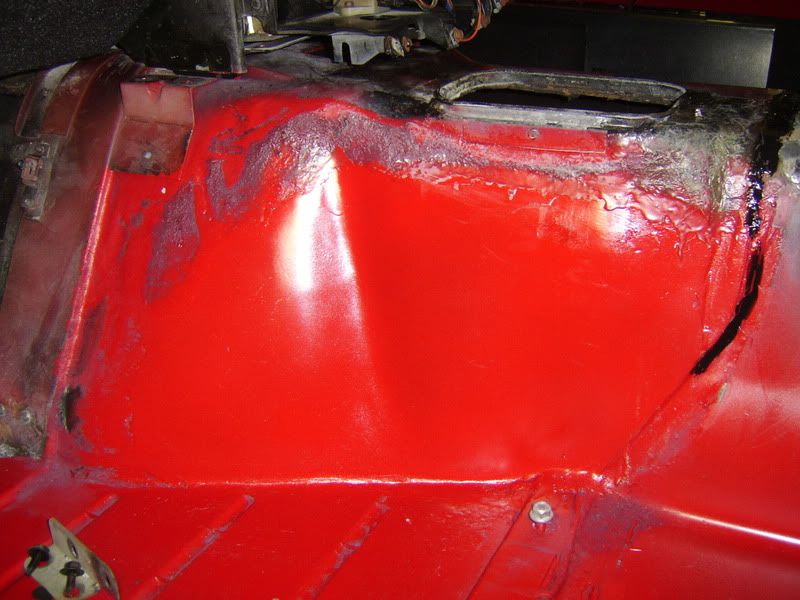
Here are some pictures of the repaired fiberglass area on the driver's side of the transmission tunnel. Evan's body shop
friend did the repair (same guy he bought the car from). The fiberglass didn't completely burn through, it was just
brittle and weak from the fire.
The repaired section is going to be sanded down so it is smoother, then a quick spray of red paint so it blends better
with the surrounding area.

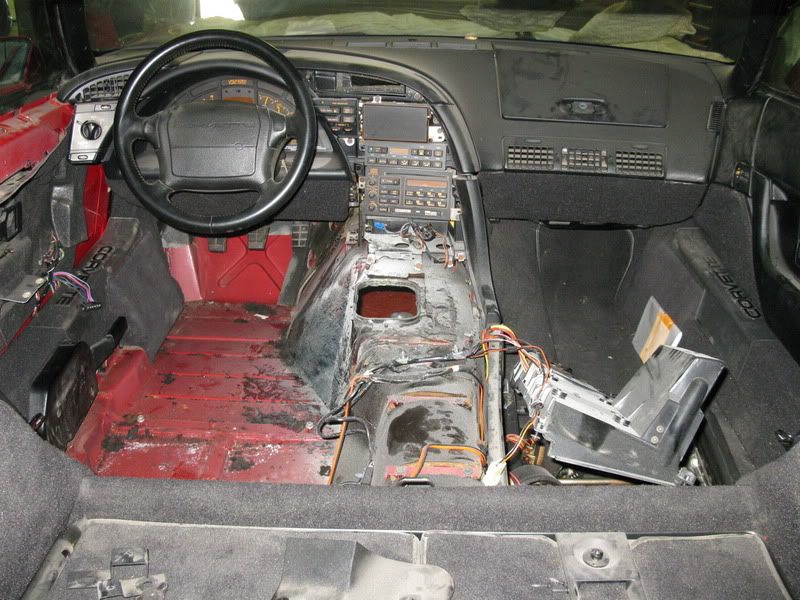
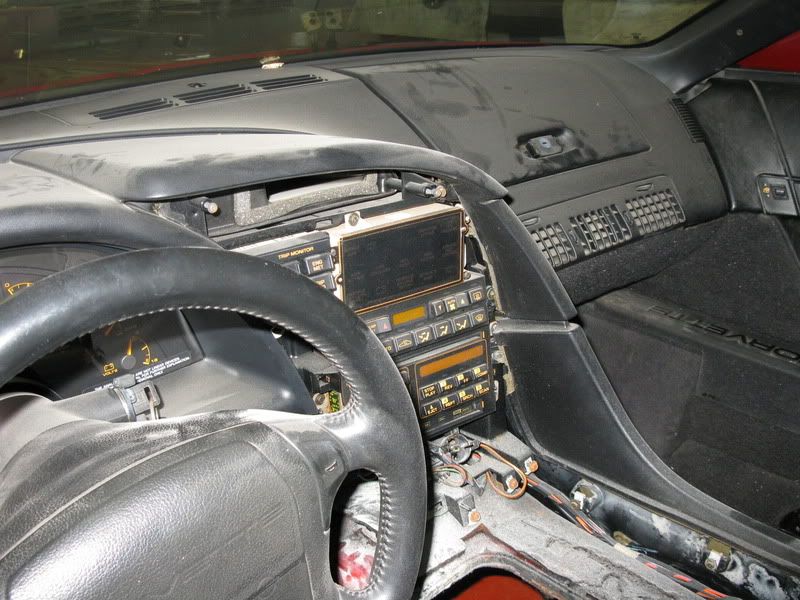
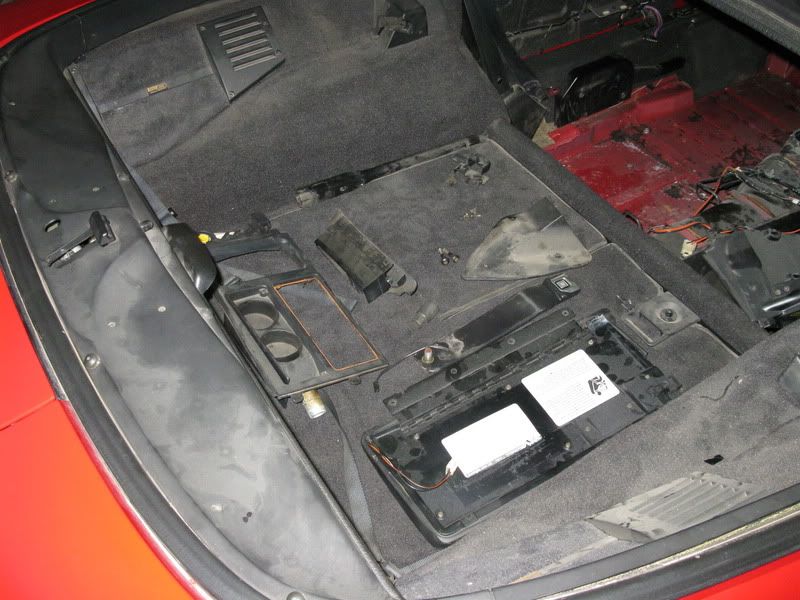
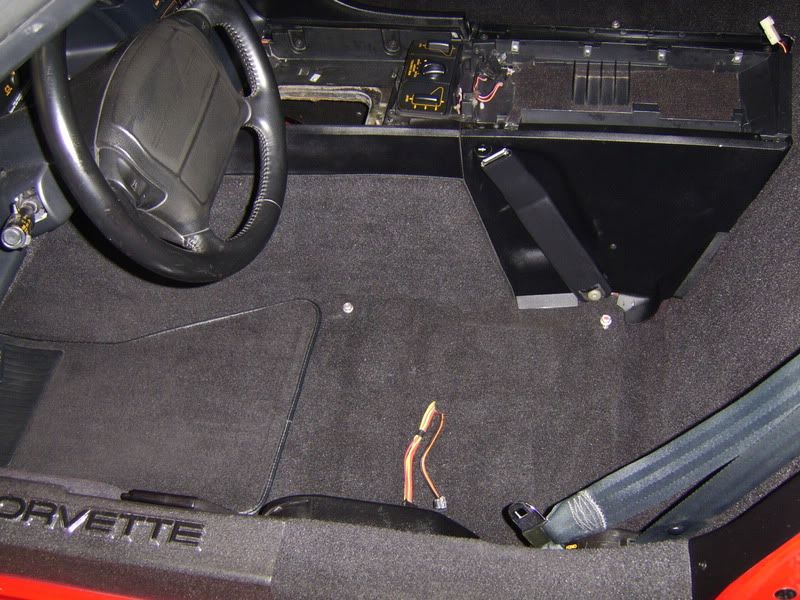
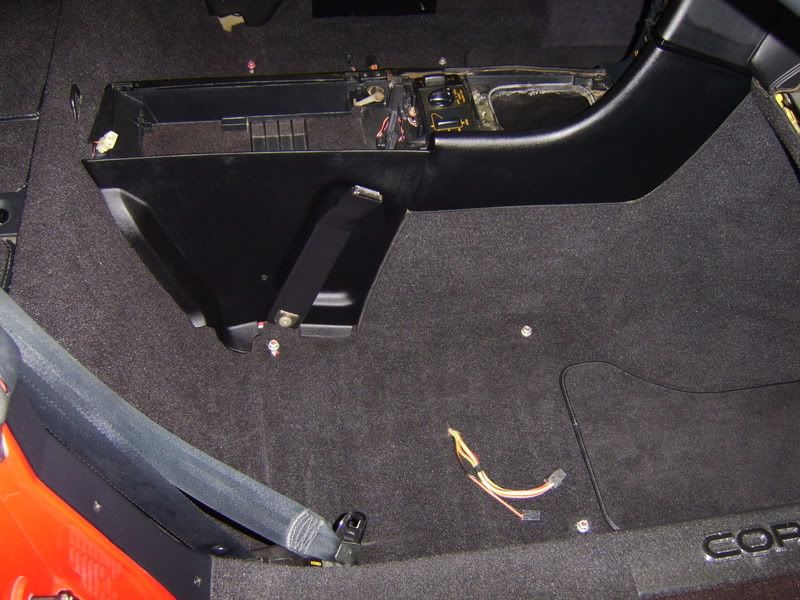
Couple more overall interior shots. It looks really dirty, but it will clean up really nice.
Now here is a little taste of what the interior will look like when I'm done with it.
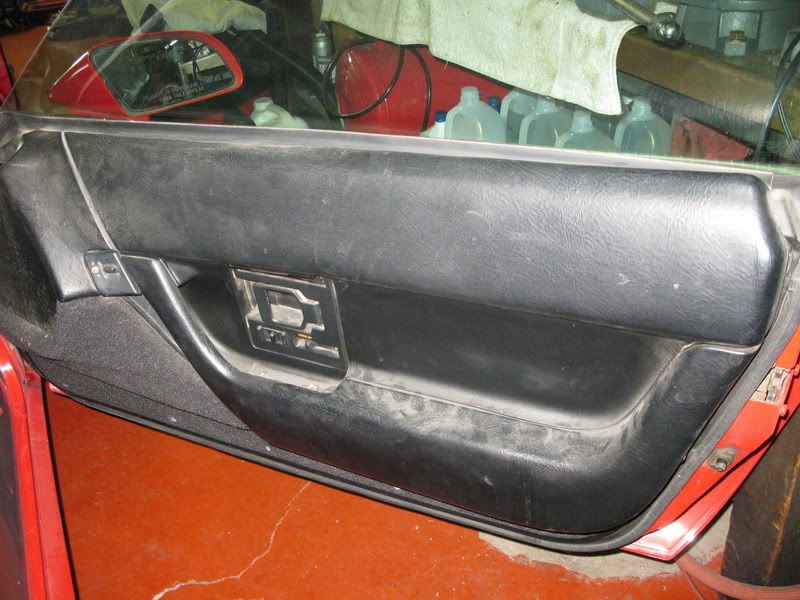
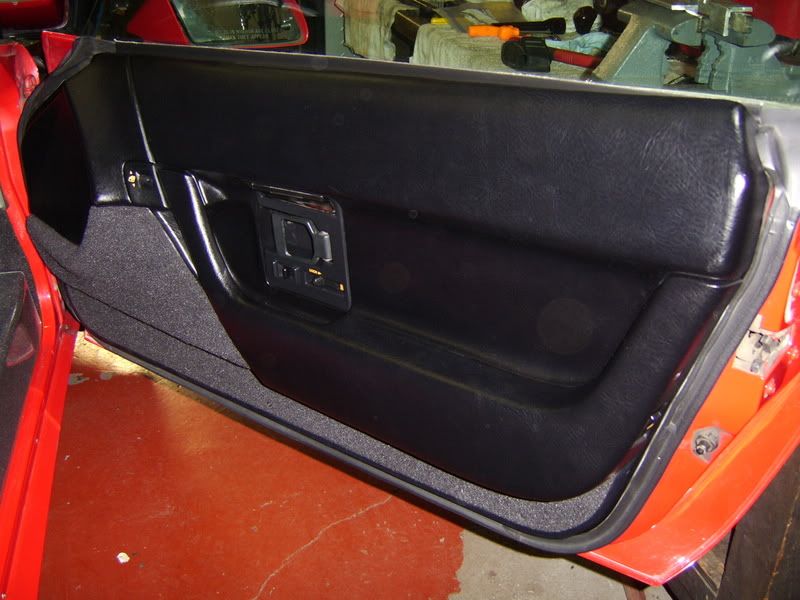
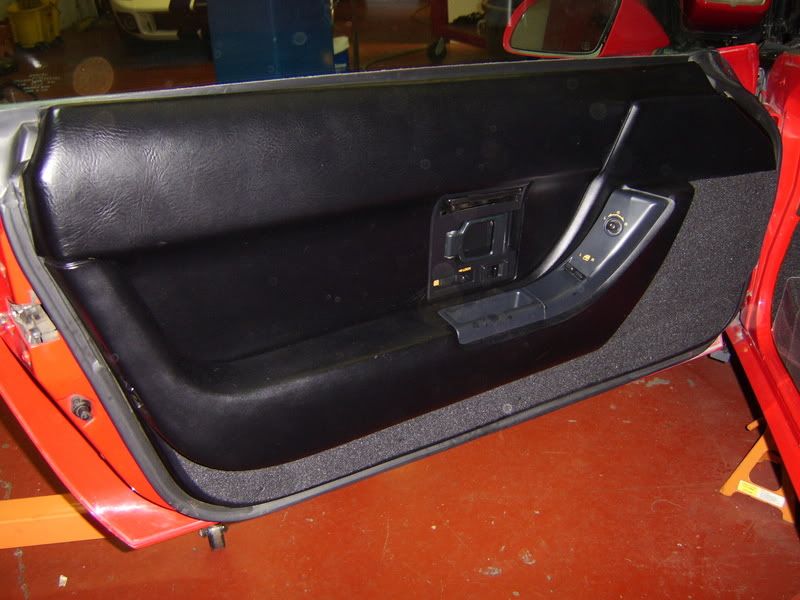
Passenger door panel before:
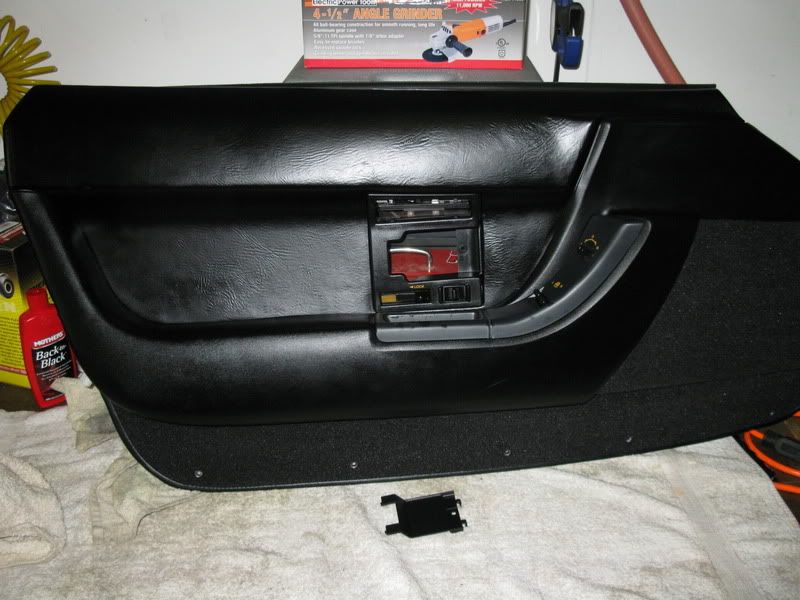
And now, the same panel after being cleaned and detailed:
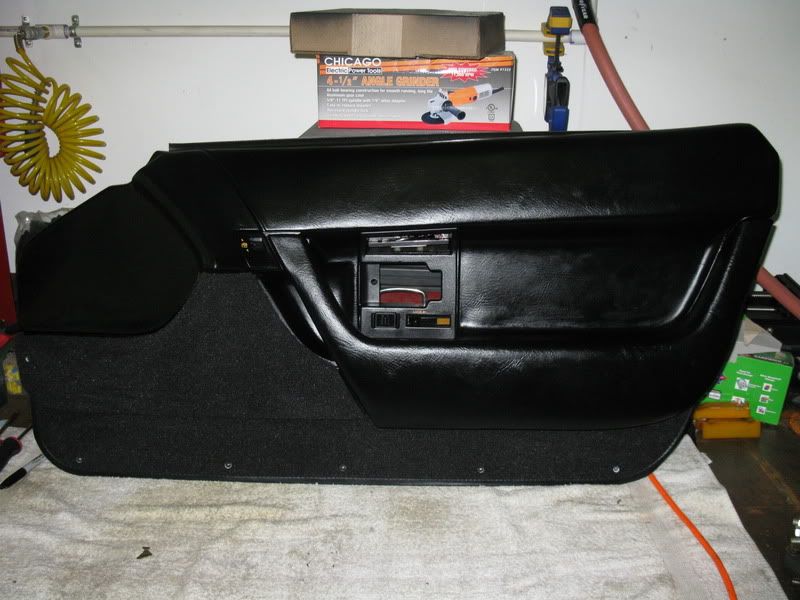
Driver's door panel after (don't have a before pic for this one):
I will continue to post updates on this project as we progress.
Update - 7/31/10:
Seats are all cleaned up now. I first wiped off the worst of the dust with a dry, clean rag. Then I wiped the entire
leather surface down with Meguire's leather cleaner/conditioner. I also cleaned & detailed the plastic seat back and
bottom.
Before:
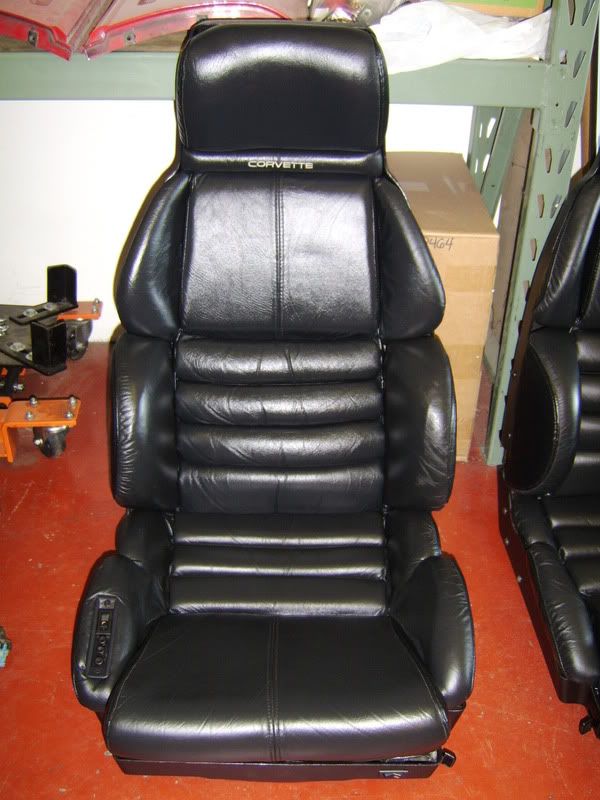
After:

Seat track assemblies have been cleaned up also.
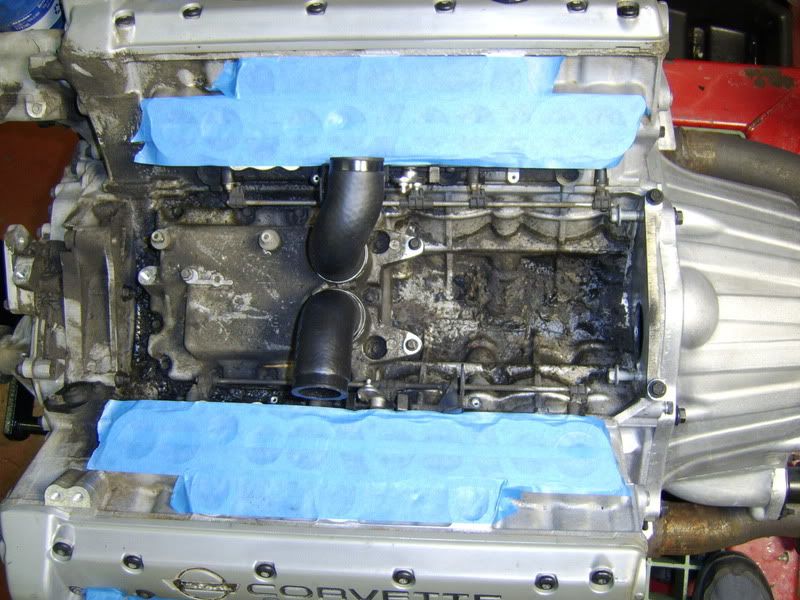
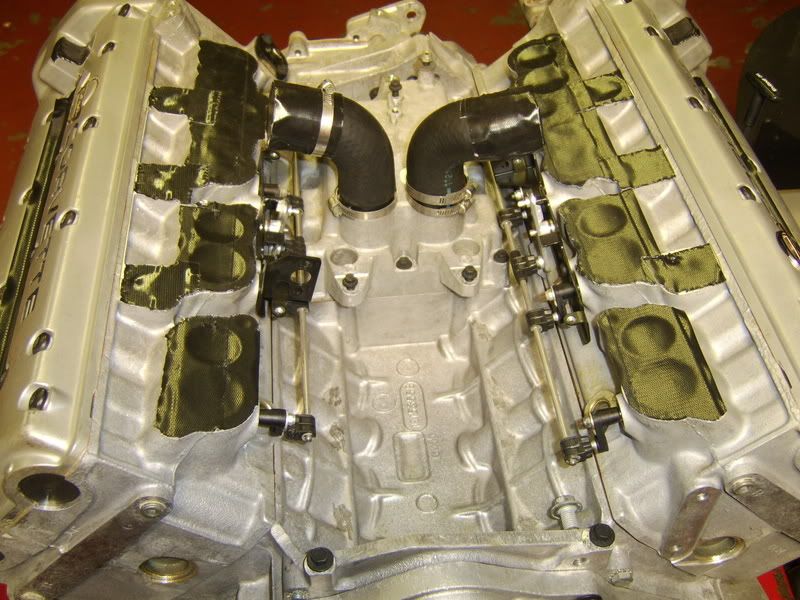
Next, I decided to start doing a little work on the LT5. Plenum removed - yup, it's REALLY dirty in there!
Update - 8/6/10:
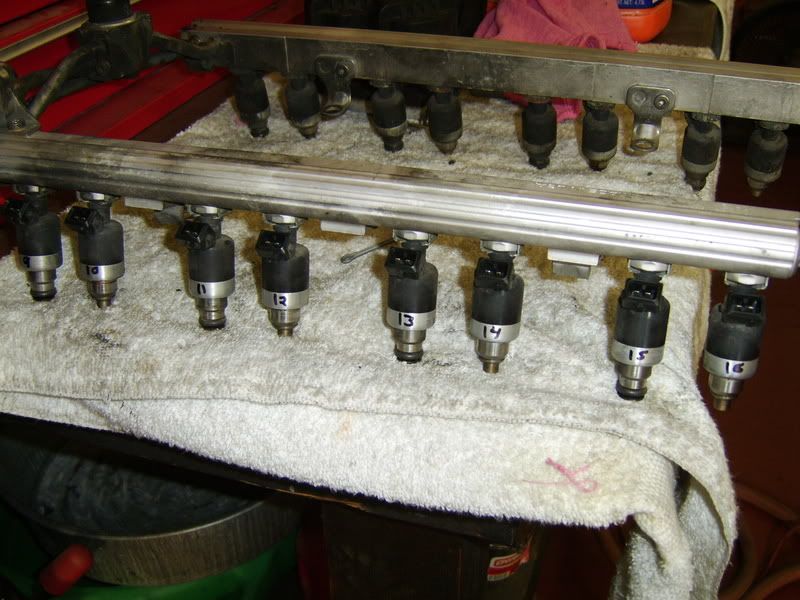
Fuel rails & injector headers removed.
Got all the front accessories & pulleys (except the crank pulley) taken off.
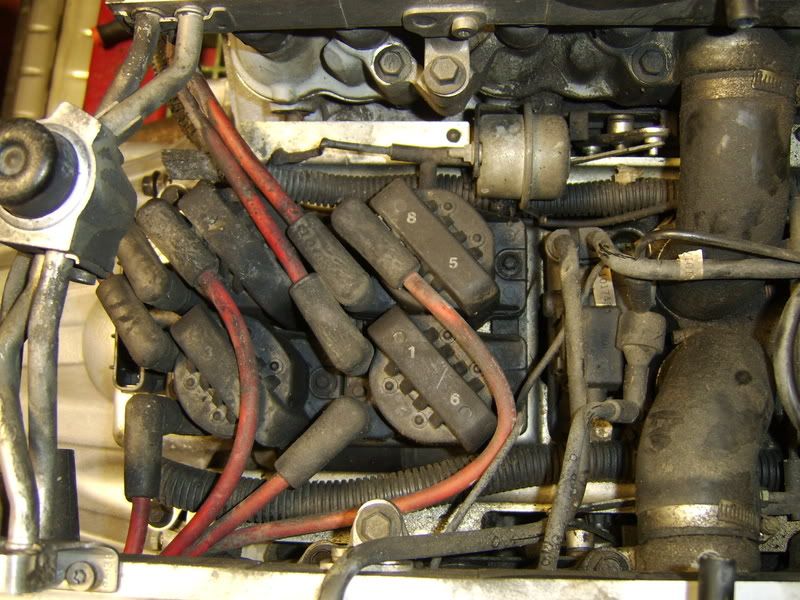
All the vacuum lines, spark plug coils & mount, secondary actuators, the metal shields covering the secondary
actuator linkage and the starter have all been removed. Looks like a swamp in there!
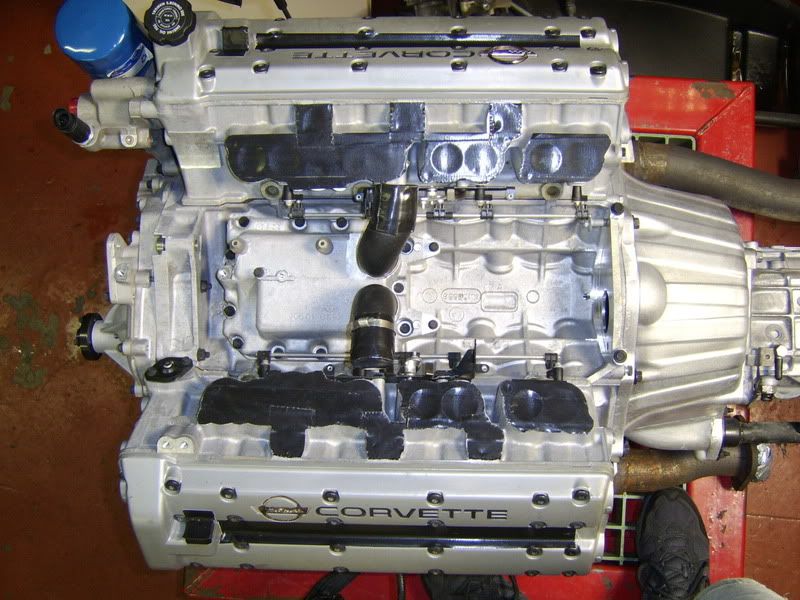
Next, I took off the blue masking tape from the heads and put on some heavy duty black tape called "gorilla tape"
that would hold up during the pressure washing. It worked out really well.
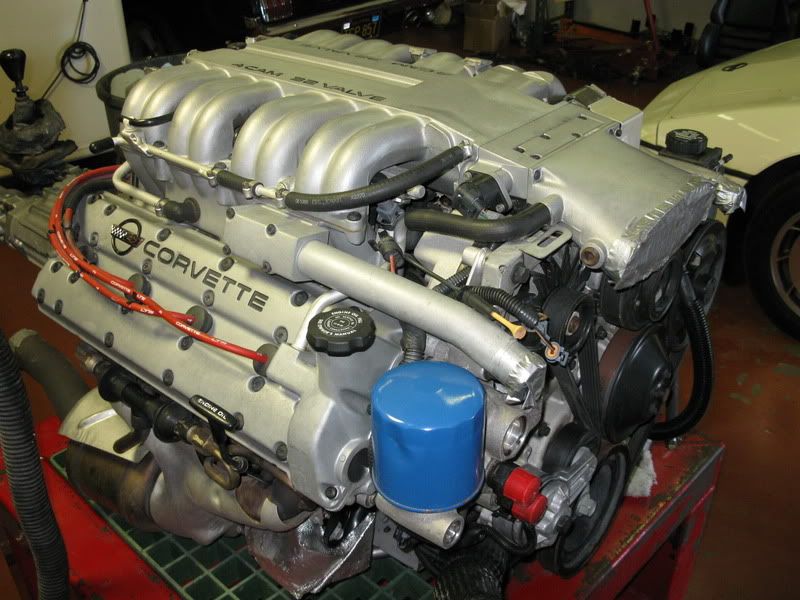
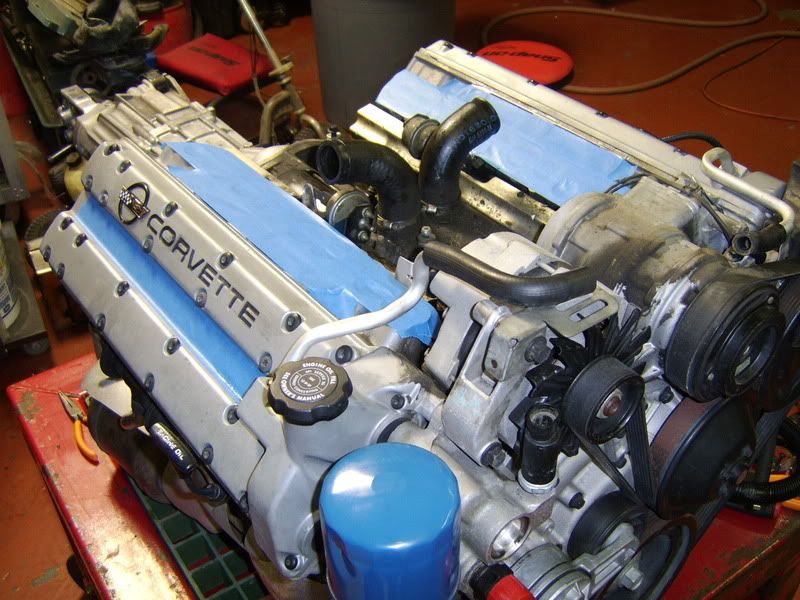
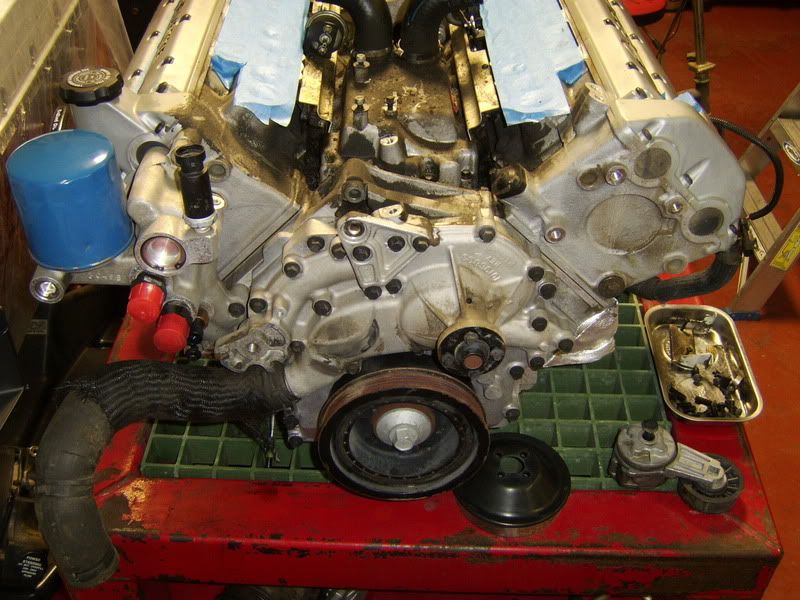
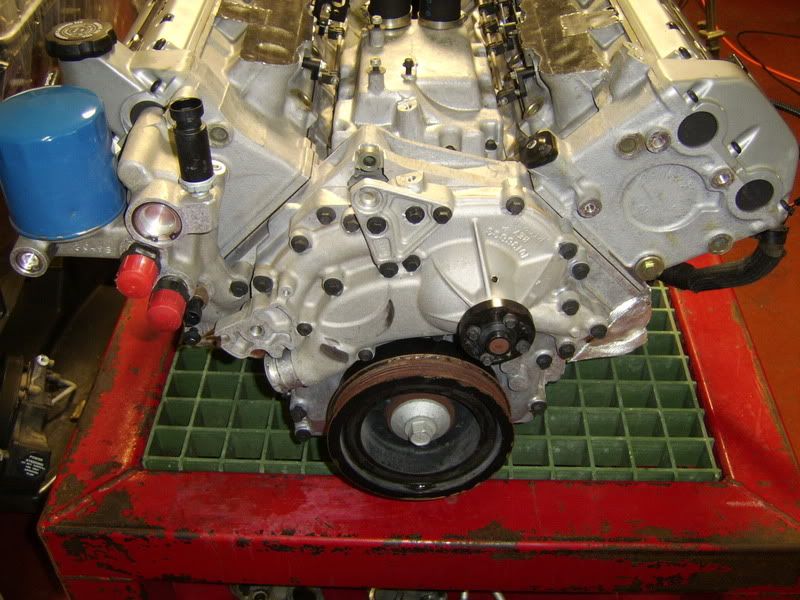
After lots of degreaser and pressure-washing, here is what the engine now looks like. It cleaned up really nice.
Also got the fuel rails and regulator cleaned up.
Before:
After:

This Z is going to be cherry when we get done with it!
Update - 12/19/10:
This project has kind of been on hold since my last update. Evan had a lot of other stuff going on the past couple
months and wasn't able to spend any time or money on it. We've started up on it again recently, though.
The repair to the trans tunnel is finished now, it has been sanded down and painted.
Cam covers are also off now. Put oil on the cams/chains and covered them up with rags so they won't get messed up
while the covers are off.
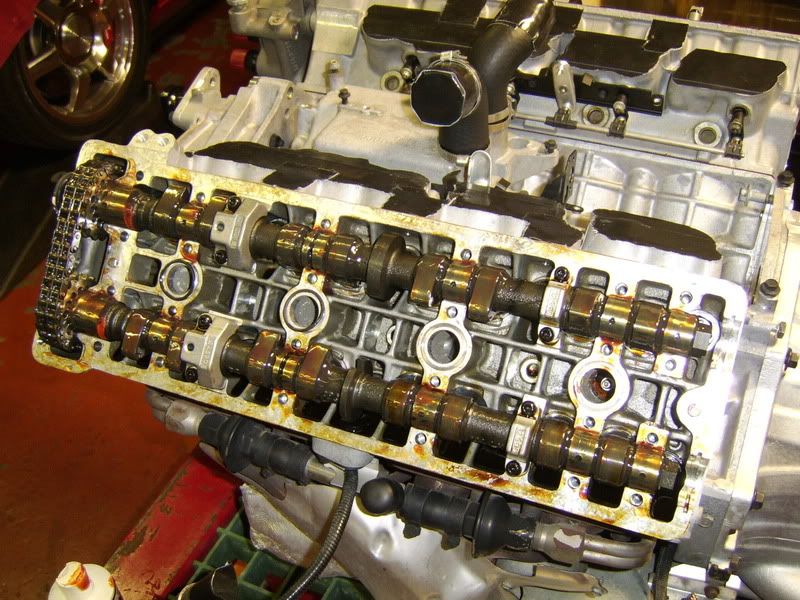
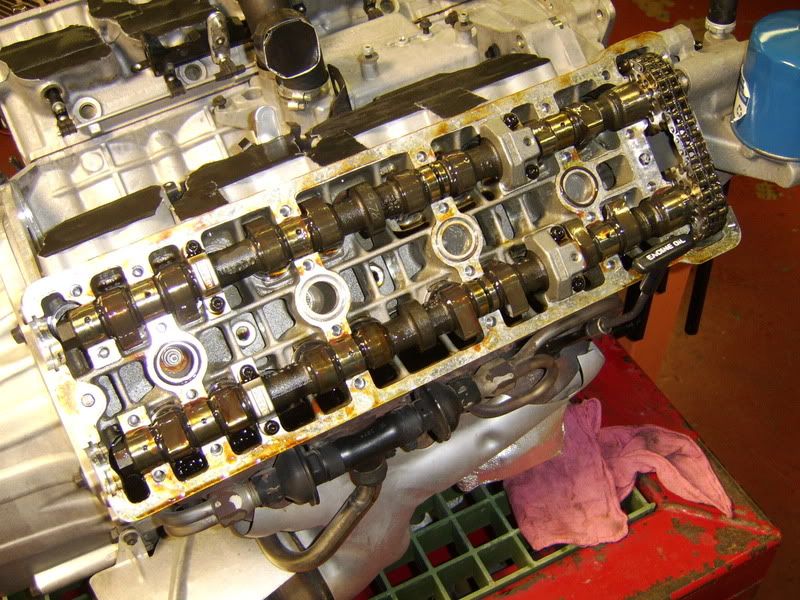
Most of the top end parts have been stripped and are ready to get repainted.
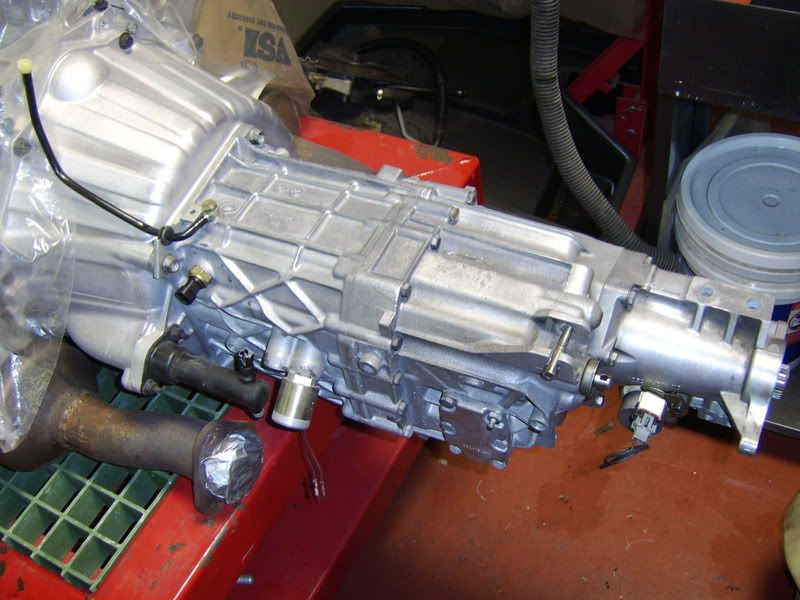
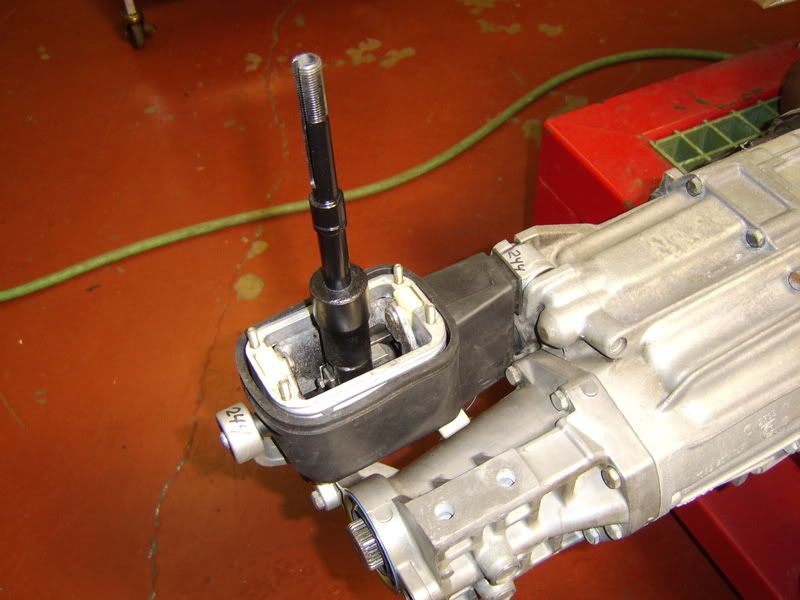
The ZF6 is coming together also. Vent tube assembly, reverse light switch, speed sensor and rear seal have all been
replaced. We are still in the process of repairing the shifter assembly.
I've also been working more on the interior, but don't have updated pics yet. I'll get them up soon.
Update - 1/22/11:
Interior is on its way to being back together now. I've cleaned all the carpet with carpet cleaner, but am still working
on detailing all the plastic/vinyl parts with Back to Black.
7/23/10:
I've started helping out my buddy Evan (eguyett1985) with the repair and restoration of the 43K mile '92 red/black ZR-1 he bought. He decided to let me do the thread posting and updating on this project.
So now I've got 2 ZR-1 projects to work on!
Here is the link to the initial thread that he posted on CF telling how he acquired this ZR-1:
http://forums.corvetteforum.com/c4-z...-opinions.html
But here is a partial quote of his initial post on CF if you don't want to or can't view the link for some reason:
eguyett1985:
"... The car is Red/Black, 1 owner, both tops, window sticker, etc. Now here's the problem; the car had a minor electrical fire underneath in the trans tunnel, the reverse light switch shorted causing the harness to catch fire briefly which scorched the LH side of the floor next to the transmission and the area of the firewall below the wiper motor. The owner opened the hood right away and put the fire out; the underside of the hood is completely undamaged as is the engine and the interior. The car was fully insured and the body shop and the insurance company were unable to locate a replacement harness over the past year and the car has sat in my friend's shop with a pending lien sale against it until last week when the body shop got title to the car. Unfortunately, the owner sent the insurance company the title he had in his possession 2 weeks earlier and accepted a payout on the car. So now, I have been offered the car with the necessary minor floorpan repair made and the engine and trans on a pallet at a great price; I have located a perfect replacement harness and can put the car back together in short order. ..."
We are not sure exactly how the fire started. Evan mentions in his post in the link above about the reverse light switch causing it (not sure where he got that info), but we are thinking now that it may have started around the VSS sensor since it seems like the fire would have traveled up towards the engine, not back towards the rear (though I guess it could have traveled back along the wire harness a little way). If the fire had started at the reverse switch, I think the shifter/VSS sensor area would not have gotten burned as bad as it did. There was also a patch of something melted onto one of the exhaust pipes near the front by the transmission, so it's also possible that the fire started as a result of the wire harness touching the exhaust.
Now for some pictures!
First, a couple of shots of the exterior. Engine bay area has already been degreased and pressure washed(no pics of that area yet), exterior has also had a quick wash. Overall, this car is in very good condition (other than the dust, dirt & fire-damaged areas
)Rims are in very good condition also, no curb-rash at all on any of them.
LT5 & ZF6 after being degreased and pressure washed.
As you can see, the rubber boot that covers the lower part of the shifter linkage got completely burned off.
Rear of the engine got burnt a little also.
Partially burnt engine harness and wiper motor.
Other than the plastic framework under the console getting some melting/warping from the heat, it doesn't look like the
fire got into the inside of the car.
Here are some pictures of the repaired fiberglass area on the driver's side of the transmission tunnel. Evan's body shop
friend did the repair (same guy he bought the car from). The fiberglass didn't completely burn through, it was just
brittle and weak from the fire.
The repaired section is going to be sanded down so it is smoother, then a quick spray of red paint so it blends better
with the surrounding area.
Couple more overall interior shots. It looks really dirty, but it will clean up really nice.
Now here is a little taste of what the interior will look like when I'm done with it.
Passenger door panel before:
And now, the same panel after being cleaned and detailed:
Driver's door panel after (don't have a before pic for this one):
I will continue to post updates on this project as we progress.
Update - 7/31/10:
Seats are all cleaned up now. I first wiped off the worst of the dust with a dry, clean rag. Then I wiped the entire
leather surface down with Meguire's leather cleaner/conditioner. I also cleaned & detailed the plastic seat back and
bottom.
Before:
After:
Seat track assemblies have been cleaned up also.
Next, I decided to start doing a little work on the LT5. Plenum removed - yup, it's REALLY dirty in there!
Update - 8/6/10:
Fuel rails & injector headers removed.
Got all the front accessories & pulleys (except the crank pulley) taken off.
All the vacuum lines, spark plug coils & mount, secondary actuators, the metal shields covering the secondary
actuator linkage and the starter have all been removed. Looks like a swamp in there!
Next, I took off the blue masking tape from the heads and put on some heavy duty black tape called "gorilla tape"
that would hold up during the pressure washing. It worked out really well.
After lots of degreaser and pressure-washing, here is what the engine now looks like. It cleaned up really nice.
Also got the fuel rails and regulator cleaned up.
Before:
After:
This Z is going to be cherry when we get done with it!
Update - 12/19/10:
This project has kind of been on hold since my last update. Evan had a lot of other stuff going on the past couple
months and wasn't able to spend any time or money on it. We've started up on it again recently, though.
The repair to the trans tunnel is finished now, it has been sanded down and painted.
Cam covers are also off now. Put oil on the cams/chains and covered them up with rags so they won't get messed up
while the covers are off.
Most of the top end parts have been stripped and are ready to get repainted.
The ZF6 is coming together also. Vent tube assembly, reverse light switch, speed sensor and rear seal have all been
replaced. We are still in the process of repairing the shifter assembly.
I've also been working more on the interior, but don't have updated pics yet. I'll get them up soon.
Update - 1/22/11:
Interior is on its way to being back together now. I've cleaned all the carpet with carpet cleaner, but am still working
on detailing all the plastic/vinyl parts with Back to Black.
Last edited by bdw18_123; 11-17-2013 at 12:46 AM.


 01-23-2011, 08:46 AM
#4
1994 Admiral Blue ZZZZZR1

All I can say is wow!!!!!!!!!
That is "professional" work to say the least!
More updates on this beast please!
David
That is "professional" work to say the least!
More updates on this beast please!
David
01-23-2011, 11:27 AM
#5
Drifting
Beautiful work!


 01-25-2011, 06:03 PM
#9
Drifting
Thread Starter
Member Since: Jun 2007
Location: Prather, California -1990 ZR-1 White/Flame Red- -SOLD!!-
Posts: 1,261
Likes: 0
Received 2 Likes
on
2 Posts
No, it's not painted, it's just aluminum. Though it probably has some kind of treatment done to it for anti-corrosion purposes, but I'm not sure. The actual metal lines that go between the two rails are stainless steel though.
The black you see on it is the soot from the fire. I just scrubbed it all real good with Simple Green. Some of the darker areas required more scrubbing than others, but I was able to get it all off.
But if your talking about the injector headers (where the bottom of the injectors plug into, that is painted. On those and the other painted top end parts, we used paint stripper then bead blasted them.
 01-26-2011, 01:15 AM
#11
Team Owner


Member Since: Aug 2005
Location: Riverside County Southern California
Posts: 34,988
Received 501 Likes
on
342 Posts
Co-winner 2020 C4 of the Year - Modified
2018 Corvette of Year Finalist
2017 C4 of Year
2016 C7 of Year Finalist
St. Jude Donor '09-'10-'11-'12-'13-'14-'15-'16-'17-'18-'19-'20


Ben, this is a good thread. Didn't know Evan had a ZR1 project going.
01-26-2011, 05:57 AM
#12
Melting Slicks

Your talking about the rail that the top of the injectors go in right?
No, it's not painted, it's just aluminum. Though it probably has some kind of treatment done to it for anti-corrosion purposes, but I'm not sure. The actual metal lines that go between the two rails are stainless steel though.
The black you see on it is the soot from the fire. I just scrubbed it all real good with Simple Green. Some of the darker areas required more scrubbing than others, but I was able to get it all off.
But if your talking about the injector headers (where the bottom of the injectors plug into, that is painted. On those and the other painted top end parts, we used paint stripper then bead blasted them.
02-16-2011, 07:49 PM
#13
Drifting
Thread Starter
Member Since: Jun 2007
Location: Prather, California -1990 ZR-1 White/Flame Red- -SOLD!!-
Posts: 1,261
Likes: 0
Received 2 Likes
on
2 Posts
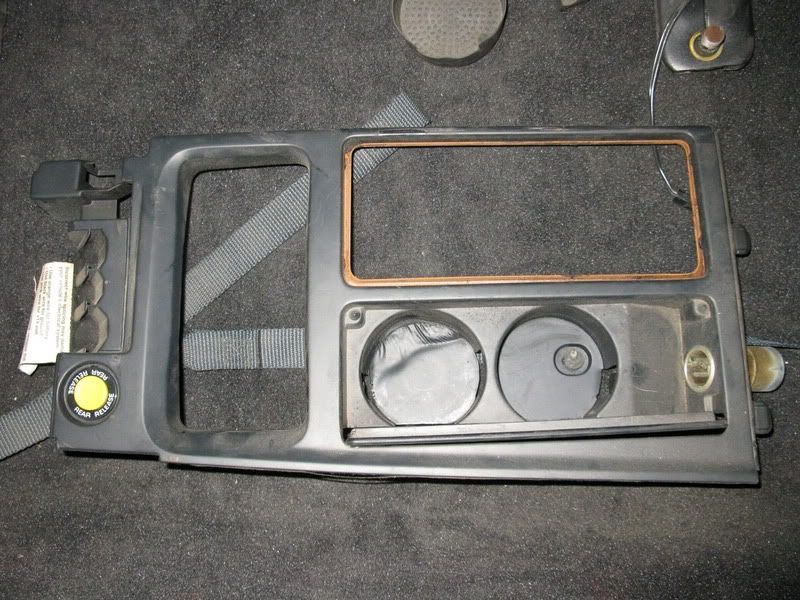
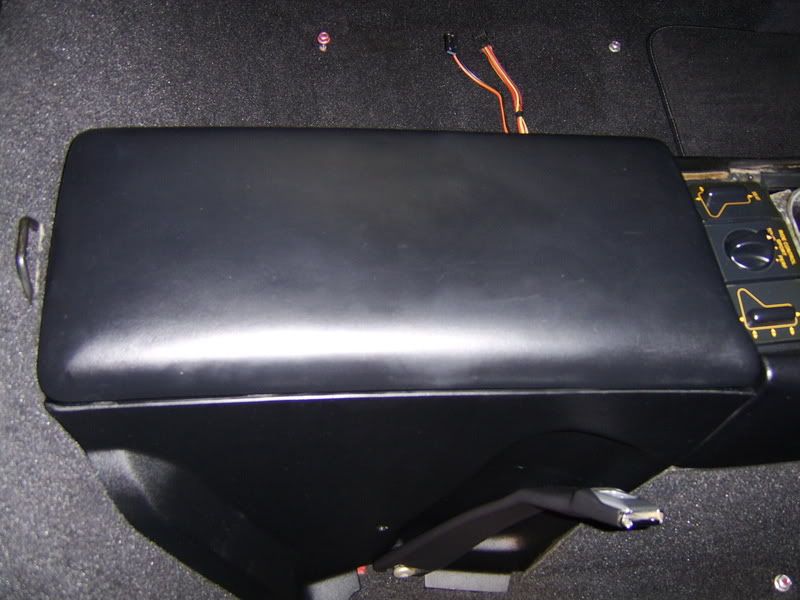
Console lid is done.
This one had the same issue that mine had, the back & front edge of the vinyl was detached and warping out some. I repaired it the same way I did on mine, using countersunk 4-40 machine screws to hold the vinyl to the plastic. Works pretty well and you can't see the screws when the lid is back together.
Then I cleaned, detailed and reinstalled the lid.
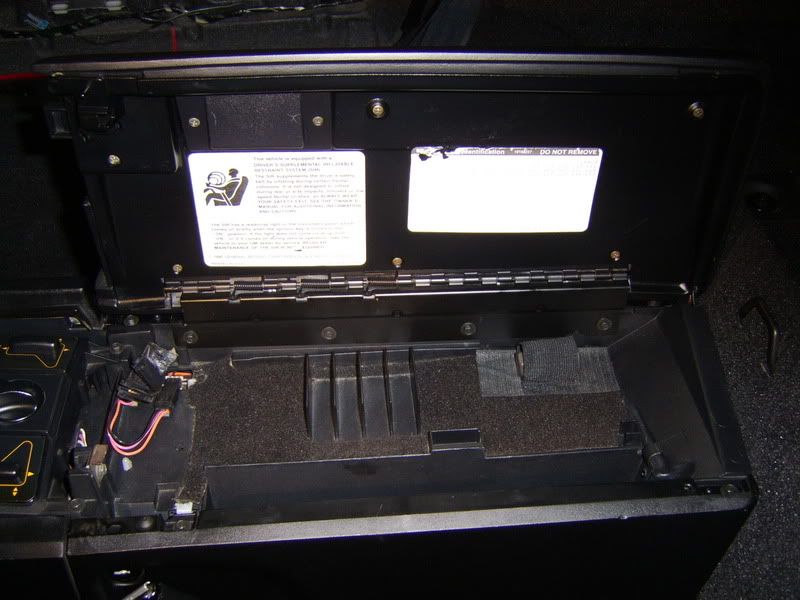
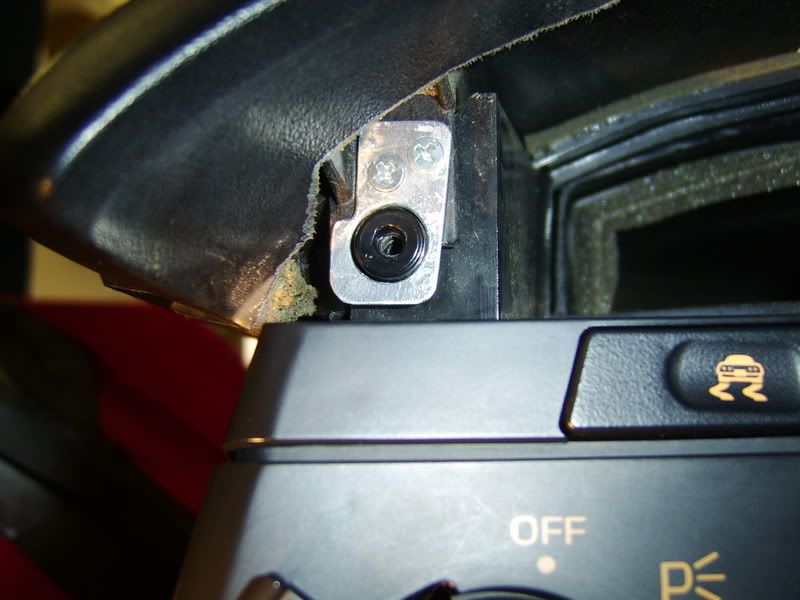
I also had to repair the the hold-down tab of the far left side corner of the dash behind the vent. I repaired it the same way I did on mine, cut out a small piece of thin aluminum sheet metal, drilled the holes and attached it with countersunk 4-40 machine screws.
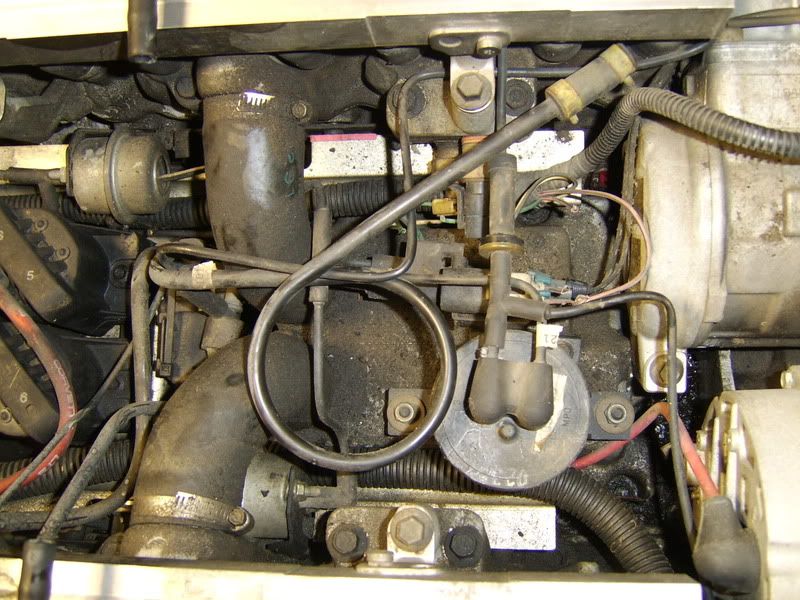
We've started doing some work in the engine bay now. Here is a picture before we did anything to it.
We got the replacement engine harness laid in and got all the plugs on the passenger side connected (the non-engine stuff). The driver's side of the harness still needs to be routed and connected.
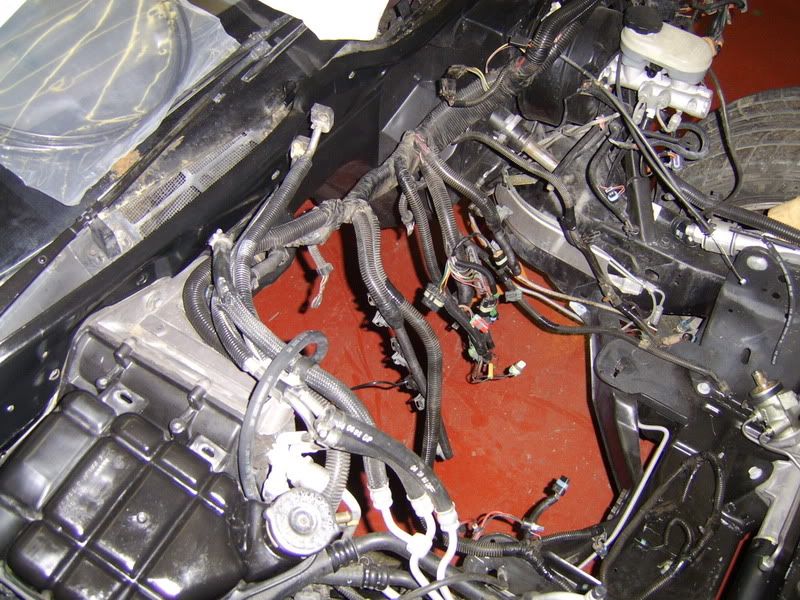
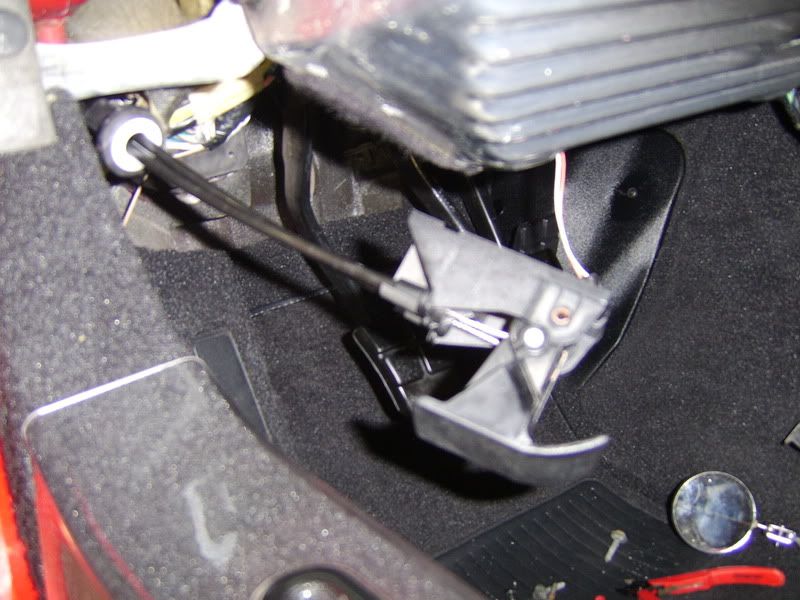
We also got the new hood release cables installed and discovered the joy of trying to get that one screw reinstalled that is buried between the two cables in the release handle assembly below the dash, what a PITA!
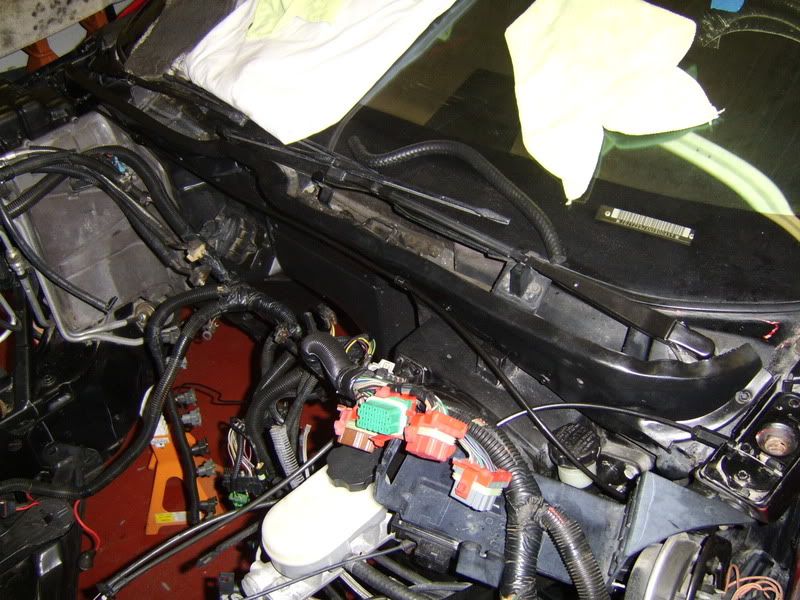
Evan removed the old hood seal that goes across directly below the windshield and installed the replacement seal. We also installed a replacement throttle cable assembly (the one from the gas pedal to the ASR servo) as the original was a bit toasted near the firewall, though still functional.
We also did a bit of cleaning and detailing in the engine bay.
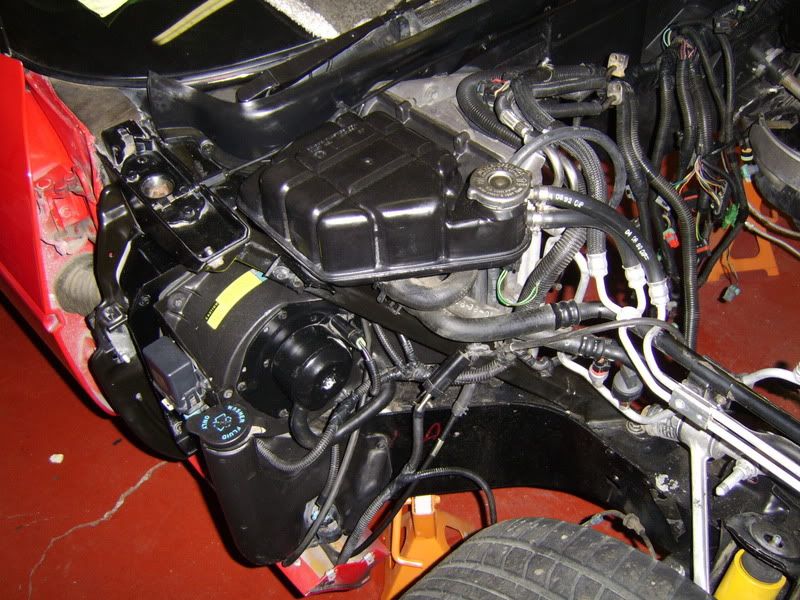
It's definitely starting to come together now! Interior is almost done, just have to get the seats reinstalled. The top end engine parts are ready to get painted and once that is done, we can start getting the engine back together and reinstalled.
This one had the same issue that mine had, the back & front edge of the vinyl was detached and warping out some. I repaired it the same way I did on mine, using countersunk 4-40 machine screws to hold the vinyl to the plastic. Works pretty well and you can't see the screws when the lid is back together.
Then I cleaned, detailed and reinstalled the lid.
I also had to repair the the hold-down tab of the far left side corner of the dash behind the vent. I repaired it the same way I did on mine, cut out a small piece of thin aluminum sheet metal, drilled the holes and attached it with countersunk 4-40 machine screws.
We've started doing some work in the engine bay now. Here is a picture before we did anything to it.
We got the replacement engine harness laid in and got all the plugs on the passenger side connected (the non-engine stuff). The driver's side of the harness still needs to be routed and connected.
We also got the new hood release cables installed and discovered the joy of trying to get that one screw reinstalled that is buried between the two cables in the release handle assembly below the dash, what a PITA!
Evan removed the old hood seal that goes across directly below the windshield and installed the replacement seal. We also installed a replacement throttle cable assembly (the one from the gas pedal to the ASR servo) as the original was a bit toasted near the firewall, though still functional.
We also did a bit of cleaning and detailing in the engine bay.
It's definitely starting to come together now! Interior is almost done, just have to get the seats reinstalled. The top end engine parts are ready to get painted and once that is done, we can start getting the engine back together and reinstalled.


 02-19-2011, 01:56 PM
#18
Drifting
Thread Starter
Member Since: Jun 2007
Location: Prather, California -1990 ZR-1 White/Flame Red- -SOLD!!-
Posts: 1,261
Likes: 0
Received 2 Likes
on
2 Posts
Good eye! I was wondering if someone would notice that!
Yes, that is a Ford GT. We work on a lot of them, installing supercharger/exhaust upgrade packages, maintenance and other things.We just dyno'd one that we finished with recently. We installed a 4.0L Whipple supercharger & JBL headers (it already had an X-pipe), it put down 862HP at the rear wheels. And man was that thing LOUD on the dyno!

Last edited by bdw18_123; 02-19-2011 at 01:58 PM.
03-20-2011, 11:41 PM
#19
Drifting
Thread Starter
Member Since: Jun 2007
Location: Prather, California -1990 ZR-1 White/Flame Red- -SOLD!!-
Posts: 1,261
Likes: 0
Received 2 Likes
on
2 Posts
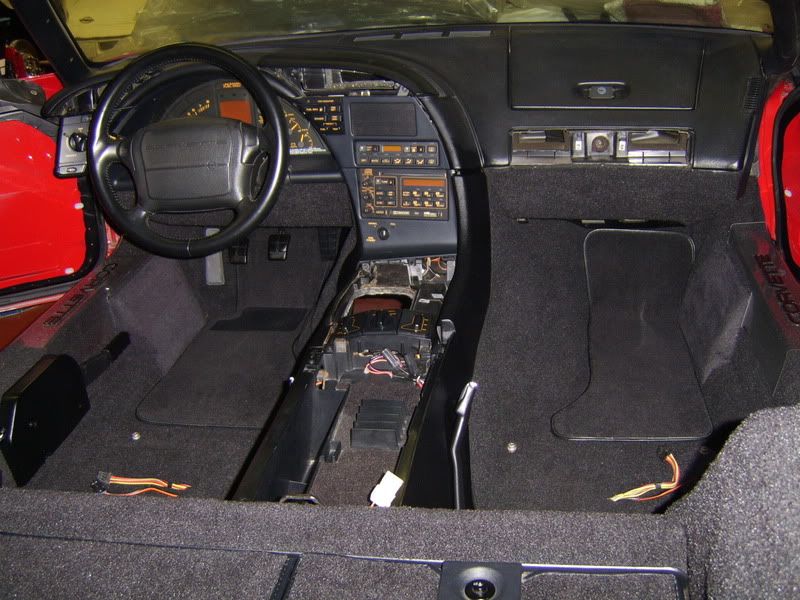
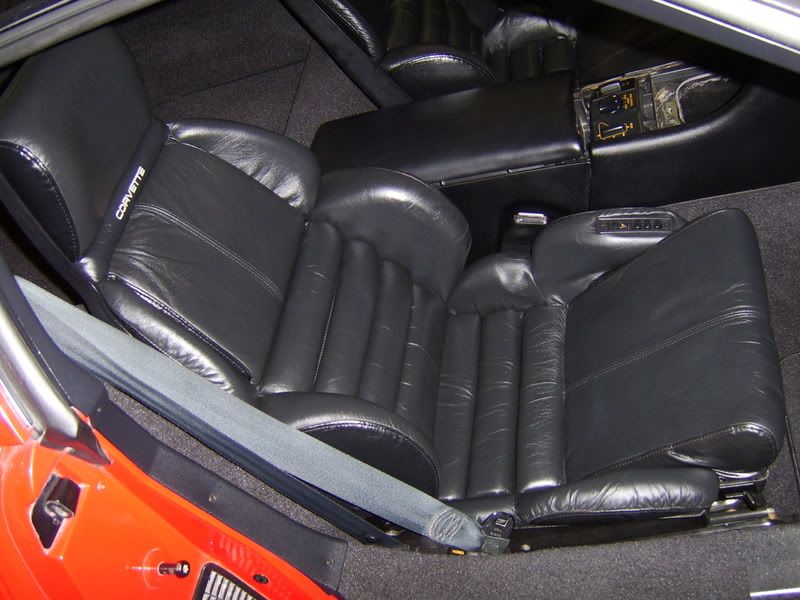
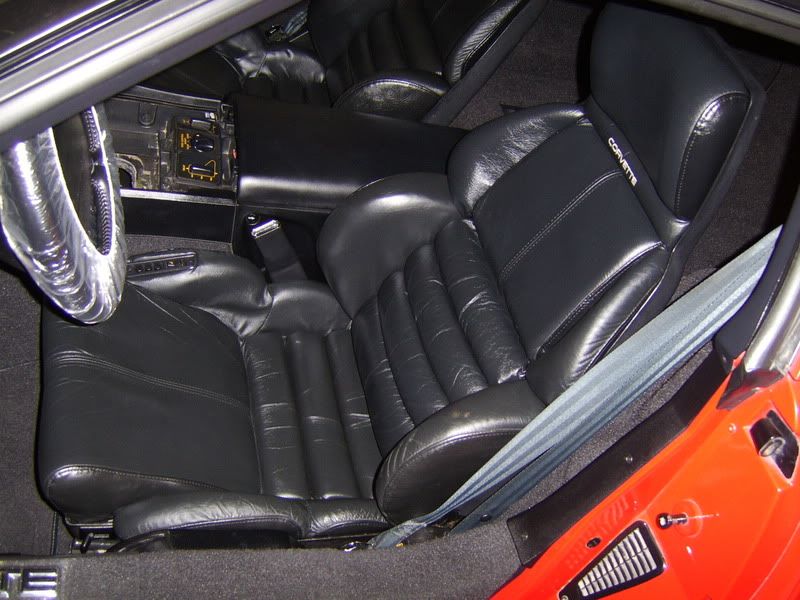
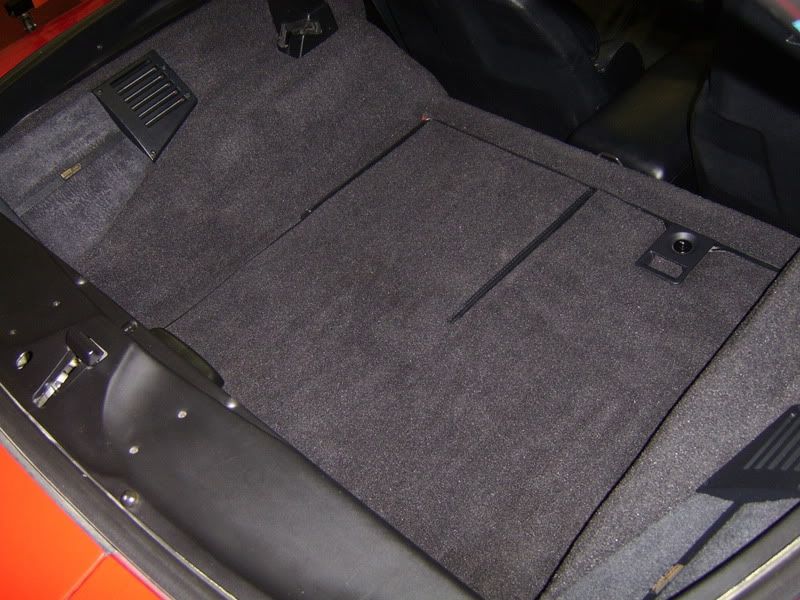
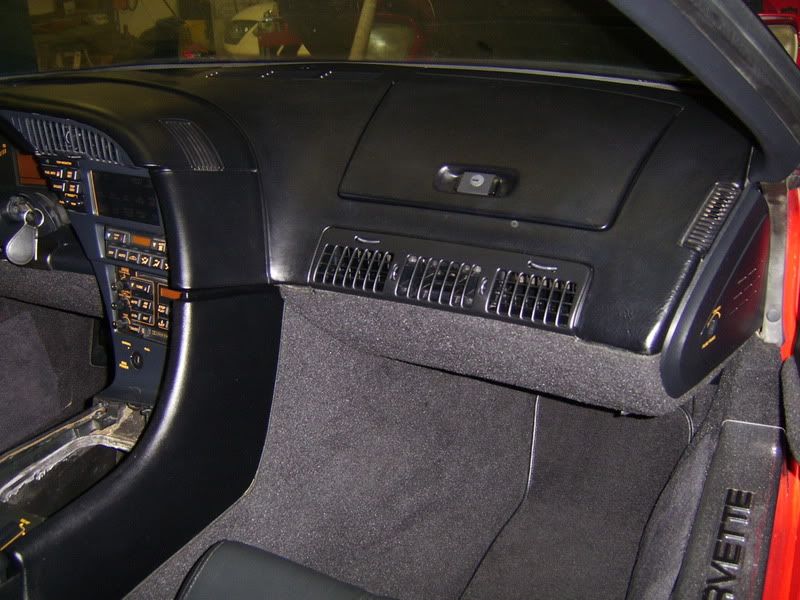
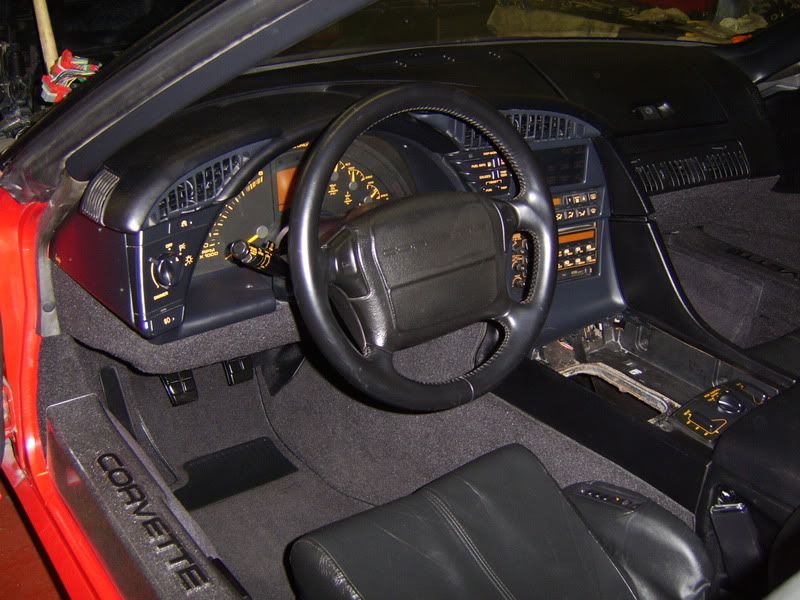
Interior is finished now, everything has been cleaned and detailed. The only interior piece not installed is the shifter console. That won't go in until after the engine & transmission are back in.
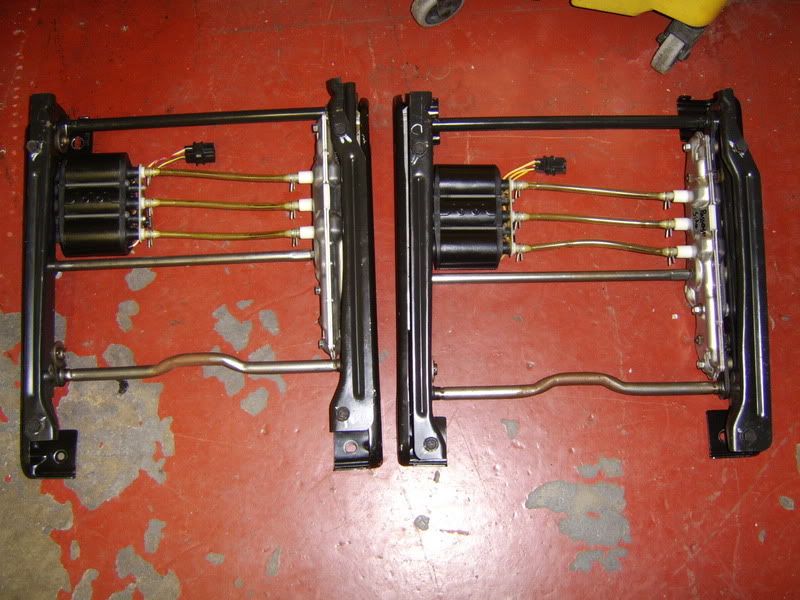
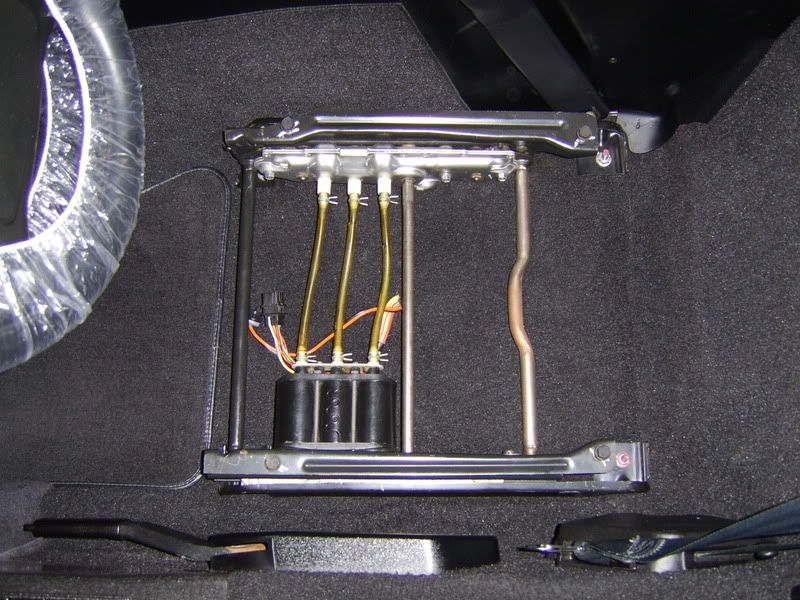
Passenger seat track installed:
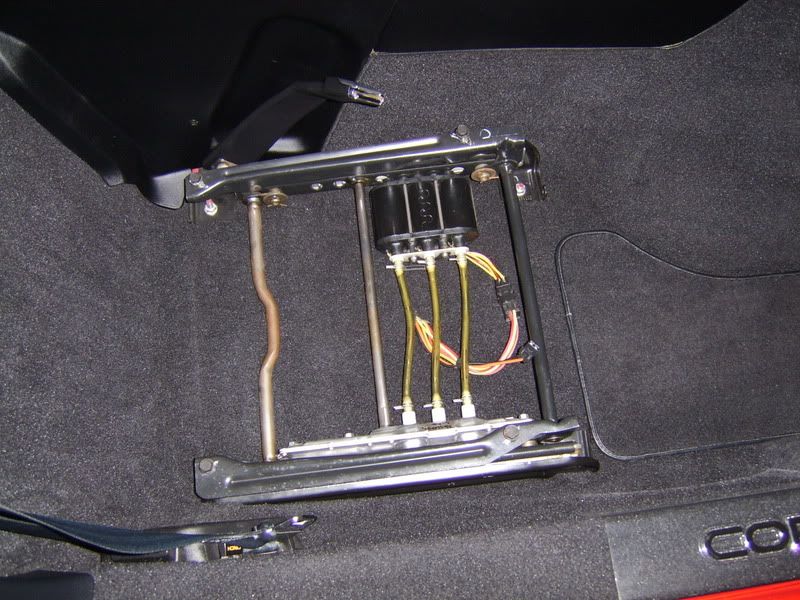
Driver seat track installed:
Here are some pictures of the finished interior:
The shifter assembly on the ZF6 is also done. It was repaired with parts purchased from Bill, the ZFDoc.
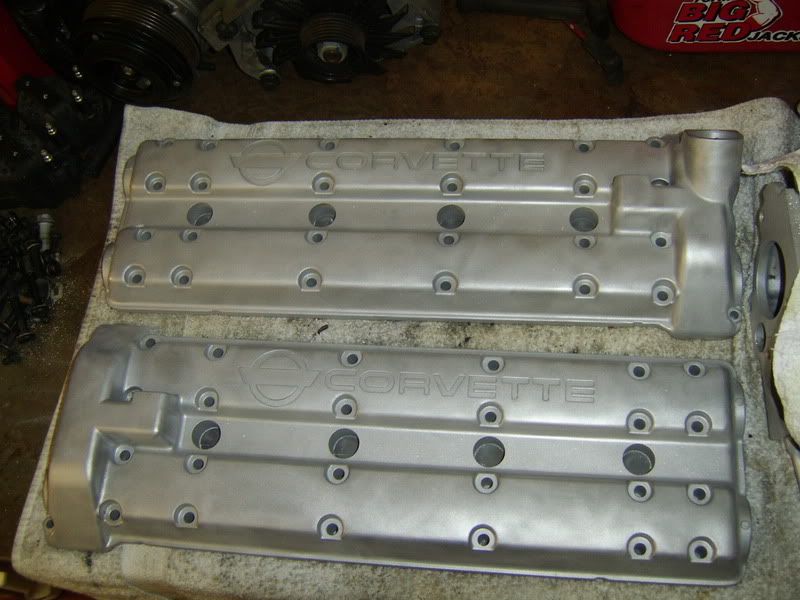
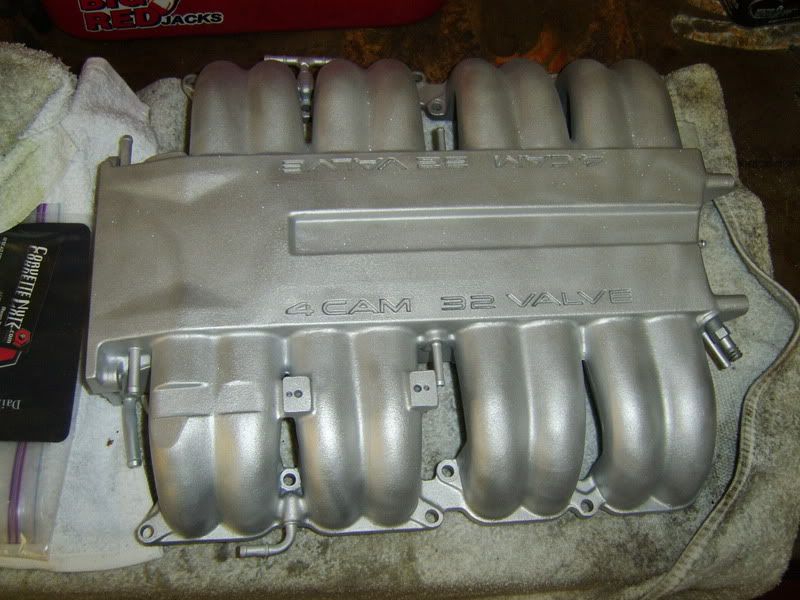
Also, the top end parts of the LT5 were sent off to be painted awhile back. We should be getting them back sometime next week.
Passenger seat track installed:
Driver seat track installed:
Here are some pictures of the finished interior:
The shifter assembly on the ZF6 is also done. It was repaired with parts purchased from Bill, the ZFDoc.
Also, the top end parts of the LT5 were sent off to be painted awhile back. We should be getting them back sometime next week.
10-24-2013, 05:43 PM
#20
Drifting
Thread Starter
Member Since: Jun 2007
Location: Prather, California -1990 ZR-1 White/Flame Red- -SOLD!!-
Posts: 1,261
Likes: 0
Received 2 Likes
on
2 Posts
I can't believe it's been over 2 and a half years since I last posted an update on this project. It got put on the back burner and Evan was too busy to deal with it. But now, he is wanting that space in his shop back for paying projects instead of personal ones.
So, this Z is back on track to being brought back to life. I'm going to start posting updates on this project again with pictures like I've been doing in this thread and with the '90 Z I used to have. Since I no longer own a ZR-1 (or any Corvette for that matter), it's nice to have one to work on.
________________________________________ _______________
Yesterday was the first day I started working on this project again, but no pics yet.
The top end parts are done now except for the the lettering needing to be painted, which Evan is going to have airbrushed on after the Z is back together and running again. They are painted silver, I'll get pics of them up when I can.
Back in 2011 sometime I think, Evan had sent out the front speakers to have the amps repaired to an audio repair shop in Florida that specializes in Bose, Infinity and Mercedes audio. So I got the front speakers put back in along with the carpeted sills and plastic vertical pieces. The interior is done except for the center console cover which can't go on until the transmission is back in.
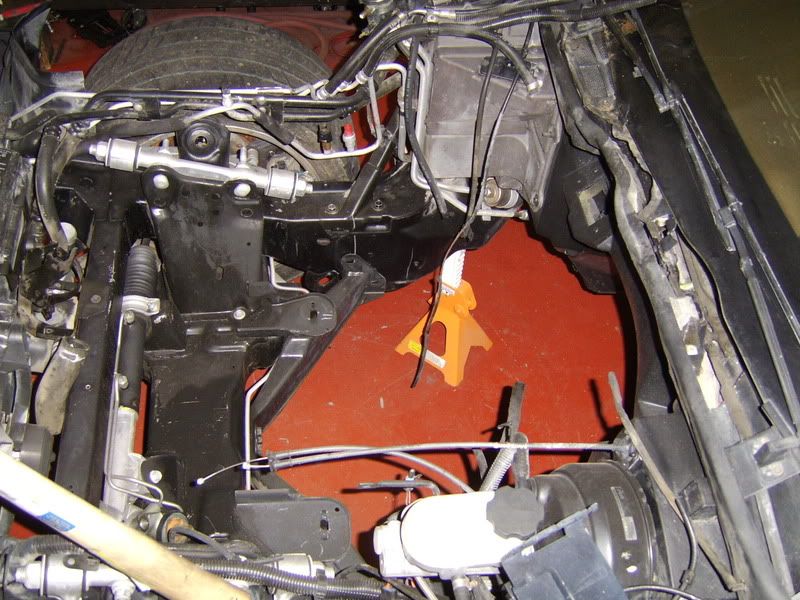
Next, we'll be working on getting the lowering wedges installed on the front spring, since the front suspension cradle is only loosely put on right now just enough to make the car a roller. We've also got the lowering bolts for the rear.
.
So, this Z is back on track to being brought back to life. I'm going to start posting updates on this project again with pictures like I've been doing in this thread and with the '90 Z I used to have. Since I no longer own a ZR-1 (or any Corvette for that matter), it's nice to have one to work on.
________________________________________ _______________
Yesterday was the first day I started working on this project again, but no pics yet.
The top end parts are done now except for the the lettering needing to be painted, which Evan is going to have airbrushed on after the Z is back together and running again. They are painted silver, I'll get pics of them up when I can.
Back in 2011 sometime I think, Evan had sent out the front speakers to have the amps repaired to an audio repair shop in Florida that specializes in Bose, Infinity and Mercedes audio. So I got the front speakers put back in along with the carpeted sills and plastic vertical pieces. The interior is done except for the center console cover which can't go on until the transmission is back in.
Next, we'll be working on getting the lowering wedges installed on the front spring, since the front suspension cradle is only loosely put on right now just enough to make the car a roller. We've also got the lowering bolts for the rear.
.
Last edited by bdw18_123; 10-24-2013 at 05:53 PM.