When you click on links to various merchants on this site and make a purchase, this can result in this site earning a commission. Affiliate programs and affiliations include, but are not limited to, the eBay Partner Network.
Then came what I thought would be a nice side project... Remove the coolant outlets. ����������..
I tried a propane torch. Still no help. I had to go buy a MAP torch to get things hotter. Eventually, I could start prying the outlets away from the heads. The funny part was that when I finally got the outlet boxes pulled over the studs, the head-less bolts unscrewed with my fingers. The issue was that the bolts had corroded so badly, they'd fused with the box. Seems like a bad design... and something that will happen every couple years if you don't change these bolts out. I think I'll add this to my list of things to do every couple years with this car.
-Gonzo
Once you get rid of the original Coolant Outlet Pipe gaskets, the corroded bolt problem goes away with them. If you look at the original gaskets, you'll notice a silk screened bead of silicone. The problem is the silicone bead did not isolate the bolt hole. The silicone bead also adds a little more thickness to the gasket. The net result is coolant seeps past the gasket where no silicone is present, into the bolt threads and begins to corrode/rust the bolts. The rust expands & locks the bolt in the bolt holes as you discovered.
The gasket you purchased from Jerrys Gaskets, purposely does away with the silicone bead & lets the gasket compress fully, all the way around the bolt hole, preventing coolant seepage into the bolt hole. Replacing the alloy steel bolts with stainless steel is added insurance.
To take the silicone bead design problem a step further, it also contributes to a host of other leaks, oil leaks. ex: gaskets for injector housings, crankcase PCV Box, Oil Pan, all are known for oil leaks in the LT5. Same process is at work here only the culprit is oil. Over time and many heat cycles, oil finds its way to the bolts. Add normal vibration to the mix & bolts begin to loosen & oil leaks appear. Jerrys Gaskets are made without the silicone silk screen and can be applied to cleaned & degreased surfaces without adhesives.
When servicing the oil leaks cited above, the best way is to clean & degrease all bolts AND the threaded holes before reassembling. I use spray brake cleaner with the small plastic tube in the spray nozzle. It's a messy job but is the only thorough way to get it done. Apply Loctite 243 if available, preferred over 242 for its ability to function better where oil is still present. Follow torque pattern procedures & torque in 2 to 3 increments to insure even clamping.
Thanks for the clarification on the gaskets. That is a good thing to know. I've become a big fan of Jerry. On the bolts and block threads... I used a prodigious amount of brake fluid cleaning out the block threads, and then ran the bolts through m6 and m8 dyes to fully clean the threads (after spending way too much time with a wire brush and brake fluid not getting very far). I've also wire-brushed the block and pan surfaces that contact the gasket. Based on another thread on ZR1.net, I plan to use a thin layer of Permatex Super 300 Form a Gasket on both sides of the oil pan gasket when I finally re-install the pan. Feels like a good thing to do with the injector housing gaskets as well.
Funny - removing the oil pan, taking apart the oil pan, cleaning, and putting everything back together has taken way more time than I thought it would... but I'm highly motivated to get this right. I've spent hours and hours, a large pile of red rags, and about 4-5 full cans of solvents and degreasers to clean up the mess from the last gasket failing.
One thing - there's a step missing with Jerry's oil pan gasket replacement instructions - remove the oil level sensor BEFORE you remove the windage tray. I broke the plastic arm that inserts through a hole in the windage tray. Jerry's seems to only have a new sensor for 93-96 LT5s. Anyone know if the 93-96 sensor emits the same resistance values as the 90-92 version? If so, I can get the later model version and change the connector.
I finally have all the parts, tools, sealants, glues, and Loctites needed to get this thing back together. Now I just need time! Monday afternoon and Tuesday are blocked off to get this thing finished up. I'll have another batch of pics then.
And ... yes. I'm having an awesome time working on the ZR1. This is quite a bit different than working on my '65. I can rebuild 90% of the '65 with 3/8, 9/16, 5/8 sockets, a big flat-head screwdriver, a crescent wrench, and a hammer. I'm using tools I haven't touched in years on the ZR1... and most of them are metric... which feels so wrong!
-Gonzo
I have to admit I got into ZR-1s because I wanted the LT5 so I wouldn't have to work on cars so much.
That engine has proven it to be true. I bought one car from Rippie, and 2 from LPE used so I didn't take a big hit, and also a 95 stock.
ALL of those cars I barely touched the engine and ran them very hard when able. I've now got an LT5 in a million pieces which is a little stressful as I'm having LT5 WOT withdrawl symptoms despite having a few other fast cars.
You'll get this one back in order soon and enjoy the reliable side. This one just wasn't cared for properly in some areas.
My buddy, Patrick, who's been a tremendous help thus far (even though most his Vette experience is with midyears), and I didn't get started today about noon. The goal was to get the top of the motor all buttoned up while I wait for my order of Loctite 243 (for the oil pan) to show tomorrow. We are close... but didn't quite finish today.
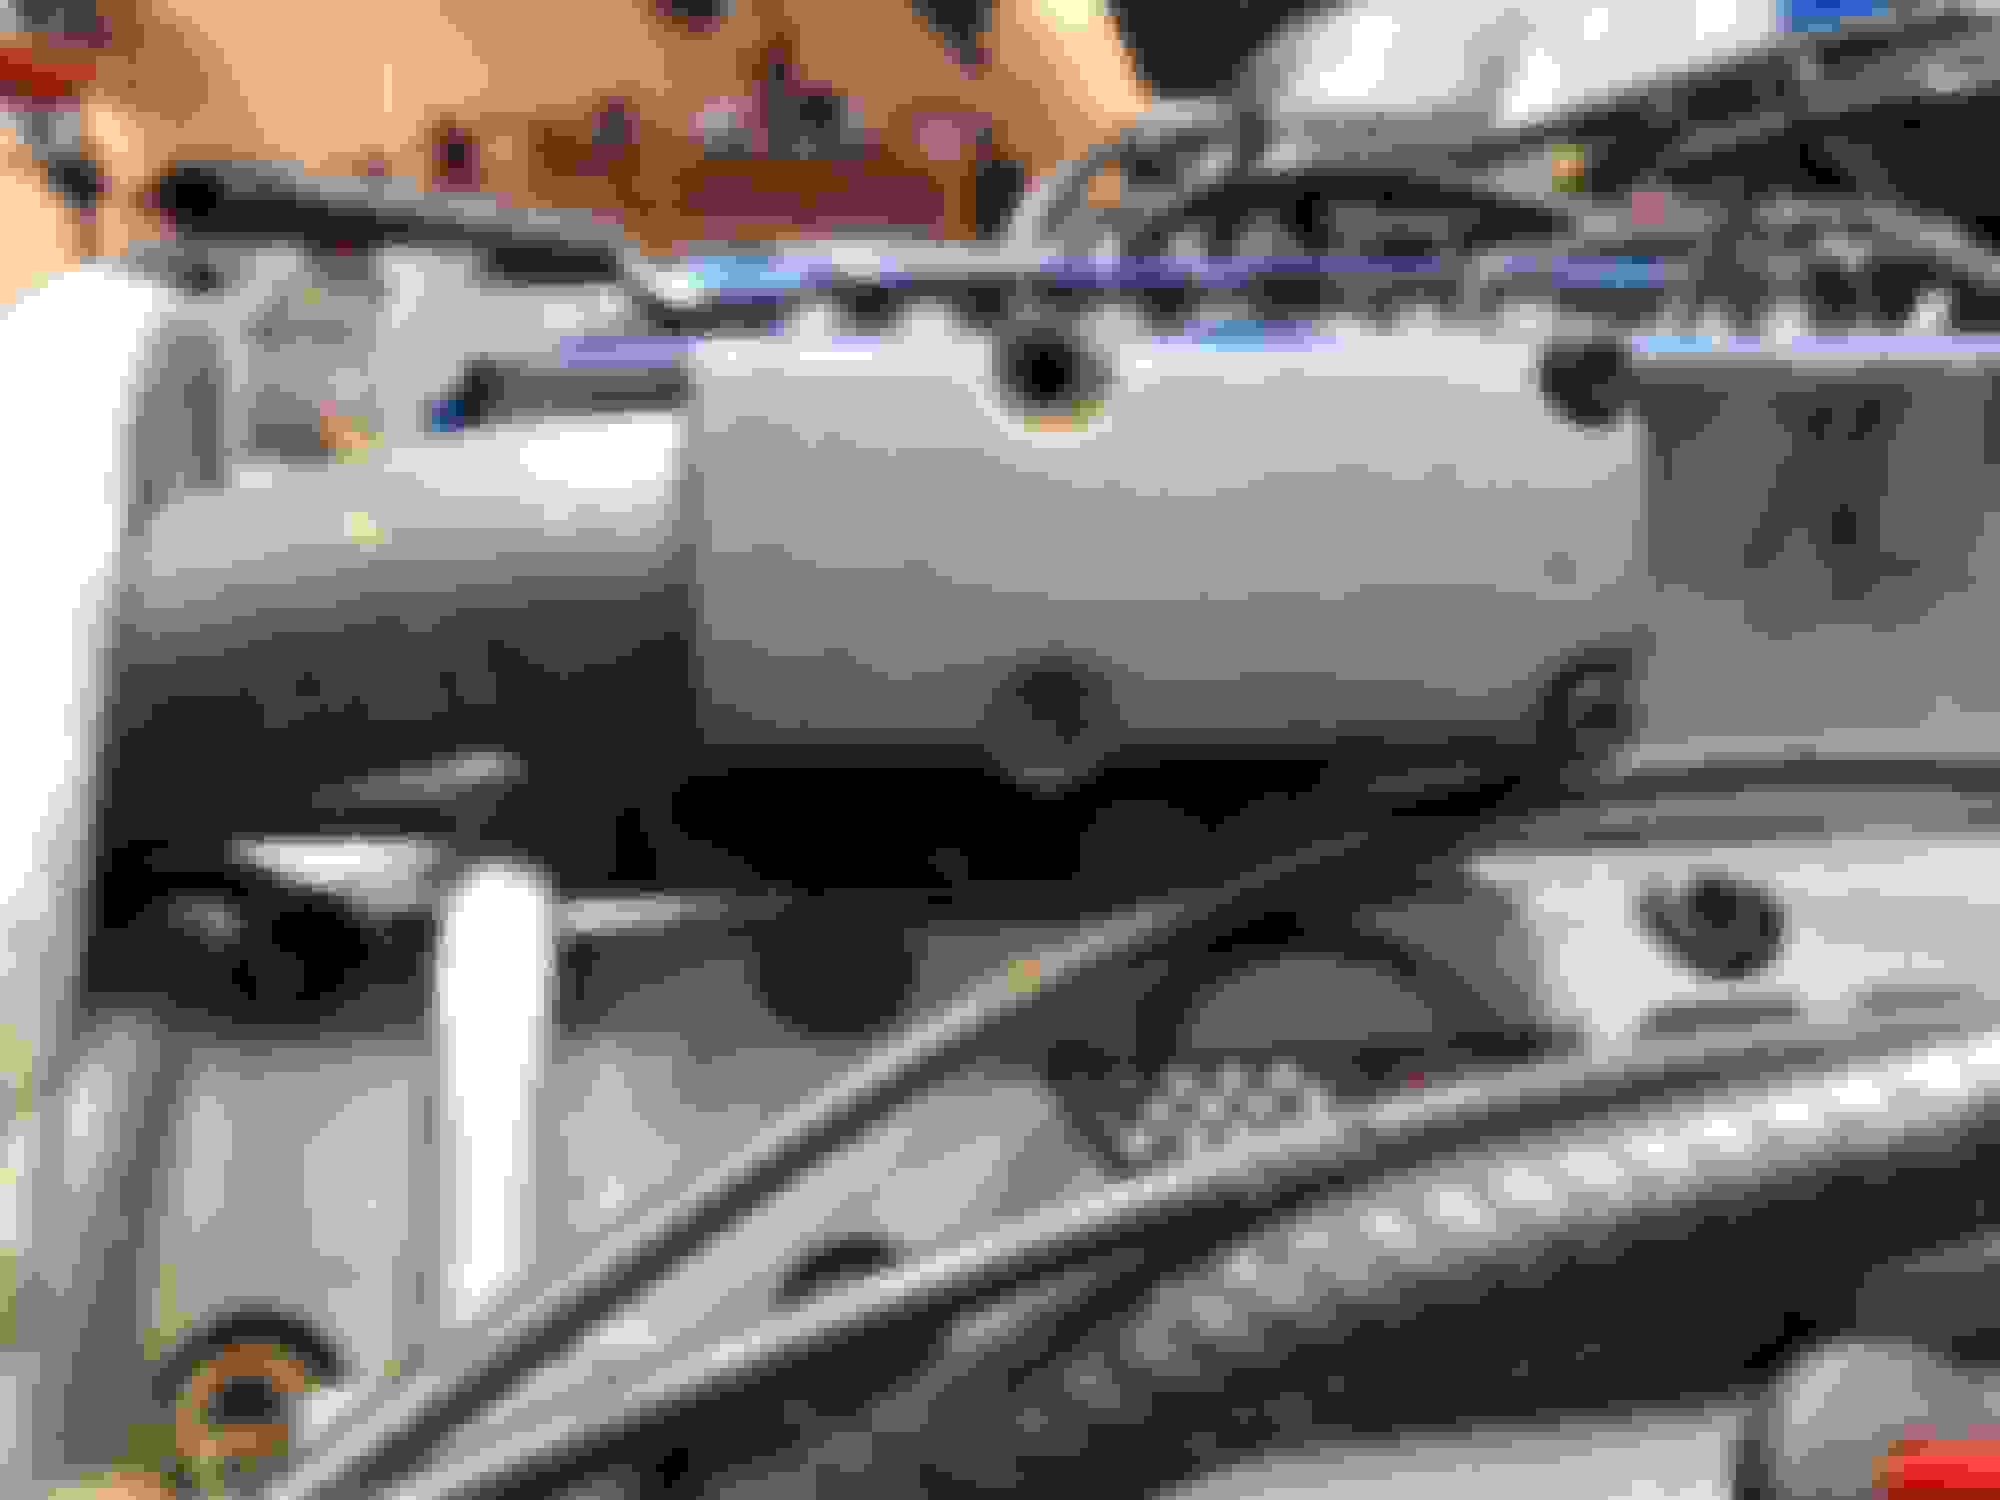
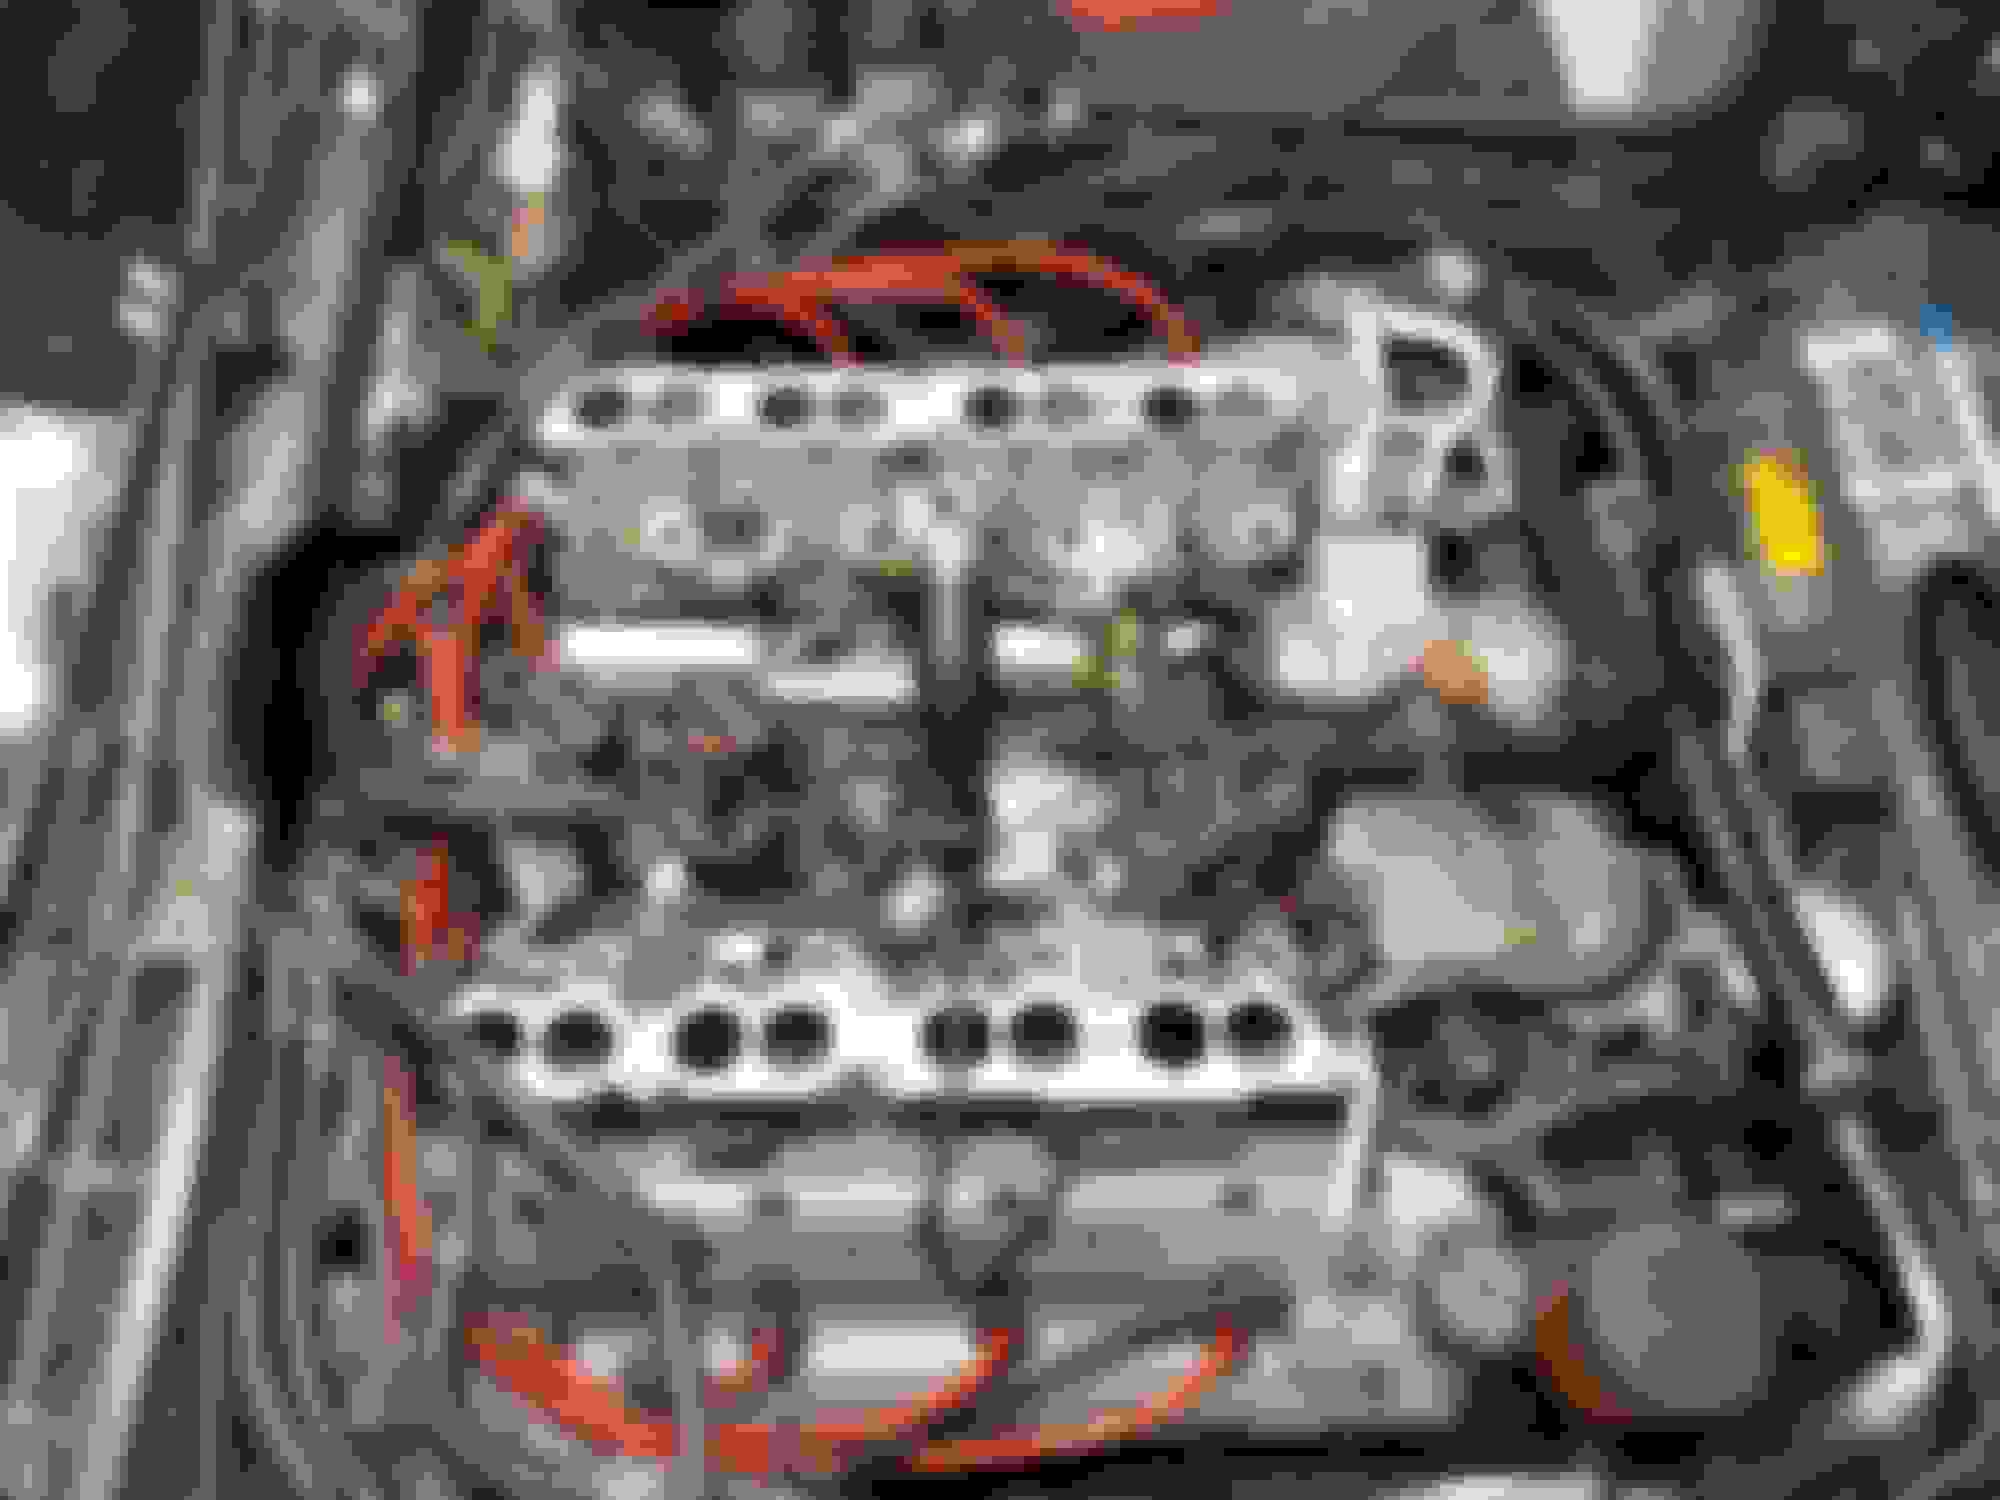
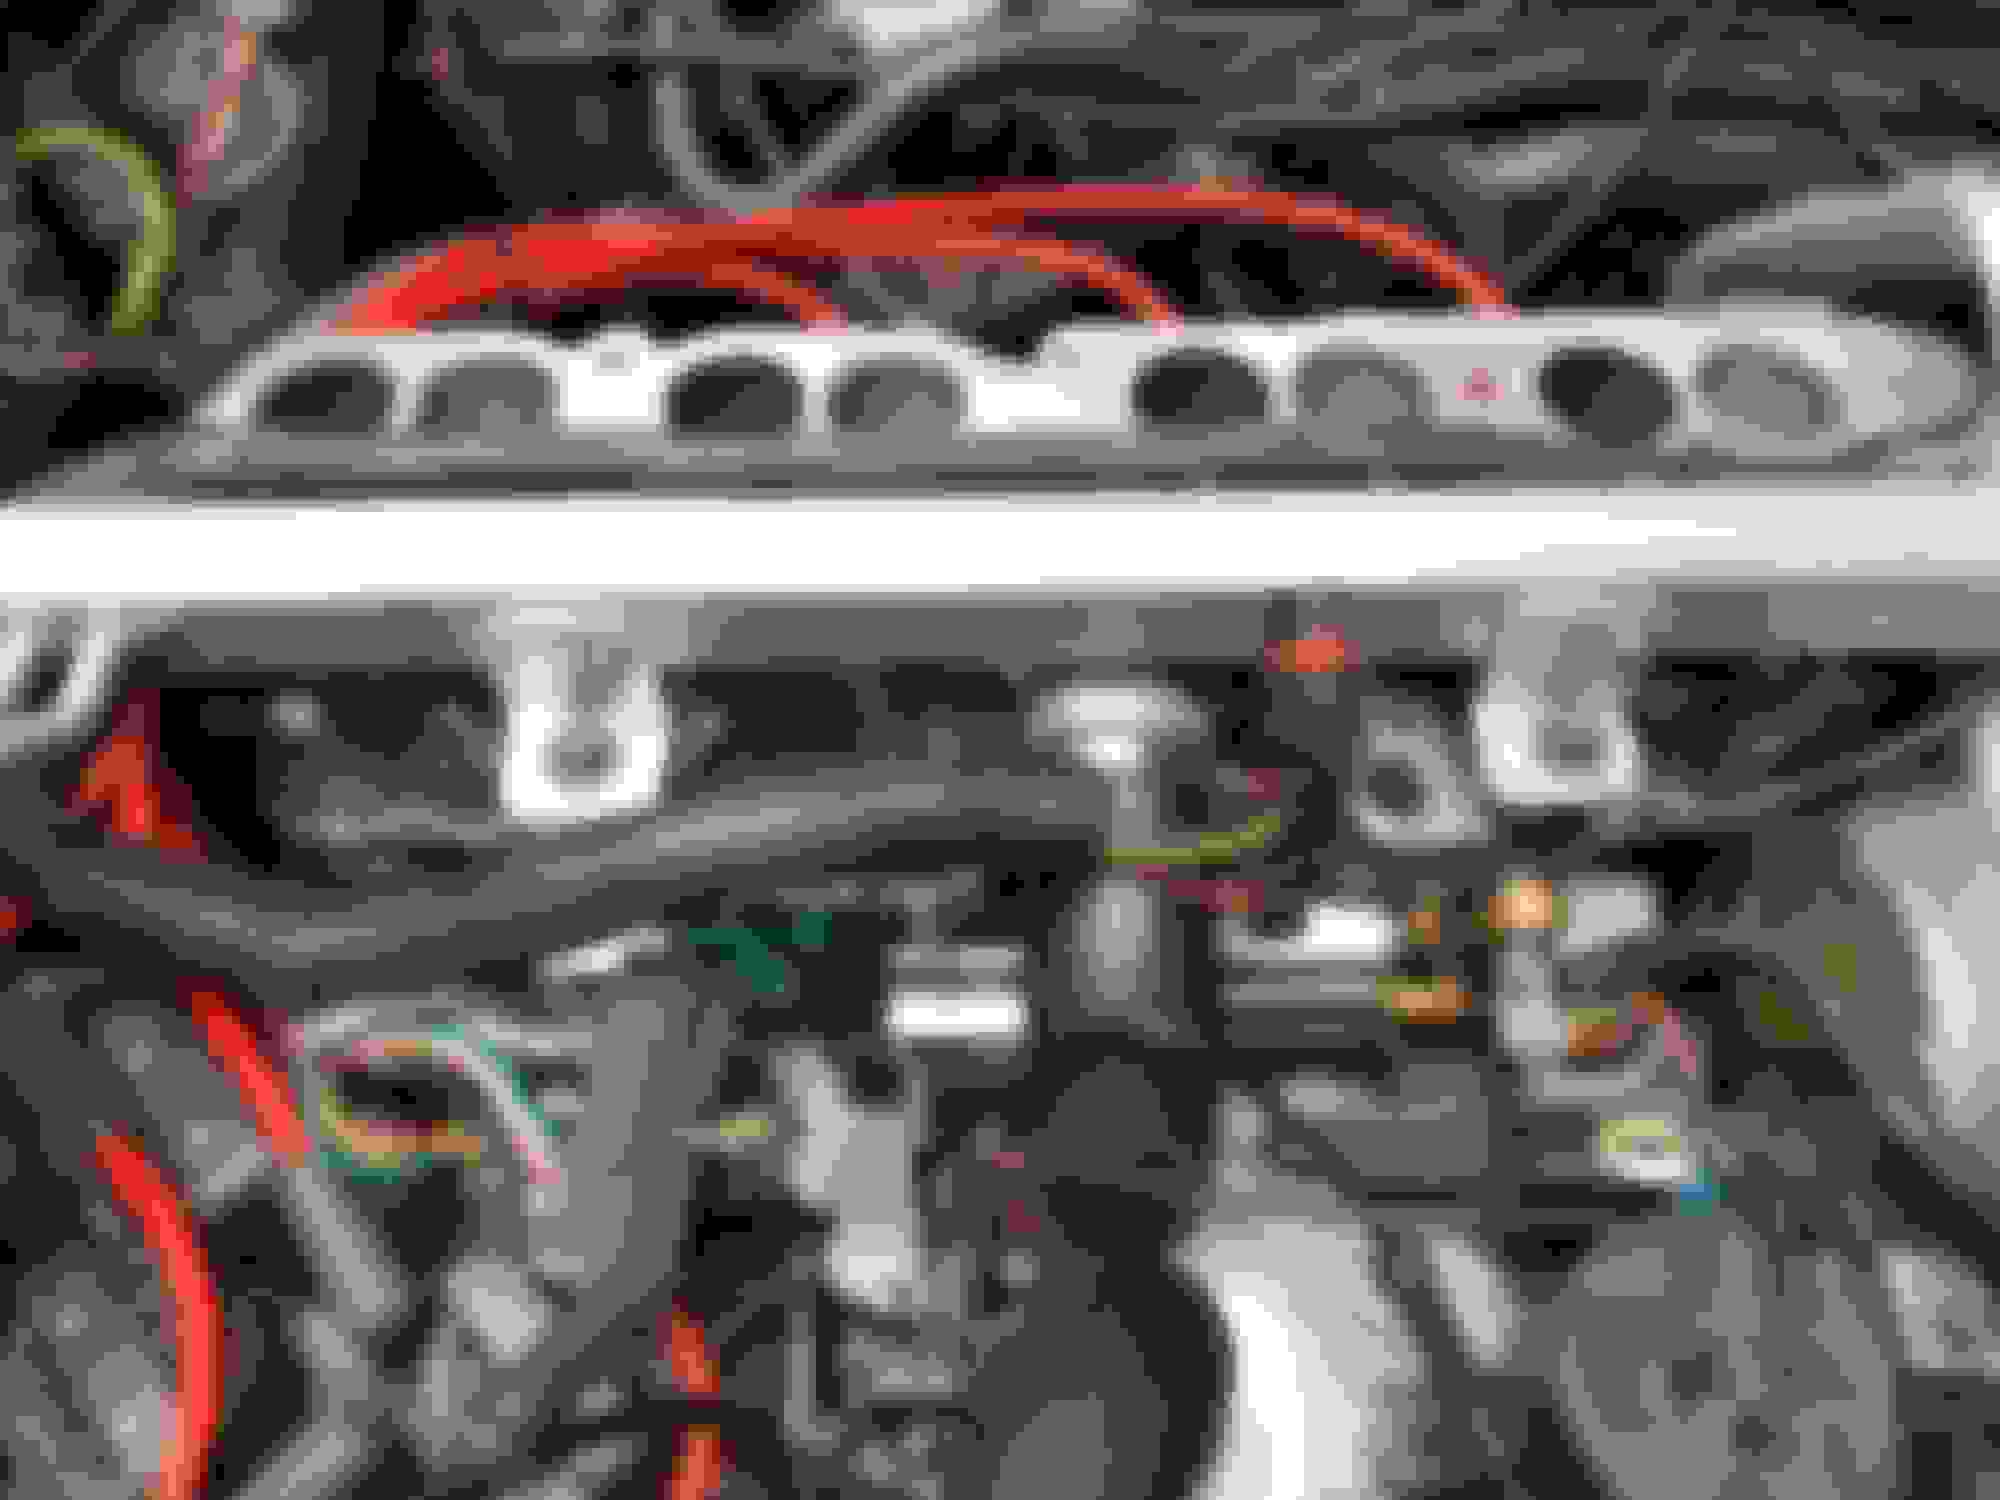
The first thing we decided to do was to pull the injector housing. For whatever reason, we planned on skipping this... but realized today how foolish that would be with everything else we've done, and it would be far easier to drill and tap for the NPT plugs to block the TB coolant.. So, we yanked those off and set to work cleaning, drilling, and tapping. Kinda strange... if you look at the below 2 pics (second one has a closer view), the oil outlets above the injector ports have drains in them... all but the two front ones, one on each side. Anyone know what that is? They were both full of oil that we did our best to clean out. Strange. You can also see in this view where I safety wired the secondary butterflies permanently open. This also gave more opportunity for cleaning. Namely, there was more rat urine between the head and the housing. Fun fun fun.
Next we re-installed the injector housings with new gaskets, and a thin layer of Permatex Super "300" Form a Gasket. With the injector housings back in place (where we started this morning...) we then starting re-installing all the bits we'd removed from the LT5-pit-of-dispair. Coils, map sensor, etc...
In this view, you can also see the NPT plugs (red) that we used to plug the TB coolant channels to the Plenum. NEXT TIME we pull the plenum, this will make life considerably easier (and less messy.
Next... injectors and fuel rails. This took far more time than I thought it would, and was the main reason we didn't finish today. You'll notice in the below picture that the brackets used to attach the the injector housings are ... not the ones we started with. The ones we started with were too tall for the new injectors... which makes no sense to me. We played with the stock L-brackets for a while, but could not get the rails and injectors to set far enough down in their individual injector housing ports. It was probably fine, but it just felt weird to not have everything seated better... so I dug out some AL scraps and fabricated new brackets for attaching the fuel rails to the injector housing. Everything else SHOULD still go back together even though the rails are now a little lower.
And then we ran outta time. The Engine is basically in the sate you see below. After making a couple stupid mistakes, we decided to button things up for the night and attack again in the morning.
I believe we have the following punch-list to get done tomorrow:
Re-attach all the connectors to the bottom of the plenum
Re-install plenum with new gaskets
Re-install fuel lines into fuel rails with new O-rings
Install new plugs
Install new coolant hoses
Re-install coolant outlets with new gaskets
Fill engine coolant
Apply loctite 243 to oil pan bolts and re-install pan
Install new oil filter
Fill oil
Start engine
Drive it like you stoke it...
Tomorrow is a new day...
-Gonzo
Last edited by Gonzo_65_L76; 09-21-2018 at 12:21 AM.
Something is not right, that fuel rail should have gone back on the original brackets. Did you compare the old and new injectors side by side and find the new ones are taller? If you did, I think you need to talk to Jerry. Did you coat the O rings with motor oil before assembly? If those injectors are not in far enough to seal, fuel may spew everywhere when you start the engine.
........................................ ..........if you look at the below 2 pics (second one has a closer view), the oil outlets above the injector ports have drains in them... all but the two front ones, one on each side. Anyone know what that is? They were both full of oil that we did our best to clean out. Strange. You can also see in this view where I safety wired the secondary butterflies permanently open. This also gave more opportunity for cleaning. Namely, there was more rat urine between the head and the housing. Fun fun fun.
Next we re-installed the injector housings with new gaskets, and a thin layer of Permatex Super "300" Form a Gasket. With the injector housings back in place (where we started this morning...) we then starting re-installing all the bits we'd removed from the LT5-pit-of-dispair. Coils, map sensor, etc...
In this view, you can also see the NPT plugs (red) that we used to plug the TB coolant channels to the Plenum. NEXT TIME we pull the plenum, this will make life considerably easier (and less messy.
Next... injectors and fuel rails. This took far more time than I thought it would, and was the main reason we didn't finish today. You'll notice in the below picture that the brackets used to attach the the injector housings are ... not the ones we started with. The ones we started with were too tall for the new injectors... which makes no sense to me. We played with the stock L-brackets for a while, but could not get the rails and injectors to set far enough down in their individual injector housing ports. It was probably fine, but it just felt weird to not have everything seated better... so I dug out some AL scraps and fabricated new brackets for attaching the fuel rails to the injector housing. Everything else SHOULD still go back together even though the rails are now a little lower.
And then we ran outta time. The Engine is basically in the sate you see below. After making a couple stupid mistakes, we decided to button things up for the night and attack again in the morning.
-Gonzo
OK, a couple of things. The holes in the cylinder heads are not "oil drain back" hole per se. The primary purpose is a restrictor in the PCV system. By design there are holes in only two of the three cavities. The injector housing actually have 3 different flow systems, intake ports, coolant passages & PCV system passages.
Second thing as previously noted, there should be no need to modify the fuel rail brackets. They do not need to be seated any deeper than what it takes to engage the o-ring seals. I have never encountered or heard of anyone needing to build new brackets to seat the injectors deeper to effect a seal. With the rails seated lower, there may be a problem in the future with attaching a fuel pressure gauge to the Schrader valve on the RH injector rail due to interference from the alternator
Today went mostly as planned... except my loctite 243 that was supposed to be 2-day shipping seems to have gotten lost by UPS. I other words, the oil pan is still sitting on the garage floor waiting for the proper thread locker to show up.
I figured out the issue with the fuel rails. The issue was on the other end of the wrench ... Apparently, it was late, and I should not have been working on items that required judgment of fine detail. The issue was that when I looked at the injectors after installing the fuel rails, I had not yet installed the spring clips that lock the injectors into the fuel rails. As such, the injectors were seated too far into the fuel rails. With the stock connectors connecting the fuel rails to the injector housing, the bottom of the injectors were fairly high off the injector housing. Yes, the injector seals were seated inside the injector housing, but not as far as it looked like they should be.
Once I installed the clips connecting the injectors to the fuel rails, the injectors came down slightly from the fuel rails, and seated deeper into the injector housing. In other words, installing the connectors correctly aligned the injectors between the rails and the housing. Problem solved. Original connectors back on the engine.
I figured the best way to report on the day was to show the before and after pics. The first pic is from the day I moved the car to my garage. The second is where we ended today.
We didn't get all the stains off the engine, but enough for now. I did a 90% (+/-) cleaning job for now. My thinking is that there's gonna be plenty of gremlins to work through, and a fair number of them will likely cause more of a mess. I'll wait to do the full detail cleaning until I've worked thru most of the gremlins, especially the messy ones. I can say that the engine is considerably cleaner (and smells less of rat urine) than when we started.
You might notice in the below pic that we also replaced all the coolant hoses. After a couple iterations, we figured out there is an order to get them all installed - Attach all the hoses to the center black pipe while you have it outside of the car. Trying to wrangle these onto the pipe inside the car is WAY to difficult. Once you have them connected to the center pipe, then drop it in place, raise the car, and connect the bottom line to the box going into the radiator. Connecting the hoses on top is relatively easy.
Those of you with a keen eye will notice that the injector housing coolant hose is not installed. I need to get a 1/2 inch hose tomorrow from the auto parts store to run between the aluminum hard lines. This will replace the rubber line that has the two outlets for the TB coolant.
HOPEFULLY... I will get my loctite in the mail so that I can install the oil pan. Once that is in place (and I install the coolant line), we should be ready to start her up!
Today was a low-key day. While waiting on Lotite 243 (no one carried it locally... and Amazon lost the first order I placed last week), I finished up the last few things left undone... mainly installed the solid heater hose along the back of the engine that connects the coolant lines from the heads, and previously connected the coolant in the TB. I needed a trip to the parts store before I could connect that up. One problem was that I had already torqued the injector housing bolts. Had to remove the end bolts (luckily the last in the torque order), run the bolts through a dye to clean the threads, and then re-install them with the heater hose brackets.
Next came filling the coolant. Many thanks to MHobtr for posting the Haibeck links on how to fill coolant without massive amounts of trapped air. In this process, I did not accurately measure the amount of coolant that came out of the car. A significant amount actually landed on the floor. That said, my best guess is that I'm within a gallon (I believe within a half gallon) of the amount I took out of the car. I did jack up the passenger side of the car as described in the Haibeck article. Needless to say, there was a ton of air that bubbled up through the line. No idea if my car was in the ~40% of Z's that need the prescribed gymnastics to fill with coolant... but it seemed like a simple (if not strange) thing to just do.
And finally, with nearly all my free time caused by waiting for parts, I spent more time today cleaning. I've incorrectly said this a few times already, but I THINK I've managed to get all the rat urine and feces scrubbed out. Today I found more on the upper fender sections attached to the hood. Apparently the rats spent a lot of time perched up there when the hood was closed. I only discovered this by cleaning up the underside of the hood
My Loctite 243 finally arrived today. Patrick and I will be installing the oil pan tomorrow morning. Theoretically, this is the last thing to do before we fill up the oil, reconnect the battery and start her up. Hopefully, tomorrow will be a final pictured post to this thread... and I can spend my free time driving!
The next step will be to get the car smog'd.
-Gonzo
Smogged ? Inspected ? Funny I can't remember when I got my Z inspected last year, I believe its only a safety inspection.....Its over 25 years so I think it qualifies....I'm in NY.....
Get rid of those "cats" and stock manifolds and go with an aftermarket system.....Those manifolds are very restrictive....Looks good...👍👍
Check that....I see your in CA...Different ball game out there as far as emissions....My guess would be more than half the hot rods running around NY would fail out there..
The good news is the car started right up. Within a couple seconds, we could tell there was a leak in the crankcase ventilation system. Fixed that.
The we started seeing the temp rise. I raised the car on the passenger side again - this time a little higher. This enable us to get another ~quart of coolant into the engine. Unfortunately, things still seem to run at about 220-230 degrees... which seems a little off being that the air temp today is < 80 degrees today.
Then we ran into a bigger problem as we were driving back. Up to this point, I was mostly babying the throttle. Very gently, I gave it a little more gas. As soon as the engine reached 3000 rpms... it started cutting out. I backed off the throttle, and everything smoothed out. I gave it ~30 seconds, and did the same thing... pushed it up to 3000rpms... same issue. Major cutting out of the engine.
I've done some searching on the forums. The only things I've found that could cause this are a bad ECM, or bad O2 sensors. Seems weird that everything would be smoothe to 3k rpms, and then go wonky.
We also have been looking over the secondary vacuum system. looks like we left a bit in there open. We're capping it off now. I can't see how this would affect things... but right now I'm a little fried and frustrated. Also a bummer... in my reading, I found some posts suggesting (no one I found confirmed) that removing the secondary vacuum system may cause emissions problem. Oh happy day. Another post seemed to infer that you cannot wire the secondary injectors on without first chipping the car. I can't believe that would be true.
Anyone have any ideas on my rough running?
There is a bit of good news - the engine is no longer spewing oil out the oil pan gasket...
I'm not a zr-1 owner. But something about keeping all 16 injectors at 50% or something like that. That is why a tune is needed. Please, zr-1 owners correct me.
Ok... here's the order of events since my last post:
Sit around and read a bunch of forum posts
Shout out a few 4-letter words
Read more forum posts
Check the coolant level for the 8th time today...
For some reason, after starting the engine three different times, and checking the fluid level each time before, during, and after each engine run... after letting things set for about an hour, the level went down in the surge tank, enough that I was able to get another 2+ quarts into the system. Strange.
We then started trying to ID the cause of 3000 rpm problem.... and then we noticed something interesting. All the lights on the status screen went out... for no apparent reason, other than we ran the engine for a while. After noticing that, we let the engine run for a while longer to see what the engine would do. I got out a laser temperature gun and started shooting everything in the engine compartment. Slowly, the hottest parts of the engine reached about 220 degrees... and then the fans kicked in. The interesting thing is that the temp gauge in the car was reading about 240 degrees. Even checked the input to the thermostat. Everything was just a hair under 220 degrees. I'm thinking the gauge in the car is a little high. In short, I think the thermostat and fan are operating at the values they're supposed to. Once the fan kicked in, the temps came down as they should.
After that discovery, we then decided to go for a drive. Engine was cooling as it should (assuming it reads 20 degrees warmer), and the warning lights in the dash were all extinguished. We got on the road and ... everything drove just fine. There was no hesitation, and we were able to accelerate past 3000 rpms without any hesitation. We tested this with varying degrees of throttle input from ultra-gentle to ~75% throttle. I let it ride up to about 6700 rpms nice and smoothly. This seems to infer that the engine was in some kind of 'limp home' mode before due to some weird engine status that had not yet reset after getting everything back together and the battery reconnected.
In other words... the car seems to have fixed itself. I'm gonna drive it more over the weekend and hopefully gain some confidence in the current state of the car so that I can move on to the next set of issues. I think the car is still running too hot (210 - 220). I did notice there there is some debris between the radiator and condensor. I'm gonna try removing the shroud to see if I can blow things out from the top... but I assume I'm gonna need to pull the radiator to get it all cleaned out. Hopefully this will reduce temps.
Another nice and unexpected find... the FX3 suspension settings work properly. I guess that's one thing I don't need to fix.
-Gonzo
Last edited by Gonzo_65_L76; 09-21-2018 at 11:48 PM.
 09-15-2018, 08:03 PM