
Auto Swap Thread
 04-12-2017, 11:45 AM
#541


Was that to me?
Brake pedal is in. Shifter is in.
I havent had much time to complete anything else. Need to put wiring harness back in first, then figure out the pinouts from RPM.
I also need to replace the torque tube couplers. I keep braking the T50 torx bits. I got one bolt out yesterday. 11 more to go.
Brake pedal is in. Shifter is in.
I havent had much time to complete anything else. Need to put wiring harness back in first, then figure out the pinouts from RPM.
I also need to replace the torque tube couplers. I keep braking the T50 torx bits. I got one bolt out yesterday. 11 more to go.
 04-12-2017, 08:16 PM
#542
Race Director


Yes. Was wondering how it was going. You might want to spray some PB Blaster on the TT Bolts and let them soak for a few hours or even overnight. If that fails try using some heat.
Looks like you're making positive progress on your conversion.
Looks like you're making positive progress on your conversion.
Was that to me?
Brake pedal is in. Shifter is in.
I havent had much time to complete anything else. Need to put wiring harness back in first, then figure out the pinouts from RPM.
I also need to replace the torque tube couplers. I keep braking the T50 torx bits. I got one bolt out yesterday. 11 more to go.
Brake pedal is in. Shifter is in.
I havent had much time to complete anything else. Need to put wiring harness back in first, then figure out the pinouts from RPM.
I also need to replace the torque tube couplers. I keep braking the T50 torx bits. I got one bolt out yesterday. 11 more to go.
04-19-2017, 04:56 PM
#543
auto harness re-installed
flex plate installed
quick time blowproof bellhousing bolted up, not completely installed (dreading the top bolts)
Transmission mounted to rear diff
stall converter (filled with fluid) and slid onto transmission
Torque tube rebuilt
Remaining tasks:
RPM jumper harness pinned out
RPM neutral safety switch wired up
install converter drive plate and torque down
mount torque tube to tranny, torque down
torque down converter to drive plate
mount tranny cooler under passenger headlight
Install N2MB 2 step wired to brake switch
04-21-2017, 11:32 AM
#544


Remaining tasks:
fill transmission while its out
fill rear diff while its out
weld bracket for shift cable
finish bolting up bellhousing
RPM jumper harness pinned out
RPM neutral safety switch jumper harness wired up
wire up transbrake that I will likely NOT use at the strip
mount tranny cooler under passenger headlight
route tranny cooling lines in the transmission tunnel
Install N2MB 2 step wired to brake switch
Bigger fuel injectors
replace intake manifold gasket
Reinstall headers
Test fit exhaust - may not fit because cutouts are located where the deep transmission pan now sits
startup tune
test start
fill transmission
test drive
Last edited by TX Z06 02; 04-21-2017 at 11:34 AM.
04-21-2017, 12:49 PM
#545
Race Director
Sounds like you're progressing well.
You might want to check the fit of your headers around the bellhousing. I had to grind down areas on the bellhousing so that the headers would clear.
The top bolts on the bellhousing are a PIA. I used a bunch of extensions and flex joints along with a short swivel socket to get mine in.
You might want to check the fit of your headers around the bellhousing. I had to grind down areas on the bellhousing so that the headers would clear.
The top bolts on the bellhousing are a PIA. I used a bunch of extensions and flex joints along with a short swivel socket to get mine in.
Slowly working on it. So far I have done:
auto harness re-installed
flex plate installed
quick time blowproof bellhousing bolted up, not completely installed (dreading the top bolts)
Transmission mounted to rear diff
stall converter (filled with fluid) and slid onto transmission
Torque tube rebuilt
Remaining tasks:
RPM jumper harness pinned out
RPM neutral safety switch wired up
install converter drive plate and torque down
mount torque tube to tranny, torque down
torque down converter to drive plate
mount tranny cooler under passenger headlight
Install N2MB 2 step wired to brake switch
04-21-2017, 03:32 PM
#546
10-4 I will check that before i start on the top bolts. I would be PISSED if i found out I had to drop it out to grind on it after the drivetrain and everything were in.
04-24-2017, 12:09 PM
#547
A few more questions:
I was only able to get about 4 qts in the pan. Does that sound right?
I only had about 3/4 qt in the torque converter.
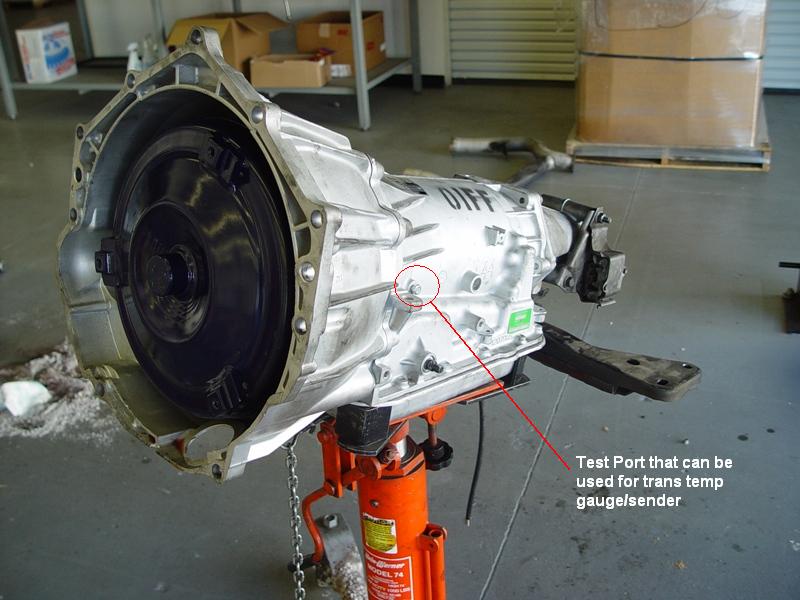
I am gonna use an external temperature gauge that I already have on my dash. I know the DIC will show it as well, but I already have this MTX dual gauge for pressure/temp. I have the pressure reading fuel pressure, but the temp isnt doing anything. Figured I would use it. Where do I need to install the sensor in the transmission? Is this the right location?
I was only able to get about 4 qts in the pan. Does that sound right?
I only had about 3/4 qt in the torque converter.
I am gonna use an external temperature gauge that I already have on my dash. I know the DIC will show it as well, but I already have this MTX dual gauge for pressure/temp. I have the pressure reading fuel pressure, but the temp isnt doing anything. Figured I would use it. Where do I need to install the sensor in the transmission? Is this the right location?
04-24-2017, 04:45 PM
#549
How to fill the Trans
http://www.rpmtransmission.mobi/file...lprocedure.pdf
http://www.rpmtransmission.mobi/file...lprocedure.pdf
From research, looks like the entire system is about 8-10 quarts fill. I only managed to fit about 4 quarts in the pan with the tranny sitting on the floor, with about another 3/4 qt in the torque converter. There's still a lot of fluid to go in it when its running. I just wanted to make sure that's ok.
04-24-2017, 05:23 PM
#550
AMP Racing

Member Since: Aug 2006
Location: Washington TWP NJ
Posts: 10,446
Received 466 Likes
on
352 Posts
2023 C5 of the Year Finalist - Modified
2017 C5 of Year Finalist
St. Jude Donor '09-'10-'11-'12

Yeh, you're doing it correctly. It's a pain in the *** to fill, but it is, what it is... as they say.
Glad your project is moving along nicely.
Glad your project is moving along nicely.
Last edited by C5 Pete; 04-24-2017 at 05:24 PM.
04-28-2017, 10:59 AM
#551
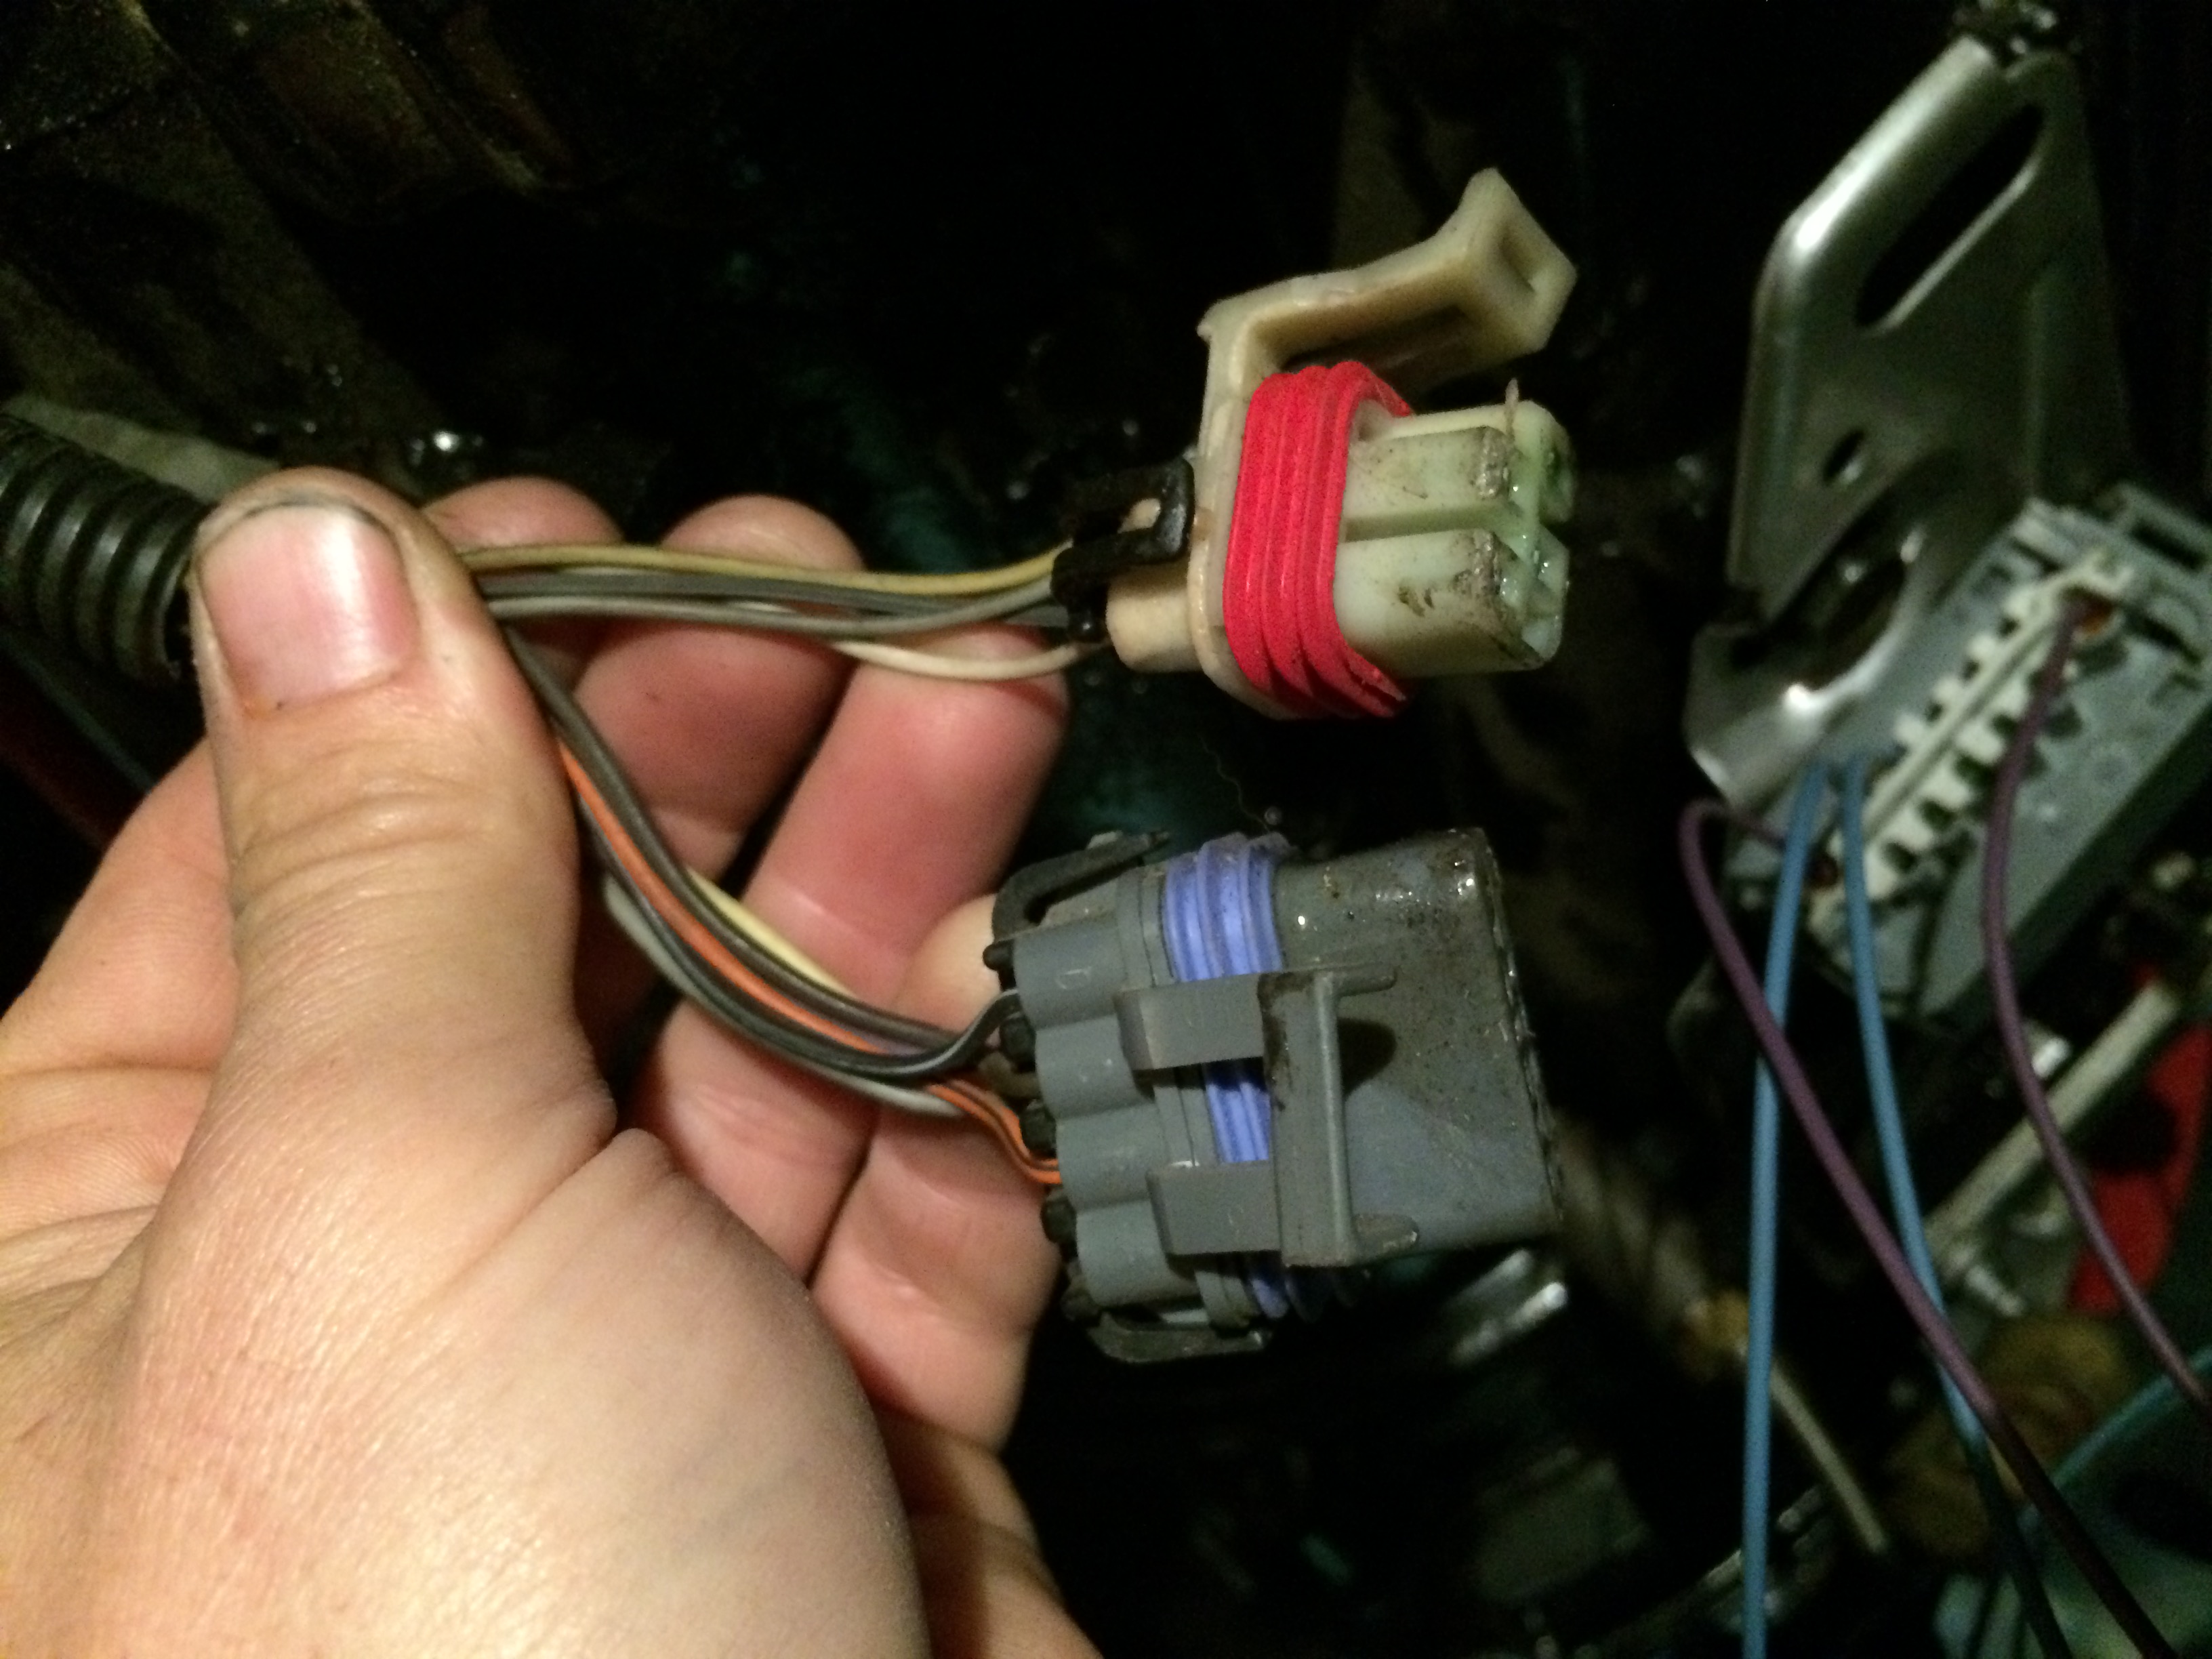
I have asked for clarification from RPM but no response yet. Where do the 2 blue wires from the neutral safety switch go? RPM said the reverse light switch? where is that?
The 2 purple wires go to the clutch pedal switch.
The 2 purple wires go to the clutch pedal switch.
04-28-2017, 01:39 PM
#552
Race Director
The reverse light switch is in the transmission. There should be a wire running up from the tunnel harness that you should change to.
04-29-2017, 09:47 PM
#553
Slowly progressing. I have only been able to work half days the last 2 days. Something always keeps coming up.
Yesterday I was able to bolt up the headers and check clearance on the bellhousing (no issues YAY!). Then I took the headers back off and bolted up the bell housing completely. The top bolt was a &*$%&$*. Since I was replacing the intake gaskets anyway, I removed the intake and tackled it from the top. The one on the top at the drivers side was the next PITA. Finally got it started with a pair of long needle nose pliers, turning it about 1/8 turn at a time. Took forever, but finally had enough space that I could get a socket on it and torque it down. All the others were fairly easy.
I also welded in the bracket for the shift cable. I thought I had it in the right place based on the pictures in this thread (See todays progress)
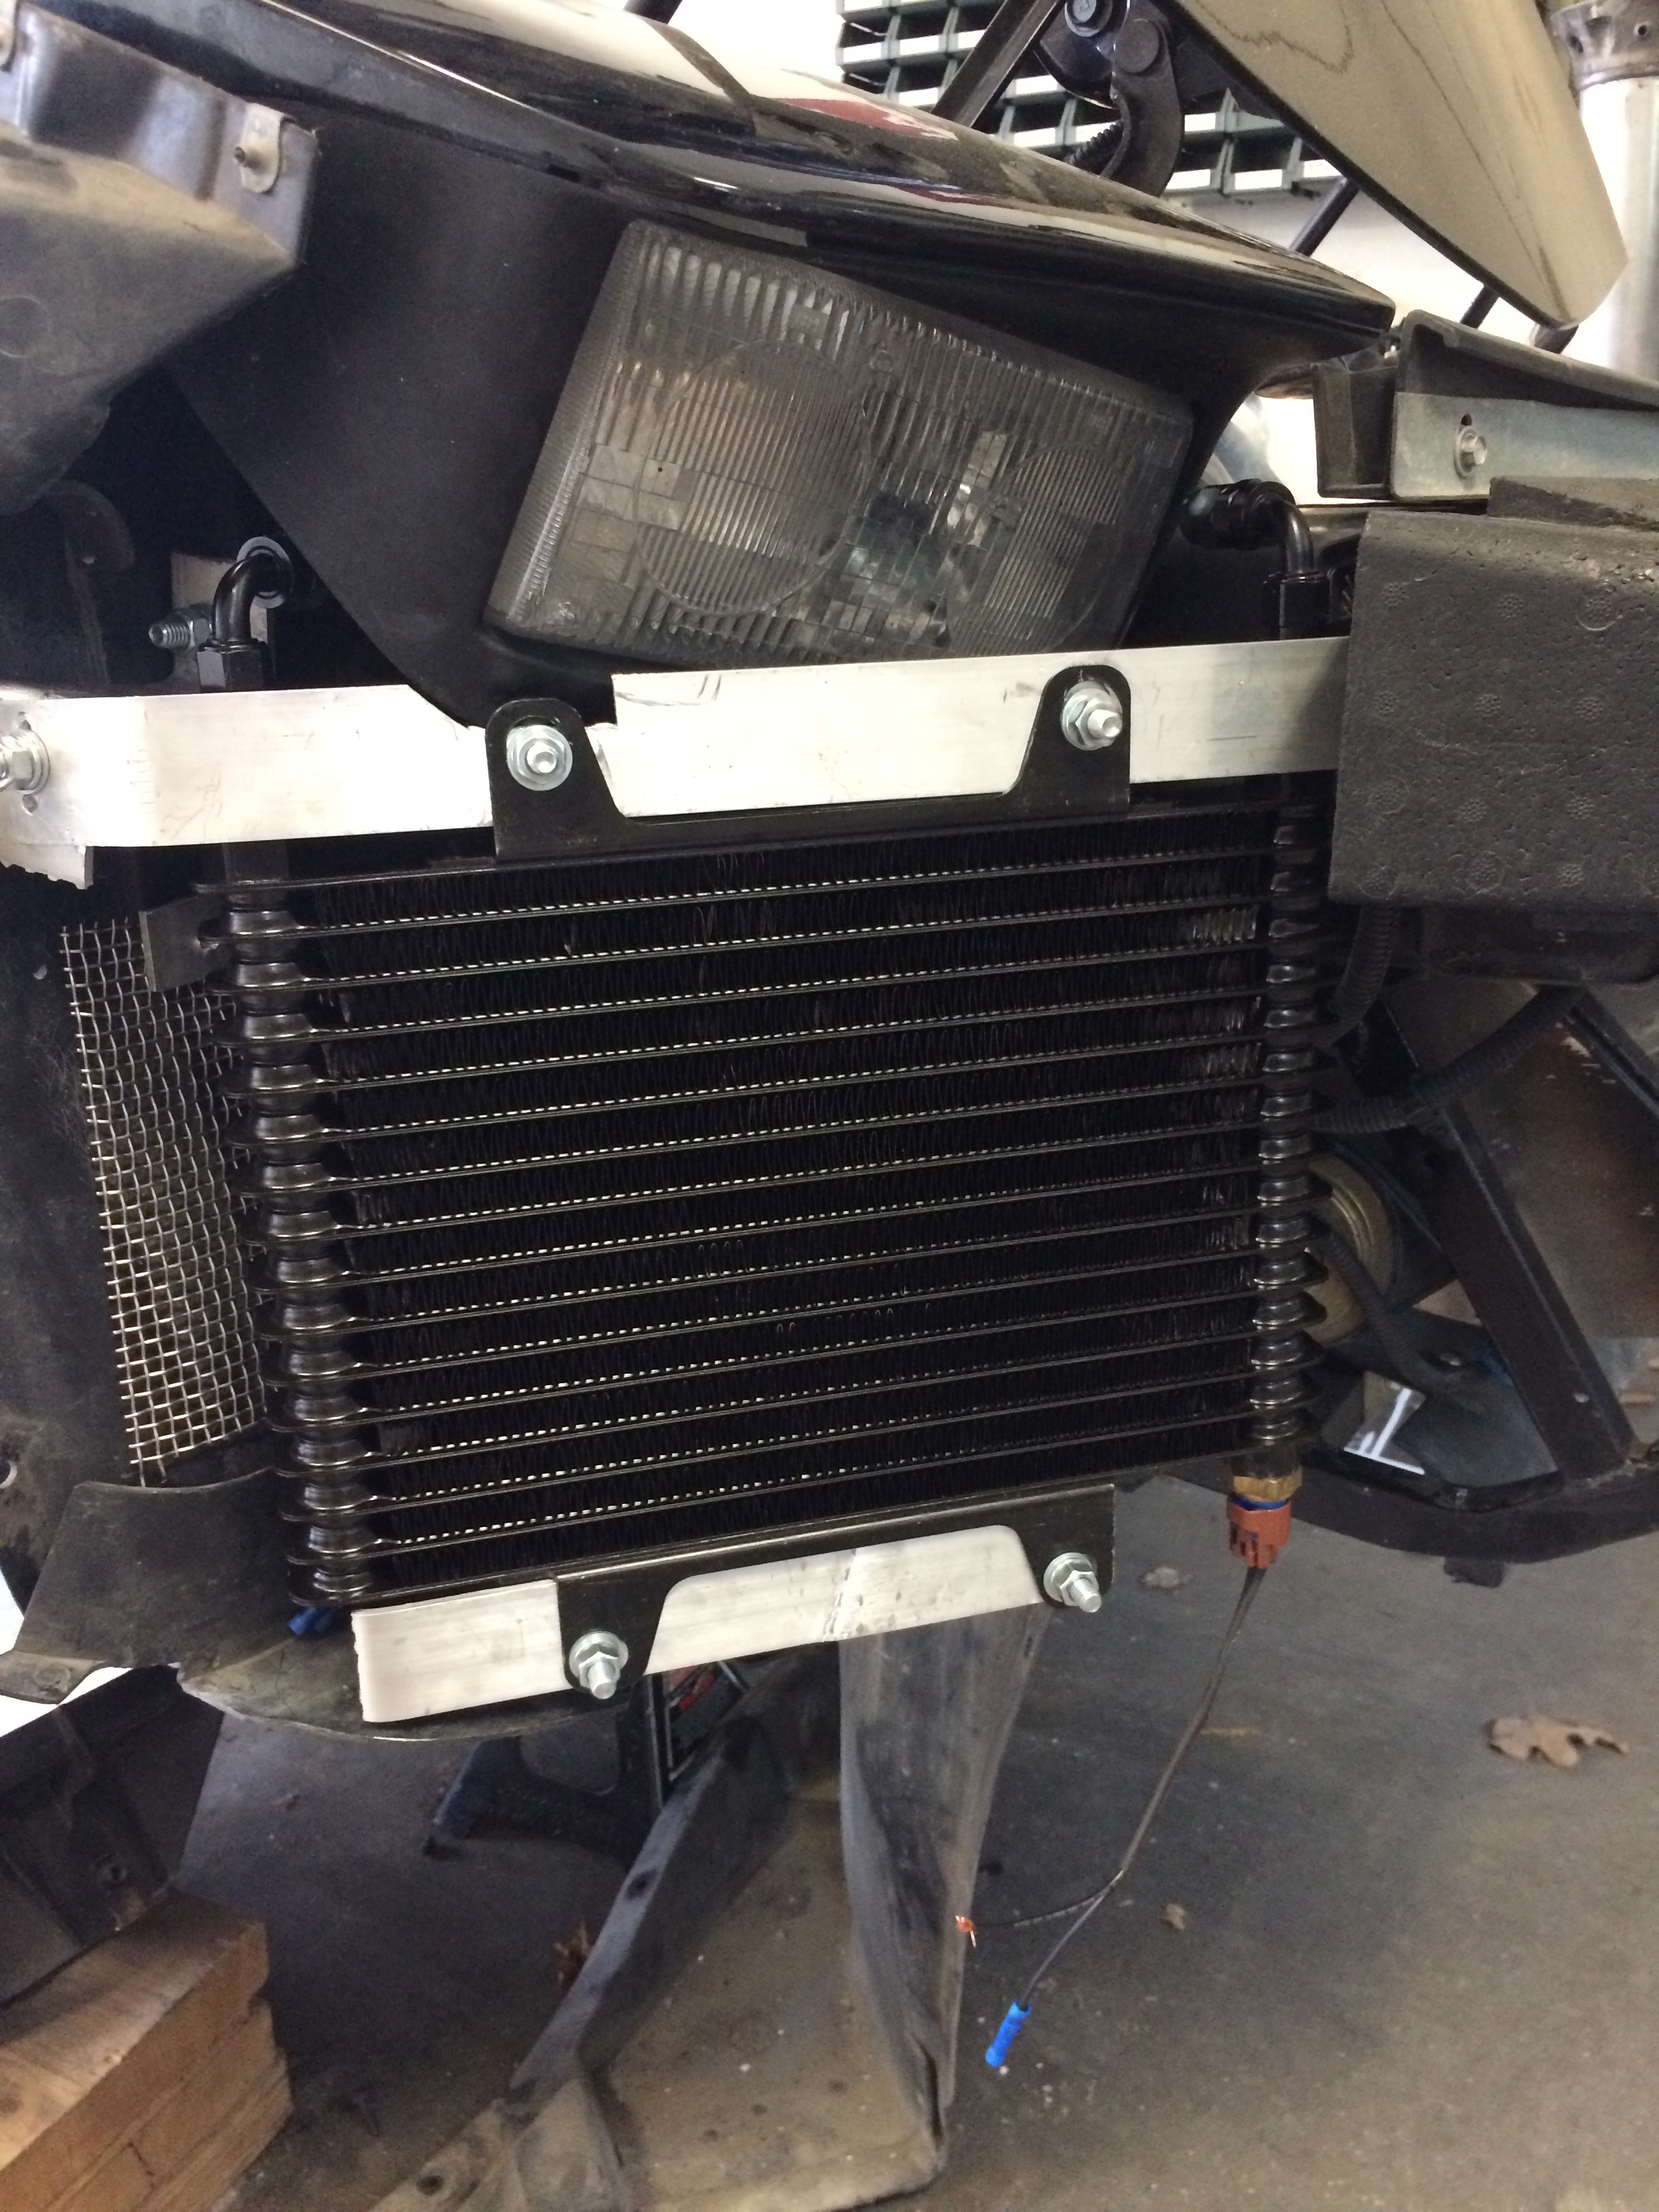
Today I finished fabbing up the mounts for the tranny cooler. I then routed the tranny cooling lines up the tunnel and through the engine bay, out front to the cooler. I need some 180 degree AN fittings, so I wasnt able to connect them just yet.
Between welding up the bracket yesterday and working on the car today, I found some notes where someone suggested hooking the shift cable up first and measuring the distance before welding the bracket in the tunnel. I didnt do that. OOPs! So now I slid the transmission/diff/TT in under the car and hooked up the cable. At first it wouldnt go into Park. Adjust the shifter all the way to the other end. Then it wouldnt go into first. So i adjusted it back near the middle and it works in all gears. Crisis averted regarding placement of the bracket, seems like everything is fine.
I then finished wiring up the tranny cooler fan and then moved on to the pin outs. I had to remove 4 pins that were already in place on the Blue plug and 2 on the Red plug. I hope thats right. Im nervous about that.
Tomorrows tasks:
1. wiring up the NSS and clean up everything in the transmission tunnel
2. intake back on
3. new injectors installed
4. and then maybe stabbing the TT into the bellhousing
5. At that point I may be ready for a test fire (unless I change injectors, then I need my startup tune first)
I will post pics later.
A few questions:
How do i add a wire into the plug on the transmission for the transbrake? According to RPM's instructions:
What do I need (pin, tap, etc) to add a wire to the W position?
Yesterday I was able to bolt up the headers and check clearance on the bellhousing (no issues YAY!). Then I took the headers back off and bolted up the bell housing completely. The top bolt was a &*$%&$*. Since I was replacing the intake gaskets anyway, I removed the intake and tackled it from the top. The one on the top at the drivers side was the next PITA. Finally got it started with a pair of long needle nose pliers, turning it about 1/8 turn at a time. Took forever, but finally had enough space that I could get a socket on it and torque it down. All the others were fairly easy.
I also welded in the bracket for the shift cable. I thought I had it in the right place based on the pictures in this thread (See todays progress)
Today I finished fabbing up the mounts for the tranny cooler. I then routed the tranny cooling lines up the tunnel and through the engine bay, out front to the cooler. I need some 180 degree AN fittings, so I wasnt able to connect them just yet.
Between welding up the bracket yesterday and working on the car today, I found some notes where someone suggested hooking the shift cable up first and measuring the distance before welding the bracket in the tunnel. I didnt do that. OOPs! So now I slid the transmission/diff/TT in under the car and hooked up the cable. At first it wouldnt go into Park. Adjust the shifter all the way to the other end. Then it wouldnt go into first. So i adjusted it back near the middle and it works in all gears. Crisis averted regarding placement of the bracket, seems like everything is fine.
I then finished wiring up the tranny cooler fan and then moved on to the pin outs. I had to remove 4 pins that were already in place on the Blue plug and 2 on the Red plug. I hope thats right. Im nervous about that.
Tomorrows tasks:
1. wiring up the NSS and clean up everything in the transmission tunnel
2. intake back on
3. new injectors installed
4. and then maybe stabbing the TT into the bellhousing
5. At that point I may be ready for a test fire (unless I change injectors, then I need my startup tune first)
I will post pics later.
A few questions:
How do i add a wire into the plug on the transmission for the transbrake? According to RPM's instructions:
Transbrake wire is added to the -W- wire position, 12
volts at less than 1.5 amps is needed to activate the
transbrake in third gear.
volts at less than 1.5 amps is needed to activate the
transbrake in third gear.
Last edited by TX Z06 02; 05-01-2017 at 09:46 AM.
05-01-2017, 09:45 AM
#554
 05-01-2017, 03:06 PM
#555
Need your help, gents. I just got off the phone with RPM where I was asking clarification on the 2 blue wires.
Now I am told that they sold me that harness by mistake, that it was for a stand-alone controller. He said since I am using the stock PCM to control the transmission, that I need to use those plugs from the post above and hook to the neutral safety switch. Additionally, there are 4 more wires to pinout for the clutch switch, brakes, reverse light.
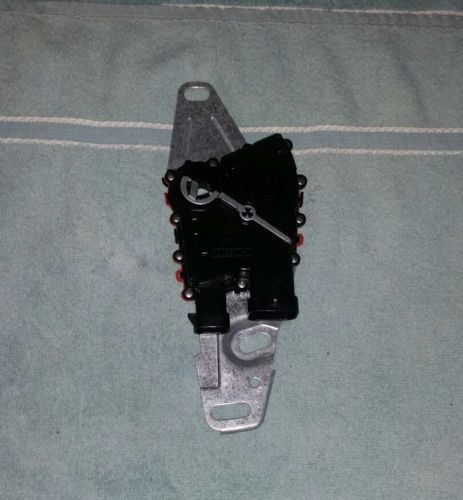
The problem with that is now I have the wrong NSS. I bought the one he told me to purchase with the single plug:
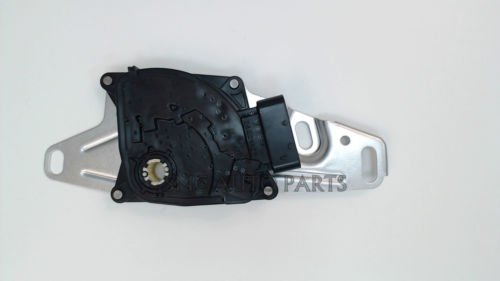
Now I need to source the one with 2 plugs.
Does all of that sound right for using the stock PCM to control the transmission?
Additionally, i asked him about the pin required for the transbrake, and he was going to send me a wire with the pin on it. And refund me for the harness that I purchased. So Kudos to RPM for those things.
Now I am told that they sold me that harness by mistake, that it was for a stand-alone controller. He said since I am using the stock PCM to control the transmission, that I need to use those plugs from the post above and hook to the neutral safety switch. Additionally, there are 4 more wires to pinout for the clutch switch, brakes, reverse light.
The problem with that is now I have the wrong NSS. I bought the one he told me to purchase with the single plug:
Now I need to source the one with 2 plugs.
Does all of that sound right for using the stock PCM to control the transmission?
Additionally, i asked him about the pin required for the transbrake, and he was going to send me a wire with the pin on it. And refund me for the harness that I purchased. So Kudos to RPM for those things.
Last edited by TX Z06 02; 05-02-2017 at 02:18 PM.
05-02-2017, 11:56 AM
#556
Where did you guys go??? Did anyone else using a stock harness and PCM to control transmission have to do this? I've read this thread like 5 times and don't recall seeing this information mentioned.
I got these notes from RPM about the additional 4 wires to connect. Can someone translate this for me, like "Wire from here to here".
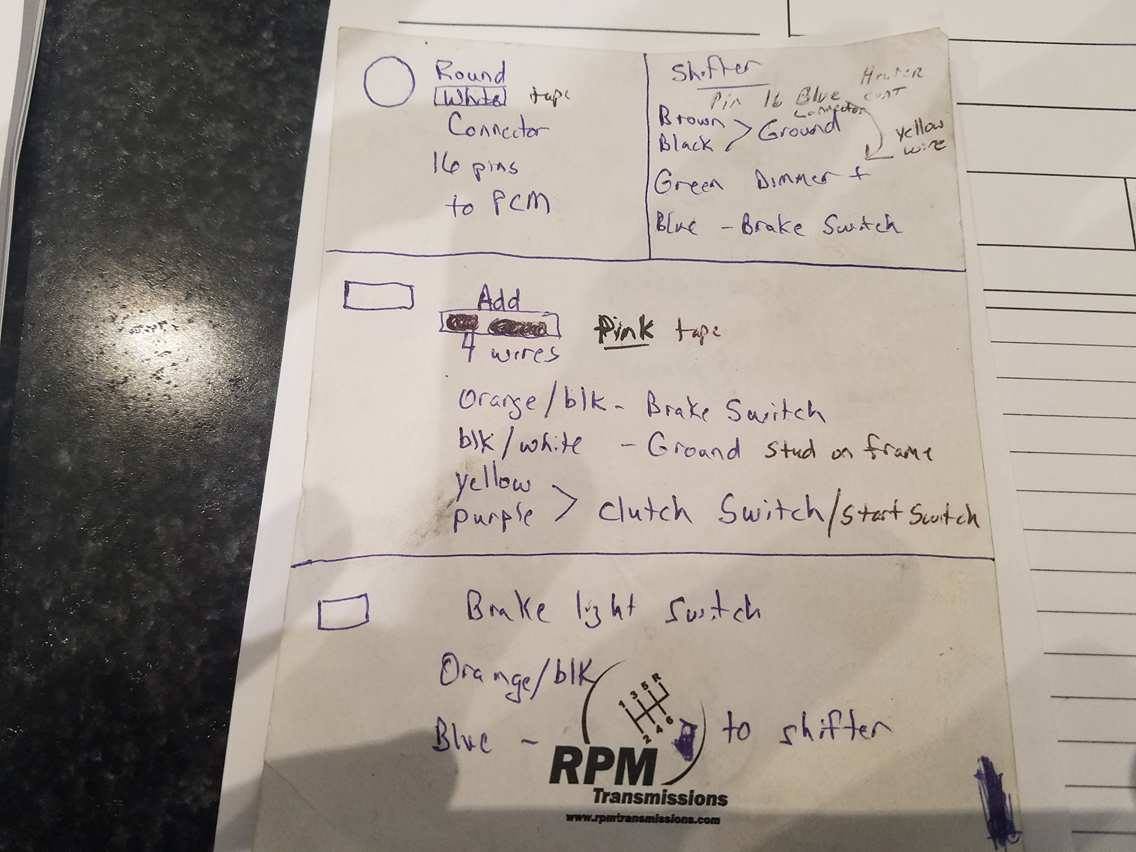
I got these notes from RPM about the additional 4 wires to connect. Can someone translate this for me, like "Wire from here to here".
05-10-2017, 09:38 AM
#557
Ok, So i think I have figured this out.
Several of these 4 new wires are for the shift lock, which a lot of you have said you werent messing with. But I am going to do it right and hook it all up.
I also bought the female connector pins for C146 from Mouser. If anyone needs part numbers, let me know. Its not hard to figure out, just search the connector part number and look for related parts. The connector pins and seals will be listed.
From Connector 146:
1. the orange/black wire goes to C3 on the stop lamp switch. My manual car doesnt have a C3, I only have 2 connectors at the stop lamp switch. I am in the process of trying to locate one from a wrecked car.
From the manual:

2. The purple and yellow wires obviously tie into the clutch switch under the steering wheel.
3. The black/white wire goes to ground. I will ground it to the frame (G104) right by the battery.
STOP LAMP SWITCH C3:
1. I already answered the orange/white wire from C146
2. The second wire (green/white) from the pigtail then goes to the shift lock solenoid at the shifter. For a 2002, its supposed to be green/white.
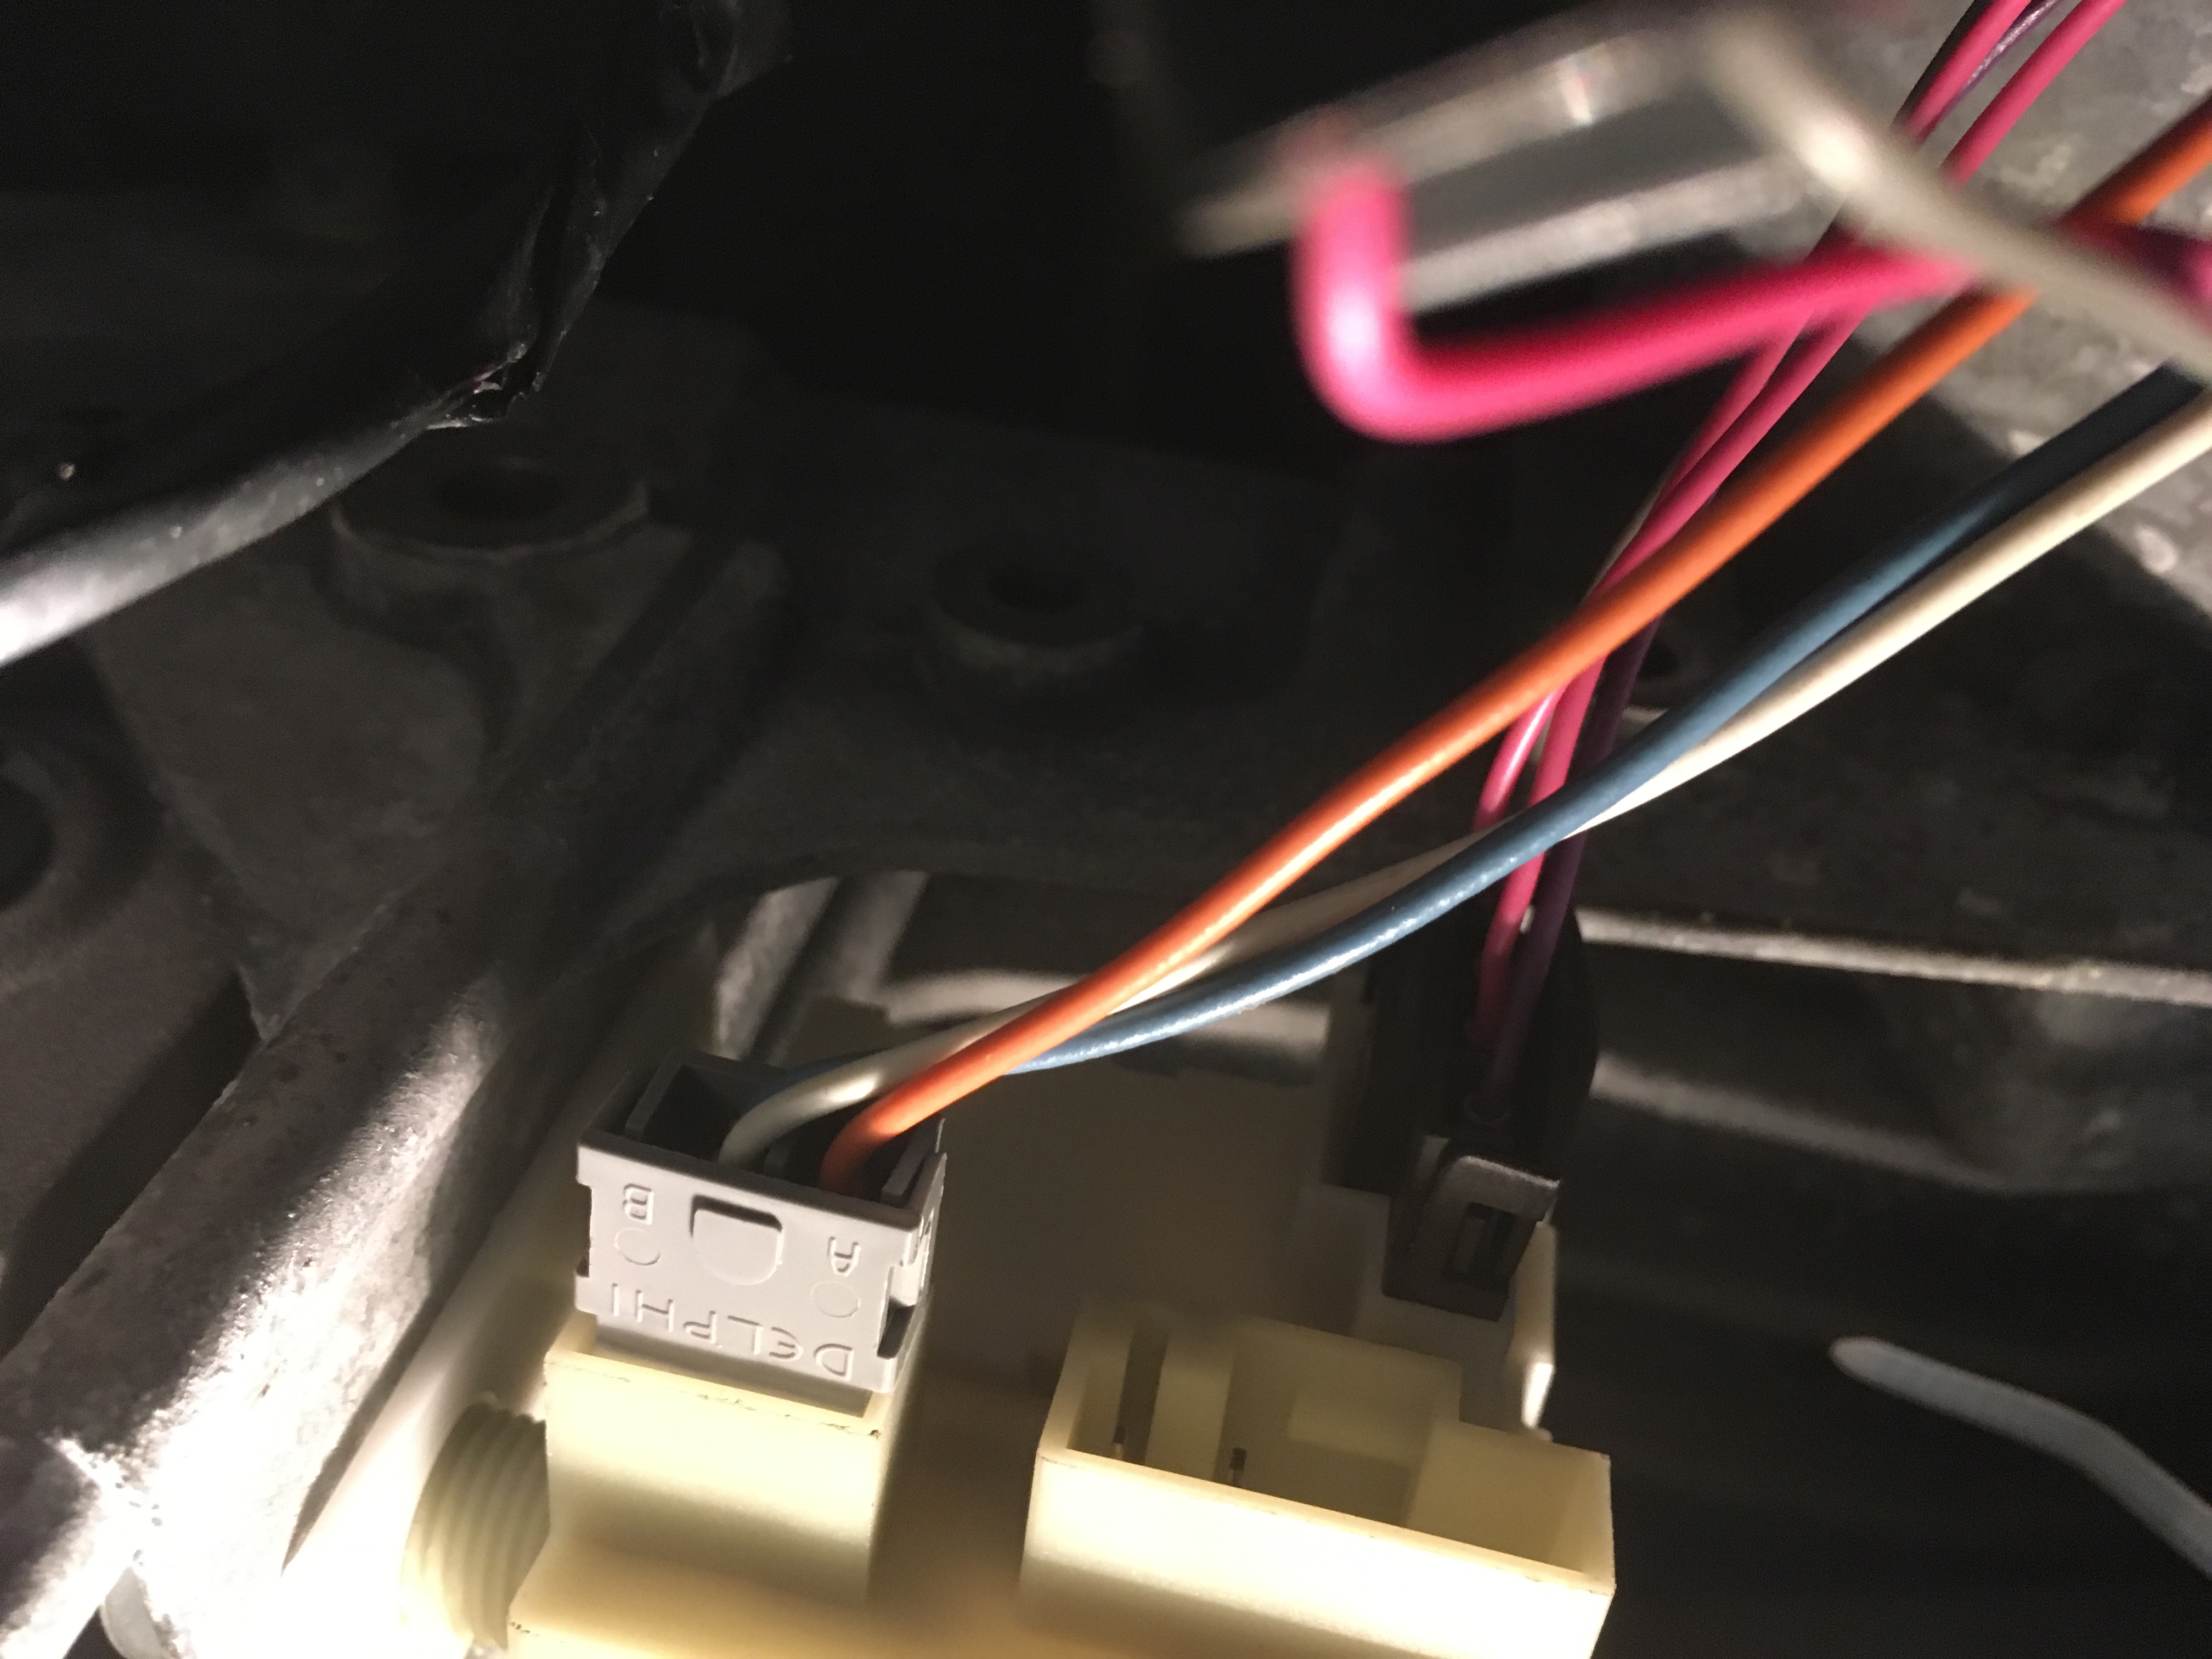
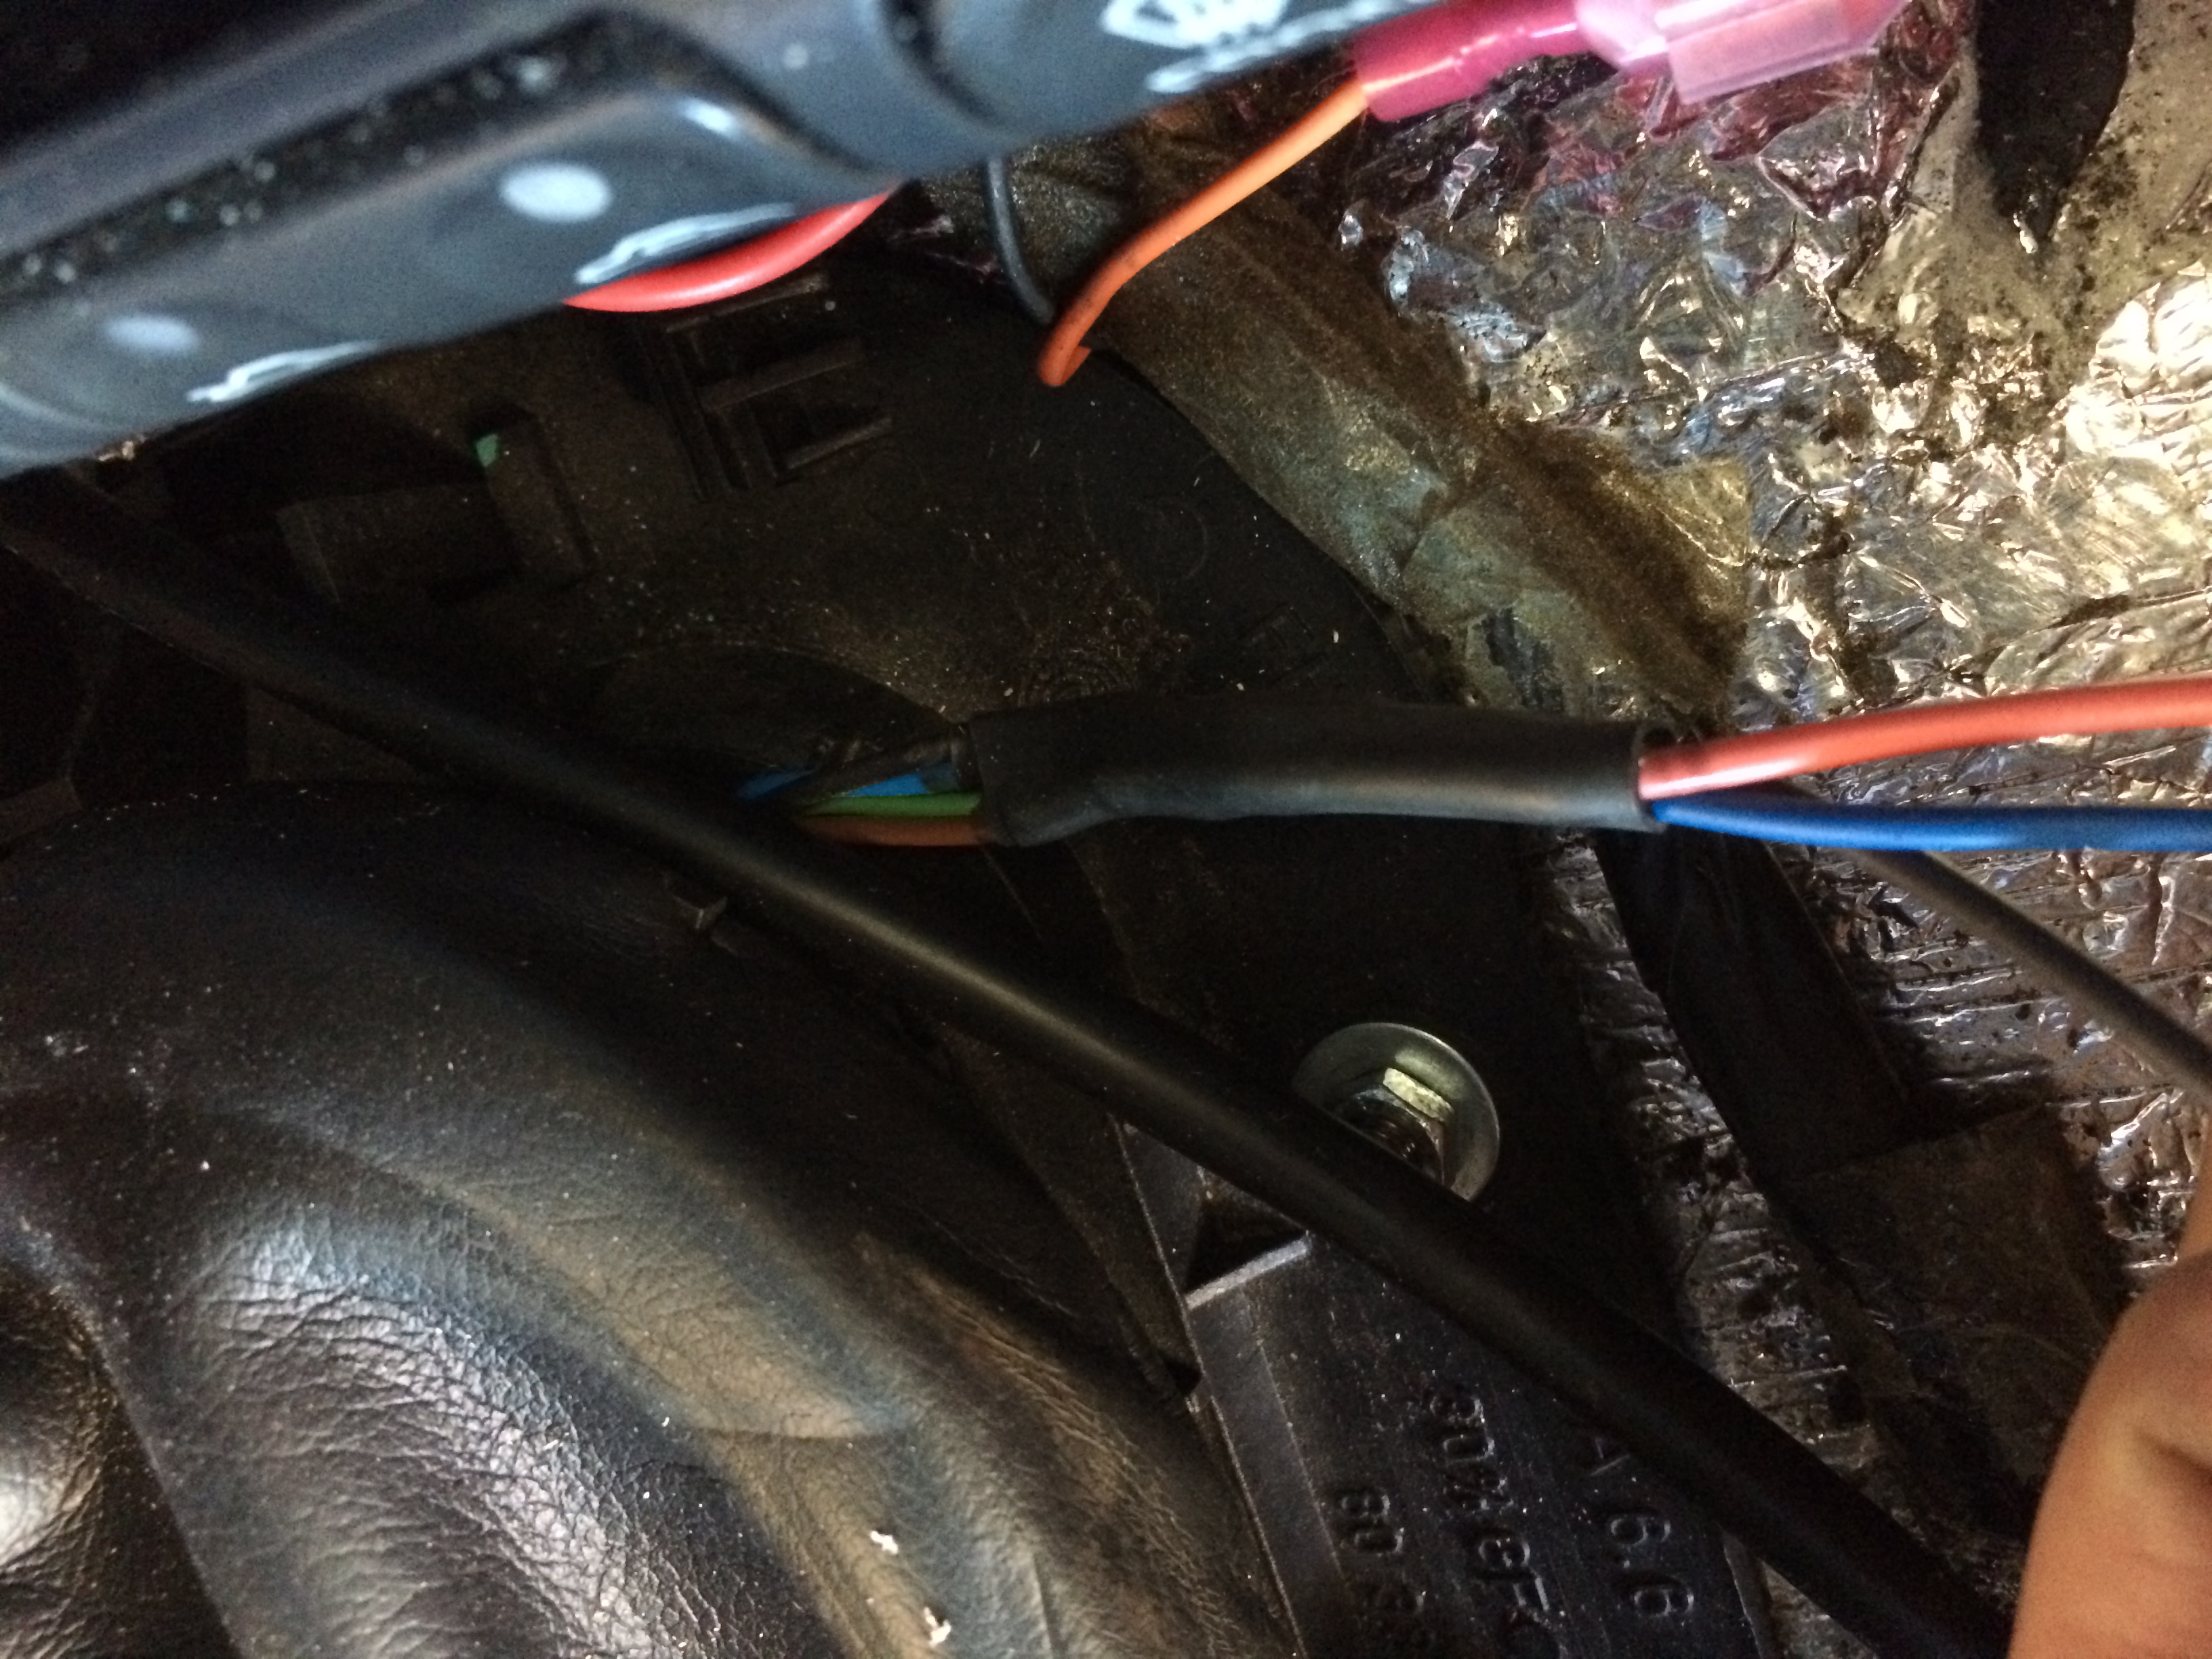
A/T SHIFT LOCK SOLENOID:
I'm not sure what year my shifter came from, but this should be the blue wire on this shifter (kinda hard to see the 4 wires (blue, green, brown and black) in the middle of the pic that are heat shrinked to 3 wires (blue, black and orange).
1. Already got the blue (or green/white for a 2002 shifter) from C3 stop lamp switch.
2. black goes to ground. I will ground at the transmission tunnel somewhere.
3. Orange - battery positive voltage. I will find constant hot to connect this to.
4. Brown should be for the dimmer. If I cannot locate a place to tie into the dimming circuit, I will just ground this with the black wire. Looks like easy locations to tie into are the yellow on the HVAC or the Brown/white on the traction control. NOTE: this should be a gray wire on a 2002.
I'm kinda disappointed in RPM, i called and left messages, sent several emails and I cannot get any kind of a response. I guess they made their sale on the jumper harness and they figure that's all they owe me since I didn't buy any hard parts from them.
Several of these 4 new wires are for the shift lock, which a lot of you have said you werent messing with. But I am going to do it right and hook it all up.
I also bought the female connector pins for C146 from Mouser. If anyone needs part numbers, let me know. Its not hard to figure out, just search the connector part number and look for related parts. The connector pins and seals will be listed.
From Connector 146:
1. the orange/black wire goes to C3 on the stop lamp switch. My manual car doesnt have a C3, I only have 2 connectors at the stop lamp switch. I am in the process of trying to locate one from a wrecked car.
From the manual:
2. The purple and yellow wires obviously tie into the clutch switch under the steering wheel.
3. The black/white wire goes to ground. I will ground it to the frame (G104) right by the battery.
STOP LAMP SWITCH C3:
1. I already answered the orange/white wire from C146
2. The second wire (green/white) from the pigtail then goes to the shift lock solenoid at the shifter. For a 2002, its supposed to be green/white.
A/T SHIFT LOCK SOLENOID:
I'm not sure what year my shifter came from, but this should be the blue wire on this shifter (kinda hard to see the 4 wires (blue, green, brown and black) in the middle of the pic that are heat shrinked to 3 wires (blue, black and orange).
1. Already got the blue (or green/white for a 2002 shifter) from C3 stop lamp switch.
2. black goes to ground. I will ground at the transmission tunnel somewhere.
3. Orange - battery positive voltage. I will find constant hot to connect this to.
4. Brown should be for the dimmer. If I cannot locate a place to tie into the dimming circuit, I will just ground this with the black wire. Looks like easy locations to tie into are the yellow on the HVAC or the Brown/white on the traction control. NOTE: this should be a gray wire on a 2002.
I'm kinda disappointed in RPM, i called and left messages, sent several emails and I cannot get any kind of a response. I guess they made their sale on the jumper harness and they figure that's all they owe me since I didn't buy any hard parts from them.
Last edited by TX Z06 02; 05-10-2017 at 09:41 AM.
05-14-2017, 05:03 PM
#558
Well I guess I did something right. Here is the first startup.
Seems to go thru the gears fine.
Now I got quite a few more things to do. First and foremost, I'm out of Amsoil atf and she isn't full yet. That was 10 qts so far.
Seems to go thru the gears fine.
Now I got quite a few more things to do. First and foremost, I'm out of Amsoil atf and she isn't full yet. That was 10 qts so far.
05-17-2017, 09:36 AM
#559
Safety Car

Thread Starter
Ok, So i think I have figured this out.
I'm kinda disappointed in RPM, i called and left messages, sent several emails and I cannot get any kind of a response. I guess they made their sale on the jumper harness and they figure that's all they owe me since I didn't buy any hard parts from them.
I'm kinda disappointed in RPM, i called and left messages, sent several emails and I cannot get any kind of a response. I guess they made their sale on the jumper harness and they figure that's all they owe me since I didn't buy any hard parts from them.
Thanks to ajg1915 for the help and wiring diagrams
 05-22-2017, 10:47 AM
#560
Update: I had to remove the cutouts from my exhaust as they no longer fit.
So i took the midpipes to the muffler shop and paid them $30 to patch up the holes.
I spent Sunday and I got it driveable, left the transmission tunnel cover off and the front bumper off. Took a quick drive around the neighborhood and it seemed to be doing great. So i put it back up on the jack stands and finished putting everything together.
I also wired in my N2MB WOT box. that's another issue for another thread.
A quick wash and dry and I drove it into town about 25 miles. The first 25 miles was great. It shifted well, locked up on the interstate and set the cruise at 75. Smooth, even seems quieter even tho more RPM's on the highway.
Got off the interstate in town and picked up my kiddo from gymnastics. Turn around to come home. Got on the interstate and the TC wont lock up. So i drove with it unlocked at 70mph, tranny temps started climbing, although it never got above 192 Deg F. Cooler works great, still dont know if the fan ever came on.
TLDR: Issues: reverse takes exactly 7 count to engage. Park to reverse or neutral to reverse, move gear selector, count to 7. I cant figure out why.
Torque converter stopped locking up. I havent figured that out yet.
Gonna check the fluid level again and see if I had an air pocket somewhere.
Last edited by TX Z06 02; 06-12-2017 at 03:27 PM.