C5 Forced Induction/Nitrous C5 Corvette Turbochargers, Superchargers, Centrifugal, Twin Screw & Roots Blowers, Twin Turbo Kits, Intercoolers, Wet & Dry Nitrous Injection, Meth
Sponsored by:
Sponsored by:

Single Turbo FRC Build

Thread Tools
 
Search this Thread
 
Old 02-16-2018, 09:33 AM
  #201  
Turpid porpoise
Melting Slicks
Thread Starter
 
Turpid porpoise's Avatar
 
Member Since: Jul 2014
Location: Virginia
Posts: 2,343
Received 352 Likes on 278 Posts
Default

Originally Posted by ascastil
Ha Ha. I googled Quick lift and Quick Jack. The only results for quick lift was some sorta face lift and the quick jack. The post was pretty old when I found out about the quick jack yesterday.
Originally Posted by ascastil
Real old post lol. From 2016
LOL, I had the Kwik Lift and actually sold it last week since it's impossible to lift a car that can't move on it's own and my car is forever taken apart. I do plan on getting the Quick Jack to replace it as it seems to be a much better alternative and I have a spare 240 outlet in my garage.
Old 02-21-2018, 08:39 AM
  #202  
Turpid porpoise
Melting Slicks
Thread Starter
 
Turpid porpoise's Avatar
 
Member Since: Jul 2014
Location: Virginia
Posts: 2,343
Received 352 Likes on 278 Posts
Default

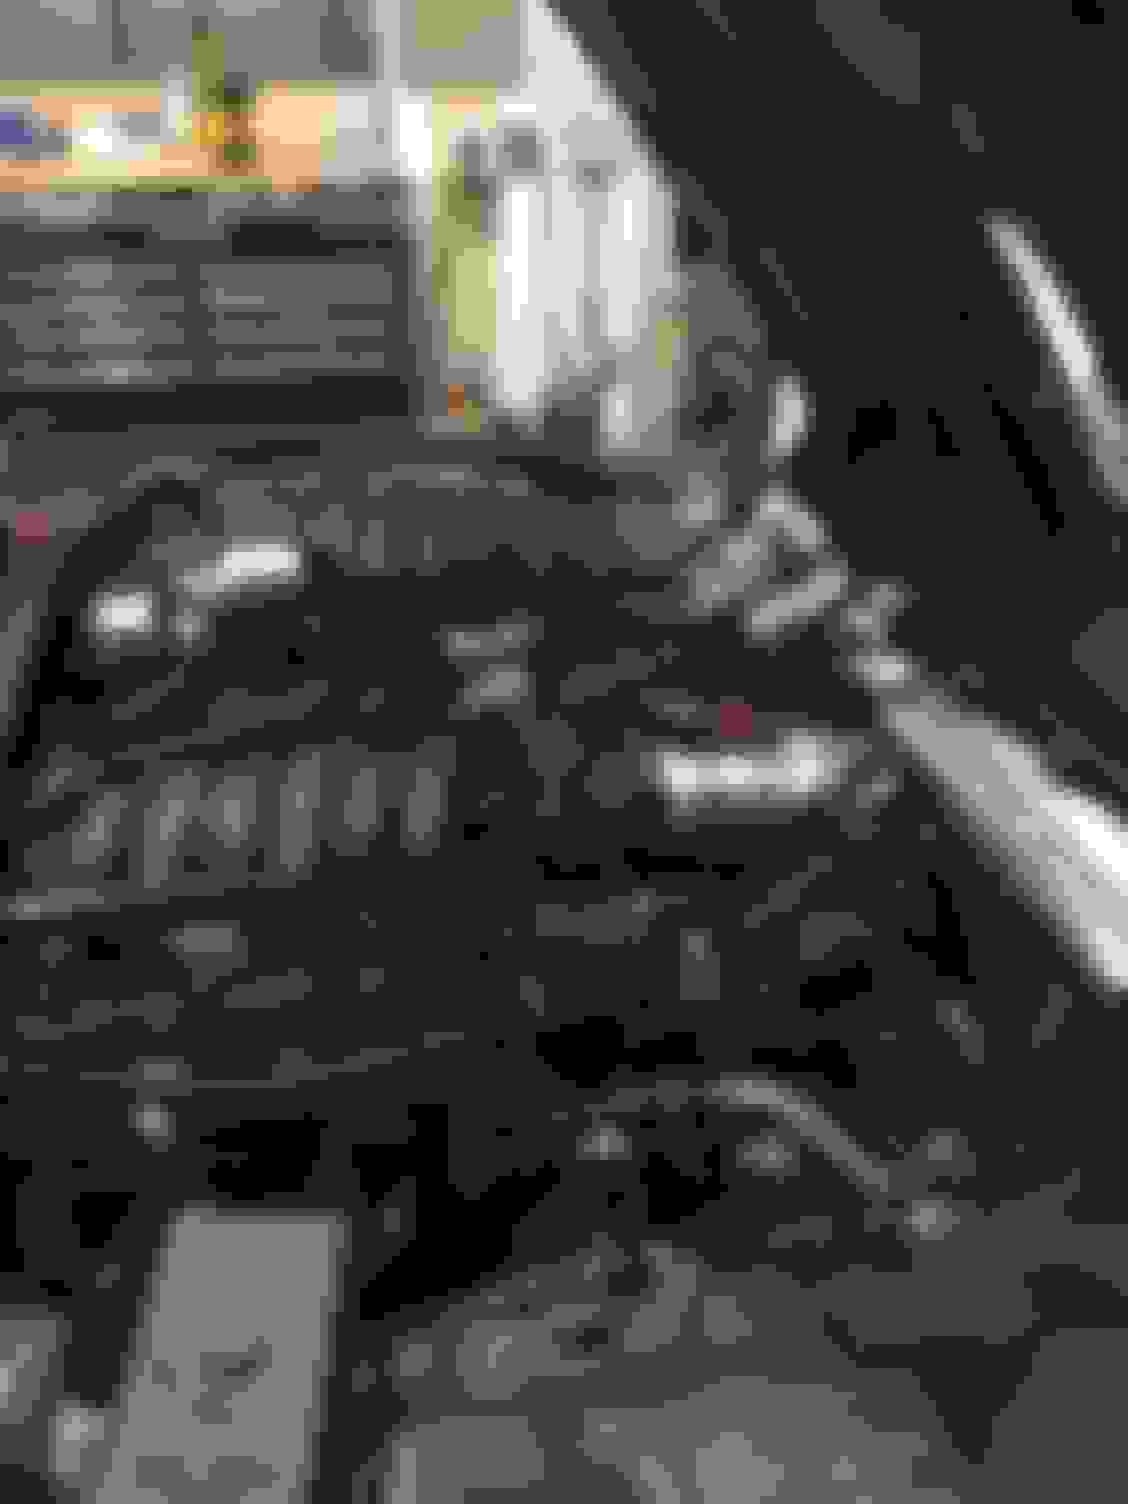
Small updates as I button up the last of the little stuff. Blow off valve flange is welded on, I would highly recommend Vibrant's tial bov flange to everyone welding one in. It came with a threaded, o-ring sealed stub so you can unthread the stub and flange from each other for welding. The material on the stub is also thicker than the flange that came with the valve. I welded a 10AN male onto my turbo intake and ran it to my clean side catch can, unfortunately I got ahead of myself and did it before I put the Alt back in so the line with have to be remade. I'll be using a turbo guard on the intake to provide some protection to the turbo. All thats left is to finish wiring the Fore FC3 to all three pumps, tighten down all the new AN lines, clean out the radiator pipes and buy/make an expansion tank. After that she gets fired up for the first time in over a year.


Old 05-21-2018, 11:43 AM
  #203  
Turpid porpoise
Melting Slicks
Thread Starter
 
Turpid porpoise's Avatar
 
Member Since: Jul 2014
Location: Virginia
Posts: 2,343
Received 352 Likes on 278 Posts
Default

So this is going to be a fairly large update lacking a bunch of photos.

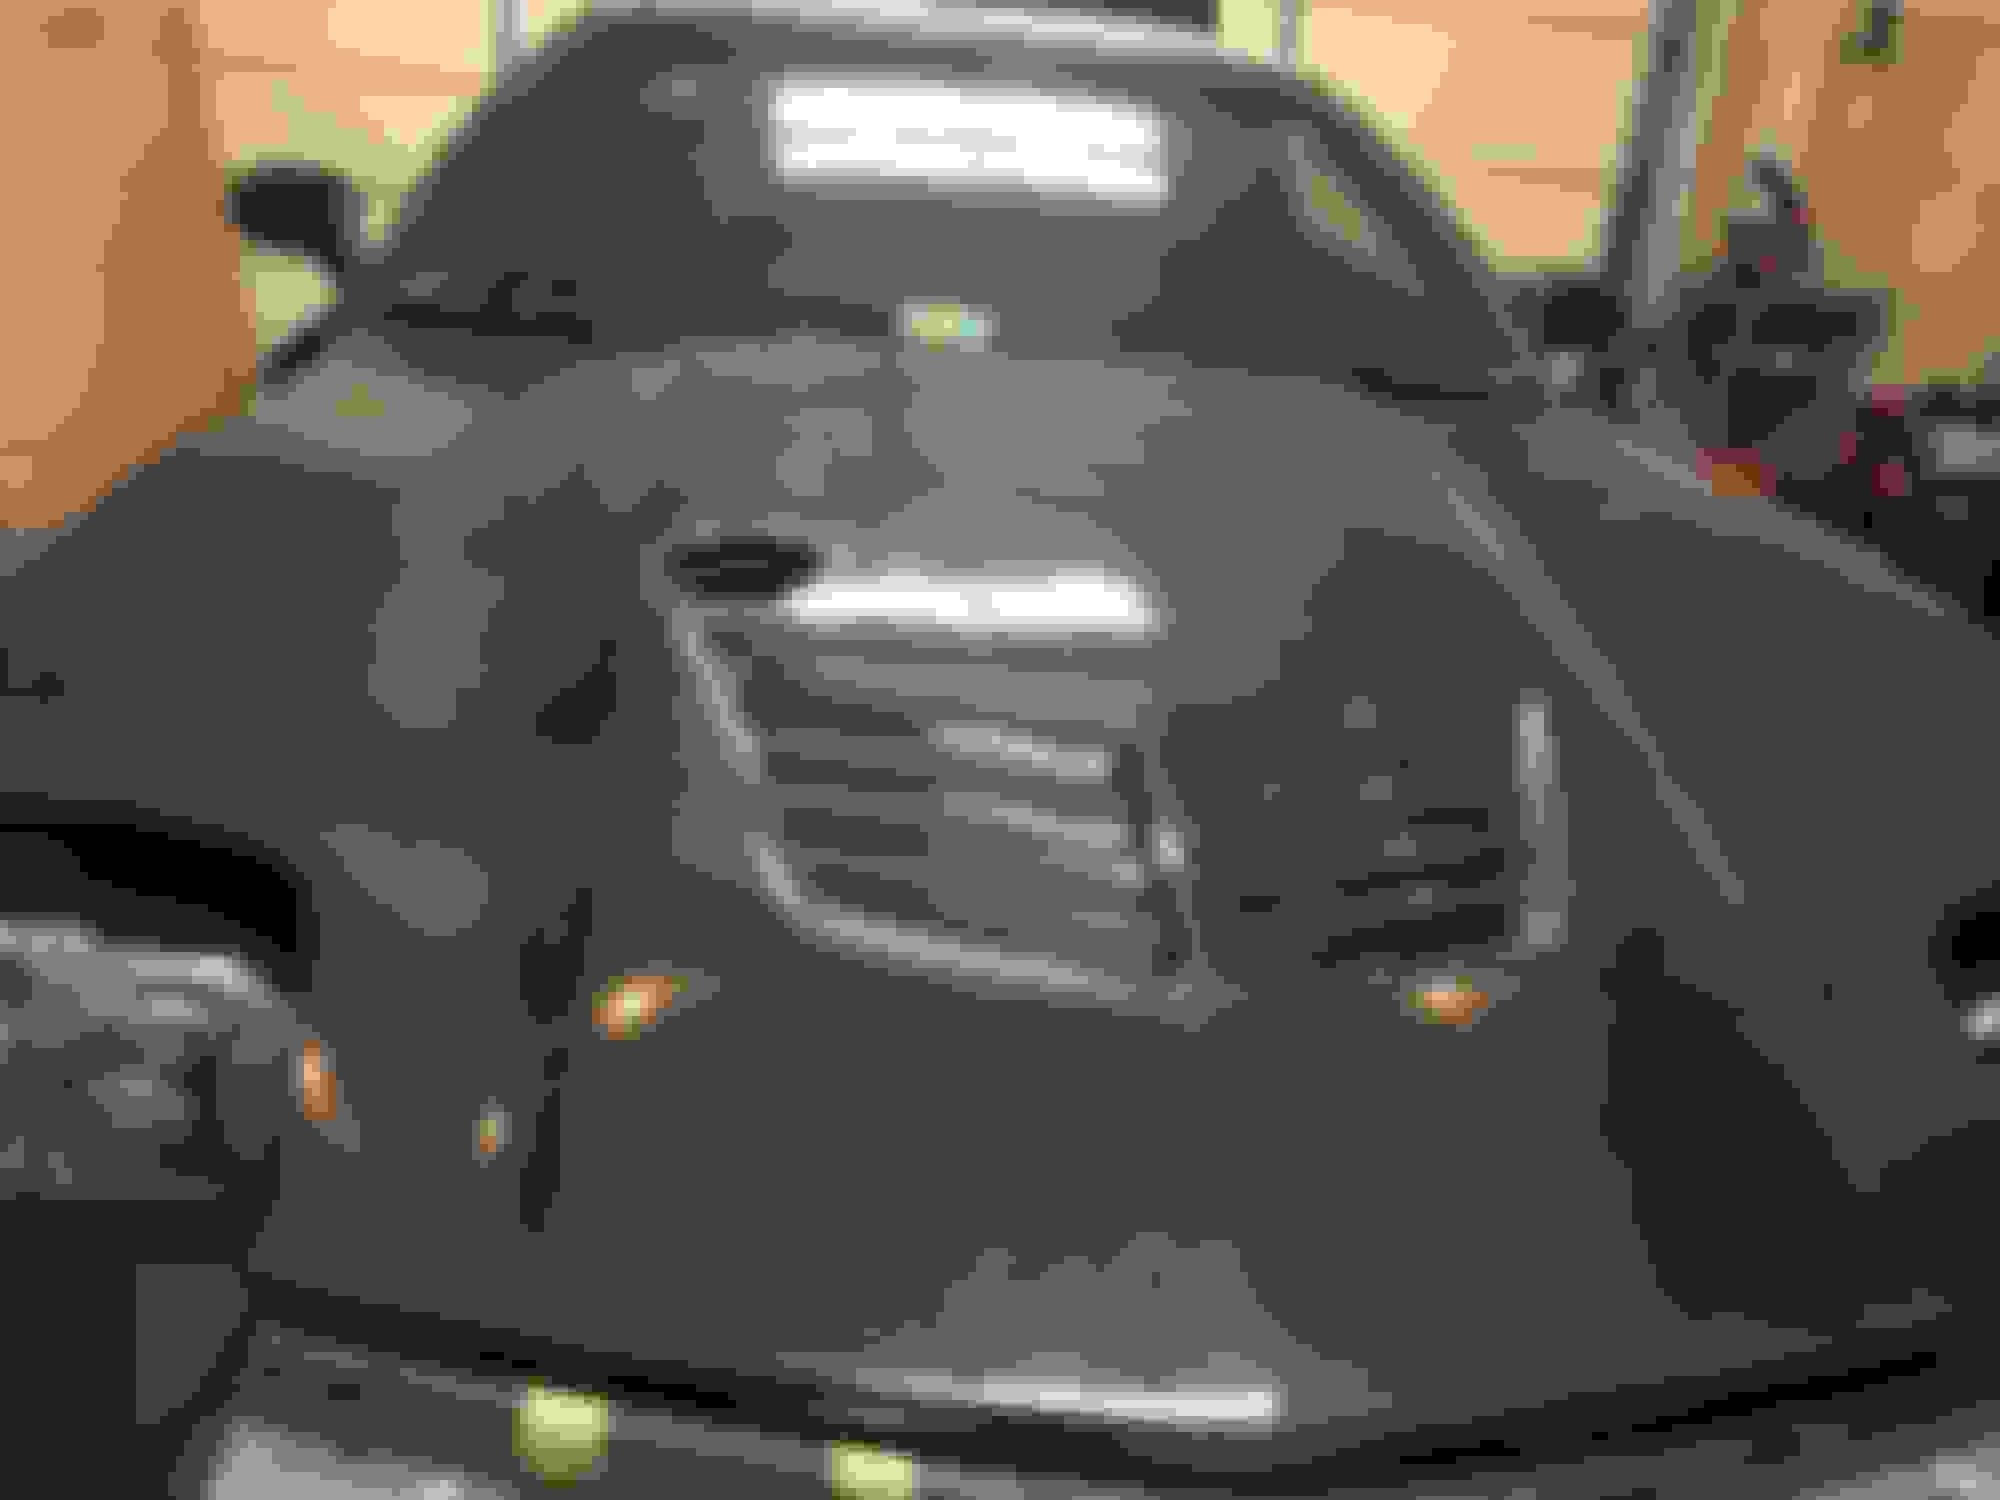
I decided to switch everything over to a Haltech standalone, I gutted the rest of the interior and redesigned my fuel setup. Outside the car I've been welding pre-existing holes shut, grinding them smooth and repainting the frame, I bought a CC carbon "Stingray" hood and I deleted the ABS block. More details will come but here's what I've added since my last post.

Haltech Elite 2500
Haltech I/O Expander Box
Haltech Dual Wideband Box
Haltech Terminated LS2 Harness
Haltech Flex Fuel Sensor
Haltech Racepak IQ3
FIC127 LS2 style injectors
LS2 Style Fuel Rails
Wilwood Brake Prop Valve
3/16" Steel Brake Lines
3/16" Steel Wastegate Hard Lines
Carbon Creationz "Stingray" Hood

I might be missing a few smaller things. Pictures are in no particular order.


Last edited by Turpid porpoise; 05-21-2018 at 11:43 AM.
Old 05-21-2018, 02:57 PM
  #204  
silver408z
Drifting
 
silver408z's Avatar
 
Member Since: Feb 2010
Location: Arlington Texas
Posts: 1,310
Received 97 Likes on 91 Posts

Default

I could be wrong but looks like someone has been talking to Bret lol.
Old 05-21-2018, 02:59 PM
  #205  
Turpid porpoise
Melting Slicks
Thread Starter
 
Turpid porpoise's Avatar
 
Member Since: Jul 2014
Location: Virginia
Posts: 2,343
Received 352 Likes on 278 Posts
Default

Originally Posted by silver408z
I could be wrong but looks like someone has been talking to Bret lol.
Lol yea, he set me up with the whole Haltech setup and he spec'd my motor(Built by Mike Van Paris) for me as well.
Old 05-21-2018, 03:26 PM
  #206  
silver408z
Drifting
 
silver408z's Avatar
 
Member Since: Feb 2010
Location: Arlington Texas
Posts: 1,310
Received 97 Likes on 91 Posts

Default

Originally Posted by Turpid porpoise
Lol yea, he set me up with the whole Haltech setup and he spec'd my motor(Built by Mike Van Paris) for me as well.
Nice, Bret has helped me spend a lot of money and I don't have a Halteck setup yet lol.
Old 05-21-2018, 03:28 PM
  #207  
Turpid porpoise
Melting Slicks
Thread Starter
 
Turpid porpoise's Avatar
 
Member Since: Jul 2014
Location: Virginia
Posts: 2,343
Received 352 Likes on 278 Posts
Default

Originally Posted by silver408z
Nice, Bret has helped me spend a lot of money and I don't have a Halteck setup yet lol.
He is very good at helping me spend money lol. He barely had to nudge me into the I/O box and IQ3.
Old 05-22-2018, 08:02 AM
  #208  
cb2004mj
Instructor
 
cb2004mj's Avatar
 
Member Since: Aug 2017
Location: mary esther florida
Posts: 201
Likes: 0
Received 6 Likes on 6 Posts
Default

its about time we got an update looking great man and it appears your taking your time to do it right the first time....or your just ocd like some of us and like things organized. either way, shes coming along nicely. you have any details on how you proceeded with the abs removal? also was that mainly doable because of the ecu,bcm changes
Old 05-22-2018, 08:07 AM
  #209  
Turpid porpoise
Melting Slicks
Thread Starter
 
Turpid porpoise's Avatar
 
Member Since: Jul 2014
Location: Virginia
Posts: 2,343
Received 352 Likes on 278 Posts
Default

Originally Posted by cb2004mj
its about time we got an update looking great man and it appears your taking your time to do it right the first time....or your just ocd like some of us and like things organized. either way, shes coming along nicely. you have any details on how you proceeded with the abs removal? also was that mainly doable because of the ecu,bcm changes
I am taking my time and I am quite OCD. I've done and redone some things 3-4 times because I wasn't completely happy with it(fuel lines mainly).

The ABS delete is still in the process but you don't need to have a standalone EMS to do it. You can simply unplug the wiring harness going to the EBCM and zip tie it up out of the way.

I used:

25 ft x 3/16" steel brake line

Edelmann Brake Adapter Fittings
EDD-262400
EDD-262800

Wilwood Adjustable Brake Prop Valve
P/N 260-11179

Dorman Brake Tee Fitting 785-436 to split the rear outlet to each rear caliper

8 x 3/8-24 Inverted Flare nuts(prop valve and tee)
2 x 7/16-24 Inverted Flare nuts(MC adapter fittings)
4 x 10x1.0 Bubble flare nuts(caliper hoses)

Last edited by Turpid porpoise; 05-22-2018 at 08:08 AM.
Old 05-22-2018, 08:41 AM
  #210  
cb2004mj
Instructor
 
cb2004mj's Avatar
 
Member Since: Aug 2017
Location: mary esther florida
Posts: 201
Likes: 0
Received 6 Likes on 6 Posts
Default

sounds simple enough really. I like where you mounted the alky controller too
Old 05-23-2018, 01:48 PM
  #211  
Turpid porpoise
Melting Slicks
Thread Starter
 
Turpid porpoise's Avatar
 
Member Since: Jul 2014
Location: Virginia
Posts: 2,343
Received 352 Likes on 278 Posts
Default

First 3 lines for the new brake setup are complete. I got both prop valve inlet lines done and the line to the drivers side caliper. This is my first time bending and flaring hard lines so it's definitely a learning process but it's not going to bad.

I ended up repurposing the mighty mouse catch can bracket I had to mount the prop valve and I'll have to, once again, move my catch can elsewhere. It just took a little cut, grind and weld and it was a perfect fit.


Old 06-04-2018, 09:40 AM
  #212  
Turpid porpoise
Melting Slicks
Thread Starter
 
Turpid porpoise's Avatar
 
Member Since: Jul 2014
Location: Virginia
Posts: 2,343
Received 352 Likes on 278 Posts
Default

Brake lines are done!

More importantly I took the plunge and cut into my brand new hood.


Old 06-04-2018, 06:35 PM
  #213  
FourG63 97GST
Melting Slicks
 
FourG63 97GST's Avatar
 
Member Since: Mar 2006
Location: South Florida FL
Posts: 2,715
Received 350 Likes on 191 Posts

Default

awesome work, like how the wiring came out
Old 06-06-2018, 08:40 AM
  #214  
Turpid porpoise
Melting Slicks
Thread Starter
 
Turpid porpoise's Avatar
 
Member Since: Jul 2014
Location: Virginia
Posts: 2,343
Received 352 Likes on 278 Posts
Default

Originally Posted by FourG63 97GST
awesome work, like how the wiring came out
Thanks man, I took a lot of time planning that out and getting everything just how I wanted it.


On another note, I finally updated the parts list on page 1 but I feel like I'm still missing items.
Old 06-06-2018, 04:20 PM
  #215  
cb2004mj
Instructor
 
cb2004mj's Avatar
 
Member Since: Aug 2017
Location: mary esther florida
Posts: 201
Likes: 0
Received 6 Likes on 6 Posts
Default

that hood looks sexy, I assume your gonna do one more pie on that exhaust to come out the hood just a bit. just the tip.....
Old 06-06-2018, 04:47 PM
  #216  
Turpid porpoise
Melting Slicks
Thread Starter
 
Turpid porpoise's Avatar
 
Member Since: Jul 2014
Location: Virginia
Posts: 2,343
Received 352 Likes on 278 Posts
Default

Originally Posted by cb2004mj
that hood looks sexy, I assume your gonna do one more pie on that exhaust to come out the hood just a bit. just the tip.....
My plan is to cut the pipe back an inch or two and use two more pie cuts to give it a softer turn up and out of the hood. I want to have it sit about 1-4”-1/2” above the hood line
Old 06-15-2018, 09:03 AM
  #217  
Turpid porpoise
Melting Slicks
Thread Starter
 
Turpid porpoise's Avatar
 
Member Since: Jul 2014
Location: Virginia
Posts: 2,343
Received 352 Likes on 278 Posts
Default

Got the tip through the hood so I guess I'm good to fire it up after I tie up a few loose ends. I have to fill the PS fluid and coolant then I think I'm good to go. I spent a few hours on the phone with Bret the other night while he set up my start up tune so I should have a video in the next couple weeks of this thing cranking for the first time.


The following users liked this post:
MVP @ TheRaceEngineShop (06-15-2018)

Get notified of new replies

To Single Turbo FRC Build

Old 06-18-2018, 09:24 AM
  #218  
Turpid porpoise
Melting Slicks
Thread Starter
 
Turpid porpoise's Avatar
 
Member Since: Jul 2014
Location: Virginia
Posts: 2,343
Received 352 Likes on 278 Posts
Default

It lives!! Massive thanks to Bret(Blownbluez06) for helping me get it idling properly and chasing down a few issues. This was literally the first start up with no tuning, Bret did quite a bit of tuning on the Idle control and fueling tables to level it out.

https://photos.google.com/share/AF1Q...FmRWdDV1ktSVp3

Little teaser of something another member is working up for me.


Obligatory engine bay shots. There may be some minor changes and of course it will all be powder/ceramic coated but this is essentially it.


Old 06-20-2018, 09:16 AM
  #219  
cb2004mj
Instructor
 
cb2004mj's Avatar
 
Member Since: Aug 2017
Location: mary esther florida
Posts: 201
Likes: 0
Received 6 Likes on 6 Posts
Default

looking great, that display mount looks clean too
Old 06-20-2018, 03:30 PM
  #220  
killacarter3
Advanced
 
killacarter3's Avatar
 
Member Since: Apr 2016
Location: Orlando Florida
Posts: 81
Received 1 Like on 1 Post
Default

Originally Posted by Turpid porpoise
It lives!! Massive thanks to Bret(Blownbluez06) for helping me get it idling properly and chasing down a few issues. This was literally the first start up with no tuning, Bret did quite a bit of tuning on the Idle control and fueling tables to level it out.

https://photos.google.com/share/AF1Q...FmRWdDV1ktSVp3

Little teaser of something another member is working up for me.


Obligatory engine bay shots. There may be some minor changes and of course it will all be powder/ceramic coated but this is essentially it.


I see the line off the radiator going to the factory coolant fill location, where does the second line go?


Quick Reply: Single Turbo FRC Build


All times are GMT -4. The time now is 12:02 AM.