
Another A&A Ti-Trim Build
 12-16-2018, 10:18 PM
#21
Drifting

Thread Starter

Tried the hoses the other way around and it's definitely less clearance, so pretty sure I had the hose direction right. In the painful process of removing the stock pulley I did beat up the pump and bearing a bit more than I'd like, so I decided to go ahead and get a reman PS pump to possibly avoid a headache post install. Really wasn't that much more than a rebuild kit and lifetime warranty. No idea if that will play into this fitment thing, we'll see. I'll see what Josh says, but most likely I'm just going to clearance the fitting a wee bit more so I don't have to worry about it rubbing, regardless of where the pulley ends up.


 12-17-2018, 12:30 PM
#23
Drifting
Thread Starter
Heard back from Josh, he said the line is backwards. I swear I tried that over the weekend and it was a no go..but I will attempt again. This is the thread that had me confused about it, it shows the 'tapered' fitting on the rack like I have it. Maybe the design has changed since the pics were taken. If that doesn't work I'm just going to grind it down a bit more and move on and reinstall on the car.
https://www.corvetteforum.com/forums...e-routing.html
Goal for today or tomorrow is to mount the blower and fire the car up and check for leaks etc before everything is on the engine is buttoned back up.
https://www.corvetteforum.com/forums...e-routing.html
Goal for today or tomorrow is to mount the blower and fire the car up and check for leaks etc before everything is on the engine is buttoned back up.
Last edited by aaronc7; 12-17-2018 at 12:30 PM.
12-22-2018, 11:24 AM
#24
Drifting
Thread Starter
Well I was kinda under the weather for part of last week so didn't get a whole lot done. New reman ps pump appears to be fine, we'll see I guess. I swapped the hose ends on the PS line and it fit fine, no pulley clearance issue. Ground down the fitting a little to be safe, have tons of space now.
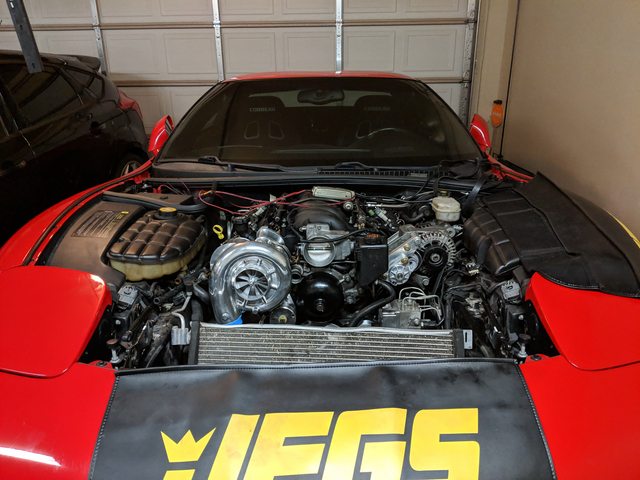
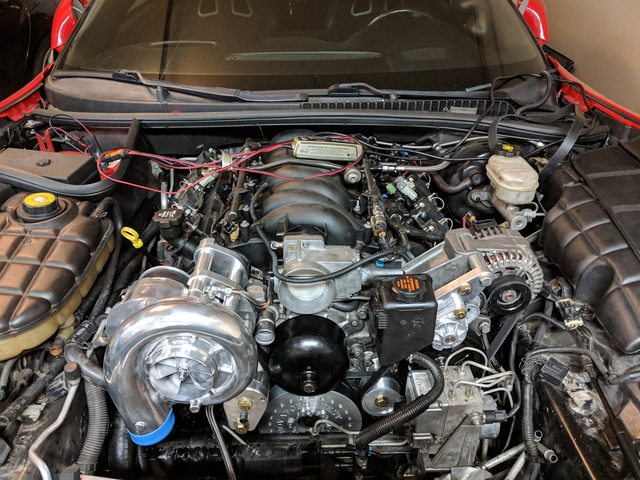
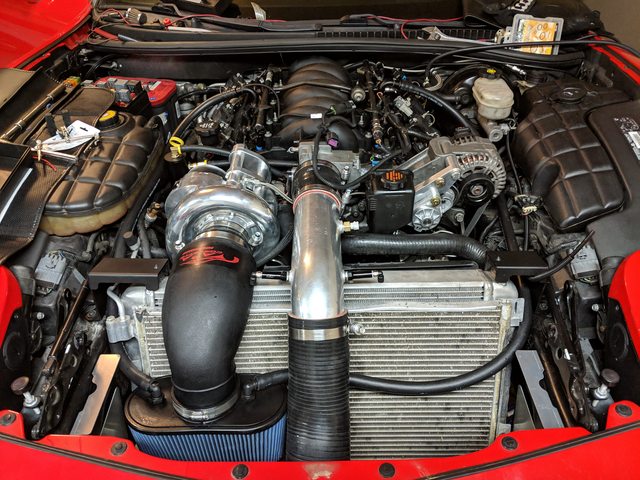
After that ordeal, finished the secondary drive setup, and mounted the blower and got the belts all situated.
One issue I did run into was getting the rear bracket of the blower installed. Of course 2 of the bolts bolt to the water pump and 2 to the head. Since my heads were milled whenever I did the port job.... the bolt holes did not line up. I had to do a little grinding on the water pump and elongated the holes in the bracket slightly. I wanted to be very conservative in this and not cut too much and possibly mess something up. It was a very snug fit, but I got it all to work. Just ended up taking a lot of time doing a lot of test fits.
Next step is clean out the radiator, condenser, and reinstall all that jazz for an engine startup to check for leaks, any belt issues before going forward with the intercooler piping and ducting.
12-23-2018, 08:04 PM
#25
Drifting
Thread Starter
Cleaned the radiator and condenser. Did a couple test fits and trimmed the fan shroud for blower clearance. Changed oil, refilled coolant, PS fluid. Changed my existing tune to speed density (still running original injectors) to keep variables at a minimum for now. One thing that surprised me was it took a good 20-30 seconds of engine cranking to build any oil pressure. I always figured 10 seconds was probably a safe/overkill amount, but wasn't the case at all. Once it got pressure, it was making 40psi at 150rpm.
Car fired right up, no fluid leaks or belt issues that I can see. Got it up to temp, burped / topped off the coolant / oil / ps fluid and called it a day. I'm going to be out of town for the holidays, I really wanted to get it fired up before the break and make sure nothing major wrong on the install so far.... looks like I'll be able to rest easy lol.
Still left:
- Rest of the kit - intercooler / piping / ducting
- Injectors, BAP, MAP sensor, spark plugs
- Catch can / PCV setup
- Meth kit , weld on bungs
01-11-2019, 12:44 PM
#26
Drifting
Thread Starter
Small update to my chitbox.
Things that I think will take me 10 mins end up taking a couple hours, but that's how it goes I guess.
Hot side charge piping was a really tight fit with larger front sway bar and the power steering cooler fins, but I made it work. Pinches the coupler a little, I wouldn't be against maybe switching over to the standard power steering cooler down the road, but something I don't want to mess with now.
Cold side piping was also more work than anticipated (looked simple). The included coupler at the throttle body is 3" long and I find it a little short too. Found a 4" long version on amazon and it gets here today. The cold side charge pipe is at the shop right now getting a few bungs welded on for IAT and methanol nozzles, then I can test that out again.
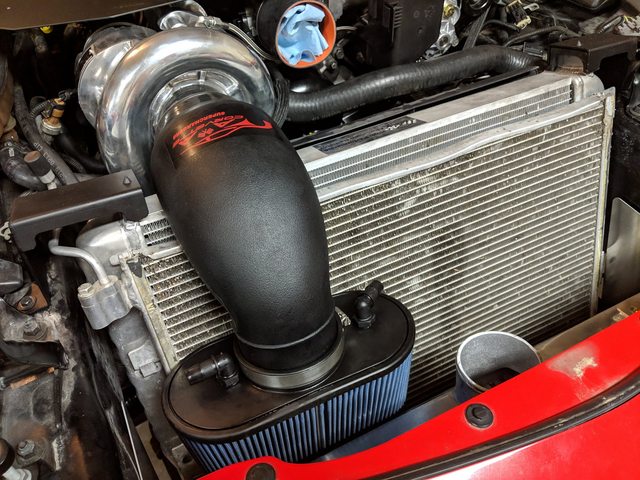
I have a -10AN fitting on both valve covers for crankcase ventilation (old track setup), so I drilled another hole in my air filter so I can run 2x -10AN (5/8") hoses for crankcase ventilation. Most certainly overkill, but that's not a bad thing. When I ran the 2 -10AN vents on this car N/A, the catch can was bone dry after 5k miles, it really helps keep the liquid flow to a minimum.
On the dirty side of the PCV system, I picked up a TPS can on holiday sale ($60) and added some of the push lock hose fittings and a built in pcv/check valve.. came out pretty clean I think.
Only a few things left and then it should be 'done'. Possibly driveable this weekend if I get the cold pipe back from the shop.
-Methanol install (electrical wiring)
-Swap injectors
-BAP
-Cold pipe / clean side PCV hoses / top shroud
Attachment 48349727
Attachment 48349728
Things that I think will take me 10 mins end up taking a couple hours, but that's how it goes I guess.
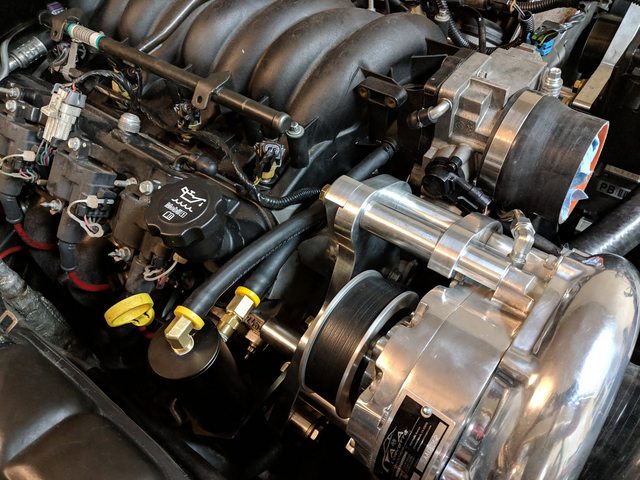
Hot side charge piping was a really tight fit with larger front sway bar and the power steering cooler fins, but I made it work. Pinches the coupler a little, I wouldn't be against maybe switching over to the standard power steering cooler down the road, but something I don't want to mess with now.
Cold side piping was also more work than anticipated (looked simple). The included coupler at the throttle body is 3" long and I find it a little short too. Found a 4" long version on amazon and it gets here today. The cold side charge pipe is at the shop right now getting a few bungs welded on for IAT and methanol nozzles, then I can test that out again.
I have a -10AN fitting on both valve covers for crankcase ventilation (old track setup), so I drilled another hole in my air filter so I can run 2x -10AN (5/8") hoses for crankcase ventilation. Most certainly overkill, but that's not a bad thing. When I ran the 2 -10AN vents on this car N/A, the catch can was bone dry after 5k miles, it really helps keep the liquid flow to a minimum.
On the dirty side of the PCV system, I picked up a TPS can on holiday sale ($60) and added some of the push lock hose fittings and a built in pcv/check valve.. came out pretty clean I think.
Only a few things left and then it should be 'done'. Possibly driveable this weekend if I get the cold pipe back from the shop.
-Methanol install (electrical wiring)
-Swap injectors
-BAP
-Cold pipe / clean side PCV hoses / top shroud
Attachment 48349727
Attachment 48349728
01-14-2019, 04:04 PM
#27
Drifting
Thread Starter
Got my charge pipe welding done and a longer TB coupler and everything fits together nicely now.
Meth kit is in and working great. I have the external 0-5V model tapped into MAP, you could in theory be spraying full blast with engine off or idle if you turned the ***** down, so gotta be a little careful with that.
Put the injectors in and started the tuning process. My clean side PCV hose/fittings get here today, should be able to knock that out quick and then basically done.
With the 80lb injectors in, on a cold start it barely idled and was running around 30:1 AFR until closed loop fueling kicked in and fuel trims were in the +30-40% range, wow. I'm getting a remote tune done, but still a tinkerer, I want to play around with fuel injection timing before I just start adding tons of fuel in the VE table. Going to try and delay injection by 10* increments and see if it needs more or less fuel as a measure of efficiency.
Attachment 48349696
01-14-2019, 04:42 PM
#28
Instructor

Looking good! I put my iat sensor and meth nozzle in pretty much the exact same spot on the 4� tube and even though I was worried about heat soak with it right above the radiator fans it is very stable and seems to be spot on with what you would expect from daily driving, idle, and wot pulls. I have the calculator for injection timing that�s in the excel spreadsheet that gets you pretty close if you know your cam specs.
Last edited by simman22; 01-14-2019 at 04:43 PM.
01-14-2019, 05:28 PM
#29
Drifting
Thread Starter
Looking good! I put my iat sensor and meth nozzle in pretty much the exact same spot on the 4” tube and even though I was worried about heat soak with it right above the radiator fans it is very stable and seems to be spot on with what you would expect from daily driving, idle, and wot pulls. I have the calculator for injection timing that’s in the excel spreadsheet that gets you pretty close if you know your cam specs.
I figure the math is only going to get you in the ballpark anyways and real testing is always better. My plan is to just advance or retard injection in 10-20* increments and see how fuel trims/ idle pulse width changes and my assumption is less fuel = more efficient.
Please attach or send the sheet you have, I'd like to take a look.
Using values @ 0.050" lift, my intake valve opens at 357* and exhaust valve closes at 359*. Most calculators / math I've seen says I need a value of around 6.3 to get the injection to start right around when the exhaust valve closes. Some other calcs say ~5.7. I have EFILive so i can't modify the boundary pulse, but since my cam isn't huge, I don't think I will need to worry about that anyways.
My initial tune was with the injection timing value @ 5.3.. advanced vs stock value. This worked well on my old injectors, but I suspect it's not working great with the new injectors. Just speculating of course, we'll see what happens.
edit: as far as the heat, I've thought about getting some reflective tape to help keep the heat away (and hide some of the scratches I've put on the pipe). But I think those are mainly to reflect radiant heat... might need something that actually is an insulator to keep heat from the heat exchangers away. I might give it a try anyway... the tape stuff is pretty cheap.
Last edited by aaronc7; 01-14-2019 at 05:31 PM.
01-14-2019, 06:17 PM
#30


With the 80lb injectors in, on a cold start it barely idled and was running around 30:1 AFR until closed loop fueling kicked in and fuel trims were in the +30-40% range, wow. I'm getting a remote tune done, but still a tinkerer, I want to play around with fuel injection timing before I just start adding tons of fuel in the VE table. Going to try and delay injection by 10* increments and see if it needs more or less fuel as a measure of efficiency.
01-14-2019, 06:25 PM
#31
Instructor
Here is the one I use. You are absolutely right in getting a ballpark and then tweaking it, mine ended up at 6.38 in the warmed up temps and higher than that it seemed like there was no change so I left it. I have a 232/247 112.5LSA and with it like that, some tweaking to the O2 sensors, an perfecting the idle timing/rpm it significantly cut down on the fuel smell and once I added the 200 CPI cats it has zero smell whatsoever. It feels a little more responsive down low but that could honestly just be a placebo effect haha. Are you running Deka 80's?
And I thought about it a little more and it probably helps with heat soak that I have an ACP heat extractor hood.
And I thought about it a little more and it probably helps with heat soak that I have an ACP heat extractor hood.
Last edited by simman22; 01-14-2019 at 06:26 PM.
01-14-2019, 06:40 PM
#32
Drifting
Thread Starter
Here is the one I use. You are absolutely right in getting a ballpark and then tweaking it, mine ended up at 6.38 in the warmed up temps and higher than that it seemed like there was no change so I left it. I have a 232/247 112.5LSA and with it like that, some tweaking to the O2 sensors, an perfecting the idle timing/rpm it significantly cut down on the fuel smell and once I added the 200 CPI cats it has zero smell whatsoever. It feels a little more responsive down low but that could honestly just be a placebo effect haha. Are you running Deka 80's?
And I thought about it a little more and it probably helps with heat soak that I have an ACP heat extractor hood.
And I thought about it a little more and it probably helps with heat soak that I have an ACP heat extractor hood.
Yes Deka 80s, the data the tuner used is a little different than the data for them posted on A&A website...but it's a well established tuner, so he may have tweaked it slightly over the years.
And I have the same train of thought Podium, I don't want to sit around and obsess over it endlessly, but I want to get injector data good before I go and tune VE or just use VE to mask other problems. Don't want to have to unnecessarily retune VE down the road after changing 1 injector setting. I've used Megasquirt in the past and this is one area where MS was really nice being able to do real time corrections.
01-14-2019, 06:46 PM
#33
Drifting
Thread Starter
OK I saw this calculator today while browsing around. For my EVC of 359 it says use 6.2.... The only limitation of this calculator is it does not allow you to compute the start of injection based on RPM and injector pulse width. IIRC, with that data melded in, I needed ~6.3 if I wanted to start injection as the exhaust valve was closing (@0.050"). Either way, yeah in the ballpark. My cam is a much smaller 226/230 113.
01-15-2019, 01:50 AM
#35
Drifting
Thread Starter
Well, I ended up not doing any tuning work, but did tie up a few loose ends with the car. All that remains now is install the BAP and trim a single panel for the hot side piping and it's all done.
Finished the crankcase ventilation setup-- 2 x -10AN lines, one from each valve cover to the air filter.
Finished methanol system and tested the nozzles out. The nozzles were pretty far recessed in the bungs and I was worried that the spray would hit the bung wall/threads and ruin any atomization effect... so i ground those down and retapped the treads a bit to make it all nice and flush on the inside of the pipe...did a quick video test to confirm and looked like it turned out well. I also wanted to see how long fluid continued to spray after the pump was shut off. The AEM nozzles have a check valve built into the nozzle holder and should do a pretty good job dealing with this line decompression / spraying issue.
For those following my purchase of the 1" longer coupler at the TB, here are some pics of the end result as well...fits quite well I think.
Last edited by aaronc7; 01-15-2019 at 01:52 AM.
01-15-2019, 09:43 AM
#36
Melting Slicks

Do you have baffles behind your 10AN valve cover vents? If not you may want to consider it or you may be pulling a lot of oil into your filter.
01-15-2019, 10:24 AM
#37
Drifting
Thread Starter
I tried the rear port on the driver side valve cover first, that is plugged but used on early LS1s.... looked like it had a nice baffle and a 3/4" barb fitting fit in perfectly. I filled up a mightymouse catch can (its a big can), in about 2 1/2 laps or just over 5 minutes on the road course. And oil spilled out onto my hot headers, I'm just lucky the car didn't catch fire. But where I put the -10an vents seem to work great... they are in the middle of the valve cover, so oil wont pool up in hard braking or acceleration and they are at the highest point, and i guess the baffles keeps oil splashing from the rocker arms out too. Another track guy I know had same issue as me, he did same thing and it solves his issues and his car has slicks and aero.
I already had the fittings on the valve covers, figured I might as well use them vs cutting into the oil cap. I used an oil cap fitting at one point for my MM catch can, and it too filled up quick, but I think the issue was pooling under hard braking. Non road course use it's probably a great spot.
Last edited by aaronc7; 01-15-2019 at 11:14 AM.
01-16-2019, 01:07 AM
#38
Drifting
Thread Starter
Well, injector timing tuning proved to be a total waste of time in my case. I did 4 back to back tests at the same temp (warmed up).
Injector timing...............Avg Idle injector PW.............Avg fuel trims
5.55 (stock)........................1.596.... ..............................+19
5.8..................................... .1.592.................................. +19
6.0..................................... .1.593.................................. +19.5
6.2..................................... .1.589.................................. +19.5
Negligible to no effect. Just going to keep stock values I guess.
Last edited by aaronc7; 01-16-2019 at 01:10 AM.
01-16-2019, 09:19 AM
#39
Instructor
You won�t see big changes honestly. And there are a lot of factors like injector size (large injectors have a much shorter pulse to deliver needed idle fuel) and how close the tune is. I would just put a number from the calculator in there and not mess with it until your fueling, timing, and all of that are dialed in and THEN in open loop with your wideband watch for the changes such as a richer idle if you delay it more. I mostly use it to help with smell on a catless vehicle and keep the exhaust tip a little cleaner, but like I said it seems like you can feel a minute difference in response and some people have shown gains on a dyno.
Last edited by simman22; 01-16-2019 at 09:20 AM.
01-16-2019, 12:45 PM
#40
Drifting
Thread Starter
After a little more discussion on the efi forum and thought on this.. I'm going to retard it a bit more and see what happens. With a value of 6.2, the injection is still happening with a 'closed' intake valve, so I might need to retard another 10-20* degrees to see any potential benefits. Quick and easy to test.. I'll do that tonight.