When you click on links to various merchants on this site and make a purchase, this can result in this site earning a commission. Affiliate programs and affiliations include, but are not limited to, the eBay Partner Network.
I figured I would create a little build progress thread on here… not some crazy amazing build by any stretch of the imagination but the section has been pretty quiet lately and maybe stir up some discussions.
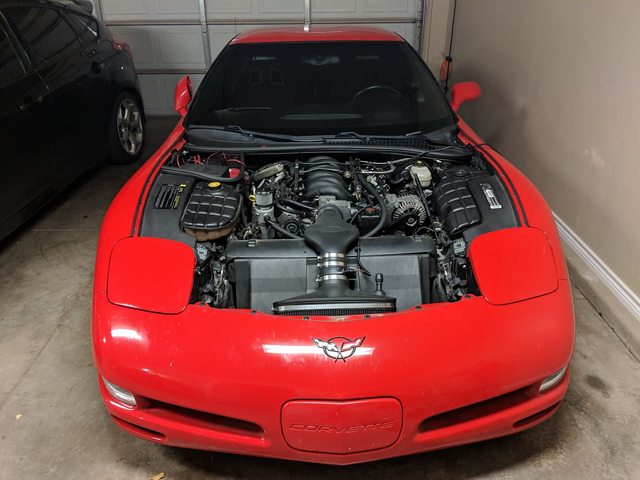
2003 C5 Z06 with around 53k miles. I blew the original LS6 on the track (road course) and did a mild rebuild with forged rods and pistons. Has a mild 226/230 cam, AI ported heads, Kooks 1 7/8” headers/x-pipe with Magnaflow exhaust. Monster LT1-S clutch, dewitts radiator w/ oil cooler, DRM bilstein shocks, Hotchkis anti-sway bars, Corbeau A4 seats, MGW shifter, some other random stuff.
Dyno’d 440whp/400wtq on a Dynocom dyno after the rebuild. I just moved and it’s at higher elevation and on the local Mustang dyno I made a whopping 350whp… 405 SAE corrected.
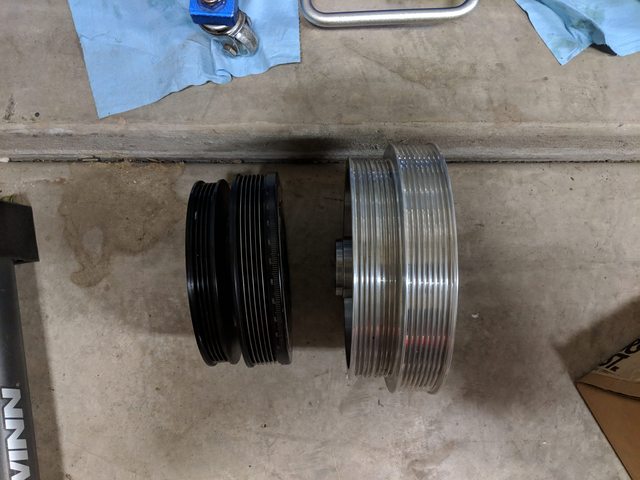
Have an A&A kit on the way with Ti-trim, their secondary drive kit / 8-rib. The crank is 10% OD and I will be running the 3.6” pulley, which should max it out around 6500 RPM. Removing MAF / external IAT for a complete SD tune. Got it during the black Friday sale, so not suprisingly they are a bit backed up right now.
I’m deviating a little from what’s common here in the fueling area. I already bought and installed the Lingenfelter “C6” in-tank complete fuel pump. From what I understand it’s just a Walbro 450, but they have a complete kit that keeps all stock bucket functionality intact. Little pricey, but I didn’t want to lose that functionality and didn’t want to have to drop the tanks again. My thought process was for ~700whp max this would be plenty and they claim it is, we’ll see I guess.
90 octane is what’s common out here, but there are a few 91 pumps… so I will definitely be running a water/methanol kit. Also deviating from what’s common on this platform, I will be running the AEM kit. Most likely a twin nozzle setup and 50/50 but I may experiment some on that. AEM measures their nozzles in cc/min, will probably start with 1000cc or 750cc.
Goal is 650whp, which might be a little aggressive for the elevation, but I’ll be happy somewhere in the 600s with a nice safe tune.
I dropped the tanks and swapped the fuel pump on jack stands in my garage. I had to buy new 6 ton jack stands to get the car high enough, but I figured it was time to get some bigger ones anyways. My car has the C6 style fuel system, so I looked up a bunch of those threads and overall it wasn�t too bad, but I did hit a few annoying snags.
For the life of me I could not get the driver tank to disconnect from the crossover tube. I looked online, and the replacement fuel line kit was pretty cheap and there was a good chance it was going to get damaged anyways� so I just reached up with a wire cutter and cut the damn lines and the rest of the removal was pretty easy.
Part of the reason why I opted to do the in tank pump was because my gas gauge had been stuck at empty for a while, so I figured I needed to drop the tanks anyways if I was ever going to replace the sending units. As it turns out the actual gas gauge issue was a poor wire connection elsewhere on the car that I later had to troubleshoot and fix.
Everything was great and car idled at 60psi until the first drive when I went to the gas station and the car would not start back up. After troubleshooting for a good 30 minutes I was about to call an uber when all the sudden it fired up and I drove home where it was cutting in and out. Turns out I likely damaged the socket where the fuel pump relay plugs into when I jumped the wires to drain the tank earlier. I opted to just bypass that relay completely since I had also installed the Racetronix harness and all has been great since (made a 1400 mile trip).
Tanks and crossover tube
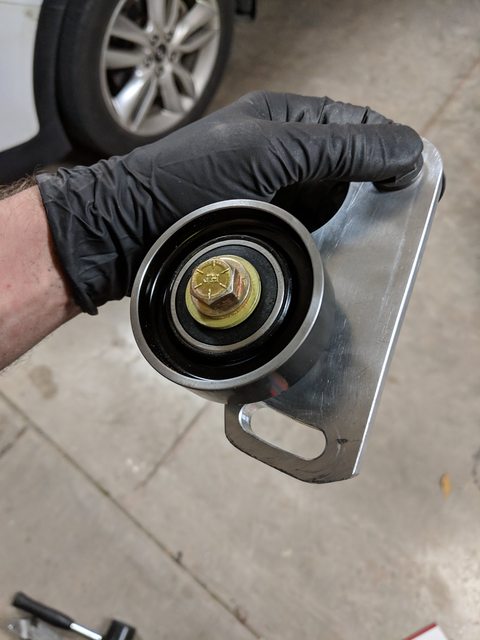
New fuel pump assembly
This is what shitty wiring looks like. Top green line is fuel pressure cutting out.
Congrats, looks like a pretty awesome build! I�m living at 8500 feet elevation and know how it feels to have the na power sucked away by elevation...... I just had an A&A kit installed and put down 584rwhp but that�s at sea level ;-/. I won�t have it back to Colorado until spring.....
best of luck and I think you�ll hit your goal!!
Thanks! It's only 4300' feet here but after living in Florida for almost 15 years it's a big change. My elevation losses are only about as half bad as yours though.... I can only imagine. We're in New Mexico, I hope to make it up to CO for some trips in the future.
Like I said in the first post, the kit hasn�t even shipped yet (should soon), but I am getting antsy so I started the teardown last night. Going to be taking my time and hopefully enjoy it (most of the time at least). I know it�s going to be hard to stop once the hardware is here though.
First order of business is a little bumper repair. Hit a cat or rabbit the other night and it cracked the bumper is a few spots and knocked out the �fog light screen�. Thankfully the 2 cracks are on the underside and I think a DIY repair will work just fine and won�t be noticeable�..I don�t think I�ll post pics of that though, might give some Corvette owners a heart attack lol.
For gauges I got the dual aeroforce interceptor OBD gauges. It can display boost (I will run a 2 bar MAP) and knock. Has 2 analog inputs which I will wire my wideband and fuel pressure sending unit to. One thing I really like is the ability to set up alerts and you can also combine them. i.e. if AFR is greater than 12.0 AND boost is greater 2psi, or whatever you want. Every now and then the car will freak out �service car soon message� or similar with the dual OBD setup, I guess it�s trying to poll too often or something, I may have to mess with some settings.
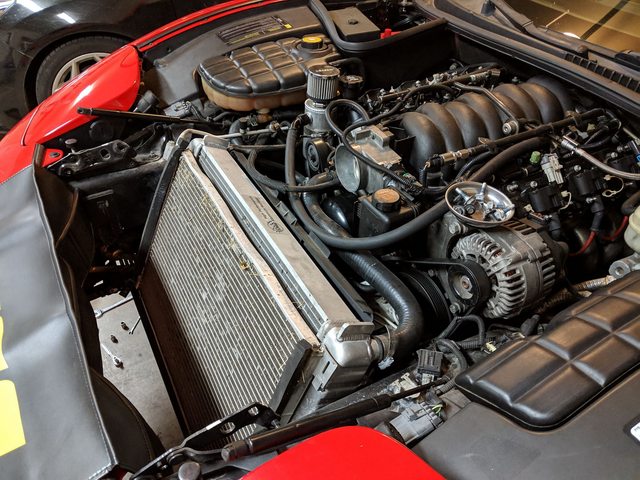
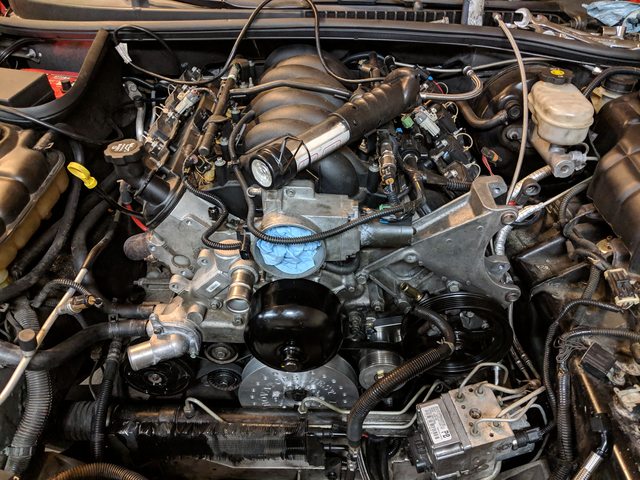
I started digging into the engine last night. I was hoping to avoid removing the radiator, but this this thicker radiator/oil lines make it impossible to just remove the fan shroud by itself apparently. Good time to give it and the condenser a thorough cleaning. Next up is the damned steering rack�but second time doing something is always easier (did it during cam swap).
I need to figure out what to do with my PCV / catch can setup. I bought a cheapy regular catch can to put between the valley cover and intake mani and I also have 2 x 10AN bungs on the valve covers and a can that will work with those. Going to have to move my current setup I think to make room for the blower. I did the 10 AN valvecover mod for the old track setup and apparently it�s working well, there was a little oily residue in the can but I couldn�t get any oil to drain out, after thousands of miles of use. Should be plenty of ventilation for the added power and I can skip drilling/tapping the oil fill port.
Go with a Mighty Mouse Set up. I really like mine.
Funny... I used to have one and then I sold it. Had issues with it on the track. I think the vacuum applied on the can was causing oil to pool up in the valvecover and I would fill the can up in a couple laps. Not really planning any more track stuff with the car now so it would probably be non-factor, but it would kill me to buy another one again. I'll stay on the lookout for a used deal perhaps. I think the cans I have now are fine but it would be nice to consolidate down to a single can.
Originally Posted by ysb02
Make sure to laser align the pulleys when you install the kit. You�ll be glad later on.
Yeah I've look at that thread a few times and trying to figure out if that's a big concern for me or not. I was hoping by getting all of my stuff from A&A I would hopefully avoid any weird issues like that. Their balancer, all new stuff from them...but who knows I guess. It seems like most are fine, but I can definitely understand the playing it safe route. Will have to think about it some more.
By talking to people smarter than me I learned that 100% meth works better in actual application than using water. Water is harder to atomize and takes more pressure to get the job done. Meth atomizes easier and is more effective. Water has a bigger capacity to cool but is harder to make effective.
Oh yeah, I've spent hours reading up on it... most guys say ultimately straight methanol is better / they had the best results with it. I have only used this stuff in the past as a safety margin and did not tune for it and I ran 50/50 mixes. I would hypothesize that in the extreme builds of 1k+ hp the advantage is significant, but more mild levels the gap narrows. Where does that leave me in the 600 rwp range??? Hard to say, so I'd like to put it to the test a little bit. If the power diff is not significant, I'll take the lower flammability, lower cylinder temps and probably safer all around option. If the power diff is big......well, I'm power hungry like the rest of you guys and I'll take straight methanol and as an added perk don't have to deal with mixing. I just want to go into it without any assumptions and actually see how it plays out.
It's also very hard to see any concrete data on this subject... I found this article recently and I think it's a great data point AND it's a C7 with a vortech s/c. Ultimately the power different between straight and 50/50 was 8hp and even less thru majority of the power curve.
I would do straight meth for safety. One you are using pump gas and not E85. Second the pump gas is only 90 not 93 or better. Lastly the overall better effective cooling of straight meth as discussed earlier.
Apparently there is a backorder / A&A is out of stock of the v3s due to holiday sale demands. They offered to change to the V2 and I accepted. The V2 Ti apparently has the "heavy duty" bearing and can take up to 55k rpm, which gives it a little more headroom than the v3. I already have everything apart, so it seemed like a good option and maybe what I should have done from the beginning anyways.
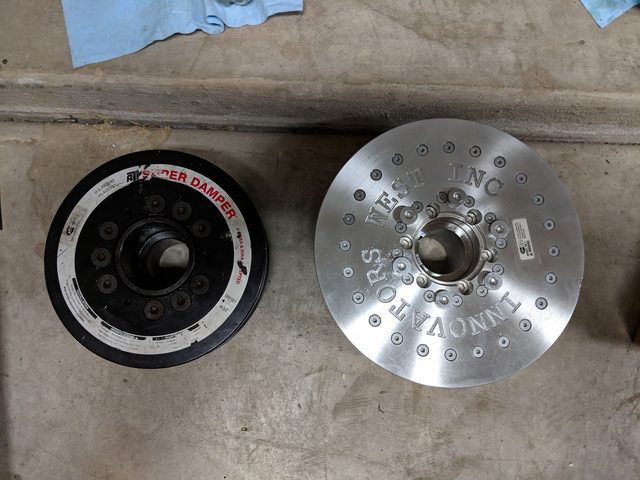
IW balancer arrived, but it's damaged unfortunately. Injectors arrived today and the rest of the kit arrives mid-week. I'll probably be held up by the balancer, hopefully another one gets shipped out soon.
Good looking build! I’m in the process of installing an ECS kit on mine and shooting for close to the same goals because I live in Colorado Springs and the elevation is depressing haha
did your balancer get damaged from shipping or what?
Hard to say but I don't think so. Box was in perfect shape. Looks like it was dropped or something before it went out. The front outer edge has a gash and is bent inwards towards the ribs of the pulley.
Made some decent progress this weekend. Went relatively smooth, a few unexpected bumps.
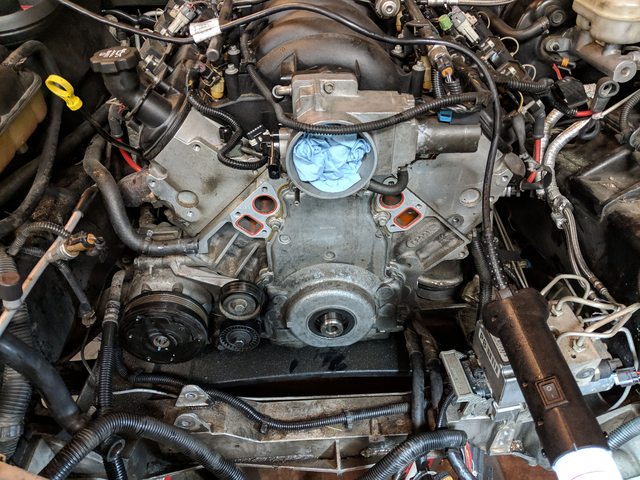
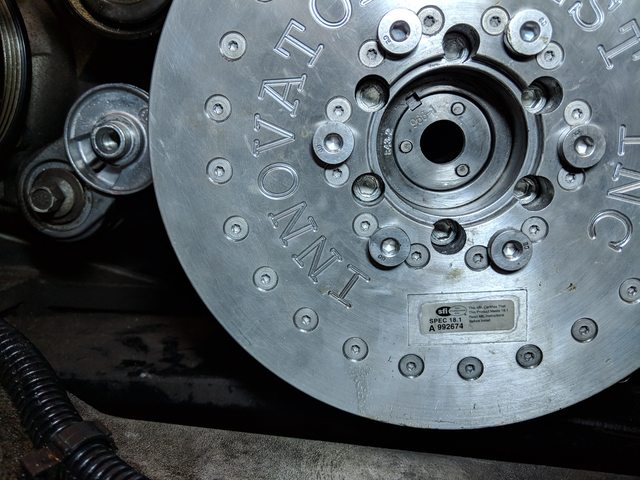
New balancer came in, but my install tool wasn't long enough. FYI the Autozone rental tool "long reach harmonic balancer install" works great, even with the 8 rib IW balancer. Drilled the pan, drilled the crank and about finished up with the secondary drive kit. Steering rack is back in, did the DRM bushing while it was out, because I figured why not... hope it tightens up the steering a bit, but not expecting miracles.
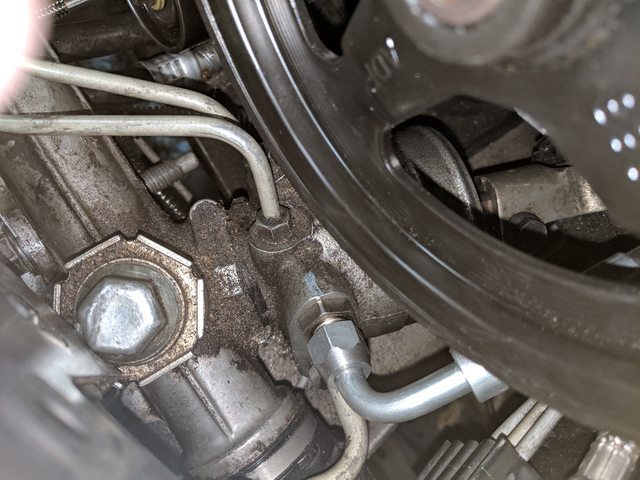
The secondary drive lower bracket interferes with the Dewitts radiator with "c6 hard lines" oil cooler BTW. I had to chop off the bottom part of the bracket and it just barely fit and you can still use another bolt to tighten the belt tension..thank goodness, feel like i dodged a bullet there.
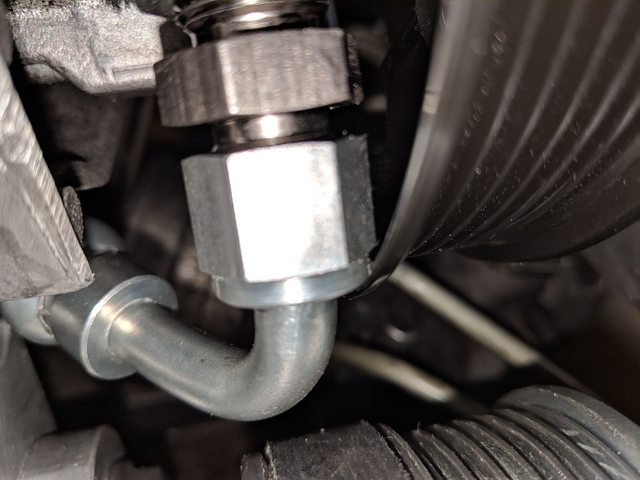
Now I'm having an issue with the C6 ps pulley interfering with their custom PS line that comes out of the pump. Not sure if I need to just pull the pulley back off a little bit or if something else is amiss. I also noticed in those threads that the hose routes under the steering shaft....mine is all above and seemed to fit OK? Sent an email and pics to Josh. It seems this has come up before on here, looked thru those threads but didn't come to an obvious answer for my situation. Little stumped on this one.... or maybe I was just getting tired last night lol.
Next up is mounting the blower itself, hope there is no big clearance issue with the full size dewitts radiator and the intake.
Overall pic
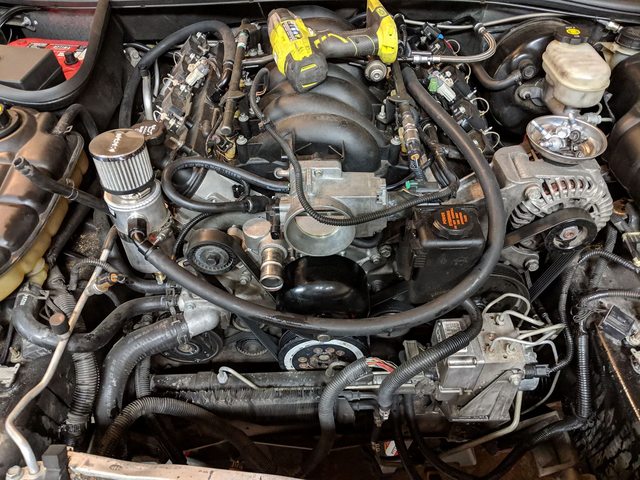
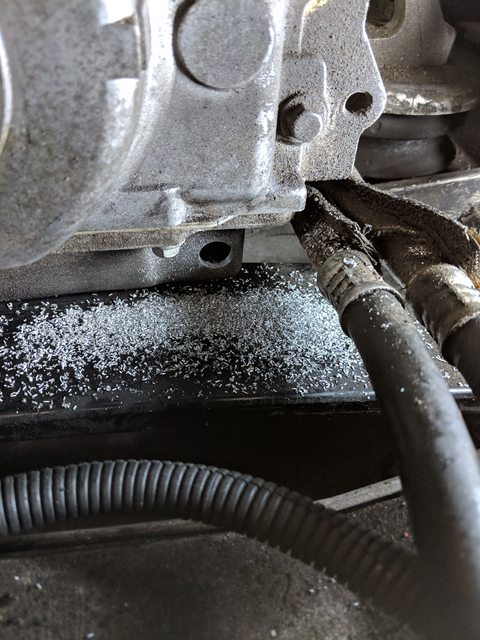
Drilling the pan
Crank pinned with IW pin kit
Bottom bracket of secondary drive modified to fit Dewitts C6 oil cooler lines
2020 Corvette of the Year Finalist (performance mods)
C5 of Year Winner (performance mods) 2019
do you have a laser alignment tool?... if so check the ps pulley in relation to the crank, I have the c6 pulley with the a&a drive and the fitting is pretty close to the lip of the pulley but it clears... my line also goes under the steering gear, have you tried swapping ends on the line?
do you have a laser alignment tool?... if so check the ps pulley in relation to the crank, I have the c6 pulley with the a&a drive and the fitting is pretty close to the lip of the pulley but it clears... my line also goes under the steering gear, have you tried swapping ends on the line?
I do not have the tool but this got me thinking I might want to invest in it. I did take the PS pump apart in my effort in getting stock pulley off. I was thinking maybe if the snap ring got bent a little the pulley might not protrude quite as much...i mean like a tiny fraction of an inch but maybe that will make a difference. In this case would I want to check relative to the crank or something else that's a 'known' like the alternator pulley? Since this belt won't touch the crank pulley directly w/ the secondary drive. I was hoping by sticking to 'known' parts and procedures I would hopefully avoid pulley alignment stuff, but I had a feeling I wouldn't be so lucky.
You mean trying the hose the other way around? I tried both ways and it fit better this way and based on the pics in a recent thread I think mine are on the right way. One end is a 90* bend and the other is slightly more than 90. The instructions could have been a little more clear about this I think. But I did not try swapping ends and re-installing the PS pulley. Trying to avoid pulling and installing this thing 5 times lol. I need a shorter bolt for the install tool, it's a total pain right now with the ABS module right there.
2020 Corvette of the Year Finalist (performance mods)
C5 of Year Winner (performance mods) 2019
since you are doing your own work the laser is a must have tool... the alternator alignment is known to be off in some cases too, the best thing to do is use the crank as your reference point and go from there... once you have the others in line with the crank you can then use them as a reference point if needed... I don't think I have a pic of mine but you might try swapping ends and run the line under the steering gear instead of over the top and see how that works

 12-03-2018, 12:26 PM