
[pics]HUD install, one of the best mods for <$400
 05-07-2006, 11:00 PM
#1
Le Mans Master

Thread Starter
Member Since: Sep 2003
Location: Farmington CT
Posts: 6,126
Received 160 Likes
on
125 Posts
Cruise-In VII Veteran

as many of you have noticed Pacethis has recently become a supporting vendor selling HUD kits, these kits take all the hassle from tracking down parts, specifically the '11-pin hud harness' (unavailable from GM)
nyhollywood recently made the trip from Long Island to CT for the install(not a bad drive when you have a Vette Doctors Rx450 equipped Nassua Blue FRC)
parts inlcuded in kit:
HUD projector w/ hardware and double sided tape for mounting
HUD switch(replaces dimmer on stock gage surround)
HUD bezel(trim to fit into dash pad)
HUD harness(uses one end of the original dimmer harness)
very detailed instructions
most '99 and newer c5's are equipped w/ the HUD cluster
dash pad removed and HUD installed(about an hour)
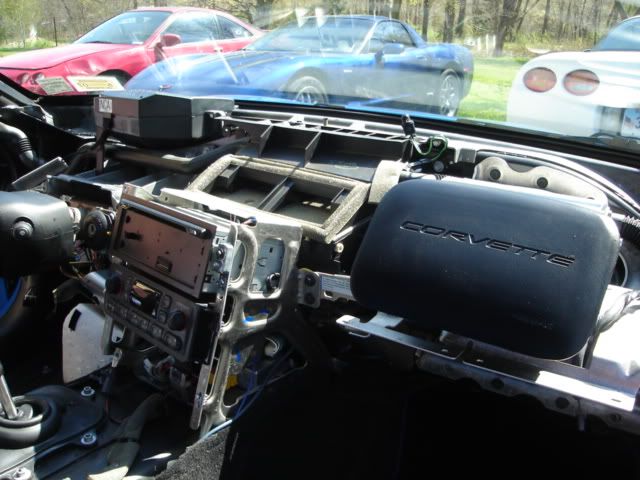
HUD projector, the harness is part of the projector, this plugs into the top of the cluster
here's the difficult part of the install, trimming the dash pad, i used a few new razor blades(lenox makes a nice utility knife), first 'scribe' the lines, then make a few passes to cut the hard plastic(1.5 hours)
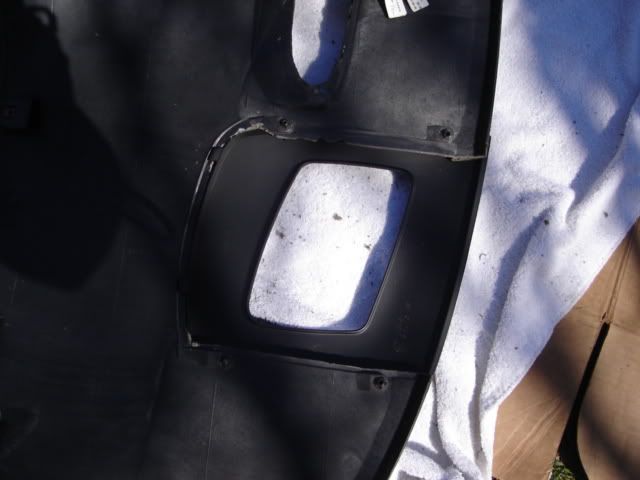
total time to install? 3 hours, the dash pad requires patience when trimming, no epoxy or glue needed, when done correctly, the 2 tabs grab the underside of aft bezel and 4 retainers hold the 4 post of the bezel
nyhollywood recently made the trip from Long Island to CT for the install(not a bad drive when you have a Vette Doctors Rx450 equipped Nassua Blue FRC)
parts inlcuded in kit:
HUD projector w/ hardware and double sided tape for mounting
HUD switch(replaces dimmer on stock gage surround)
HUD bezel(trim to fit into dash pad)
HUD harness(uses one end of the original dimmer harness)
very detailed instructions
most '99 and newer c5's are equipped w/ the HUD cluster
dash pad removed and HUD installed(about an hour)
HUD projector, the harness is part of the projector, this plugs into the top of the cluster
here's the difficult part of the install, trimming the dash pad, i used a few new razor blades(lenox makes a nice utility knife), first 'scribe' the lines, then make a few passes to cut the hard plastic(1.5 hours)
total time to install? 3 hours, the dash pad requires patience when trimming, no epoxy or glue needed, when done correctly, the 2 tabs grab the underside of aft bezel and 4 retainers hold the 4 post of the bezel

 05-08-2006, 12:40 AM
#3
Race Director

Member Since: Jan 2003
Location: Houston, Tx Got traction?
Posts: 14,285
Likes: 0
Received 0 Likes
on
0 Posts
CI 5-6-7-8-9-10 Veteran
St. Jude Donor '07-'08

Originally Posted by red97vette
awsome, thanks for the great tips!
dan
dan
Steve, great job!
05-08-2006, 02:00 AM
#4

 Not sure I'd want to take my dash apart to that degree. Glad that HUD came on my car. Guess I will be pretty much gutting the interior when I do my stereo install though.
05-08-2006, 07:09 AM
Not sure I'd want to take my dash apart to that degree. Glad that HUD came on my car. Guess I will be pretty much gutting the interior when I do my stereo install though.
05-08-2006, 07:09 AM
#5
Burning Brakes

Member Since: Apr 2004
Location: Haymarket VA
Posts: 1,235
Likes: 0
Received 2 Likes
on
2 Posts
CI 7-8 Veteran
Originally Posted by TA8088
Not sure I'd want to take my dash apart to that degree. Glad that HUD came on my car. Guess I will be pretty much gutting the interior when I do my stereo install though.A word to the wise, do not use a battery powered Dremel to do this, use a corded one. There just isn't enough oomph in the battery jobbie.
05-08-2006, 08:02 AM
#6
Team Owner


I'd think anyone w/o HUD would want to do this. Good info.
05-08-2006, 08:07 AM
#7
Cherish your Hopes...

Member Since: Feb 2002
Location: West Palm Beach FL
Posts: 13,032
Received 215 Likes
on
132 Posts
Cruise-In VII Veteran
St. Jude Donor '05-'06-'07
great mod and inexpensive considering the benefits!
..doesnt sound like anyone was dilly dallying around either...
git 'er done
..doesnt sound like anyone was dilly dallying around either...
git 'er done