
Lifting the C5 Pictures
 10-28-2008, 02:09 AM
#41
Burning Brakes


Member Since: Nov 2005
Location: "Man been singin' the Blues, since he began to till the ground"...Vancouver, USA WA.
Posts: 1,053
Likes: 0
Received 2 Likes
on
1 Post


 JOE
JOE


 Darwin anyone????
10-29-2008, 09:43 PM
Darwin anyone????
10-29-2008, 09:43 PM
#45
Drifting

reminds me of the clutch basket retention/separator tool we made out of a 2x10 to disassemble my brothers harley clutch. for the vette ramps i just made a reeeeeaaaaalllllyyy long cut on a chunk of 4x4.
btw.....nice mcgyvering
for the vette ramps i just made a reeeeeaaaaalllllyyy long cut on a chunk of 4x4. btw.....nice mcgyvering
01-28-2009, 08:09 PM
#46
Melting Slicks


[QUOTE=Gene Wolf;1560707164]Hi,
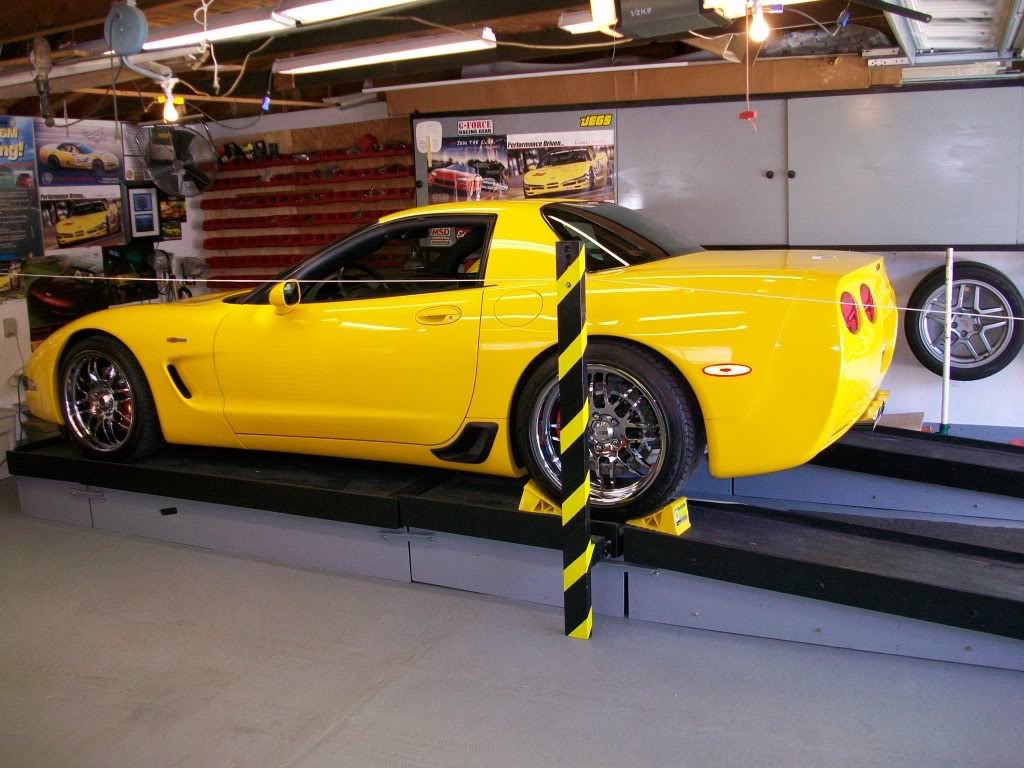
Here are some pictures which help demonstrate how to use the ramps and crossmembers described here:
http://forums.corvetteforum.com/show...g&forum_id=103
What is the length of the cross members, ( front and rear )these look great. .. good job
Here are some pictures which help demonstrate how to use the ramps and crossmembers described here:
http://forums.corvetteforum.com/show...g&forum_id=103
What is the length of the cross members, ( front and rear )these look great. .. good job
Last edited by silverbullit99; 01-28-2009 at 08:23 PM.
01-28-2009, 08:40 PM
#47

Maybe a second 2X6 board, doubling the thickness of the existing 2X6 spanning the crossmember support thus reducing the chance of breakage, would be in order here. Anything that would reinforce the 2X6 and give it more rigidity and less flex would be an improvement.
05-25-2009, 04:41 PM
#49
Drifting
I use the same wood devise as the OP, BUT, I replaced the 2x6 with a 2x8 and used Pressure treated wood. It's much stiffer. Also replaced the upper square 2x "pads" with 1/2" pine blocks. They are only pads and keep the center of the 2x6(8) from touching the cross member. With the thinner pan, I have less difficulty maneuvering the jack under the car. 1" more free space vertically! (no flex with the 2x8-) Also, with the wood between the jack stand and the frame, there is NO slip, as the top of the jack stand "bites" slightly into the wood. Have used this MANY times...
) Also, with the wood between the jack stand and the frame, there is NO slip, as the top of the jack stand "bites" slightly into the wood. Have used this MANY times...
05-25-2009, 05:54 PM
#51
Drifting
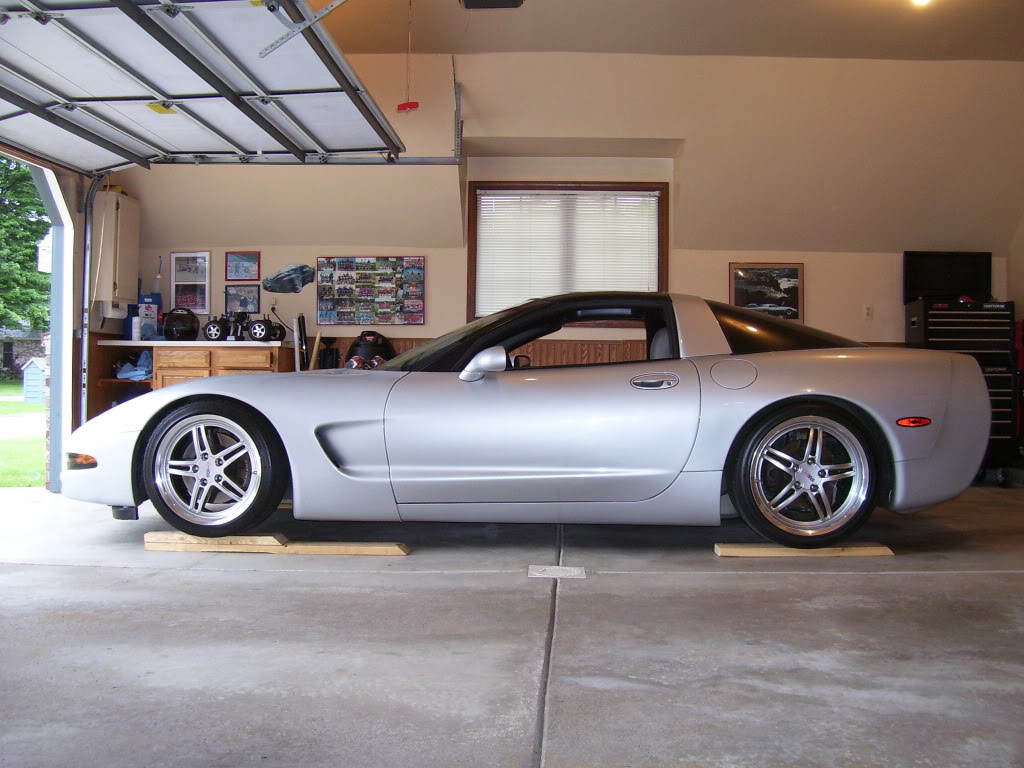
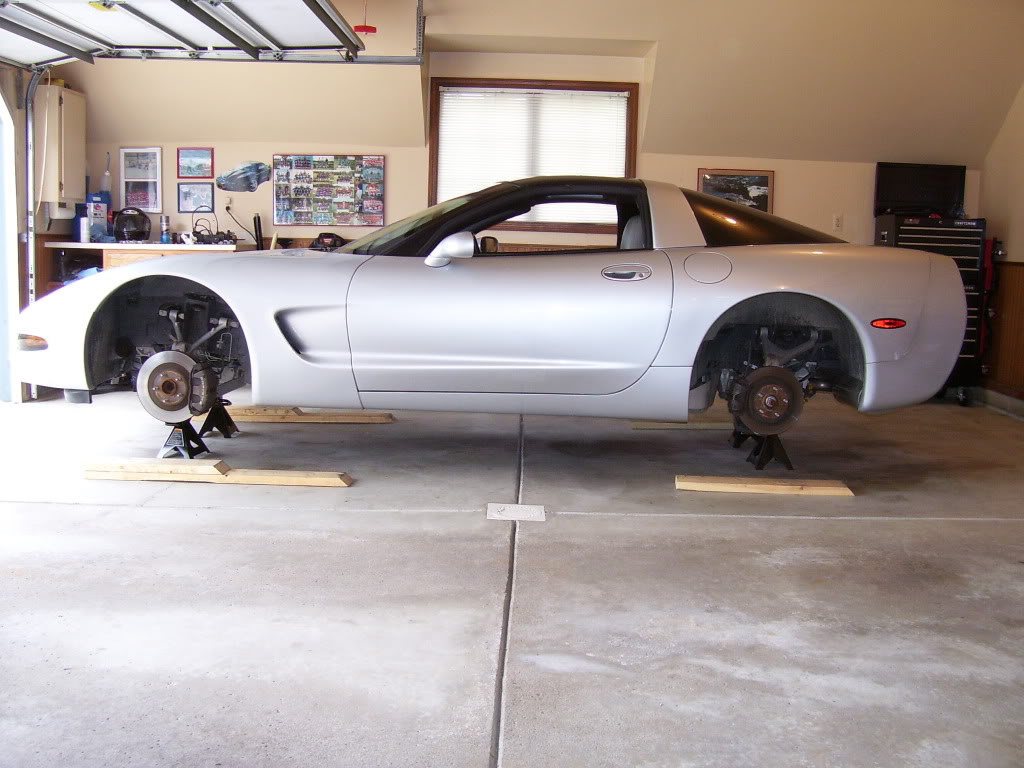
...well, I guess I'll post MY method...


Magicly, before driving off the ramps the car had drilled and slotted rotors with painted calipers.
I doubt anyone will find jack stands with the semi flat tops anymore. I had two and my father gave me his two.
Magicly, before driving off the ramps the car had drilled and slotted rotors with painted calipers.
I doubt anyone will find jack stands with the semi flat tops anymore. I had two and my father gave me his two.
06-01-2009, 09:03 AM
#52
Burning Brakes
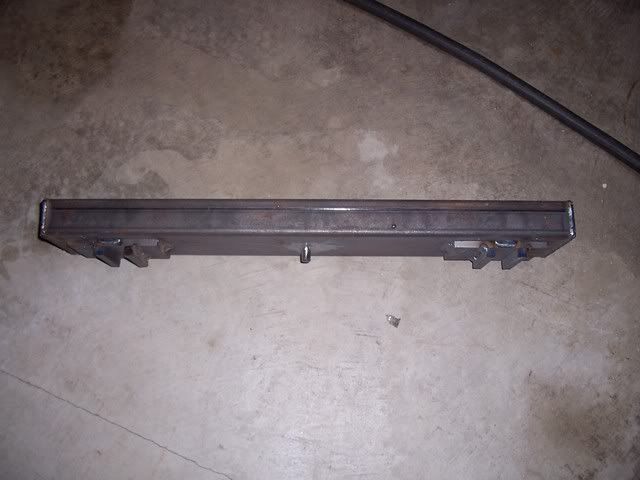
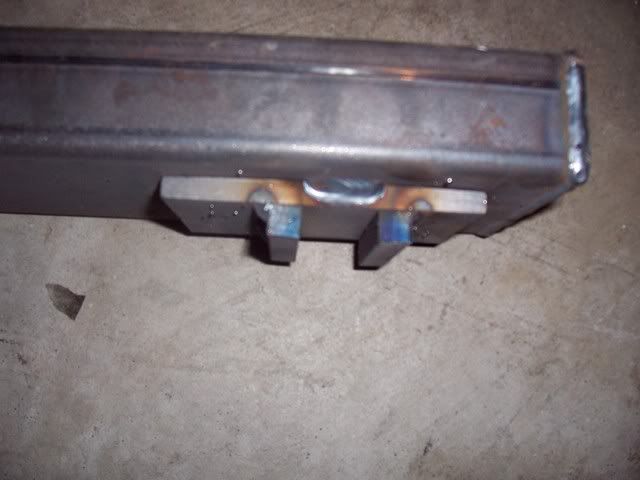
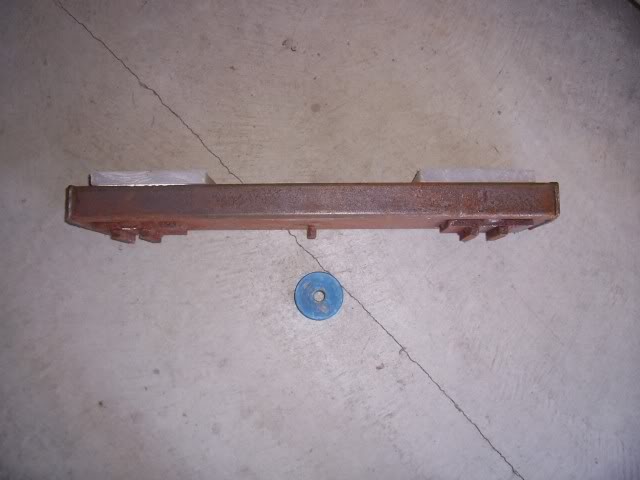
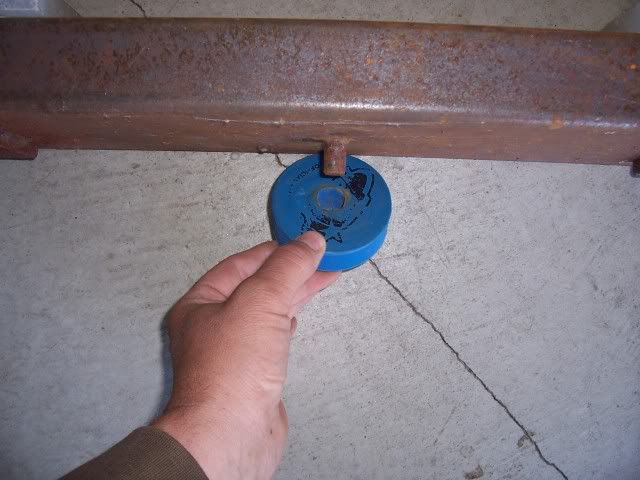
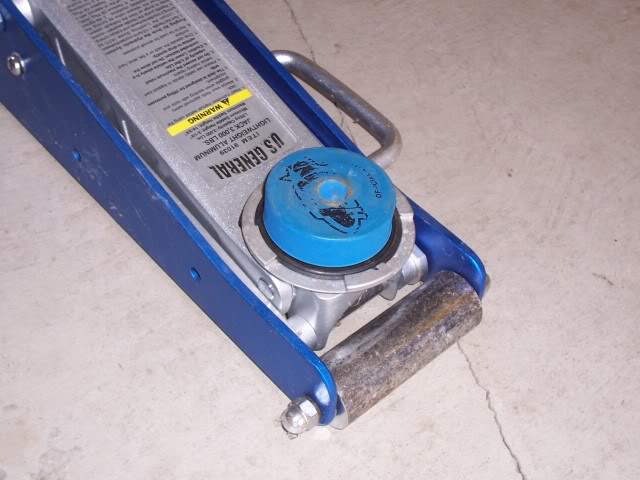
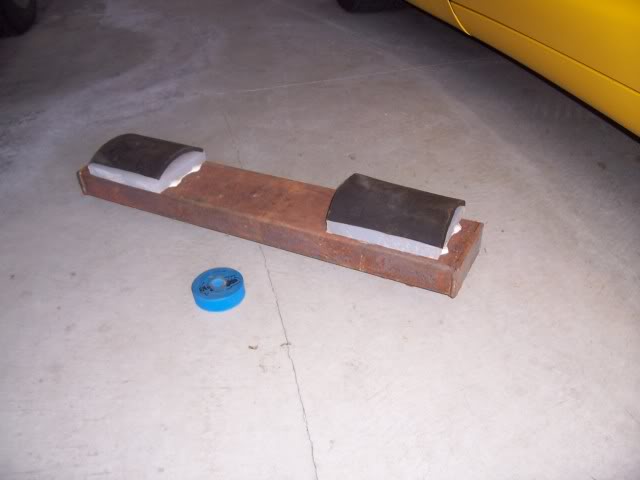
A few guys e-mailed me about the steel I used for the x-beam adapters I had welded up. The dimensions are: 28"L x 5"W x 2"H. The bottom pieces for your jack can be made with any small stock laying around. Give the welder the head of your jack and he'll figure it out. The pin was originally there because I have one jack with a hole and one without (flat surface). For the one without, I use a hockey puck with a hole drilled in it slightly larger than the pin. The pin is 3/4" in length so it doesn't protrude through the puck which is 1" thick. Actually, I recommend using the pin and puck method regardless of your jack becasue it allows you to eaily swivel the adapter under the car to allign it with the jacking points of the x-beam. The improvements to the original idea are the glued on 3/4" plastic ends on the member. Then I slide the 1/4" rubber on top of that before I jack. This height is important, because the oil drain plug is directly behind the center of the front x-member and you need to make sure you don't jack on it. So make sure you have adequate clearance that you don't have to worry about it. This summer I will be attaching the rubber to the plastic permanently. Hope this helps and explains the reason why it is like it is.

Last edited by John G Pircsuk; 06-01-2009 at 09:09 AM.
12-08-2009, 11:53 PM
#53
Pro


Member Since: Oct 2009
Location: Bowling Green KY
Posts: 600
Likes: 0
Received 0 Likes
on
0 Posts
With all this jacking going on it is making hair grow in my hands.
Seriously, just for a moment, I did a search for 'pucks' and this thread was exactly what I was needing. Good Work. Thanks for everyone's time and effort.
Seriously, just for a moment, I did a search for 'pucks' and this thread was exactly what I was needing. Good Work. Thanks for everyone's time and effort.
Last edited by wcdaniel; 12-08-2009 at 11:58 PM. Reason: Fat Fingers


 12-09-2009, 09:58 AM
#59
Le Mans Master


Member Since: May 2007
Location: Belleville Mich.
Posts: 5,393
Likes: 0
Received 15 Likes
on
14 Posts

Once I bought my first vette (03 Z 06) back when it was brand new, after trying to lift it safely to do it's very first oil change, I knew I had to come up with something alot easier to get it up in the air. Made my own ramp lift system out of wood. Life has been alot better since.
12-09-2009, 05:41 PM
#60
