
Write-Up:C6 ZR1 Exhaust on C5, Manifolds,ZR1 3" Cats,3" ZR1 Xpipe,3" B&B Fusion(pics)
 02-24-2013, 12:52 AM
#1
Team Owner


Thread Starter

Dyno Update - results are in - 4/19/2013 - Big thumbs up to Charlie and Austin @ RPM Motors
First it was necessary for me to install a "PROPER" Crank Case Evacuation System - here is my write up on my Monster 2 Catch Can Installation with Pics -
Thanks to the proper guidance of Charlie I got headed in the correct direction and was able to get the proper set-up for my combo, I wasn't able to go any further a few weeks back specifically because of an INADEQUATE Crank Case Evac system
http://forums.corvetteforum.com/c5-f...ntri-pics.html
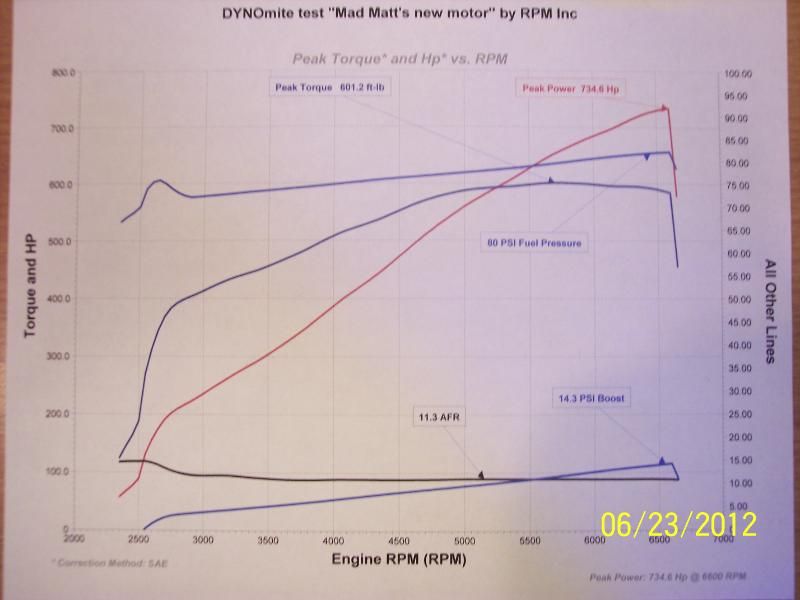
Dyno Results: I lost - .4 RWHP and 15 RWTQ - "NEW DYNO SHEET"
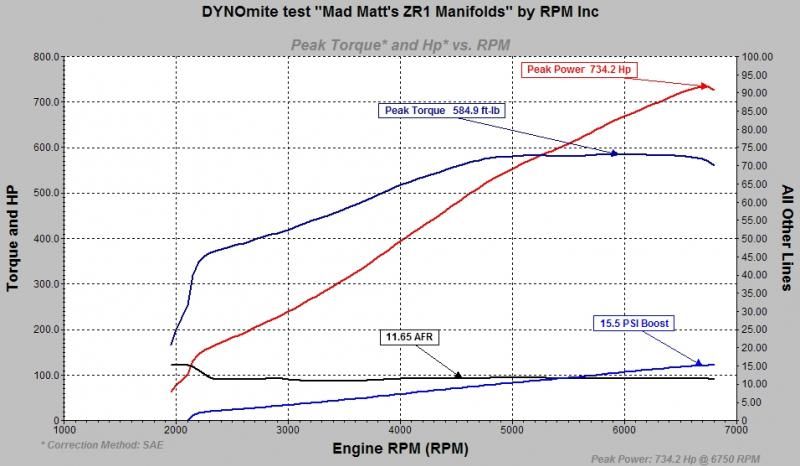
"OLD DYNO SHEET" -
First and foremost: Performance Impressions -
By the feel of my "BUTT" Dyno and going from 70 MPH - 140 MPH, I felt no difference at all. It still pulled like a rapped ape and a 700 lb Gorilla pushing you into the seat.
DYNO UPDATE: 3/5/2013
Today took it the tuner and it was really PIG Rich right 10.4 AFR out of the box it made 692 RWHP brought it to 10.6 AFR and went to 695 RWHP (40 RWHP loss for now) and not much timing -
We did not continue to tune, after a second run I was getting too much crank case pressure - So I had him stop - no need to continue to beat on it with a defunct Crank Case Ventilation System - If I am going to do this I am going to do it correct!
I have needed to do a proper Crank Case Vent system for a long, long time - so now I will do my CC Vent system and then take it back to bring it near the Original RWHP (I wont mind being around 725 RWHP which would be -10 RWHP and I would be fine with that = SMOG Legal! )
So please be patient with me as I do this necessary step - (something I should of done a long time ago )
I will probably get it back to the tuner this month and get the results -
I have talked to Rev Xtreme and am getting a set-up specific to Forced Induction - he went over and explained all the ins and outs and do's and don'ts to CC ventilating, proper and improper set-ups (Mine was way improperly done )
)
Sound: It is amazing, love the LOUD straight through/Open side under WOT and the QUIET Side under cruising conditions - they have a nice mix between Flowmasters and the C5 Z06 Titanium Mufflers
For me living in California and in trying to keep Smog legal I decided to do this mod and "NOT" loose RWHP but even gain some due to better flow! (Dyno to come later)
I "REMOVED" my 1 3/4" Kooks Headers, 3" Kooks Xpipe and Hiflow Cats, stepped into Kooks' 2 1/2" Mid Section and then into the Stock C5 Z06 Titanium Mufflers.
I "INSTALLED" C6 ZR1/Z06 Exhaust manifolds, C6 ZR1/Z06 3" Cats down pipes, C6 ZR1 X-Pipe into Custom B&B Fusion 3", that goes all the way over the axle into the B&B Fusion Mufflers (These B&B's are kinda designed like the Flowmaster inside, some pics below will show it) -
I do have a LS2 Oil Pan on my Vette so this really does help in installation and clearance as opposed to the LS1/6 Batwing Oil Pan! Really helped in the removal of the headers too!!!
Video loaded at the bottom of post!
Gaskets Parts List:
Exhaust Manifold to Head - My TFS 215's are D-Port shaped heads, so these match up perfectly!

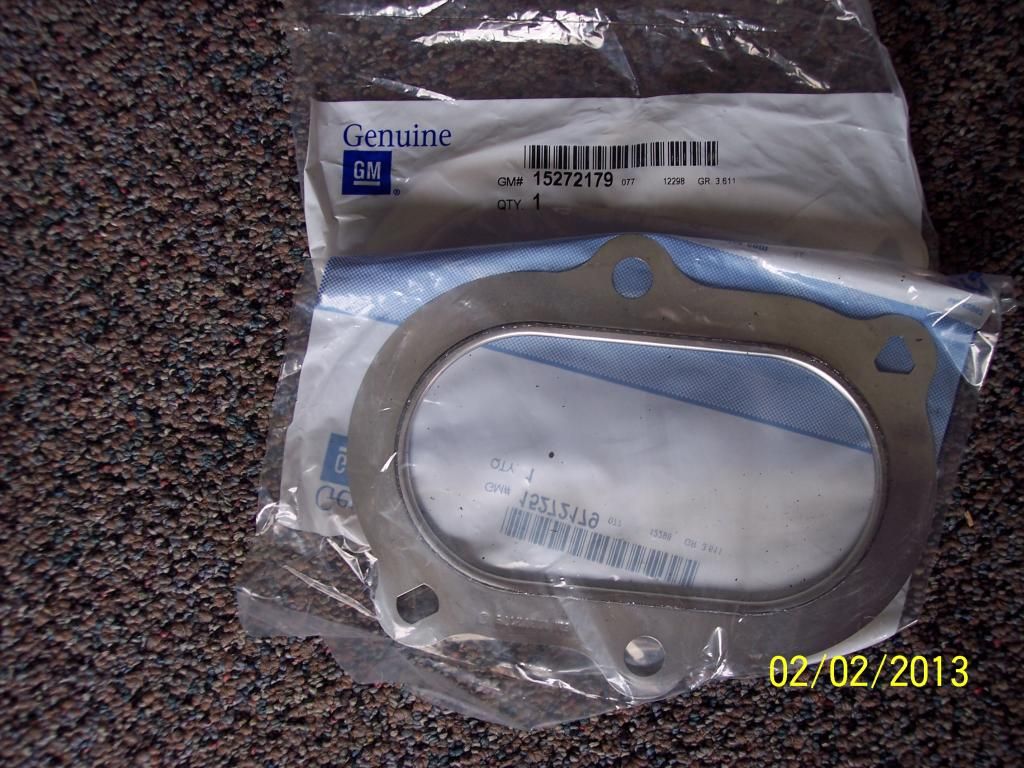
Exhaust Manifold to Cat Downpipe -
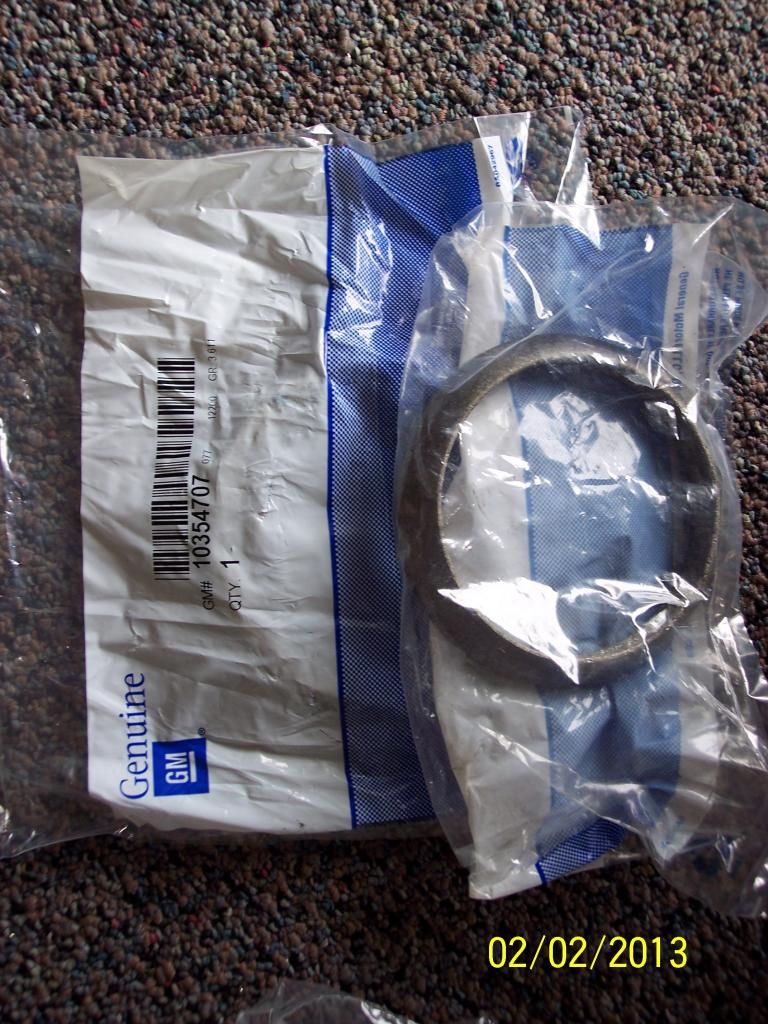
Cat Downpipe to X-Pipe - Donut Gasket
Here it is from the beginning - Manifolds: I needed the smog tubes which the C6's do not use, so I had some made from Kooks Headers -
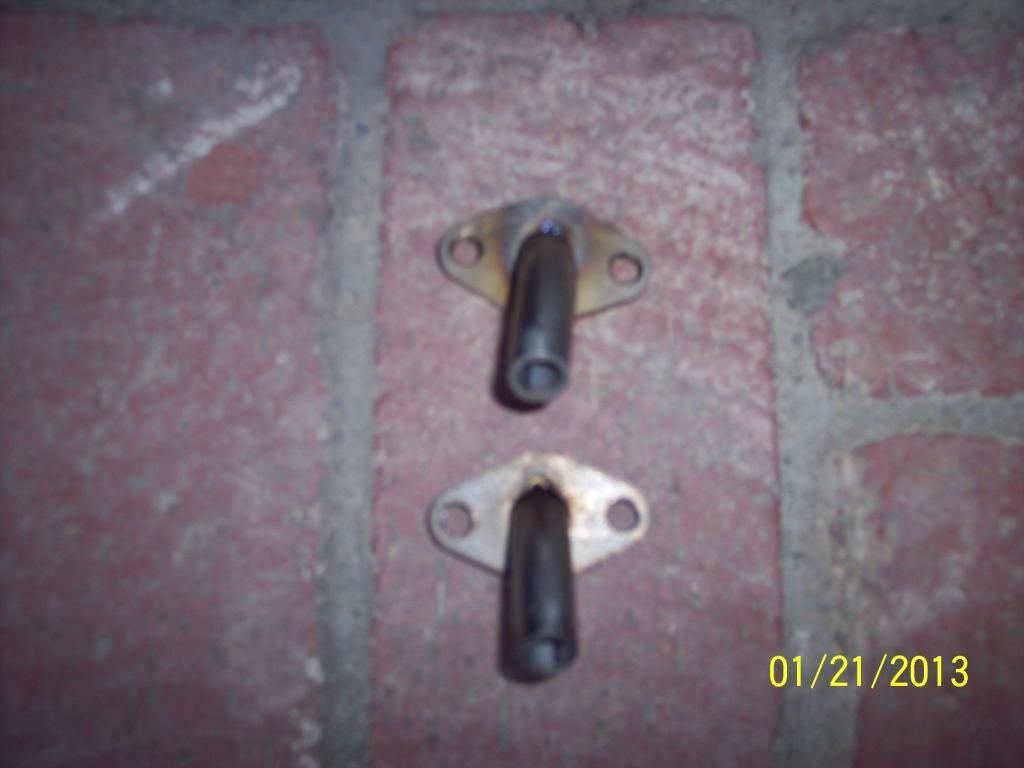

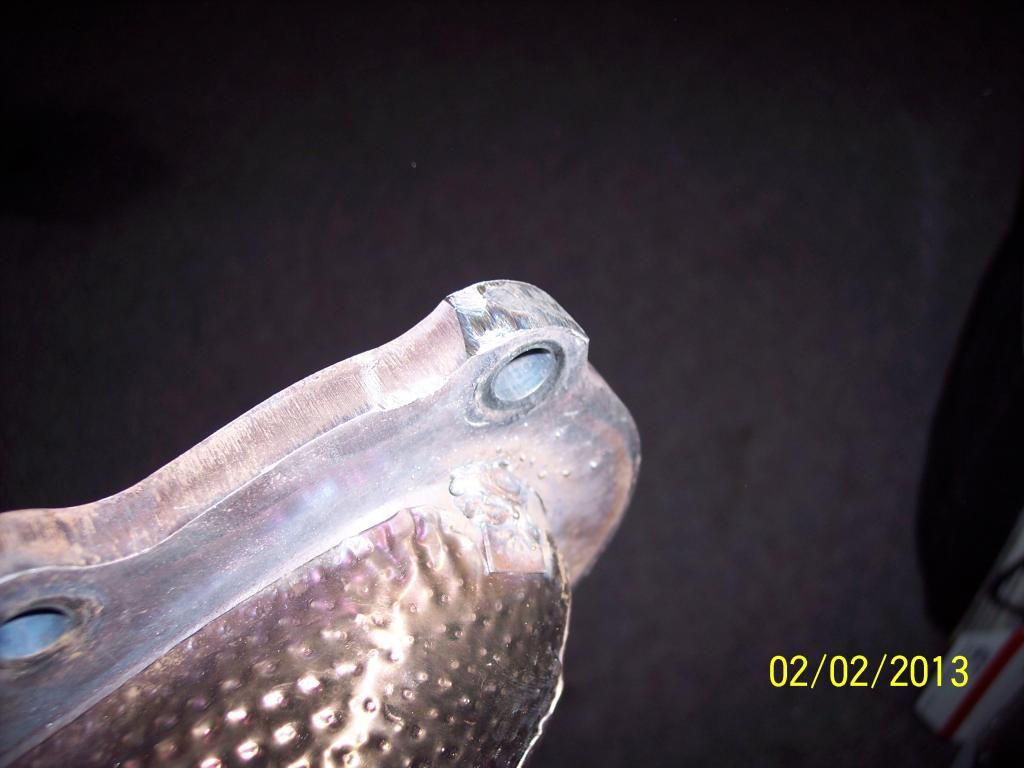
Had the manifolds drilled in the appropriate place for the Air Tubes and welded on - fully functional too!

I also made a perch for the Oil Dip Stick to bolt too - I will get a picture of it too - this had to be done at the end when all the other welding was being done, that way it lined up perfectly!
Here you go:
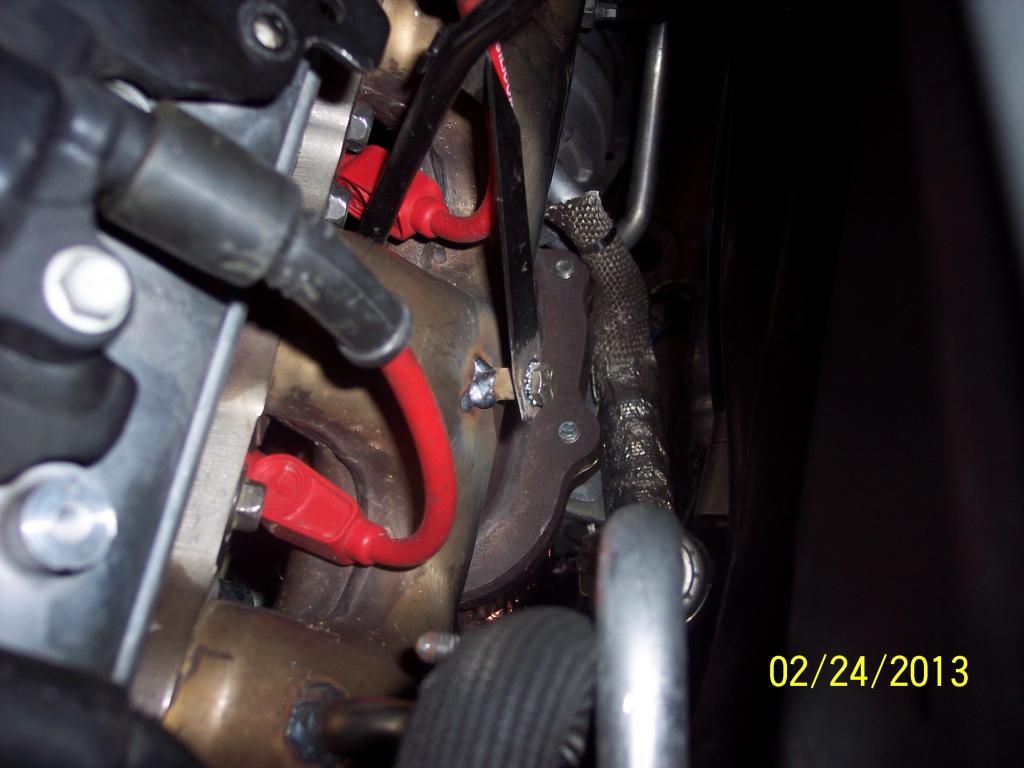
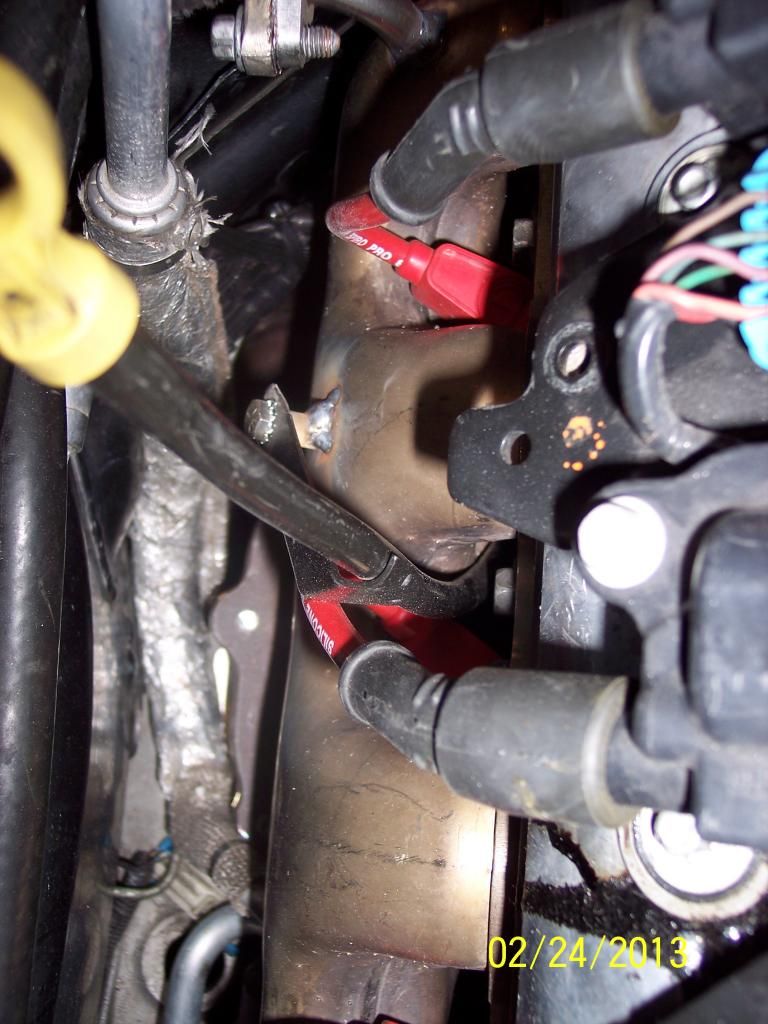
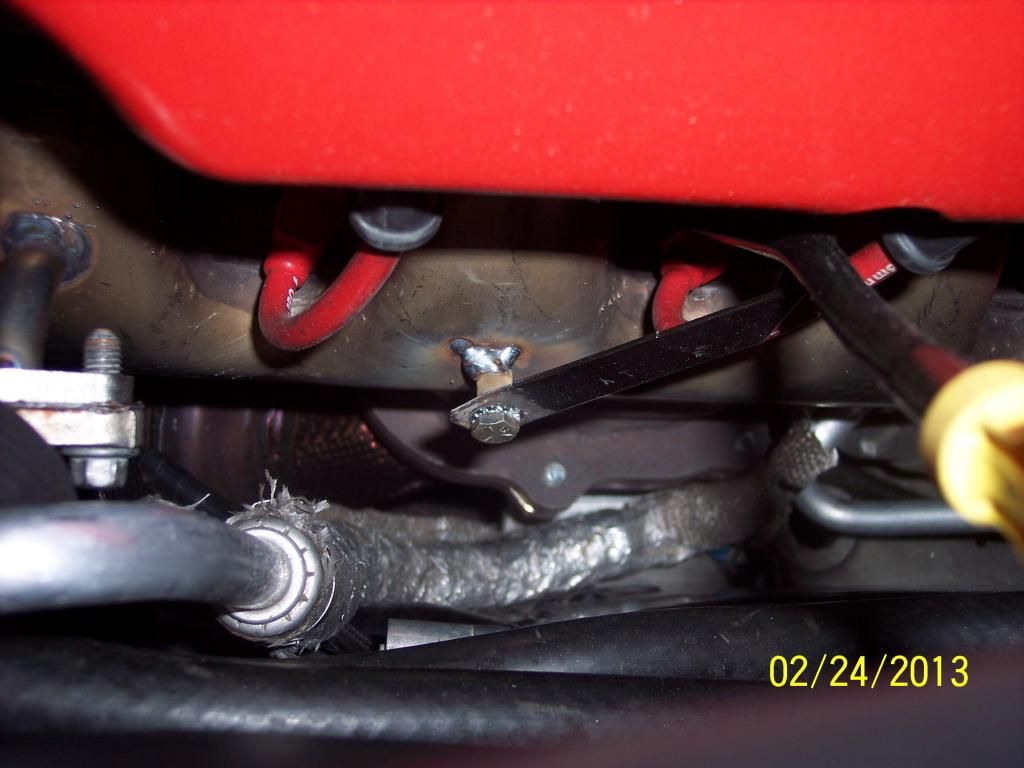
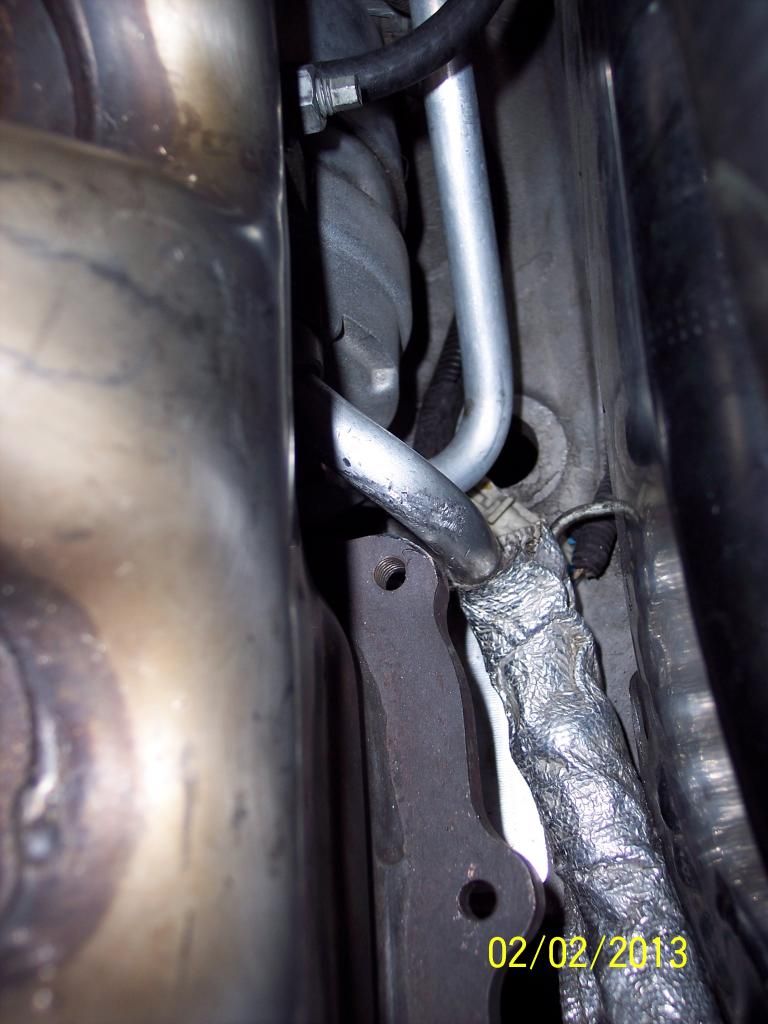
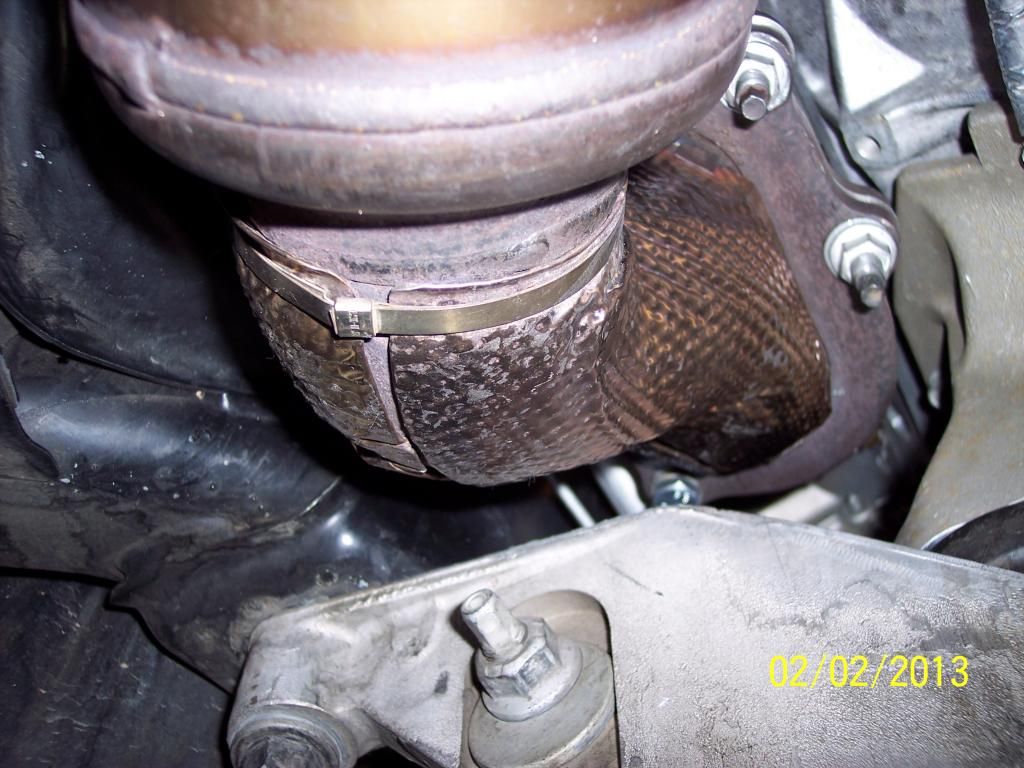
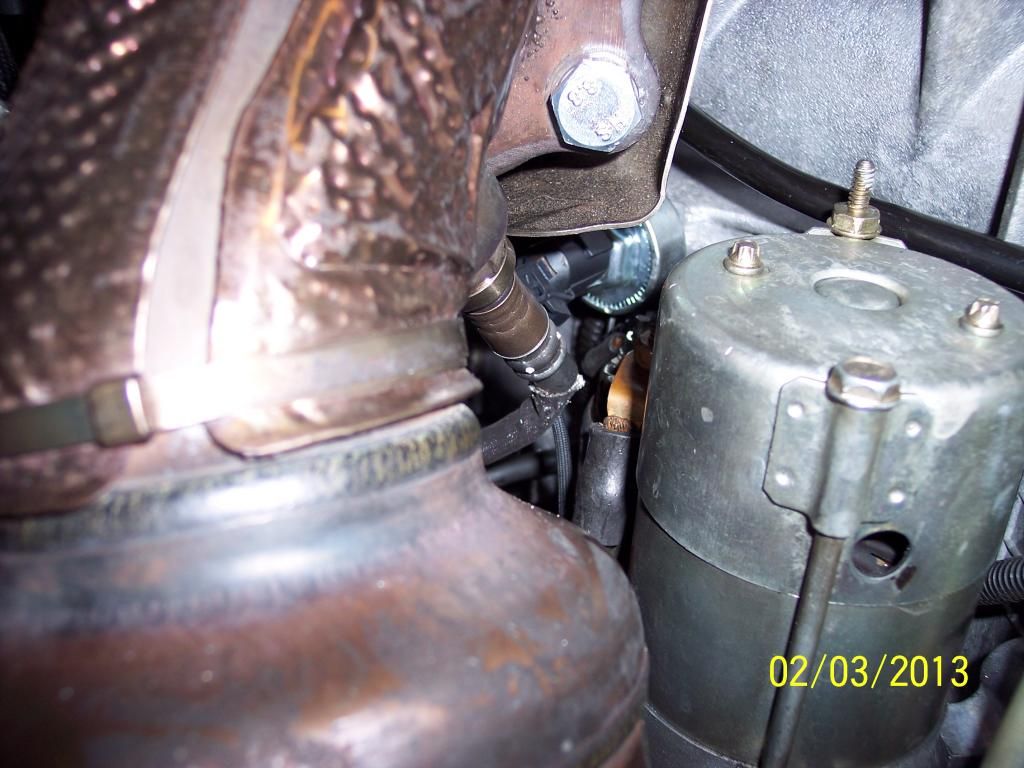
Had a Wideband O2 Bung Welded here for now (Ideally before the cat is preferred, will do later now that I have the proper clearances)
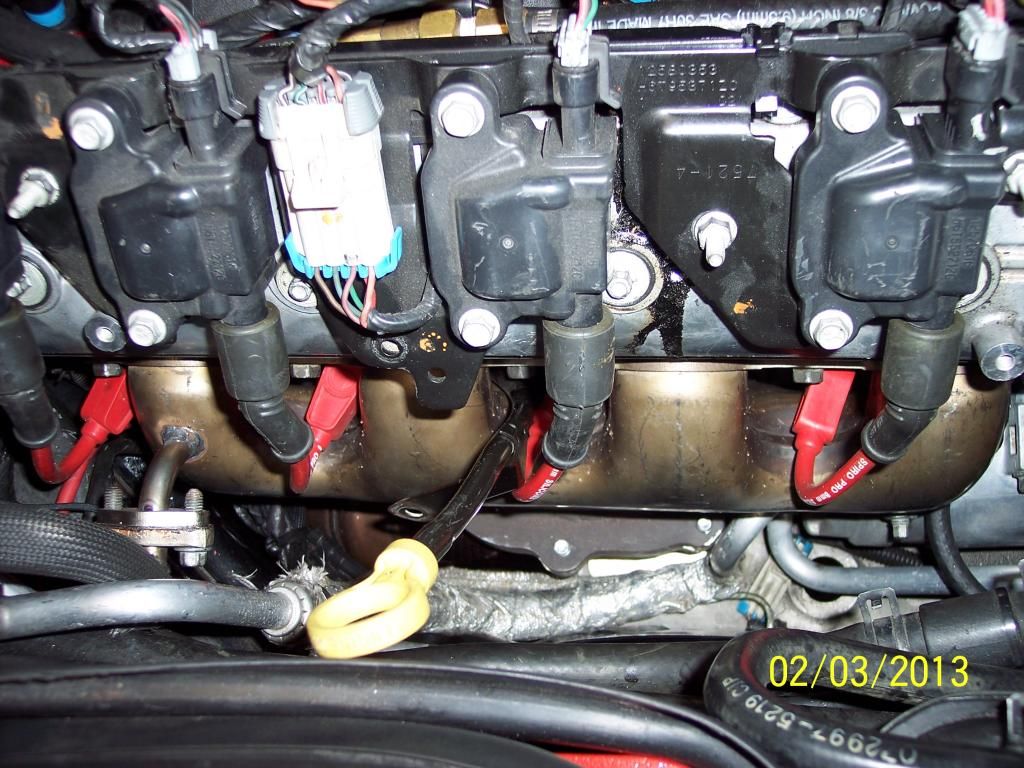
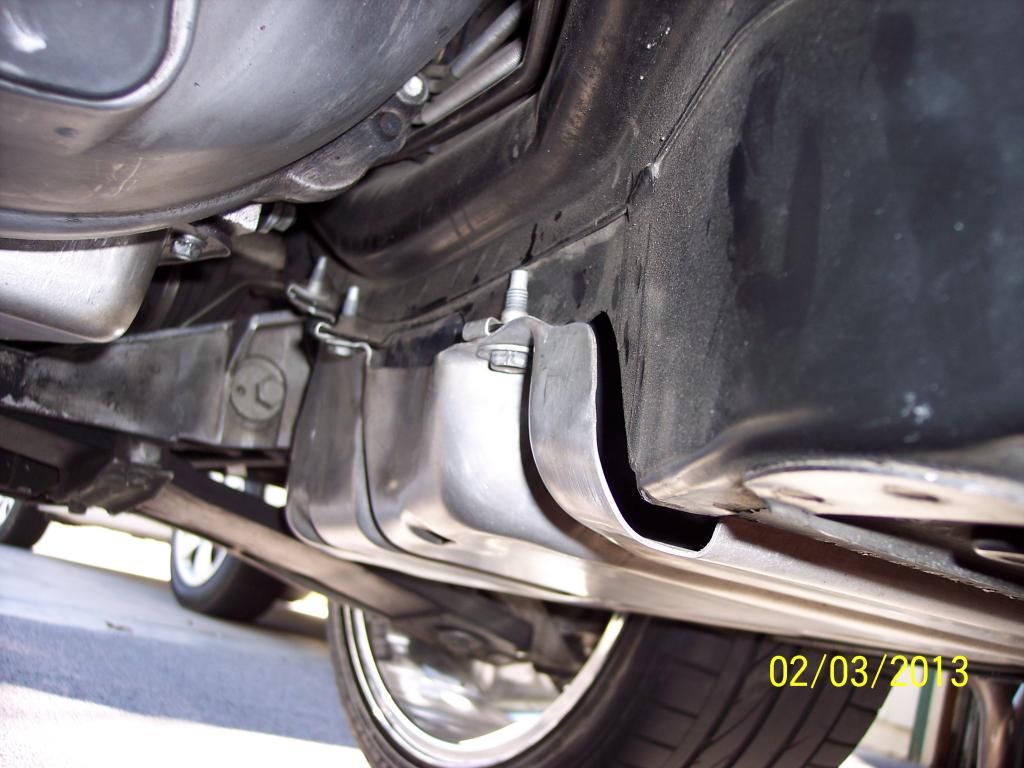
You will need to GRIND some of the Flange Ear off the "PASSENGER" Side of the exhaust manifold that is next to the AC Compressor for clearance - not much is needed -

You can see it next to the AC Line:
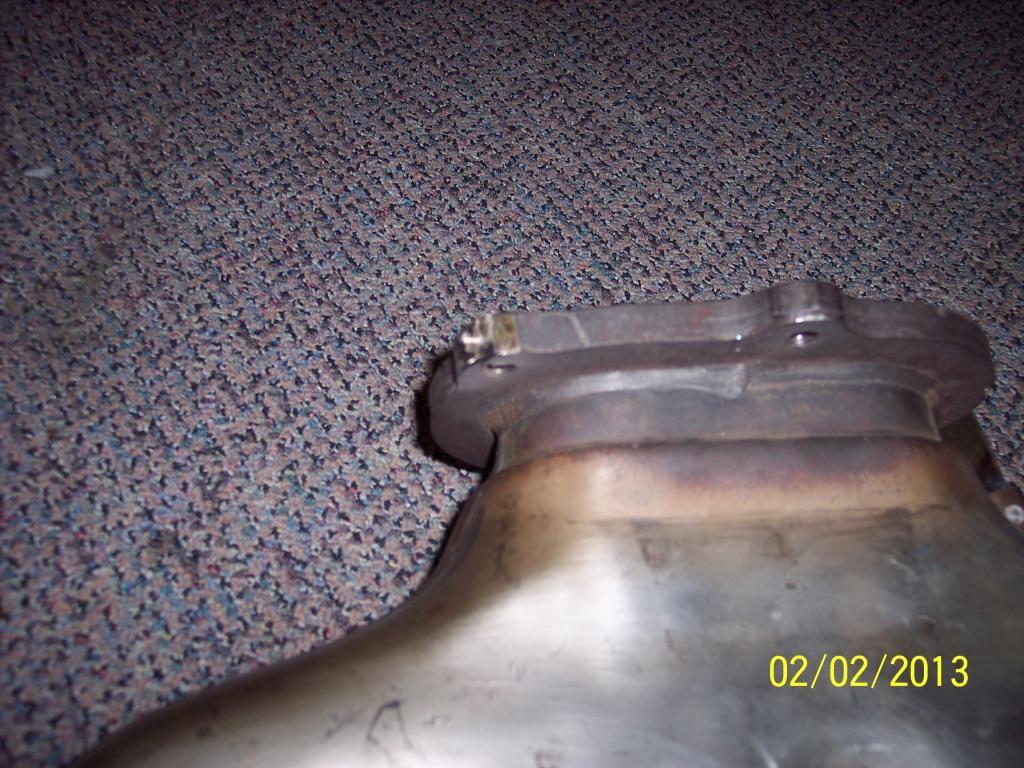
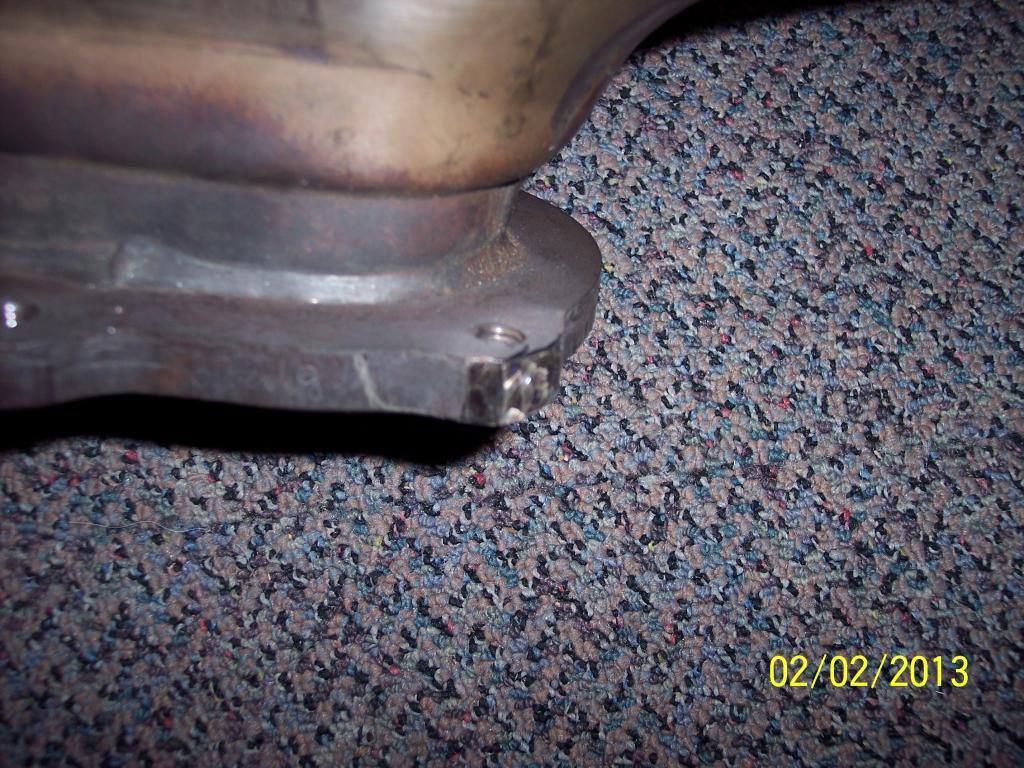
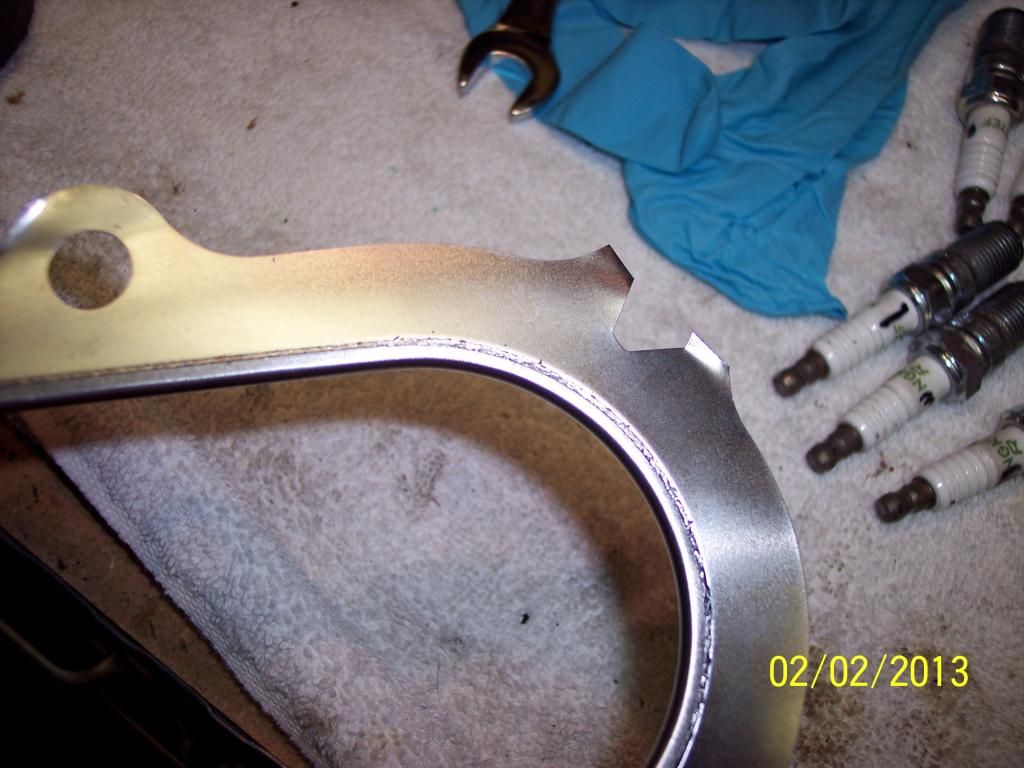
You also will need to Grind the Bottom Downpipe Flange and the GASKET
Now onto the Install -
Passenger Side: All the Bolts are easy to get to on this side -

Drivers side - From the Bottom I used a "LONG" handled 13mm Wrench to reach the back most bolt to the manifold -
Downpipes - I used 2 of the factory studs on the DRIVERS Side and New Bolts on the PASSENGER Side (Studs wont work) 10mx1.5x36mm Bolts - Used Anti-Seize on all bolts and studs
Driver Side: All Studs and Bolts can be gotten with a socket very easily!
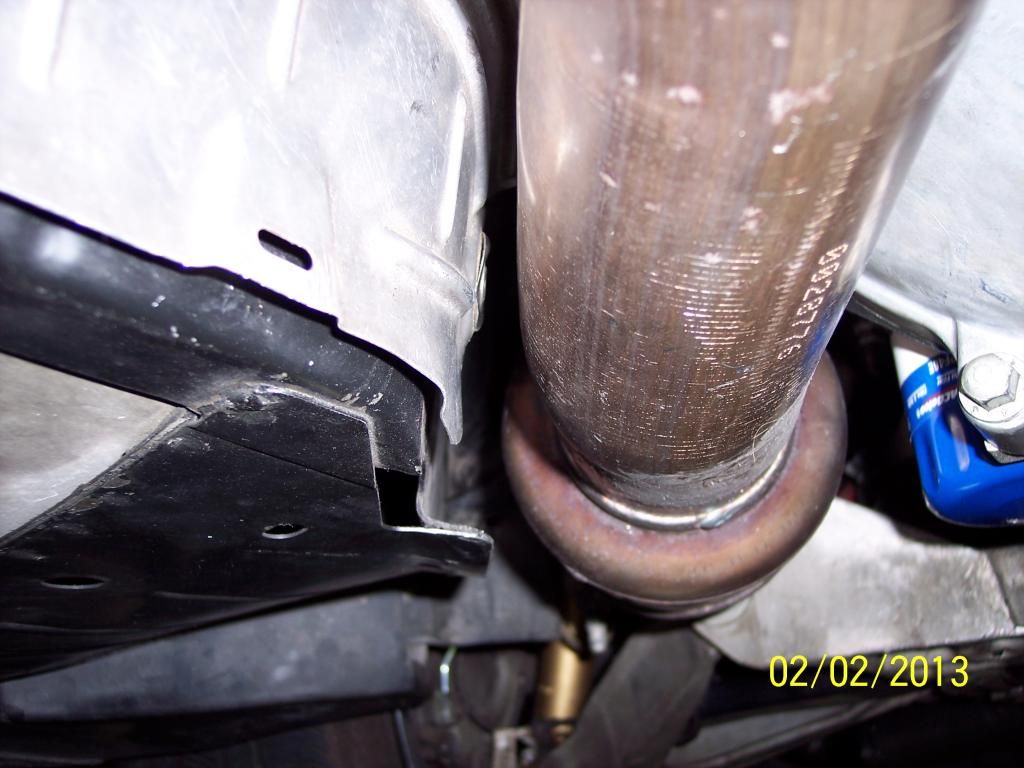
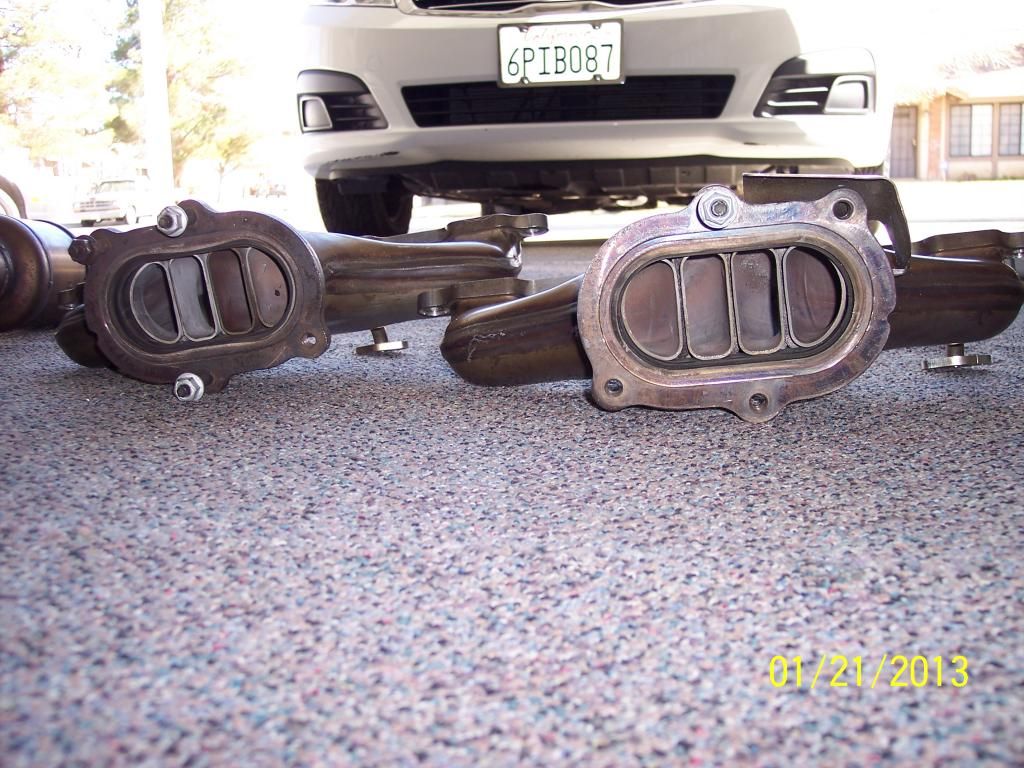
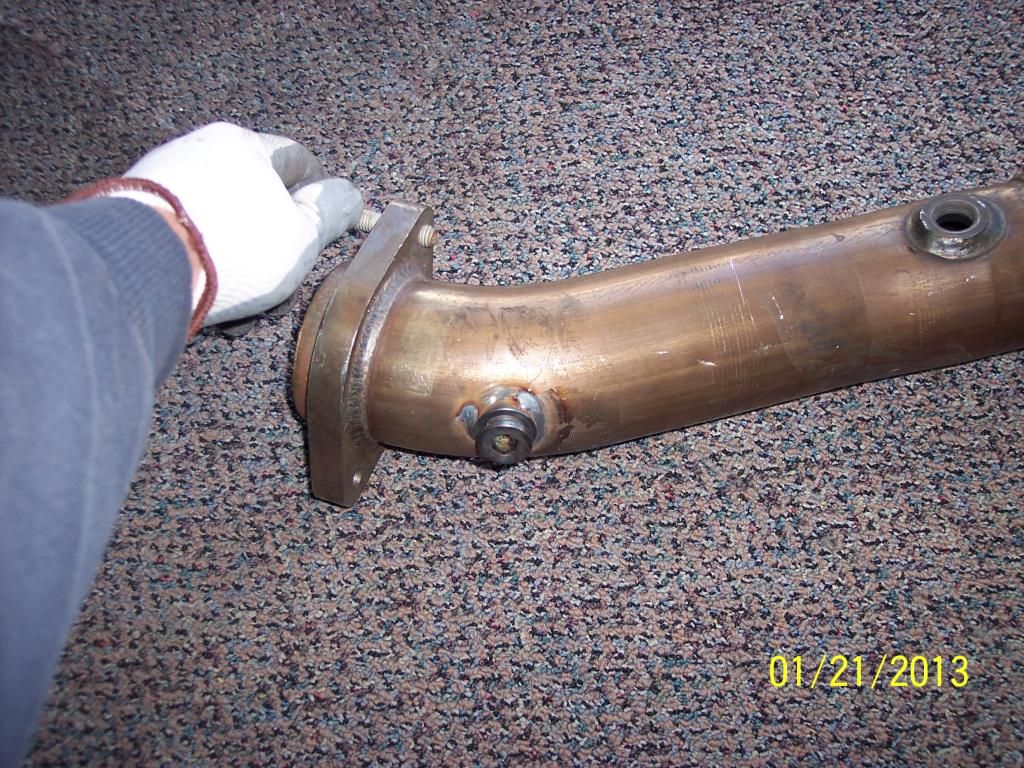
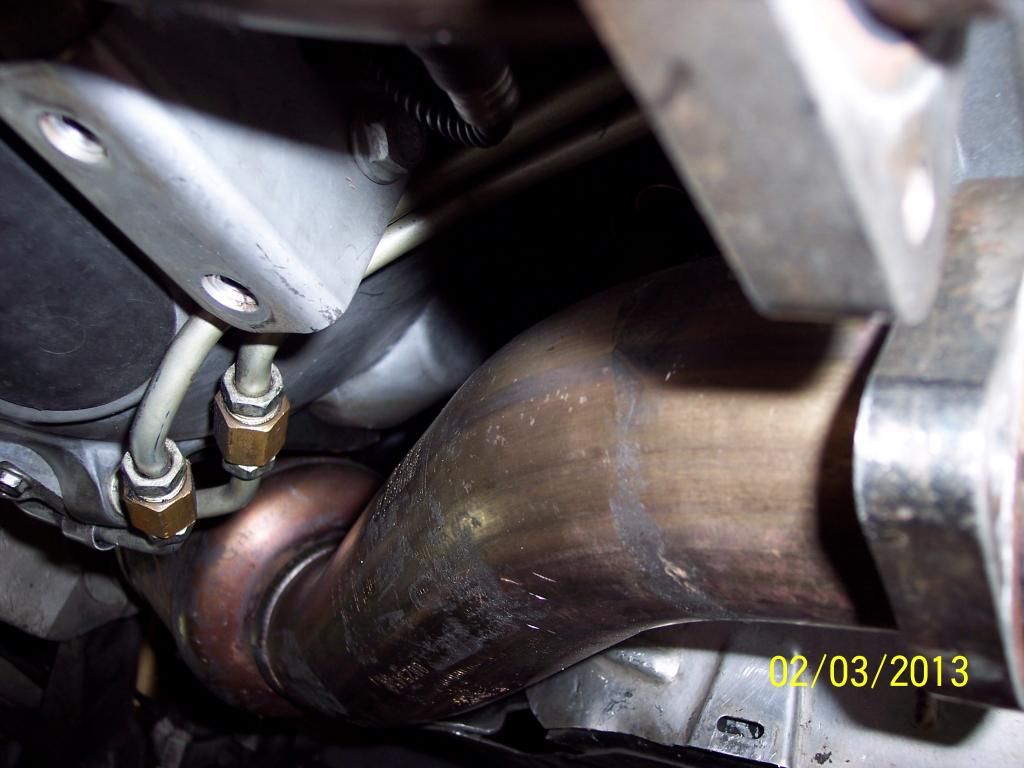
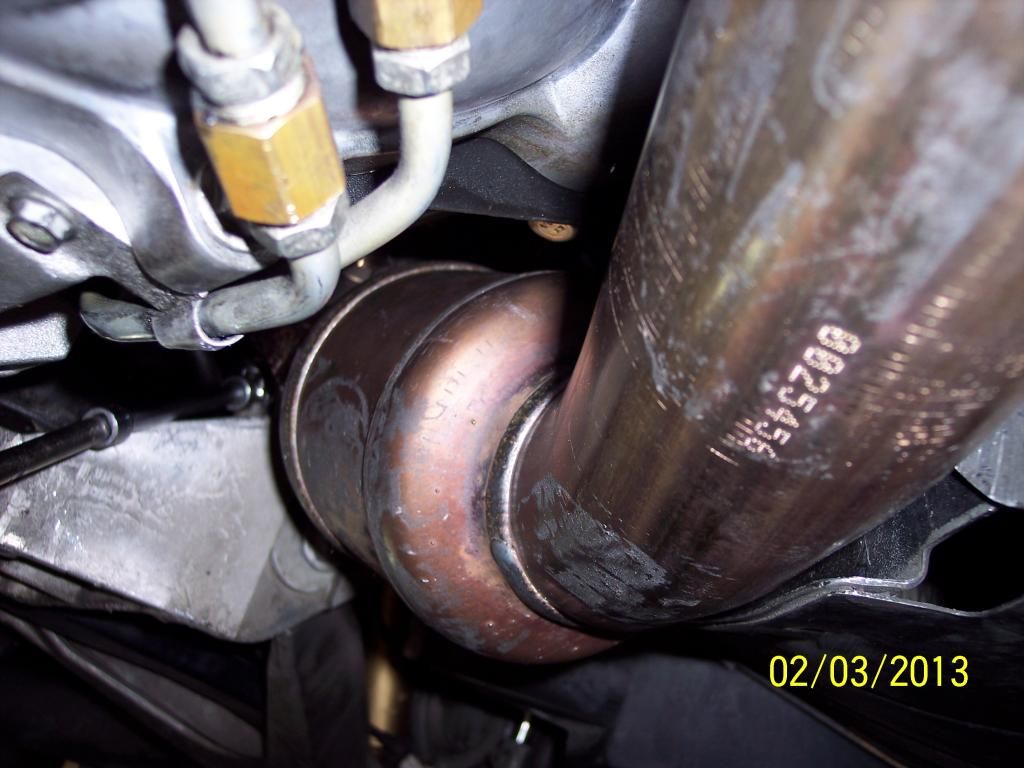
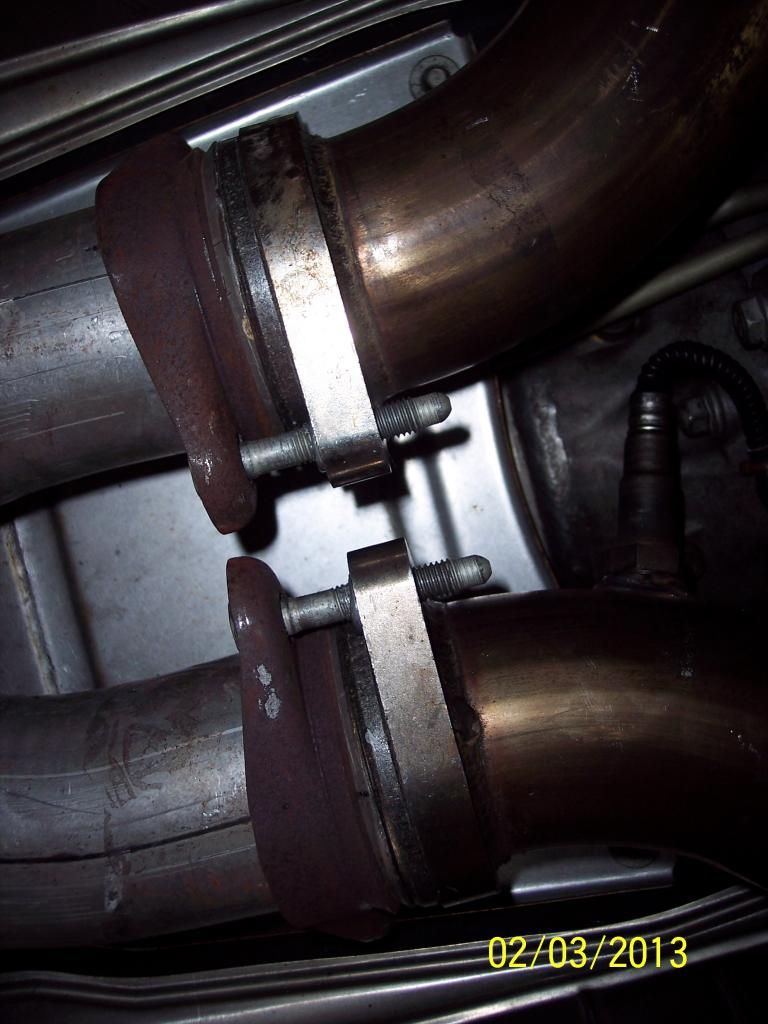
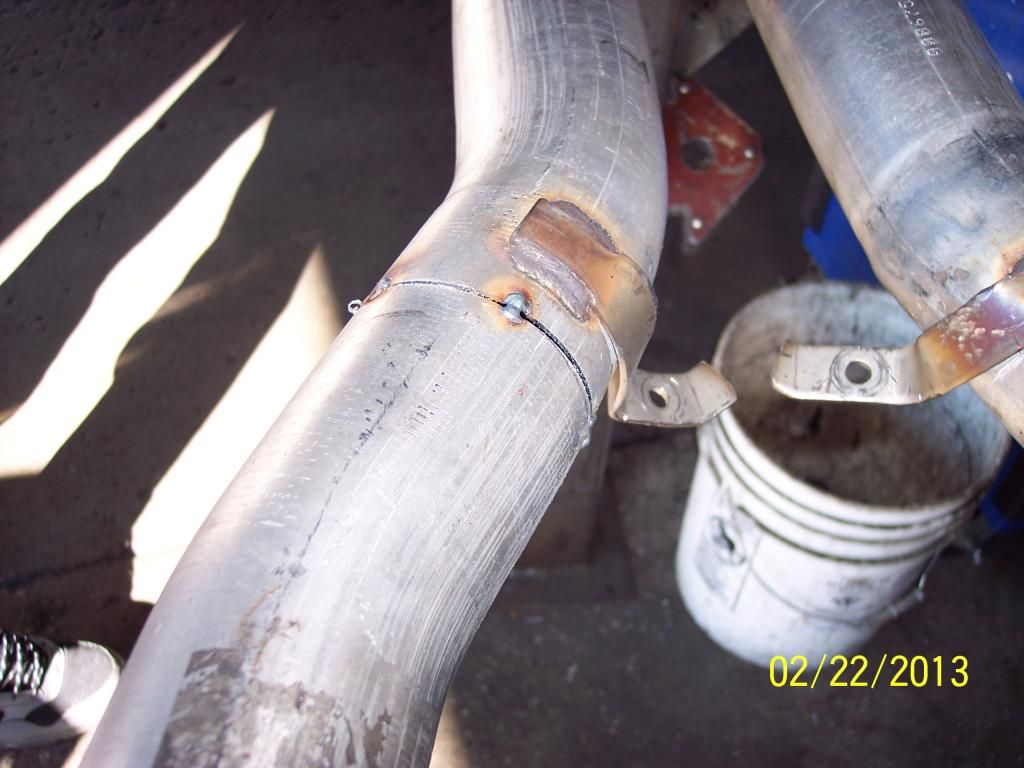
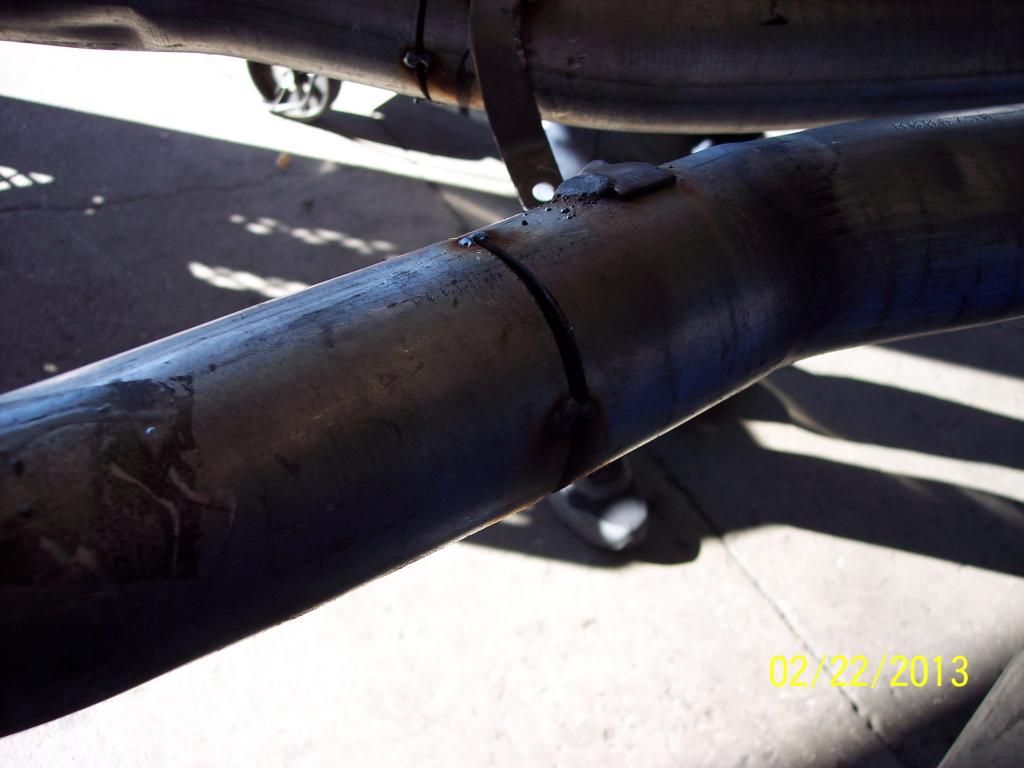
Comparison of the ZR1 3" Down Pipe to the Kooks Header Collector:
Passenger Side: I did cut the tab on the starter positive Cable and turn it downward to clear the O2 Sensor, I was able to use bolts on this side only and the furthest BOLT near the AC Line can be gotten with a extension and socket:


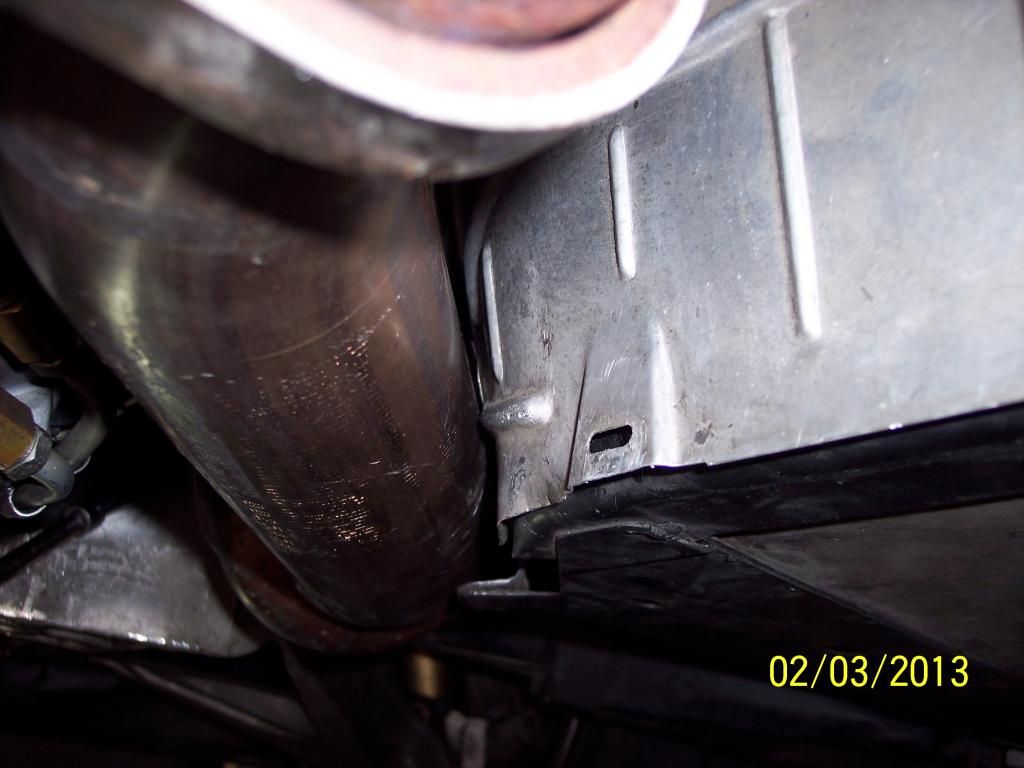
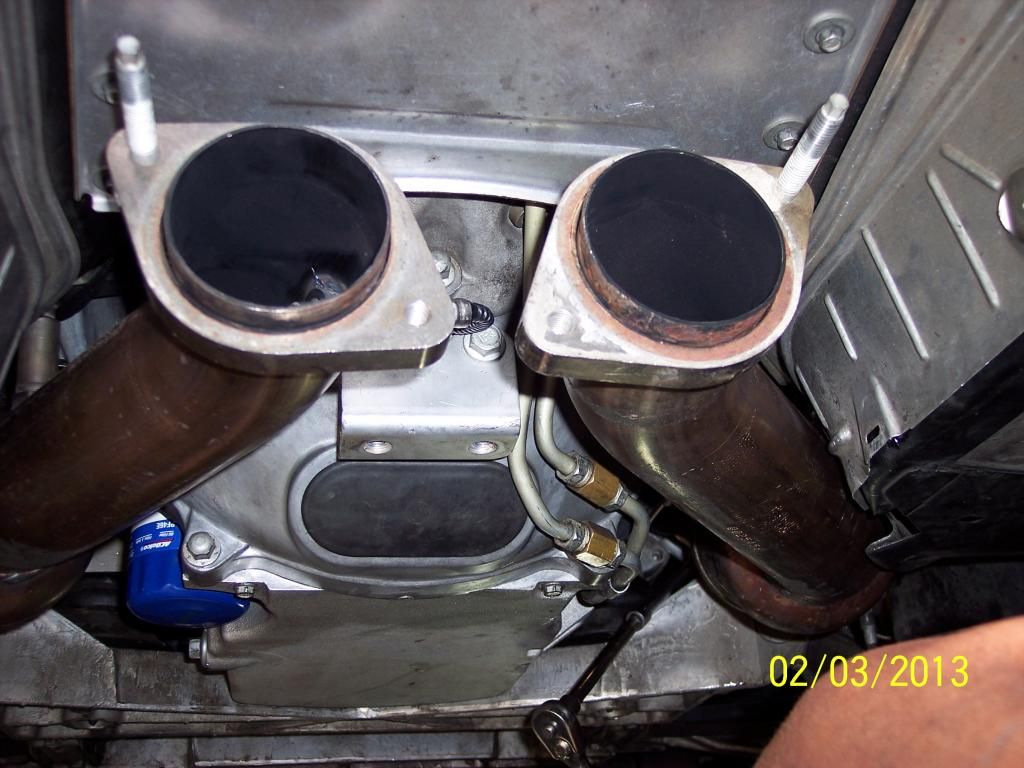
Plenty of Clearance:
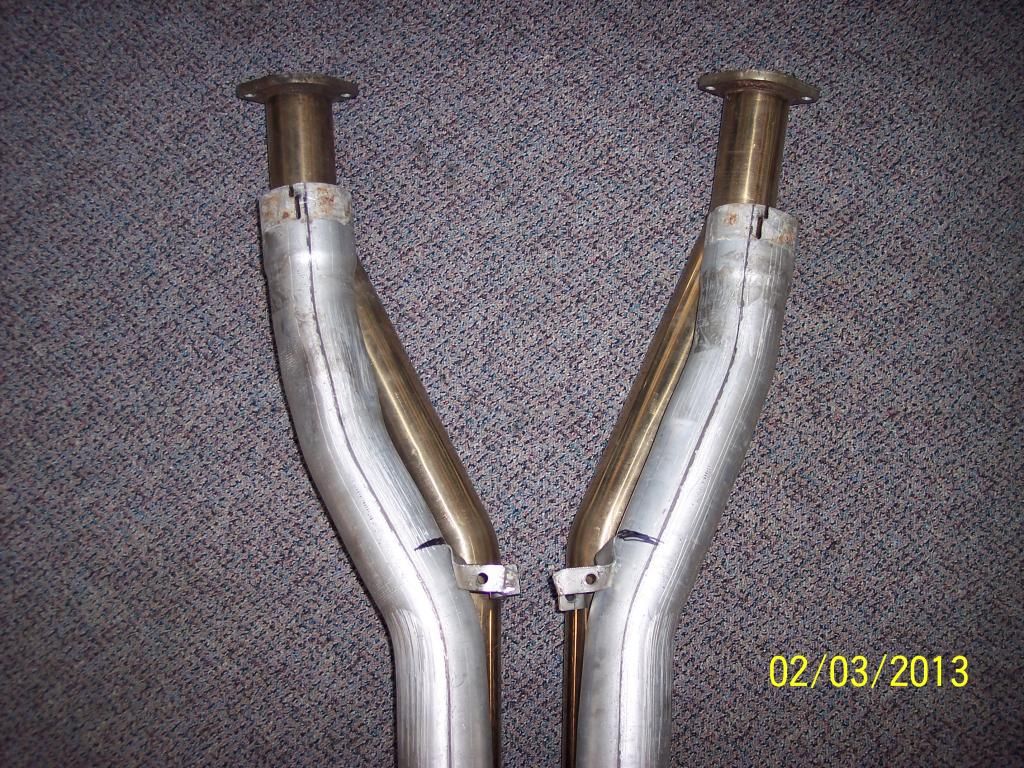
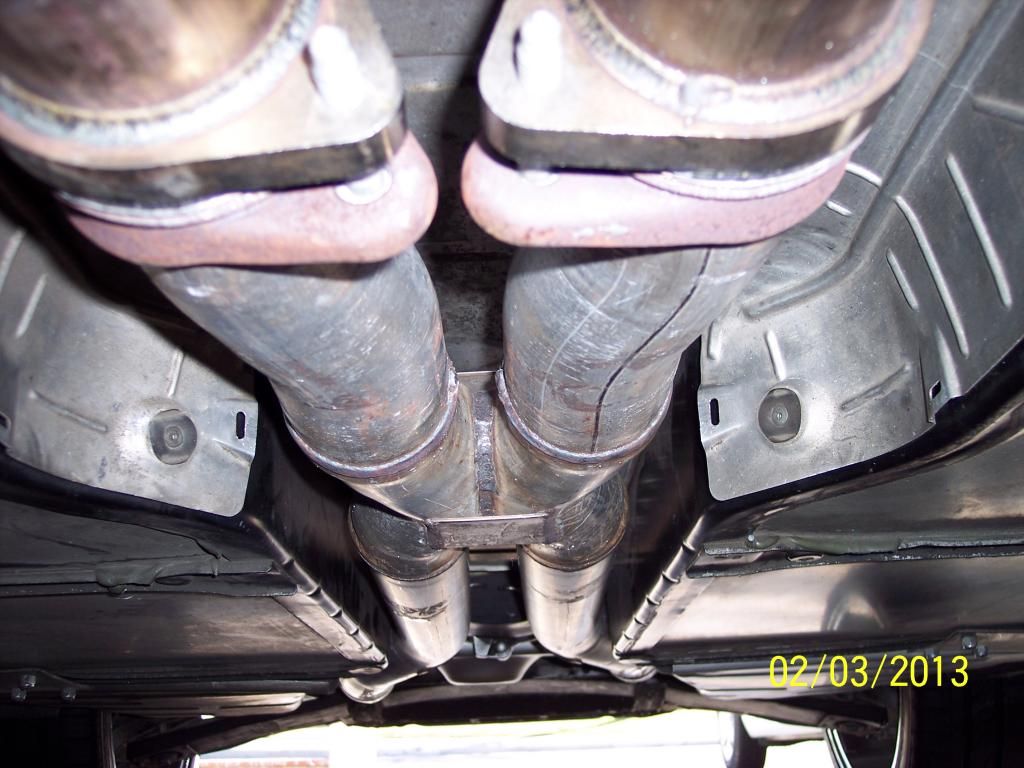
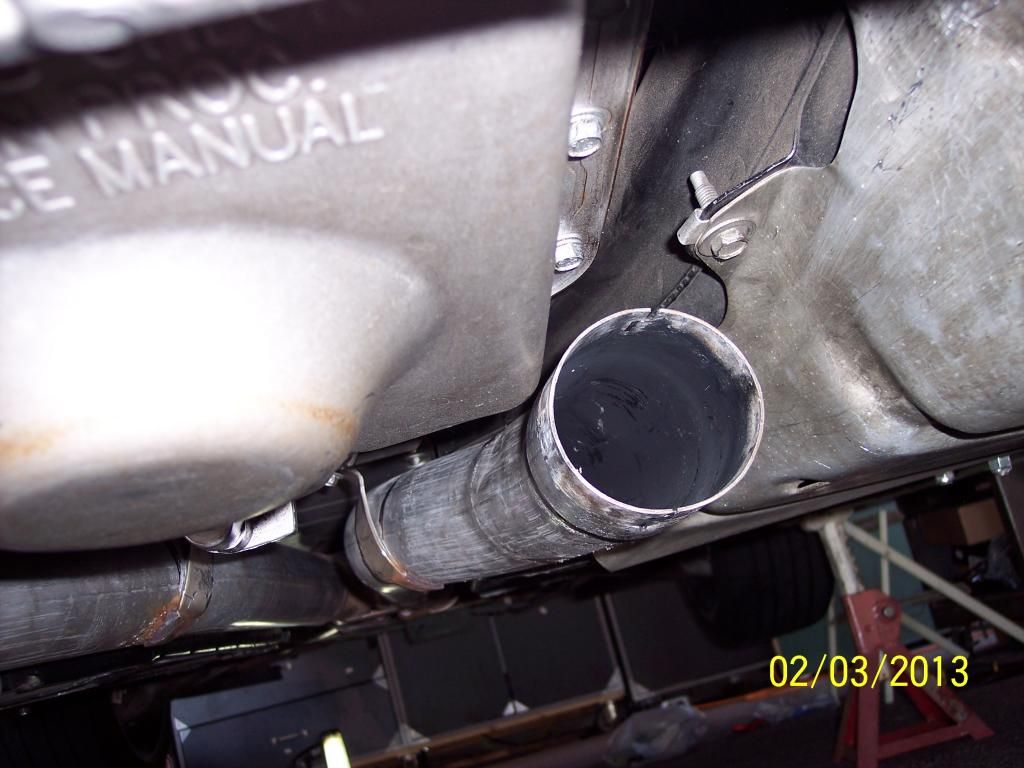
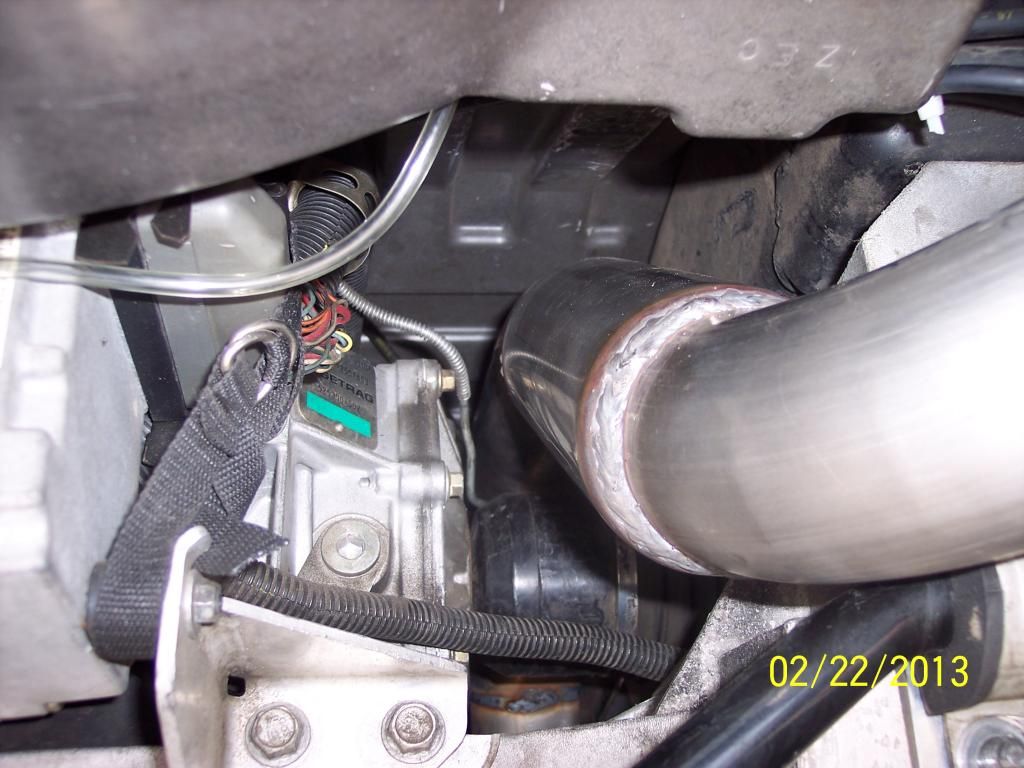
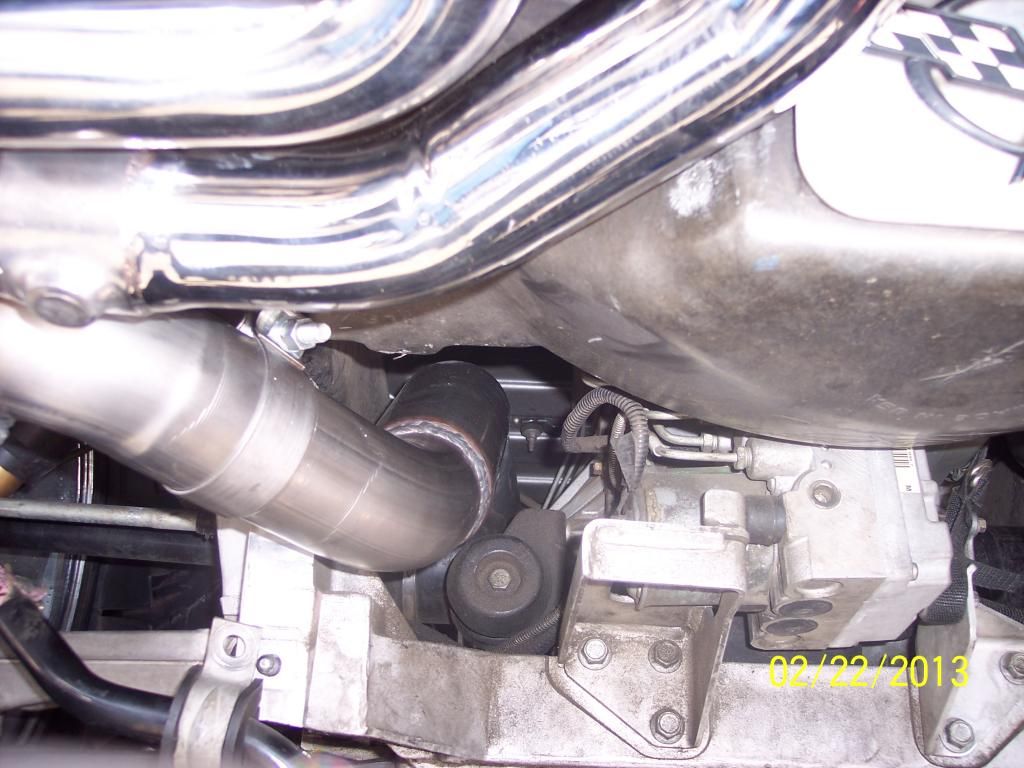
Getting ready for the 3" ZR1 X-Pipe:
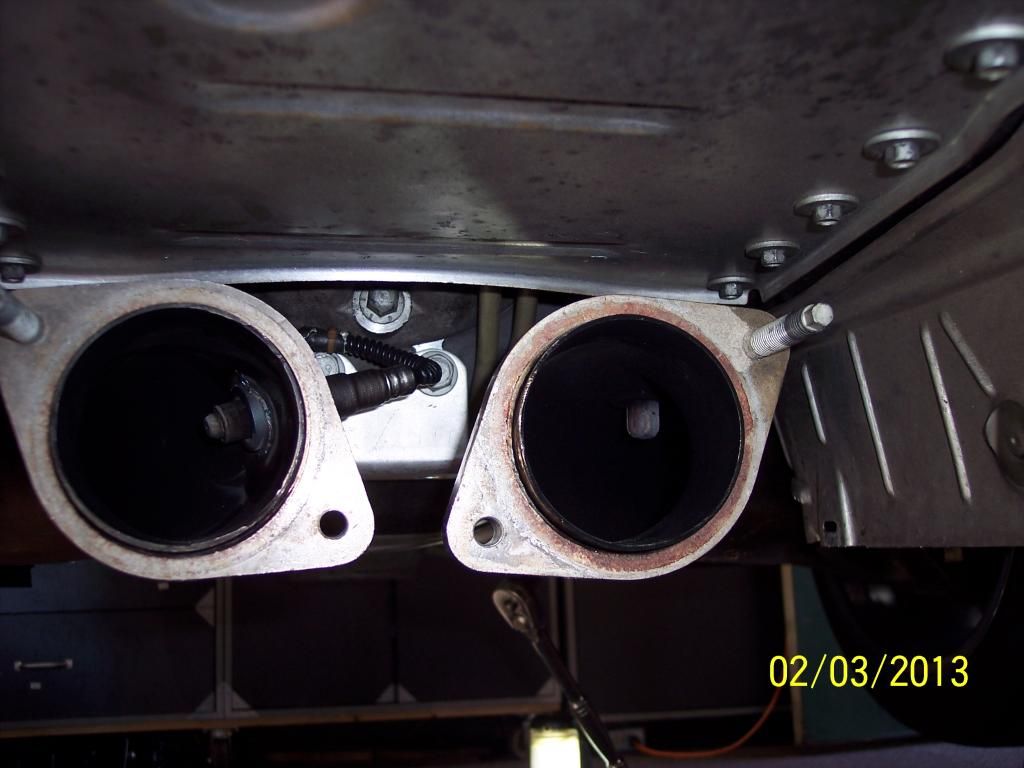
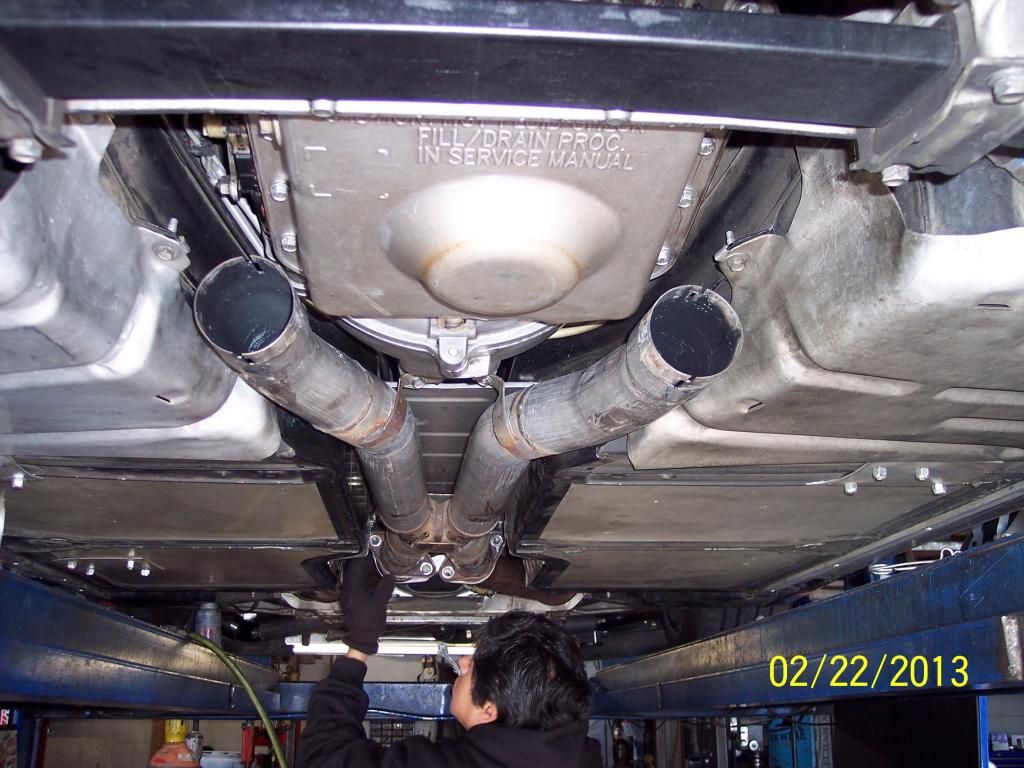
3" ZR1 X-Pipe Install:
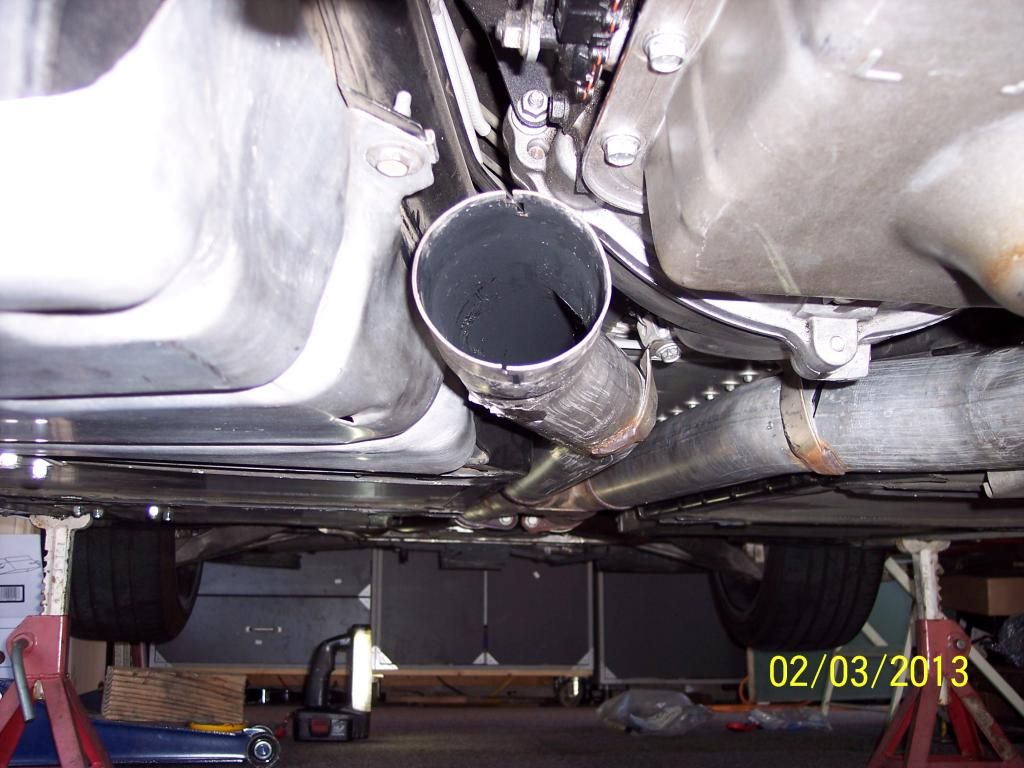
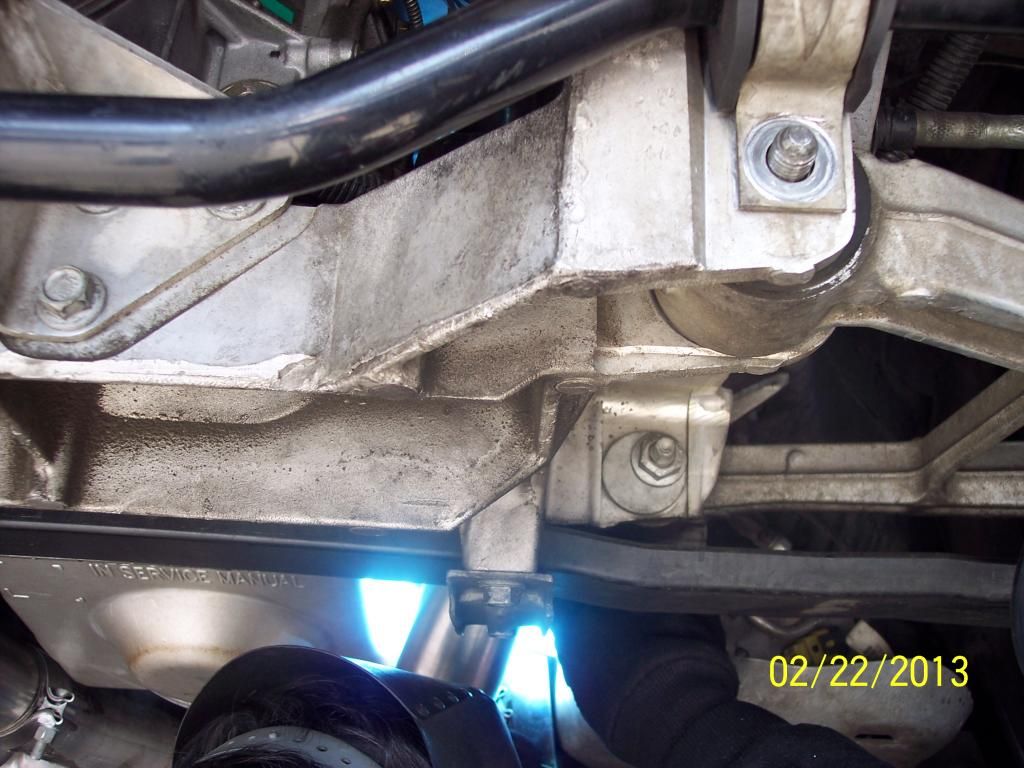
Now the Raer Hangers next tothe transmission are about 2" too far towards the rear and the 3" Tubes are too narrow and will have to be spread in order to clear the A4 tranny (Not sure of the MN6, but they should need some adjusting - I did some man bending to get the trajectory close to the C5's H-Pipe and off from touching the tranny pan
Cut here:
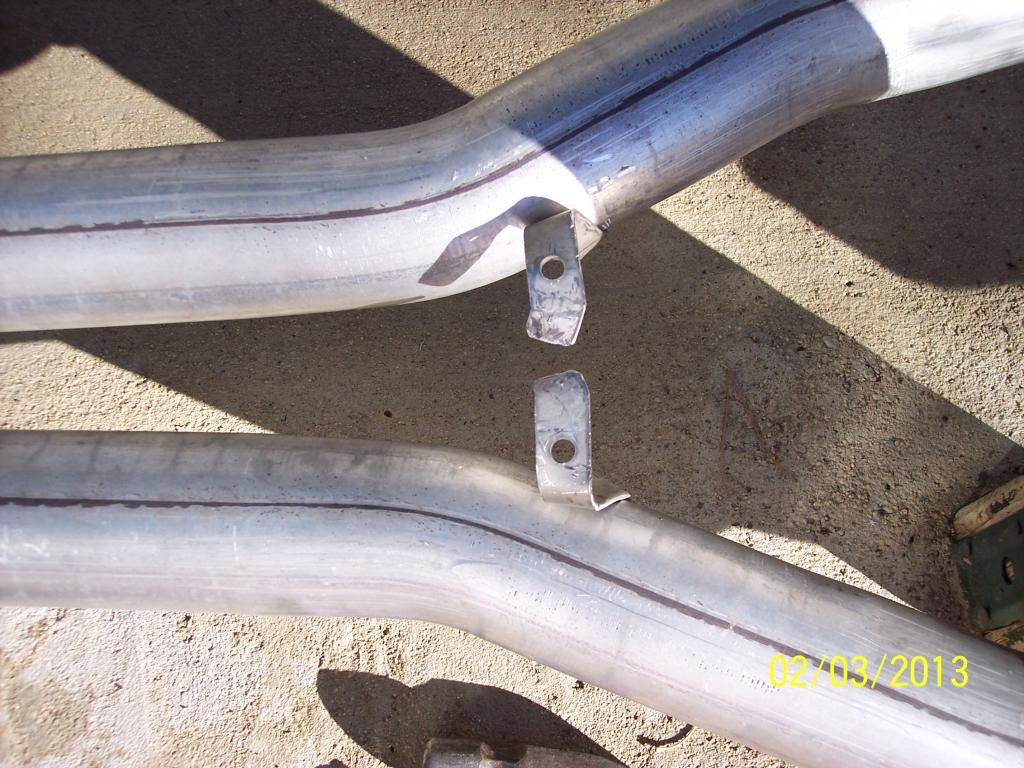
Did some man bending to get the rear hanger brackets about 1 1/2" - 2" forward:

Now time to do some spreading of the tubes slightly:

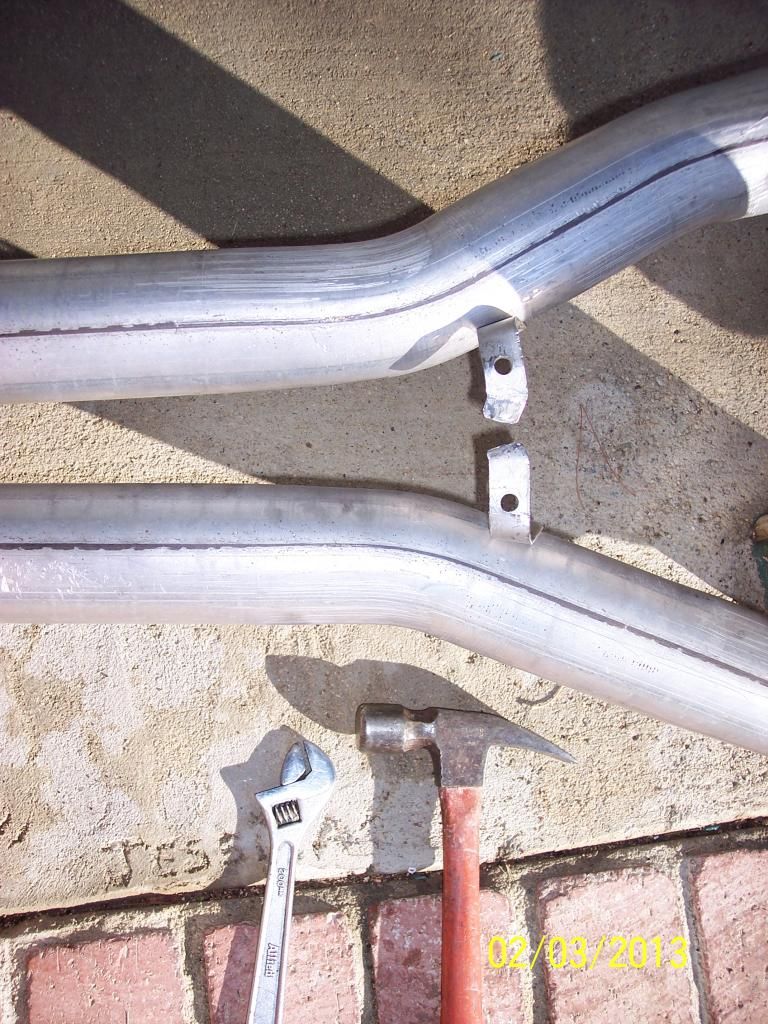
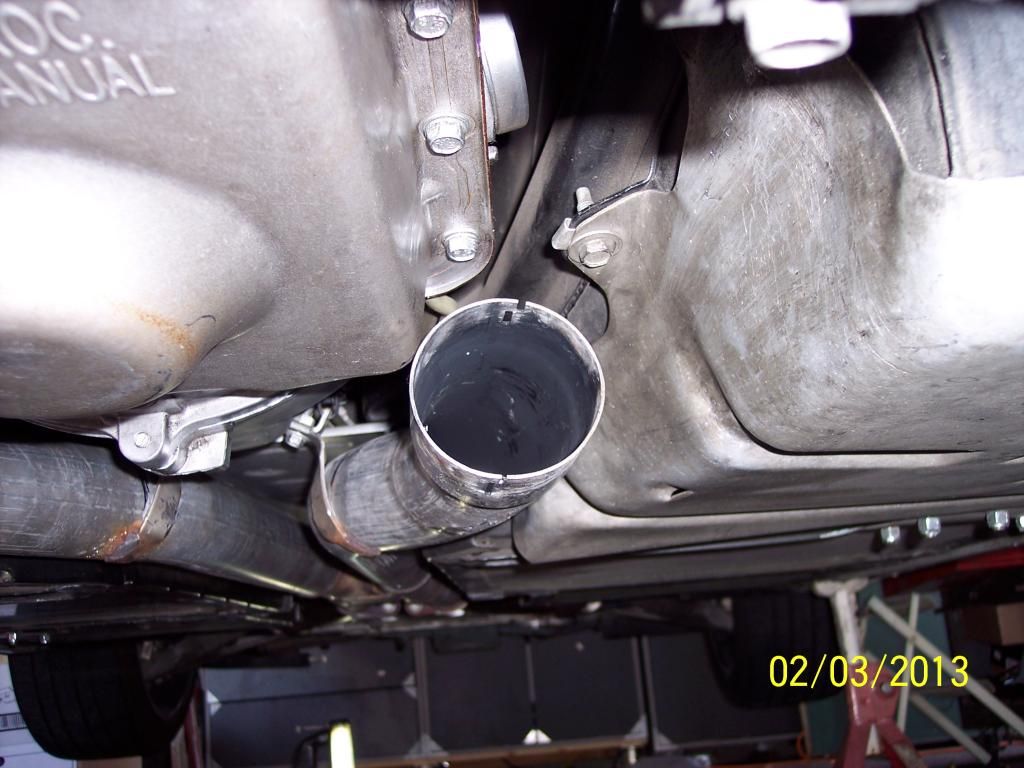
I had to cut the welds on the Factory 3" x 1" Clamps because they were hitting the A4 Tranny Pan:

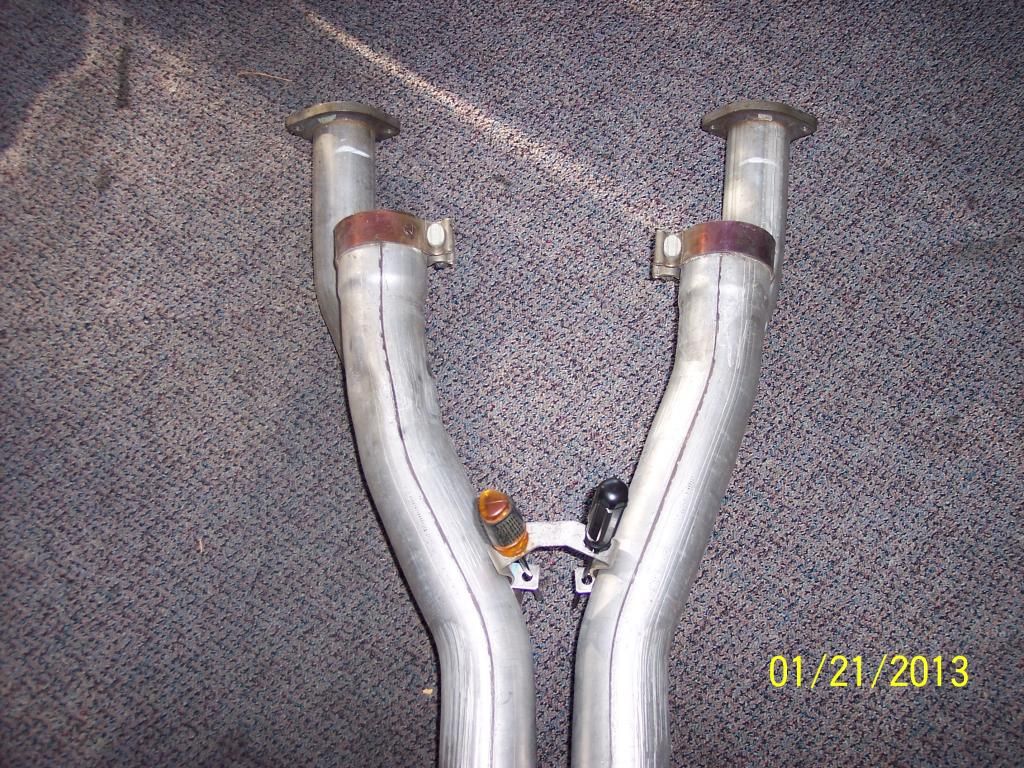
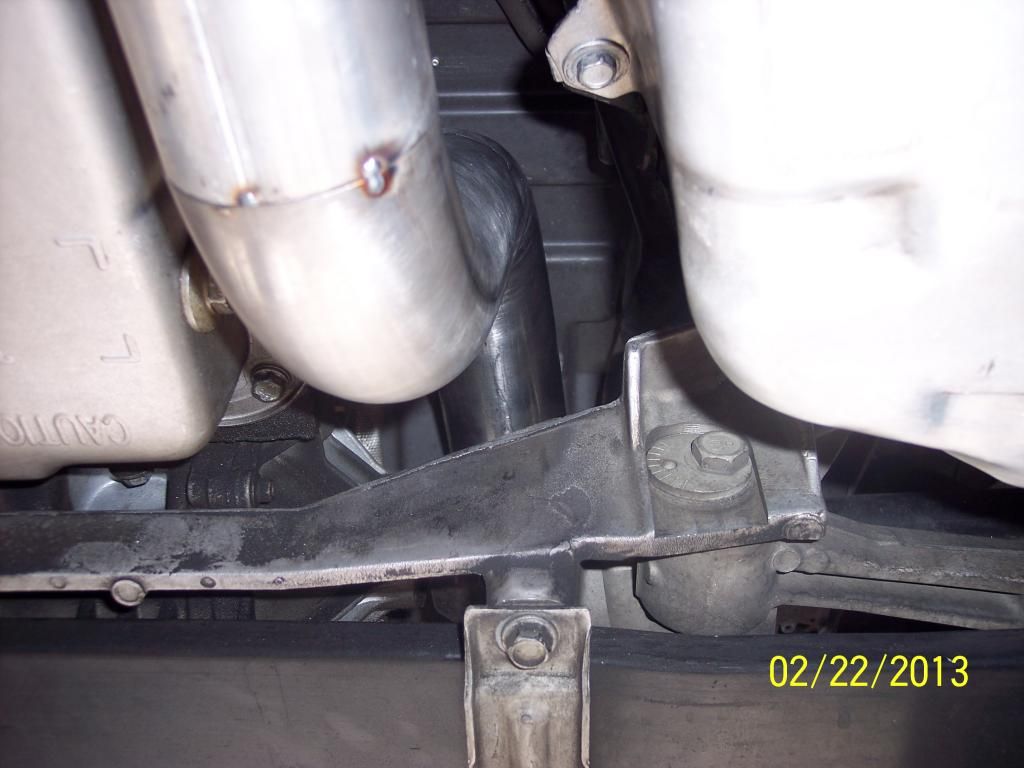
Now you can see that the trajectory is close to the C5 after the man bending and tweaking: Laid on top of C5 X-Pipe for visual -
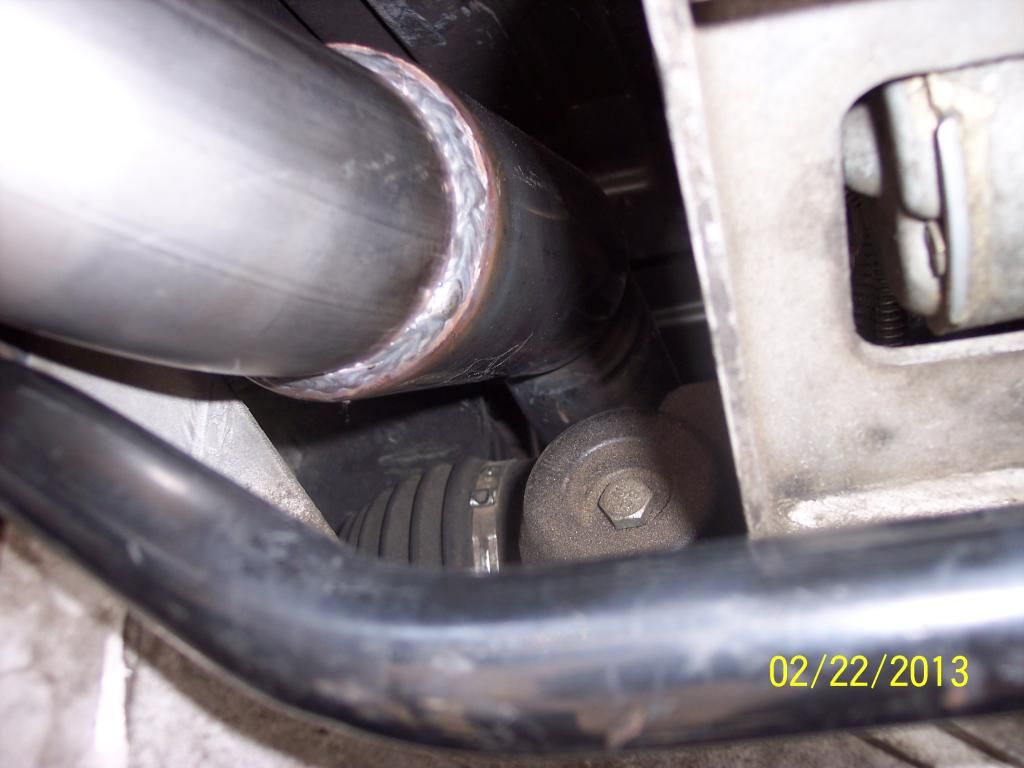
Now time to hang the X-Pipe: I used the ZR1 Factory Studs and Bolts for the X-Pipe, made it real easy to hang -
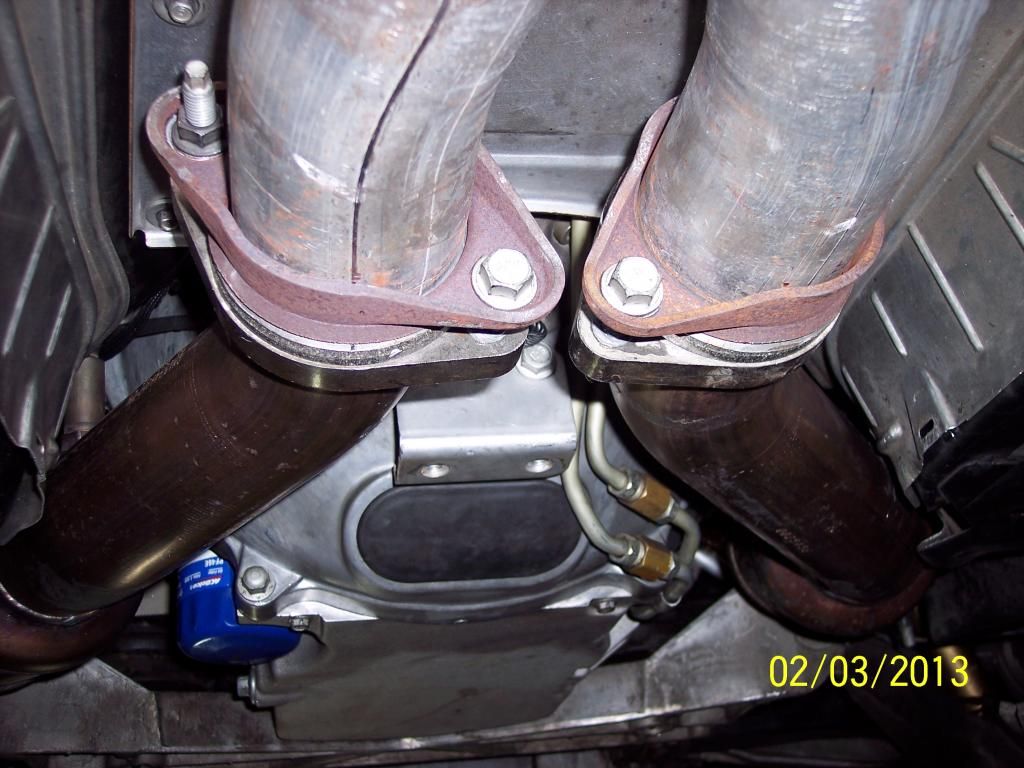
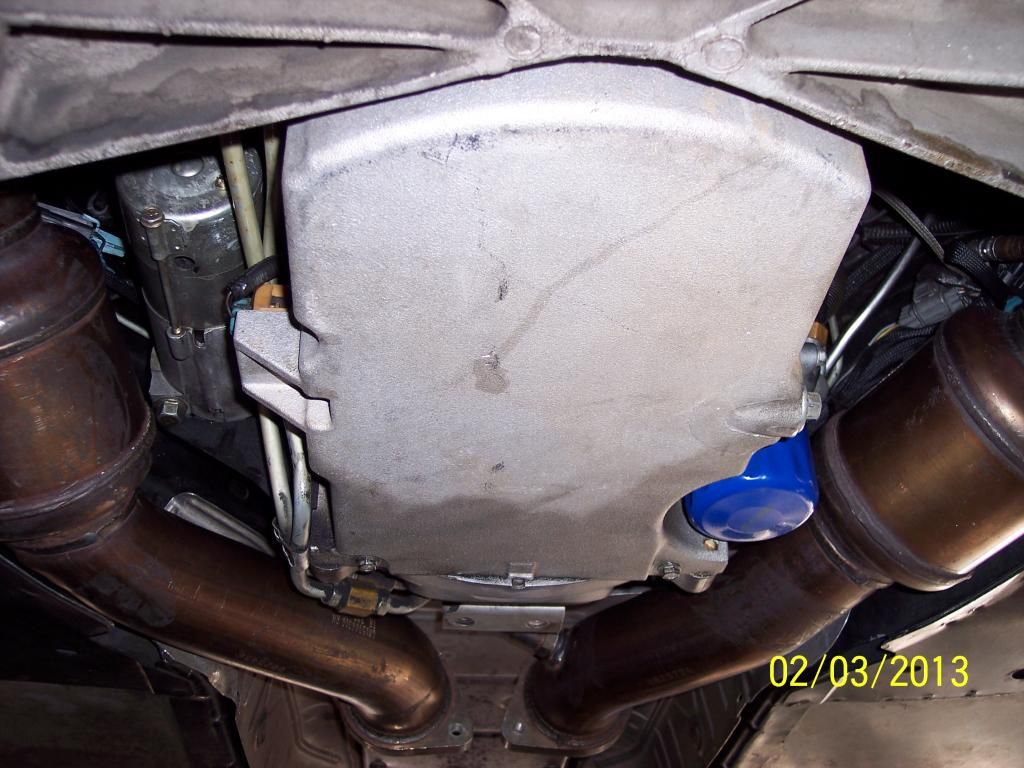
Had to slightly tweak the skid pan with a rubber mallet for slight clearance:

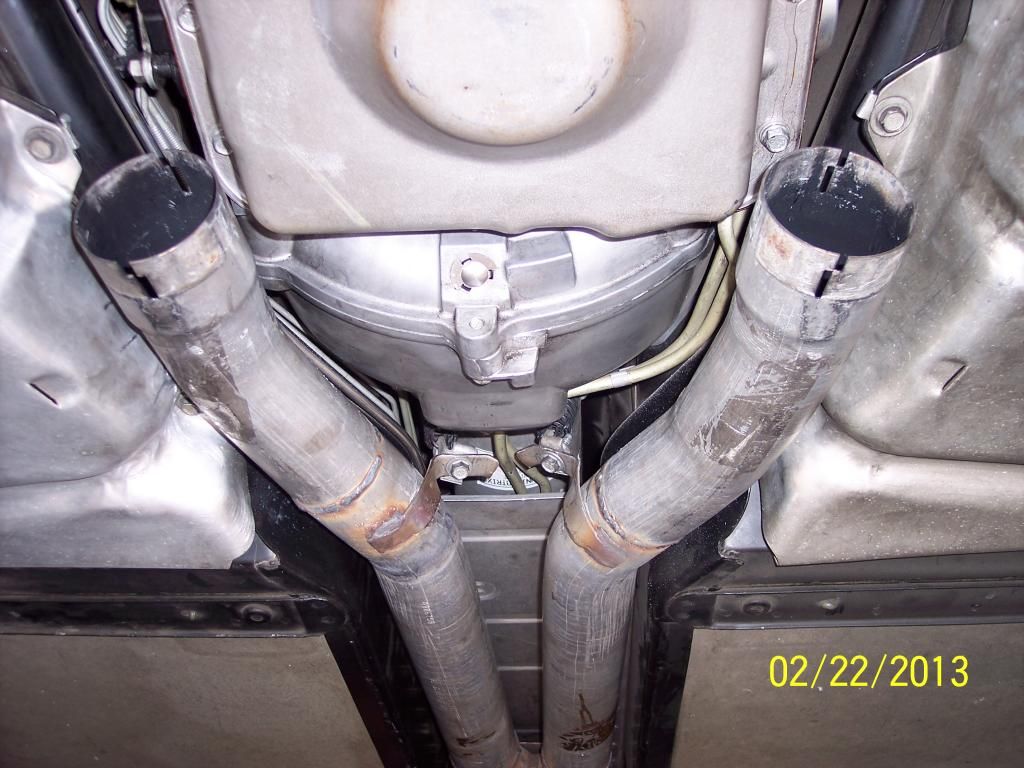
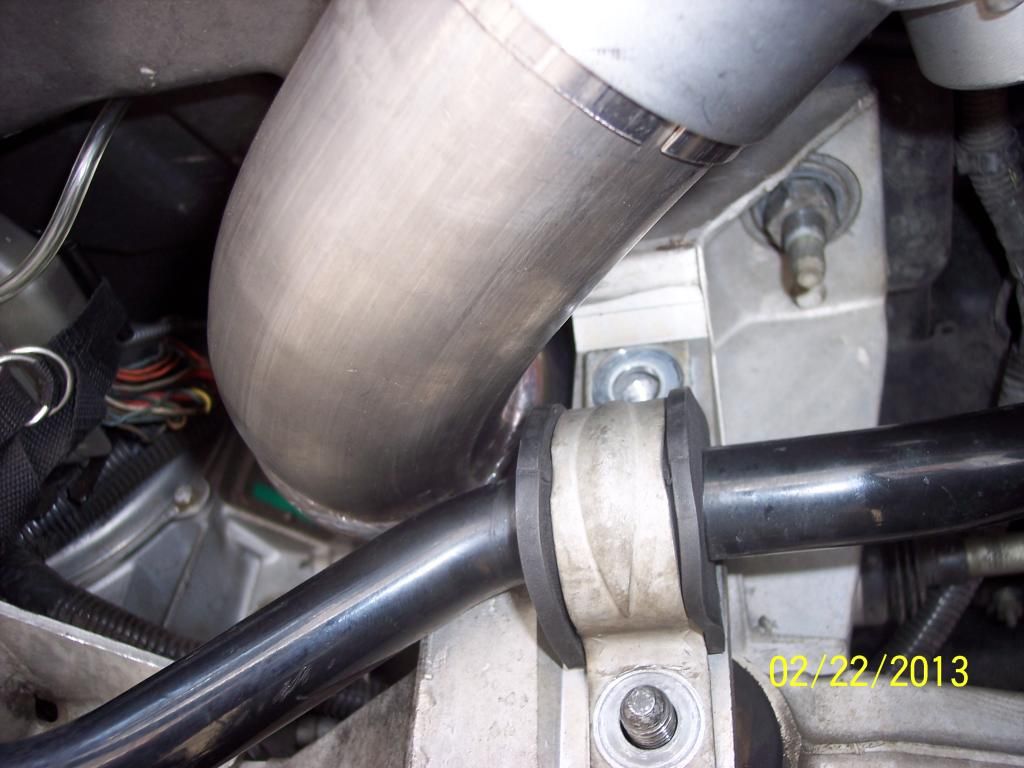
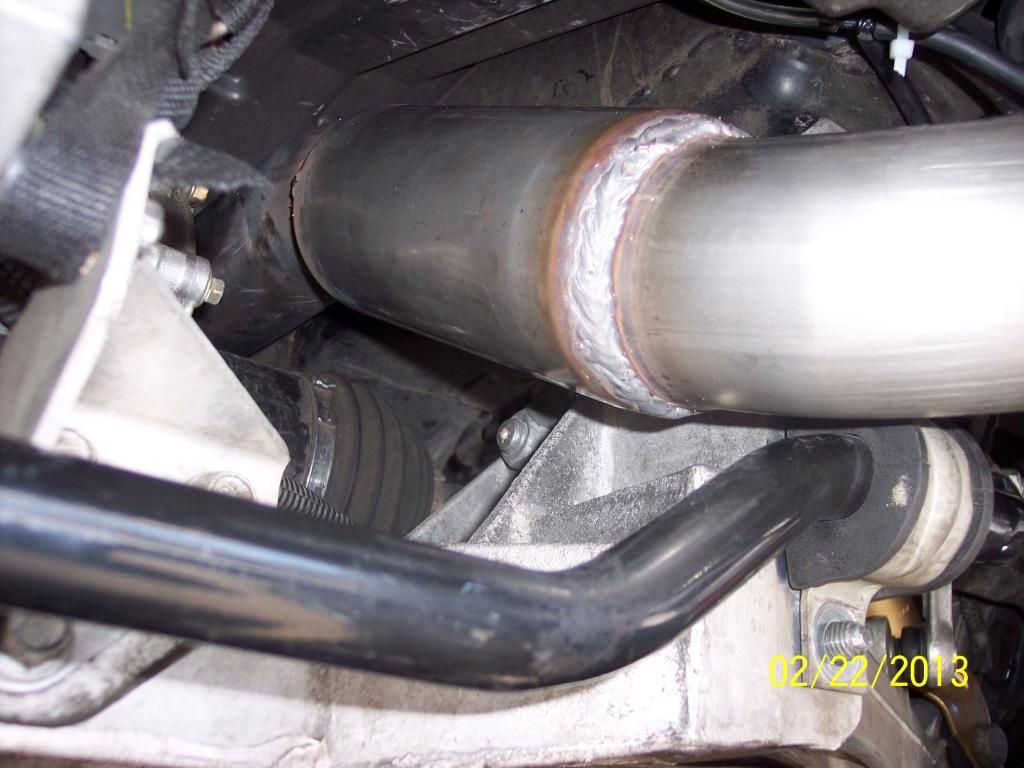
A Look at the Rear Most Section:
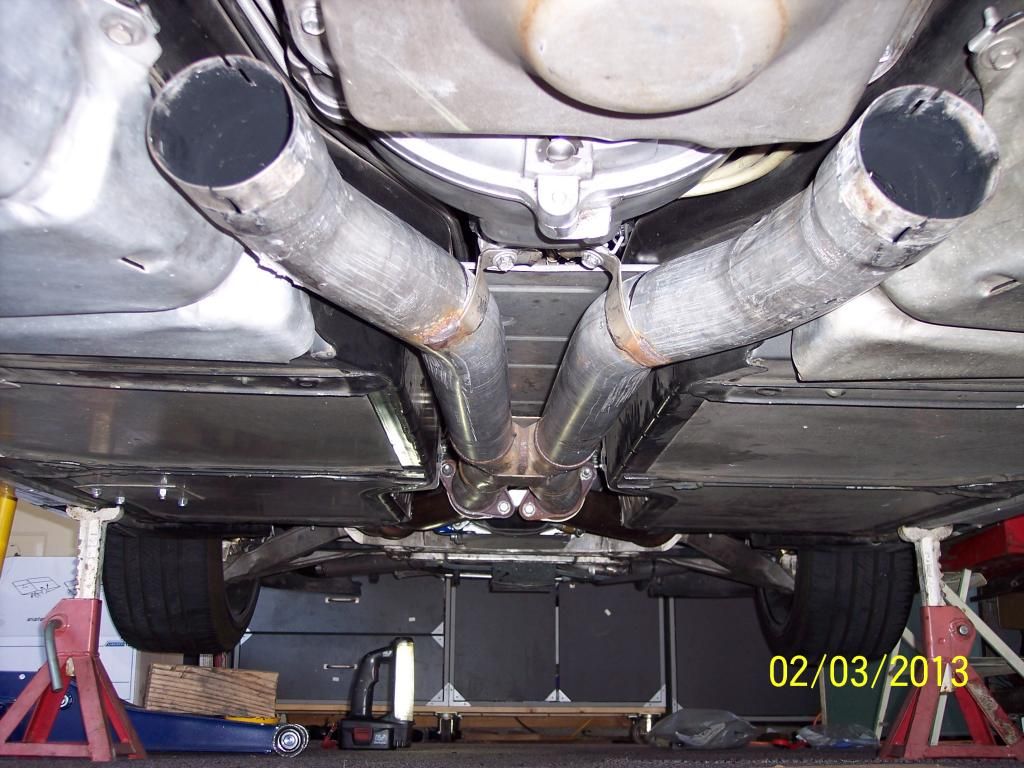
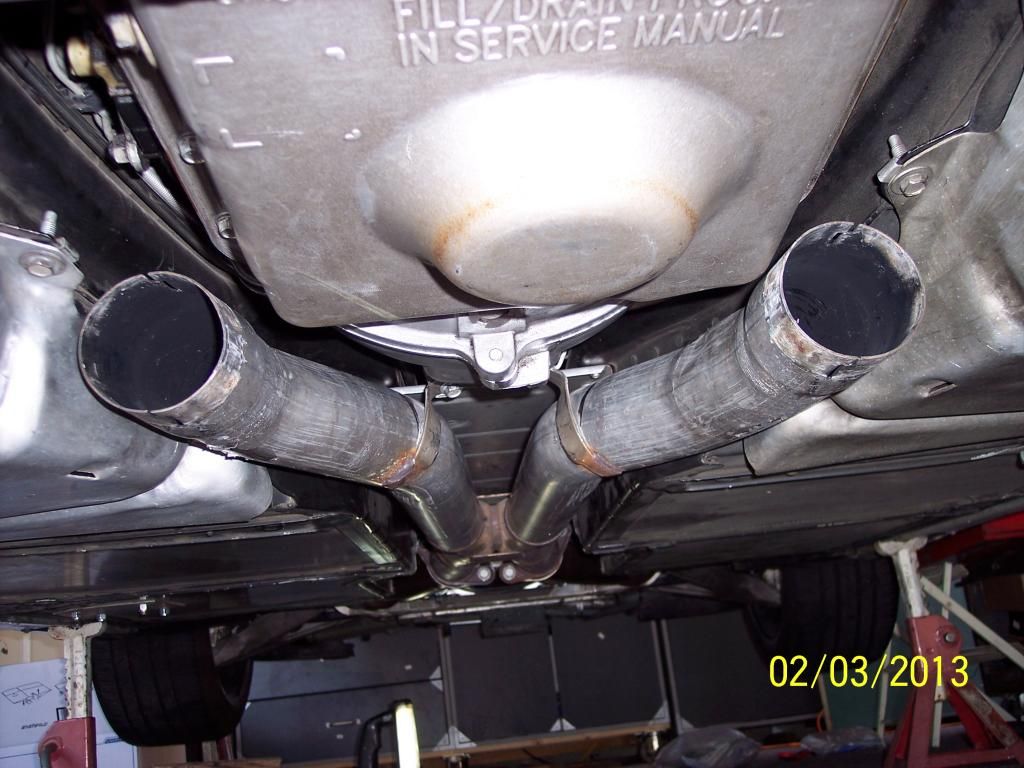
Picture shot from the Front towards the Rear:
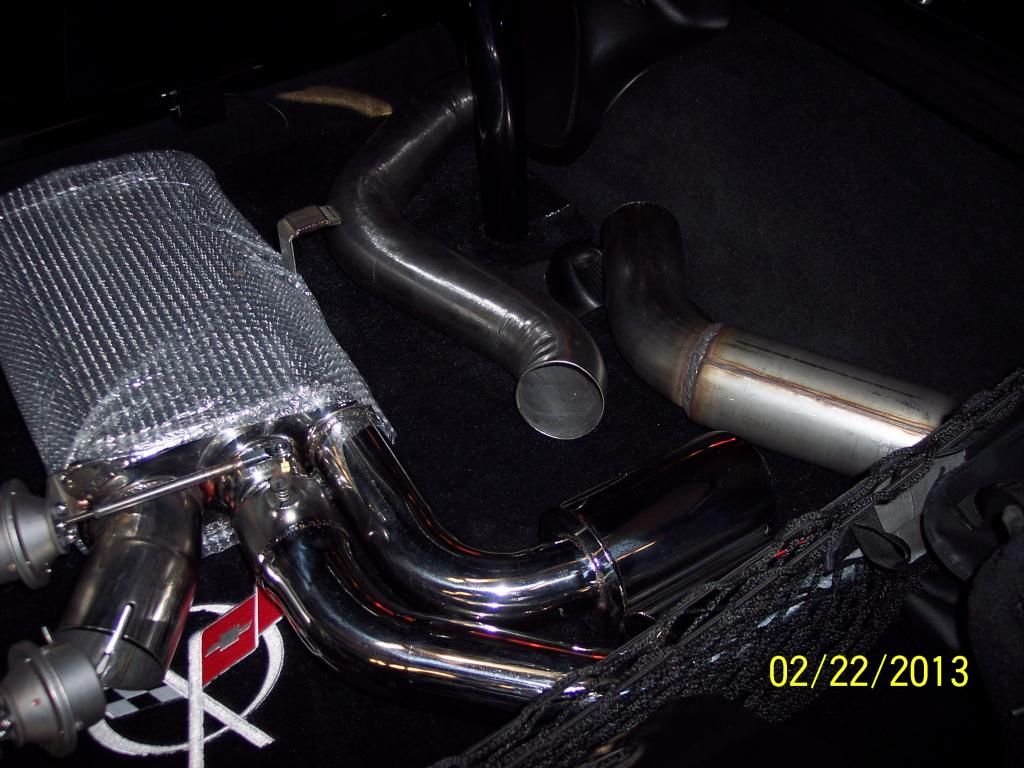
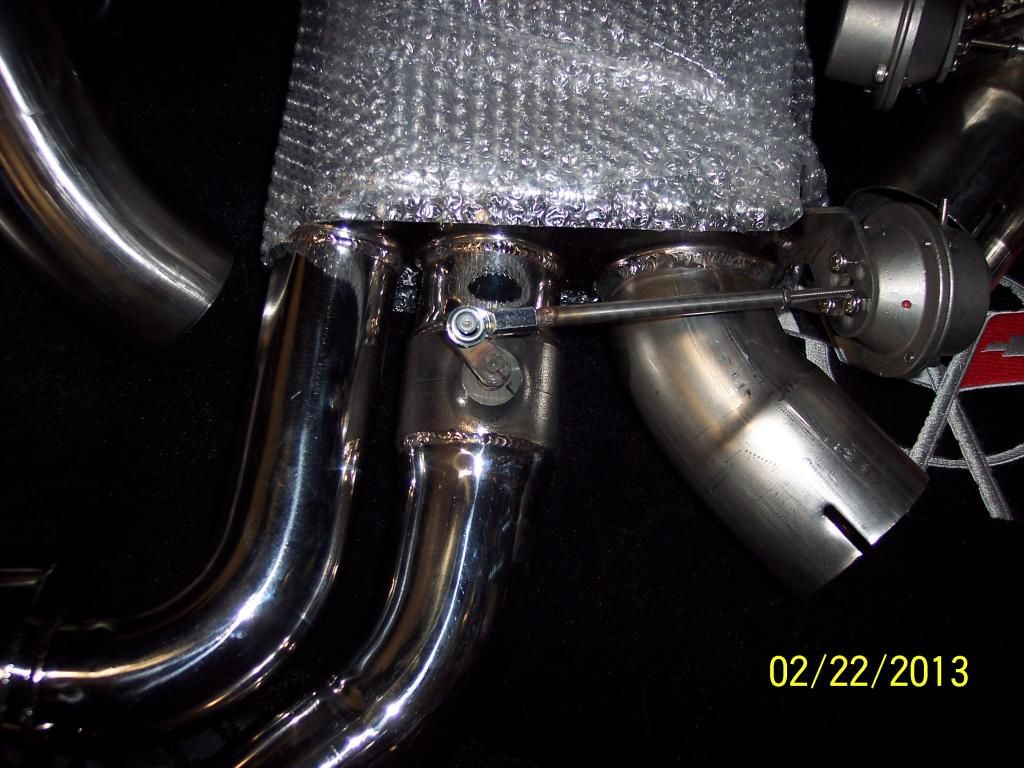
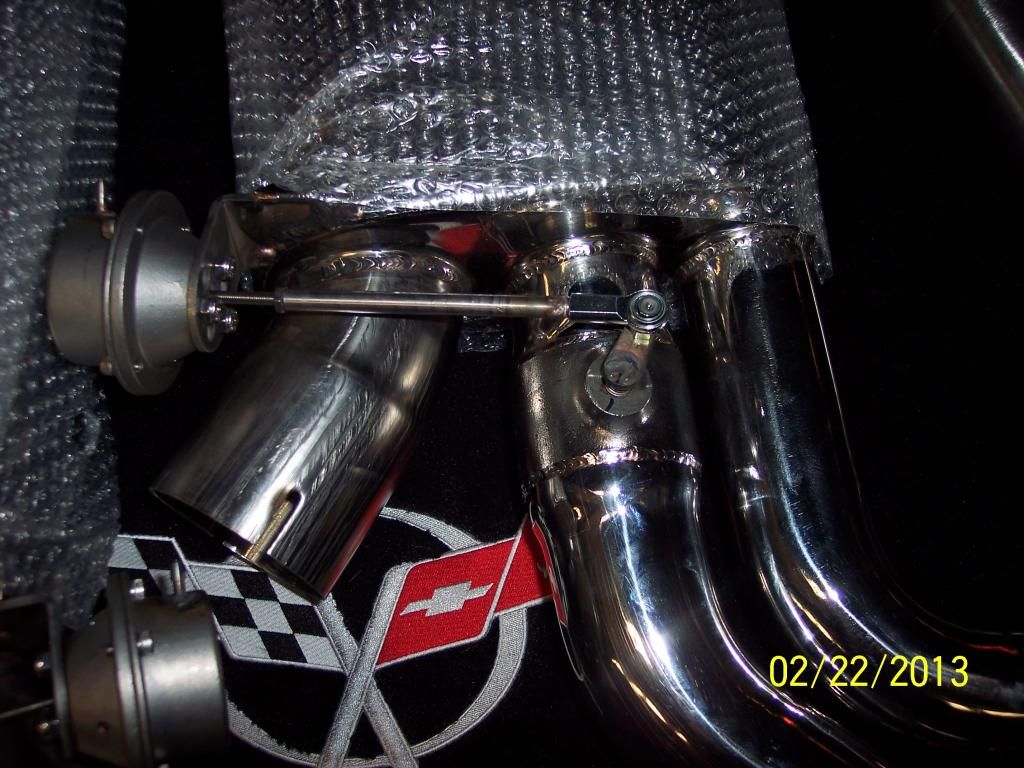
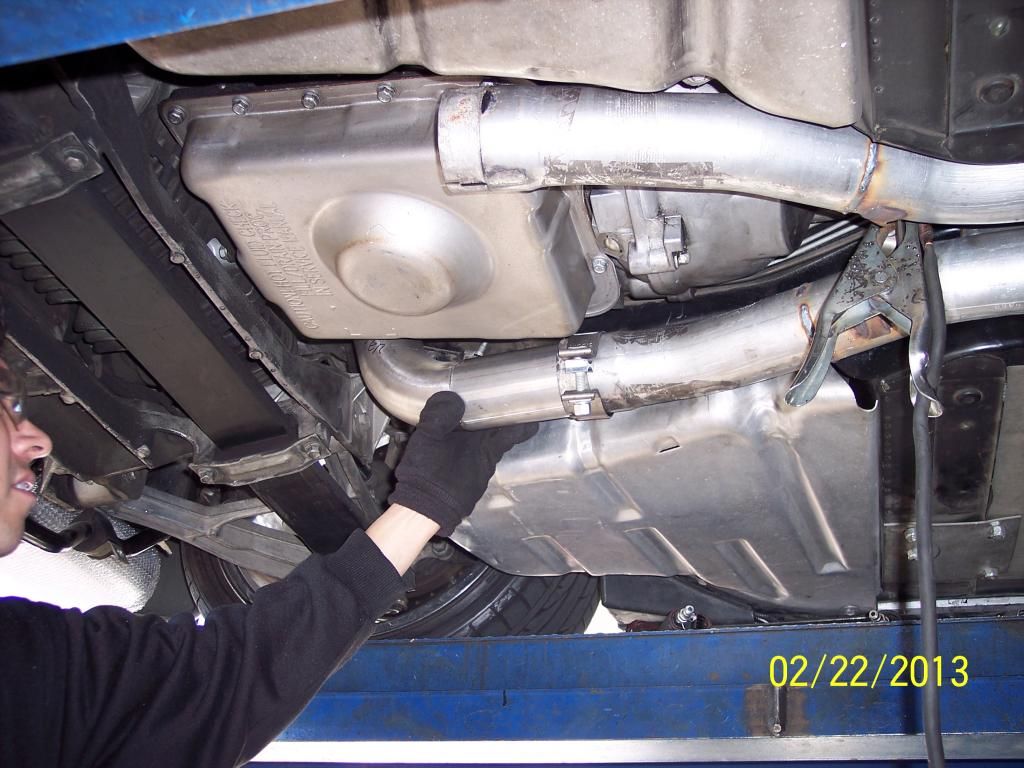
Now it is time to go over to the Muffler shop and get the B&B 3" Fusion installed: It was shipped from B&B in a couple pieces, that is the over the axle pieces - for the custom install and to make sure there is plenty of clearance -
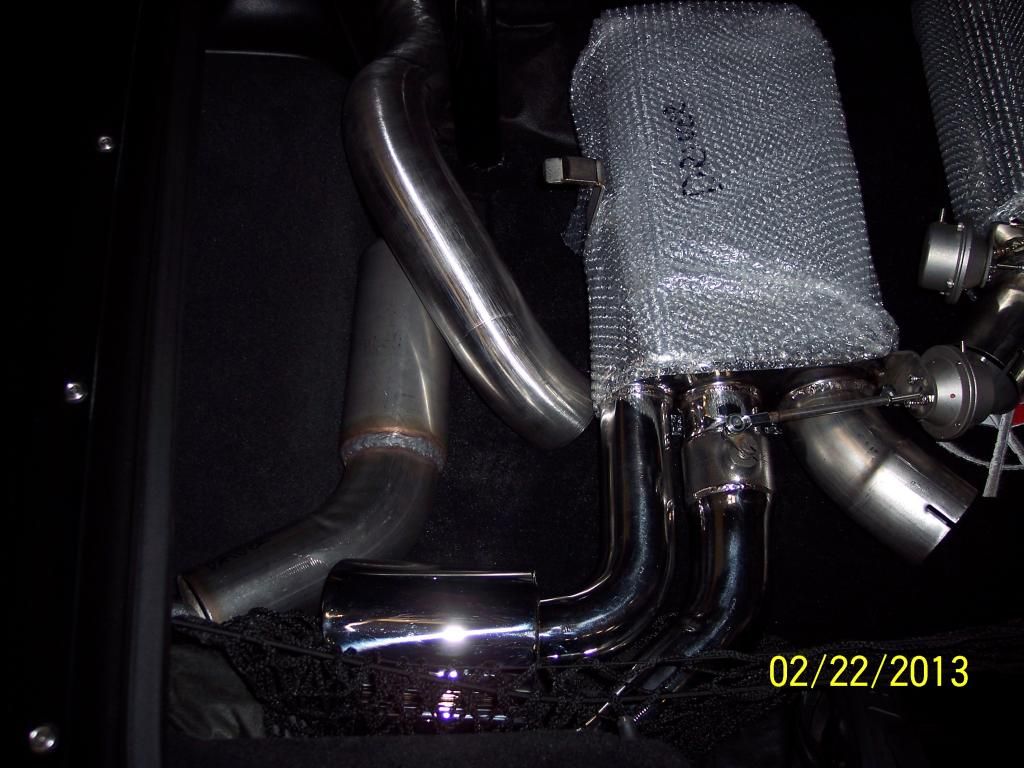
You can see the mufflers the 3" over the axle section and the down section - a few pics the night before -
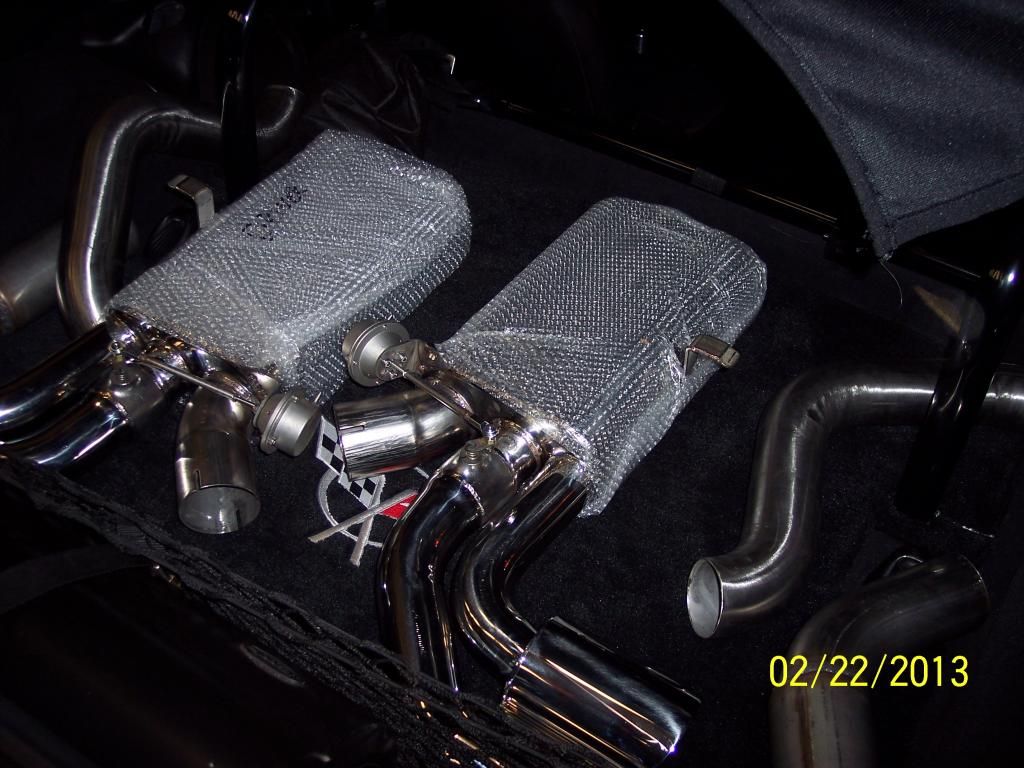
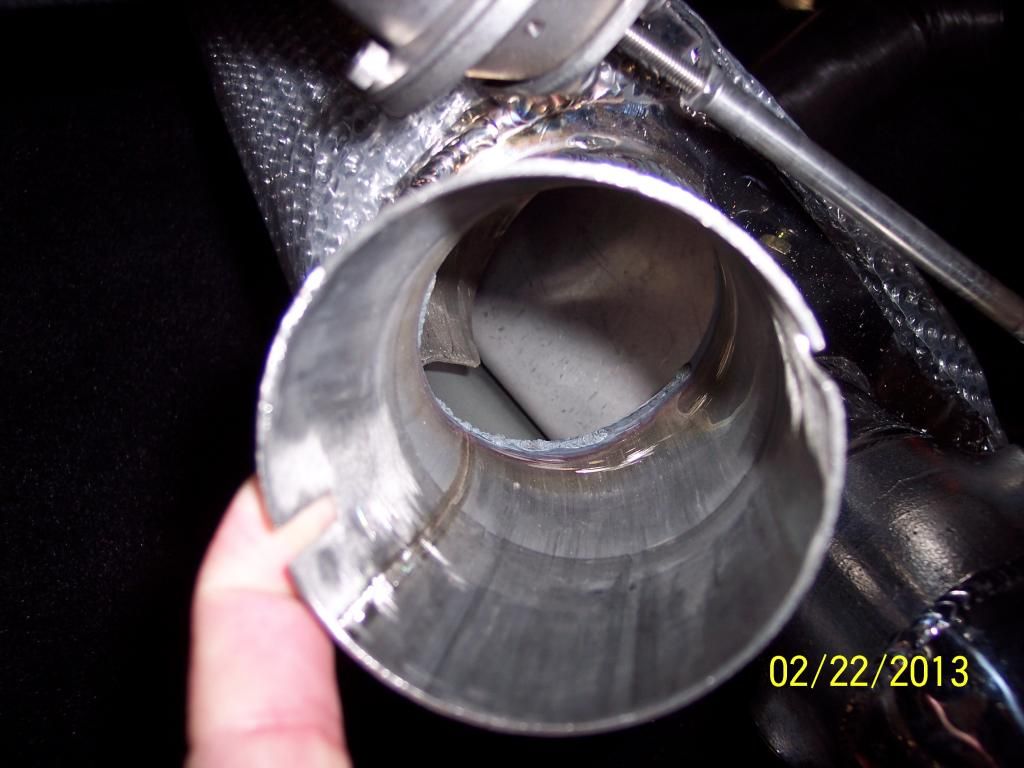
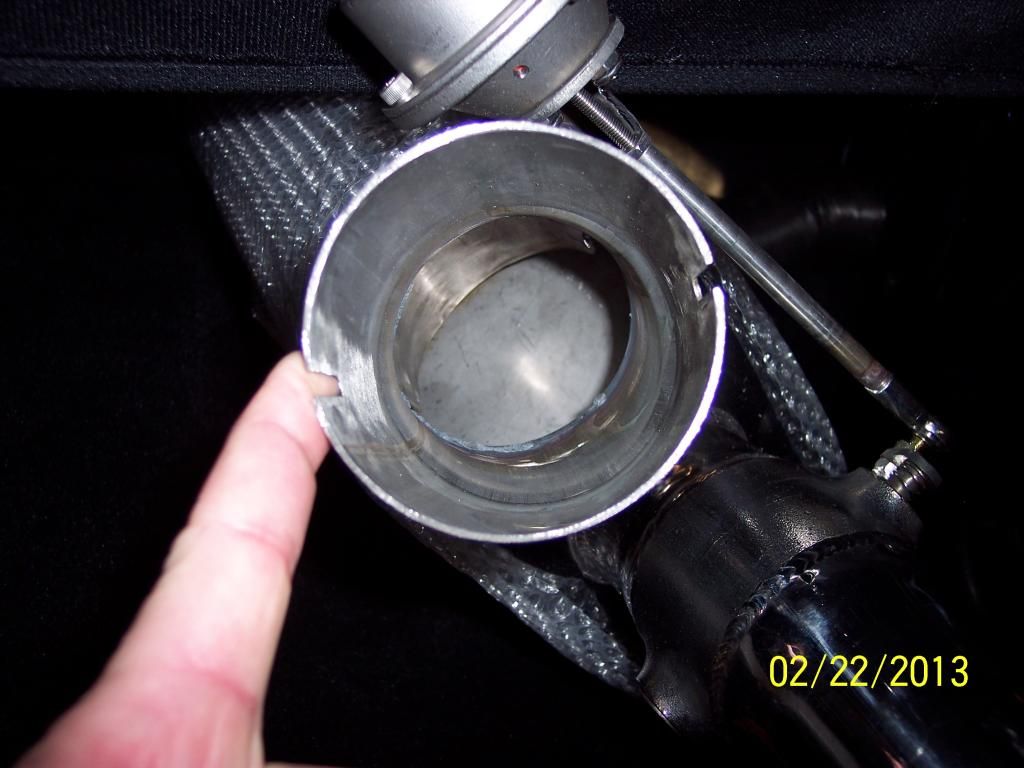
Here is a shot of the baffling inside the B&B Fusion Muffler - reminds me slightly of a Flowmaster design BUT not quite a flowmaster: You can see that once the Butterfly opens that it will bounce off the baffle and out the Bi-Mode Pipe and any extra pressure will be spent through the muffler out the quiet side too!
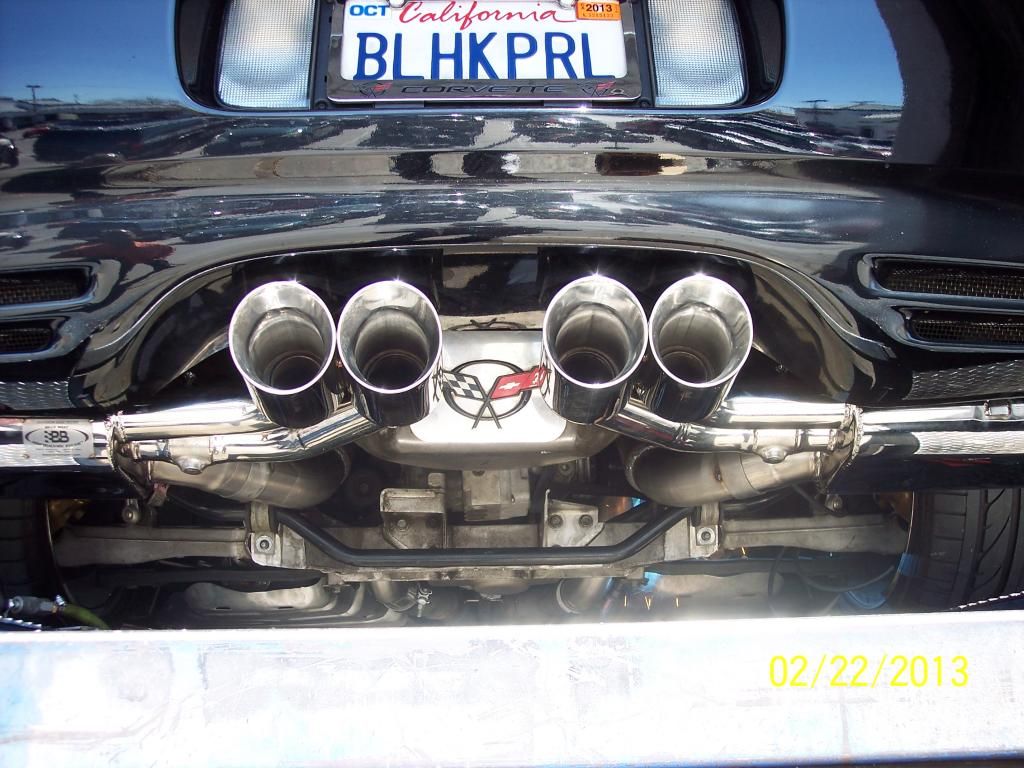
The Tips and Pipes:

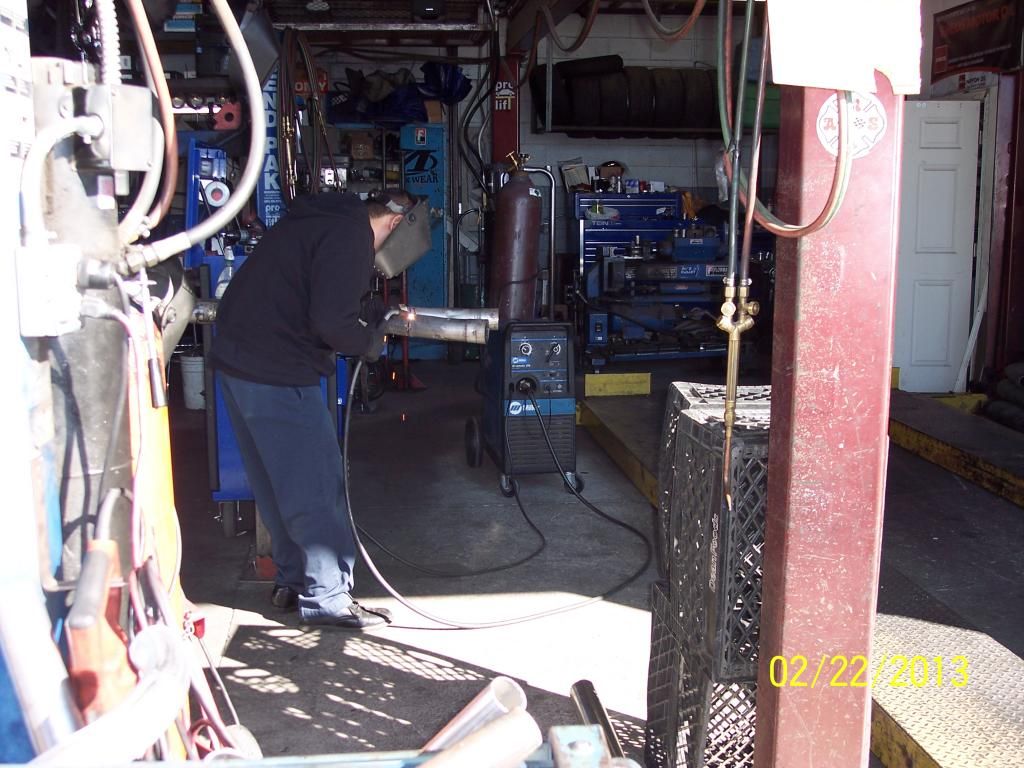
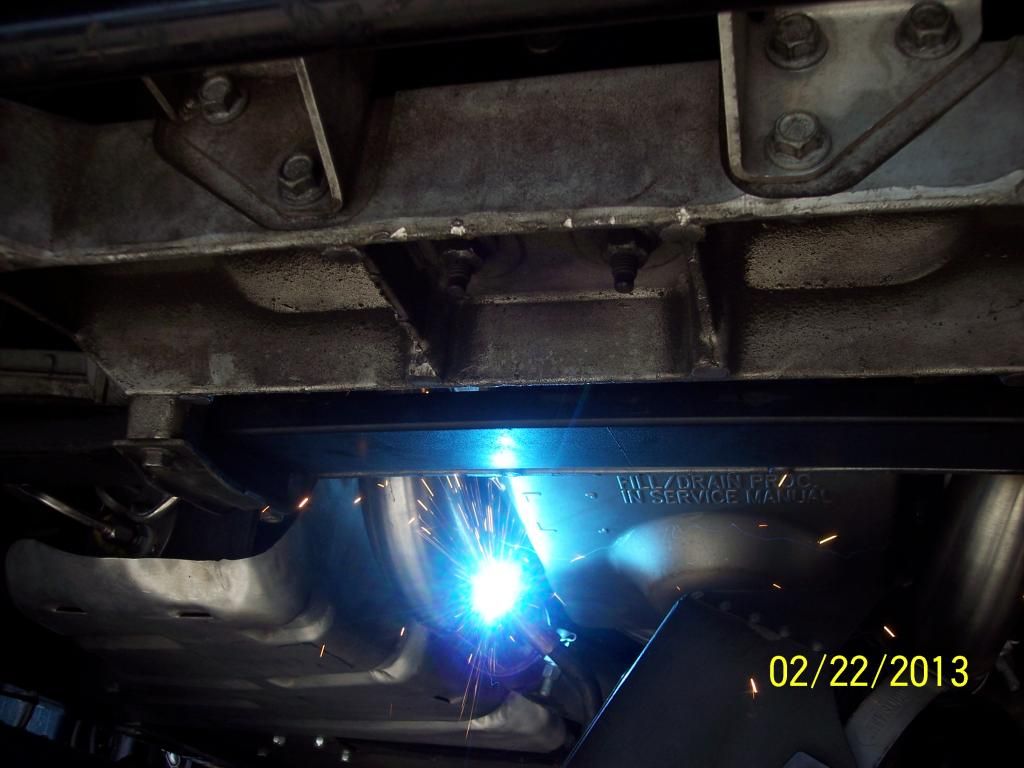
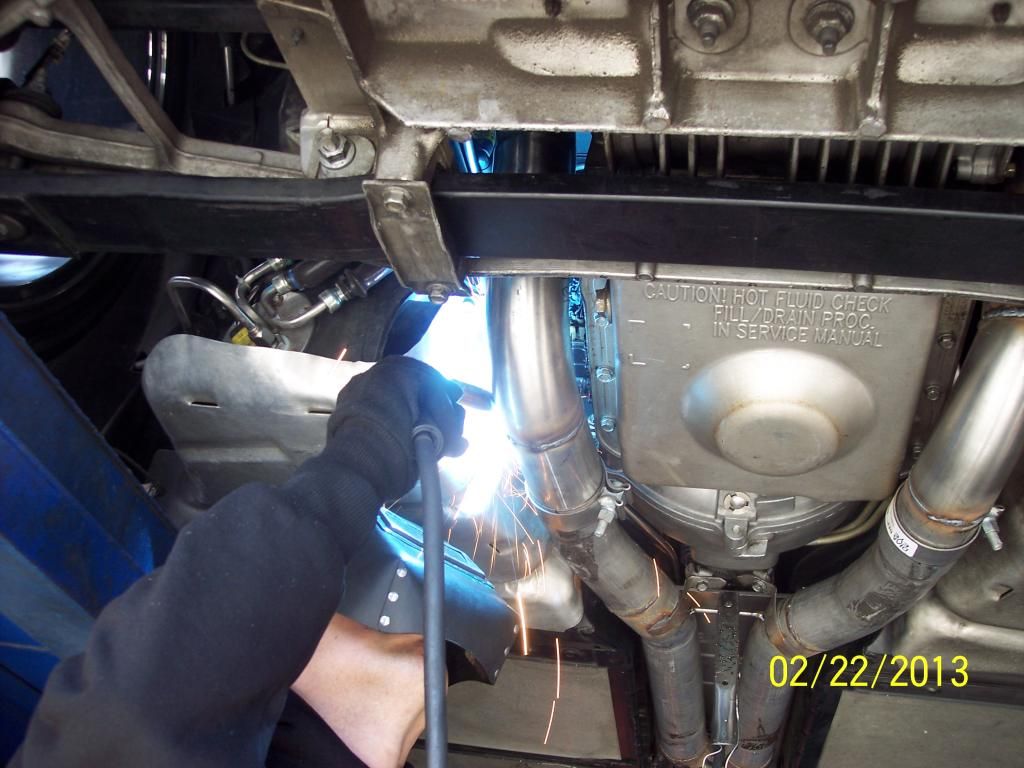
At the Muffler Shop Getting Fabbed up: Had to do some pie cuts to the rear most section near the tranny on the 3" X-Pipe and welds to get the fitment just right (Joe is an excellent fabricator)
Closing the Pie Cuts:
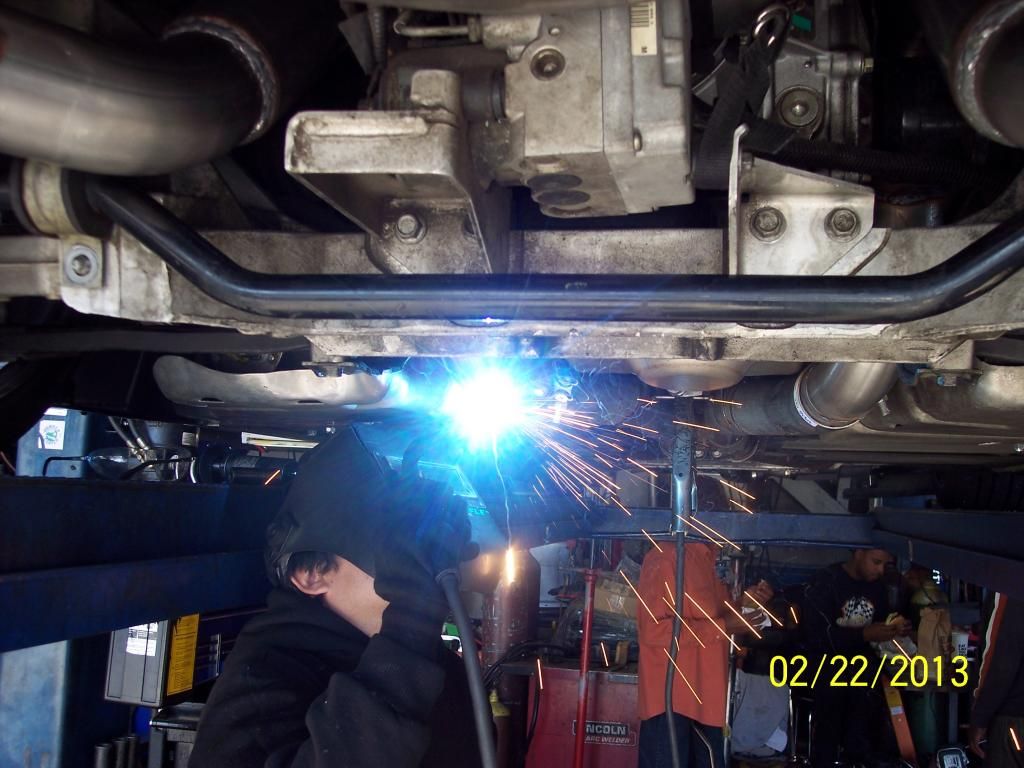
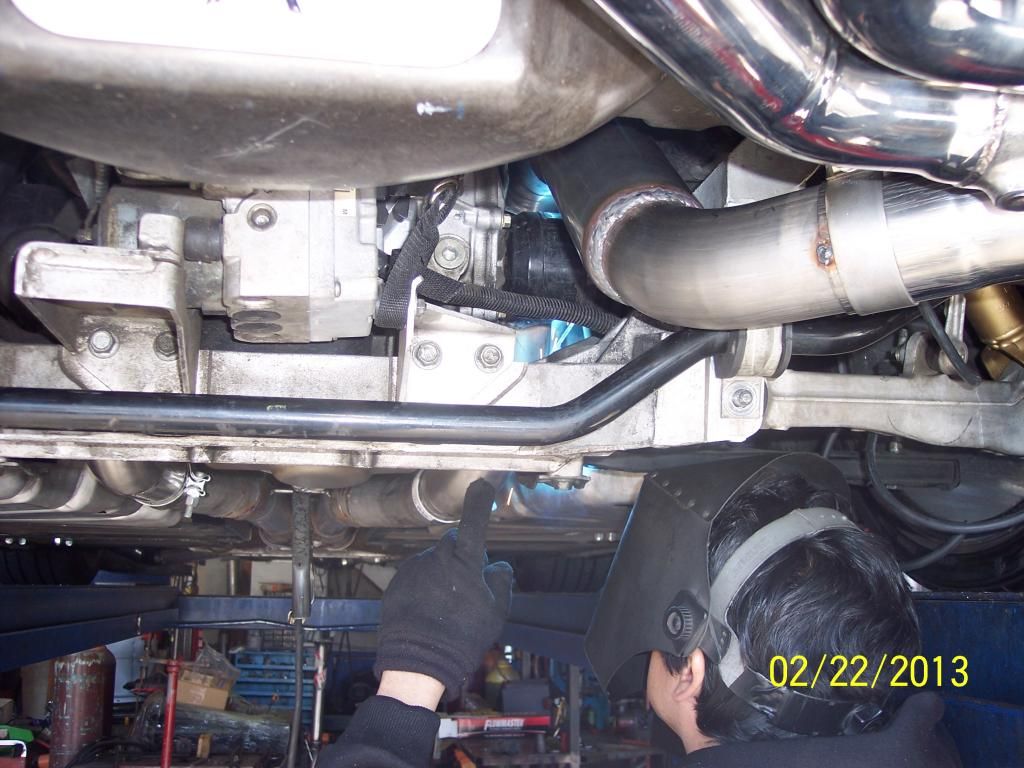
Hanging the X-Pipe and installing the 3" Over the Axle Pieces and welding them up:
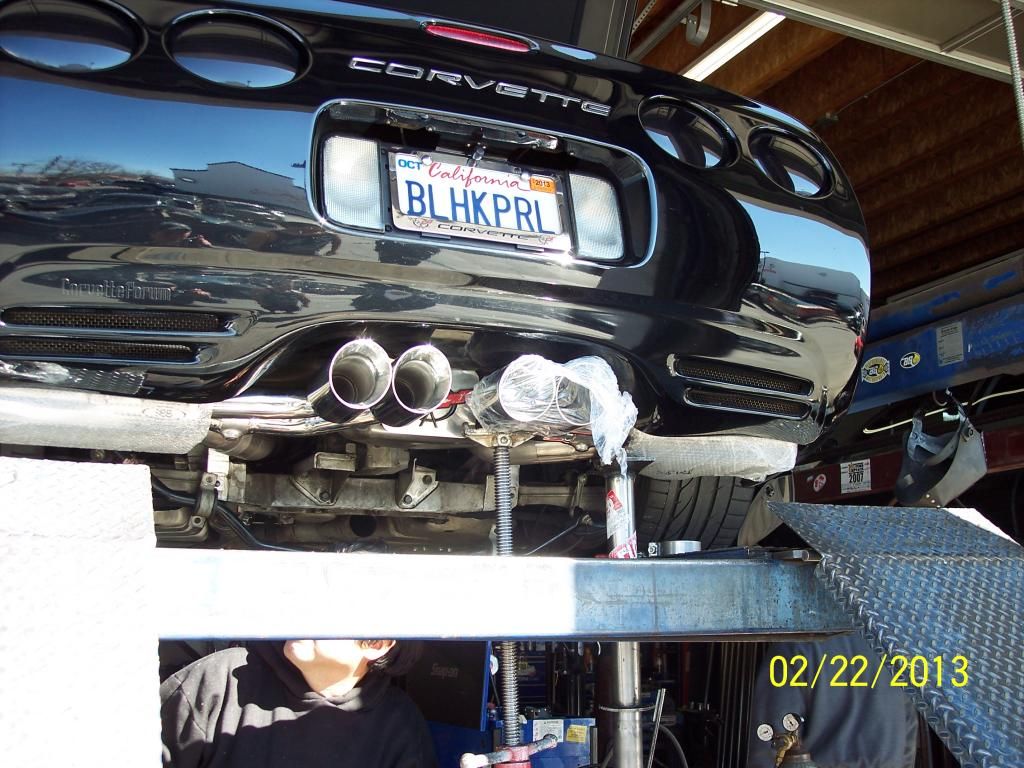
A Picture of the Drivers side muffler: I wrapped the tips in plastic wrap to protect them -
Passenger side and drivers:

Welding the pieces and finishing up: You will also notice between the rear hangers Joe put a small brace for strength -
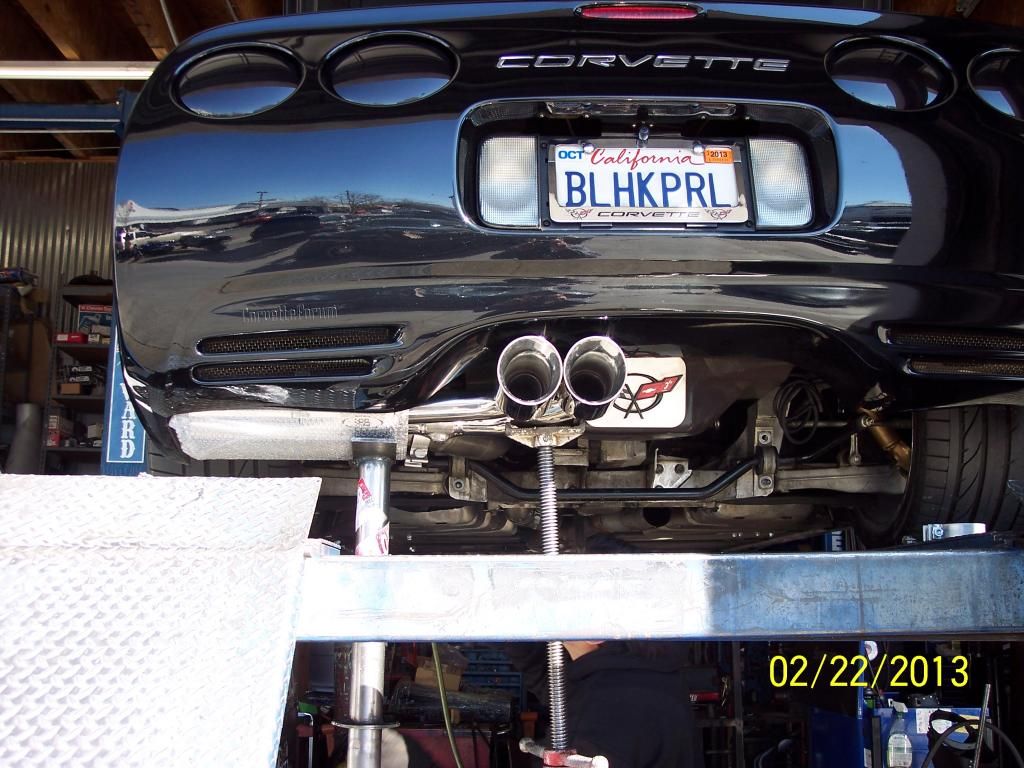
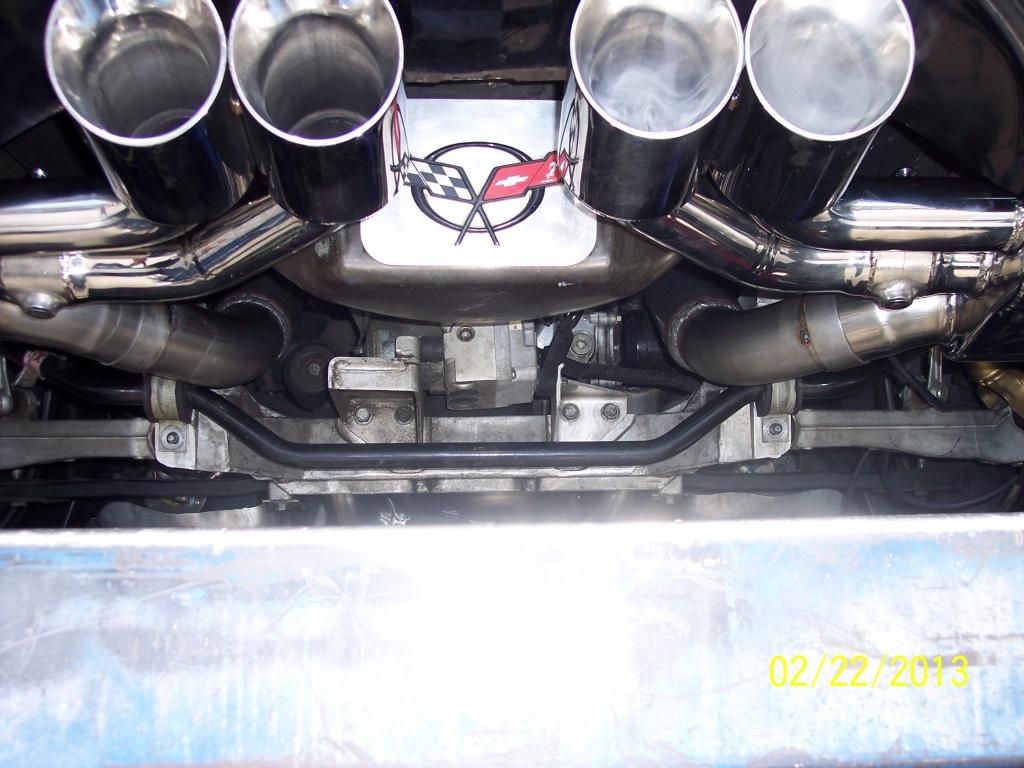
Finished pictures and clearance pictures:

Done Pictures:
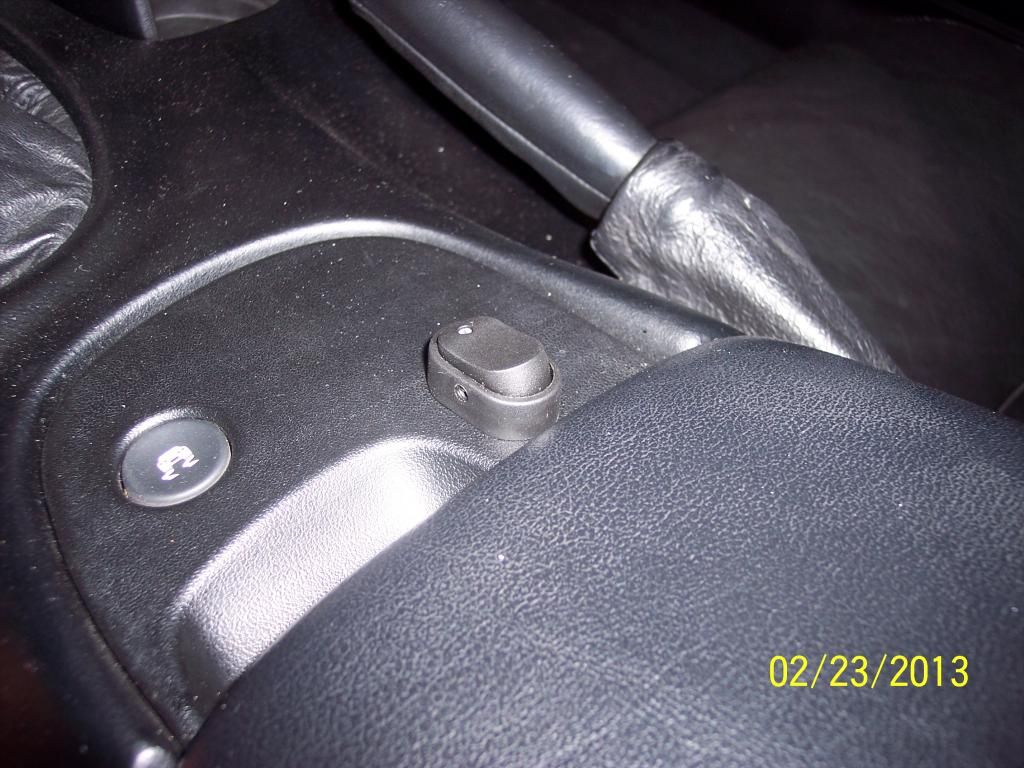
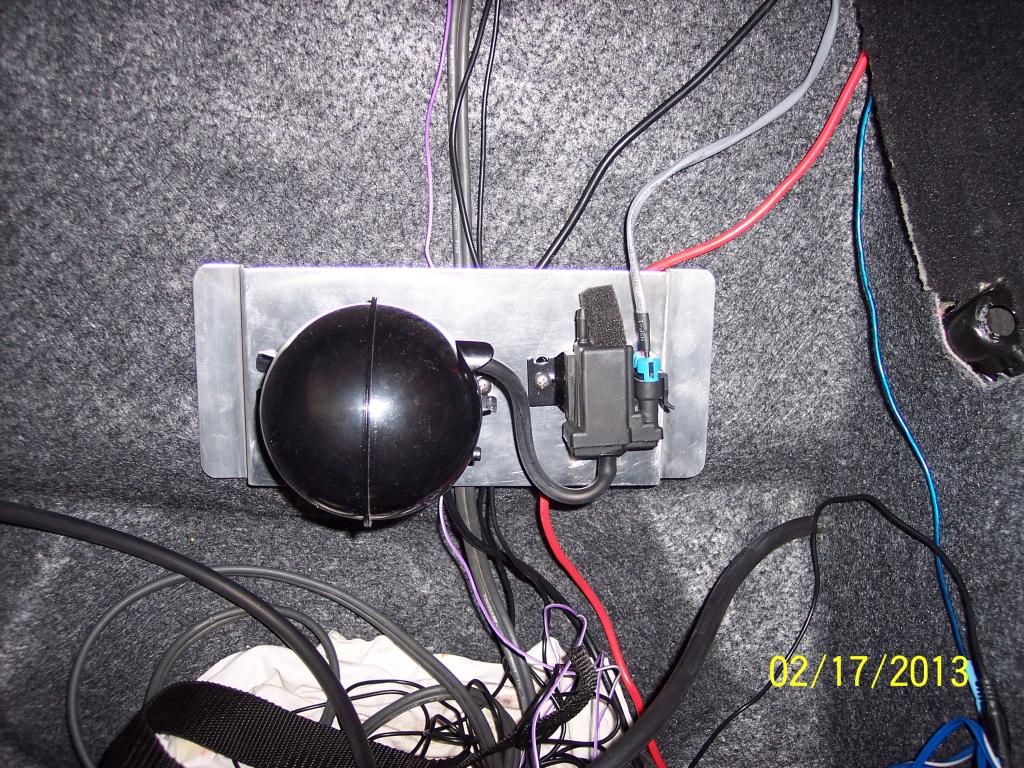
I wanted to follow B&B's Vacuum tube and wiring instructions but I did not want to use the Key Fob - I preferred to use a switch that I will leave in the ON position "BUT" will have a 12 volt ignition source power it immediately on start-up, thus allowing the vacuum to close the Bi-Mode butterfly valves (They are always in the open position)
I can flick the switch at any time from open to closed!
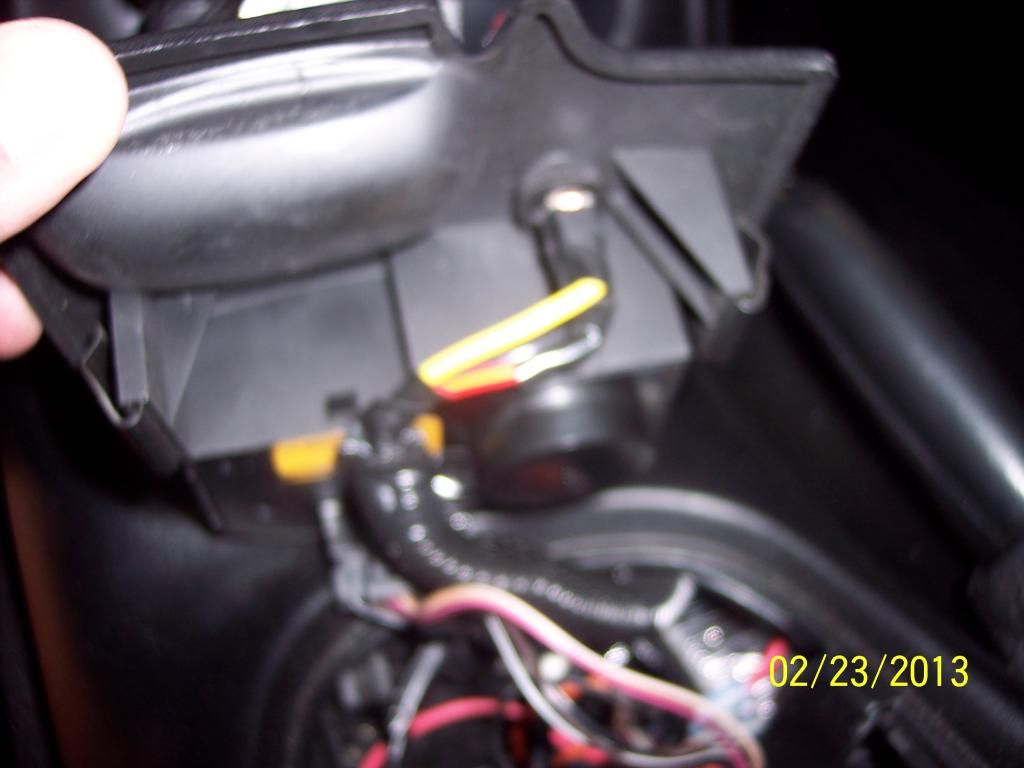
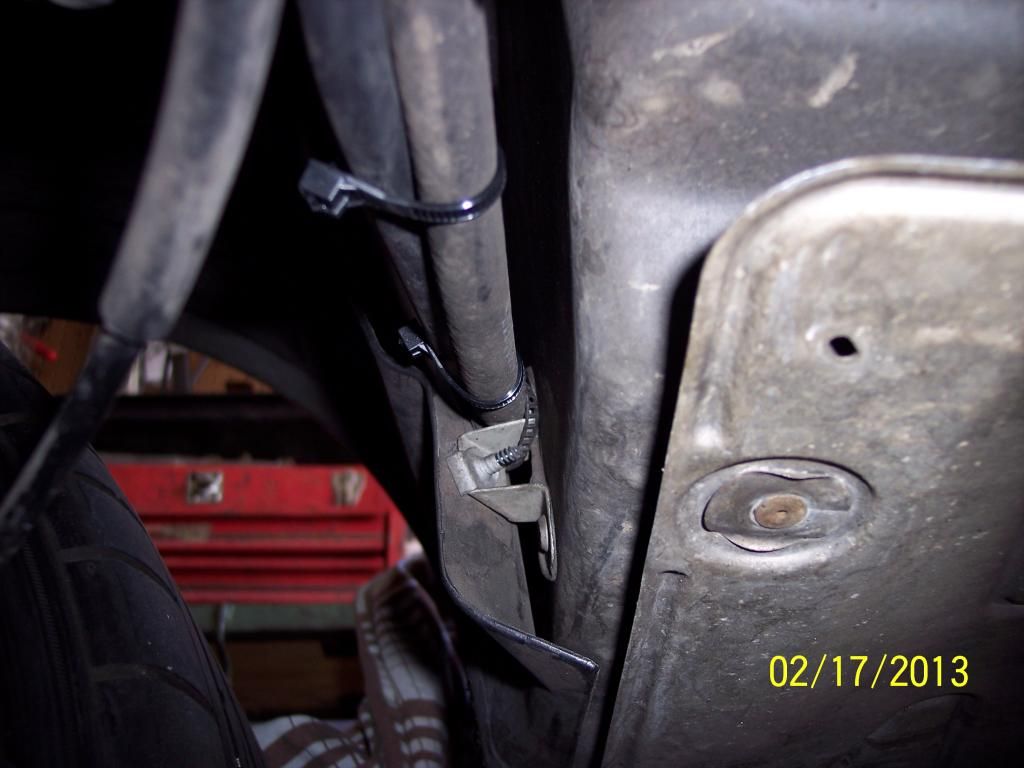
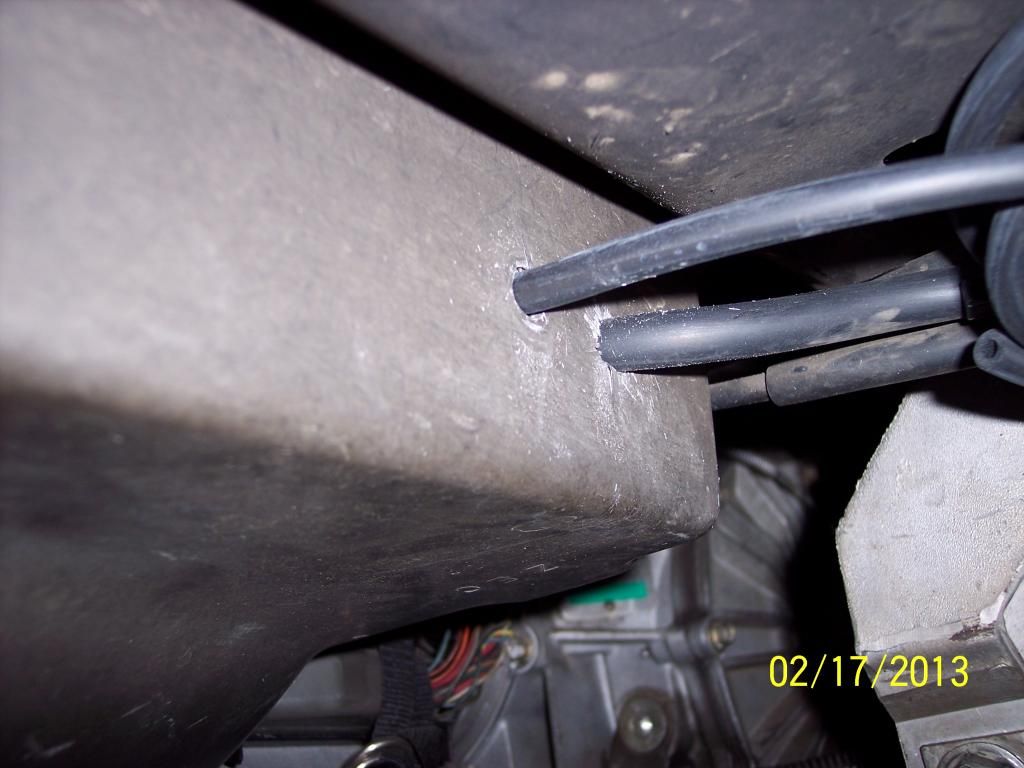
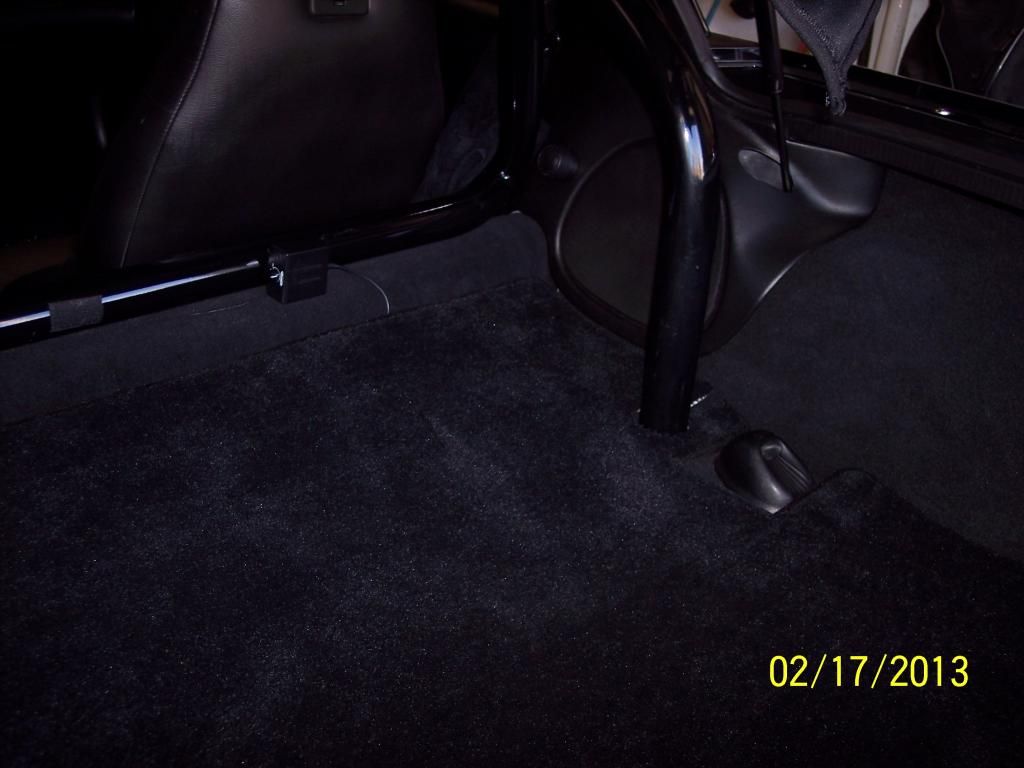
I ran my vacuum line down behind battery and down the cavity on the passenger side and over the rear fender well liner and followed the E-Brake cable coming out of the rear fender well and into the rear center compartment
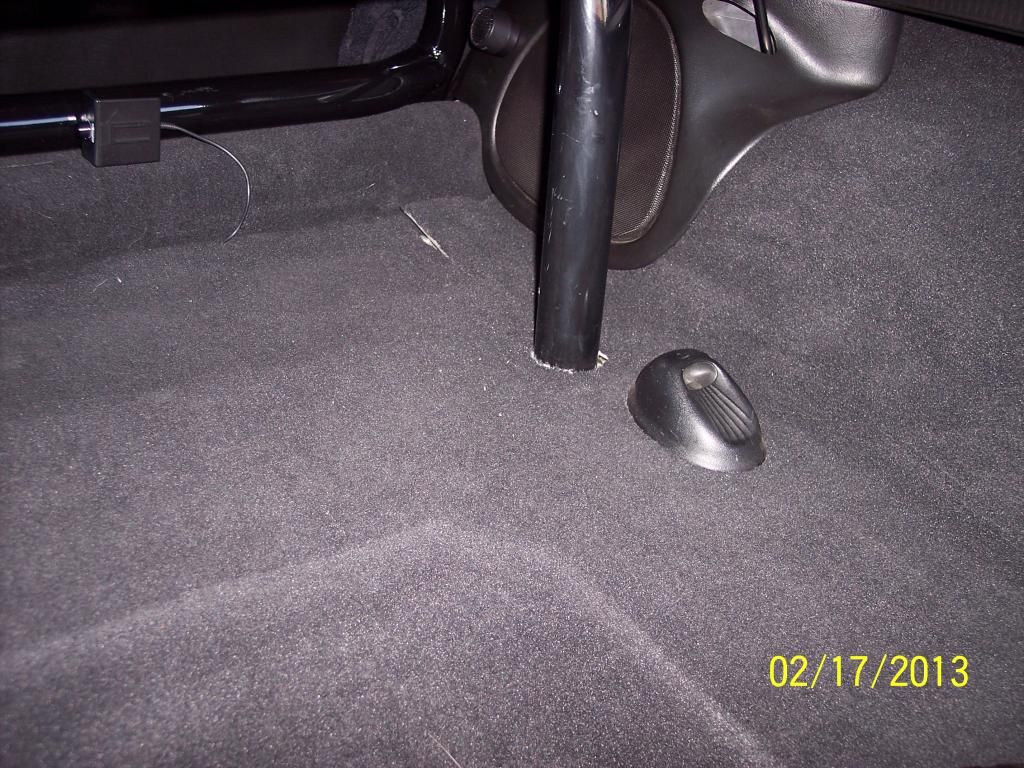
I ran the wiring the way B&B said, down the inside rocker panel and up the seat belt post,over the hump and next to the speaker - however I did run it under the carpet into the compartment like my rear camera and Bazooka Tube wiring -
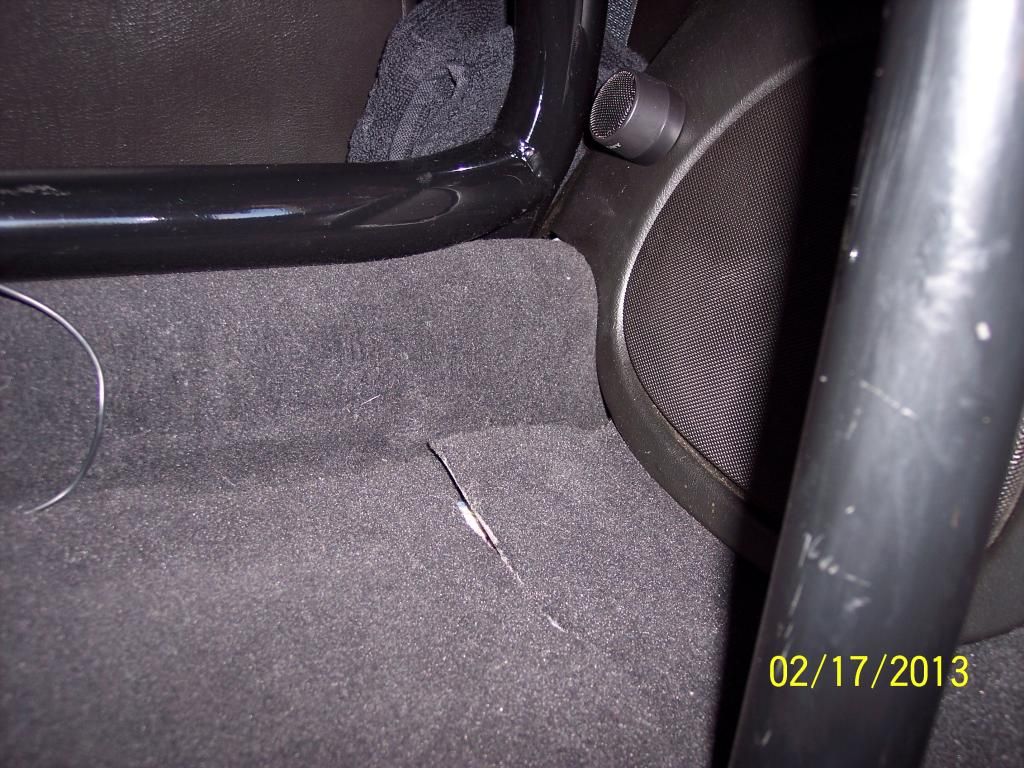
Over to the corner:
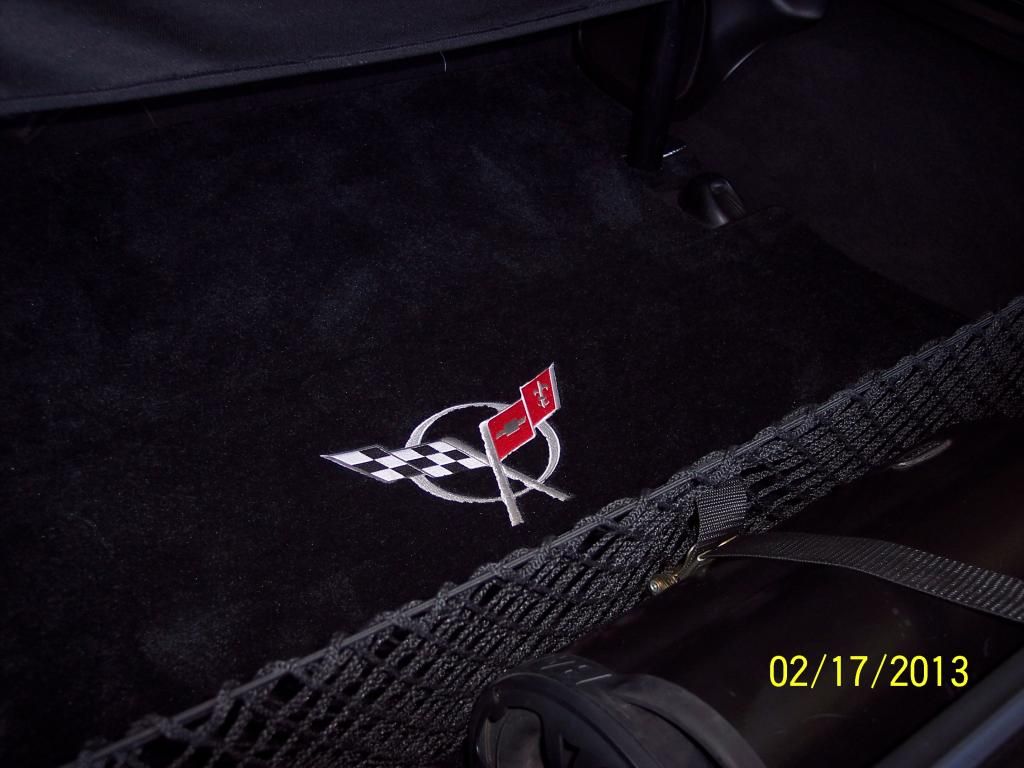
Then covered it with my Cargo Mat:
I think that is about it for now - It sounds awesome
I am going to take some video of it tomorrow for sound clips and visual , Sunday February 24th and post it up here as well -
I will also take some pictures of the Vette in the daylight to show the mufflers and tips etc.!
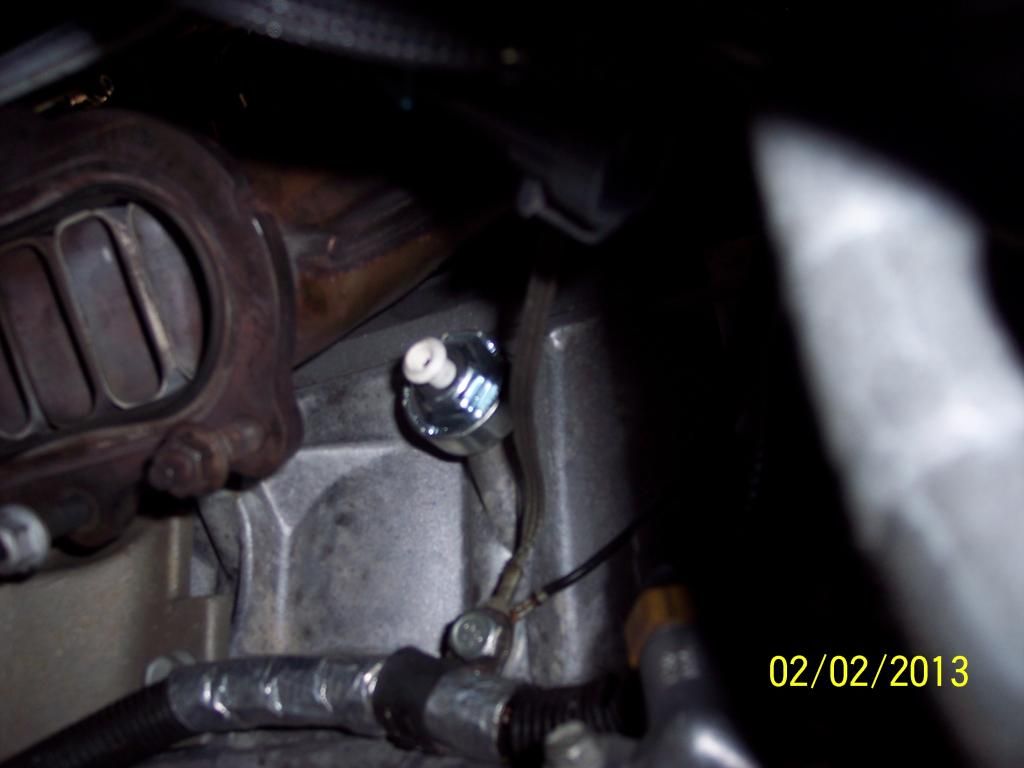
Bonus Pictures: You might of noticed I re-located my KNOCK SENSORS to the side of my block like the LS2, but used the holes already on the block - this gets a better reading should knock happen - I used the LS2 Knock Sensor Extension (Racetronix) for putting in a LS2 in the early Vette!
http://www.racetronix.com/RX-LS2-KSRH.html
Drivers Side:
Passenger Side:
Enjoy and I hope that is it for now! Feel free to ask any questions!
I will also be doing a Dyno in the near future for a comparisson from the Header system!
Thanks,Matt
(call or text) 661-406-7516
First it was necessary for me to install a "PROPER" Crank Case Evacuation System - here is my write up on my Monster 2 Catch Can Installation with Pics -
Thanks to the proper guidance of Charlie I got headed in the correct direction and was able to get the proper set-up for my combo, I wasn't able to go any further a few weeks back specifically because of an INADEQUATE Crank Case Evac system
http://forums.corvetteforum.com/c5-f...ntri-pics.html
Dyno Results: I lost - .4 RWHP and 15 RWTQ - "NEW DYNO SHEET"

"OLD DYNO SHEET" -

First and foremost: Performance Impressions -
By the feel of my "BUTT" Dyno and going from 70 MPH - 140 MPH, I felt no difference at all. It still pulled like a rapped ape and a 700 lb Gorilla pushing you into the seat.
DYNO UPDATE: 3/5/2013
Today took it the tuner and it was really PIG Rich right 10.4 AFR out of the box it made 692 RWHP brought it to 10.6 AFR and went to 695 RWHP (40 RWHP loss for now) and not much timing -
We did not continue to tune, after a second run I was getting too much crank case pressure - So I had him stop - no need to continue to beat on it with a defunct Crank Case Ventilation System - If I am going to do this I am going to do it correct!
I have needed to do a proper Crank Case Vent system for a long, long time - so now I will do my CC Vent system and then take it back to bring it near the Original RWHP (I wont mind being around 725 RWHP which would be -10 RWHP and I would be fine with that = SMOG Legal!
)So please be patient with me as I do this necessary step - (something I should of done a long time ago
)I will probably get it back to the tuner this month and get the results -
I have talked to Rev Xtreme and am getting a set-up specific to Forced Induction - he went over and explained all the ins and outs and do's and don'ts to CC ventilating, proper and improper set-ups (Mine was way improperly done
)Sound: It is amazing, love the LOUD straight through/Open side under WOT and the QUIET Side under cruising conditions - they have a nice mix between Flowmasters and the C5 Z06 Titanium Mufflers
For me living in California and in trying to keep Smog legal I decided to do this mod and "NOT" loose RWHP but even gain some due to better flow! (Dyno to come later)
I "REMOVED" my 1 3/4" Kooks Headers, 3" Kooks Xpipe and Hiflow Cats, stepped into Kooks' 2 1/2" Mid Section and then into the Stock C5 Z06 Titanium Mufflers.
I "INSTALLED" C6 ZR1/Z06 Exhaust manifolds, C6 ZR1/Z06 3" Cats down pipes, C6 ZR1 X-Pipe into Custom B&B Fusion 3", that goes all the way over the axle into the B&B Fusion Mufflers (These B&B's are kinda designed like the Flowmaster inside, some pics below will show it) -
I do have a LS2 Oil Pan on my Vette so this really does help in installation and clearance as opposed to the LS1/6 Batwing Oil Pan! Really helped in the removal of the headers too!!!
Video loaded at the bottom of post!
Gaskets Parts List:
Exhaust Manifold to Head - My TFS 215's are D-Port shaped heads, so these match up perfectly!
Exhaust Manifold to Cat Downpipe -
Cat Downpipe to X-Pipe - Donut Gasket
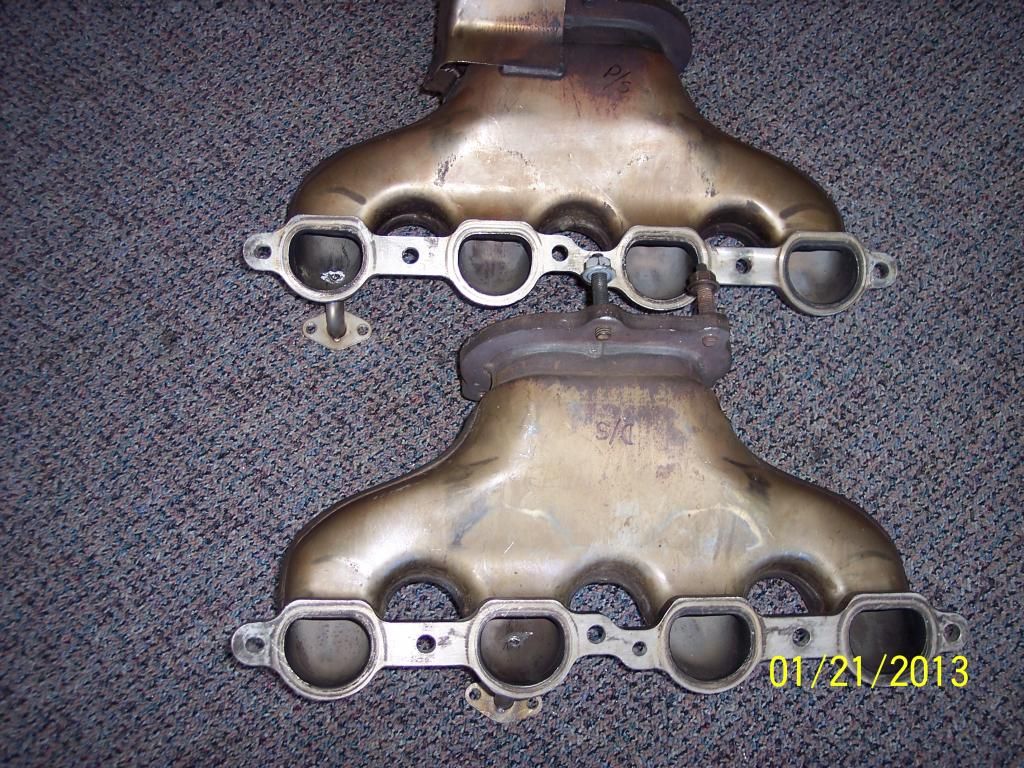
Here it is from the beginning - Manifolds: I needed the smog tubes which the C6's do not use, so I had some made from Kooks Headers -
Had the manifolds drilled in the appropriate place for the Air Tubes and welded on - fully functional too!
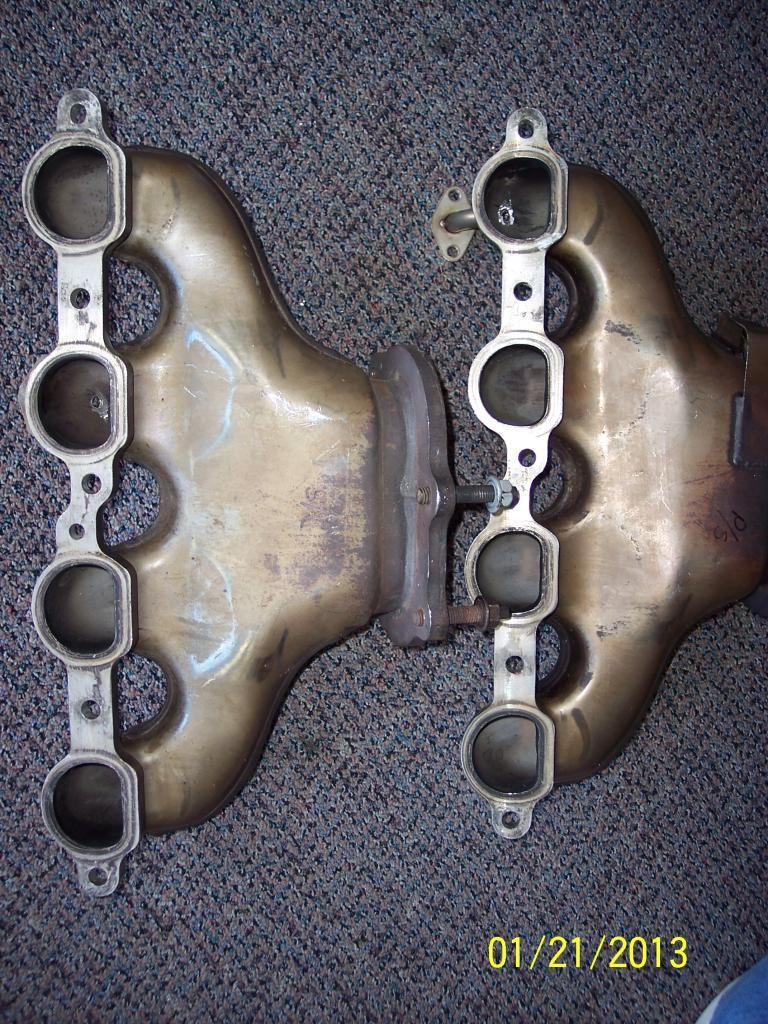
I also made a perch for the Oil Dip Stick to bolt too - I will get a picture of it too - this had to be done at the end when all the other welding was being done, that way it lined up perfectly!
Here you go:
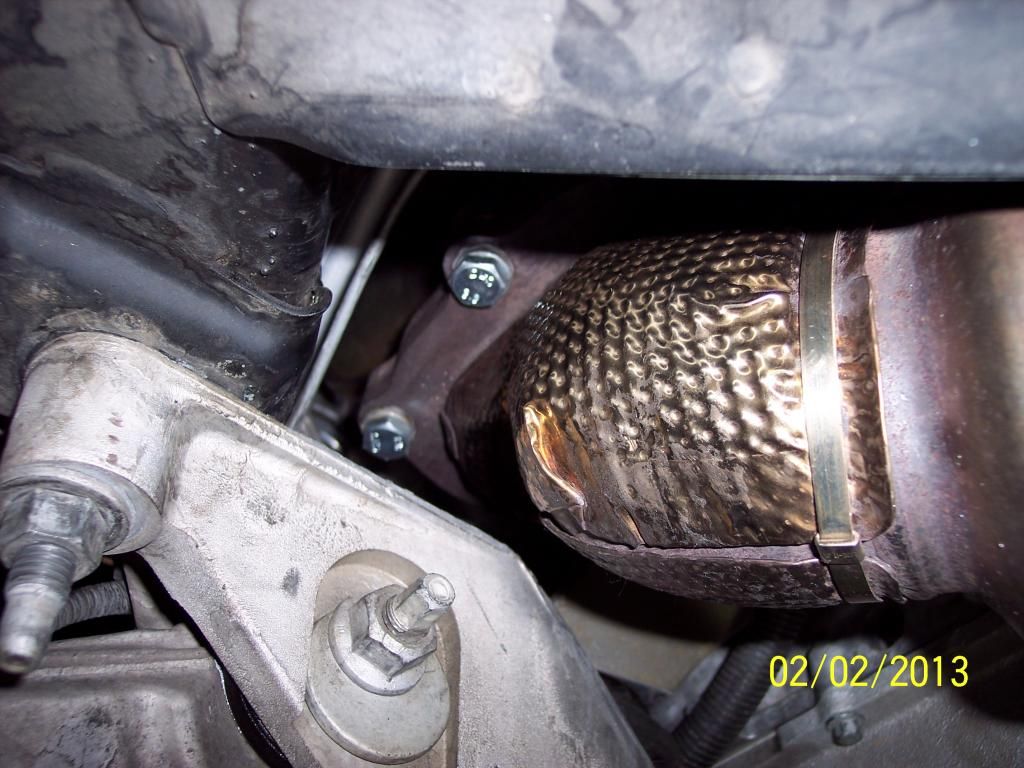
Had a Wideband O2 Bung Welded here for now (Ideally before the cat is preferred, will do later now that I have the proper clearances)
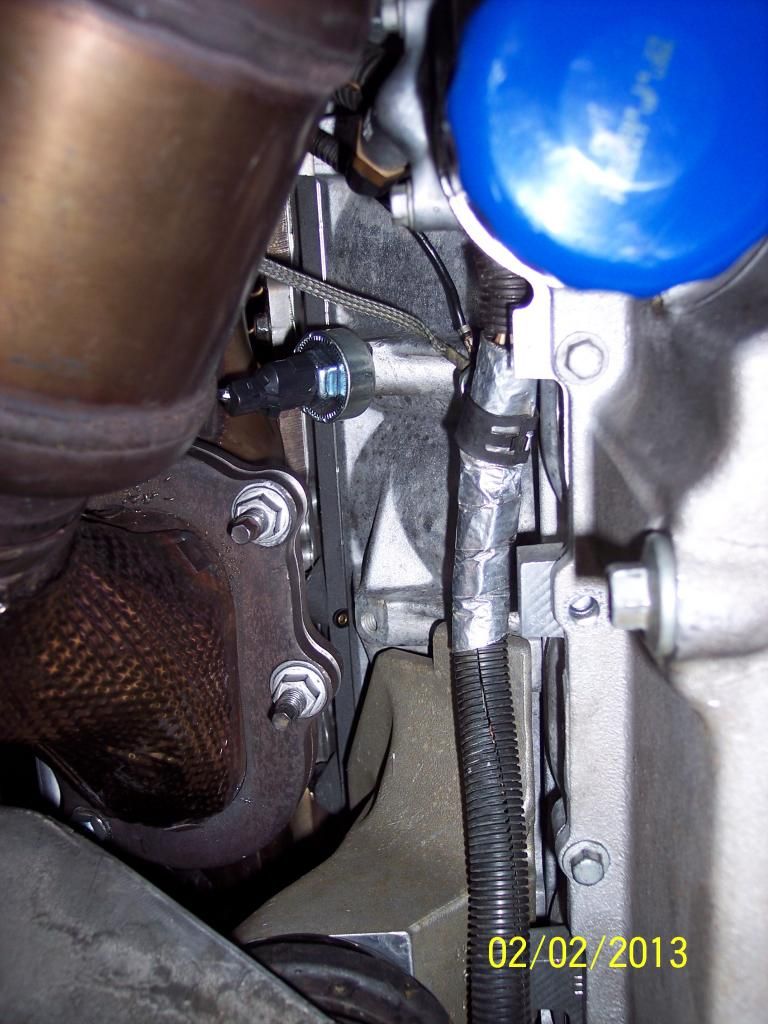
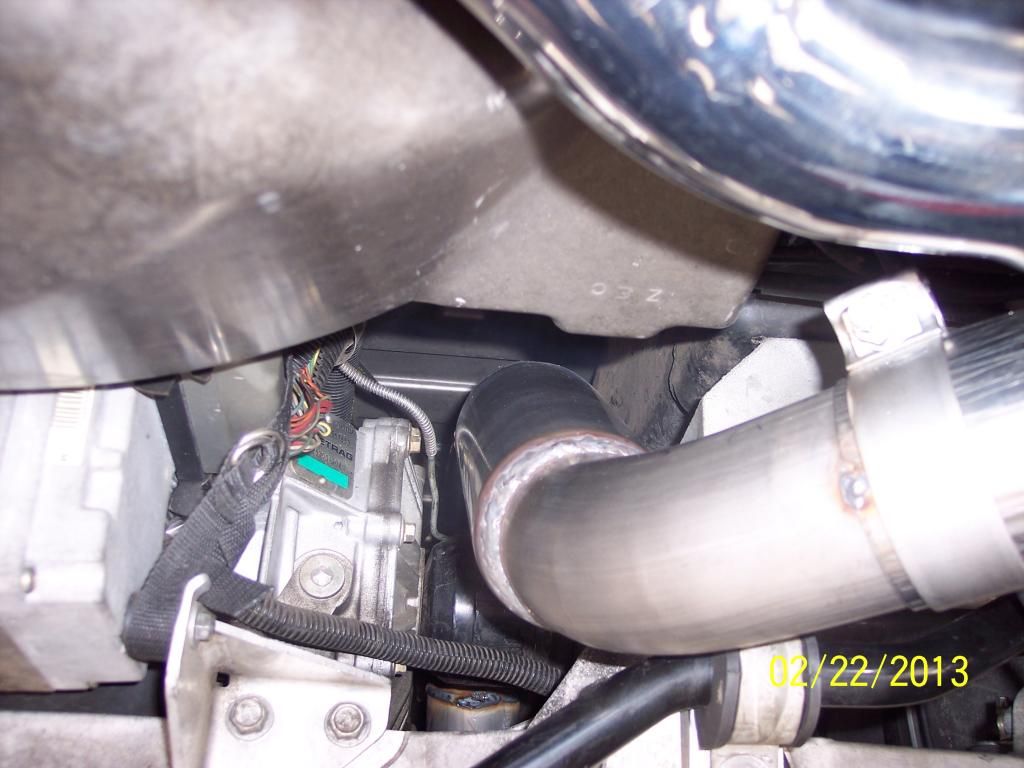
You will need to GRIND some of the Flange Ear off the "PASSENGER" Side of the exhaust manifold that is next to the AC Compressor for clearance - not much is needed -
You can see it next to the AC Line:
You also will need to Grind the Bottom Downpipe Flange and the GASKET
Now onto the Install -
Passenger Side: All the Bolts are easy to get to on this side -
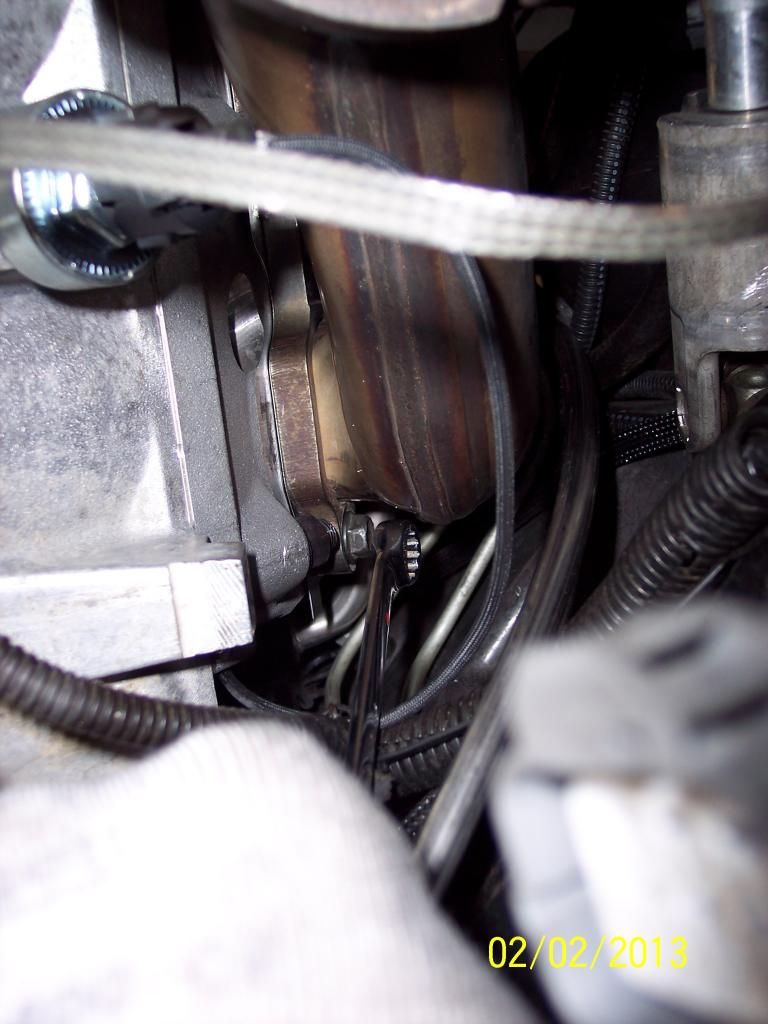
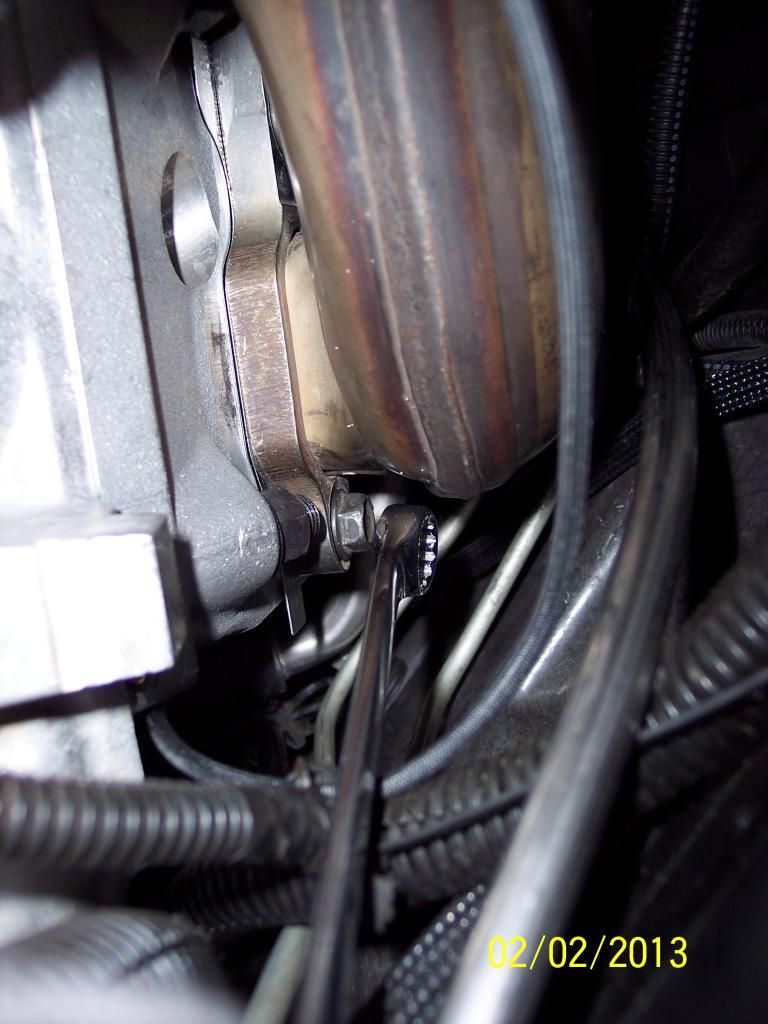
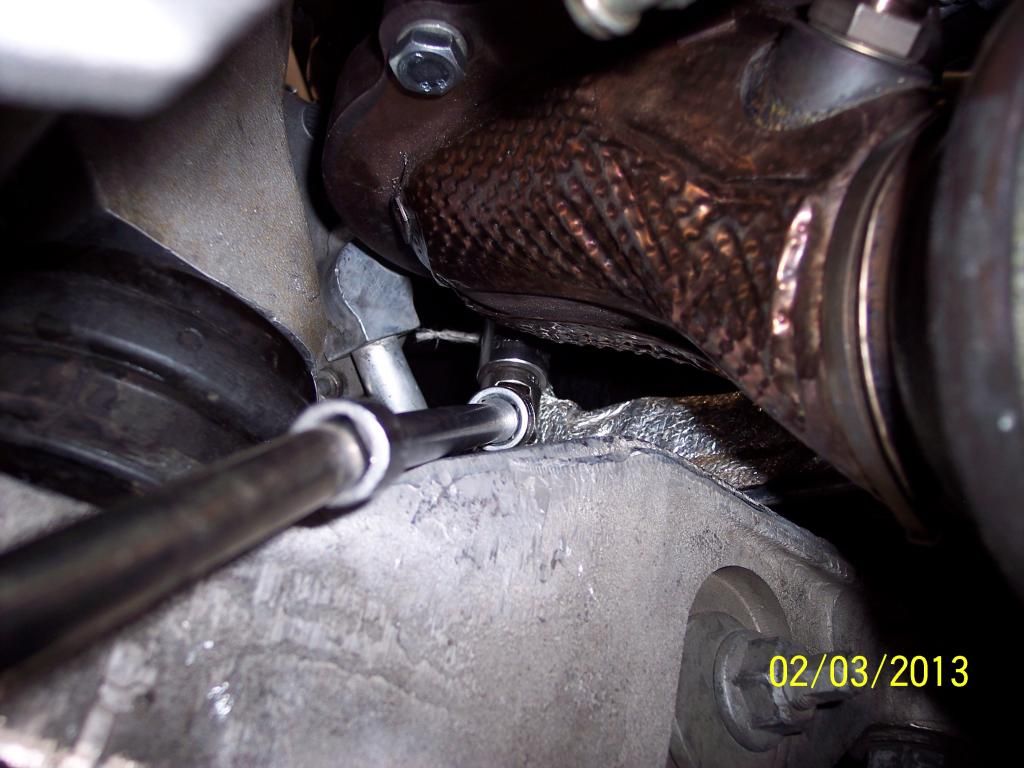
Drivers side - From the Bottom I used a "LONG" handled 13mm Wrench to reach the back most bolt to the manifold -
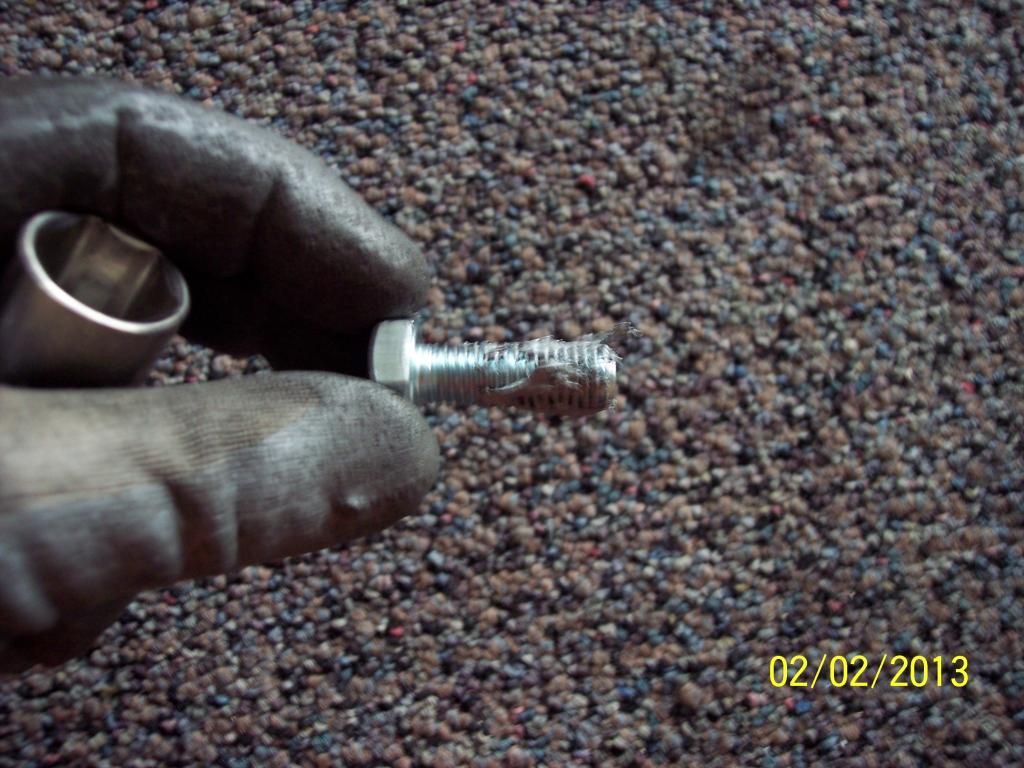
Downpipes - I used 2 of the factory studs on the DRIVERS Side and New Bolts on the PASSENGER Side (Studs wont work) 10mx1.5x36mm Bolts - Used Anti-Seize on all bolts and studs
Driver Side: All Studs and Bolts can be gotten with a socket very easily!
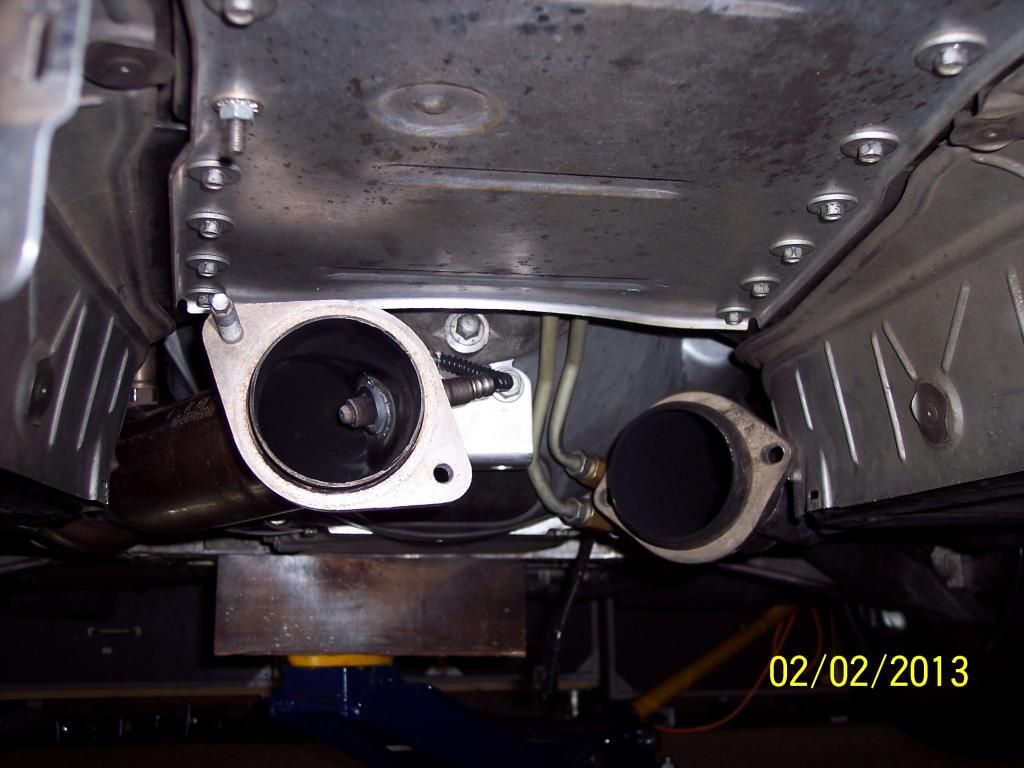
Comparison of the ZR1 3" Down Pipe to the Kooks Header Collector:
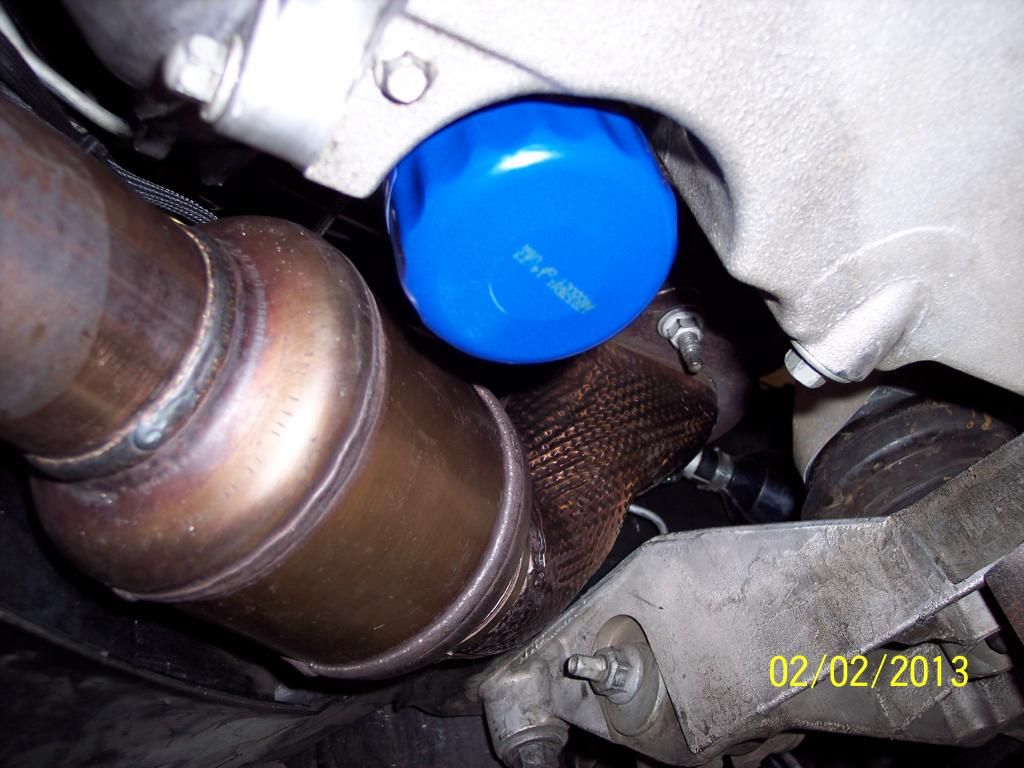
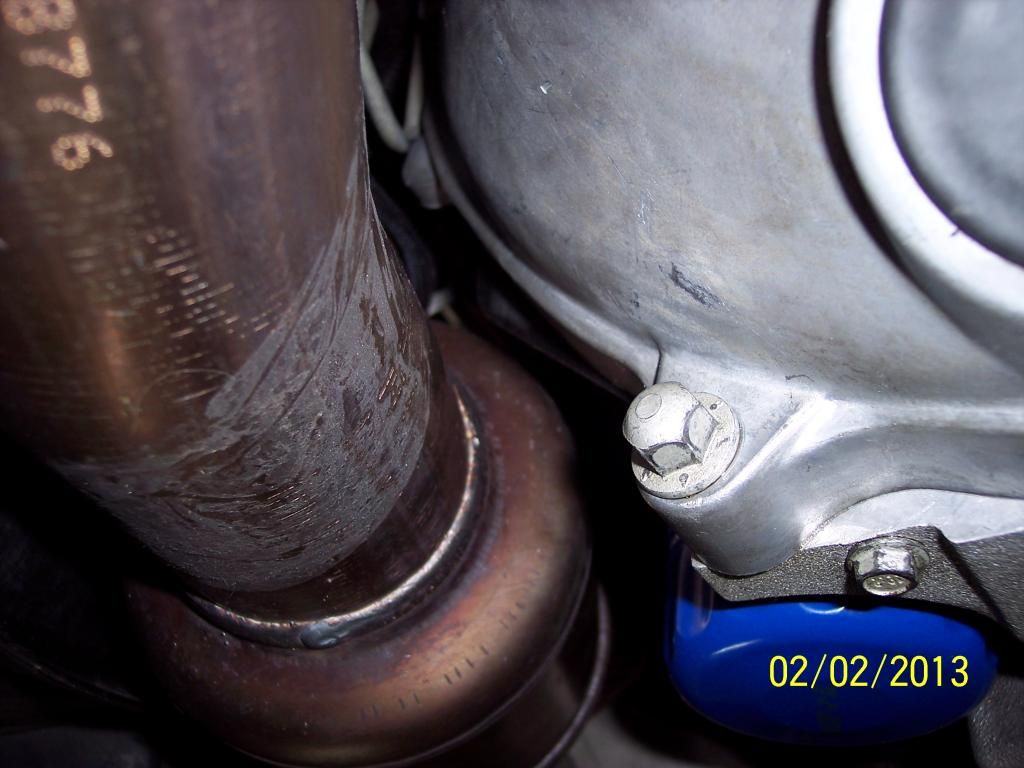
Passenger Side: I did cut the tab on the starter positive Cable and turn it downward to clear the O2 Sensor, I was able to use bolts on this side only and the furthest BOLT near the AC Line can be gotten with a extension and socket:
Plenty of Clearance:
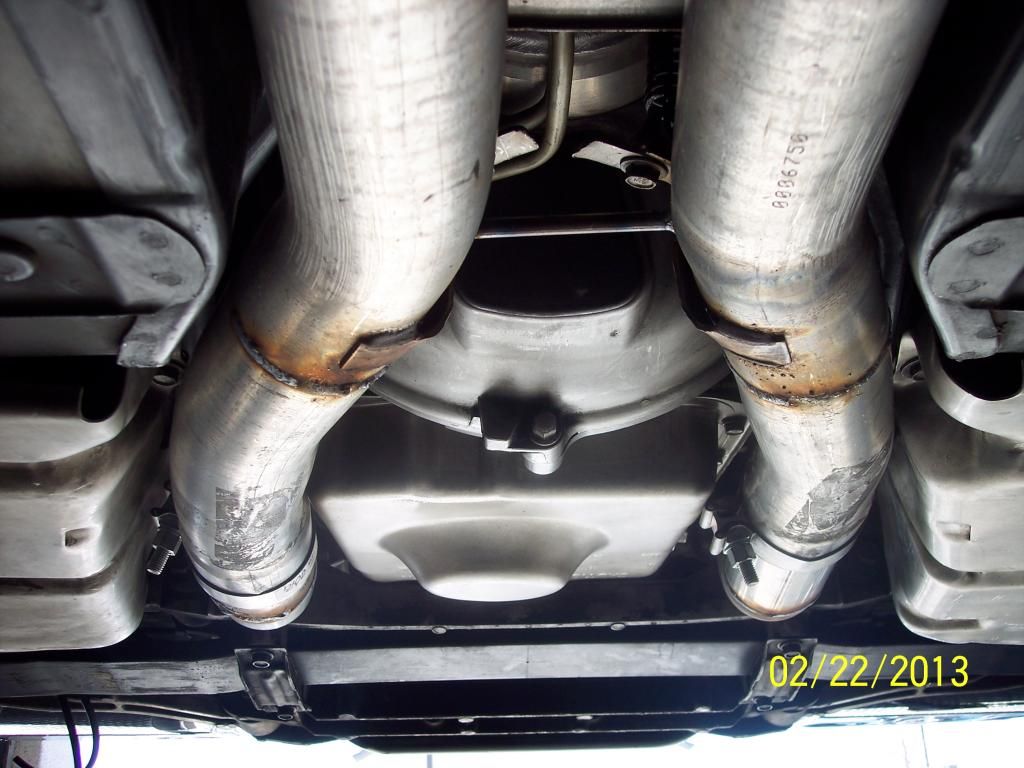
Getting ready for the 3" ZR1 X-Pipe:
3" ZR1 X-Pipe Install:
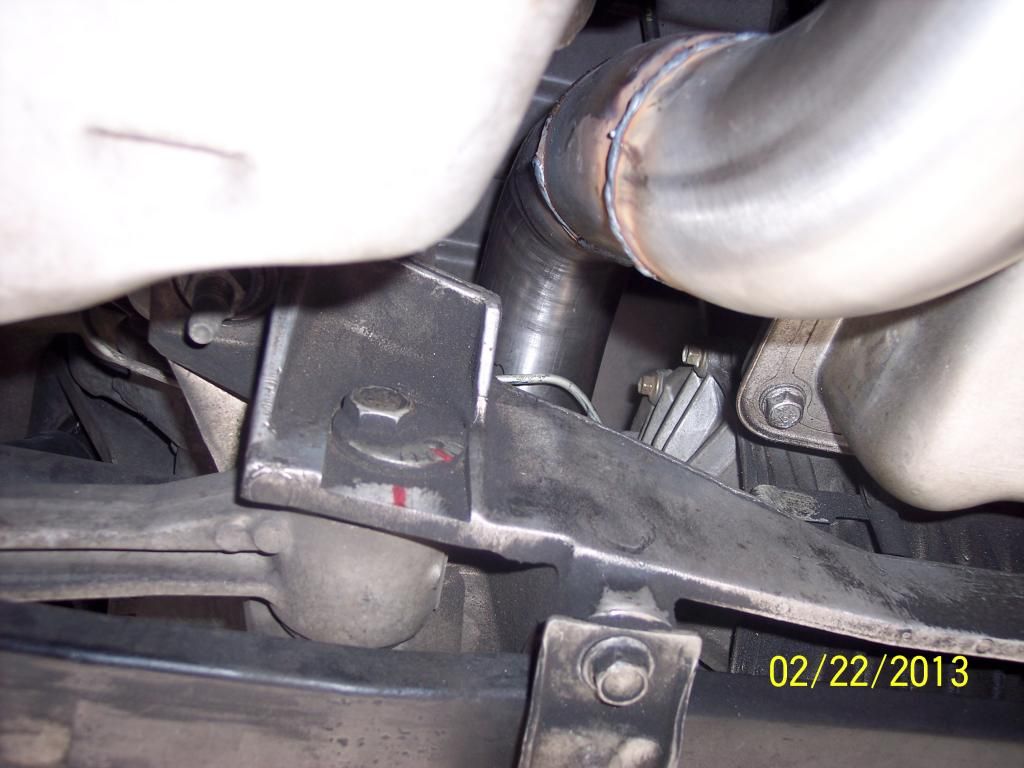
Now the Raer Hangers next tothe transmission are about 2" too far towards the rear and the 3" Tubes are too narrow and will have to be spread in order to clear the A4 tranny (Not sure of the MN6, but they should need some adjusting - I did some man bending to get the trajectory close to the C5's H-Pipe and off from touching the tranny pan
Cut here:
Did some man bending to get the rear hanger brackets about 1 1/2" - 2" forward:
Now time to do some spreading of the tubes slightly:
I had to cut the welds on the Factory 3" x 1" Clamps because they were hitting the A4 Tranny Pan:
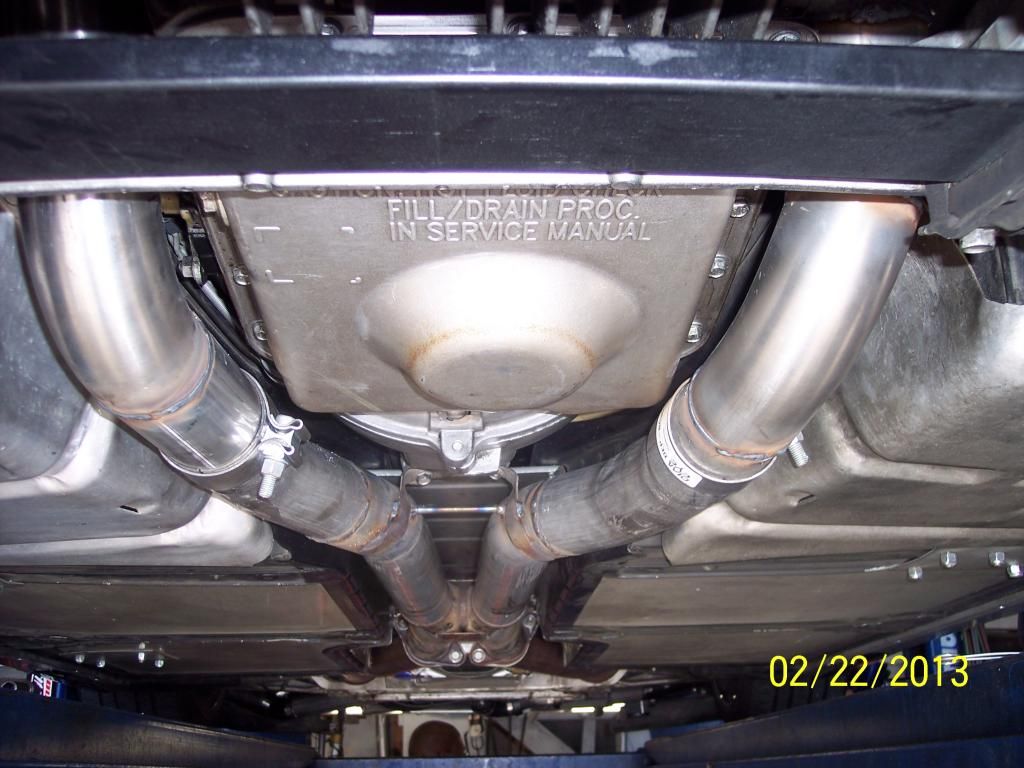
Now you can see that the trajectory is close to the C5 after the man bending and tweaking: Laid on top of C5 X-Pipe for visual -
Now time to hang the X-Pipe: I used the ZR1 Factory Studs and Bolts for the X-Pipe, made it real easy to hang -
Had to slightly tweak the skid pan with a rubber mallet for slight clearance:
A Look at the Rear Most Section:
Picture shot from the Front towards the Rear:
Now it is time to go over to the Muffler shop and get the B&B 3" Fusion installed: It was shipped from B&B in a couple pieces, that is the over the axle pieces - for the custom install and to make sure there is plenty of clearance -
You can see the mufflers the 3" over the axle section and the down section - a few pics the night before -
Here is a shot of the baffling inside the B&B Fusion Muffler - reminds me slightly of a Flowmaster design BUT not quite a flowmaster: You can see that once the Butterfly opens that it will bounce off the baffle and out the Bi-Mode Pipe and any extra pressure will be spent through the muffler out the quiet side too!
The Tips and Pipes:
At the Muffler Shop Getting Fabbed up: Had to do some pie cuts to the rear most section near the tranny on the 3" X-Pipe and welds to get the fitment just right (Joe is an excellent fabricator)
Closing the Pie Cuts:
Hanging the X-Pipe and installing the 3" Over the Axle Pieces and welding them up:
A Picture of the Drivers side muffler: I wrapped the tips in plastic wrap to protect them -
Passenger side and drivers:
Welding the pieces and finishing up: You will also notice between the rear hangers Joe put a small brace for strength -
Finished pictures and clearance pictures:
Done Pictures:
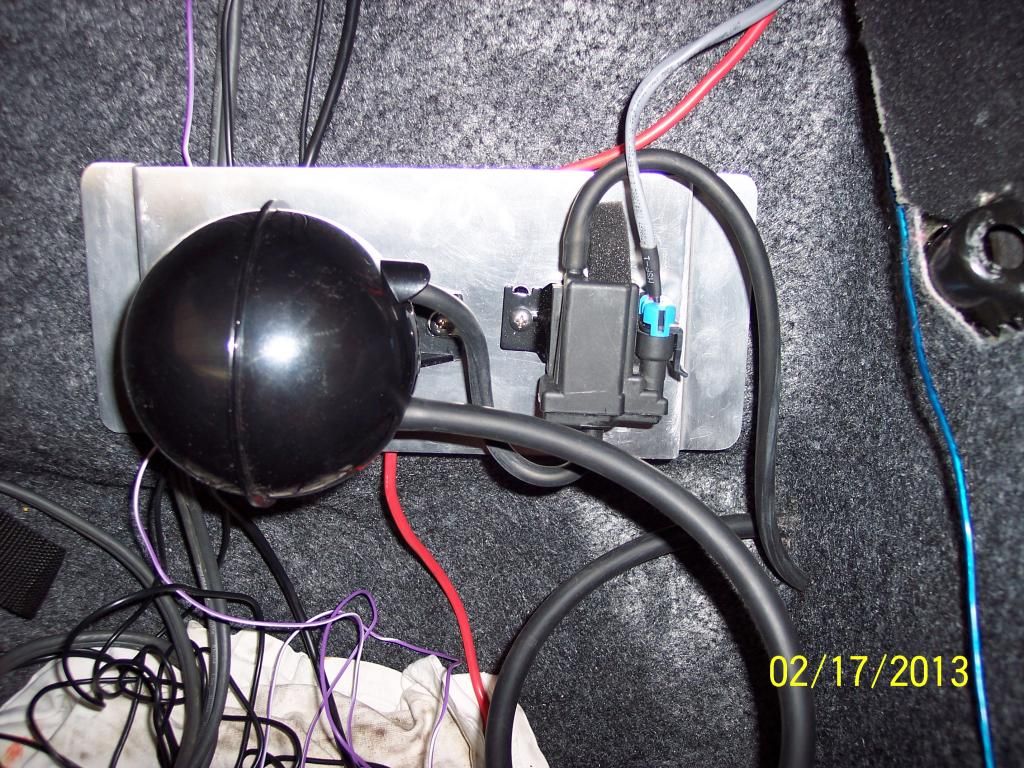
I wanted to follow B&B's Vacuum tube and wiring instructions but I did not want to use the Key Fob - I preferred to use a switch that I will leave in the ON position "BUT" will have a 12 volt ignition source power it immediately on start-up, thus allowing the vacuum to close the Bi-Mode butterfly valves (They are always in the open position)
I can flick the switch at any time from open to closed!
I ran my vacuum line down behind battery and down the cavity on the passenger side and over the rear fender well liner and followed the E-Brake cable coming out of the rear fender well and into the rear center compartment
I ran the wiring the way B&B said, down the inside rocker panel and up the seat belt post,over the hump and next to the speaker - however I did run it under the carpet into the compartment like my rear camera and Bazooka Tube wiring -
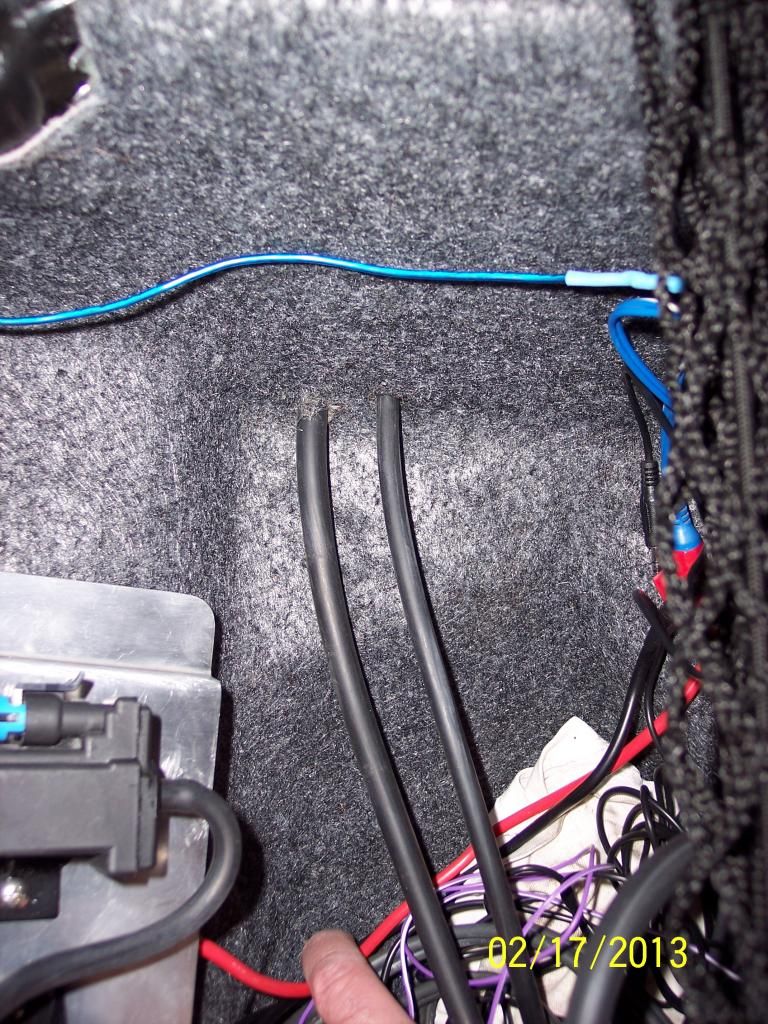
Over to the corner:
Then covered it with my Cargo Mat:
I think that is about it for now - It sounds awesome
I am going to take some video of it tomorrow for sound clips and visual , Sunday February 24th and post it up here as well -
I will also take some pictures of the Vette in the daylight to show the mufflers and tips etc.!
Bonus Pictures: You might of noticed I re-located my KNOCK SENSORS to the side of my block like the LS2, but used the holes already on the block - this gets a better reading should knock happen - I used the LS2 Knock Sensor Extension (Racetronix) for putting in a LS2 in the early Vette!
http://www.racetronix.com/RX-LS2-KSRH.html
Drivers Side:
Passenger Side:
Enjoy and I hope that is it for now!
Feel free to ask any questions! I will also be doing a Dyno in the near future for a comparisson from the Header system!
(call or text) 661-406-7516
Last edited by madmatt9471; 04-19-2013 at 06:33 PM. Reason: Fix Wording! Add Pictures! added video

 02-24-2013, 09:34 AM
#3
Team Owner
Thread Starter
And yes I wanted a true 3" system and it allows me to keep the RWHP and no exhaust restrictions and all the while I am California "****" Smog compliant!

Thanks,Matt
02-24-2013, 09:40 AM
#4
Melting Slicks

Matt, Tremendous post. I read the entire thing and learned quite a bit. Thanks for taking all that time doing the wrte up. Post of the year so far. Thanks!
Oh, and also, I'm envious as heck about the new setup. I will be checking for the vids and audio later today!! I'd love to know your cost for parts only. PM me if you want to share.
Now go take the audio/video
Oh, and also, I'm envious as heck about the new setup. I will be checking for the vids and audio later today!! I'd love to know your cost for parts only. PM me if you want to share.
Now go take the audio/video
02-24-2013, 09:46 AM
#5
Team Owner
Thread Starter
Matt, Tremendous post. I read the entire thing and learned quite a bit. Thanks for taking all that time doing the wrte up. Post of the year so far. Thanks!
Oh, and also, I'm envious as heck about the new setup. I will be checking for the vids and audio later today!! I'd love to know your cost for parts only. PM me if you want to share.
Now go take the audio/video
Oh, and also, I'm envious as heck about the new setup. I will be checking for the vids and audio later today!! I'd love to know your cost for parts only. PM me if you want to share.
Now go take the audio/video
Believe me my eyes were tired by the time I was finished doing the write-up -

I felt a little Koo! Koo!

Right now it is 6:46 AM - I will have to wait a little before I do the video, neighbors might not like it!

Thanks,Matt
02-24-2013, 10:18 AM
#7
Team Owner
Thread Starter
02-24-2013, 11:23 AM
#8
Safety Car

Outstanding writeup Matt!
Really like the extra steps w/ the smog tubes and dip stick, making this a complete replacement that's smoggable while having some really nice gains. The Fusions look really nice too!
Having done this coming from C5 long tubes, then trying on a set of LG Pro's to be sure I wasn't missing too much power-wise, the LS7 manifolds are back on and staying on. Aside from not having to deal with the smog issues, how much quieter the cabin and engine bay is, is night and day.
02-24-2013, 11:27 AM
#9

great write up, I am also thinking of doing this setup as well. I have long tubes as well,not on car at the moment. with this setup the only thing that looks like it might be a problem is the batwing pan. how much were the air tube hook ups, another small issue,but looks like you solved that.
02-24-2013, 11:32 AM
#10
Team Owner
Thread Starter
Outstanding writeup Matt!
Really like the extra steps w/ the smog tubes and dip stick, making this a complete replacement that's smoggable while having some really nice gains. The Fusions look really nice too!
Having done this coming from C5 long tubes, then trying on a set of LG Pro's to be sure I wasn't missing too much power-wise, the LS7 manifolds are back on and staying on. Aside from not having to deal with the smog issues, how much quieter the cabin and engine bay is, is night and day.
Really like the extra steps w/ the smog tubes and dip stick, making this a complete replacement that's smoggable while having some really nice gains. The Fusions look really nice too!
Having done this coming from C5 long tubes, then trying on a set of LG Pro's to be sure I wasn't missing too much power-wise, the LS7 manifolds are back on and staying on. Aside from not having to deal with the smog issues, how much quieter the cabin and engine bay is, is night and day.
I totally agree that the cabin is really, really quieter than before and the wife really, really appreciated that too!
Especially with the Fusions on it is even better - even really nice while driving with the Butterfly open too!

Thanks,Matt
02-24-2013, 11:40 AM
#11
Team Owner
Thread Starter
great write up, I am also thinking of doing this setup as well. I have long tubes as well,not on car at the moment. with this setup the only thing that looks like it might be a problem is the batwing pan. how much were the air tube hook ups, another small issue,but looks like you solved that.
NO Charge $ to weld them up from my fabricator since he was going to do the rest of the system anyway!
You will not have a problem with the "Batwing" pan, it will still fit with plenty of room. The problem with the "Batwing" pan it installing and removing Long Tube Headers - having the LS2 pan was just a added benefit!
I got tall the gaskets brand new for $100 shipped from GM Part Direct!
Believe this or not my muffler/fabricator was only going to charge me $120 for the job, I gave him $200 and $14 cash tip! He does too many good things for me to feel like "I" short changed hin!

Right now there is a member selling a complete set-up in the Southern California section and for a good price too:
http://forums.corvetteforum.com/sout...is-obispo.html
Tell him I sent you!
Thanks,Matt
02-24-2013, 12:02 PM
#12
Pro


You have put a lot of thought and energy into this project. The write up is excellent and the photos are great. My point you ask?
How will this altered exhaust be legal in California? I understand that these are factory exhaust manifolds and head pipe/cats. Aren't they altered? Is it acceptable to position and weld the A.I.R. tubes?
I think what you have done is great. I just want to be sure it will fly before I spend the time, effort and money.
02-24-2013, 12:09 PM
#13
thanks Matt, I am waiting for my long tubes to sell for the $$$ to do this. would love to see your setup in person. Installing the long tubes was not a problem, so I should not have to much problem with this setup. I work in machine shop so making air tubes should not be problem, just need to find out what stainlees to use.
Mike
Mike

 02-24-2013, 01:10 PM
#15
Team Owner
Thread Starter
You have put a lot of thought and energy into this project. The write up is excellent and the photos are great. My point you ask?
How will this altered exhaust be legal in California? I understand that these are factory exhaust manifolds and head pipe/cats. Aren't they altered? Is it acceptable to position and weld the A.I.R. tubes?
I think what you have done is great. I just want to be sure it will fly before I spend the time, effort and money.
How will this altered exhaust be legal in California? I understand that these are factory exhaust manifolds and head pipe/cats. Aren't they altered? Is it acceptable to position and weld the A.I.R. tubes?
I think what you have done is great. I just want to be sure it will fly before I spend the time, effort and money.
As for the Air Tubes - I put those on there for visual and functional purposes (In case I wanted to turn the Air Pump back on) - A few of the other C5 members have not even put a set of Air Tubes on their set-up and have passed the visual -
The Air Tubes are only on for 30 seconds on initial start up of your vehicle and shut off and in no way will they make you fail a smog check, especially the visual! (The only way you will FAIL a smog check is "IF" your Check Valve fails on the Smog Air Tube set-up
)Plus the p[osition of the Air Tubes in the the stock location for the '97-'00 C5 Corvette's!
It will fly and it it will pass California Smog and it does does not drop off in power what-so-ever!
HECK! I passed with Longtube HeadersI just nailed it at 82 MPH (it is 40* and cold out here) and it broke the rear tires loose and got side ways - that is very rare that it gets out of control at 80 MPH, usually it happens at 75 MPH and below

I am close to you so if you ever would like to see it in person I would love to shop it to you!
Thanks,Matt
02-24-2013, 01:13 PM
#16
Team Owner
Thread Starter
thanks Matt, I am waiting for my long tubes to sell for the $$$ to do this. would love to see your setup in person. Installing the long tubes was not a problem, so I should not have to much problem with this setup. I work in machine shop so making air tubes should not be problem, just need to find out what stainlees to use.
Mike
Mike
You should have no problem with the set-up at all - plus I don't live real far and am only a phone call away!
As for the stainless that Kooks uses it should be the same as any of the other Header Companies use - regular and easy to get!
Whenever you want to set something up I am good and we can see if our schedules will mesh and make it happen!
Thanks,Matt 661-406-7516
02-24-2013, 01:52 PM
#17
Team Owner
Thread Starter
Video and sound clips:
Thanks,Matt
Thanks,Matt
02-24-2013, 06:24 PM
#18
Melting Slicks
02-24-2013, 06:41 PM
#19
Race Director


Member Since: May 2003
Location: Iowa
Posts: 13,995
Received 2,706 Likes
on
1,668 Posts
St. Jude Donor '03-'04-'05-'06-'07-'08-'09-'10-'11-'12-'13-'14-'15-'16'-'17-�18-'19-'20-'21-'22-
'23-'24


AWESOME write up
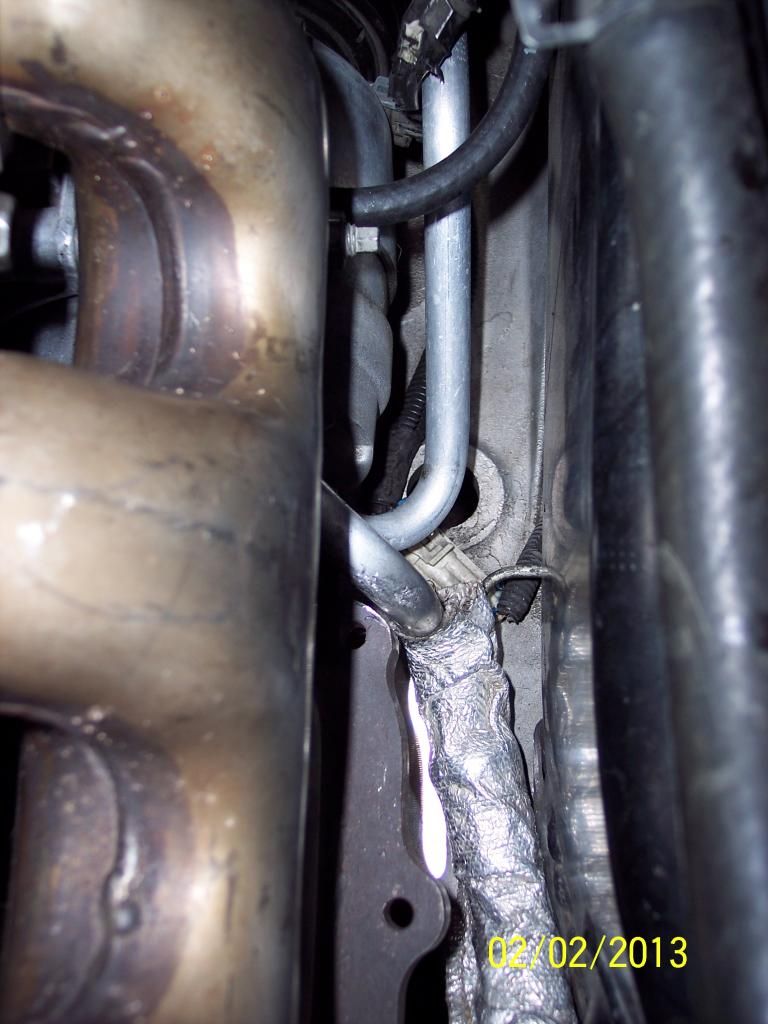
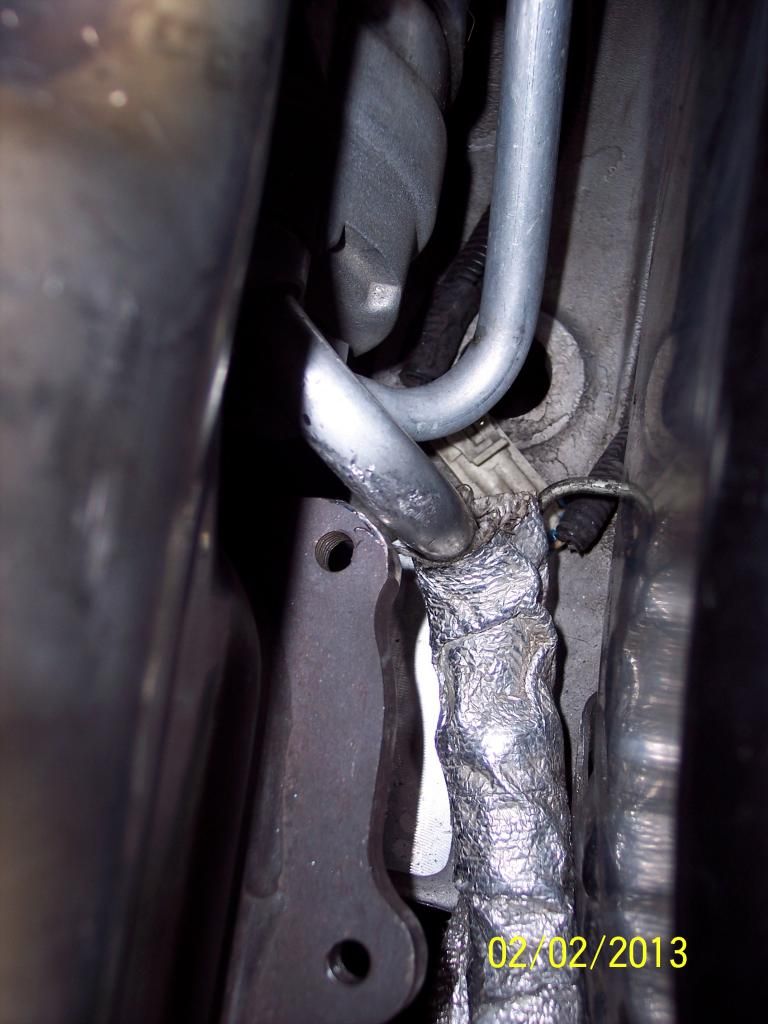
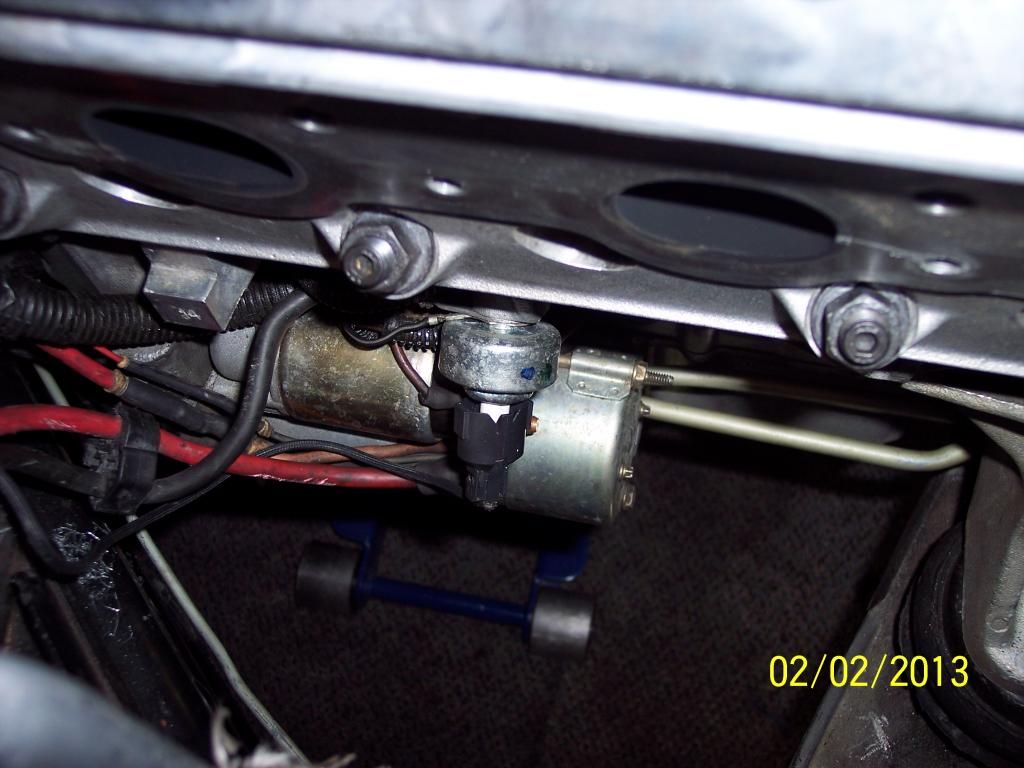
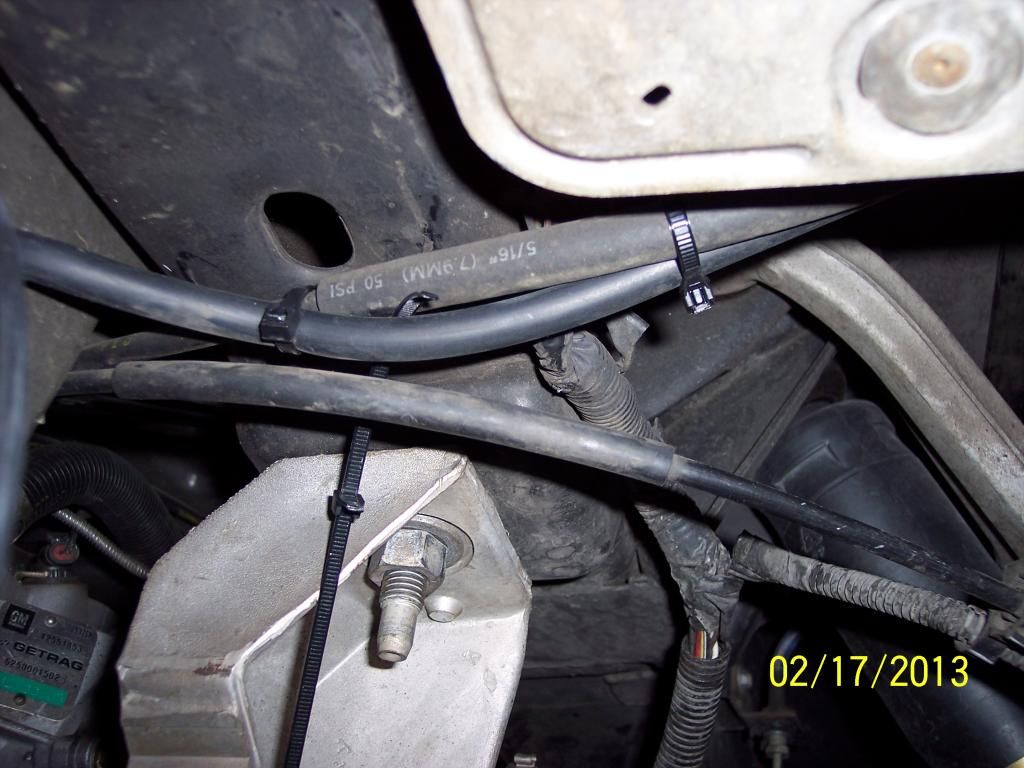
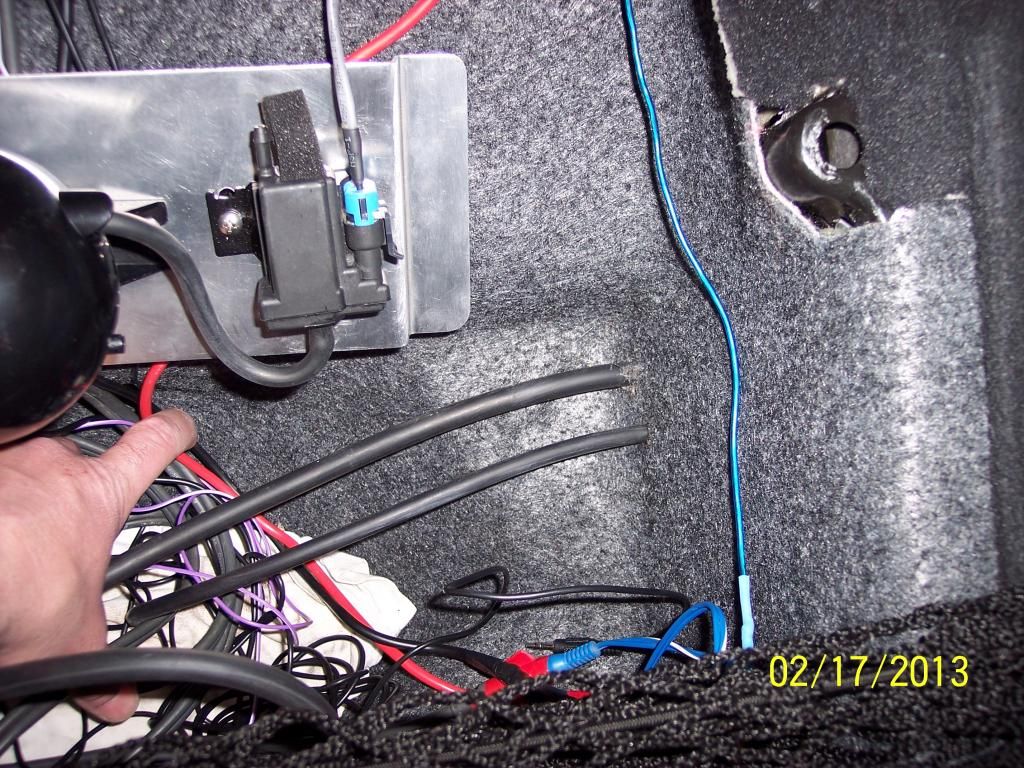
This picture has me concerned. Is one of those the wire from the battery to the amp? If so, please put a grommet around the wire. Without a grommet, the power wire insulation will wear over time. You do not want that to happen.
If that is not a power wire
This picture has me concerned. Is one of those the wire from the battery to the amp? If so, please put a grommet around the wire. Without a grommet, the power wire insulation will wear over time. You do not want that to happen.
If that is not a power wire
02-25-2013, 06:39 AM
#20
Team Owner
Thread Starter
AWESOME write up
This picture has me concerned. Is one of those the wire from the battery to the amp? If so, please put a grommet around the wire. Without a grommet, the power wire insulation will wear over time. You do not want that to happen.
If that is not a power wire
This picture has me concerned. Is one of those the wire from the battery to the amp? If so, please put a grommet around the wire. Without a grommet, the power wire insulation will wear over time. You do not want that to happen.
If that is not a power wire
(1) The fat one is the Vacuum line from the motor to the Vacuum pod for the B&B Fusion(Much like a brake booster)
(2) The smaller of the two is the vacuum line coming out of the pod to the B&B Fusion mufflers pods to control the Bi-Mode butterfly valves (That is to operate the open straight through side)
Thanks,Matt