When you click on links to various merchants on this site and make a purchase, this can result in this site earning a commission. Affiliate programs and affiliations include, but are not limited to, the eBay Partner Network.
I've seen some posts lately describing an issue I had with air coming out of all vents. While I've wanted to write this up since last summer, I just haven't really had much time. So, the below dates back to mid July last year.
Quick flashback to the winter of 2015/6:
Around New Years I was working on my car and noticed battery acid at the base of my battery tray and on the frame just underneath it. I didn't think much of it at the time, as there hadn't ever been any issues, so I quickly neutralized the acid (wasn't too warm out to do a thorough job) and thought nothing of it. As the battery was replaced by the dealer when I bought my car, I didn't think this acid was the result of a current issue. In addition, because it was winter, and road salt was everywhere, it was a few months before I started driving the Vette again- and even longer before I started to use the HVAC on anything but the lowest fan speed. So, with that, fast forward to the first really HOT day in 2016�
�when I noticed the AC was really weak. Freezing cold, but barely coming out of the vents. It was the first time I was using the AC in a while so I didn't think much of it, at first. A few days later, I was driving on a humid night and my front windshield starts fogging up. Turns out there was ice cold air coming out the defroster vents when my HVAC settings didn't call for the use of these vents. Feeling around, I noticed air was again weakly coming out of all vents. A quick search here mentioned a leaky battery could result in acid eating through the HVAC actuator door vacuum lines (don't know the formal name for this) resulting in the symptoms I observed. After seeing the past evidence of a leaky battery, this seemed like it could be my problem. However, I was also slightly alarmed knowing the main wire harnesses were in the same vicinity, and did not yet know what mess I may come to find myself in. (Slight spoiler: wires were thankfully fine)
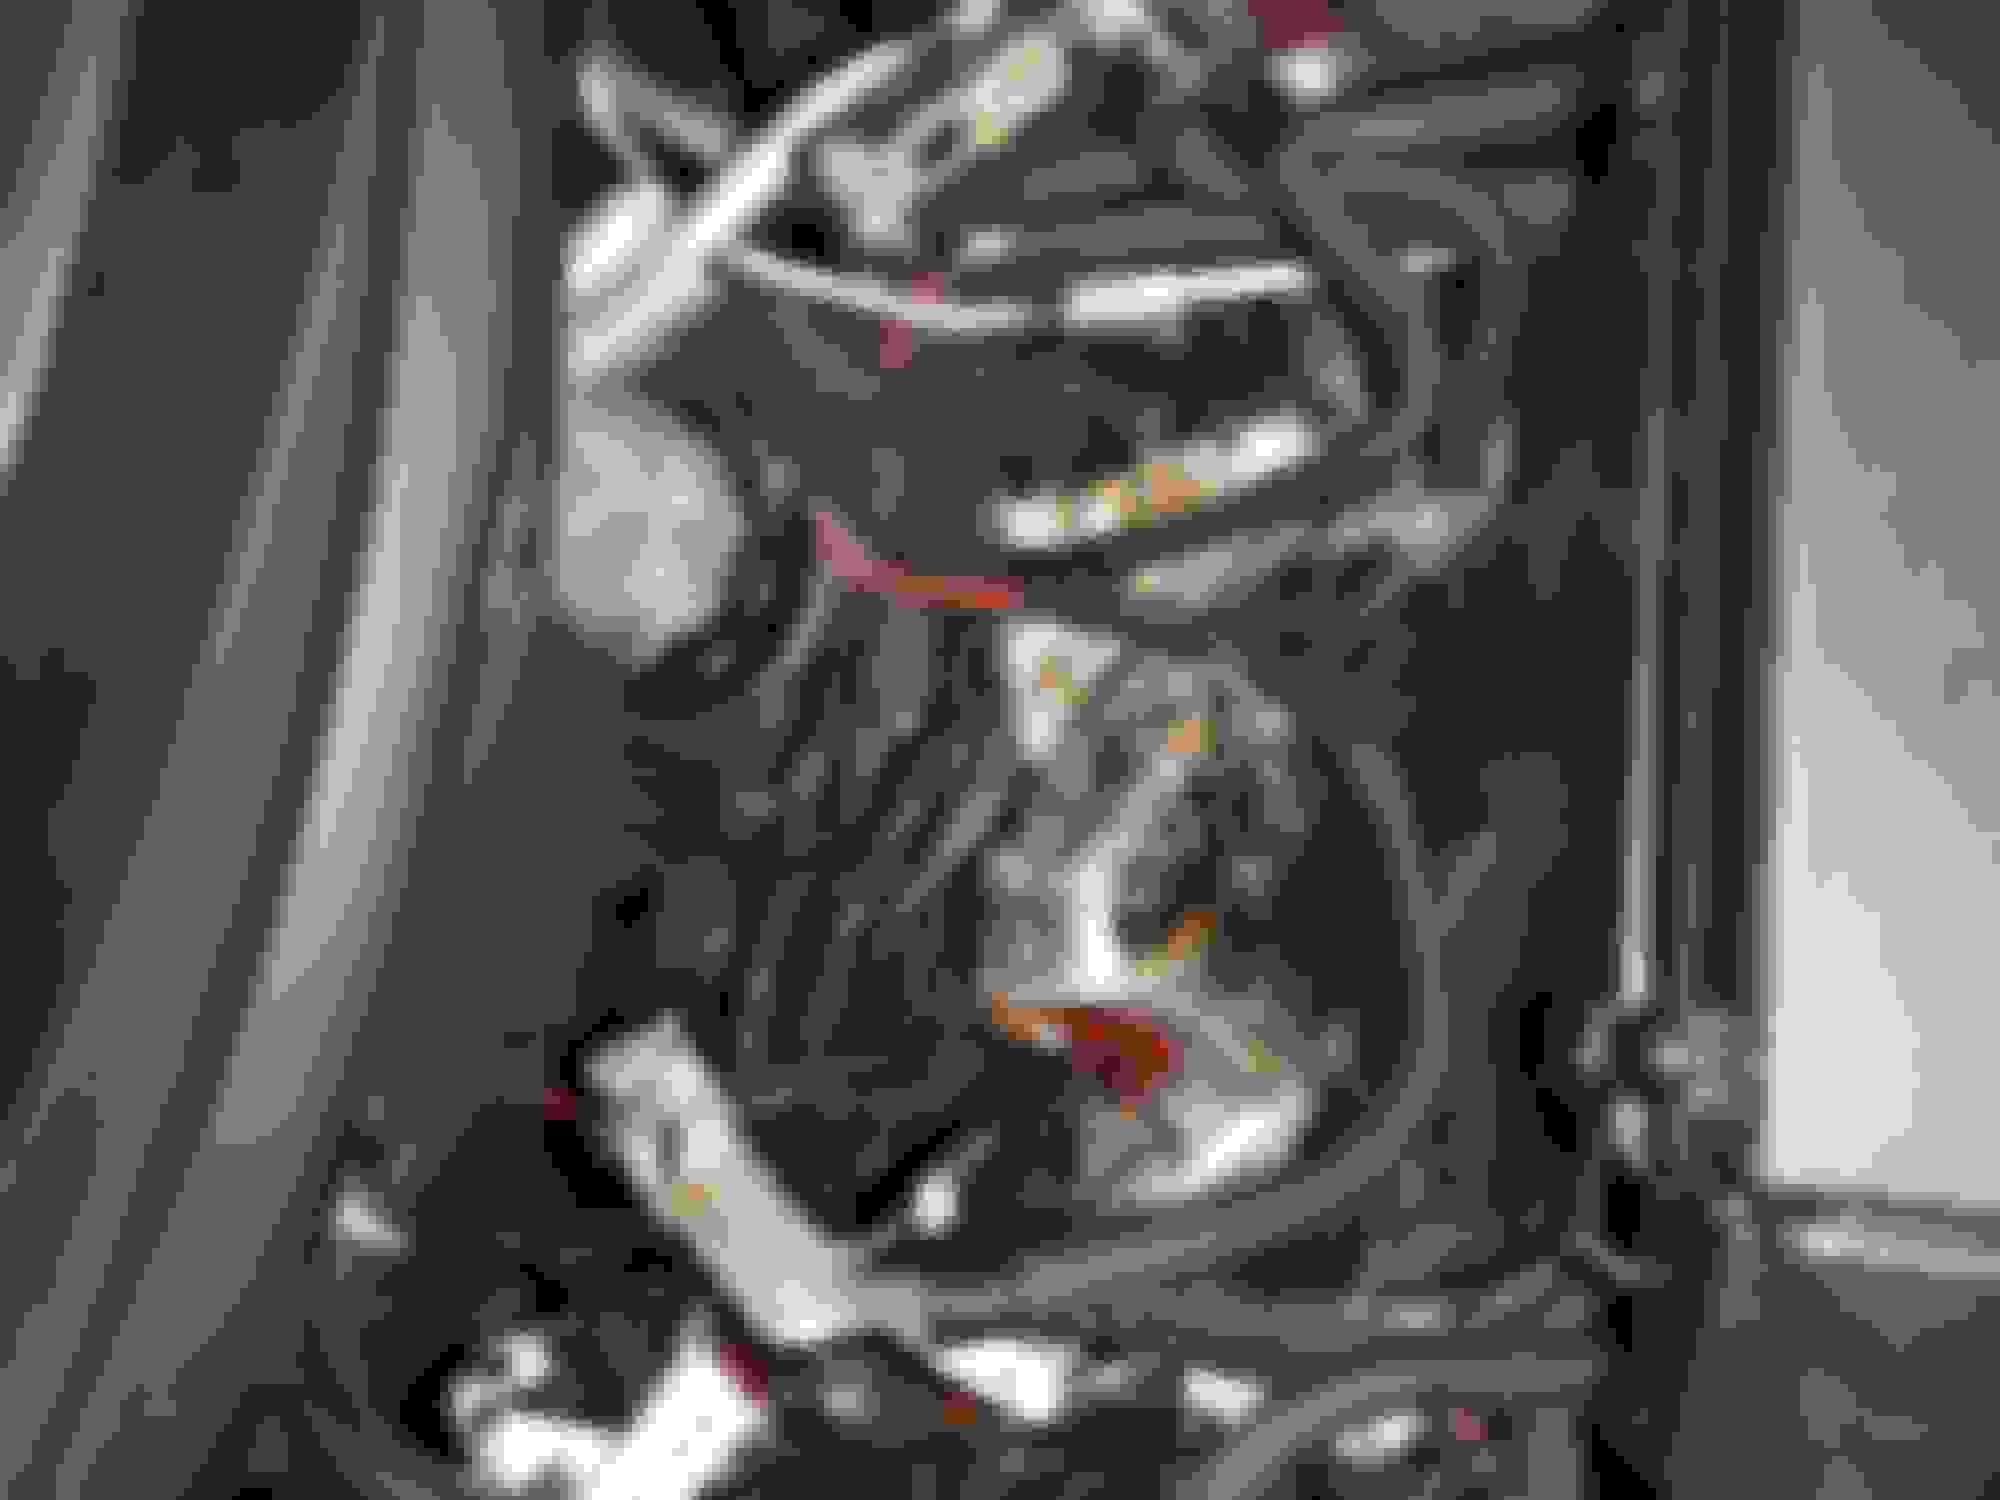
Finally, I am off from work for 2 weeks in July, with 4 days completely free before my wife and I left for a vacation. Perfect amount of time fix what I thought could be an issue with my vacuum line. First step was removing the battery to see what I would find. It wasn't pretty, the acid was back and made a mess, mostly on the metal frame. However, I saw residue on the wire harnesses and discovered a damaged vacuum line. In addition, I also saw a fair amount of residue down the side of the frame, and from the first look, thought it went down by the ECBM/PCM. To get a better look, I took off the access panel in the passenger side front wheel well. Below is what I saw:
The mess to clean up
If you look carefully you'll see a small hole in the vacuum line (in-between the Y of the wire bundles)
More mess to clean and sort
Knowing how much work it is to fix wires whose insulation was eaten by acid, and having heard stories of how the acid could go onto damage the ECBM and PCM, if left to run its course, with the time I had, I was going to fix this the right way- once and for all. To me, "right" meant taking off that quarter panel to thoroughly neutralize the acidic residue and repaint as needed.
While taking off the quarter panel sounds easy, it was the first time I've ever attempted this on any car, so I was a bit nervous. However, with 20/20 hindsight, it actually wasn't so difficult. Plastic baggies to organize parts, and many reference photos, proved to be quite helpful. While I've read it is possible to remove the quarter panel without removing the passenger side light, I wasn't able to get my hands in a position to access the two bolts slightly obscured by the light, so out it came.
Passenger side light removed
Passenger side light removed- Look where the bumper and quarter panel meet. You'll see an obscured bracket; this is where the bolts attaching the panel to the bumper are located.
Aside from the bolts attaching the front end of the quarter panel to front bumper, all other bolts are relatively easy to access. You have the bolts on the top of the quarter panel in the engine bay, one underneath the quarter panel- attaching it to the body of the car (near where you jack up a C5), and you have one bolt hidden inside the access panel that attaches the panel to the body of the car
View of the bolt located inside the quarter panel
The bolt location at the bottom, rear of the quarter panel
Quarter panel removed
With the quarter panel off, the next item on the list was to fix the busted vacuum line. To do this, I cut the damaged vacuum line away, along with a smaller section, so that I could fit, and clamp, a rubber air hose over the existing line.
At this point, I reconnected the battery to confirm the HVAC was working correctly. Thankfully, it was! With the line fixed, it was time to neutralize the acid residue on the frame, wires, battery tray, ECBM and PCM. Neutralizing the acid took a few boxes baking soda (and some store bought neutralizer after I ran out of baking soda), various brushes, some water to rinse the mess away, and a catch pan for the run-off. Basically, I doused everything with baking soda, scrubbed away, let the mess sit, rinsed with water, and repeated the process numerous times. To clean the wires, I cut the electrical tape holding the mesh binding the wires together, separated the wires the best I could and cleaned them using the process described above. I also followed this same procedure, although much more delicately, to clean the ECBM and PCM.
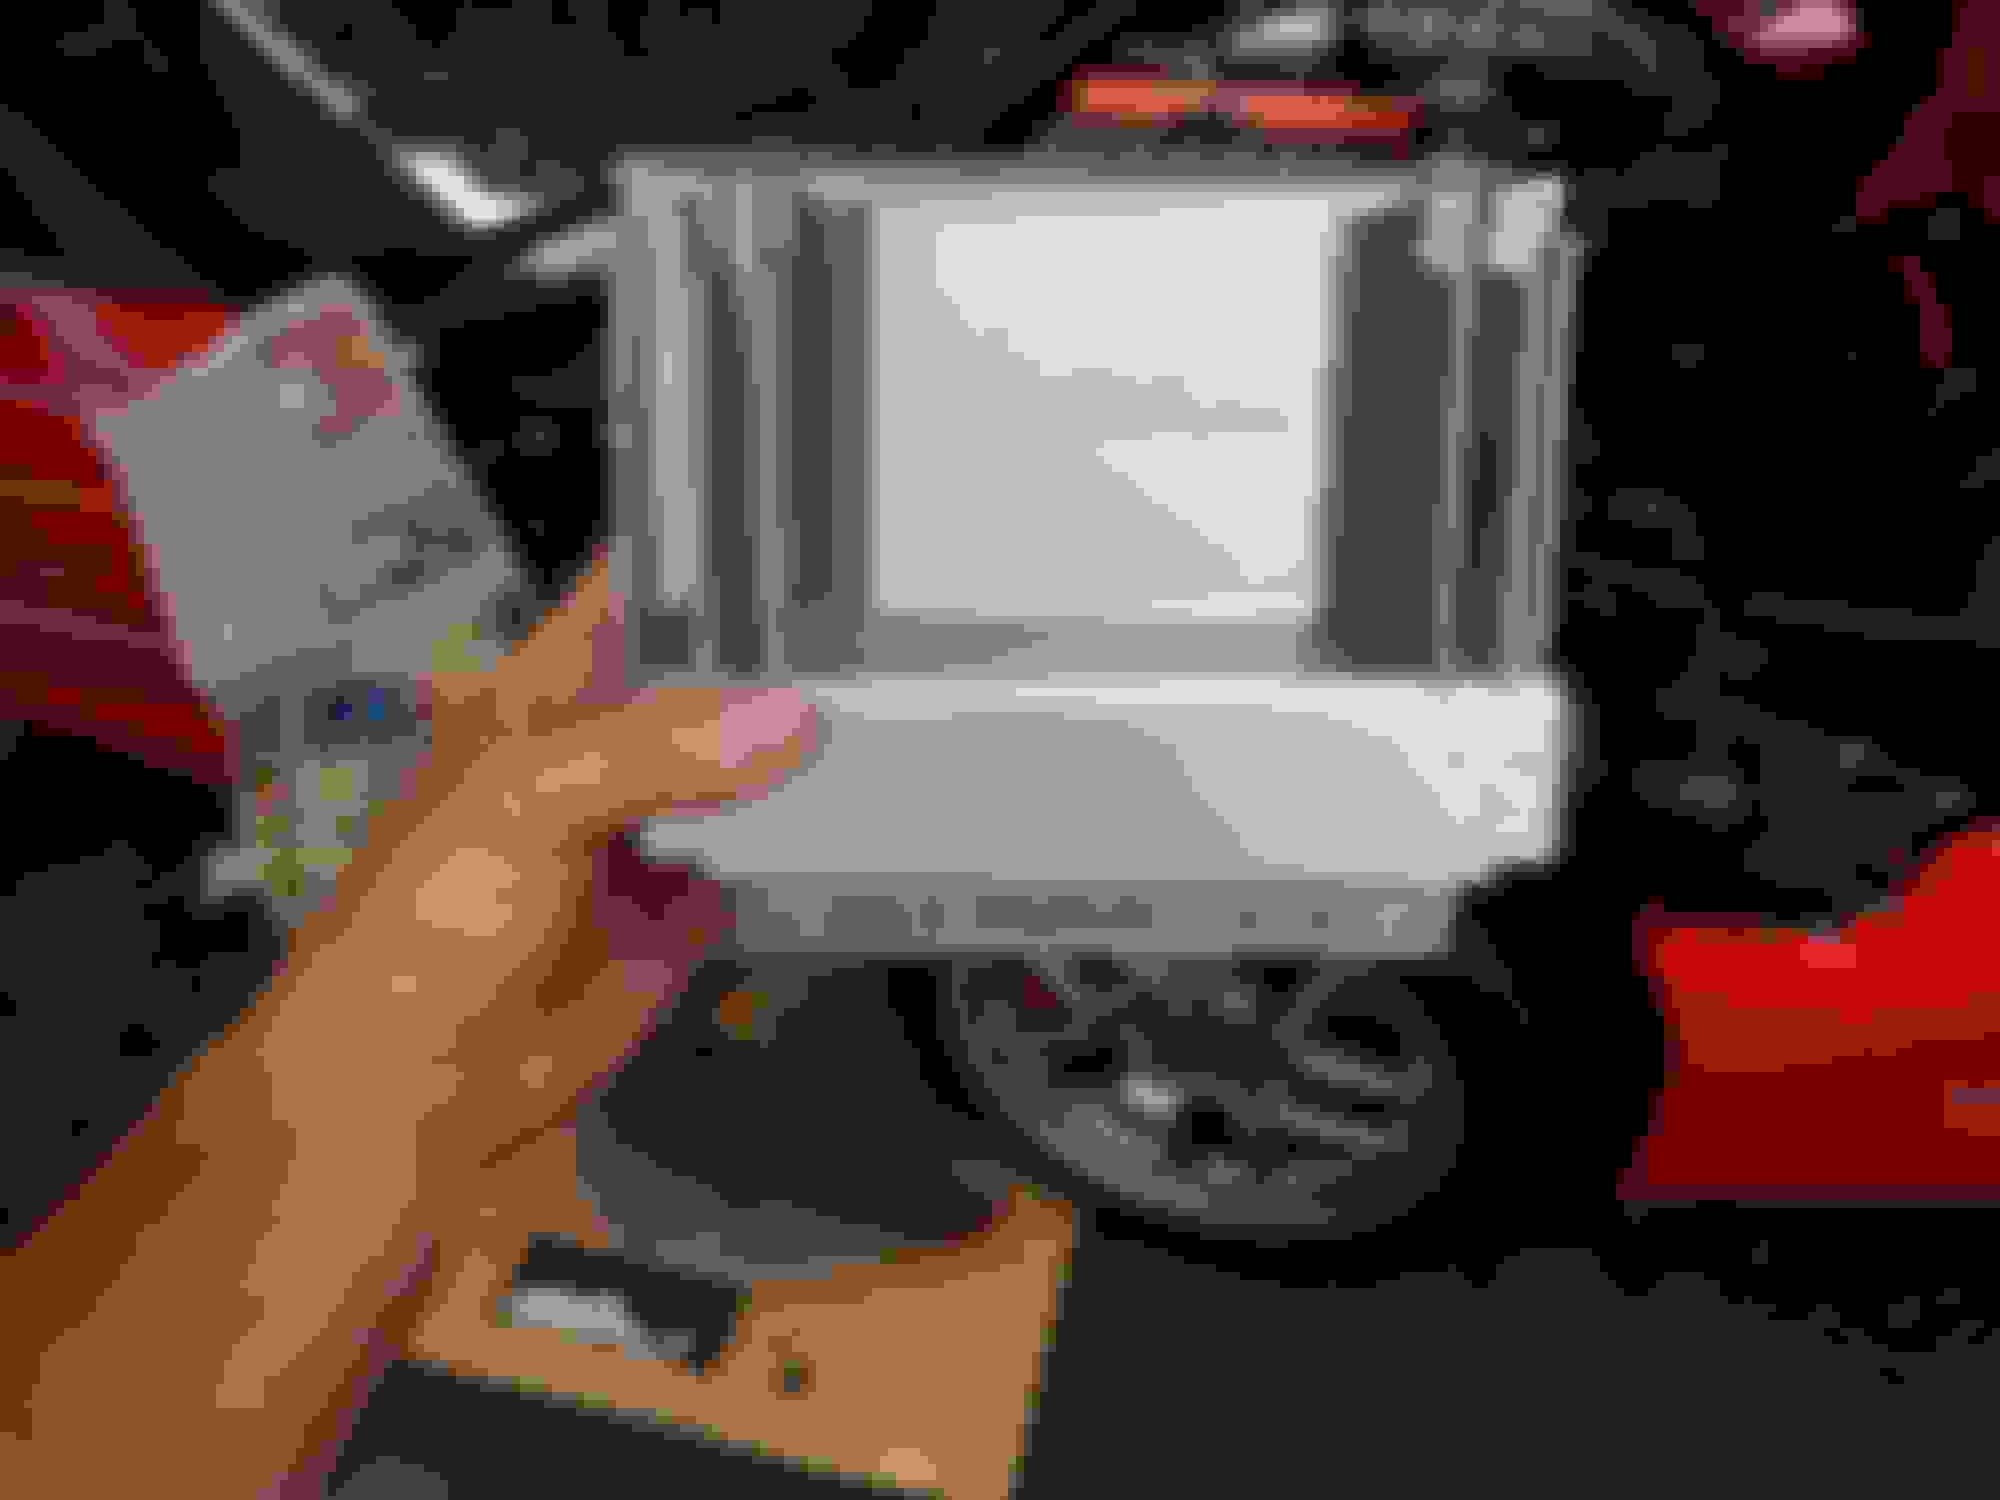
ECBM before any clean up
Luckily the connector pins were in perfect condition.
Carefully collecting the mess
The only hiccup encountered to this point was that I broke the plastic mount that holds the ECBM to the frame, which presented me with the problem of how to get my Vette up a slightly inclined driveway and back into the garage before leaving for a vacation�another story for another time.
�Whoops
After cleaning everything well, and letting it all dry thoroughly, it was time to prime, paint, and clear the frame under the battery tray.
Primed
Painted and cleared
ECBM post cleaning and painting
Another view of a cleaned, painted ECBM
ECBM, PCM, udder, wire harnesses reassembled
Nearly there!!
All finished)
So, how'd this all happen? I always wondered how the battery in the C5 was clamped down. What I didn't realize until I started this process was that the front clamp that holds down the battery was missing on my car. So my guess is the battery had extra play, leading to the leak. As part of this repair, I ordered a clamp and found a bolt that would fit the battery tray at a local store. It has been almost 8 months since my repair was finished and in that time the HVAC has been working fine, without issue. Once the weather warms, I'll take the battery, and battery tray out, to confirm I am indeed still issue free.
Very good writeup. Thanks for posting it. I love pictures with instructions so this works. Sorry you had the leaking battery issue. I did too but it was back in 2007. You did yours the right way.
Wow...great job fixing that mess. Looks like kind of a total PITA. I can't work on cars (not knowledgeable enough...yet), so that would have been a financial nightmare for me. That's why I'm glad I replaced a lead acid battery that was working perfectly and was only 2-3 years old with an AGM. That was eye opening. Thanks again for sharing.
Great write up. I'm sure it will help someone in the future. Hopefully not me!
Thanks for the props everyone! I hope this thread goes to help someone down the road. It wasn't fun to find that mess, but I love diving into fixes like this. Wasn't mechanically complicated (luckily) and end result was rewarding. The only not-so-fun part was being baked by the hot sun, with no breeze. At one point I had a patio umbrella wedged in the hinge of my garbage can to help create some shade. That and a box fan went a long way. It was quite the sight...but it worked
As far as what battery type it was and where the leak originated�It was a normal lead acid, top post battery. However, it was some off brand I never heard of (don't recall the name). When i took out the battery, it was wet along the backside of the casing. So my guess is that there was some crack I couldn't see along the top back, and the acid just ran down the casing onto the frame.
Really Great Post!! First of All thanks for the time you invest on this
I don't know if my problem could be related to the same, I have a C5 1998 with only 10,000miles on it so you may imagine that I don't replace many times the battery
Well, in the pst months when the temperature was cold, I took a ride and ask for the AC control to high a little the inner temperature but I noticed that was very hot air so then I low the temp but continued very hot so the I took it to the lowest temp and was when started to blow cold air, I thought that could be something related to vacuum.
The the car was stored again for more than a month and just today, a day a little warm, I tried to take the inner temp to a comfortable feeling and justa a last time, If I ask a little warmer, starts to blow very hot air so I have to put in lowest temp so I it can blow cold air BUT I notice that is colder in the passenger grills than in the drivers!!
I wish I could help more with that one, but I'm not sure what that could be. My temperature always came out according to my HVAC setting and the dual climate control always worked before this fix. A quick way to see if there is an acid leak would be to take the battery out and take out the tray it rests on. If you don't see any residue then I'd think you would be able to cross that off the list.
One reason why both of my Z06's I have always replaced the Lead Acid battery with a expensive but worth it AGM battery, they are fully sealed and wont ever leak. Sears sells one that is actually a very good unit: DieHard Platinum size 75/86DT CCA 880 and RC 135 , It's identical to the Odyssey unit but $75 cheaper. (that's the one for '04Z's but might work for other cause it has top and side posts)
I wish I could help more with that one, but I'm not sure what that could be. My temperature always came out according to my HVAC setting and the dual climate control always worked before this fix. A quick way to see if there is an acid leak would be to take the battery out and take out the tray it rests on. If you don't see any residue then I'd think you would be able to cross that off the list.
thanks men!
you know?... I'm noticing a little "clicking" noice from maybe the rear of the Radio, just like clocking so maybe could be the gear/mesh that opens the little part that lets pass on the air from heating son maybe opens more than it has to or don't close full

 03-06-2017, 12:22 AM