When you click on links to various merchants on this site and make a purchase, this can result in this site earning a commission. Affiliate programs and affiliations include, but are not limited to, the eBay Partner Network.
Those of you that have already installed your DD in the VN Bezel........have you found any issues that those of us about to do this install should know about??
Thanks in advance!
And has anyone tried Marc's new adjustable DD bracket?
Those of you that have already installed your DD in the VN Bezel........have you found any issues that those of us about to do this install should know about??
Thanks in advance!
And has anyone tried Marc's new adjustable DD bracket?
Those of you that have already installed your DD in the VN Bezel........have you found any issues that those of us about to do this install should know about??
Thanks in advance!
And has anyone tried Marc's new adjustable DD bracket?
Originally Posted by candyredwing
What is the "new" adjustable DD bracket ?
I will have the NEW Brackets that have been 3D Printed on Tuesday. They are made from part CF and plastic, in other words you will not break them. Also the gentleman who builds them is an engineer so he has done several revisions to get them perfect. They are bad ***! Fully adjustable and comes with screws. $19 bucks for the set,
More details first of the week and they will be ready to order by end of the week latest.
Marc
Last edited by Marc@Vettenuts.net; 04-01-2018 at 12:42 PM.
Mine showed up a few days ago.. Looks very nice, much better quality than some of the other bezels I have seen. I am planning on putting everything in tomorrow and will report back with some pictures!
Got my VetteNuts Console in last week, looks awesome. Had my new Radio all wired up and working a couple of weeks ago.It was just sitting atop the climate control. So today I installed the mounting brackets and after a few tries got the radio lined up with the console opening. Now the radio I bought is a Pioneer AVH-2300NEX with a motorized display to insert CDs and DVDs. Installed, the bar between the radio and climate control interferes with the motorized display. I checked and the radio mounting stops are flush with the console opening. so it is sticking through the opening as far as it will go. I hate to start filing on this awesome looking console. Has anyone encountered and overcome this issue?
Mine also arrived and it looks like a great bezel and finish. I will be painting mine to match the 50th Anniversary color medium dark neutral. So I am disassembling the door and cup holder so I can paint them more easily. All the small bits look exactly like the OEM.
While trial fitting my Pioneer NEX 5200 I do have a slight gap at the top between the top of the Pioneer and the bezel. But after several ideas, I found a nice piece of weatherstrip that I mounted to the top of the Pioneer that fills it fine. I have noticed during the trial fitting that the slim bar between the head unit and HVAC panel seems to want to curve outward once the Pioneer is in the bezel. I am working on a solution to firm up the dividing bar before I install everything. I originally ordered a set of mounting brackets with the bezel but they do not look very sturdy nor adjustable. Glad to see Marc now has an adjustable set in the works. I will put off the full install until I can get a set of these.
Will post pics once the fitting and brackets are ready to go.
I'm having the same issue that jrprich is. The bar between the h/u and ac controller seems to bow out. Will order the adjustable brackets when available to see if I can align the h/u better, not only up and down but side to side. The L brackets just don't do it for me .
btw this is with an AVIC 5200NEX.
Last edited by Carl Timonen; 04-01-2018 at 08:27 PM.
I'm having the same issue that jrprich is. The bar between the h/u and ac controller seems to bow out. Will order the adjustable brackets when available to see if I can align the h/u better, not only up and down but side to side. The L brackets just don't do it for me .
btw this is with an AVIC 5200NEX.
Mine is also an AVIC 5200NEX.
I should know tomorrow if my first idea will resolve the bowing issue for me.
What I am trying is to epoxy a narrow piece of stainless steel along the center back side of the plastic bar. Should work but I will let the epoxy cure overnight before messing with it. Just happened to have an old set of wiper blades on my shop table. After trying to see if I could use one of the old rubber wiper blades to fill a gap along the top of my bezel (didn't work well). I noted that on each side of the rubber wiper is a stiff piece of SS just the right width and thickness to possibly serve as a reinforcement for the bar in question. So I cut a piece to length and epoxied it to the back side of the bar.
I was thinking of the basic same idea since that piece is so thin, but will wait for some better brackets and go from there. Let us know how it comes out.
I'm having the same issue that jrprich is. The bar between the h/u and ac controller seems to bow out. Will order the adjustable brackets when available to see if I can align the h/u better, not only up and down but side to side. The L brackets just don't do it for me .
btw this is with an AVIC 5200NEX.
That is the one other imperfection I forgot to mention. I do get a little bow out of that plastic bar. It means your head unit needs to go up just a little bit as I could get it to disappear if I pushed the head unit up further but I couldn't get the bezel to snap into place everywhere so settled in where I am at. Like the AC control, it wasn't noticeable enough for me to worry about.
That is the one other imperfection I forgot to mention. I do get a little bow out of that plastic bar. It means your head unit needs to go up just a little bit as I could get it to disappear if I pushed the head unit up further but I couldn't get the bezel to snap into place everywhere so settled in where I am at. Like the AC control, it wasn't noticeable enough for me to worry about.
In my case, I cannot push the unit up anymore as the two pads on the back/top of the bezel prevent the unit from going any farther up.
BTW, the SS bar I epoxied to the back side of the lower bar seems to be working as desired in trial fitting.
But won't be sure until everything is installed in the Vette.
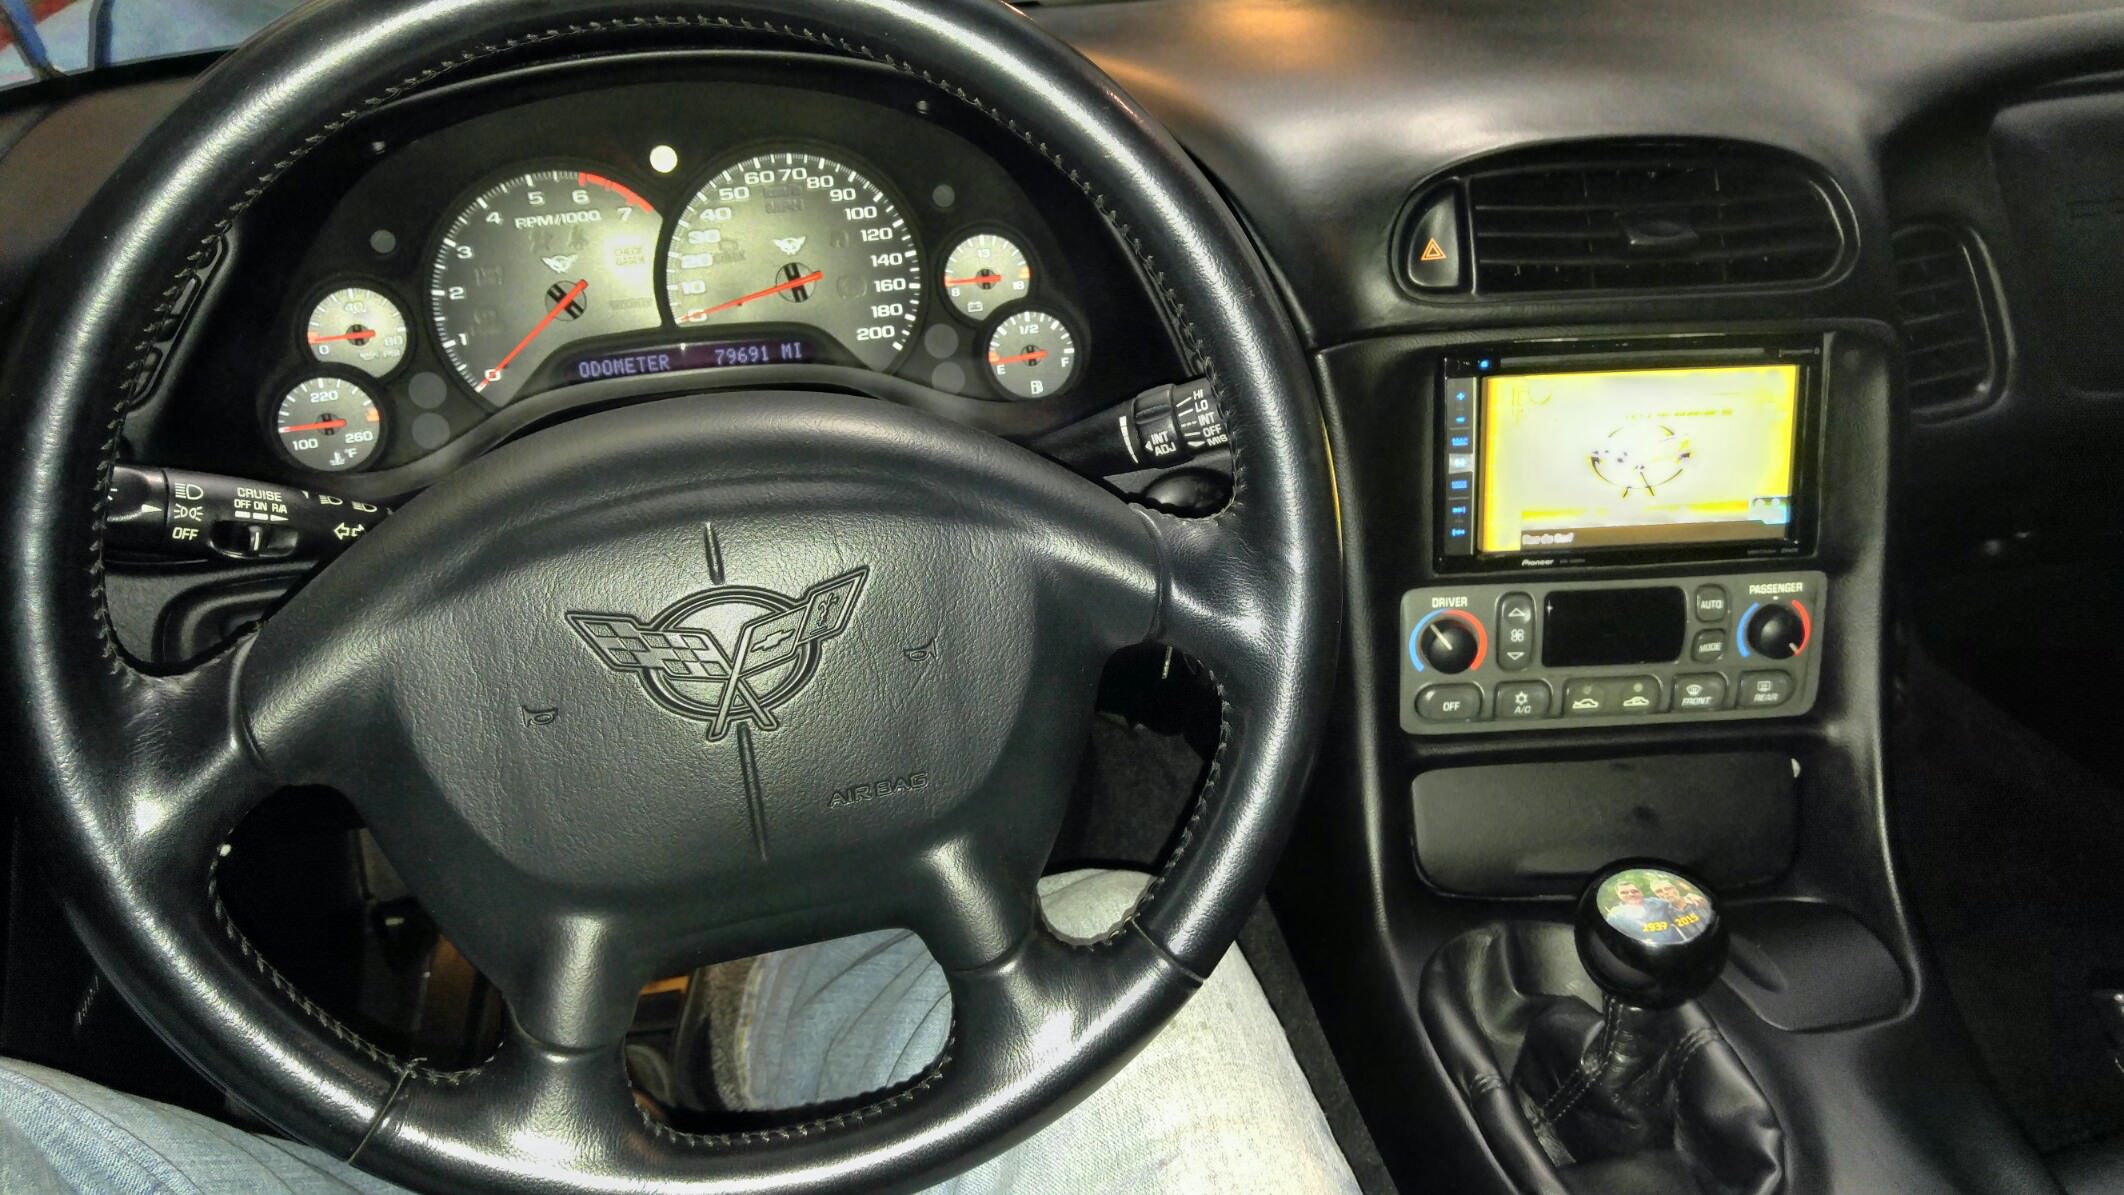
Well, here it is. Not totally finished yet, but I thought I would post this for you all to see. The bezel is from Vette Nuts. The head unit is a Pioneer AVIC-5200. I've used the XSVI-2004 interface between it and the Bose speakers. The XSVI also retains RAP, which is nice. The cigarette lighter has been replaced with a dual USB receptacle that is connected to the head unit, so I can plug in my phone, or a USB key for more music or updates. I also installed a wireless backup camera, which saved me having to fish wires through the car.
The bezel's finish is top notch. The texture and color are spot on, giving the impression that it came from GM. The added advantage over the Metra bezel is retention of the cup holder and ash tray doors, which gives a real look of authenticity. As for the fitment, it required a bit of maneuvering, and a touch of material removal to get everything to fit and sit right. This is not a PnP affair. The climate control module had to be shimmed out, or else you get a noticeable gap between it and the bezel. No biggie, I used an appropriate amount of stacked washers, along with longer screws to get it flush to the bezel.
For the head unit, I had to Dremel a touch off the inside edge of the top (where it meets the topside of the head unit), and about 1/8" off the bottom where it runs along the head unit. There's also some reworking of the sub frame that need to be done, namely removal of the old Bose unit's support bracket, as well as two tabs in the back up top to allow the new unit to go in completely. Some material removal of the center vent plastic work was also required to gain an added 1/8" in vertical space. When you're stuffing an elephant up a mouses ****, every little bit counts to keep the mouse from complaining. The GPS antenna I installed on the dash, next to the HUD display bezel. The wire can run down through the vent bezel (next to the light sensor), and to the head unit.
All in all, it's a task, requiring lots of "put it in, take it out, put it in, take it out" to get the fitment just right, but I'm really happy with the end result. If I have a gripe, it would be with the brackets. A bit short on the slotted side, and a bit short on the tabbed side. Since the head unit sits a bit offset in the sub frame, one tab offers ample coverage, while the other juuuust gives you enough to get a screw through it and the sub frame. Otherwise, a great product that gives new life to the C5 interior functionality. Bravo Vettenuts!!
Looks great!
I am installing a Pioneer AVIC-5200NEX as well.
Did you keep track of how many washers you used per side on the HVAC panel screws?
Also curious about "as well as two tabs in the back up top to allow the new unit to go in completely. Some material removal of the center vent plastic work was also required to gain an added 1/8" in vertical space." Can you provide some more details?
I still need to paint my entire bezel as my 03 50th Anniv interior color is GM Medium Dark Neutral. Have to wait for some warmer and drier weather to do the painting.
Also waiting on a new bracket from VetteNuts that will provide more adjustability.
For the HVAC panel, I would hazard to say that slight differences from car to car would differ the amount of washers that you would need, but on mine, 3 on the left, and 5 on the right.
As for the trimming and tabs, here's a picture. I've indicated what I removed;
With the 5200 being as deep as it is, the tabs in the back end up forcing the unit to tilt upwards when completely inserted, which is not what you want. Trim these as flush as possible.
Finally got mine installed last night. I pretty much agree with everything digi2t has said. Quality is fantastic, but don't go into this project thinking you won't have to make any modifications. I shimmed my HVAC control out as well, could probably even afford to bring it out a little bit further, but it doesn't bother me for now. I did not do any trimming to the top of the opening, but if I need to go back in again, I will as my headunit does tilt back slightly causing a small gap on the upper right edge. Overall, I am very happy with the product and can say that it is far superior to the Metra bezel from my experience.
Don't mind the fingerprints everywhere, should have wiped it down before taking pictures.
For the HVAC panel, I would hazard to say that slight differences from car to car would differ the amount of washers that you would need, but on mine, 3 on the left, and 5 on the right.
As for the trimming and tabs, here's a picture. I've indicated what I removed;
With the 5200 being as deep as it is, the tabs in the back end up forcing the unit to tilt upwards when completely inserted, which is not what you want. Trim these as flush as possible.
What brackets did you use to mount the HU? Did they attach to where the stock ones did or somewhere else? I have the VN brackets and they cover the holes the guide pins on the bezel use.
Last edited by oneandgone; 04-06-2018 at 01:05 PM.
What brackets did you use to mount the HU? Did they attach to where the stock ones did or somewhere else? I have the VN brackets and they cover the holes the guide pins on the bezel use.
I used the brackets that I ordered from Vettenuts, along with the bezel. I couldn't use them in the stock position due to their shape, size, as well as the available screw placement holes on the side of the HU. What I did was use one bracket on the top right corner, and one bracket on the lower left corner of the HU. I then adjusted the depth of the HU to meet the bezel. Once I had the final position of the HU established, I drilled a pilot hole through the bracket and subframe flange, and used self tapping screw to secure the works. The advantage of having the brackets offset like this is that you can tweak them later to adjust the vertical angle of the HU a bit.
During the initial mockup, I recommend using one screw per bracket to attach them to the HU. When the HU looks good in the bezel, I used a small straight edge, and using a straight line off the side of the HU, sighted a reference mark somewhere that will allowed me to set the HU in the right spot left to right. I put a small piece of painters tape on the climate control unit, and make a small pencil mark there. Since the HU doesn't sit center in the sub frame, you can rely on it, or the CCU to center the HU to the bezel. When I removed the bezel to attach the brackets to the sub frame, I used the established mark to align the HU to the final position, and drilled my pilot holes.
If you use this method, and everything goes well, you should be right in the wheelhouse left to right. A small angle adjustment might be the only thing left to get it to sit perfect in the bezel. Once it's just right, you can add a second set of screws to secure the brackets to the HU. Depending on how well (or not) they're aligned, you might have screw holes available to you on the HU. If not, you have to mark the brackets, and tear everything down to drill them.
Got my VetteNuts Console in last week, looks awesome. Had my new Radio all wired up and working a couple of weeks ago.It was just sitting atop the climate control. So today I installed the mounting brackets and after a few tries got the radio lined up with the console opening. Now the radio I bought is a Pioneer AVH-2300NEX with a motorized display to insert CDs and DVDs. Installed, the bar between the radio and climate control interferes with the motorized display. I checked and the radio mounting stops are flush with the console opening. so it is sticking through the opening as far as it will go. I hate to start filing on this awesome looking console. Has anyone encountered and overcome this issue?
So the issue was the front cover was being pressed against the bar by the two tabs at the top of the console. There is about 1/8" gap at the top of the radio but the tabs keep the radio from being able to adjust up. I ended up filing about 1/8" off the top of the bar between the radio and the climate control. This allows the bar to just clear the radio face. This also eliminated the bowing other are experiencing. I was tempted to file down the tabs at the top of the bezel but thought better of it.
Here is mine that was installed at VetteNuts.I also had the insulation and sound deadener installed. It's so much more quiet, especially
for a convertible.


 03-31-2018, 11:05 PM