Summary of one expensive experience.
 05-26-2018, 08:22 PM
#1
Racer

Thread Starter

Hi all,
Haven't been as active usual the past year - kind of reached the end of my stick for a while and left the vette at my parents garage to sit while I figured it out. Last year in June, my engine had a valve spring break, and triggered me to begin this expensive revamp of my vette. Unfortunately as I was very new to this level of modification - I made some mistakes, and had some unlucky events.
I researched all over trying to figure out what I wanted to do - ended up going over the top cubes with the power train to hold it. I'll list out some of what I've learned from the experience, and my review of some of the parts i've purchased during the adventure.
These lessons are not all self taught, I've read many threads where other more experienced members shared their thoughts and I echo them. Perhaps I did not internalize them in time for this project, but in the future... I know now.
---------------------Lessons Learned------------------------
1)If and when possible, buy local. Once you install that part and find something defective (in my case, engine) it can be very difficult to get the builder to take action / responsibility. There could be exceptions to this, but it does come down to personal experience with each vendor. In the future, I will always buy from someone within driving distance (400mi~).
2)Dependent on the first lesson. One Stop Shop: Have a single shop build and install everything, this will avoid the risk of finger pointing between shops to who is at fault for an issue. (My builder stated the engine was working as expected, and that the installer could have messed something up). Some shops don't do all pieces, so it does come down to what you are trying to do. (engine replacement vs headlight replacement)
3)Make friends with your shop. While my mechanics were working on my car, I repeatedly shipped food / water / energy drinks - what I found out they liked. I asked them if i could also work on my car while it was on the lift - and they let me. This is probably rare due to liability, but it was a small shop and we became good friends. They always went above and beyond to try and fix my issues, helped me sell my old parts, and gave me advice.
4)Things will go wrong. Always budget failure into the scope of a project. If you are doing your own work - you probably can get away with a bit less as you are just spending your own time fixing the issue (unless ya really fucked up. ) I would set aside 10-40% total cost of project for the unexpected, larger projects have larger issues typically. My costs ballooned due to hours spent troubleshooting the oil pressure issues.
5) The community has your back. This forum, other LS forums, and fellow car owners, etc - all typically will try to help you. Make an effort, show that you care, and give back. It's a circle of love. I couldn't have done this project without the folk on this forum. When you encounter an issue, spend some time searching and researching - read threads. Gold is hidden everywhere. Its the one or two thoughtful posts in a thread that actually have the key to your problem. >I totally posted dumb and low effort questions in the beginning as well, it's part of the progression to knowledge. <
<
6)Define your goals. I don't know what people refer to it as, so i'll call it power creep. Modding is expensive and addicting. When in the position of framing a new project, really define your goal. Think on it for a few weeks. I never really set a goal post for my project, so I kept just pushing the price up. It started with a new LS1, but ended up as a 427 LS3+full power train. Write down what you want... why you want it. Justifying it is up to you, and the costs are up to you to manage. Just don't get stuck going down a road you aren't willing to fully commit to. Backing out of a 30k project because it is creeping to 40k - you will lose a lot. I'm glad I didn't quit, even though it cost me a LOT. (I even made a thread that I was going to quit )
)
------------------Thoughts on project and hardware -------------------------------
1)Engine - LS3 427. have provided the build before, can again if desired. With the decent aggressive CAM - it doesn't make much power under 2.5k, however, above 4k is pretty nuts. I've removed my cat's and just have some after market mufflers - it is very loud. Smells a bit like a chainsaw / old muscle car. Highly recommend NOT removing your cats unless you love very loud things, smell of fuel, and have a place to register with no emission control . I would recommend going for a LS3 418 or a bit smaller to avoid the piston rock found with 427, feels a bit like a time bomb. Research the oil issues in LS3 if you are a track racer type.
>If you have an engine built for you, ensure you check some basics before putting it in the car.
-front timing wheel (1x or 4x), crank reluctor (24x or 58x i believe), plugs and seals (oil passage plug... )
)
2)Power Train - T6060 + C6Z + 3.5 Drive shaft + RPS Twin Carbon Clutch
-Excellent support by Rick @ RKT Performance. No issues with the rear end. Just had to cut / adjust exhaust as needed which was simple for my shop. Do not skimp out on the little pieces that keep your engine delivering power to the wheels. I went with the build back to front approach. This rear end should be able to handle over 1000WHP. Although how you drive is probably more important (launching with radial+slick vs normal street driving)
3)Other mods I recommend:
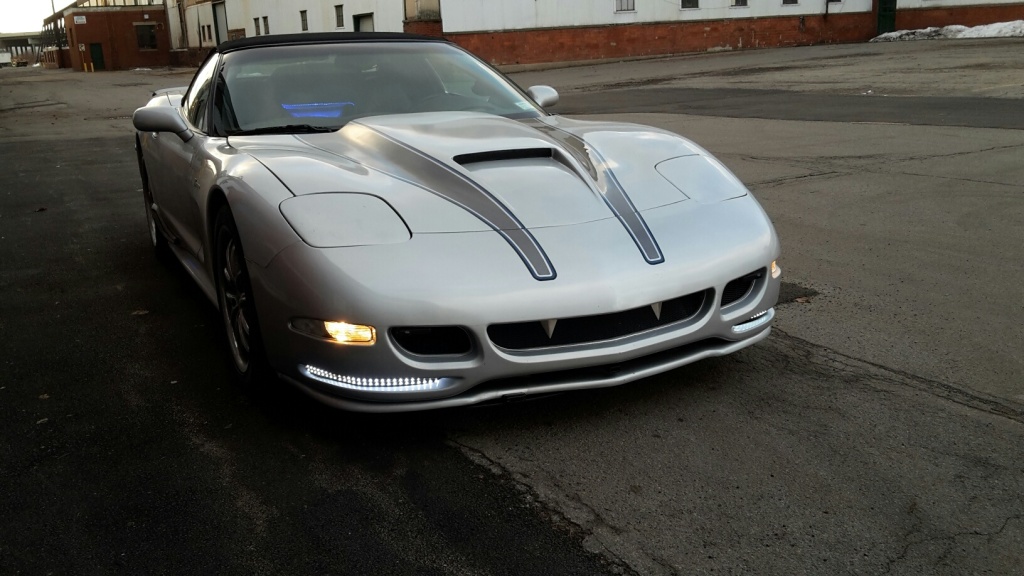
-Headlights, highly recommend changing. Radioflyer makes amazing headlights. I suggest ensuring all the screws/bolts are torqued... I had one of the bulbs start falling out, made for an interesting drive home.
-Sound proofing interior - I double layered sound proofing across the entire interior and underneath where the torque tube sits. Car is now reasonable to take on long trips, and is much cooler.
-Ticks Adjustable Master Cylinder - This is amazing. Might make the pedal a bit stiffer, but you can adjust to to almost any height which works great when you change your clutch to aftermarket and such.
See ya on the streets
-Derz
Haven't been as active usual the past year - kind of reached the end of my stick for a while and left the vette at my parents garage to sit while I figured it out. Last year in June, my engine had a valve spring break, and triggered me to begin this expensive revamp of my vette. Unfortunately as I was very new to this level of modification - I made some mistakes, and had some unlucky events.
I researched all over trying to figure out what I wanted to do - ended up going over the top cubes with the power train to hold it. I'll list out some of what I've learned from the experience, and my review of some of the parts i've purchased during the adventure.
These lessons are not all self taught, I've read many threads where other more experienced members shared their thoughts and I echo them. Perhaps I did not internalize them in time for this project, but in the future... I know now.
---------------------Lessons Learned------------------------
1)If and when possible, buy local. Once you install that part and find something defective (in my case, engine) it can be very difficult to get the builder to take action / responsibility. There could be exceptions to this, but it does come down to personal experience with each vendor. In the future, I will always buy from someone within driving distance (400mi~).
2)Dependent on the first lesson. One Stop Shop: Have a single shop build and install everything, this will avoid the risk of finger pointing between shops to who is at fault for an issue. (My builder stated the engine was working as expected, and that the installer could have messed something up). Some shops don't do all pieces, so it does come down to what you are trying to do. (engine replacement vs headlight replacement)
3)Make friends with your shop. While my mechanics were working on my car, I repeatedly shipped food / water / energy drinks - what I found out they liked. I asked them if i could also work on my car while it was on the lift - and they let me. This is probably rare due to liability, but it was a small shop and we became good friends. They always went above and beyond to try and fix my issues, helped me sell my old parts, and gave me advice.
4)Things will go wrong. Always budget failure into the scope of a project. If you are doing your own work - you probably can get away with a bit less as you are just spending your own time fixing the issue (unless ya really fucked up.
) I would set aside 10-40% total cost of project for the unexpected, larger projects have larger issues typically. My costs ballooned due to hours spent troubleshooting the oil pressure issues.5) The community has your back. This forum, other LS forums, and fellow car owners, etc - all typically will try to help you. Make an effort, show that you care, and give back. It's a circle of love. I couldn't have done this project without the folk on this forum. When you encounter an issue, spend some time searching and researching - read threads. Gold is hidden everywhere. Its the one or two thoughtful posts in a thread that actually have the key to your problem. >I totally posted dumb and low effort questions in the beginning as well, it's part of the progression to knowledge.
<6)Define your goals. I don't know what people refer to it as, so i'll call it power creep. Modding is expensive and addicting. When in the position of framing a new project, really define your goal. Think on it for a few weeks. I never really set a goal post for my project, so I kept just pushing the price up. It started with a new LS1, but ended up as a 427 LS3+full power train. Write down what you want... why you want it. Justifying it is up to you, and the costs are up to you to manage. Just don't get stuck going down a road you aren't willing to fully commit to. Backing out of a 30k project because it is creeping to 40k - you will lose a lot. I'm glad I didn't quit, even though it cost me a LOT. (I even made a thread that I was going to quit
)------------------Thoughts on project and hardware -------------------------------
1)Engine - LS3 427. have provided the build before, can again if desired. With the decent aggressive CAM - it doesn't make much power under 2.5k, however, above 4k is pretty nuts. I've removed my cat's and just have some after market mufflers - it is very loud. Smells a bit like a chainsaw / old muscle car. Highly recommend NOT removing your cats unless you love very loud things, smell of fuel, and have a place to register with no emission control
. I would recommend going for a LS3 418 or a bit smaller to avoid the piston rock found with 427, feels a bit like a time bomb. Research the oil issues in LS3 if you are a track racer type.>If you have an engine built for you, ensure you check some basics before putting it in the car.
-front timing wheel (1x or 4x), crank reluctor (24x or 58x i believe), plugs and seals (oil passage plug...
)2)Power Train - T6060 + C6Z + 3.5 Drive shaft + RPS Twin Carbon Clutch
-Excellent support by Rick @ RKT Performance. No issues with the rear end. Just had to cut / adjust exhaust as needed which was simple for my shop. Do not skimp out on the little pieces that keep your engine delivering power to the wheels. I went with the build back to front approach. This rear end should be able to handle over 1000WHP. Although how you drive is probably more important (launching with radial+slick vs normal street driving)
3)Other mods I recommend:
-Headlights, highly recommend changing. Radioflyer makes amazing headlights. I suggest ensuring all the screws/bolts are torqued... I had one of the bulbs start falling out, made for an interesting drive home.
-Sound proofing interior - I double layered sound proofing across the entire interior and underneath where the torque tube sits. Car is now reasonable to take on long trips, and is much cooler.
-Ticks Adjustable Master Cylinder - This is amazing. Might make the pedal a bit stiffer, but you can adjust to to almost any height which works great when you change your clutch to aftermarket and such.
See ya on the streets
-Derz

The following 4 users liked this post by derz_vette:
ArmchairArchitect (06-15-2018),
Dark Sarcasm (05-26-2018),
Josephta (05-29-2018),
Route99 (05-26-2018)
 05-26-2018, 09:25 PM
#3
Le Mans Master


While I agree with what you have said above, I think it is important to decide BEFORE you begin, what your end USAGE is! Is it cool looks and street driving? Is it drag racing? Is it roadrace track usage. Each of these goals is completely different from the other, and you will be very unhappy if you spend your money and time to build a car for something different than your intended usage.
05-26-2018, 09:55 PM
#4
Burning Brakes


Great write up and well said. So....is this beast done or? Pics? Vids? Numbers? We want MOAR!!!
05-26-2018, 09:57 PM
#5
Team Owner

Member Since: Jul 2016
Location: The Steel City, Colorful Colorado
Posts: 25,306
Received 1,679 Likes
on
1,182 Posts
Winner 2020 C7 of the Year - Modified
Moar! 
05-26-2018, 11:02 PM
#6
Administrator


Member Since: Mar 2001
Location: In a parallel universe. Currently own 2014 Stingray Coupe.
Posts: 342,956
Received 19,296 Likes
on
13,969 Posts
C7 of the Year - Modified Finalist 2021
MO Events Coordinator
St. Jude Co-Organizer
St. Jude Donor '03-'04-'05-'06-'07-'08-'09-'10-'11-'12-'13-'14-'15-'16-'17-'18-'19-
'20-'21-'22-'23-'24
NCM Sinkhole Donor
CI 5, 8 & 11 Veteran


Thanks for sharing your thoughts on how your project went. I'm sure they will help other members who need to do work on their car.


 05-27-2018, 09:49 PM
#9
Racer
Thread Starter
Final dyno numbers
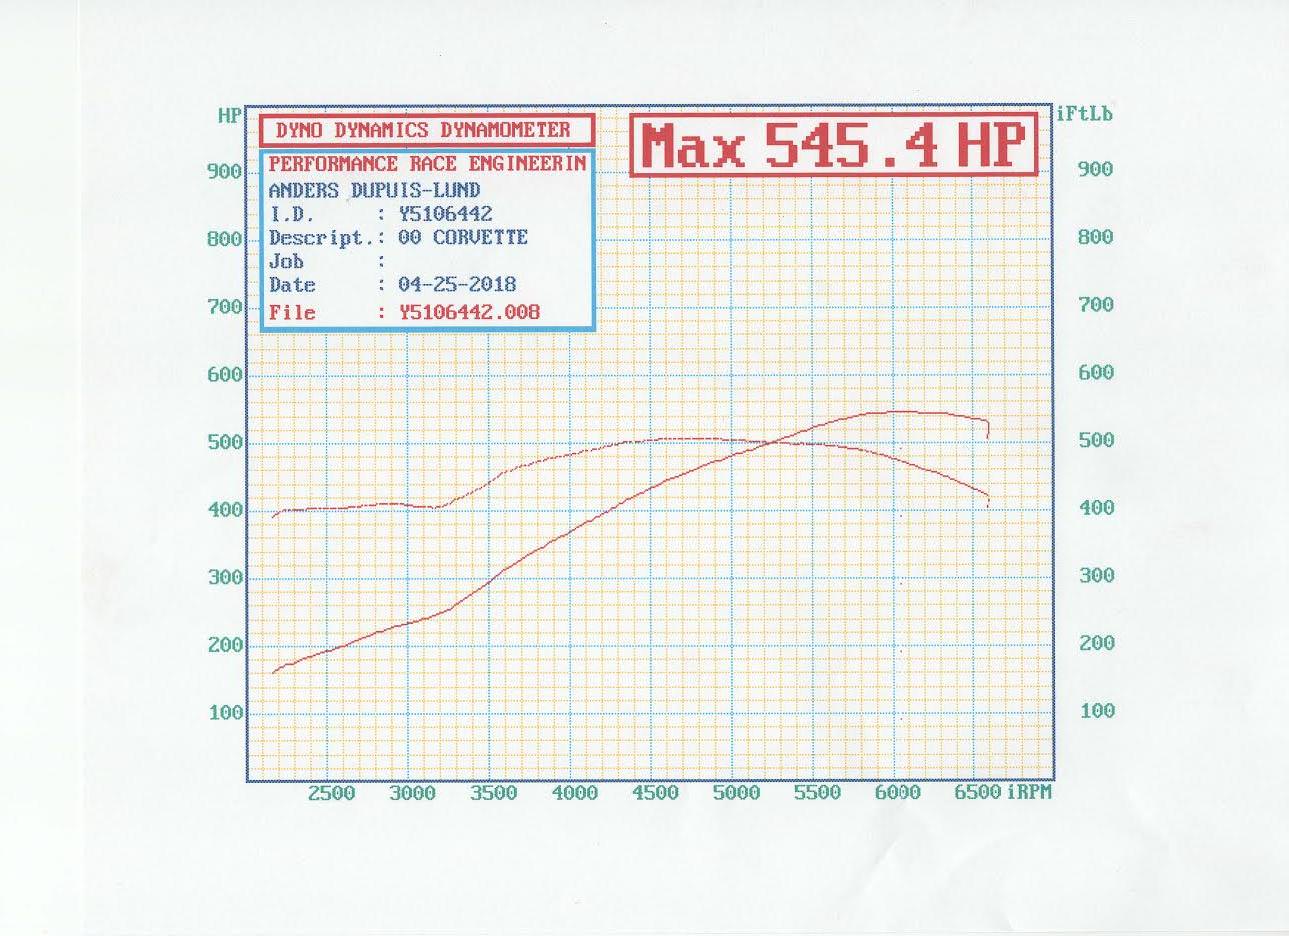
Its not completely done... probably never will be.
I'm still looking into the oil blowby issues, want a BBK (need to swap off the CCW's though) and want to install a two step... to shoot fireballs out the back.
The following users liked this post:
oneandgone (05-27-2018)
05-27-2018, 09:51 PM
#10
Racer
Thread Starter
While I agree with what you have said above, I think it is important to decide BEFORE you begin, what your end USAGE is! Is it cool looks and street driving? Is it drag racing? Is it roadrace track usage. Each of these goals is completely different from the other, and you will be very unhappy if you spend your money and time to build a car for something different than your intended usage.
05-27-2018, 11:45 PM
#11
Burning Brakes
Very nice! Your perseverance has paid off!
06-15-2018, 12:12 PM
#12
Advanced

Member Since: Aug 2003
Location: Hudson OH
Posts: 98
Likes: 0
Received 0 Likes
on
0 Posts

I have a 2003 C06 with 12K mi. thinking of having valve springs replaced as a preventive measure.
Any idea what that will cost?
Go to Chevy dealer or find local shop?
Thanks
John
Any idea what that will cost?
Go to Chevy dealer or find local shop?
Thanks
John
06-15-2018, 01:42 PM
#13
Race Director


If you are somewhat mechanically inclined, you can do it yourself. It really isn't that bad of a job. I went this route.
https://www.jegs.com/webapp/wcs/stor...rsistYmm=false
You also need the valve spring compression tool
https://www.jegs.com/webapp/wcs/stor...rsistYmm=false
And an air hose to pump air into the cylinder. to keep the valves up. Jegs sells the entire kit with everything wou need but I couldn't find it just now.
And if you go that far, most people change the valve guides and plugs and wires. I would recommend tht as the wires get brittle and may break off when you remove the plugs. (I broke three. Dielectric grease on the wire plug ins on the new wires will help the next time you pull the wires off the plugs). And valve cover gaskets. So you are looking at about $500 in parts. If you do it yourself of course the labor is free. It took me about I think 4-5 hours. That was the first time I did it. SO if you choose to farm it out, take the shop labor rate X maybe 4 hrs. Call around for estimates.
https://www.jegs.com/webapp/wcs/stor...rsistYmm=false
You also need the valve spring compression tool
https://www.jegs.com/webapp/wcs/stor...rsistYmm=false
And an air hose to pump air into the cylinder. to keep the valves up. Jegs sells the entire kit with everything wou need but I couldn't find it just now.
And if you go that far, most people change the valve guides and plugs and wires. I would recommend tht as the wires get brittle and may break off when you remove the plugs. (I broke three. Dielectric grease on the wire plug ins on the new wires will help the next time you pull the wires off the plugs). And valve cover gaskets. So you are looking at about $500 in parts. If you do it yourself of course the labor is free. It took me about I think 4-5 hours. That was the first time I did it. SO if you choose to farm it out, take the shop labor rate X maybe 4 hrs. Call around for estimates.
06-15-2018, 05:18 PM
#14

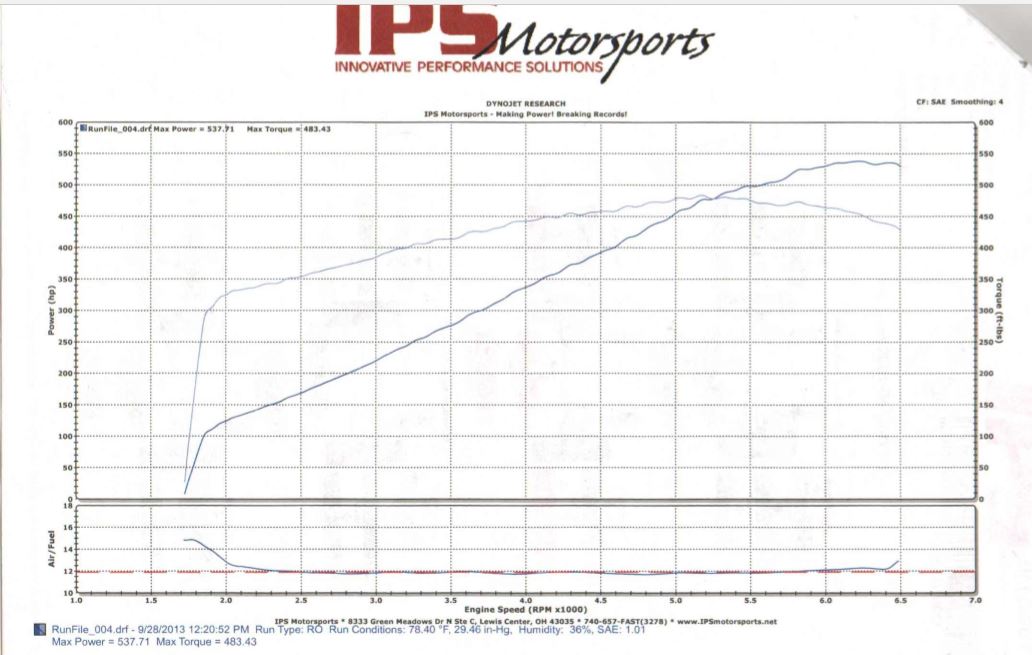
Instead of building the engine, 2 months after I bought my 20k mile 2002 C5 M6 in 2013 I had an 8 psi A&A kit installed on my shortie headers and stock cats engine in 3 days for 8200.00 and the dyno is similar to yours.
537.71 hp 483.43 ft/lb torque
Since then I went with long tubes which dropped it to 6 psi
and a smaller 3.4" pulley that brought it back up to 8 so it's more now.
Added an ECS rear end brace.
Put 20k miles on it in 4 years.
Also had to do the clutch last year.
Runs great has 47k miles on it now.
537.71 hp 483.43 ft/lb torque
Since then I went with long tubes which dropped it to 6 psi
and a smaller 3.4" pulley that brought it back up to 8 so it's more now.
Added an ECS rear end brace.
Put 20k miles on it in 4 years.
Also had to do the clutch last year.
Runs great has 47k miles on it now.
Last edited by StrangelovesM6Vert; 06-15-2018 at 06:09 PM.
06-20-2018, 11:49 AM
#15
Racer
Thread Starter
Instead of building the engine, 2 months after I bought my 20k mile 2002 C5 M6 in 2013 I had an 8 psi A&A kit installed on my shortie headers and stock cats engine in 3 days for 8200.00 and the dyno is similar to yours.
537.71 hp 483.43 ft/lb torque
Since then I went with long tubes which dropped it to 6 psi
and a smaller 3.4" pulley that brought it back up to 8 so it's more now.
Added an ECS rear end brace.
Put 20k miles on it in 4 years.
Also had to do the clutch last year.
Runs great has 47k miles on it now.
537.71 hp 483.43 ft/lb torque
Since then I went with long tubes which dropped it to 6 psi
and a smaller 3.4" pulley that brought it back up to 8 so it's more now.
Added an ECS rear end brace.
Put 20k miles on it in 4 years.
Also had to do the clutch last year.
Runs great has 47k miles on it now.
At least I can say... I have some seriously terrible MPG.
 06-20-2018, 02:40 PM
#16
I went from 16 mpg to 14 with the SC.
Put 300 hrs of other mods in including full color change, Tigershark nose , custom hood, monster stereo, Recaros etc...
Now I have a "Corvette SUV"
 as a daily driver and did the same thing.
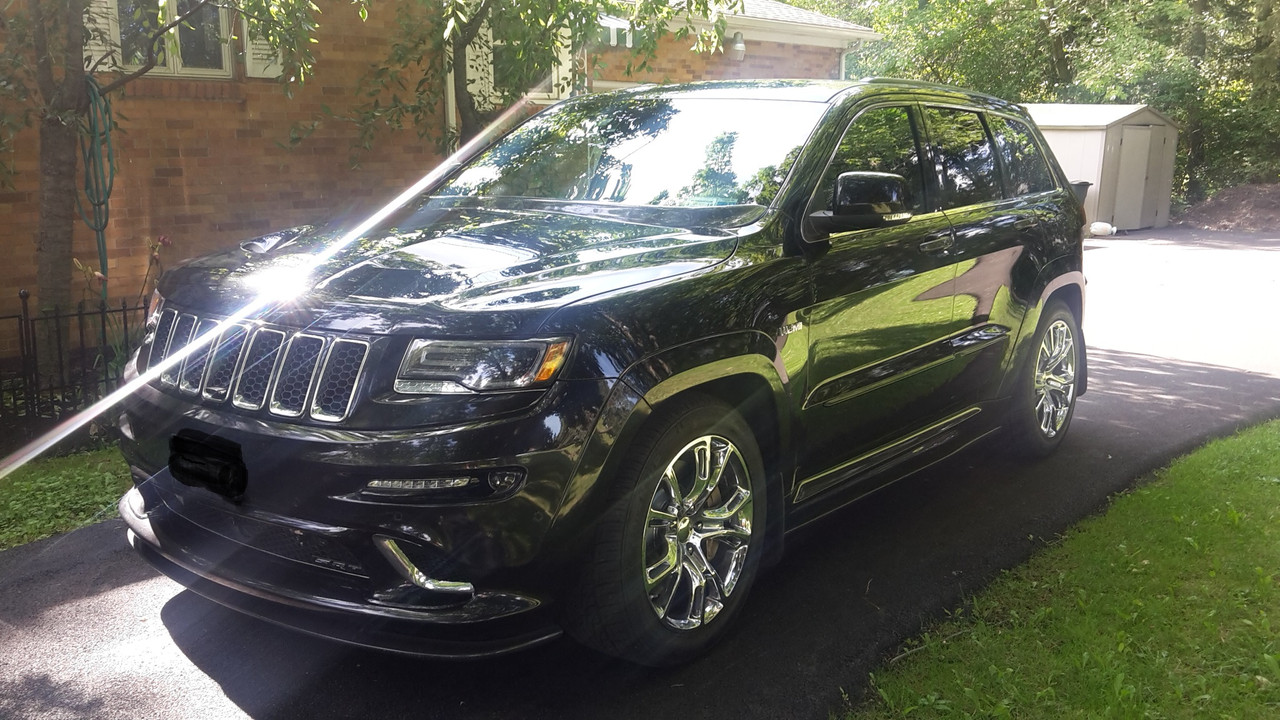
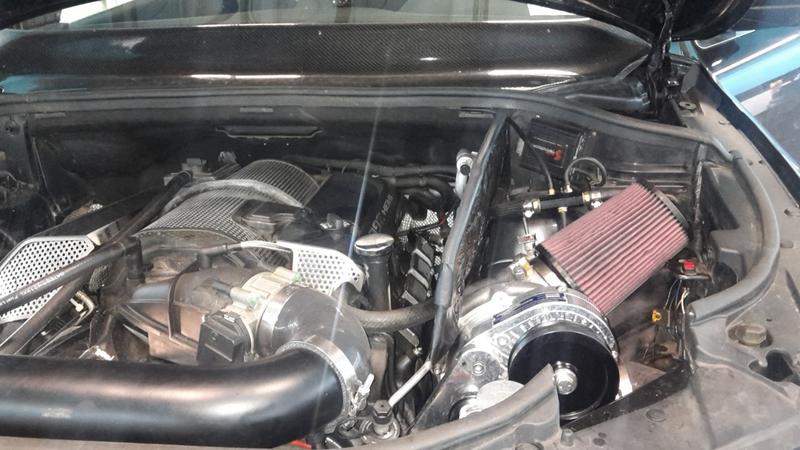
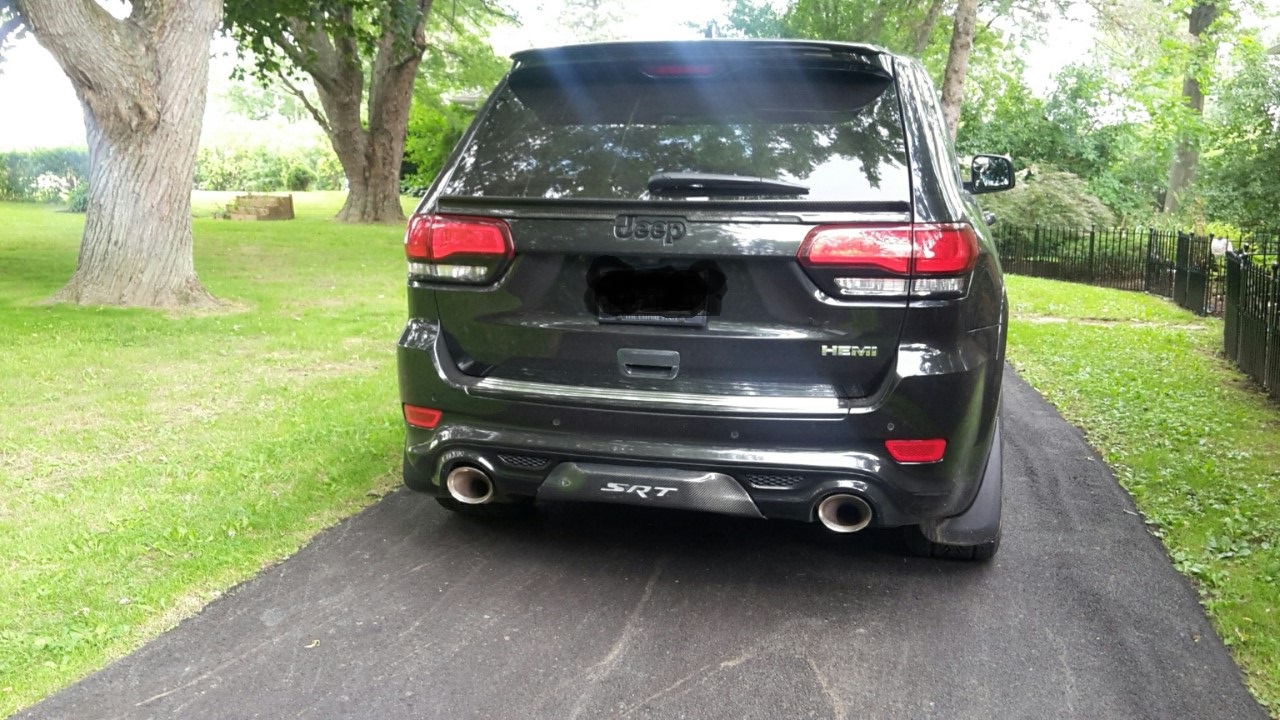
I give you my 2014 8 speed Procharger Grand Cherokee HEMI SRT

The Corvette is like getting in and out of a bath tub while the GC is like
a Laziboy
for this 60 year old body