
My CL is fixed and it cost me $0.
 05-16-2009, 10:27 PM
#21
Tech Contributor


Member Since: Dec 1999
Location: Anthony TX
Posts: 32,736
Received 2,180 Likes
on
1,583 Posts
CI 6,7,8,9,11 Vet
St. Jude Donor '08

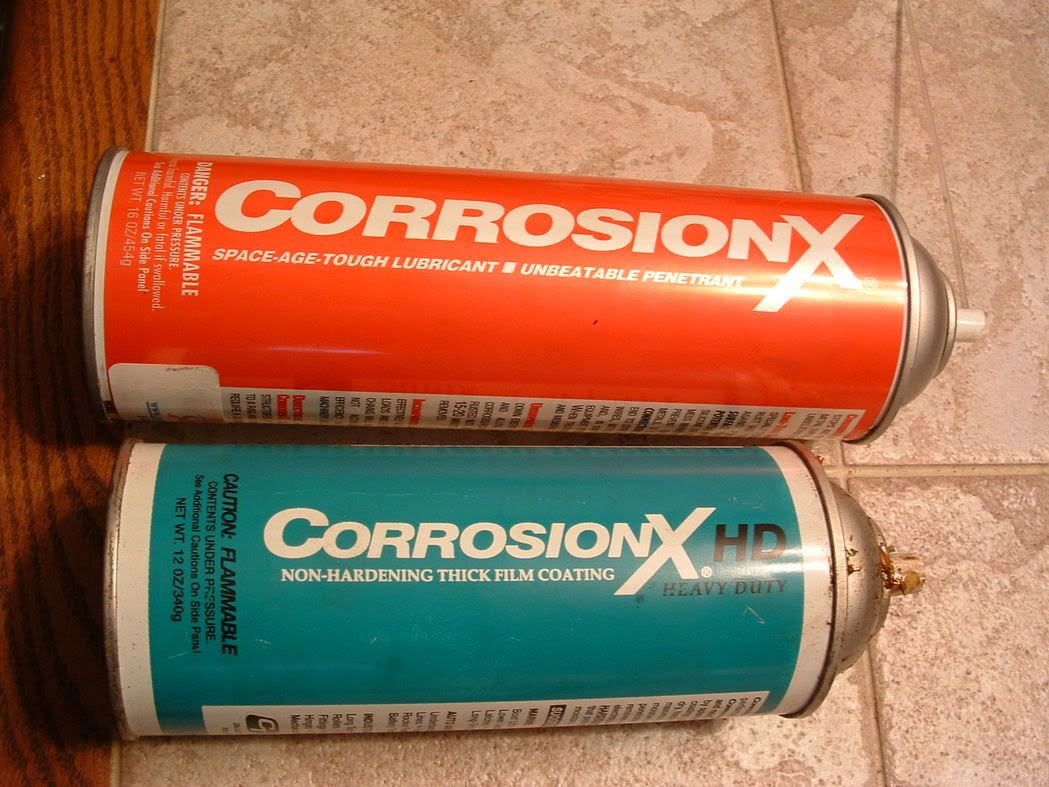
Good ground pictures! I use this stuff to prevent corossion after i clean grounds.
You can find it on line:
Heres another pic of G-202
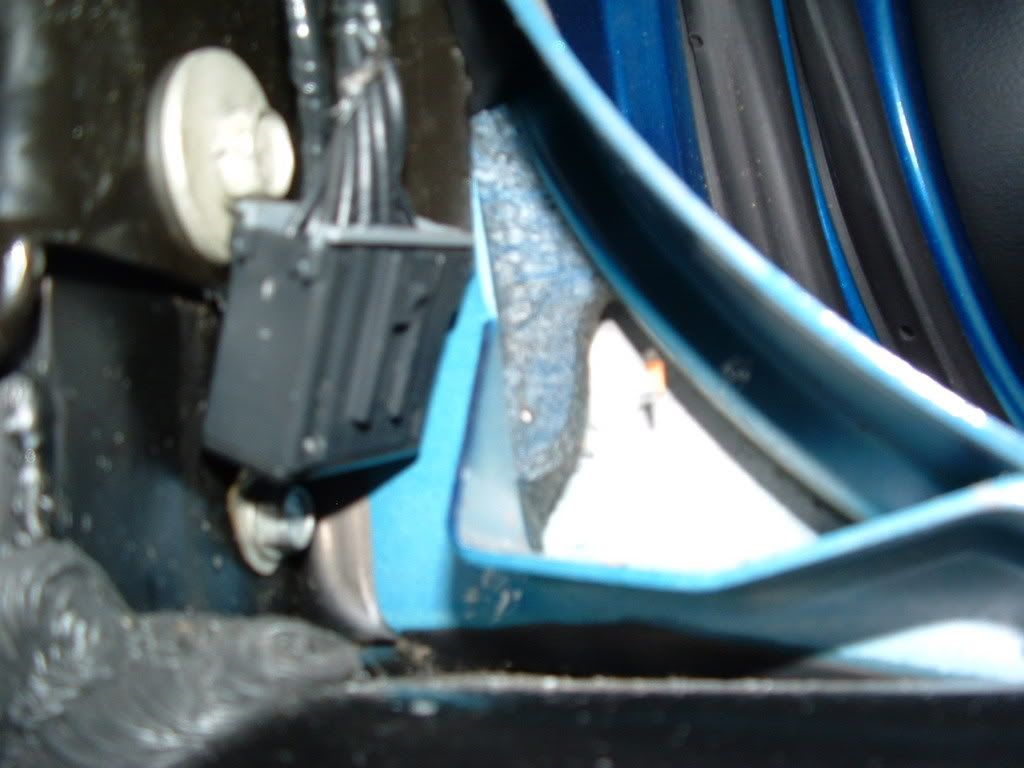

BC
You can find it on line:
Heres another pic of G-202
BC

 05-17-2009, 10:05 AM
#23
Thanks for all the great info in this thread everyone!
05-17-2009, 02:18 PM
#24
Tech Contributor
Member Since: Dec 1999
Location: Anthony TX
Posts: 32,736
Received 2,180 Likes
on
1,583 Posts
CI 6,7,8,9,11 Vet
St. Jude Donor '08
The ONLY time I have ever had a Column Lock issue was on my 98. The CLB alone solved that. As soon as my 02 Z went out of warrenty the CLB went in. ZERO issue.
The only non stock ground that I have on the ZO6 is a heavy gage wire from the alternator to ground G-101.
BC
The only non stock ground that I have on the ZO6 is a heavy gage wire from the alternator to ground G-101.
BC
 05-17-2009, 05:53 PM
#26
Tech Contributor
Member Since: Dec 1999
Location: Anthony TX
Posts: 32,736
Received 2,180 Likes
on
1,583 Posts
CI 6,7,8,9,11 Vet
St. Jude Donor '08
The alternator is mounted to the main auxiliary bracket which is mounted to the engine block. All of the joints between the alternator and the engine have resistance. The more corrosion between those joints, the more it can have an effect on the alternator and its proper operation. So, I ran a 10 GA stranded wire from one of the alternator case bolts to chassis ground G-101.
I have never had any electrical issues with my 02 ZO6 and I don't want any..
The BIG three is an outstanding preventative measure to help stop electrical issues.
BC
I have never had any electrical issues with my 02 ZO6 and I don't want any..
The BIG three is an outstanding preventative measure to help stop electrical issues.
BC
05-17-2009, 09:22 PM
#27
Race Director

The alternator is mounted to the main auxiliary bracket which is mounted to the engine block. All of the joints between the alternator and the engine have resistance. The more corrosion between those joints, the more it can have an effect on the alternator and its proper operation. So, I ran a 10 GA stranded wire from one of the alternator case bolts to chassis ground G-101.
I have never had any electrical issues with my 02 ZO6 and I don't want any..
The BIG three is an outstanding preventative measure to help stop electrical issues.
BC
I have never had any electrical issues with my 02 ZO6 and I don't want any..
The BIG three is an outstanding preventative measure to help stop electrical issues.
BC
the big three???
05-24-2009, 04:29 AM
#28
I have an 03 Z06 with little over 20k miles (as of 5/23/09) and had the "pull key...wait 10 sec" and "Service Column Lock" with the steering column locked up on me. It happened on my driveway at home and luckily I wasn't somewhere where I could have been stranded or had to have the car towed back. My car is completely stock and I had recently installed a new battery. Nonetheless, this can be a very frustrating ordeal.
Well, I wanted to see where this electro-mechanical gizmo was mounted, to see if I can find and remove the locking plate (didn't get to it), and to look at the wiring when I later install the Column Lock Bypass (CLB), but first have to free up this lock before installing the CLB. I was intreaged to hear that some owners have gotten this thing freed up by violently shaking the steering wheel left and right while turning the key on...well, I tried that at first and that didn't work for me, but I wanted to take a more direct approach to see this actuator. With some finesee, I carefully took the knee panel AND the lower column cover off.
Then, I simply used the back of the screwdriver handle to tap this metal thing underneath the steering column while simultaneously turning the ignition key on and off...lo and behold, the damn thing finally freed itself. To verify, I repeatedly turned the key on and off a dozen times or so to hear this actuator and to make sure it kept working. So far, so good. Also, the "service column lock" display message cleared. I will be installing the CLB later. This procedure worked for me, worth trying if you ever get your steering locked up like I have.
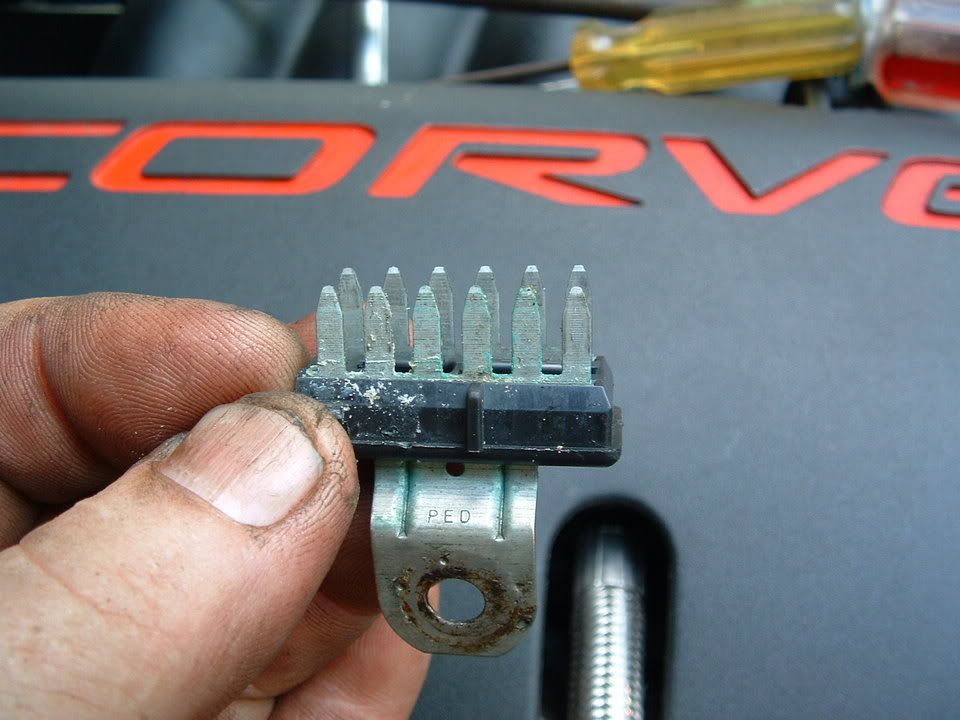
Here's a pic what I tapped (sorry about the camera phone quality):

Well, I wanted to see where this electro-mechanical gizmo was mounted, to see if I can find and remove the locking plate (didn't get to it), and to look at the wiring when I later install the Column Lock Bypass (CLB), but first have to free up this lock before installing the CLB. I was intreaged to hear that some owners have gotten this thing freed up by violently shaking the steering wheel left and right while turning the key on...well, I tried that at first and that didn't work for me, but I wanted to take a more direct approach to see this actuator. With some finesee, I carefully took the knee panel AND the lower column cover off.
Then, I simply used the back of the screwdriver handle to tap this metal thing underneath the steering column while simultaneously turning the ignition key on and off...lo and behold, the damn thing finally freed itself. To verify, I repeatedly turned the key on and off a dozen times or so to hear this actuator and to make sure it kept working. So far, so good. Also, the "service column lock" display message cleared. I will be installing the CLB later. This procedure worked for me, worth trying if you ever get your steering locked up like I have.
Here's a pic what I tapped (sorry about the camera phone quality):
 04-05-2011, 07:59 PM
#30
Navigator


Member Since: Mar 2011
Location: Fargo ND
Posts: 9
Likes: 0
Received 0 Likes
on
0 Posts
Yeah! The mechanic at my dealership blamed the aftermarket Viper alarm & remote starter for the "remove key" issue. I gave him a link to this thread and asked him to humor me and clean these grounds & run a wire back up to the negative terminal as instructed. Bingo! He said no more issue. He also said that Corvette owners are usually really up on repairs, so it didn't surprise him that this did the trick. Thank you all for taking the time to post your problems and fixes- it's a valuable resource to this newbie owner of a '98 convertible.

04-05-2011, 08:43 PM
#31
Tech Contributor
Member Since: Dec 1999
Location: Anthony TX
Posts: 32,736
Received 2,180 Likes
on
1,583 Posts
CI 6,7,8,9,11 Vet
St. Jude Donor '08
The Column Lock Issue can stem from many issues. Some are well known and some not so well known things to chack. One thing that can contribute to the CL issue is a 12 VDC battery that is either under charged or aged and has insufficient Cold Cranking Amperage.
Make SURE that the battery is FULLY CHARGED and in good condition. If your un sure, have it tested. Alo make sure that the battery terminals are clean and properly tightened 97-03 = 11 ft/lbs torque
Lets look at the column lock schematic:
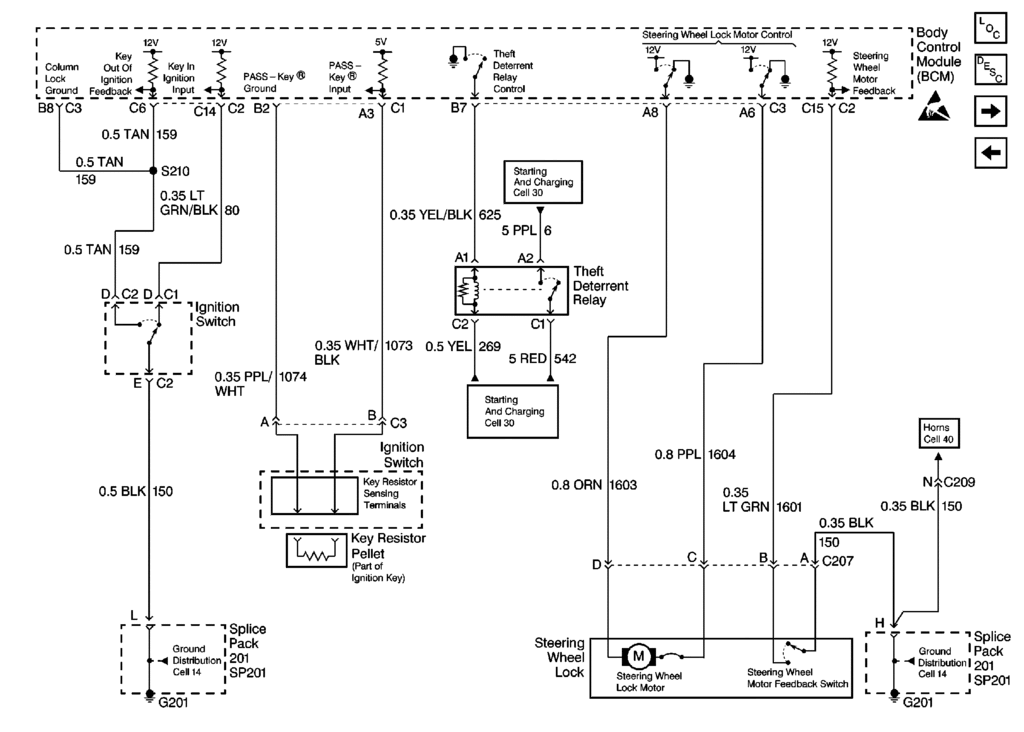
As you can see, Chassis Ground G-201 is the ONLY associated ground for that circuit.
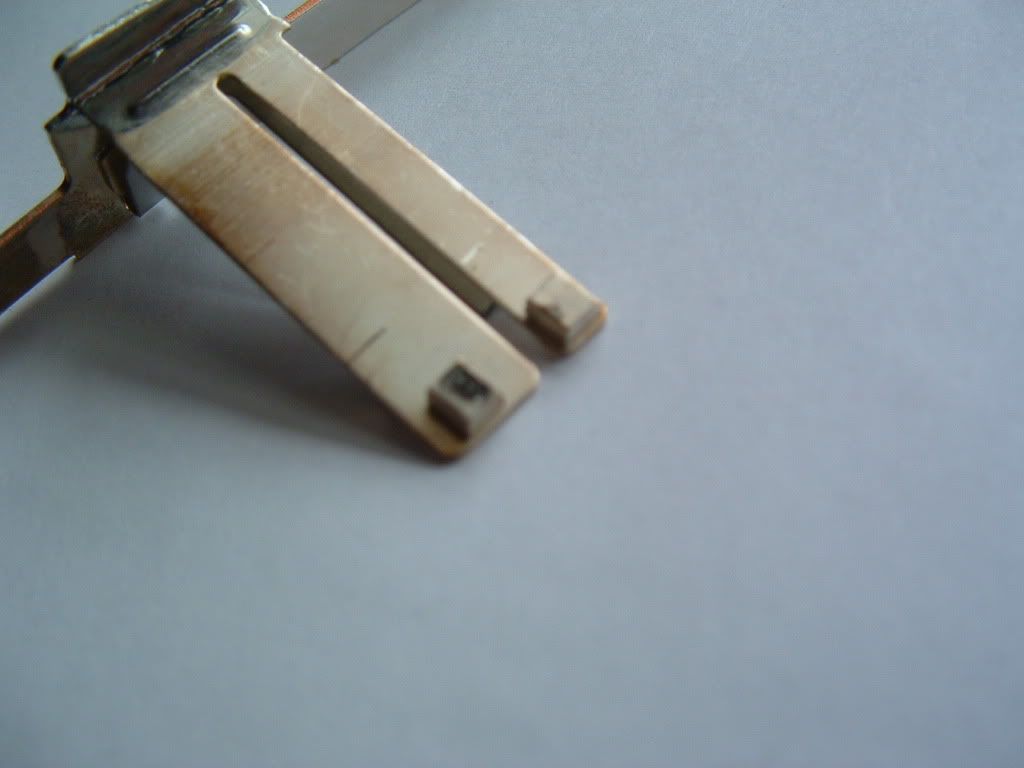
When you are dealing with the block type of ground that G- 201 is, you have to completely disassemble the connector to effectively clean it. Unless you get the connector apart like the photos below, the ground could still be compromised:
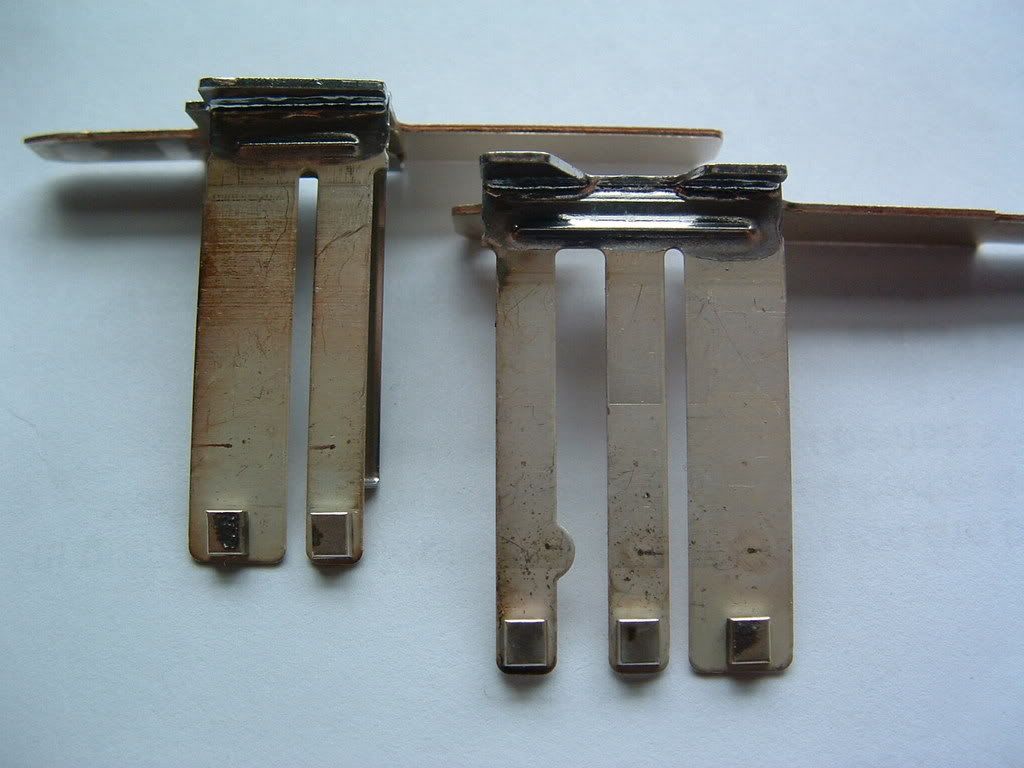
The female pins can also get deformed and not make proper contact with the male pin. Make sure that the female pins are not damaged!
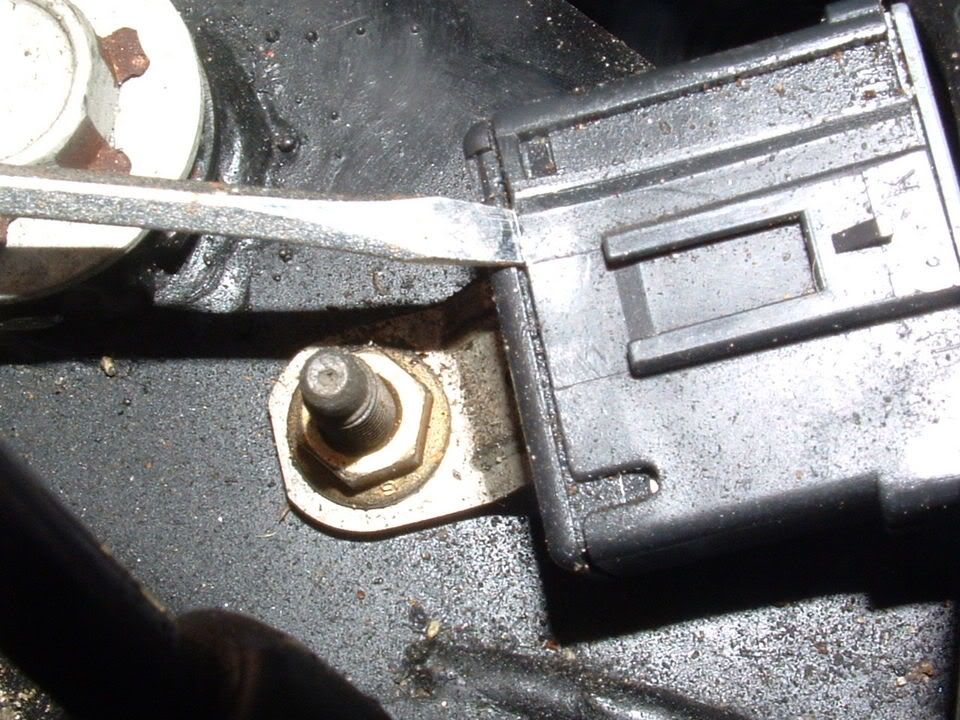

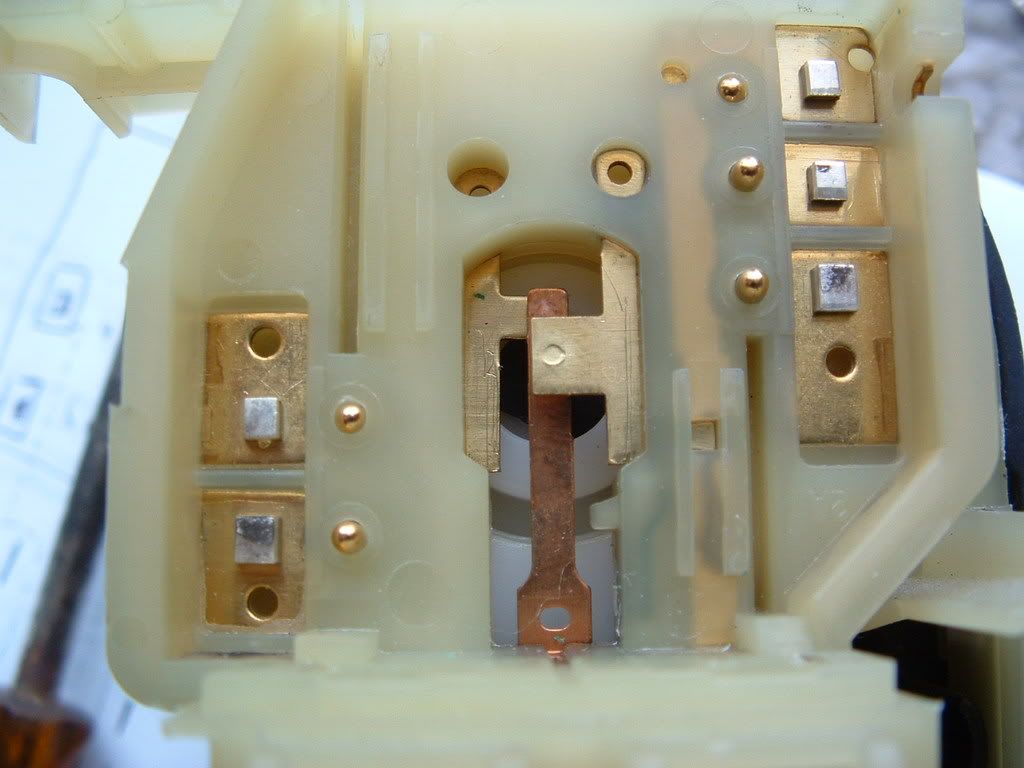
The green stuff on the pins is NOT suppose to be there!!!!
Another common issue (gets more common as the days click by) is defective ignition switches. The SIX switches inside the ignition switch that provide 12 VDC power to NUMEROUS modules and circuits thru out the C5 get carbon up and fail to provide FULL BATTERY voltage to circuits that the switch supplies.
Heres a picture of some burnt ignition switch contacts:
Here is the entire post on cleaning/repairing the ignition switch:
-C5 ignition Switch repair - http://forums.corvetteforum.com/c5-t...ch-repair.html
Hope this helps.
Bill
Make SURE that the battery is FULLY CHARGED and in good condition. If your un sure, have it tested. Alo make sure that the battery terminals are clean and properly tightened 97-03 = 11 ft/lbs torque
Lets look at the column lock schematic:
As you can see, Chassis Ground G-201 is the ONLY associated ground for that circuit.
When you are dealing with the block type of ground that G- 201 is, you have to completely disassemble the connector to effectively clean it. Unless you get the connector apart like the photos below, the ground could still be compromised:
The female pins can also get deformed and not make proper contact with the male pin. Make sure that the female pins are not damaged!
The green stuff on the pins is NOT suppose to be there!!!!
Another common issue (gets more common as the days click by) is defective ignition switches. The SIX switches inside the ignition switch that provide 12 VDC power to NUMEROUS modules and circuits thru out the C5 get carbon up and fail to provide FULL BATTERY voltage to circuits that the switch supplies.
Heres a picture of some burnt ignition switch contacts:
Here is the entire post on cleaning/repairing the ignition switch:
-C5 ignition Switch repair - http://forums.corvetteforum.com/c5-t...ch-repair.html
Hope this helps.
Bill
Last edited by Bill Curlee; 04-05-2011 at 08:49 PM.
01-12-2012, 05:45 PM
#32
8th Gear

Member Since: Jun 2009
Posts: 8
Likes: 0
Received 0 Likes
on
0 Posts
I know this is an old thread, but that seems to be my M.O.
I had a column lock issue with my 97 M6 car that I was able to recently fix with the help of this forum, but mine was different than most so I thought it may be worth adding.
I do not know if the CLB has been performed on my car or not (still don't know, it works and that is what the driver or wife in this case cares about). My car started giving the code in the info display "service column lock" and you could no longer hear the actuator motor functioning, but luckly it was inop. in the "unlocked" postion and was still drivable. I took the advice of this thread and cleaned and inspected the A pillar grounds, to my disappointment they had no corosion what so ever. I did clean and scuff all of the contacting surfaces and add dielectric grease to the pins anyway. After I was all done I reconnected the battery ground, and decided to check the positive side just for good measure, and it was loose. I couldn't believe that the positive batter cable could cause my issue. The column lock started functioning correctly again immediatly. It seems that this was the cause of my problem (and several other interm codes that the car was throwing, but not now), but maybe the BCM needed to be reset? The interesting thing to me is that everything else in the car worked as it should, except for the column lock and my wife drove it that way for over a week.
08-19-2013, 04:35 PM
#33
Cruising

Member Since: Sep 2011
Location: Round Rock TX
Posts: 11
Likes: 0
Received 0 Likes
on
0 Posts
Chuckster, I am in the throws of investigating a tough 'Pull Key and Wait 10secs' message. On my list of to-do's is to check the grounds. I got them all except those near the doors. I tried the link you provided, but it did not work. I did, however, find what I believe is the website where the pics should be. http://vette747.com/index.php/en/ However, there were no specific pics showing the grounds near the A Pillers. Are there other locations or links where I might find an actual picture of the grounds? Much appreciated.
I found a site with Pictures where the ground points are.. I swear to GOD I posted this today and it showed up.. But this Crackhead Forum software just deleted my post... 
Here it is again...
http://pages.infinit.net/vette747/Ground
Here it is again...
http://pages.infinit.net/vette747/Ground
08-19-2013, 04:52 PM
#34
Tech Contributor
Member Since: Dec 1999
Location: Anthony TX
Posts: 32,736
Received 2,180 Likes
on
1,583 Posts
CI 6,7,8,9,11 Vet
St. Jude Donor '08
LOOK AT POST 21! That is a picture of G-202. There is one JUST LIKE IT on the other side G201.
08-20-2013, 11:19 AM
#35
Cruising
Member Since: Sep 2011
Location: Round Rock TX
Posts: 11
Likes: 0
Received 0 Likes
on
0 Posts
Thanks again. Hope you're patient with me. I see the close up, but I'm trying to figure out where this is relative to the door opening. Is this near the floor, and if so, towards the front of the car, or towards the rear. Or, is it half way up the door front or rear? I'm asking this so I don't rip up too much of the moldings and trim since this stuff can be fragile. (seems the shop manual isn't much help) Again, much appreciated on the guidance and help here.
08-20-2013, 01:17 PM
#36
Burning Brakes


Member Since: Jul 2011
Location: Fredericksburg Virginia
Posts: 1,083
Likes: 0
Received 107 Likes
on
84 Posts

They are in front and you remove the long moulding that starts at the seat belt and goes forward up the front near the dash. The grounds are behind it so you will see them when you remove the trim.
GL
Chris
GL
Chris
08-20-2013, 07:50 PM
#37
Tech Contributor
Member Since: Dec 1999
Location: Anthony TX
Posts: 32,736
Received 2,180 Likes
on
1,583 Posts
CI 6,7,8,9,11 Vet
St. Jude Donor '08
HGeres an easy land mark..... Shut the door. Look where the door SPEAKER IS.. The grounds are at the front lower section below that speaker. You MUST remove the sill trim. Pull it straight UP
BC
BC