When you click on links to various merchants on this site and make a purchase, this can result in this site earning a commission. Affiliate programs and affiliations include, but are not limited to, the eBay Partner Network.
I've been running the B&B PRT over-the-axle mufflers for a few years on an otherwise stock exhaust, and now it was time to complete the rest of the system with long tubes, x-pipe and hi-flow cats... It took about a month and a half for everything to arrive which pushed my timeline somewhat out of whack - I was hoping to have this done back in May so I could focus on other tasks. But, some things happen at their own pace! The headers are well-made and look great - however installing them would have a few twists and turns. The instruction sheet which comes with the headers is surprisingly vague and isn't much help.
Just a few initial impressions of how things went:
DRIVER SIDE:
The header on this side is loaded from underneath the vehicle. This can be done without a lift, but you'll need a lot of clearance as the header goes in pointing straight up. While up top make sure to remove spark plugs and coil packs to avoid breaking anything. From underneath, removal of the flywheel inspection plate helps gain some much-needed room, however a few things quickly become apparent...
- The "Bat Wing" oil pan is a genuine pain in the butt and the wings are constantly in the way. I can see why others have considered swapping oil pans to the LS2 design while doing this; you will be fighting with the oil pan during the entire installation!
- Disconnect ALL ground straps and wires along where the header will slide in. I made the mistake of leaving the oil temp sensor wire connected since it wasn't really in the way - and I ended up destroying the connector accidentally while pulling the header up into the engine compartment.
- You will have to remove the 18mm lower engine mount nut so you can tilt the engine. B&B Tech Support indicated that the engine needed to be raised "2 or 3 inches" for the header to slip in - however this is impossible to do with the intake manifold in place. The fuel rail will bottom out on the underside of the cowl after the engine is lifted only about an inch.
- No matter what, you will also have to cut or grind off the semi-circular flange that protrudes from the bellhousing at roughly the 10 O' Clock position. The header jams up on this no matter how you load it - I tried removing the engine mount completely to gain some maneuvering room, however this didn't help. There appears to be no way around this; and I wasted several days trying to find a different solution!
PASSENGER SIDE:
Fortunately this goes smoother than the other side. You will be loading the header in from the top and the engine doesn't need to be lifted. However, the starter has to come out as it (and the right side bat wing) will be in the way.
- Same as the Driver Side, remove plugs and coil packs to prevent breakage. Yes, you probably could leave some stuff in place - but the hassle of having to find replacement parts for the ones you inadvertently wrecked by being in such a hurry is just added aggravation and expense.
- The A/C tubes will be the significant challenge here, as these will be in the way. The upper one (low-pressure side?) needs to be pulled about 2 inches farther away from the engine in our for the header to drop down into the engine.
LESSONS LEARNED:
- Do NOT tighten the headers into place until the transmission inspection cover and starter have been put back in place. Once the headers are secured, you can't put the things you took off back on - this is a juggling act and the tubes will have to be moved around to get everything back where it needs to be!
- O2 harness extensions are going to be needed, unless you want to splice wires into place to make the connector reach further. The O2 bung on the stock exhaust manifold is a lot farther up than it is on the headers, where it is located way down by the collector flange!
- Also, the O2 sensor CANNOT be installed into the passenger side header prior to being dropped in - it will absolutely get in the way! However, it can be installed first on the Driver Side and there will be no problems.
SUMMARY:
There will probably be another snag or two along the way, but things are looking better now than they did initially. The only real bummer is needing to replace the oil temp sensor connector - anyone know where I can buy a new pig tail?
More to follow!
Jeff
Last edited by kalayaan12; 07-03-2017 at 01:41 AM.
Reason: Adding pictures
It's interesting that after 20 years there are still fitment issues. I won't comment on the junk brand that I bought that didn't fit. Looks like yours turned out half decent so far.
It's interesting that after 20 years there are still fitment issues. I won't comment on the junk brand that I bought that didn't fit. Looks like yours turned out half decent so far.
I've installed headers on a couple of other, older cars that I used to own, and my $0.02 worth is this.....installing a set of headers, especially in a newer car, with 2 tons of stuff packed into the engine compartment, is like trying to put 10 pounds of s**t in a 5 pound bag.
The engine compartment was never really designed to accommodate 4 individual, 1.5-1.875" pipes. The engineers designed the car around a much smaller, cast iron manifold. To me, being an exhaust header designer HAS to be a task for those with the patience of Job......
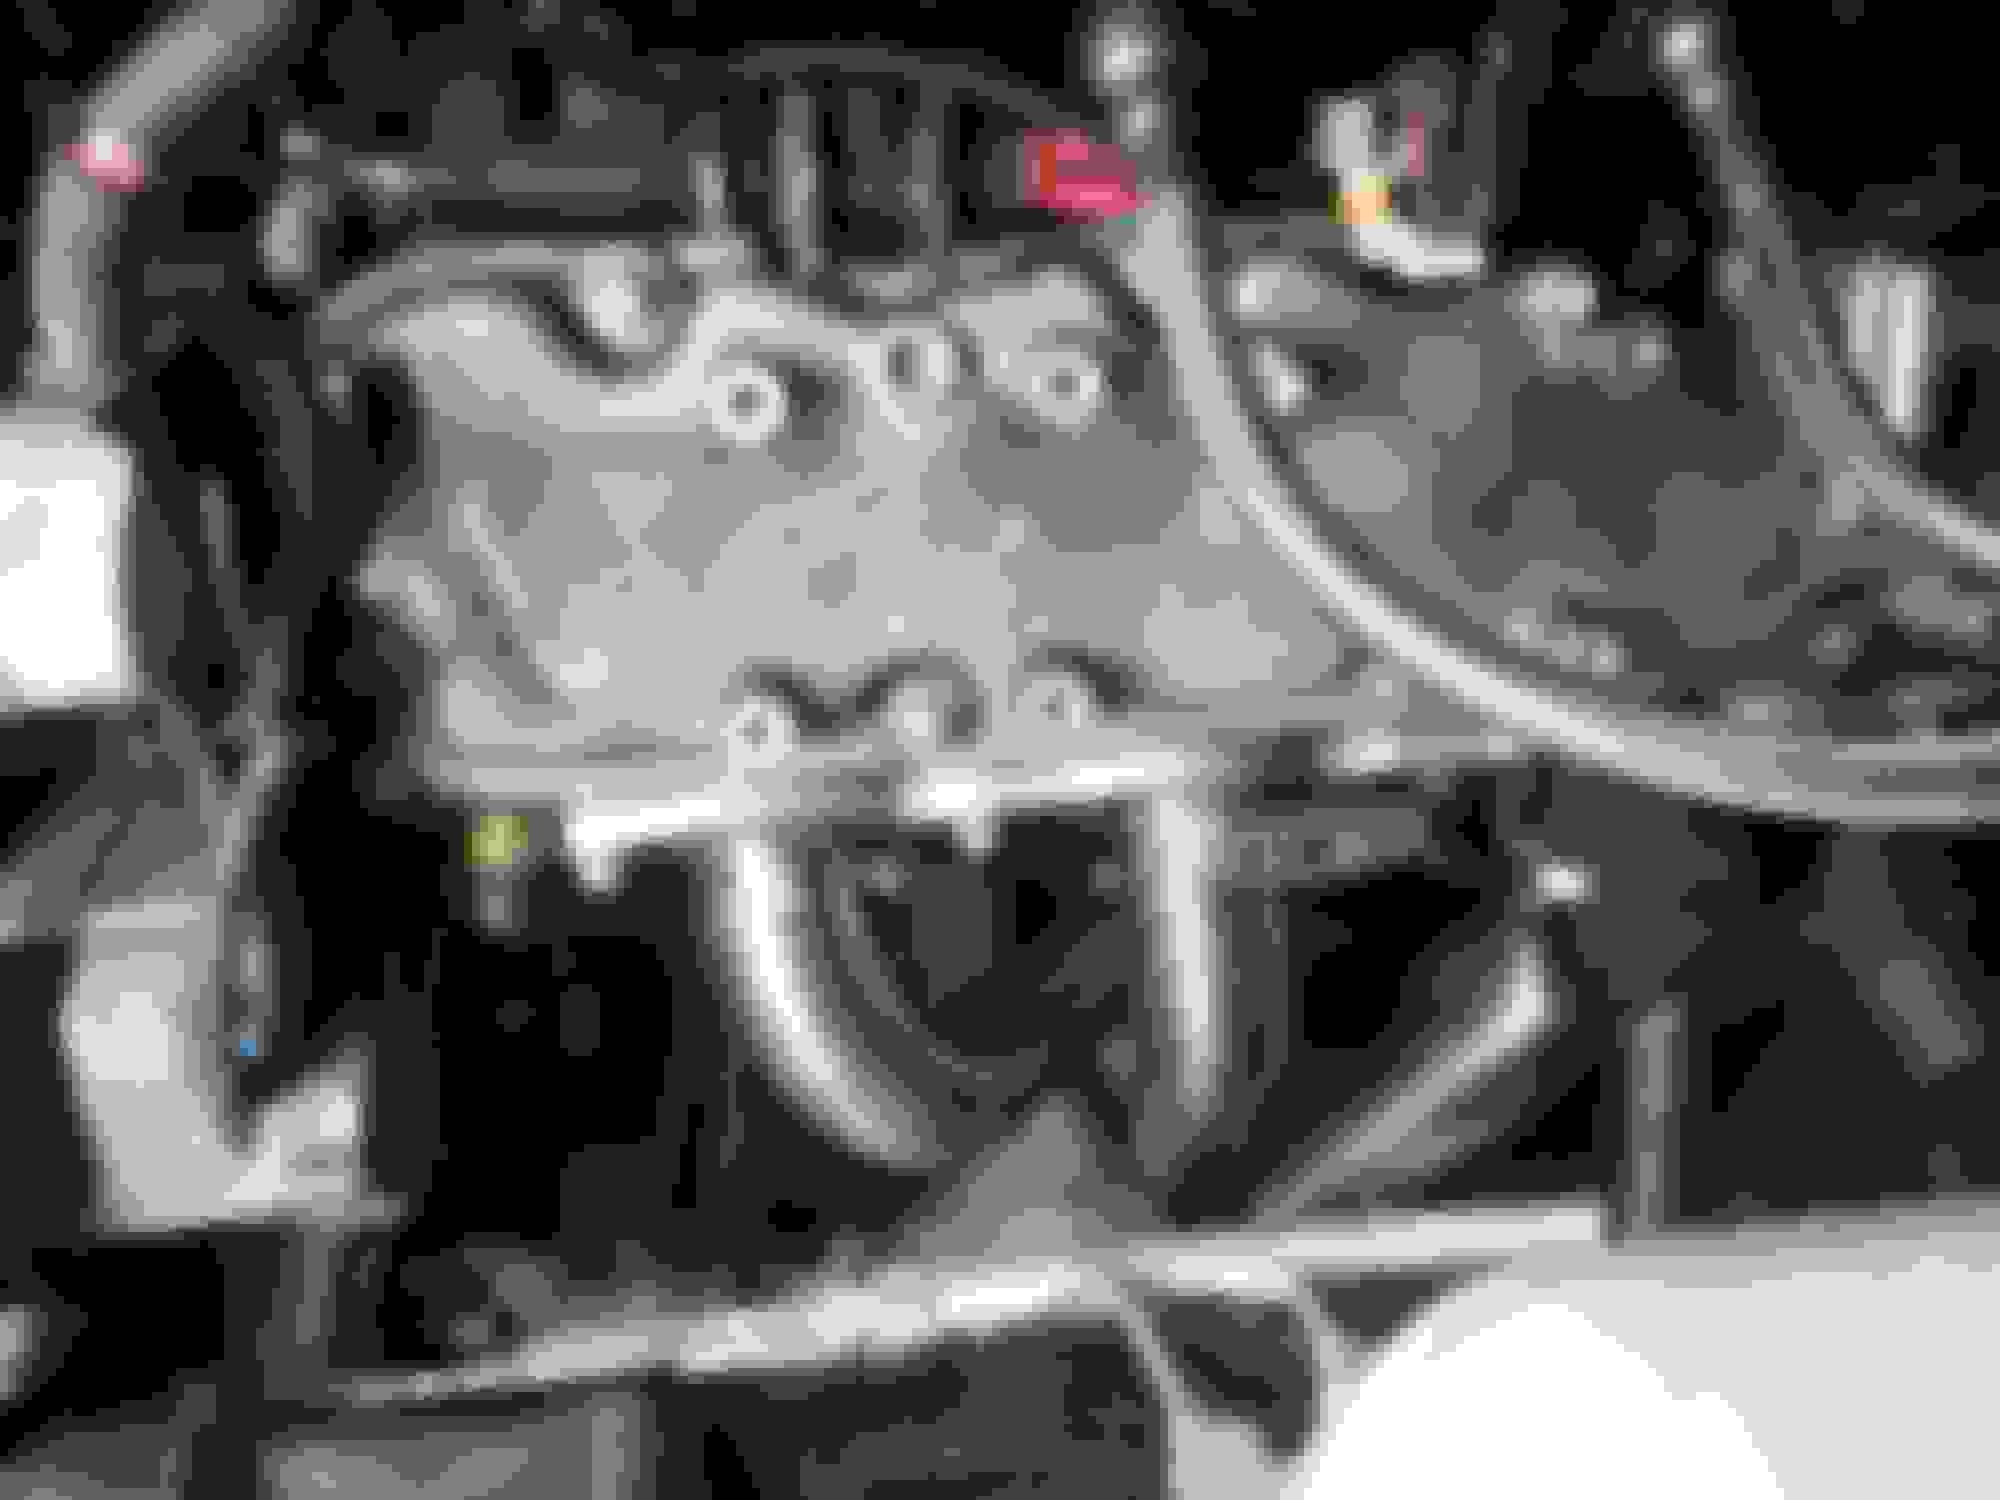
Once the O2 harness extenders arrived in the mail (12" extenders will work fine for the upstream sensors, no extenders are needed for the downstream ones), it was time to get back under the car again.
With the rest of the exhaust installed (finally) things were starting to look up. However, a quick check after snugging all the fasteners up revealed that the O2 sensor on the Driver Side (which points to the passenger side of the vehicle) was squashed up against the bottom of the torque tube tunnel plate... @#$!!
Although the Cat pipe can be loosened and rotated very slightly, this isn't quite enough to eliminate the contact between the O2 sensor and the tunnel plate. Off came the exhaust to make sure I didn't somehow put something together wrong.... Everything checked out, just the orientation of the O2 bung was off maybe by a couple of degrees - it needed to be at a slightly flatter angle. Next step will be to take a ball peen hammer to the tunnel plate in the area of interference to open up some clearance!
Another thing that became apparent is that the O2 harness wires have no choice but to lay across the collector and tube(s) and will need shielding. I found a pretty good "Heat Sheath" at my local auto parts store that resembles the same one used on the A/C tube that runs by the exhaust manifold on the passenger side. Unfortunately, it wasn't big enough to slide past the connectors on the O2 sensor - so a special order for the larger one was needed... It should be here Monday.
My initial inclination was to go with a Z06 exhaust instead of headers, and now I'm beginning to think that might not have been such a bad idea... But the end is in sight!
Last edited by kalayaan12; 07-09-2017 at 12:52 AM.
I installed LG headers almost 12 years ago (on stands) without any major problems. I've heard ARH, Stainless Works, Kooks, etc. are all fairly easy to install too. May I ask why you chose a lesser used brand?
I installed LG headers almost 12 years ago (on stands) without any major problems. I've heard ARH, Stainless Works, Kooks, etc. are all fairly easy to install too. May I ask why you chose a lesser used brand?
Two reasons:
- My experience with B&B's PRT cat-back system (based on parameters of fit, appearance and function) was quite positive, which definitely influenced my decision to try out the rest of the system.
- Also, I was looking to add long tubes / cats / x-pipe in preparation for head and cam swap - then a blower at some point. The goal was to do this in my garage without having to do any welding. Sticking to B&B parts to complete the rest of the exhaust would be one way to achieve that result.
More to follow!
Jeff
Last edited by kalayaan12; 07-09-2017 at 06:13 PM.
Good luck with your mods. I've done most of the progression of catback, headers, heads/cam, EWP, ported FAST90, and more, so a bit of unsolicited advice; If you're planning on a 'charger, maybe stop at your full exhaust system, and save the other steps, and just go straight to supercharging. It's cheaper and easier to add boost/meth/fuel system upgrades for more power, rather than doing all the H/C/Fast stuff first. You're going to need to budget for a good clutch, and I would recommend adding a trans/diff brace, such as ECS so you don't twist the diff into scrap the first time you hit second gear hard.
Good luck with your mods. I've done most of the progression of catback, headers, heads/cam, EWP, ported FAST90, and more, so a bit of unsolicited advice; If you're planning on a 'charger, maybe stop at your full exhaust system, and save the other steps, and just go straight to supercharging. It's cheaper and easier to add boost/meth/fuel system upgrades for more power, rather than doing all the H/C/Fast stuff first. You're going to need to budget for a good clutch, and I would recommend adding a trans/diff brace, such as ECS so you don't twist the diff into scrap the first time you hit second gear hard.
ZV -
Many thanks for the advise!
Part of my "plan" was to also replace the alternator bracket with the newer (stronger) version than mine came with, put on a new dampener and pin the crank in preparation for the possibility of just going right into an A&A centrifugal setup and skipping the Head / Cam step altogether as you've recommended.
Chances are I'll be lucky just to finish up these headers before my vacation ends next week...
Slipped the "heat socks" (or whatever they're called) over the O2 wiring harness extensions, tightened everything up, connected the battery and turned the key...
In a word - awesome!!!
But there are still too many wires that are unprotected and too close to the headers for me to take it for a spin yet - plus there's a ground wire I missed connecting to the block and the oil temp wiring that tore out of the connector still needs to be fixed...
About 10 minutes later, I went back out in the garage and started it up again and revved it a bit. Huge smile on my face the whole time. This is a very good sound - and I cannot wait to get this finished up and out on the road!
Jeff
Last edited by kalayaan12; 07-22-2017 at 09:14 PM.
Once the O2 harness extenders arrived in the mail (12" extenders will work fine for the upstream sensors, no extenders are needed for the downstream ones), it was time to get back under the car again.
With the rest of the exhaust installed (finally) things were starting to look up. However, a quick check after snugging all the fasteners up revealed that the O2 sensor on the Driver Side (which points to the passenger side of the vehicle) was squashed up against the bottom of the torque tube tunnel plate... @#$!!
Although the Cat pipe can be loosened and rotated very slightly, this isn't quite enough to eliminate the contact between the O2 sensor and the tunnel plate. Off came the exhaust to make sure I didn't somehow put something together wrong.... Everything checked out, just the orientation of the O2 bung was off maybe by a couple of degrees - it needed to be at a slightly flatter angle. Next step will be to take a ball peen hammer to the tunnel plate in the area of interference to open up some clearance!
Another thing that became apparent is that the O2 harness wires have no choice but to lay across the collector and tube(s) and will need shielding. I found a pretty good "Heat Sheath" at my local auto parts store that resembles the same one used on the A/C tube that runs by the exhaust manifold on the passenger side. Unfortunately, it wasn't big enough to slide past the connectors on the O2 sensor - so a special order for the larger one was needed... It should be here Monday.
My initial inclination was to go with a Z06 exhaust instead of headers, and now I'm beginning to think that might not have been such a bad idea... But the end is in sight!
I am not fond of the O2 sensor to tunnel plate clearance. If it were mine I would drill a hole and route the wires on top of the plate. I have friends who have done this with other headers and it keeps the wires from getting burned on the header. We have also used P clamps held in place by the tunnel plate bolts to hold the wires away from the exhaust.
Looking at the picture further, if those are rear O2s and you can get away with it in your state, I'd program the O2s to non reporting and plug the O2 bung.
I had B&Bs on my C4 and the welds on the resonator cracked. B&B replaced the resonator without any problems and kept a customer happy. Every company has things go wrong from time to time, it is how you respond which makes a good company stand out.

 07-03-2017, 01:06 AM