
C5 Z06 180 degree header build thread
 03-24-2017, 08:23 PM
#121
Instructor

Thread Starter

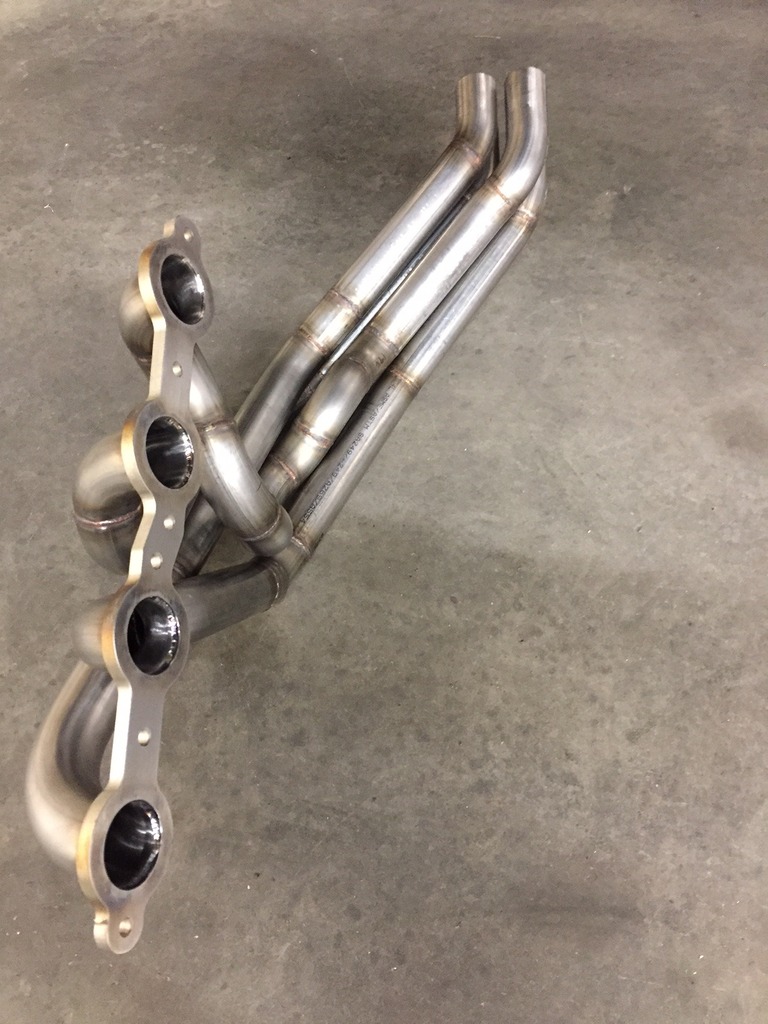
Passenger side header welded out and done except for the collector retaining tabs, still not sure what style I'm going with on those.
I've been working on the driver side and it is not cooperating. So, I took a break from the stainless steel side of things and played with some aluminum.
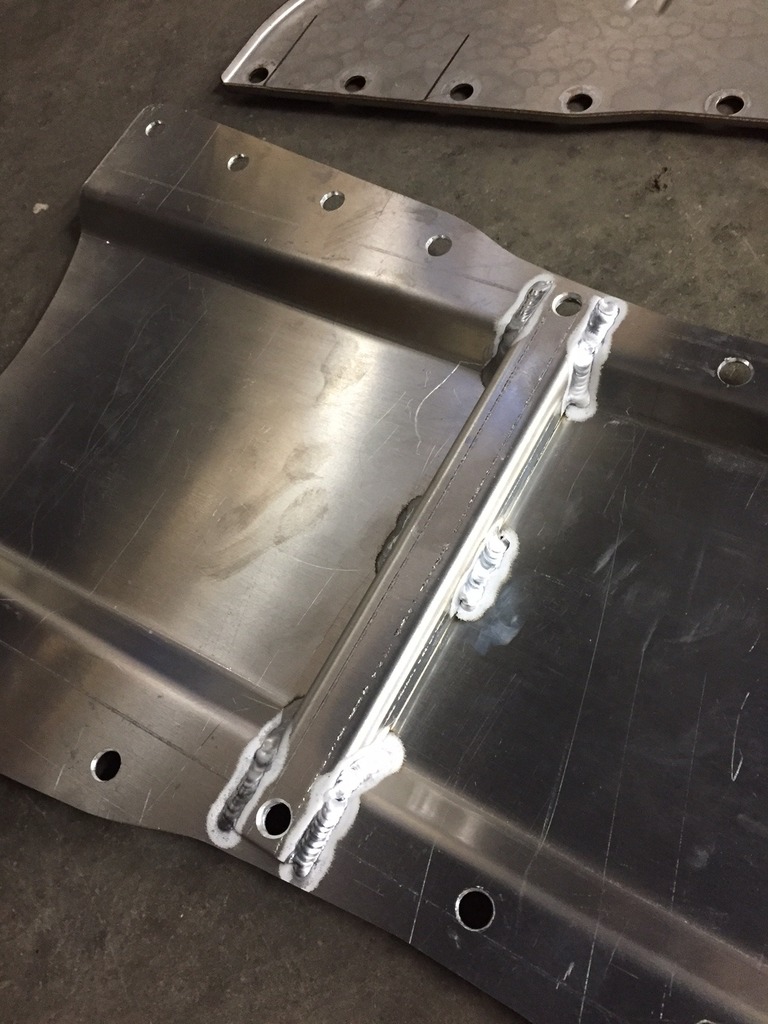
New tunnel plate made from .100" thick 3003 aluminum.
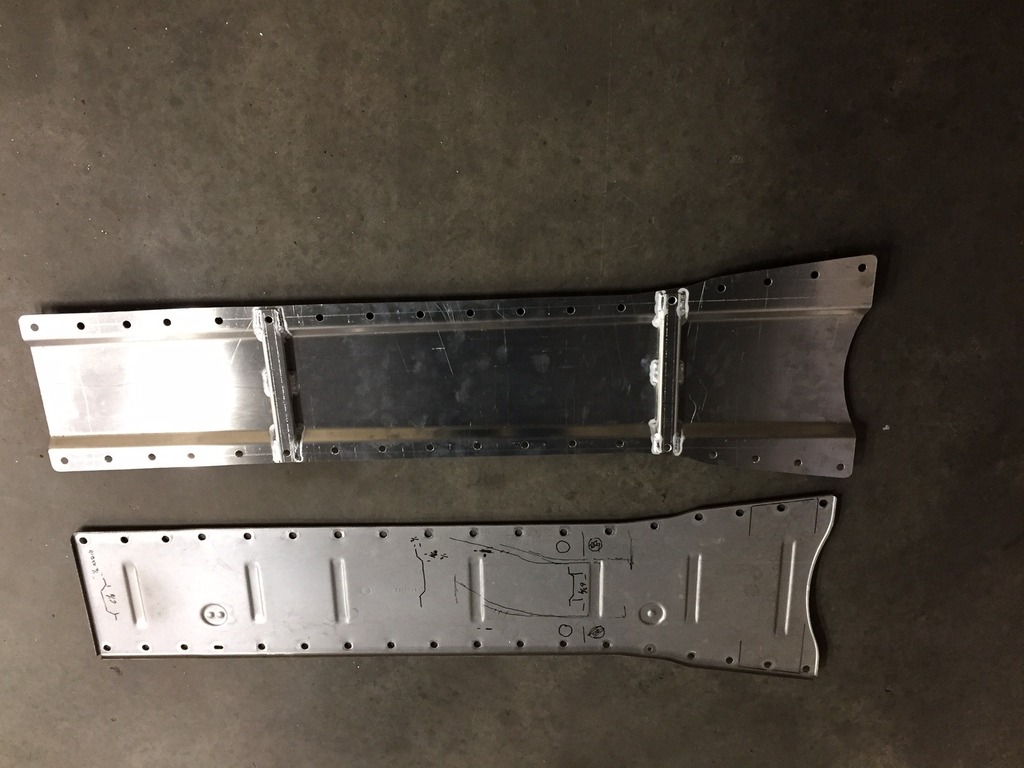
I went with a hat channel style that gives me more clearance to the exhaust where it is stacked top and bottom. Went from 1/8" clearance in the tightest spot to a full 1/2"
Even though it was far stiffer than the factory plate, I went ahead and added two channels at locations where the exhaust clearance is not an issue, the merge point of the collectors and after the V-bands that the X-pipe will connect to.


I've been working on the driver side and it is not cooperating. So, I took a break from the stainless steel side of things and played with some aluminum.
New tunnel plate made from .100" thick 3003 aluminum.

I went with a hat channel style that gives me more clearance to the exhaust where it is stacked top and bottom. Went from 1/8" clearance in the tightest spot to a full 1/2"
Even though it was far stiffer than the factory plate, I went ahead and added two channels at locations where the exhaust clearance is not an issue, the merge point of the collectors and after the V-bands that the X-pipe will connect to.


The following 6 users liked this post by Tinmatt:
Black 03 Z06 (03-24-2017),
BmoreRnsDeep (06-19-2017),
NSFW (05-29-2018),
striper (03-25-2017),
VFR RC46 (01-29-2020),
and 1 others liked this post.
03-24-2017, 08:27 PM
#122

Can't believe it. Seven pages of artistic workmanship and only three thanks? OK now four.
Man you have some incredible skills. Thanks of sharing the project.
Man you have some incredible skills. Thanks of sharing the project.
The following users liked this post:
Tinmatt (03-24-2017)


 03-25-2017, 03:07 AM
#126
Le Mans Master

This is an amazing thread. I would never have imagined that it is possible to build a 180 header in a front engine V8 and still have ground clearance or no pipes coming through the windshield. The workmanship is outstanding. It's on the cutting edge of metal artwork. Even if they don't work, and I'm sure they will, they are beautiful to look at. I can't wait to see the finished product. Since I installed my header and exhaust system myself and know of the space limitations I wondered how you could fit all those pipes in that tunnel.
03-25-2017, 09:07 AM
#127
Team Owner


The following users liked this post:
v8srfun (03-25-2017)
03-31-2017, 10:48 AM
#128
Advanced
Following this all the way. Read the entire thread up to this point and am completely in awe of your craftsmanship!
Last edited by sjgrimsley; 04-26-2017 at 01:12 PM.
03-31-2017, 11:48 AM
#129
Drifting

03-31-2017, 01:00 PM
#131
Team Owner

 04-04-2017, 09:24 AM
#133
Drifting

 04-04-2017, 11:51 AM
#134
Instructor
Thread Starter
Sorry for the delay in updates. I've been fighting the driver side header but it's starting to come together, #1 and #7 primaries are done and the other two should work as planned. Updates are worthless without pictures so I'll try to get some up when I get back in the shop.
Funny thing on in the name Tinman, that is what I go by pretty much everywhere else. But as a recent member here, I was too late and that name was already taken. So a hybrid of it and my first name had to do. Even that was taken on Instagram so I had to add a few digits and am Tinmatt777 on there.
Much thanks again to everyone for the compliments! Glad everyone is enjoying the build.
04-04-2017, 07:15 PM
#136
Instructor
Thread Starter
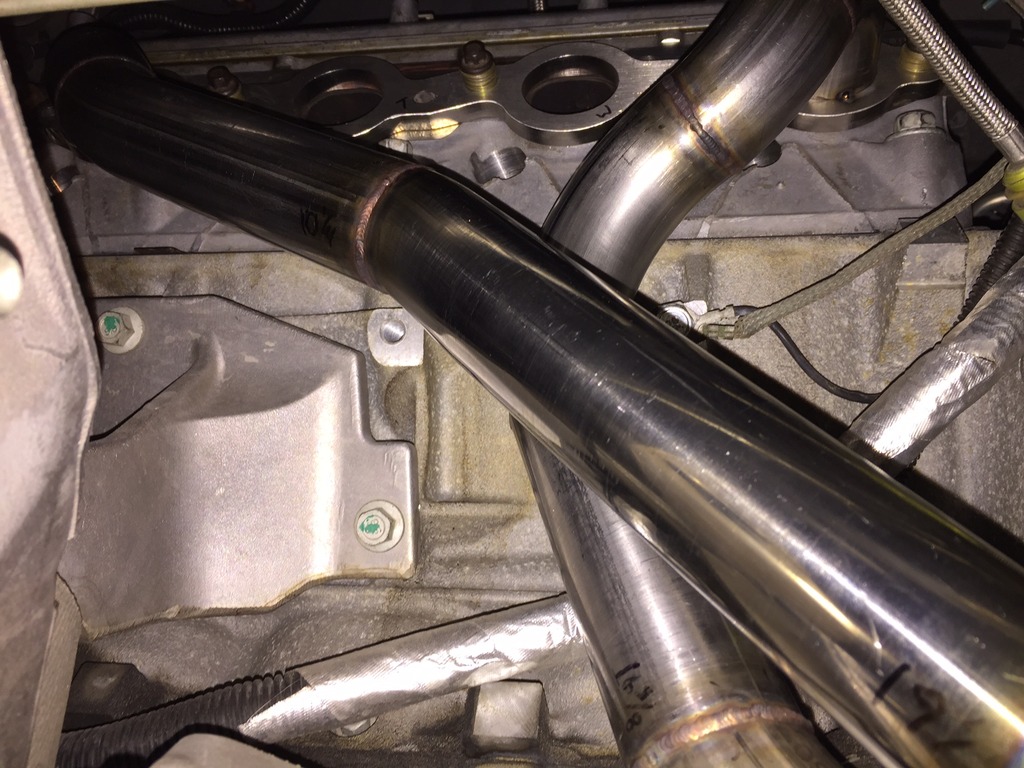
Driver side is proving to be not as easy as expected. The angle of the spark plugs does make things easier but to make the primary lengths equal, the outer two must be established first as they have the shortest and longest distances to the collector. Once they are established, the inner two banks can do whatever is needed to match the outer banks in length. On the passenger side, the outer two banks entered the upper collector making the inner banks fairly easy to work with as they were under the previously established upper two primaries. On the driver side, it's the opposite situation. The established primaries are on the bottom and I'm now between a figuratively rock and a hard place with the inner two primaries being between the established outer primaries and the bellhousing/block.
#1 and #7 complete with the #3 and #5 being worked from the collector forward. It takes a lot of bends to make the #7 as long as #1.
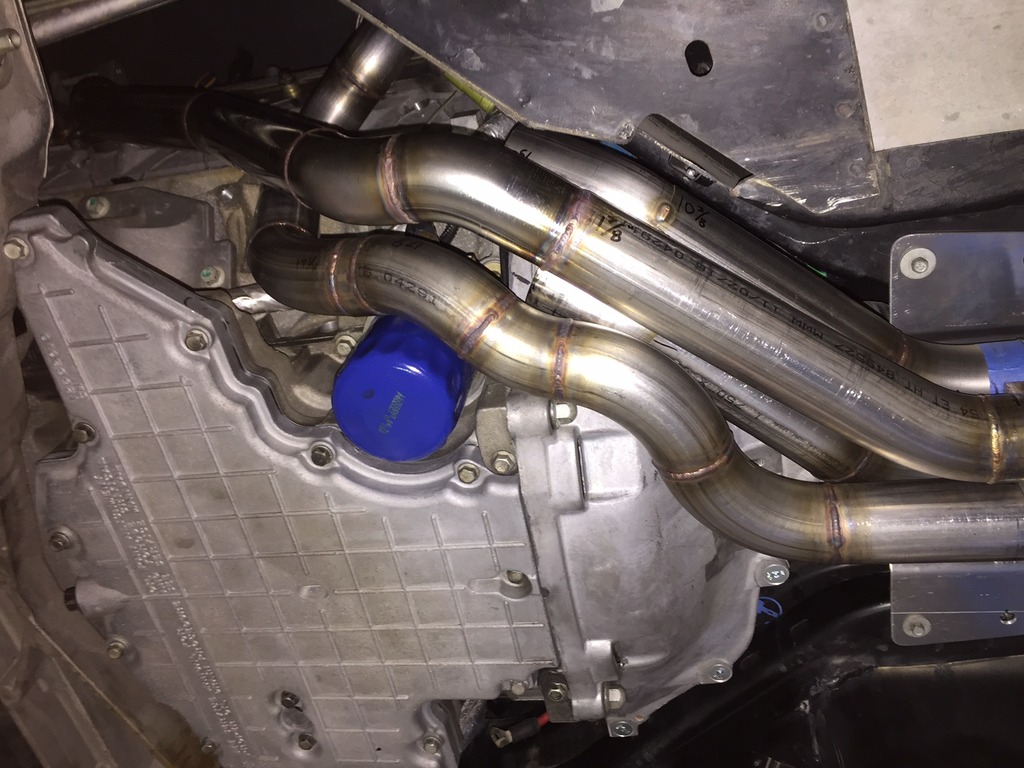
#1 and #7 as the make their way to the header flange.
At least one detail is done. O2 sensor wiring routed and through the new tunnel plate.
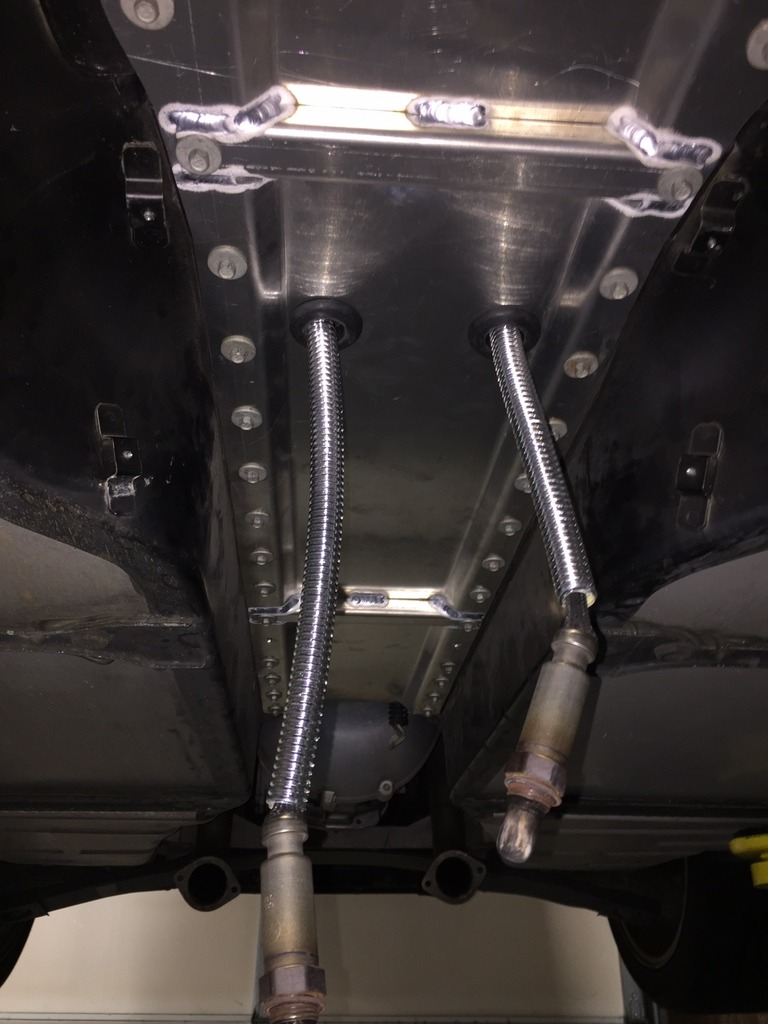
#1 and #7 complete with the #3 and #5 being worked from the collector forward. It takes a lot of bends to make the #7 as long as #1.

#1 and #7 as the make their way to the header flange.

At least one detail is done. O2 sensor wiring routed and through the new tunnel plate.
 04-05-2017, 07:17 PM
#137
Instructor
Thread Starter
The new plan of attack. The primaries are held together on the collector end with a simple hose clamp and some steel plate shims tack welded in a cross pattern to hold them exactly as they slip into the collectors. To further lock them in position there are three pieces of scrap 16ga. stainless sheet tacked between the tubes just past the hose clamp. Now I can fiddle with the remaining two tubes on the bench instead of under the car. A few back and forths from bench to car will be required to check for clearance and ease of installation along the way but much easier than how I was doing things.

A few other things going on in this picture. Yes, I'm aware of the fire hazard of the insulation facing near the weld bench. Relax, the hole is from various parts falling off the backside of the bench over all the years that I did not put up any drywall or other actual interior wall type finish, not from a previous fire.
Secondly, these 1 1/2" diameter pieces of ducting make great visual planners of the paths needed to get the lengths equal.
Thirdly, wish I could take credit for discovering this one, ping pong ***** in the coffee can. The perfect easy way to measure centerline length. Drop them in, multiply by 1.5, done.
The following users liked this post:
TastyBacon (04-07-2017)
04-05-2017, 07:38 PM
#139
Instructor
Thread Starter
It was touched on. If someone is buying, I'm selling. However, all the secrets are exposed in this thread so I don't really have anyway to prevent others from copying the design.
04-05-2017, 10:31 PM
#140
Racer
Well hey I'm semi local to you so anytime you get bored and want to make another set you let me know
Found a video with some 180 degree headers.
Found a video with some 180 degree headers.
Last edited by Ludeaem; 04-05-2017 at 10:35 PM.