
DIY: Investigating Sloppiness of the C5 Shifter/Linkage/Trans
 01-26-2017, 10:54 AM
#1
Drifting

Thread Starter

This subject has been beaten to death over the years and there are many "fixes" out there for it, but most require fairly expensive aftermarket shifters or the anti-venom mod (which did nothing for me but make shifts more vague) - a lot of people just "learn to live with it".
Being a bored engineer in the thick of winter I have no problem disassembling the assembly, starting with the shifter all the way back to the transmission, to find out what's going on. This thread will be a running log of my experiences as I go along.
I have owned and driven BMWs that have the best shift feel I've ever experienced, and while even in its best form a C5 won't feel that good, I'm trying to at least get closer.
The problem that I'm addressing is the general sloppiness of the C5 drivetrain - this means the shifter (upper and lower box), shift linkage (between lower box and transmission case), and the inner workings of the transmission itself. I have excessive play in the shift lever when in gear, and especially in neutral. My shifter also does not spring back to center from the 5-6 position, but DOES spring back from the 1-2 position. Again, the C5 drivetrain is generally sloppy compared to the likes of BMW, Miata, S2000 shift feel, but these traits are unacceptable and very annoying during any sort of driving (relaxed or spirited).
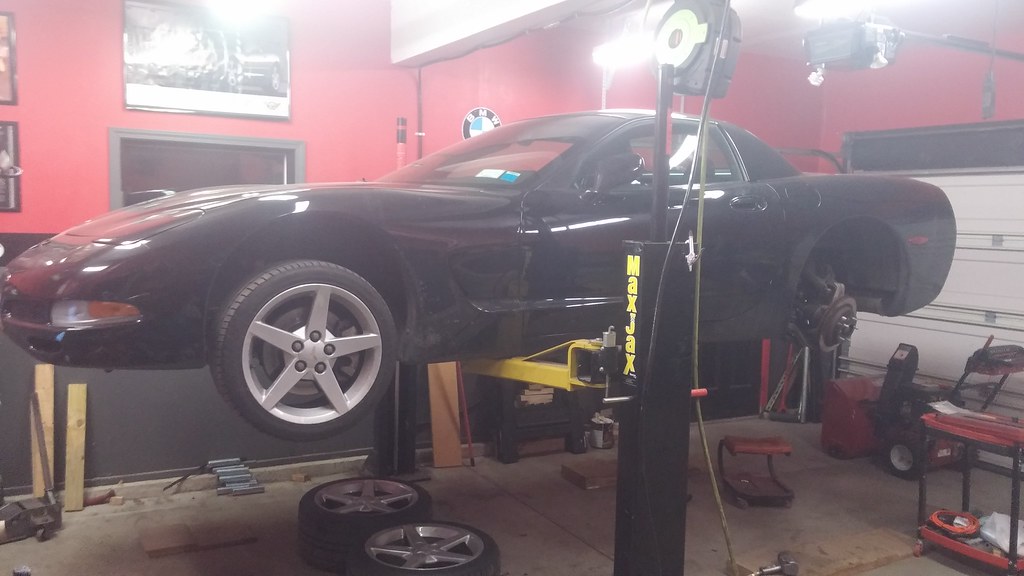
I already have a full C6Z06 upper and lower shifter installed. The remainder of the drivetrain is completely stock - chassis is a 2000 FRC Hardtop with approximately 115K miles. The car was owned by a female for most of its life and not abused, so the theory is that simple wear and tear on moving components has caused this sloppiness.
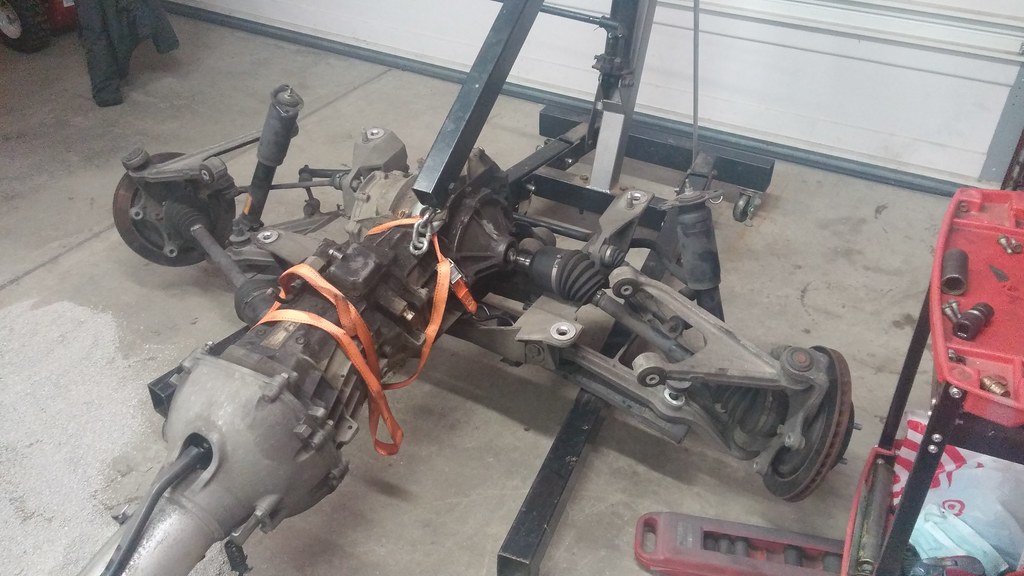
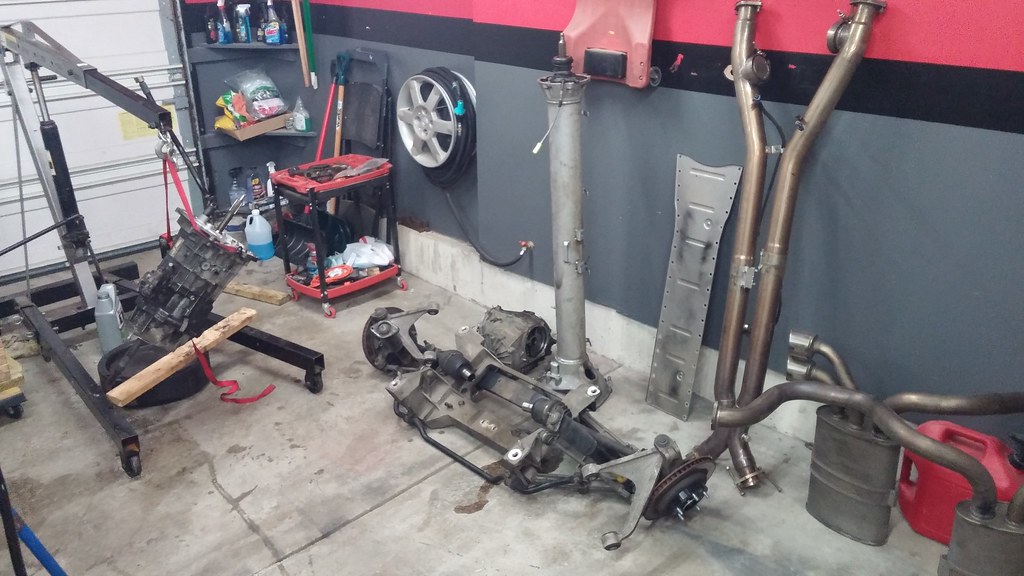
I had already pulled the torque tube, transmission, and rear end for some unrelated work, so this was a great time to inspect the components and find out where the play is coming from, starting with the shifter.
I actually did a refurb on the C6Z lower box when I bought it used, before even installing it in the car for the first time. It needed a thorough cleaning and lubrication, and that did help the general smoothness of the action, but didn't do anything for the sloppiness.
Here is my train of thought and plan of attack:
The plastic bushings that hold the "yoke" shaft have a 1/16" of slop in them which translates to play in the shift **** when in neutral, or any gear really. They will be replaced with either delrin or bronze bushings that will provide a much more solid "hold" on the shaft.
The C6 Upper box looked to be fine. I found that the black "cup" that rides in the lower "receiver" has no slop and moves very freely.
With the entire drivetrain removed from the car (minus engine), the shift linkage (with no shifter attached) still does not spring back from 5-6 to center. This rules out the shifter as causing my centering issue, although the shifter still contributes to the slop. From a great post by Bill Curlee:
I bolted the shifter assembly back onto the torque tube to visualize what the shift linkage was doing, and chase down the slop. This video shows the bushing wear in the lower box. The left to right wiggling of the shift ****/lever at the end of the video has no effect on movement of components in the trans - it's all slop in the joint at the rear bellhousing! Any similar front/rear movement of the shift ****/lever has equal slop that is a result of the worn bushings inside the lower box.
There is also lots of play evident in the joint assembly right before the shift linkage enters the transmission. It looks to be held together with roll pins, I have not yet disassembled that area.
Of course I COULD purchase a (relatively) expensive aftermarket shifter such as MGW, Hinson, Kirban that has internal centering springs, but I feel that they are somewhat of a band aid to the pre-existing condition inside the transmission. They also tend to be very stiff and the throw is excessively short, which makes the effort go way up. I drive my car 99% on the street with a couple track days a year so an easy, low effort throw is important.
So the final list of suspects, working towards the back of the car:
C6 Lower box mount bushings (that mount the box to the torque tube) - non issue. These are solid on my C6Z shifter. No movement.
C6 Lower box shaft bushings - cause shifter sloppiness. Plan to install new bronze bushings custom sized to my yoke, press fit into box. Not too bad of a job, will require some machining.
T56 Shift linkage to trans - cause shifter sloppiness. Need to investigate, there looks to be a brass bushing inside a mini u-joint that is worn.
C5 T56 internal centering spring - causes shifter not to snap back to neutral from the 5-6 gate (in my case). Again, an aftermarket shifter might help, but I want to get to the root cause. I initially thought this might be caused by the fore-aft detent ball that rides on top of the shift gate (NOT the detent ball that is altered by the anti-venom mod)
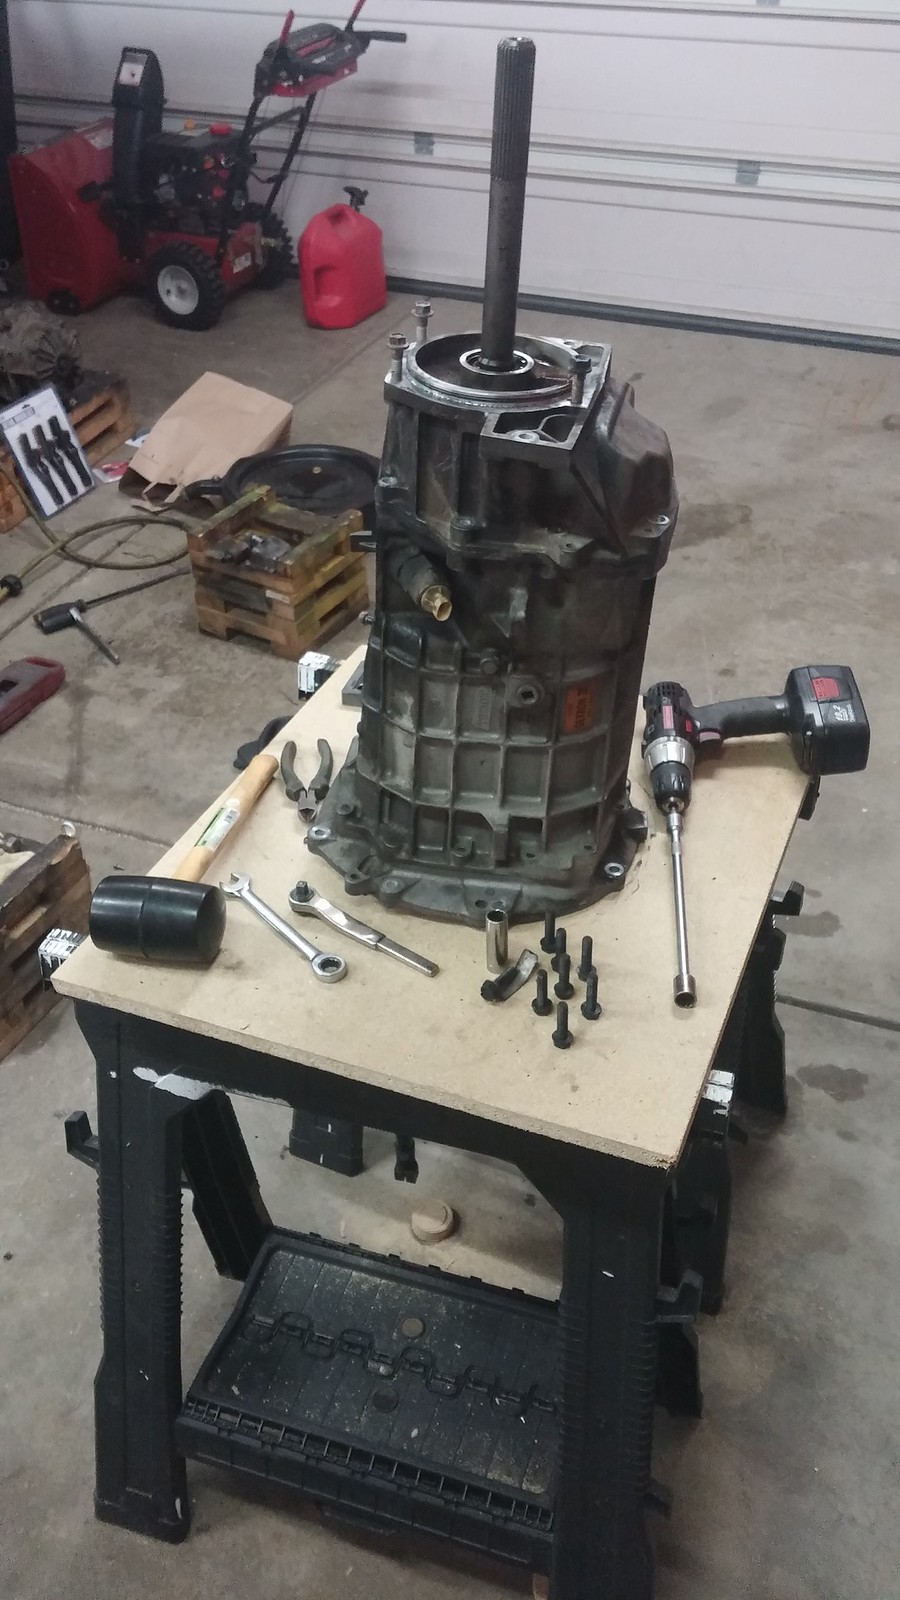
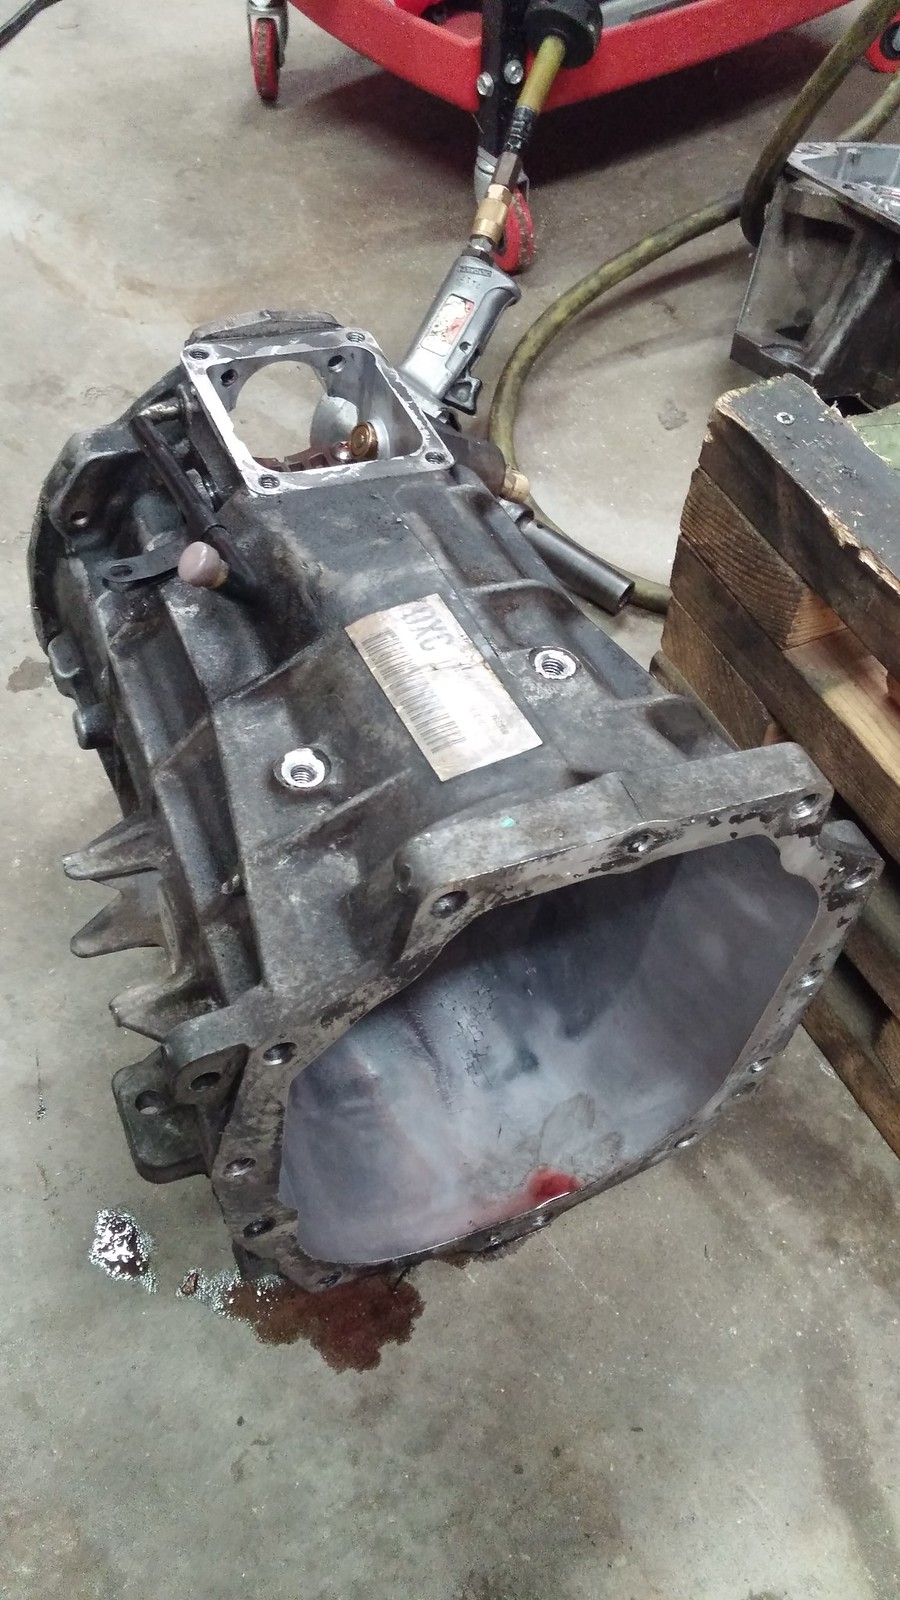
So I mounted up my T56 on the worktable.
 0125171925 by Norbert Ogiba, on Flickr
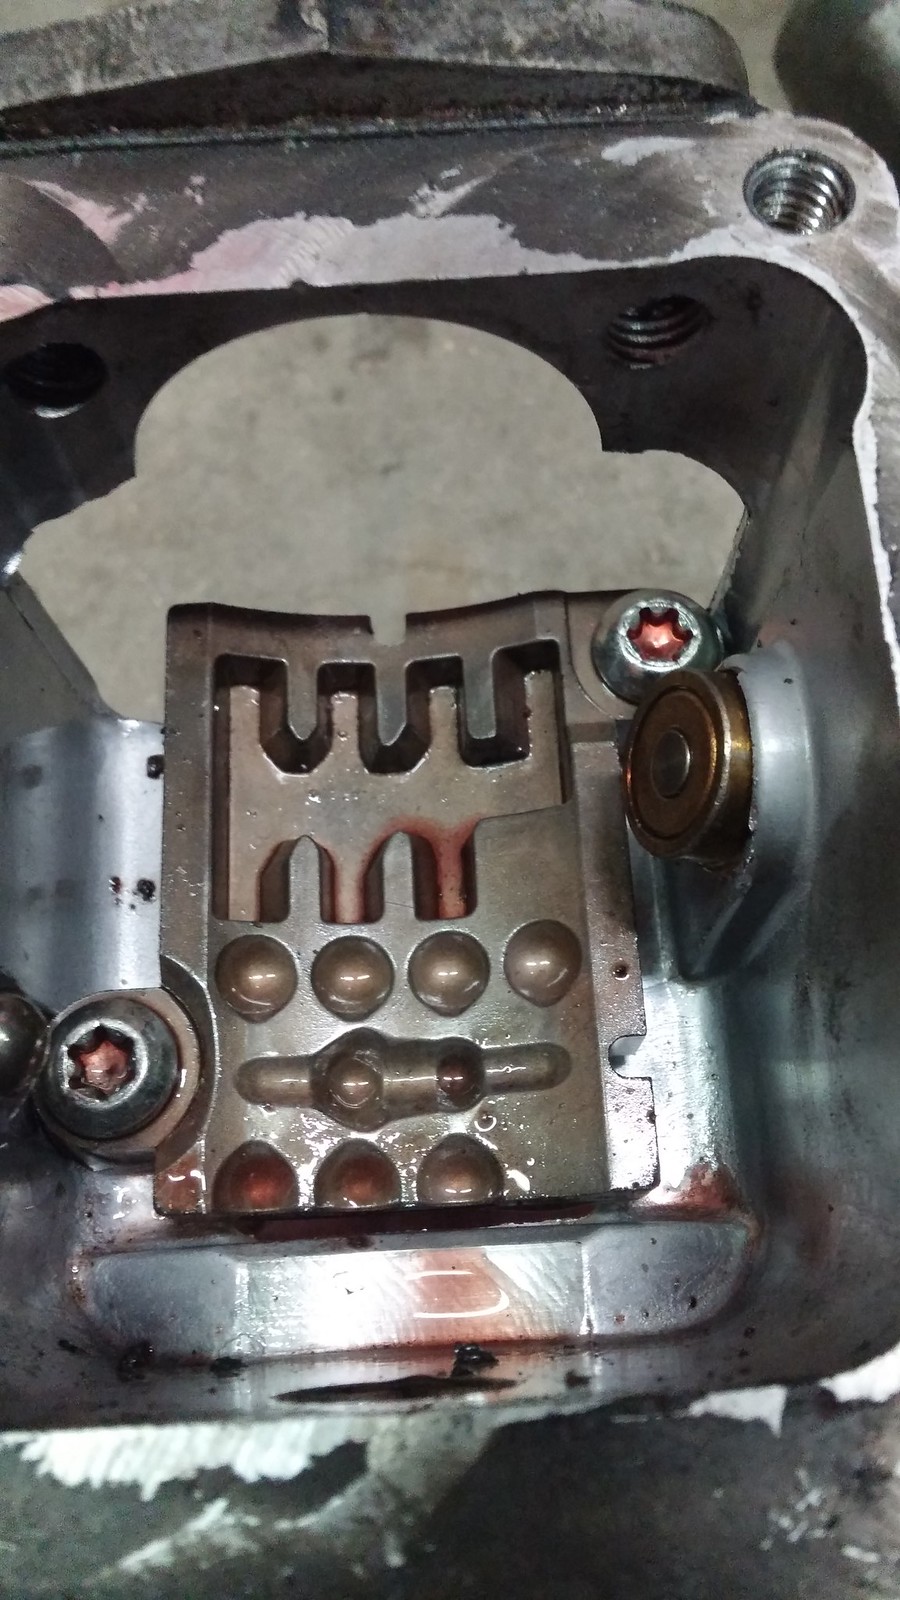
After pulling the rear tail housing case I visually verified that the shift detent ball wasn't binding up. This is not my picture, just an example of the guide plate that the lower detent ball rides in. I can't get the shift rail block off yet to verify if the ball is physically free, but that will come later.
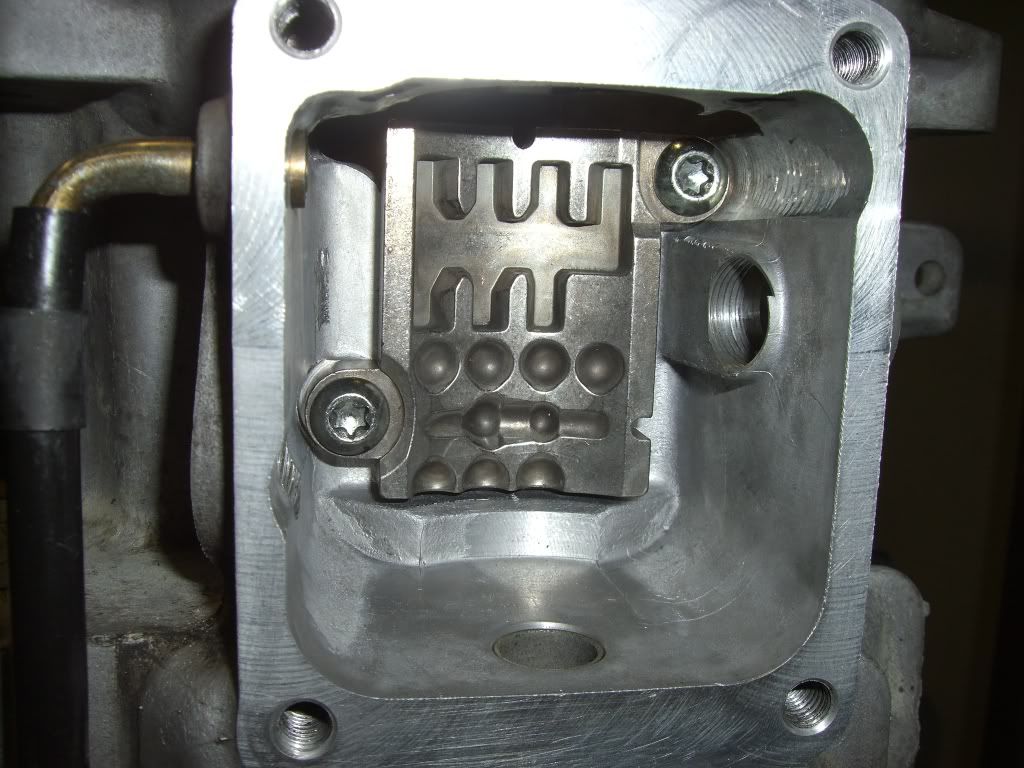
According to Bill Curlee: "There is a U shaped spring on the bottom plate that returns the shifter back to the center: " Through the process of elimination, this must be what is causing my shifter not to return back to center.
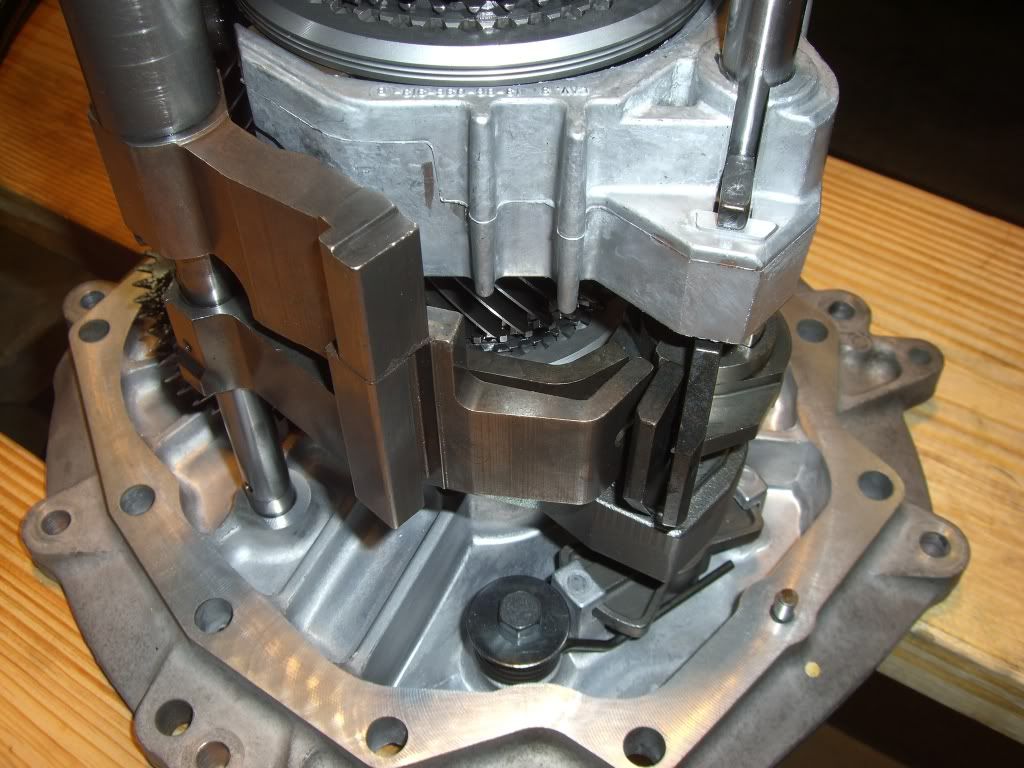
Tailhousing off.
 0125171930 by Norbert Ogiba, on Flickr
I don't know if someone has gone through this trans in its life, but the buildup on the magnets didn't look TOO bad for 115k. I will be removing and cleaning these prior to reassembly. For what it's worth, I did replace the trans fluid with Dexron III ATF 1 year and 10K miles ago, and it looked brand new while draining.
That's where I left off for the night, my snap ring pliers were not big enough to handle the rings on the reverse shaft. More to come tonight.
Being a bored engineer in the thick of winter I have no problem disassembling the assembly, starting with the shifter all the way back to the transmission, to find out what's going on. This thread will be a running log of my experiences as I go along.
I have owned and driven BMWs that have the best shift feel I've ever experienced, and while even in its best form a C5 won't feel that good, I'm trying to at least get closer.
The problem that I'm addressing is the general sloppiness of the C5 drivetrain - this means the shifter (upper and lower box), shift linkage (between lower box and transmission case), and the inner workings of the transmission itself. I have excessive play in the shift lever when in gear, and especially in neutral. My shifter also does not spring back to center from the 5-6 position, but DOES spring back from the 1-2 position. Again, the C5 drivetrain is generally sloppy compared to the likes of BMW, Miata, S2000 shift feel, but these traits are unacceptable and very annoying during any sort of driving (relaxed or spirited).
I already have a full C6Z06 upper and lower shifter installed. The remainder of the drivetrain is completely stock - chassis is a 2000 FRC Hardtop with approximately 115K miles. The car was owned by a female for most of its life and not abused, so the theory is that simple wear and tear on moving components has caused this sloppiness.
I had already pulled the torque tube, transmission, and rear end for some unrelated work, so this was a great time to inspect the components and find out where the play is coming from, starting with the shifter.
I actually did a refurb on the C6Z lower box when I bought it used, before even installing it in the car for the first time. It needed a thorough cleaning and lubrication, and that did help the general smoothness of the action, but didn't do anything for the sloppiness.
Here is my train of thought and plan of attack:
The plastic bushings that hold the "yoke" shaft have a 1/16" of slop in them which translates to play in the shift **** when in neutral, or any gear really. They will be replaced with either delrin or bronze bushings that will provide a much more solid "hold" on the shaft.
The C6 Upper box looked to be fine. I found that the black "cup" that rides in the lower "receiver" has no slop and moves very freely.
With the entire drivetrain removed from the car (minus engine), the shift linkage (with no shifter attached) still does not spring back from 5-6 to center. This rules out the shifter as causing my centering issue, although the shifter still contributes to the slop. From a great post by Bill Curlee:
I bolted the shifter assembly back onto the torque tube to visualize what the shift linkage was doing, and chase down the slop. This video shows the bushing wear in the lower box. The left to right wiggling of the shift ****/lever at the end of the video has no effect on movement of components in the trans - it's all slop in the joint at the rear bellhousing! Any similar front/rear movement of the shift ****/lever has equal slop that is a result of the worn bushings inside the lower box.
There is also lots of play evident in the joint assembly right before the shift linkage enters the transmission. It looks to be held together with roll pins, I have not yet disassembled that area.
Of course I COULD purchase a (relatively) expensive aftermarket shifter such as MGW, Hinson, Kirban that has internal centering springs, but I feel that they are somewhat of a band aid to the pre-existing condition inside the transmission. They also tend to be very stiff and the throw is excessively short, which makes the effort go way up. I drive my car 99% on the street with a couple track days a year so an easy, low effort throw is important.
So the final list of suspects, working towards the back of the car:
C6 Lower box mount bushings (that mount the box to the torque tube) - non issue. These are solid on my C6Z shifter. No movement.
C6 Lower box shaft bushings - cause shifter sloppiness. Plan to install new bronze bushings custom sized to my yoke, press fit into box. Not too bad of a job, will require some machining.
T56 Shift linkage to trans - cause shifter sloppiness. Need to investigate, there looks to be a brass bushing inside a mini u-joint that is worn.
C5 T56 internal centering spring - causes shifter not to snap back to neutral from the 5-6 gate (in my case). Again, an aftermarket shifter might help, but I want to get to the root cause. I initially thought this might be caused by the fore-aft detent ball that rides on top of the shift gate (NOT the detent ball that is altered by the anti-venom mod)
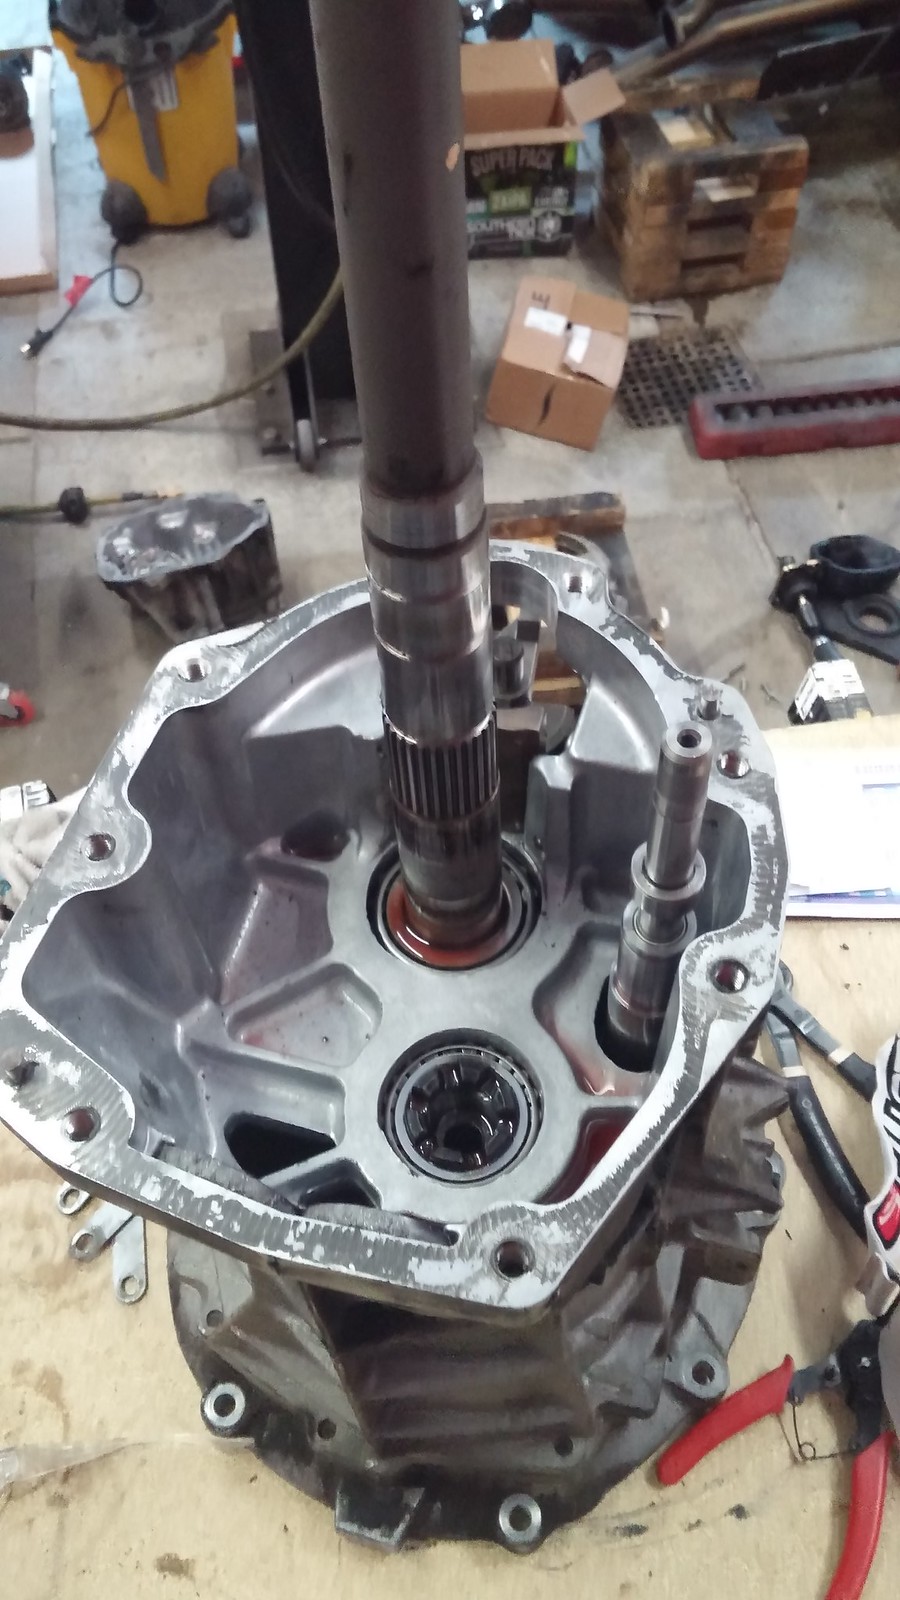
So I mounted up my T56 on the worktable.
0125171925 by Norbert Ogiba, on FlickrAfter pulling the rear tail housing case I visually verified that the shift detent ball wasn't binding up. This is not my picture, just an example of the guide plate that the lower detent ball rides in. I can't get the shift rail block off yet to verify if the ball is physically free, but that will come later.
According to Bill Curlee: "There is a U shaped spring on the bottom plate that returns the shifter back to the center: " Through the process of elimination, this must be what is causing my shifter not to return back to center.
Tailhousing off.
0125171930 by Norbert Ogiba, on FlickrI don't know if someone has gone through this trans in its life, but the buildup on the magnets didn't look TOO bad for 115k. I will be removing and cleaning these prior to reassembly. For what it's worth, I did replace the trans fluid with Dexron III ATF 1 year and 10K miles ago, and it looked brand new while draining.
That's where I left off for the night, my snap ring pliers were not big enough to handle the rings on the reverse shaft. More to come tonight.

The following users liked this post:
DaDuck (01-26-2017)
01-26-2017, 03:12 PM
#2


Pull the rubber boots off the shift linkage/rod and check out those u-joints. Every one I've taken apart has been bone dry. I don't think GM puts any lube in them at all, and they wear quickly. The best condition used one I've seen had under 20k miles on it and it was still noticeably sloppier than new...even a brand new one isn't all that tight, and the design is cheap. I think the only real fix is to replace or rebuild those U-joints.
01-26-2017, 03:51 PM
#3

subscribed
01-26-2017, 05:11 PM
#4
Le Mans Master

Very impressed and curious.
01-27-2017, 01:41 PM
#5
Tech Contributor


Member Since: Dec 1999
Location: Anthony TX
Posts: 32,736
Received 2,180 Likes
on
1,583 Posts
CI 6,7,8,9,11 Vet
St. Jude Donor '08

 WATCHING!
 01-31-2017, 03:02 PM
#6
Drifting
Thread Starter
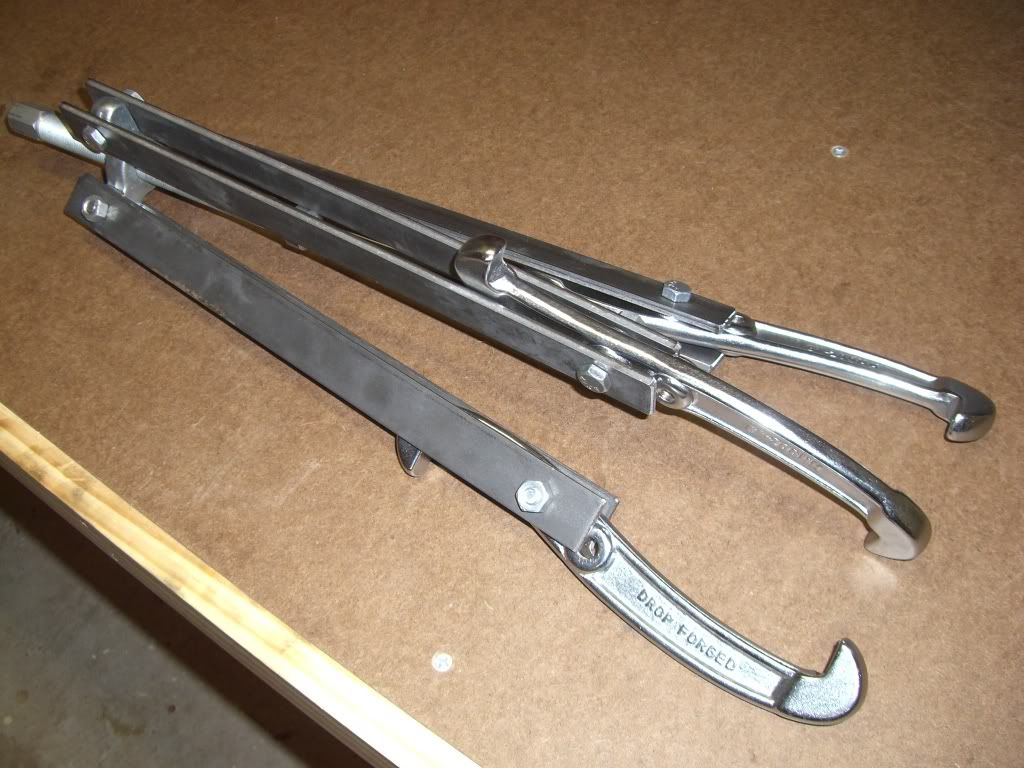
Good news - I was able to pull off the 5-6 driven gear without much difficulty after making up some 3 jaw puller extensions
Not my pic, just an example
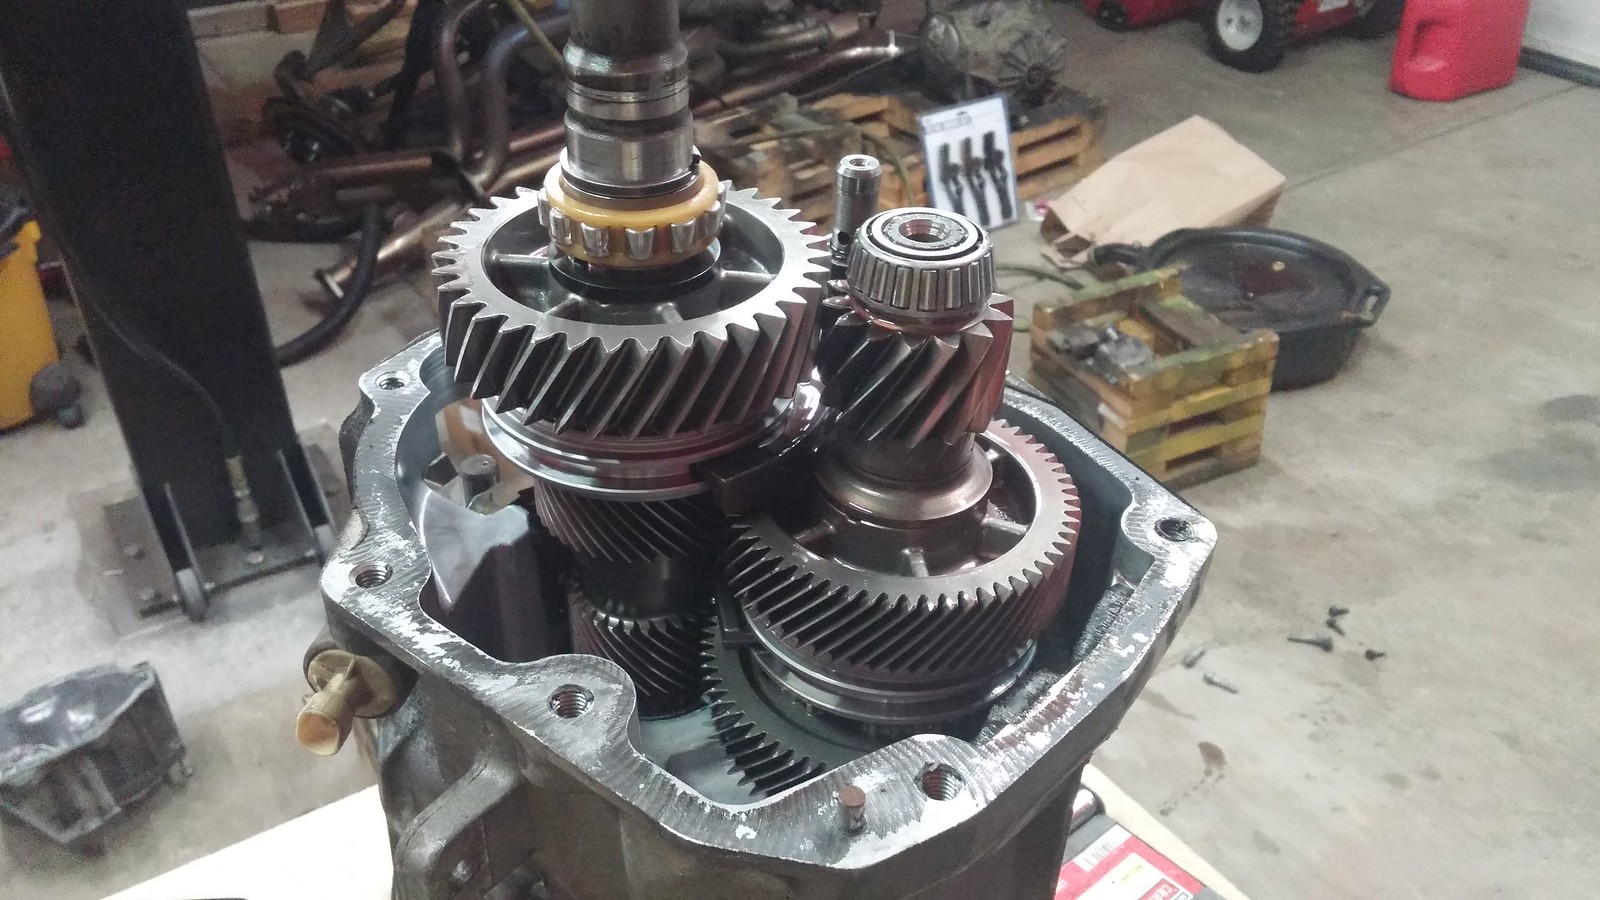
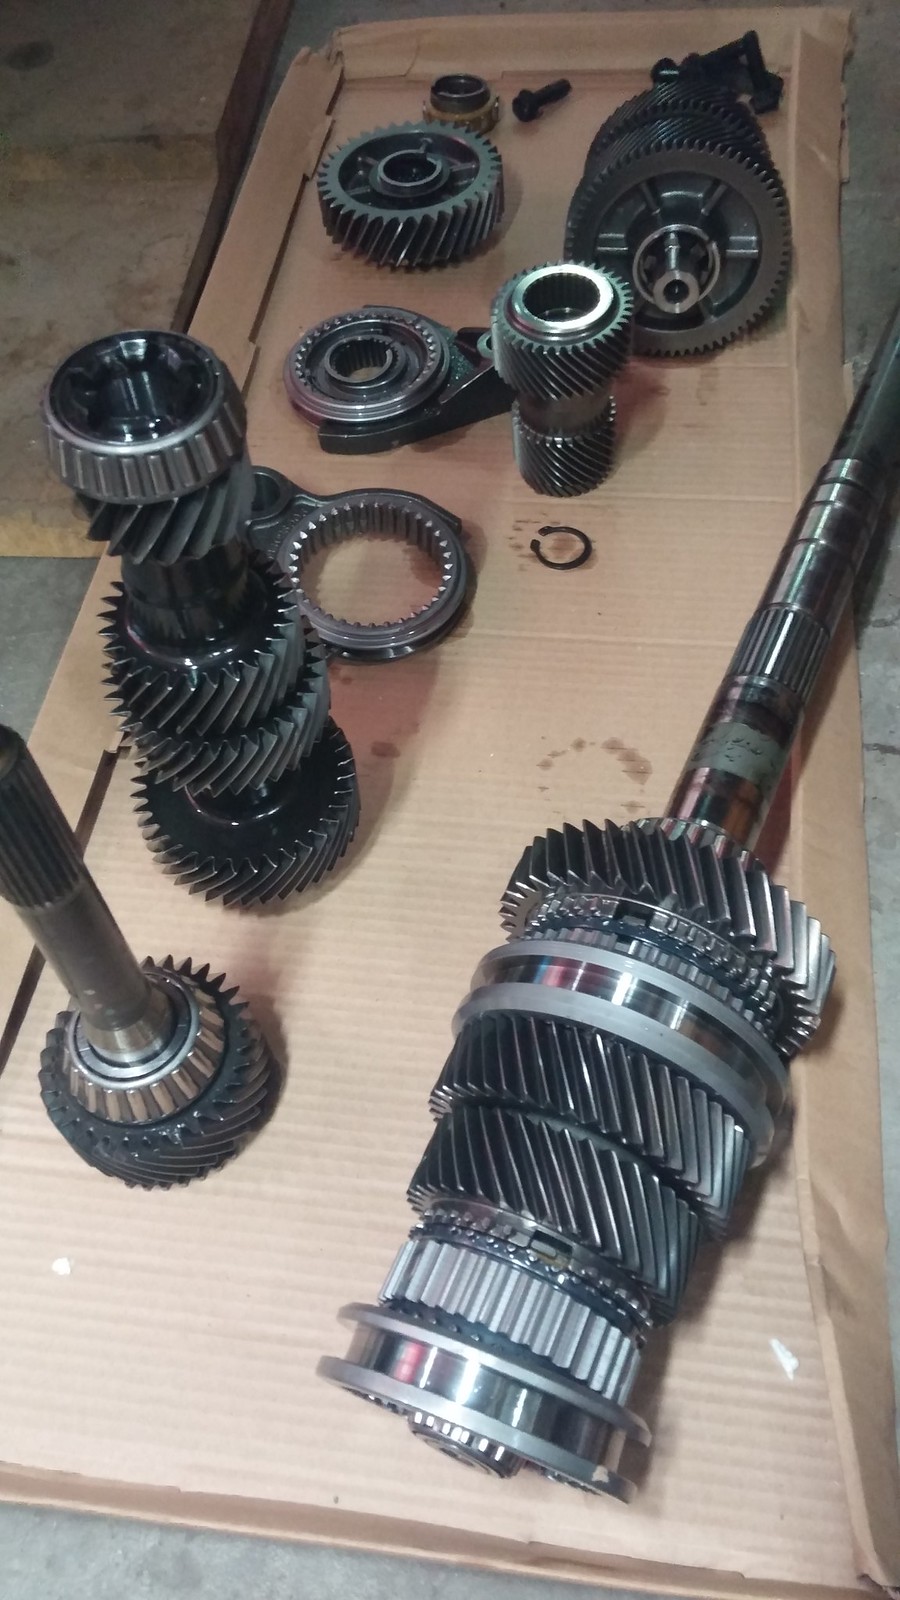
Main case nearly empty of parts (all 5-6 and reverse stuff gone)
Everything laid out in order of disassembly
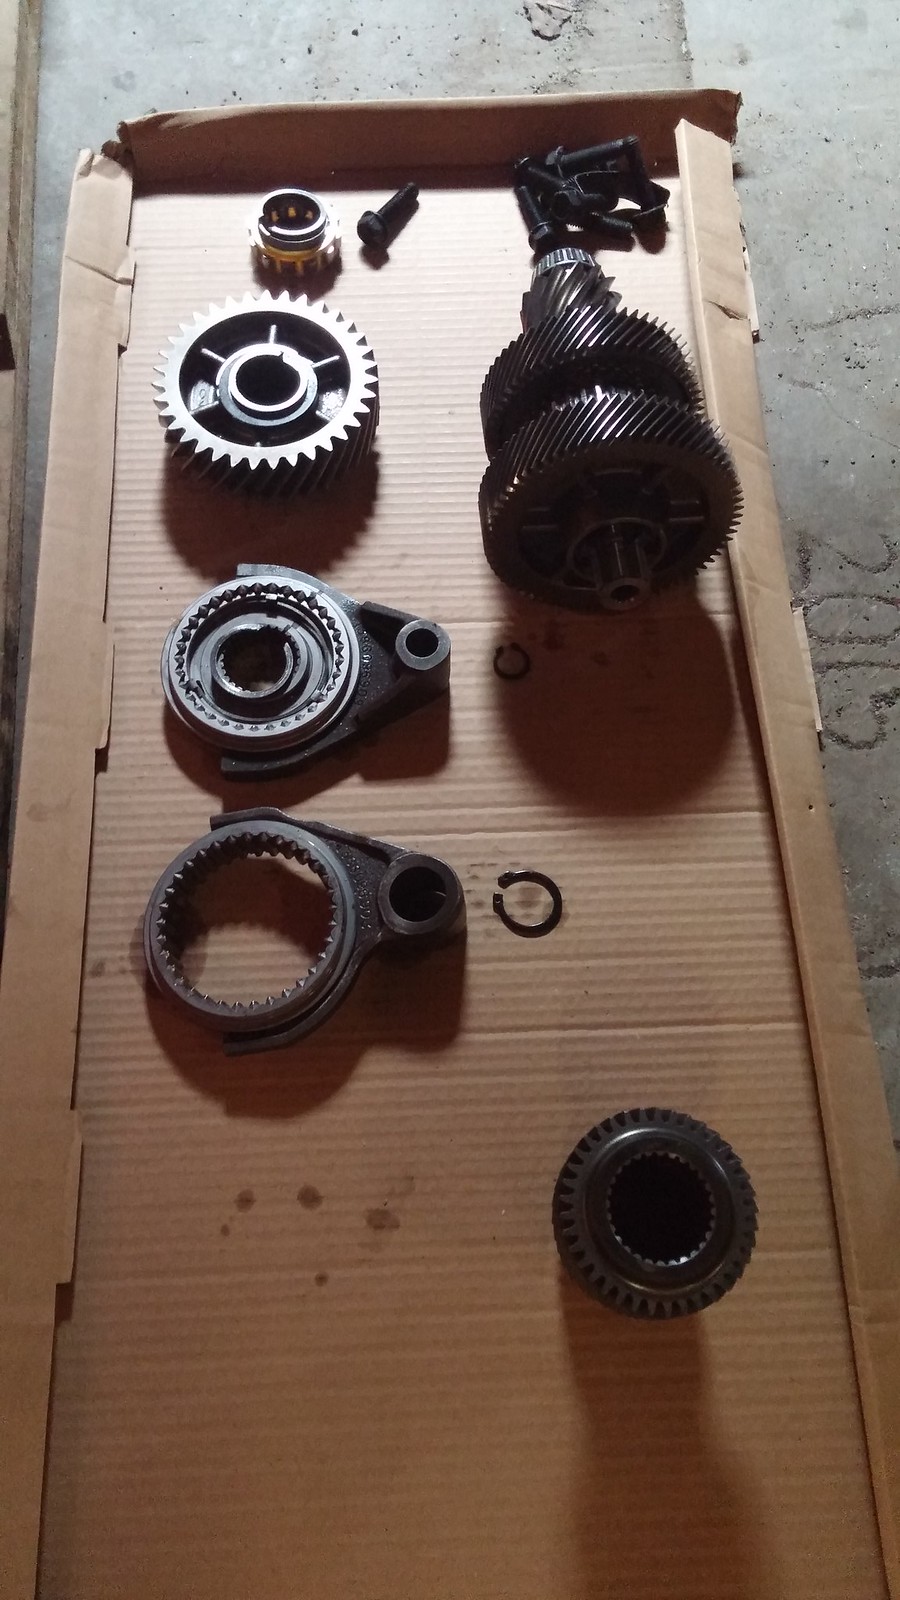
The bad news is that both the 5-6 and reverse shift fork pads showed issues of cracking. Probably to be expected after 115K miles. I will be replacing them for all gears/forks with billet bronze units.

Magnets will need some cleanup but no chunks of anything on them, just that metallic paste
Hoping to have the main case off the front plate this week so I can finally get to the spring that made me take this whole thing apart in the first place.
Not my pic, just an example
Main case nearly empty of parts (all 5-6 and reverse stuff gone)
Everything laid out in order of disassembly
The bad news is that both the 5-6 and reverse shift fork pads showed issues of cracking. Probably to be expected after 115K miles. I will be replacing them for all gears/forks with billet bronze units.
Magnets will need some cleanup but no chunks of anything on them, just that metallic paste
Hoping to have the main case off the front plate this week so I can finally get to the spring that made me take this whole thing apart in the first place.
The following users liked this post:
Sam Handwich (01-31-2017)
02-01-2017, 04:11 PM
#7
Drifting
Thread Starter
Got some work in last night.
Main case off
 0131171903 by Norbert Ogiba, on Flickr
And it's remarkably light
 0131171903b by Norbert Ogiba, on Flickr
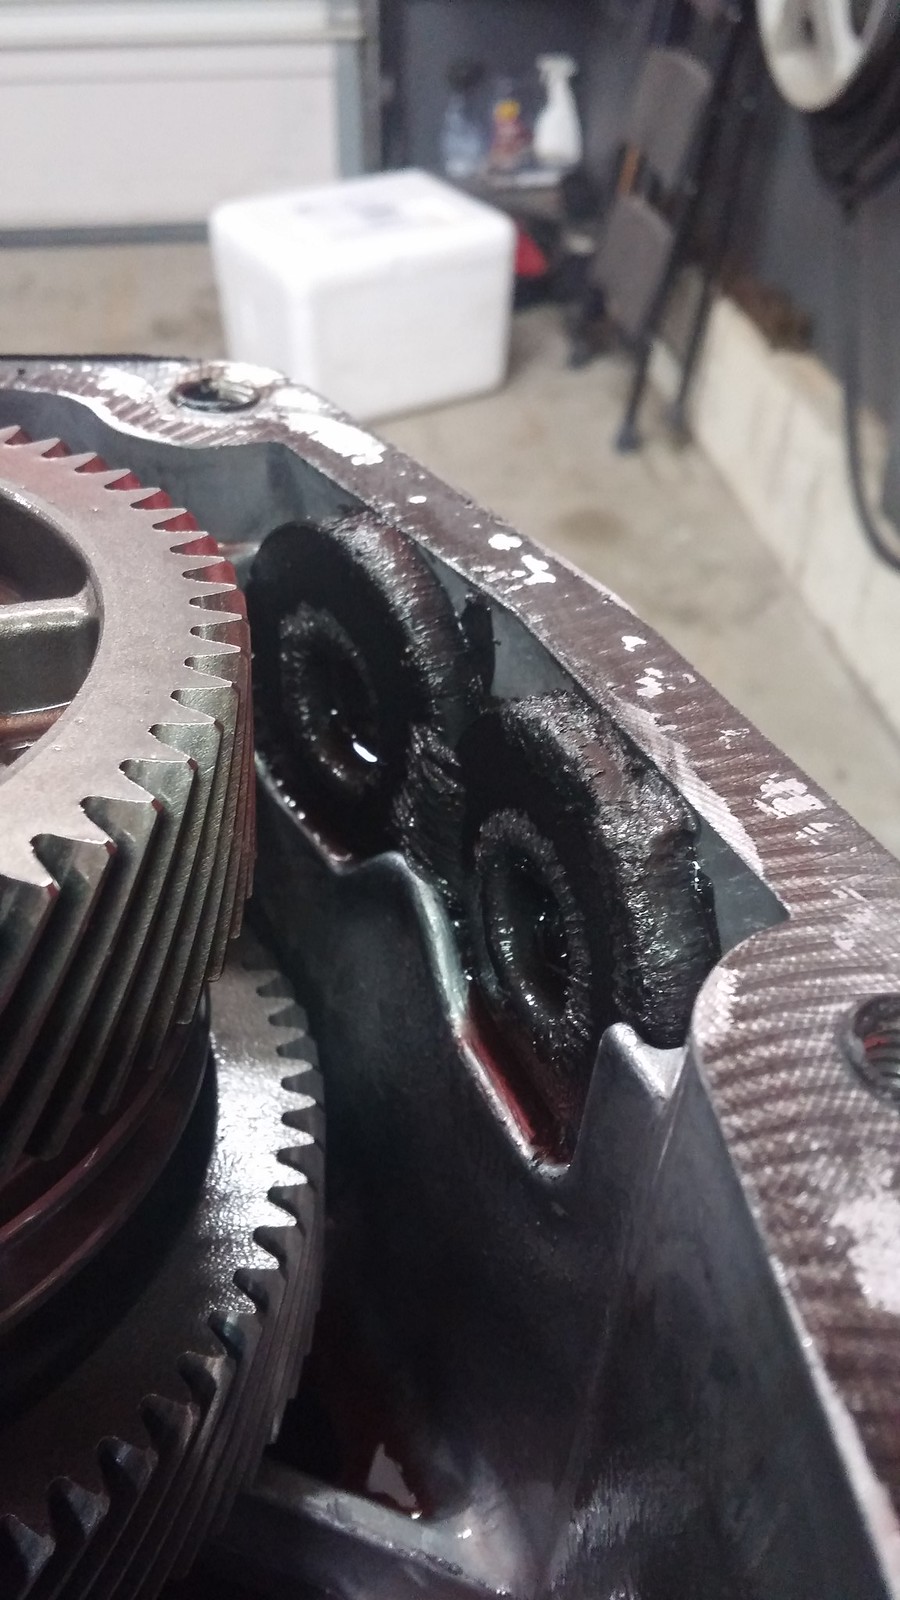
The torsion spring I've been trying to get at.
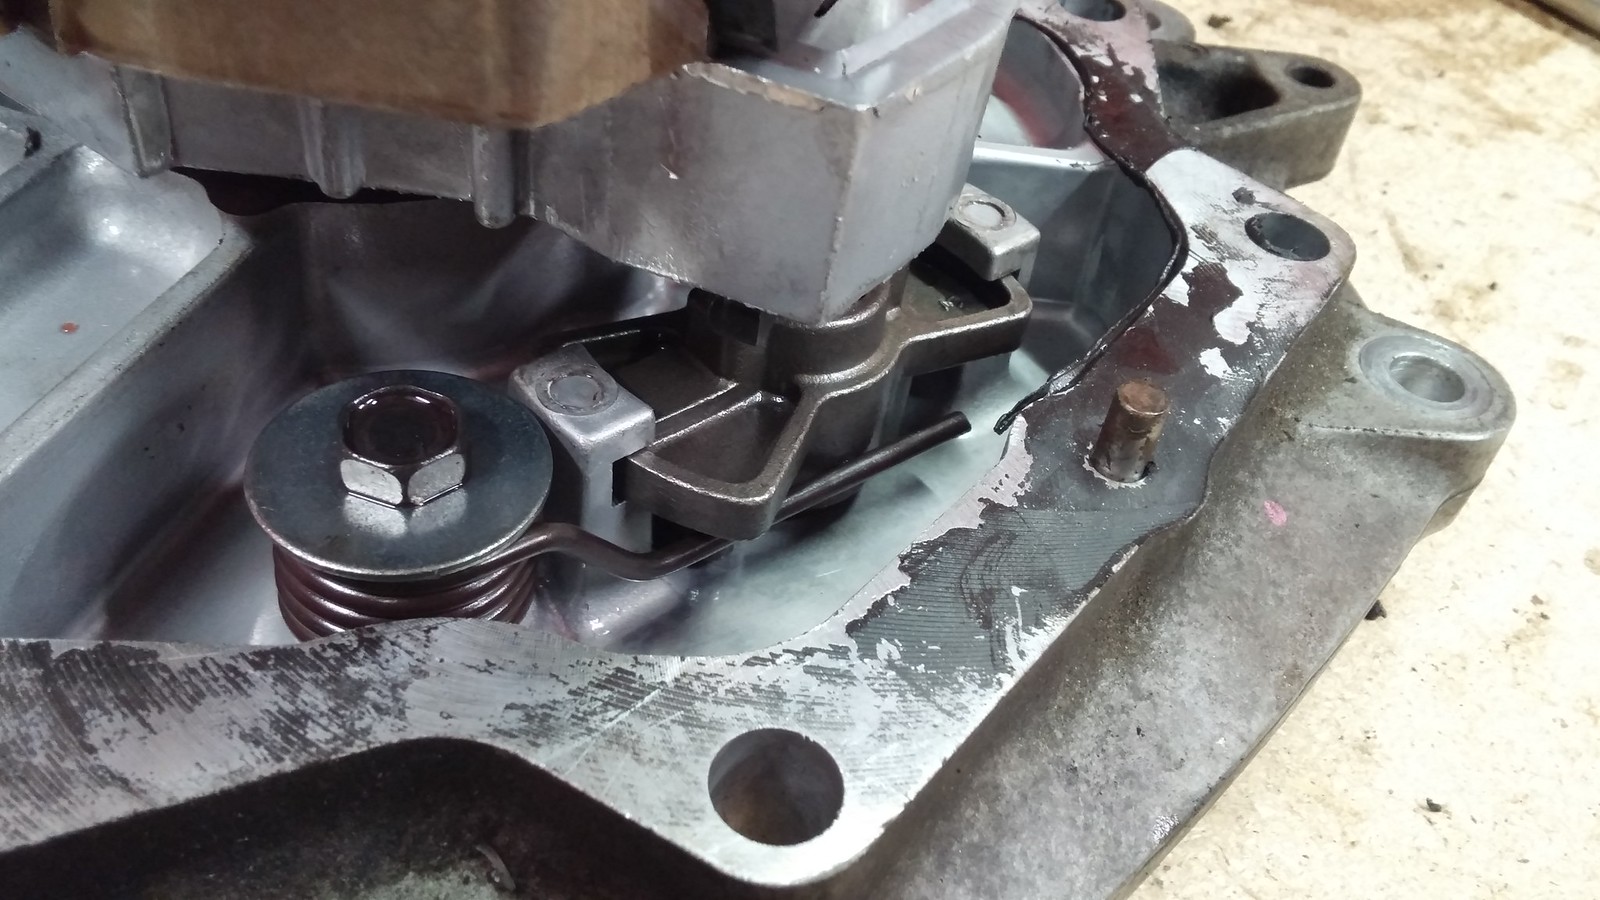 0131171903a by Norbert Ogiba, on Flickr
Shift guide plate was in nice shape, so was the detent ball that rides in it
 0131171905 by Norbert Ogiba, on Flickr
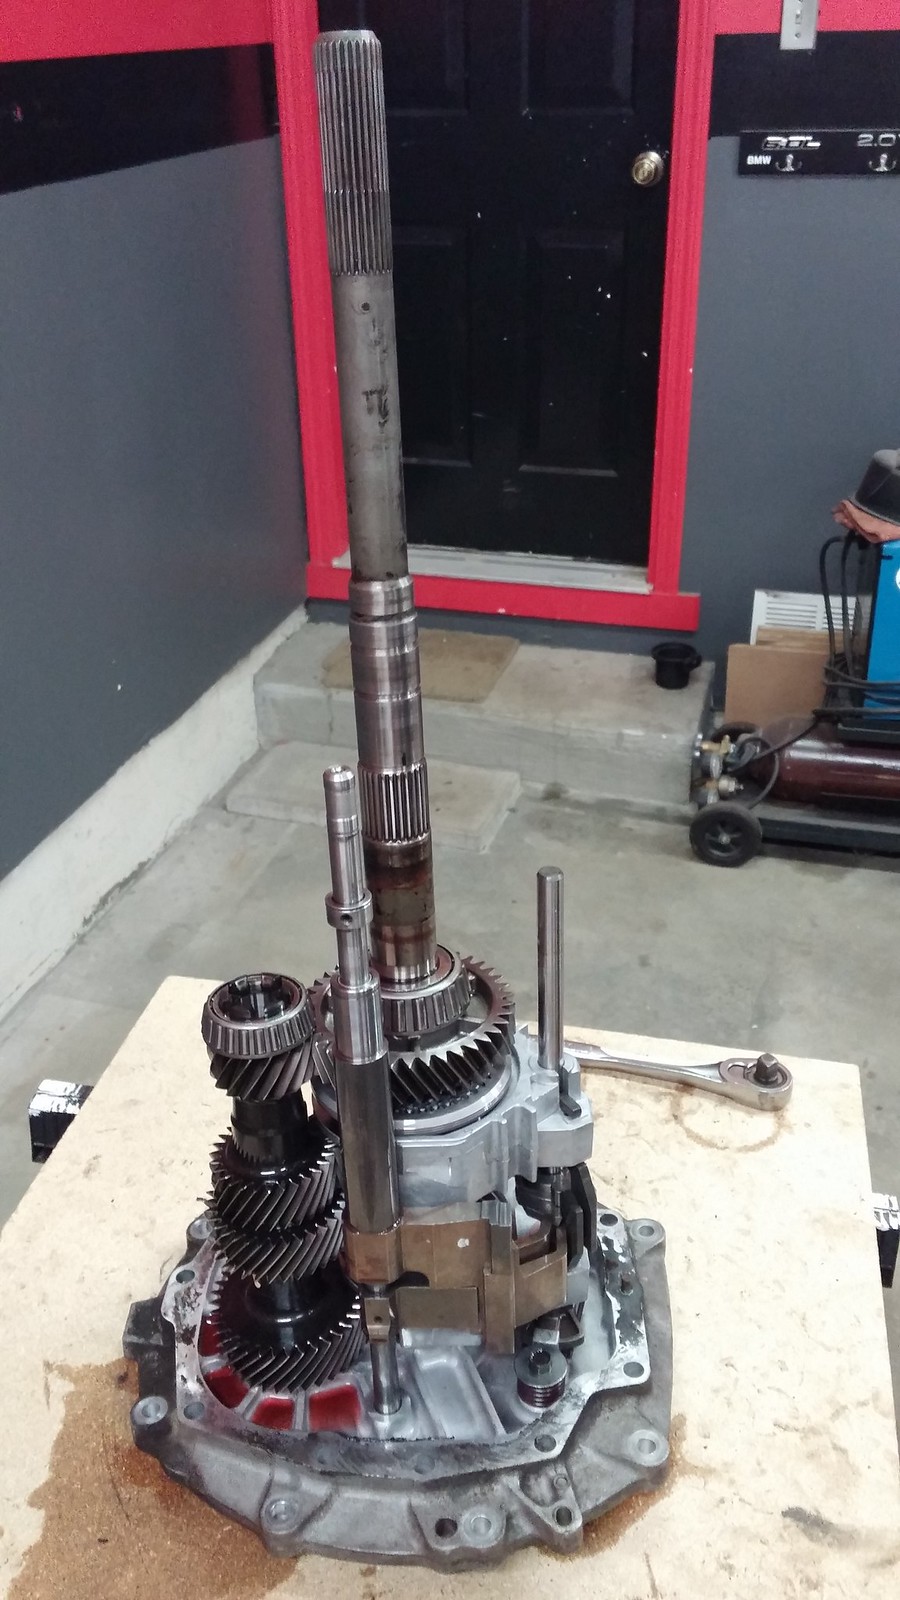
Mainshaft off, parts pile grows
 0131172025 by Norbert Ogiba, on Flickr
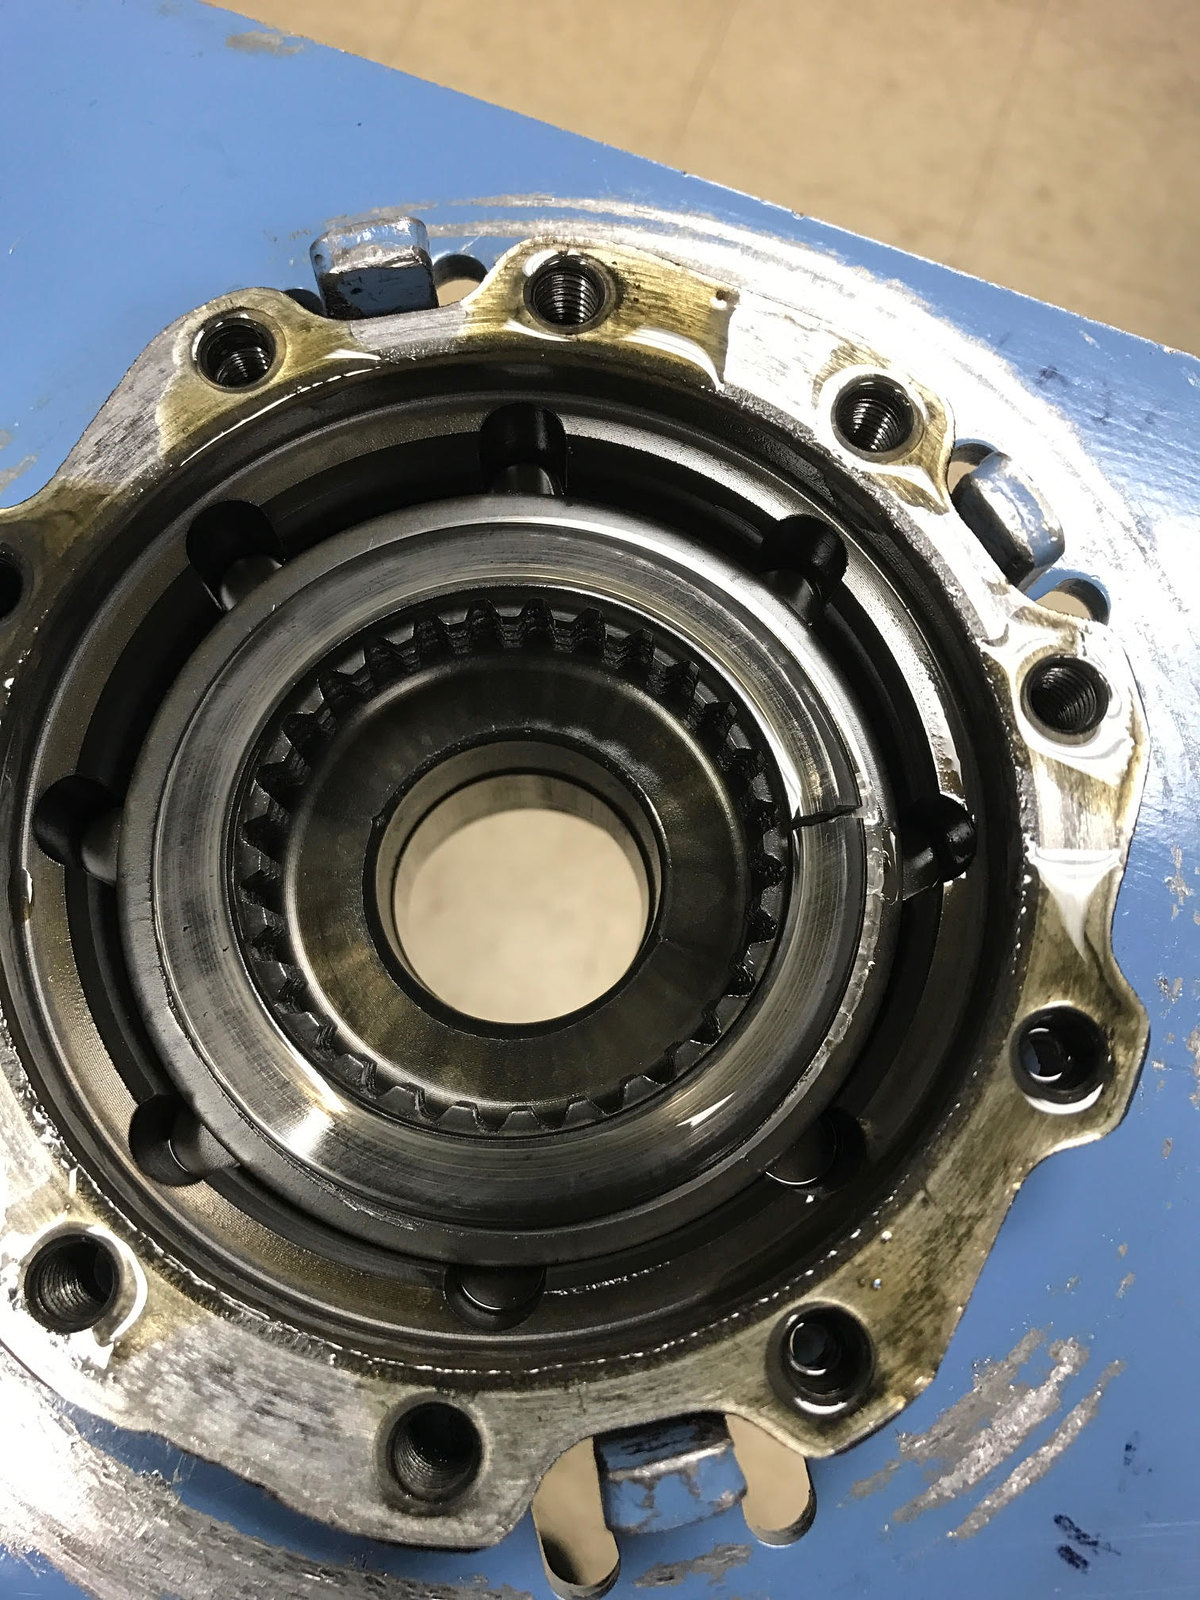
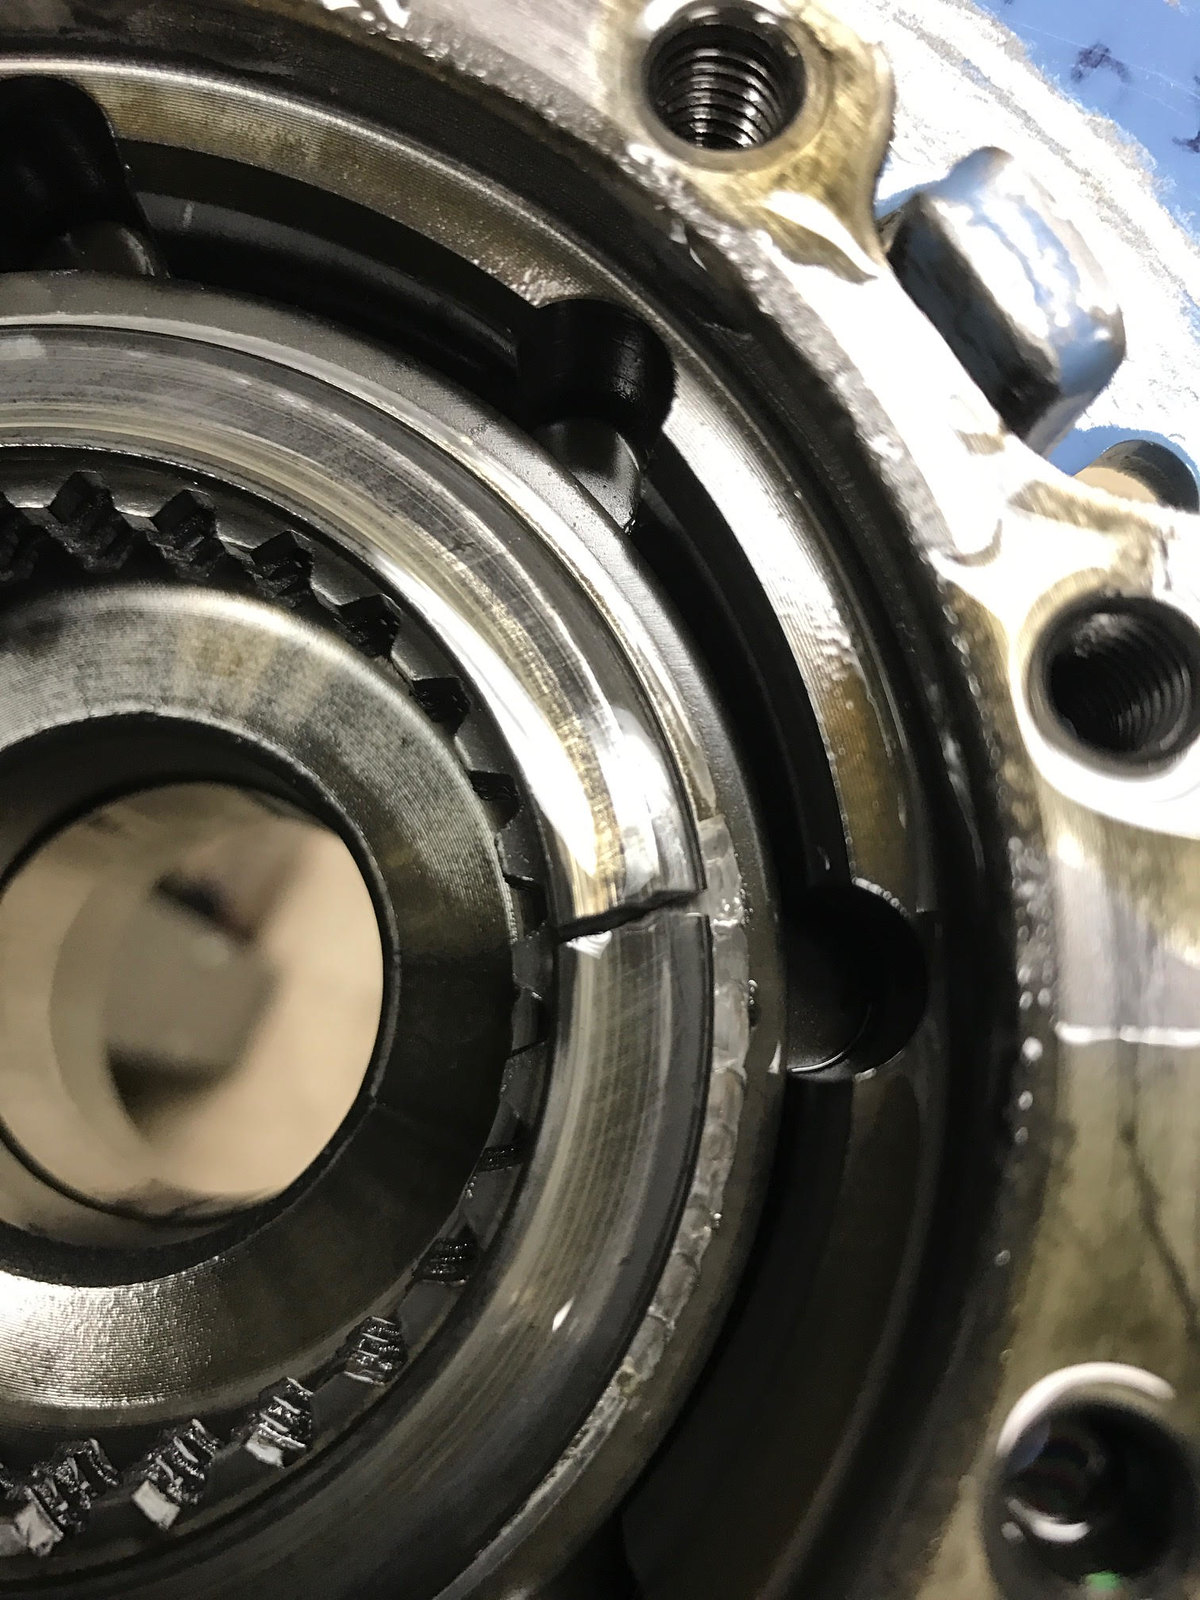
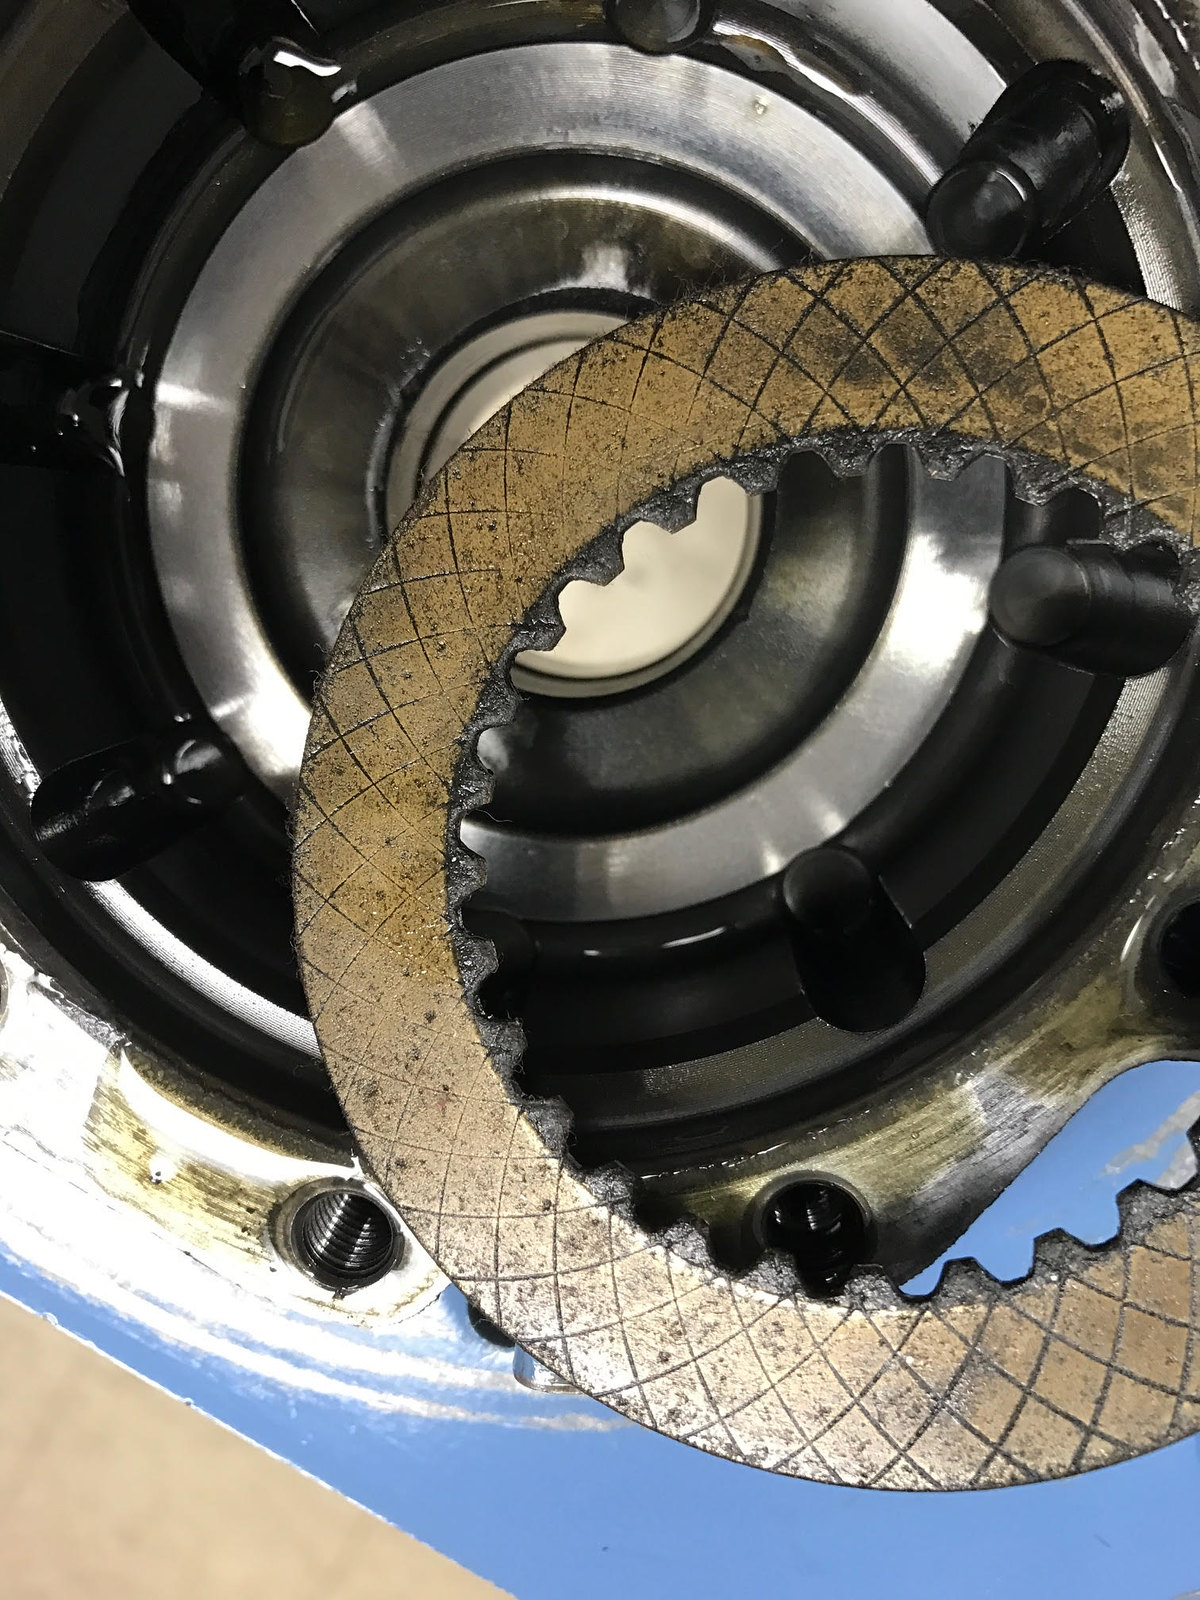
The stock 3.42 diff arrived today at RKT Performance for a rebuild and Motive 4.10 ring and pinion install. Rick sent over some pictures of the worn clutches and broken Belleville spring.
 unnamed1 by Norbert Ogiba, on Flickr
 unnamed2 by Norbert Ogiba, on Flickr
 unnamed3 by Norbert Ogiba, on Flickr
In addition to the Motive 4.10s it will be getting new C6Z06 clutches, springs, seals, and o-rings.
While I wait on T56 parts and the diff I think I'll start to work on the torque tube. That will consist of inspection of the rubber couplers (guibos), bushings, and bearings. Last of the "must do" items is an LS7 clutch and flywheel. I am starting to get the itch to drive this thing.
Main case off
0131171903 by Norbert Ogiba, on FlickrAnd it's remarkably light
0131171903b by Norbert Ogiba, on FlickrThe torsion spring I've been trying to get at.
0131171903a by Norbert Ogiba, on FlickrShift guide plate was in nice shape, so was the detent ball that rides in it
0131171905 by Norbert Ogiba, on FlickrMainshaft off, parts pile grows
0131172025 by Norbert Ogiba, on FlickrThe stock 3.42 diff arrived today at RKT Performance for a rebuild and Motive 4.10 ring and pinion install. Rick sent over some pictures of the worn clutches and broken Belleville spring.
unnamed1 by Norbert Ogiba, on Flickrunnamed2 by Norbert Ogiba, on Flickrunnamed3 by Norbert Ogiba, on FlickrIn addition to the Motive 4.10s it will be getting new C6Z06 clutches, springs, seals, and o-rings.
While I wait on T56 parts and the diff I think I'll start to work on the torque tube. That will consist of inspection of the rubber couplers (guibos), bushings, and bearings. Last of the "must do" items is an LS7 clutch and flywheel. I am starting to get the itch to drive this thing.

 02-01-2017, 04:22 PM
#9
Drifting
Thread Starter
It's not as if I can add a shim to the spring due to the design. Maybe I can try to "bend" the old one out so that it has more preload on the cam block.
02-07-2017, 01:24 PM
#11
Drifting
Thread Starter
So while I wait for the diff to come back and other parts to come in, I had a friend make me some brass bushings for the C6 lower shift box.
After a long Monday at work followed by some snowmobiling, it was nice to come home to this and relax.
by https://www.flickr.com/photos/nogiba/, on Flickr
Pressed into retaining plastic
by https://www.flickr.com/photos/nogiba/, on Flickr
Great fitment on the larger (rear) bushing, only minor hand sanding needed.
by https://www.flickr.com/photos/nogiba/, on Flickr
The rear bushing needed more work to to fit correctly as it was too tight. It was taking forever to hand sand this stuff so I chucked up the shift rod in the 5 axis CNC lathe and got to it.
https://www.youtube.com/watch?v=EqcF...ature=youtu.be
After a long Monday at work followed by some snowmobiling, it was nice to come home to this and relax.
Pressed into retaining plastic
Great fitment on the larger (rear) bushing, only minor hand sanding needed.
The rear bushing needed more work to to fit correctly as it was too tight. It was taking forever to hand sand this stuff so I chucked up the shift rod in the 5 axis CNC lathe and got to it.
https://www.youtube.com/watch?v=EqcF...ature=youtu.be
02-07-2017, 03:26 PM
#12
Tech Contributor
Member Since: Dec 1999
Location: Anthony TX
Posts: 32,736
Received 2,180 Likes
on
1,583 Posts
CI 6,7,8,9,11 Vet
St. Jude Donor '08
I was thinking about that as I worked last night. Rick at RKT is shipping me a new one. I'll remove the old one and do the very scientific and calibrated "squish each one in each hand at the same time and see if the new one is stiffer" test. Probably install the new one and see if the action feels any different.
It's not as if I can add a shim to the spring due to the design. Maybe I can try to "bend" the old one out so that it has more preload on the cam block.
It's not as if I can add a shim to the spring due to the design. Maybe I can try to "bend" the old one out so that it has more preload on the cam block.
BC
02-07-2017, 04:02 PM
#13
Drifting
Thread Starter
Bill, I have not yet been able to find one that is sold separately. Rick at RKT56 is rebuilding my diff and was nice enough to throw one in the package. I'll compare the spring tension between his and mine, and use the better of the two. If both are the same, I'll try to bend one so that it has increased tension.
Last edited by nsogiba; 02-07-2017 at 04:05 PM.
02-07-2017, 04:03 PM
#14
So ...
... The rear bushing needed more work to to fit correctly as it was too tight. It was taking forever to hand sand this stuff so I chucked up the shift rod in the 5 axis CNC lathe and got to it.
https://www.youtube.com/watch?v=EqcF...ature=youtu.be
... The rear bushing needed more work to to fit correctly as it was too tight. It was taking forever to hand sand this stuff so I chucked up the shift rod in the 5 axis CNC lathe and got to it.
https://www.youtube.com/watch?v=EqcF...ature=youtu.be
Good stuff.
The following users liked this post:
nsogiba (02-07-2017)
02-07-2017, 04:22 PM
#15
Burning Brakes


 02-07-2017, 08:37 PM
#17
Team Owner

So while I wait for the diff to come back and other parts to come in, I had a friend make me some brass bushings for the C6 lower shift box.
After a long Monday at work followed by some snowmobiling, it was nice to come home to this and relax.
0206172108 by Norbert Ogiba, on Flickr
Pressed into retaining plastic
0206172109a by Norbert Ogiba, on Flickr
Great fitment on the larger (rear) bushing, only minor hand sanding needed.
0206172108a by Norbert Ogiba, on Flickr
The rear bushing needed more work to to fit correctly as it was too tight. It was taking forever to hand sand this stuff so I chucked up the shift rod in the 5 axis CNC lathe and got to it.
https://www.youtube.com/watch?v=EqcF...ature=youtu.be
The OE pinch clamp Torx screw (bolt) does not use all the available threads. Not sure why, but that's the way it is. I think too many people may be over torquing it to make it "tight" or slopping on Loc-Tite, or both and possibly damaging the clamp threads. Any solution should not involve cranking down the tightness.
I did 2 things:
1. Install a longer Allen cap screw that utilizes all the threads and,
2. Install a Nord Loc washer to maintain torque w/o use of Loc-Tite. Note: Nord Loc requires the torque spec to be increased by 20%, clean and dry (no oil or lube). Also the aforementioned cap screw needs to be long enough to accommodate the extra thickness of the Nord Loc washer.
Both cap screw and Nord Loc washer available at McMaster-Carr.
No more vague/sticking neutral centering issue. Bear in mind I have a TR-6060 transmission, so the general shifting qualities are better than the T-56s to begin with.
YMMV
The following users liked this post:
Sam Handwich (02-07-2017)
02-07-2017, 09:02 PM
#18
Drifting
Thread Starter
Take a close look at the shift rod pinch clamp. I had some slop that caused the same sticking/vague neutral "centering" issue i.e. left/right, right/left, etc. My problem was the pinch clamp.
The OE pinch clamp Torx screw (bolt) does not use all the available threads. Not sure why, but that's the way it is. I think too many people may be over torquing it to make it "tight" or slopping on Loc-Tite, or both and possibly damaging the clamp threads. Any solution should not involve cranking down the tightness.
I did 2 things:
1. Install a longer Allen cap screw that utilizes all the threads and,
2. Install a Nord Loc washer to maintain torque w/o use of Loc-Tite. Note: Nord Loc requires the torque spec to be increased by 20%, clean and dry (no oil or lube). Also the aforementioned cap screw needs to be long enough to accommodate the extra thickness of the Nord Loc washer.
Both cap screw and Nord Loc washer available at McMaster-Carr.
No more vague/sticking neutral centering issue. Bear in mind I have a TR-6060 transmission, so the general shifting qualities are better than the T-56s to begin with.
YMMV
I did verify that the pinch clamp was not loose when "tightened" on my assembly.
Meanwhile in the garage:
Last edited by nsogiba; 02-27-2017 at 07:54 AM.
02-27-2017, 07:55 AM
#19
Drifting
Thread Starter
Torque tube is reassembled with new couplers, transmission is back together.
03-06-2017, 04:12 PM
#20
Drifting
Thread Starter
Quick update. Trans is back together, while filming that video I briefly talked about how sloppy the shift linkage between the shifter and the trans is (specifically, the u-joint where it connects to the trans via roll pin):
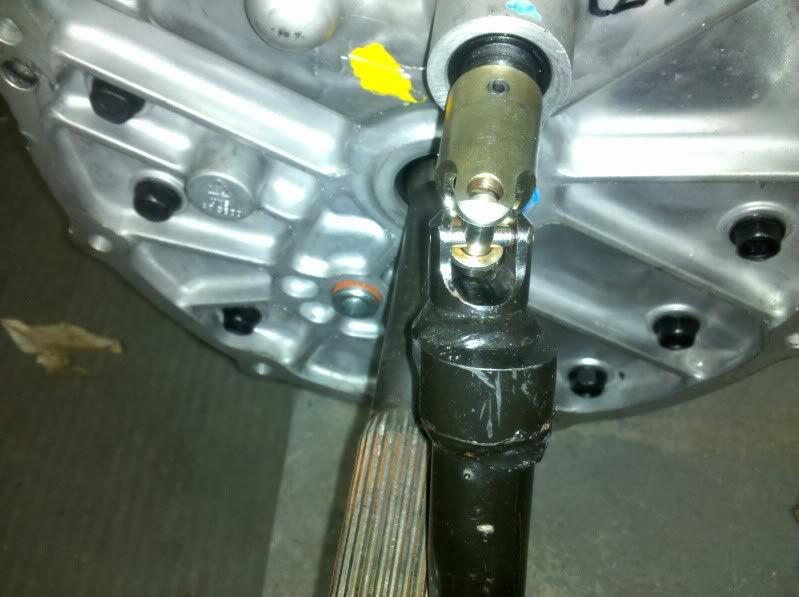
I took a ride to the local specialty hardware store, advance auto, Autozone, and Fleet Pride - nobody even carries a generic u-joint similar to the one welded to the shaft, so it's back to the drawing board. I did some research and found that steering shaft u-joints are fairly similar in size and construction and will see about the same torque as a shift rod linkage. A few minutes later I had this guy on the way:

I don't know whether this is something that can be bolted/roll pinned to the shift shaft, or if I'll have to weld on. I don't see it wearing out in the lifetime of the car. Hopefully it is a true "zero slop" unit.
I took a ride to the local specialty hardware store, advance auto, Autozone, and Fleet Pride - nobody even carries a generic u-joint similar to the one welded to the shaft, so it's back to the drawing board. I did some research and found that steering shaft u-joints are fairly similar in size and construction and will see about the same torque as a shift rod linkage. A few minutes later I had this guy on the way:
I don't know whether this is something that can be bolted/roll pinned to the shift shaft, or if I'll have to weld on. I don't see it wearing out in the lifetime of the car. Hopefully it is a true "zero slop" unit.