
Near perfect clear bra install. Long but w/ lots of pics.
 02-20-2008, 11:38 AM
#1
Melting Slicks

Thread Starter
Member Since: Sep 2006
Location: Mill Creek Washington
Posts: 2,501
Likes: 0
Received 38 Likes
on
30 Posts

I thought I would share with everyone my recent experience with a protective paint product called Venture Shield and the process involved with installing it to my satisfaction. I recently bought my second Vette, this one brand spanking new, and began to consider protecting it.
Let me start by saying I have always been hesitant to have any type of clear protective film installed for a few reasons.
1. The film is visible on the paint once installed (lines/ seams, and orange peel effect).
2. The film will discolor obscuring the paint beneath.
3. The film will not remove easily should I opt to get rid of it.
With that said I spent a lot of time researching online, looking at clear bras first hand and talking to both people that have the product and installers. From what I have learned and seen I decided it was time experience a clear bra install for myself.
The clear and obvious choice from the available products was �Venture Shield�. Not trying to knock anyone with a 3M product but the VS product is head and shoulders above the 3M. I have seen the two products applied to the same car side by side and the VS has considerably less peel effect (comparable to the peel effect Vette�s come with from the factory), and VS does not tint or discolor the paint it is being applied to. I have seen the 3M product darken, by a shade or two the paint on which it has been applied. Imagine you have a fender repainted for whatever reason and it does not match the doors or hood�.that is how the 3M looked to me. Strictly my opinion, not being scientific here.
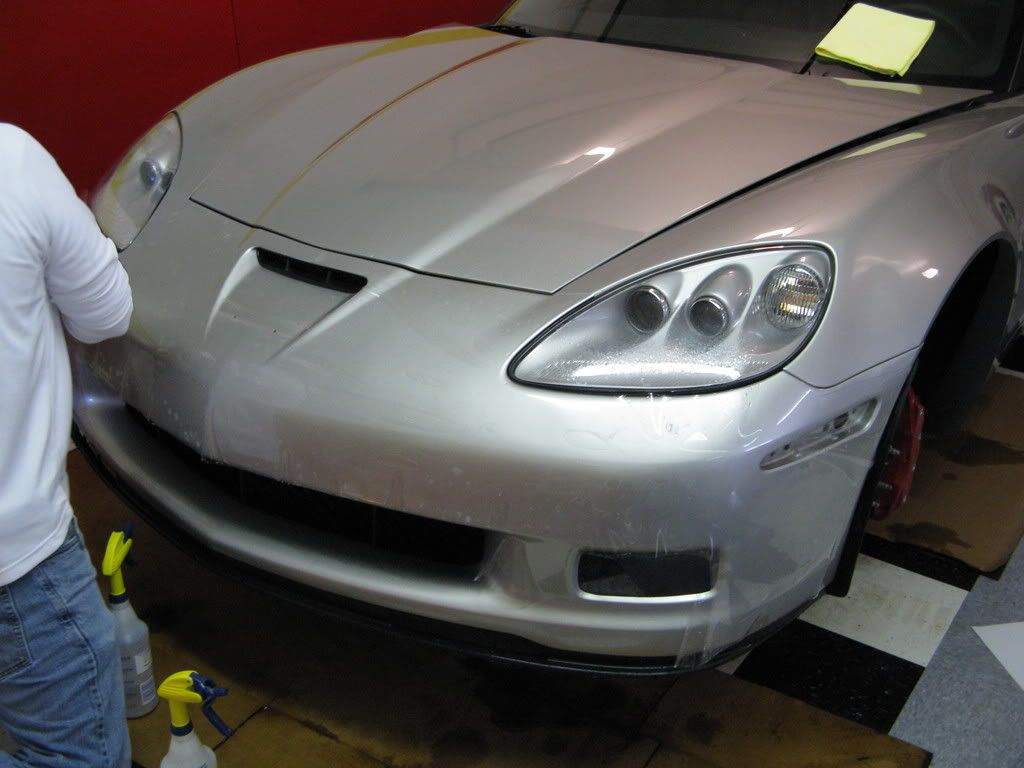
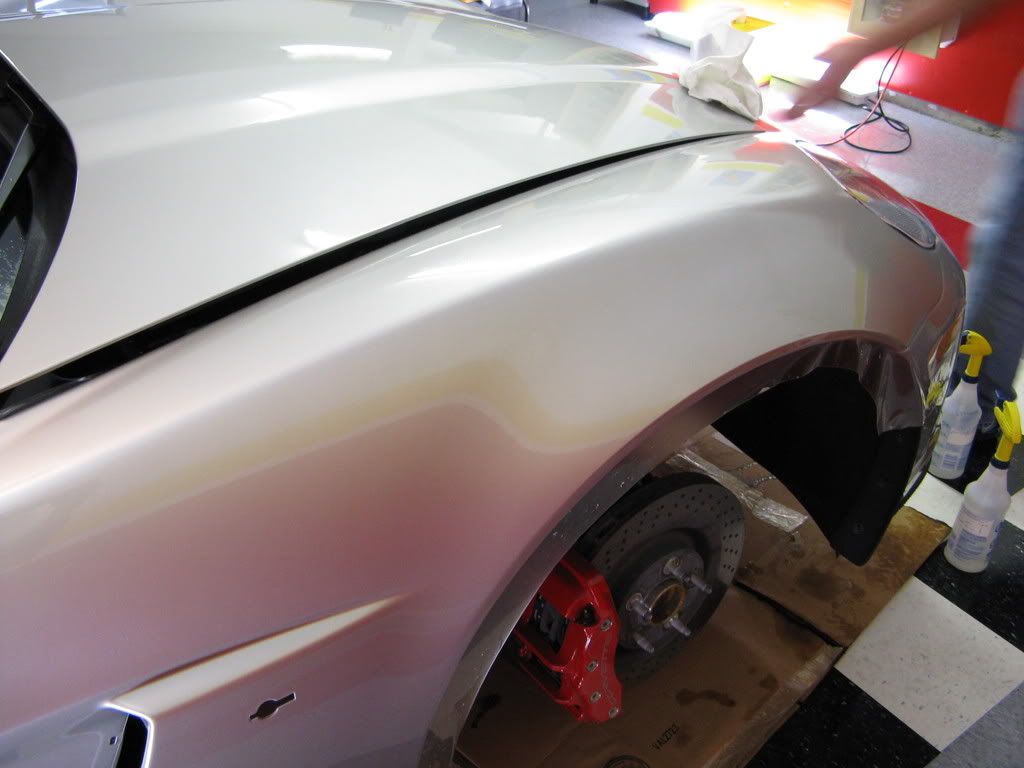
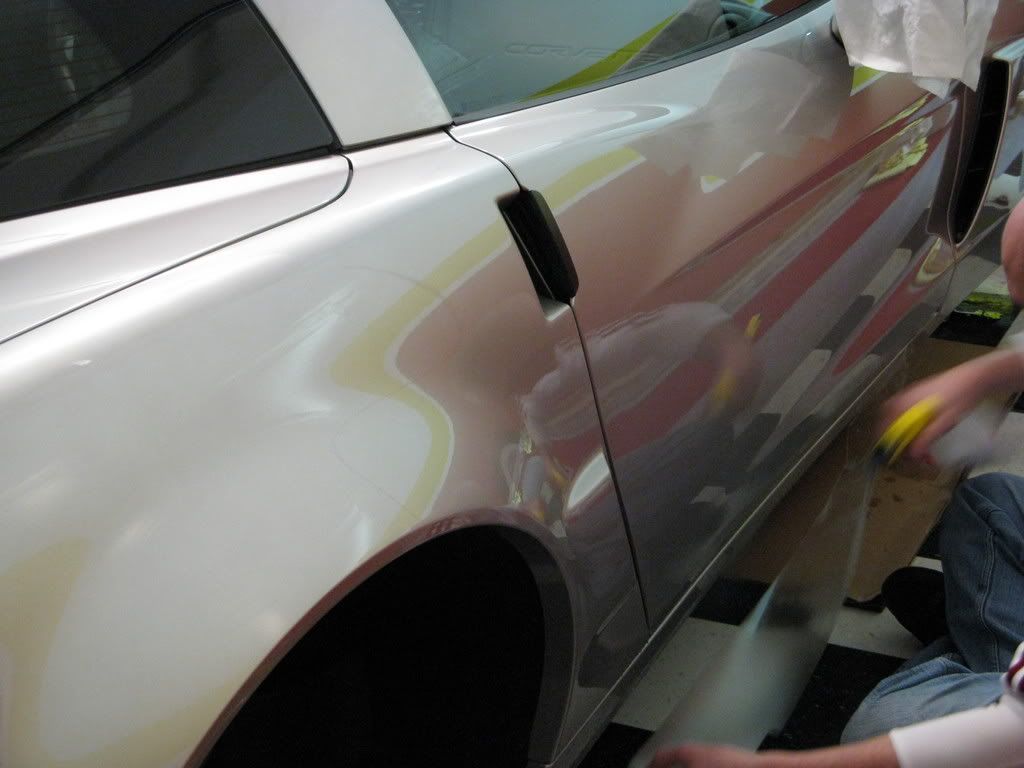
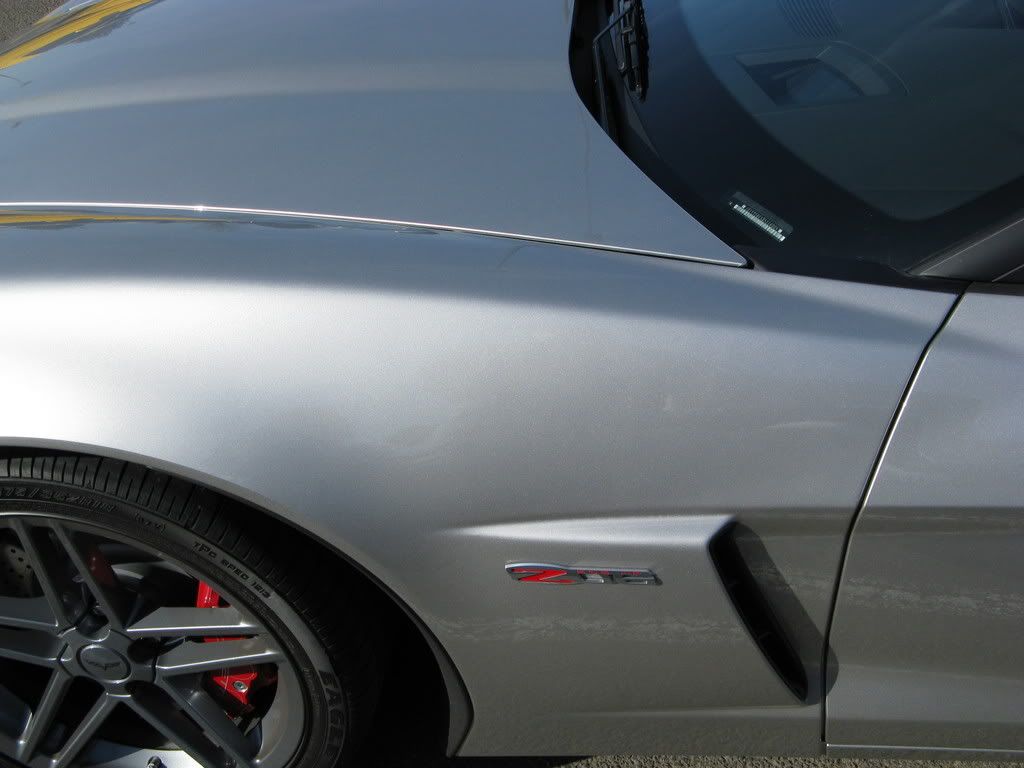
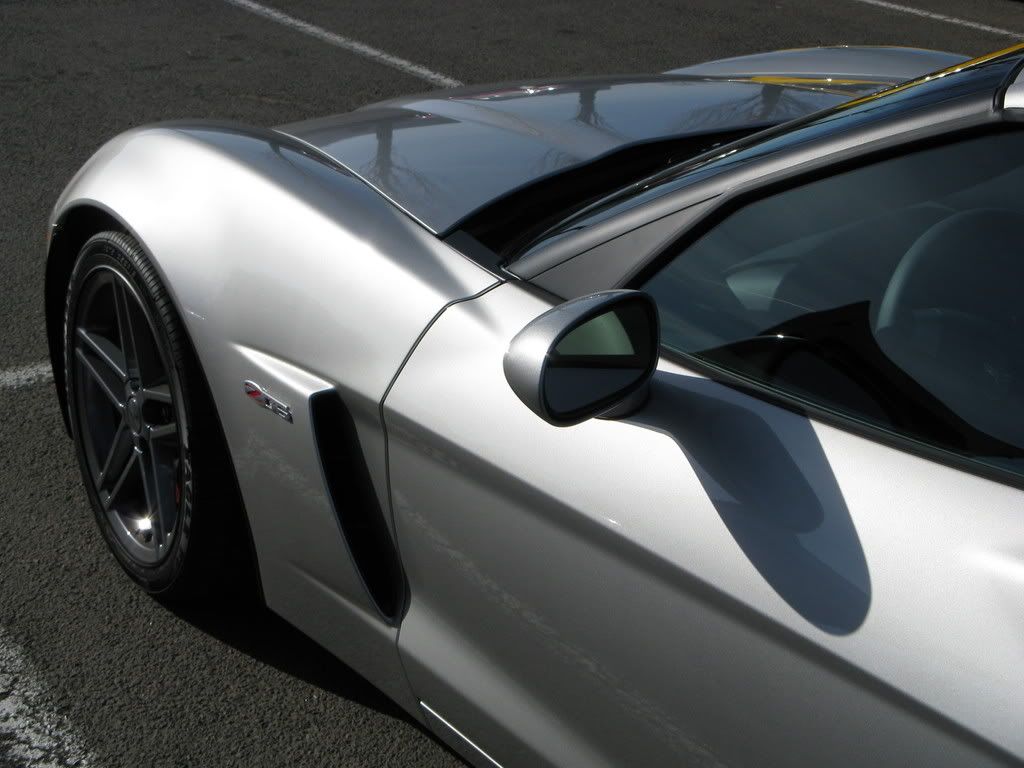
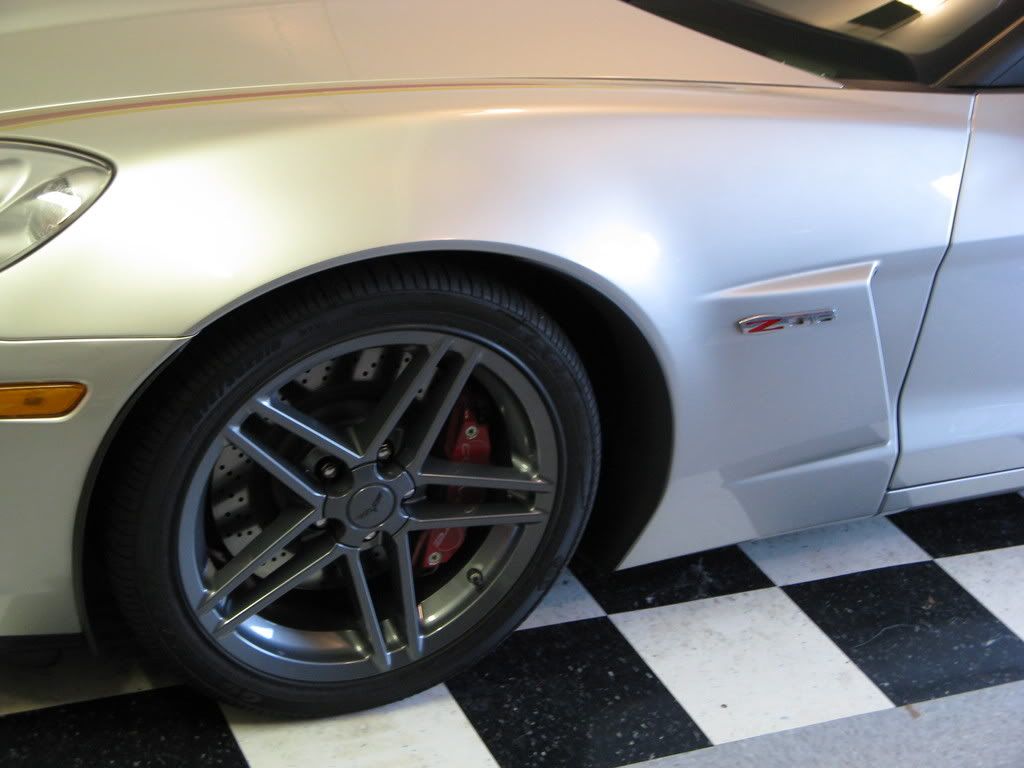
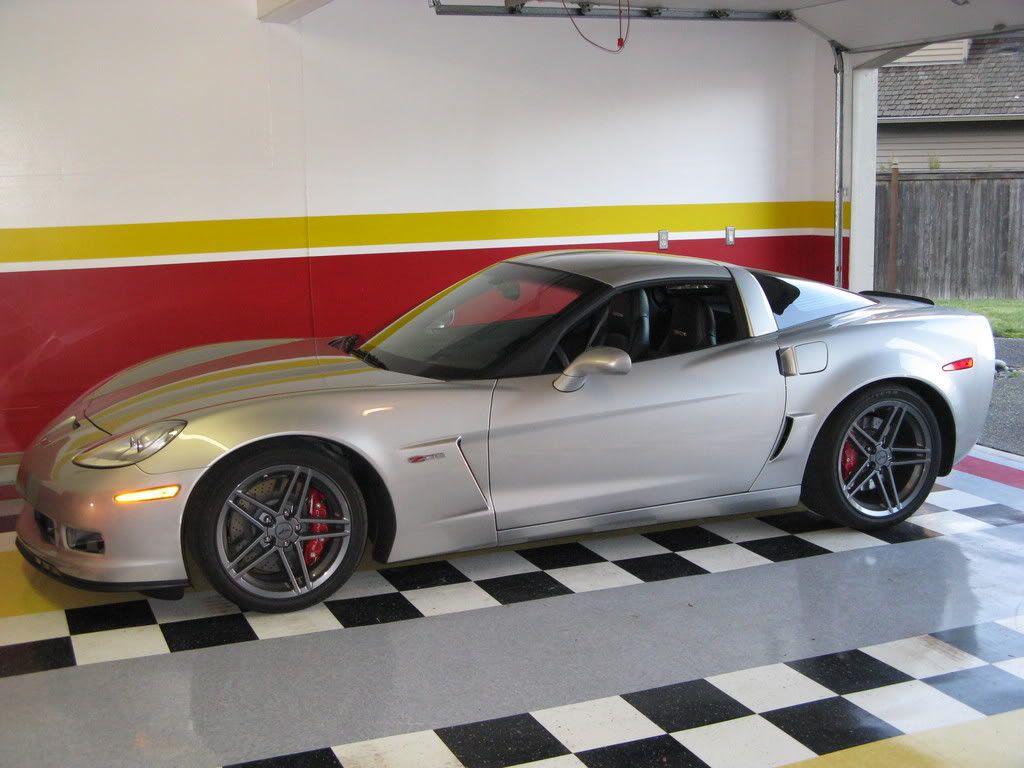
The visibility of the product being my biggest concern I decided to work with the installer I had chosen to minimize the appearance of the film. What does this mean? Well it means that on my hood and fenders I have a complete wrap done. VS is now made in sheets (58 inches) large enough to completely cover the C6 hood and fender. I also had the standard rocker panel pieces installed under the doors, the rear brake duct area covered and the nose covered with a couple of custom changes.
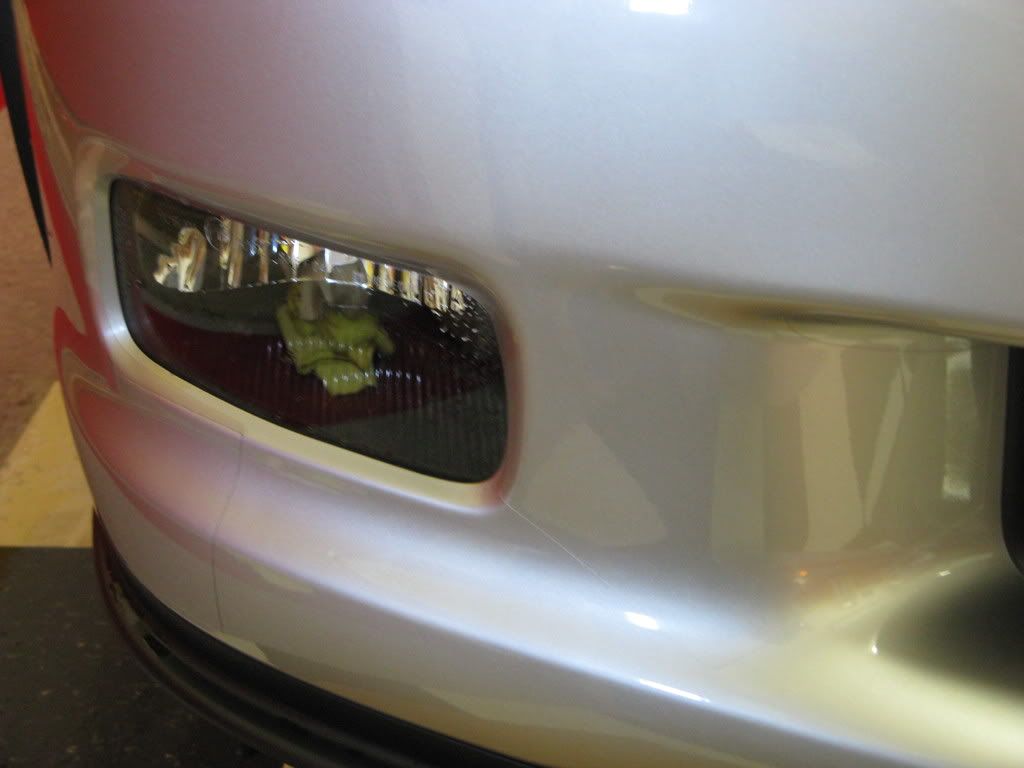
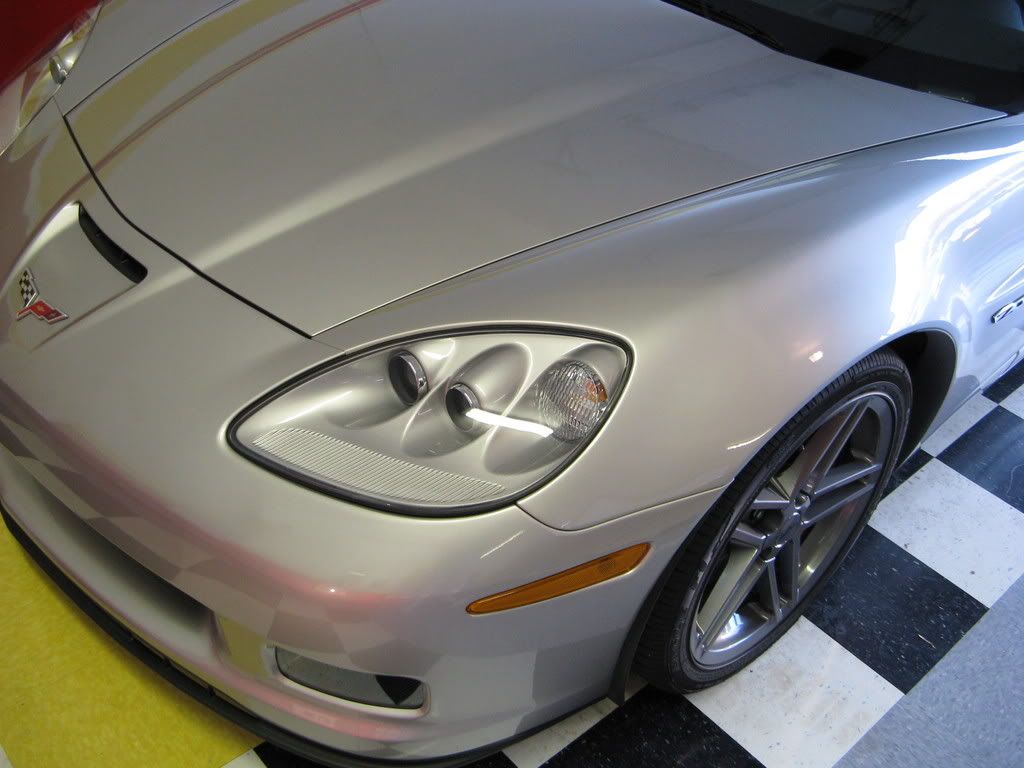
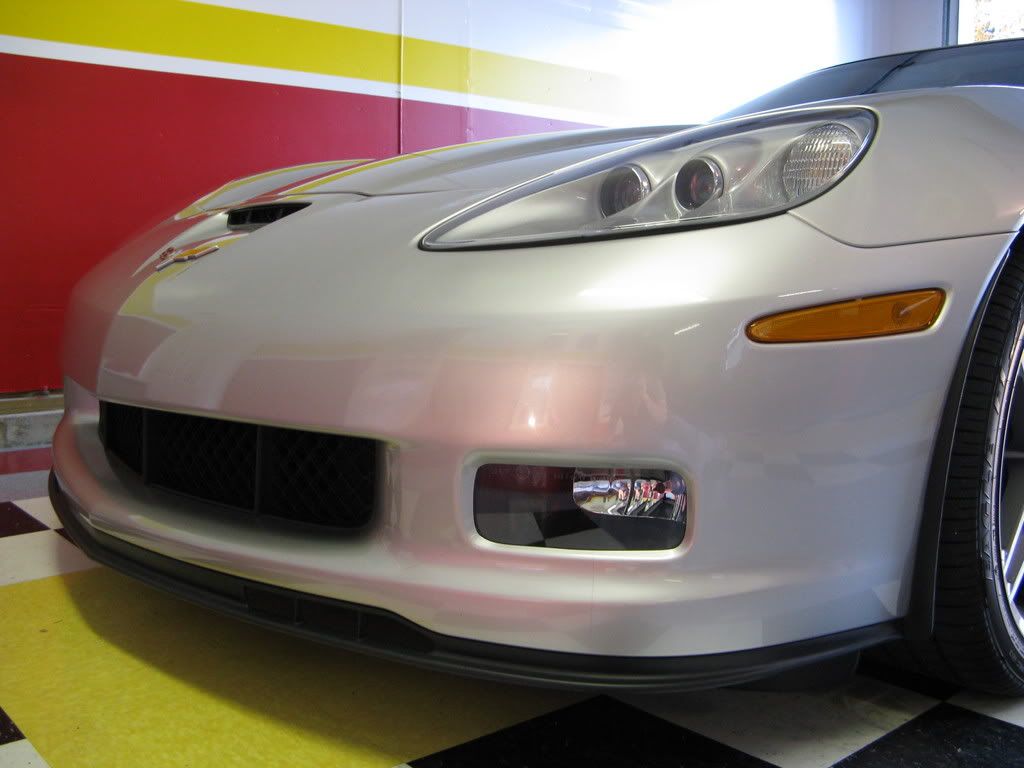
First the nose: This is a two-piece install and the most visible film on the entire car. Can you see it from 10 feet away? No. Can you see it if you walk up and look real close? Yes, but to minimize the visible lines the installer eliminated the cutouts for the nose badge and marker lights. The crossed flags are laid on top of the film and the film runs behind the side markers. The side marker lights were removed prior to installing the film. Very fast and easy to do.
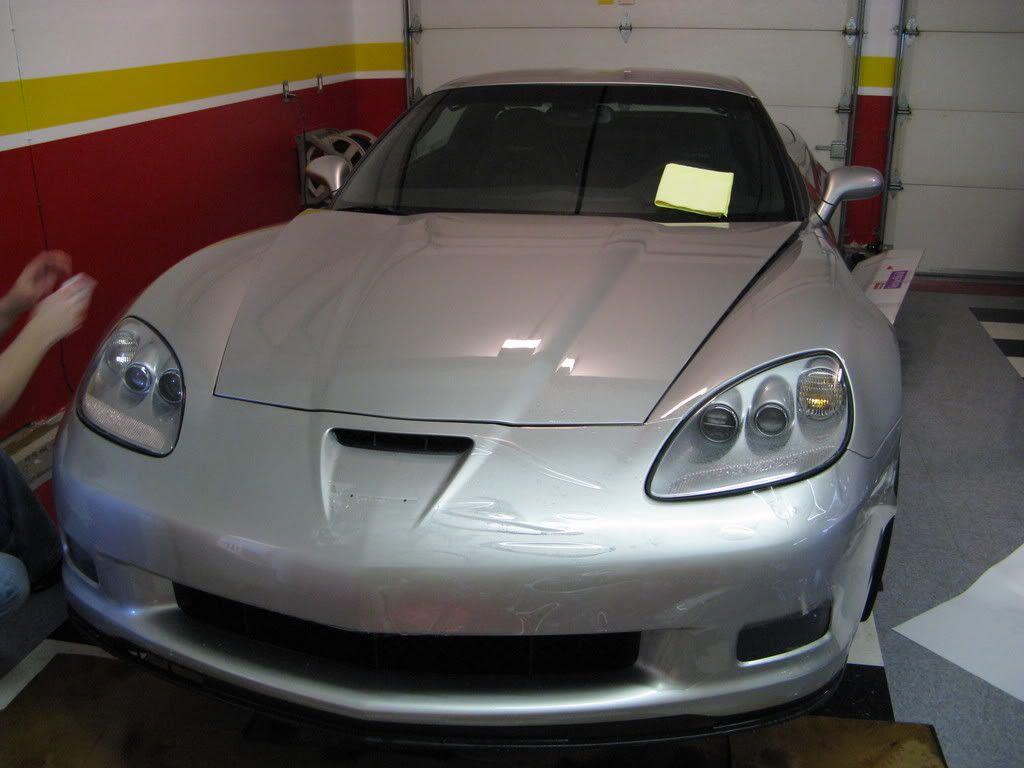
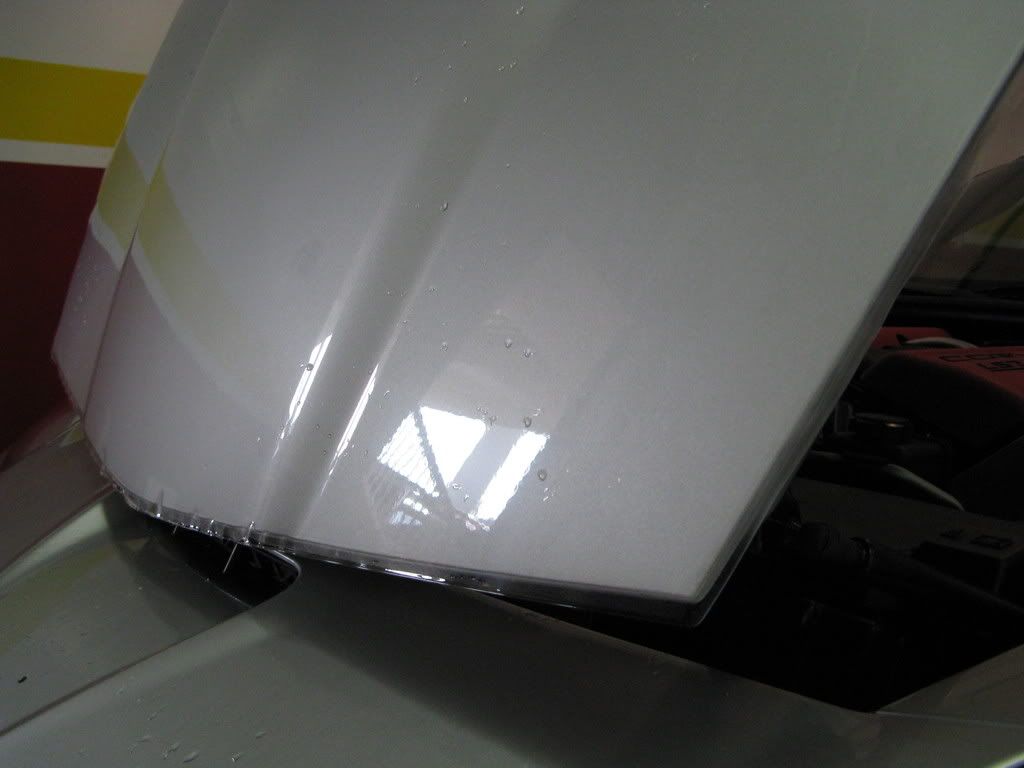
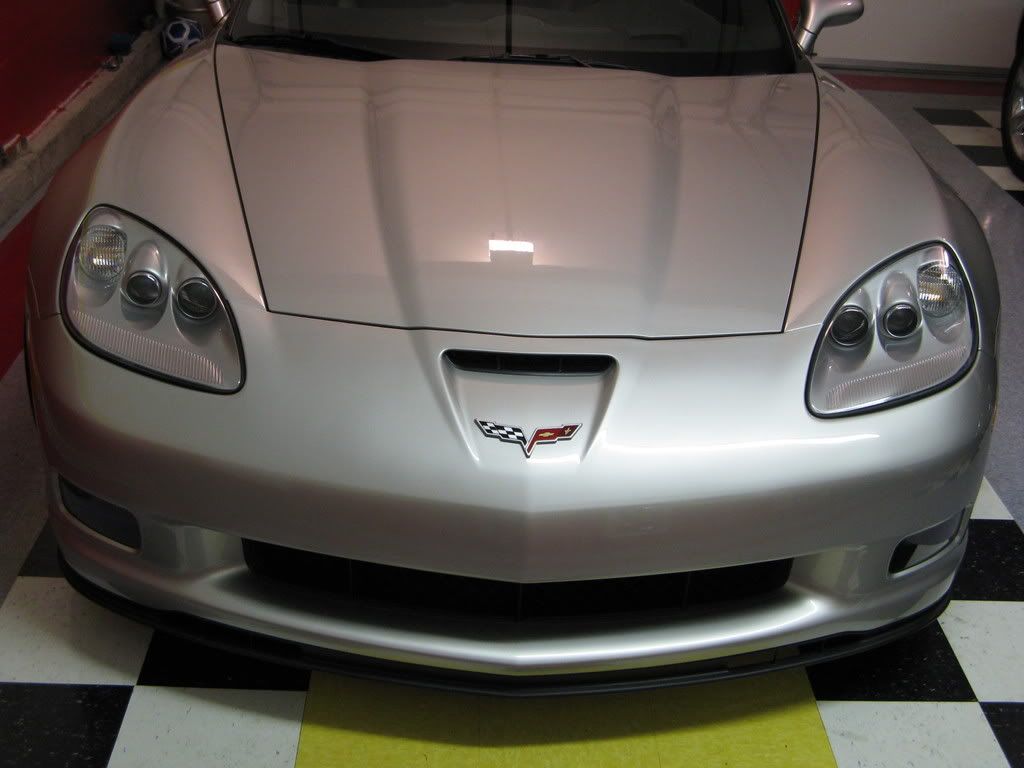
Hood: This was relatively straightforward. One large sheet covering the entire hood. No seams! I dare anyone that does not know the car has been covered to spot it unless I point it out.

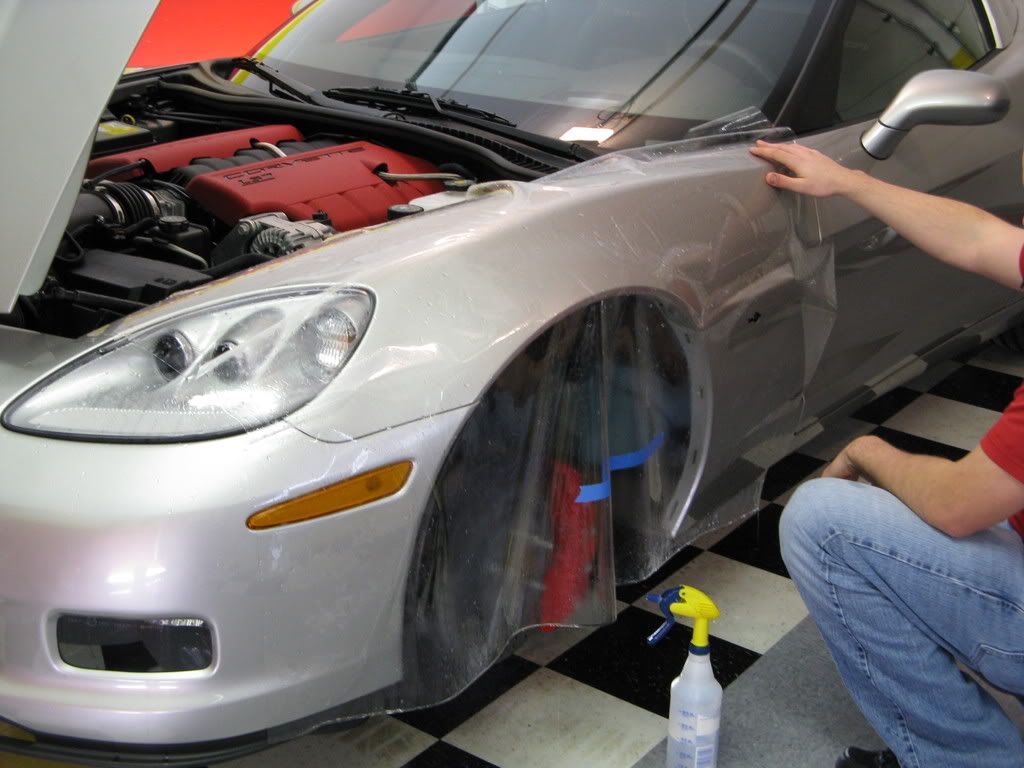
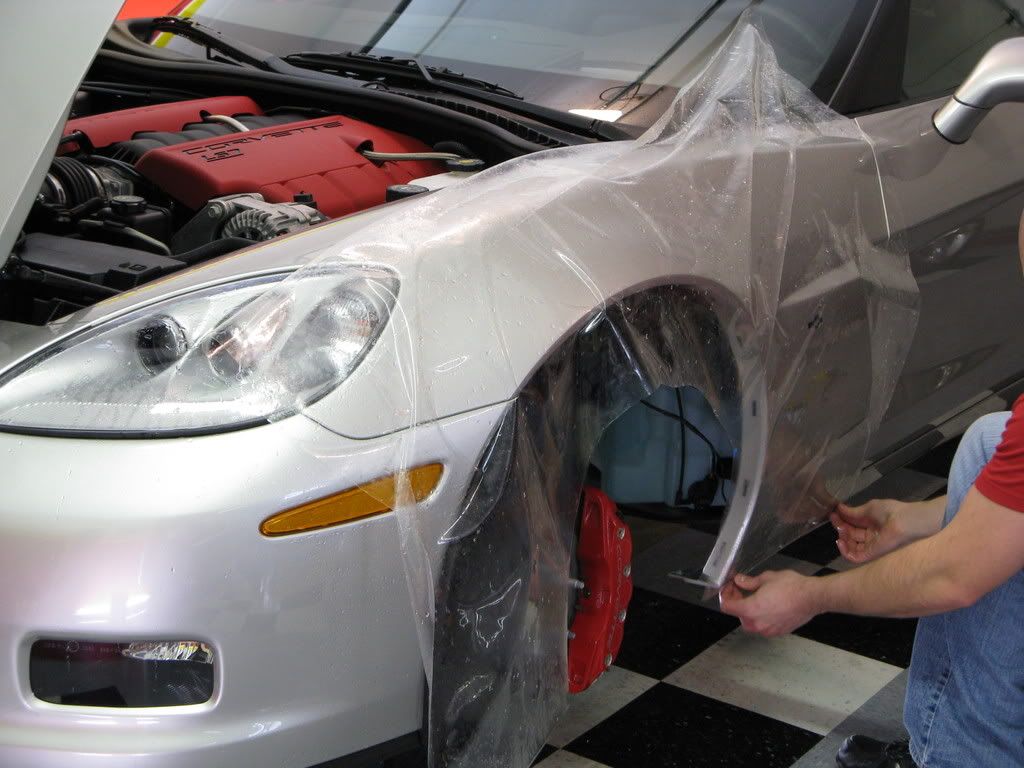
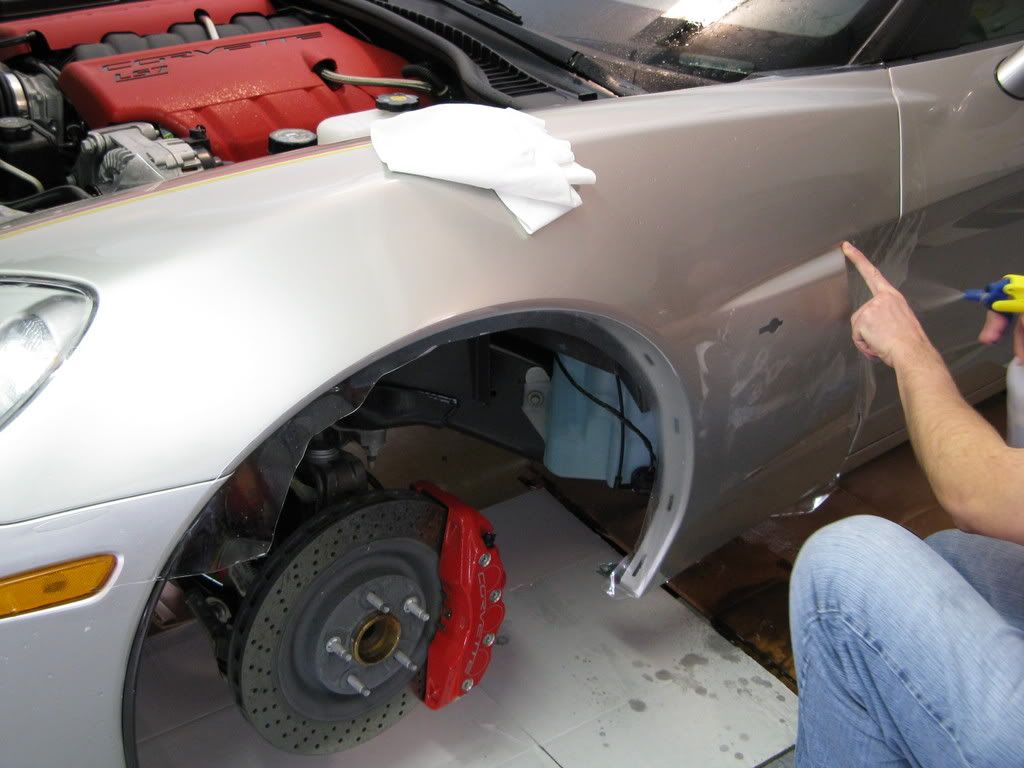
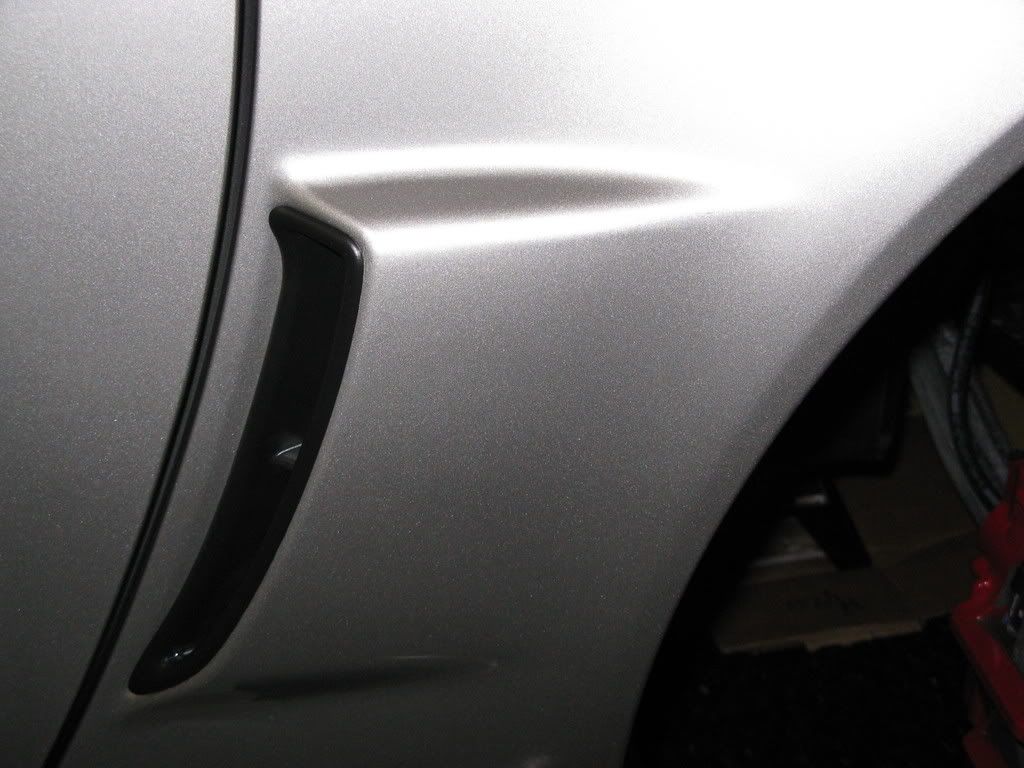
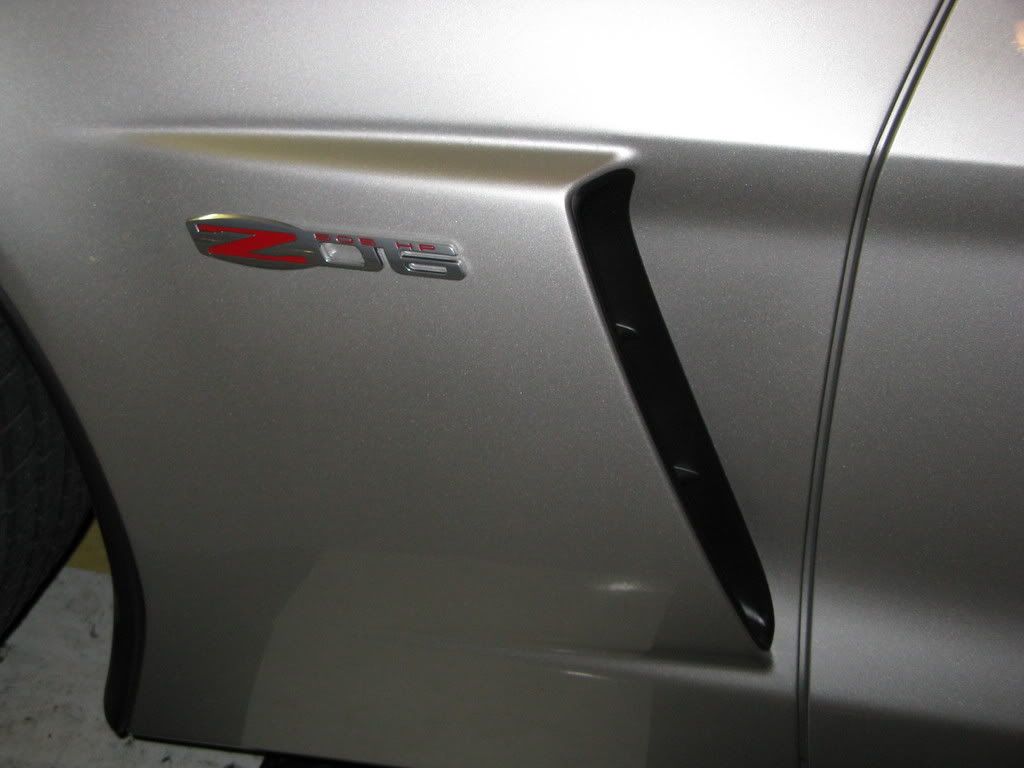
Front fenders: The fenders took the most amount of work. Originally we started with precut complete fenders. The precut pieces fit well around the headlights but the further back towards the vent and doors the film went the less ideal the fit became. The fenders took a lot of massaging and stretching to lay down. Once it was done they looked good but there were places were large edges were visible. Solution�redo the fenders again but this time instead of using a precut form, custom cut a sheet of film large enough to cover everything. This required the removal of the rear portion of the front inner wheel liner, the plastic vent inserts (Z06), and the side badges. Side badges were also removed for the original precut front fender film application. After a couple of hours the result was one fender completely covered with one, half-inch edge, visible only from a very close distance. The second fender only took an hour having learned some better techniques from doing the first. The second fender has absolutely no visible edges at all. It looks completely stock like the hood. Reinstall the removed parts (about 5-10 minutes) and you would never know the fender is covered. Again I dare anyone to spot it.
Prep:

Install:
Rockers: Very straight forward. Unless you get on your back and look under the car you will not see the film.
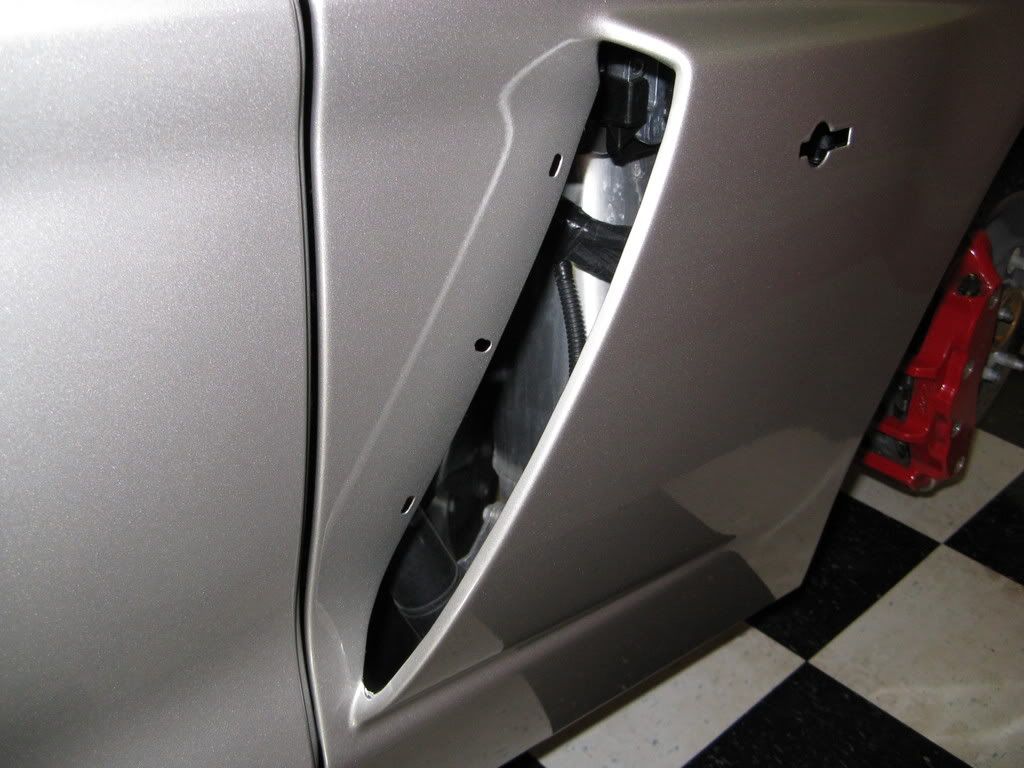
Rear Fender: Some have gone all out and covered large portions of the rear fenders, especially up and over the rear brake ducts. I opted for the standard rear brake duct kit. This kept the visible edge of the film to a minimum yet protects the hardest hit area of the rear fender. Should I see damage occur above the film I will reconsider and look at a more custom option.

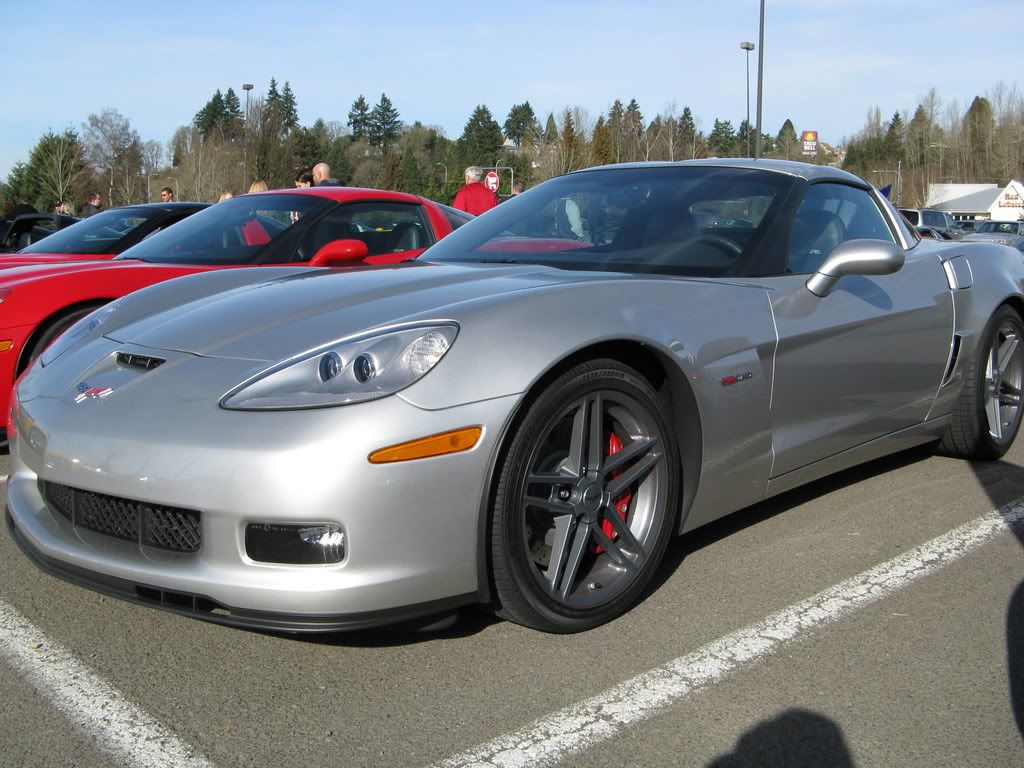
Finished product:

I passed on the headlight, mirror, and windshield treatment. Mostly due to trying to minimize evidence of a clear film install on the car. The mirrors, and headlights at least to me stand out as having been covered. The windshield while it may save me a chip or more is a risk I�m willing to take at this point.
Overall considering how hesitant I was to have a clear bra product installed on my car I have to say I am extremely pleased and would not hesitate to do it again. In fact I�m looking at the possibility of having the entire hood on my wife�s GXP covered in one piece and it is much larger, and more complicated (similar to a C4 clamshell hood) than the Vette�s hood. This past Sunday I went on a 400 mile cruise and on the way back the car was pelted mercilessly at one point by sand kicked up from the road used for recent snow storms and took a mean shot right to the hood. Noticed it when I got home. If I hadn�t had the VS installed it would have taken some paint of the hood and left an eyesore that I would see every day. I would mention the installer by name but he is not a supporting vendor at present. If you are at all interested PM me and I will forward you his business contacts. He operates in the Western Washington area but has gone as far south as the Portland area. Having the right installer is key to getting the job done right! Not only is installer that did my car very good but his customer service is excellent. Willing and able to work with you in order to help meet your expectations.
Hope this has helped some of you that are considering protecting your car.
Let me start by saying I have always been hesitant to have any type of clear protective film installed for a few reasons.
1. The film is visible on the paint once installed (lines/ seams, and orange peel effect).
2. The film will discolor obscuring the paint beneath.
3. The film will not remove easily should I opt to get rid of it.
With that said I spent a lot of time researching online, looking at clear bras first hand and talking to both people that have the product and installers. From what I have learned and seen I decided it was time experience a clear bra install for myself.
The clear and obvious choice from the available products was �Venture Shield�. Not trying to knock anyone with a 3M product but the VS product is head and shoulders above the 3M. I have seen the two products applied to the same car side by side and the VS has considerably less peel effect (comparable to the peel effect Vette�s come with from the factory), and VS does not tint or discolor the paint it is being applied to. I have seen the 3M product darken, by a shade or two the paint on which it has been applied. Imagine you have a fender repainted for whatever reason and it does not match the doors or hood�.that is how the 3M looked to me. Strictly my opinion, not being scientific here.
The visibility of the product being my biggest concern I decided to work with the installer I had chosen to minimize the appearance of the film. What does this mean? Well it means that on my hood and fenders I have a complete wrap done. VS is now made in sheets (58 inches) large enough to completely cover the C6 hood and fender. I also had the standard rocker panel pieces installed under the doors, the rear brake duct area covered and the nose covered with a couple of custom changes.
First the nose: This is a two-piece install and the most visible film on the entire car. Can you see it from 10 feet away? No. Can you see it if you walk up and look real close? Yes, but to minimize the visible lines the installer eliminated the cutouts for the nose badge and marker lights. The crossed flags are laid on top of the film and the film runs behind the side markers. The side marker lights were removed prior to installing the film. Very fast and easy to do.
Hood: This was relatively straightforward. One large sheet covering the entire hood. No seams! I dare anyone that does not know the car has been covered to spot it unless I point it out.
Front fenders: The fenders took the most amount of work. Originally we started with precut complete fenders. The precut pieces fit well around the headlights but the further back towards the vent and doors the film went the less ideal the fit became. The fenders took a lot of massaging and stretching to lay down. Once it was done they looked good but there were places were large edges were visible. Solution�redo the fenders again but this time instead of using a precut form, custom cut a sheet of film large enough to cover everything. This required the removal of the rear portion of the front inner wheel liner, the plastic vent inserts (Z06), and the side badges. Side badges were also removed for the original precut front fender film application. After a couple of hours the result was one fender completely covered with one, half-inch edge, visible only from a very close distance. The second fender only took an hour having learned some better techniques from doing the first. The second fender has absolutely no visible edges at all. It looks completely stock like the hood. Reinstall the removed parts (about 5-10 minutes) and you would never know the fender is covered. Again I dare anyone to spot it.
Prep:
Install:
Rockers: Very straight forward. Unless you get on your back and look under the car you will not see the film.
Rear Fender: Some have gone all out and covered large portions of the rear fenders, especially up and over the rear brake ducts. I opted for the standard rear brake duct kit. This kept the visible edge of the film to a minimum yet protects the hardest hit area of the rear fender. Should I see damage occur above the film I will reconsider and look at a more custom option.
Finished product:
I passed on the headlight, mirror, and windshield treatment. Mostly due to trying to minimize evidence of a clear film install on the car. The mirrors, and headlights at least to me stand out as having been covered. The windshield while it may save me a chip or more is a risk I�m willing to take at this point.
Overall considering how hesitant I was to have a clear bra product installed on my car I have to say I am extremely pleased and would not hesitate to do it again. In fact I�m looking at the possibility of having the entire hood on my wife�s GXP covered in one piece and it is much larger, and more complicated (similar to a C4 clamshell hood) than the Vette�s hood. This past Sunday I went on a 400 mile cruise and on the way back the car was pelted mercilessly at one point by sand kicked up from the road used for recent snow storms and took a mean shot right to the hood. Noticed it when I got home. If I hadn�t had the VS installed it would have taken some paint of the hood and left an eyesore that I would see every day. I would mention the installer by name but he is not a supporting vendor at present. If you are at all interested PM me and I will forward you his business contacts. He operates in the Western Washington area but has gone as far south as the Portland area. Having the right installer is key to getting the job done right! Not only is installer that did my car very good but his customer service is excellent. Willing and able to work with you in order to help meet your expectations.
Hope this has helped some of you that are considering protecting your car.
 02-20-2008, 11:45 AM
#2
Advanced

Member Since: Jan 2008
Location: Grass Valley California
Posts: 87
Likes: 0
Received 0 Likes
on
0 Posts
That's incredible. I was always wary of the idea, but I can't even tell you have a clear bra in those pics.
I wonder though, how it would appear on black.
I wonder though, how it would appear on black.
02-20-2008, 12:05 PM
#5
Safety Car


I don't think they should call yours a bra as it covers the entire front of your vehicle which makes more sense then a those partial front bumper and 1/4 of the hood installs which makes the end lines look like scratches. Yours is very nice in deed. 

 02-20-2008, 01:10 PM
#8
Le Mans Master

 02-20-2008, 01:26 PM
#9
Burning Brakes


Member Since: Aug 2007
Location: SF Bay Area CA
Posts: 1,199
Likes: 0
Received 0 Likes
on
0 Posts
I had clear bras on a Porsche and on a ML and did not like it. Often when seen with polarized glasses you see color patterns and when hit by a rock they often have to be replaced anyway. I do not use that in my cars any longer.
02-20-2008, 01:34 PM
#10
Melting Slicks
Thread Starter
Member Since: Sep 2006
Location: Mill Creek Washington
Posts: 2,501
Likes: 0
Received 38 Likes
on
30 Posts
All I wear are polarized sunglasses and you DO NOT get a rainbow effect when looking at the car at any angle. If the damage done by debris is bad enough then yes the film will need to be raplaced. I'd rather replace the film that have to respray part of the car and hope for a good match especially on a metallic finish. Did you use VS or was it a different product?
 02-20-2008, 02:56 PM
#13
Melting Slicks
Thread Starter
Member Since: Sep 2006
Location: Mill Creek Washington
Posts: 2,501
Likes: 0
Received 38 Likes
on
30 Posts
02-20-2008, 03:01 PM
#14
Le Mans Master

 02-20-2008, 04:26 PM
#16
Team Owner

Member Since: Jun 2005
Location: Northern, VA
Posts: 46,104
Received 2,481 Likes
on
1,944 Posts
St. Jude Donor '15
"In honor of jpee"
Looks very good and glad you like it. Nice write up and pics. Very helpful to see and read it all.
from a guy with the 3M and only quarter of the hood done.....
from a guy with the 3M and only quarter of the hood done.....


 02-20-2008, 11:22 PM
#20
Melting Slicks
Thread Starter
Member Since: Sep 2006
Location: Mill Creek Washington
Posts: 2,501
Likes: 0
Received 38 Likes
on
30 Posts
If you go to the official VS website you can locate dealer/ installers in your area.
http://www.ventureshield.com/