
#74 LED vanity mirror (pics)
 09-10-2008, 04:03 AM
#1
Drifting

Thread Starter

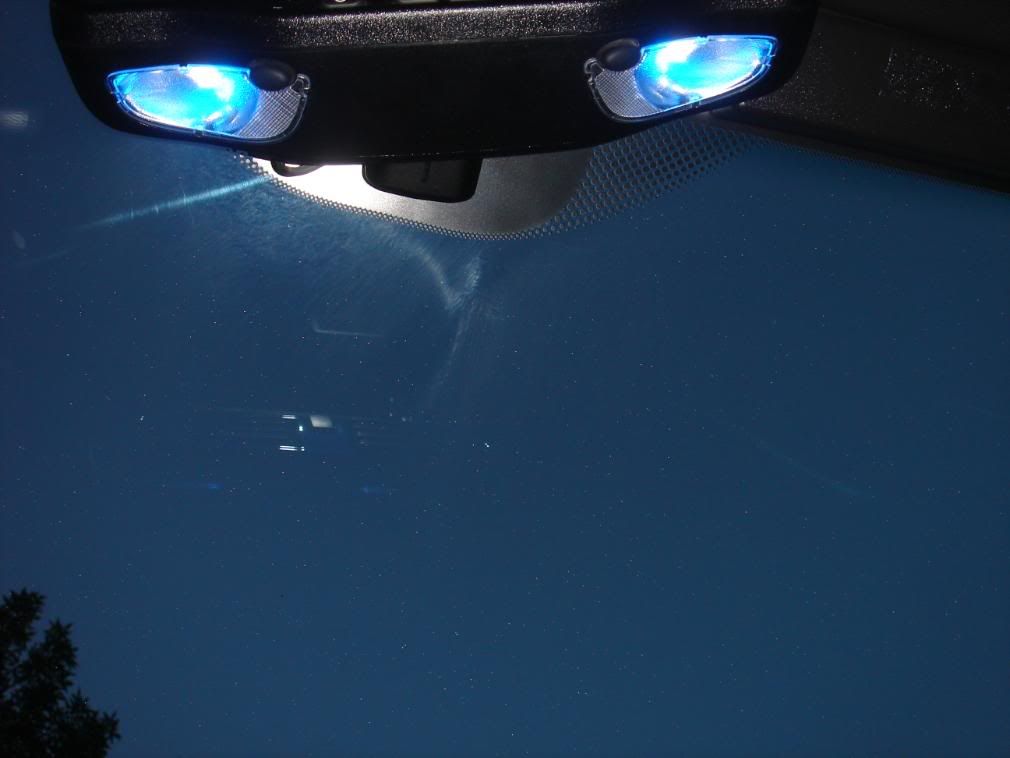
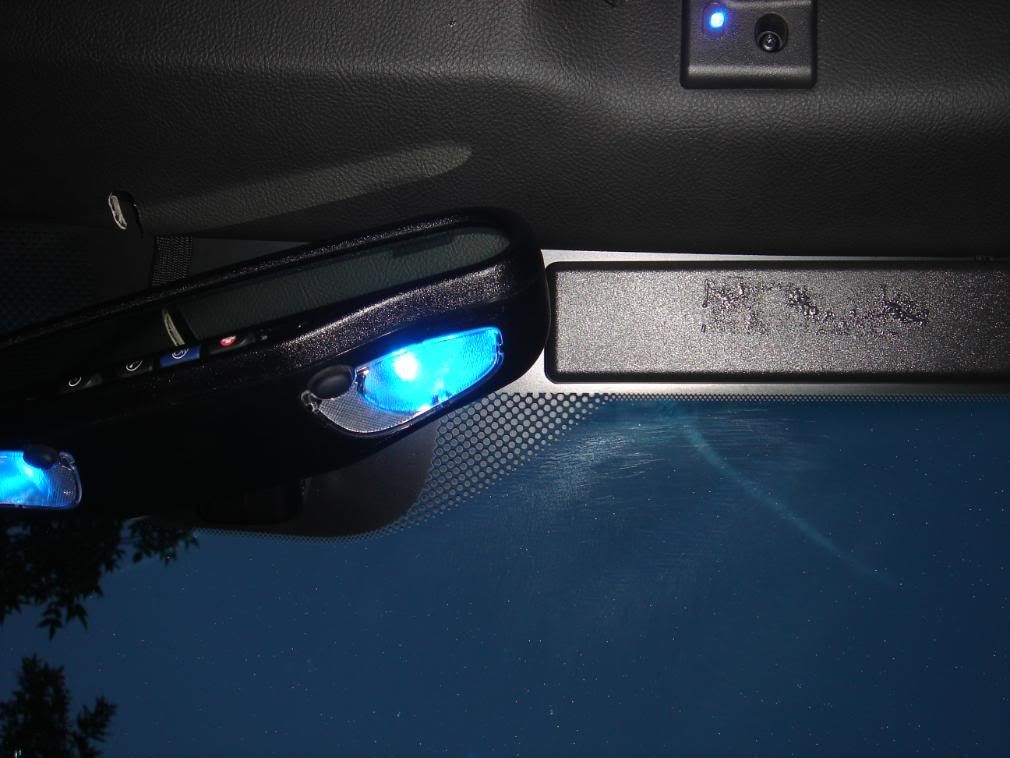
here a a few pics of my vanity mirrors that i changed to LED's... it will really light up your face at night... 
almost to bright....
I've used the single LED for a long time a just put the 3 LED's in... it is little brighter.... worth it?... i think so....
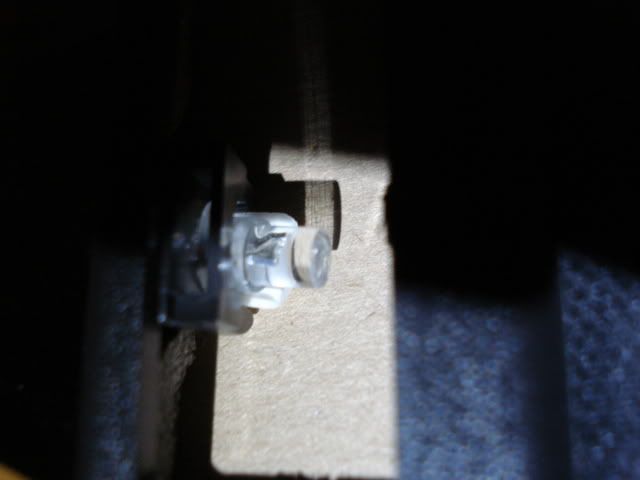
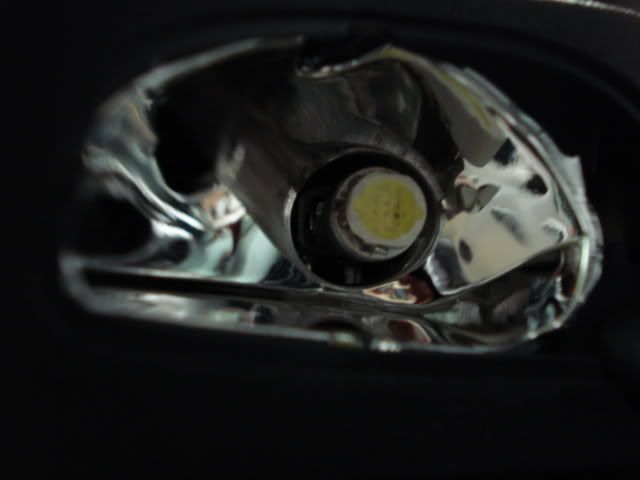
NOTE: it is VERY hard to remove the stock bulbs (broke two of four) and the new LED's are set back quite a bit (see pics) and VERY hard to install in the holders (small pliers and luck)
every now and then someone asks about them so i decided to make a post...
i guess I'm lucky i have not had any problems with my LED's on my car... i have changed every bulb to an LED inside and out (except gauges)....
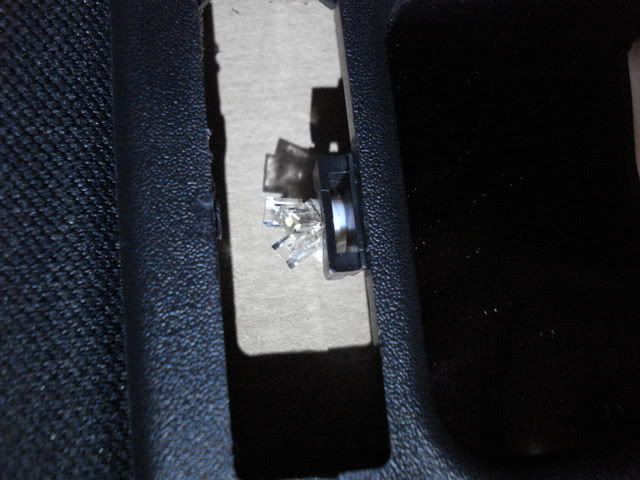
#74 single LED with a little aluminum foil for a reflector....

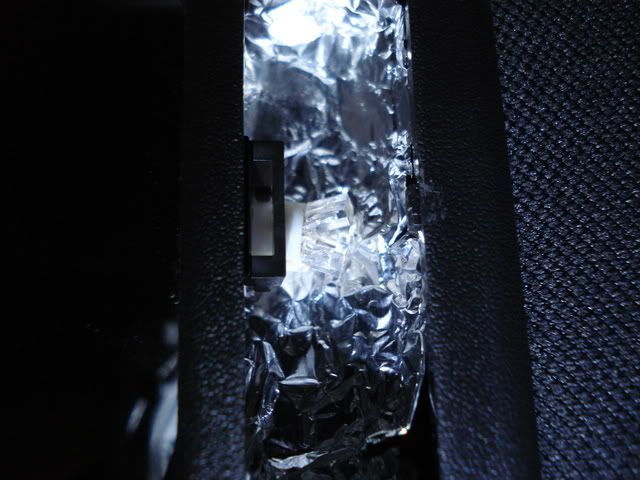
#74 Tri-Power 3 LED with a little aluminum foil for a reflector....
no yellow bulbs...

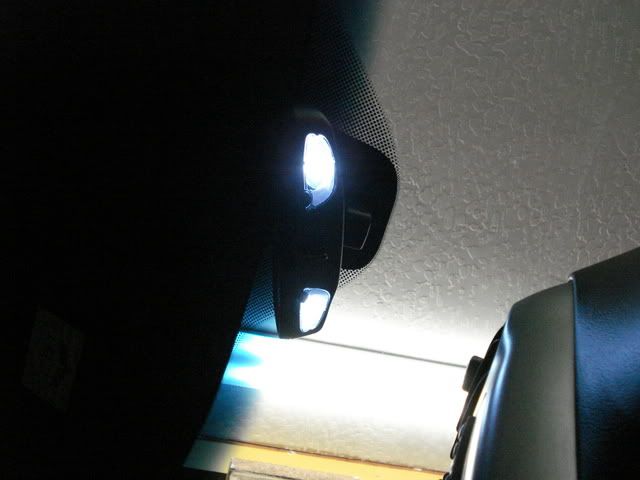
almost to bright....
I've used the single LED for a long time a just put the 3 LED's in... it is little brighter.... worth it?... i think so....
NOTE: it is VERY hard to remove the stock bulbs (broke two of four) and the new LED's are set back quite a bit (see pics) and VERY hard to install in the holders (small pliers and luck)
every now and then someone asks about them so i decided to make a post...
i guess I'm lucky i have not had any problems with my LED's on my car... i have changed every bulb to an LED inside and out (except gauges)....
#74 single LED with a little aluminum foil for a reflector....
#74 Tri-Power 3 LED with a little aluminum foil for a reflector....
no yellow bulbs...
 09-10-2008, 05:01 AM
#3
Drifting
Thread Starter
pulling out the bulbs are hard - they are slippery - i used thin rubber and pliers - made it a little easier (didn't break those)
i used the 194 LED (arrow)

i used the 194 LED (arrow)
09-10-2008, 07:03 AM
#4
Le Mans Master

Did my interior too... Still need to do the glove compartment(more bulbs coming in the mail...) Will need a few more for the mirrors...

Last edited by Tom_Slick; 09-23-2008 at 06:27 PM.
09-22-2008, 08:39 PM
#5
Melting Slicks


 09-22-2008, 11:14 PM
#10
Team Owner


That does look good.
09-23-2008, 02:20 PM
#11
Instructor

Member Since: Jun 2006
Location: Houston TX
Posts: 139
Likes: 0
Received 0 Likes
on
0 Posts
Just for future reference on how to remove those Map Light bulbs, I had posted a "How-To" thread on the Tech Section. Just get a kite string, tie slip knot, slip it over the bulb using a toothpick or something small to push the string over the fat portion of the bulb, tighten the knot and pull out. Easy as pie.
09-23-2008, 06:13 PM
#12
Burning Brakes

Just for future reference on how to remove those Map Light bulbs, I had posted a "How-To" thread on the Tech Section. Just get a kite string, tie slip knot, slip it over the bulb using a toothpick or something small to push the string over the fat portion of the bulb, tighten the knot and pull out. Easy as pie.
Pretty ingenious idea
09-23-2008, 06:28 PM
#13
Le Mans Master
Just for future reference on how to remove those Map Light bulbs, I had posted a "How-To" thread on the Tech Section. Just get a kite string, tie slip knot, slip it over the bulb using a toothpick or something small to push the string over the fat portion of the bulb, tighten the knot and pull out. Easy as pie.
Last edited by Tom_Slick; 09-23-2008 at 06:31 PM.
09-23-2008, 07:51 PM
#14
Melting Slicks
 09-23-2008, 10:36 PM
#16
Burning Brakes
Member Since: Dec 2005
Location: Austin TX
Posts: 1,106
Likes: 0
Received 0 Likes
on
0 Posts

Royal pain in the rear, the easiest way I found to remove it was to wrap some electrical or a some duct tape around it as best you can then use it as a handle to pull the bulb out. It also helps to remove the fuse so the bulbs don't get too hot and you don't get blinded... 