
How To: Painting the back bumper 'CORVETTE'


 09-27-2008, 04:53 PM
#47
Melting Slicks


Member Since: May 2006
Location: Westchester County New York
Posts: 2,934
Received 258 Likes
on
171 Posts

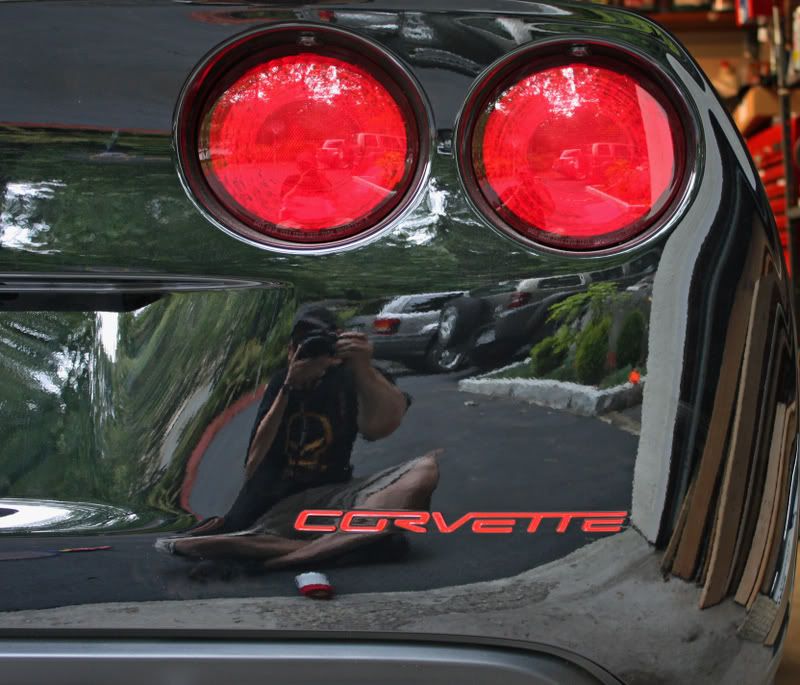
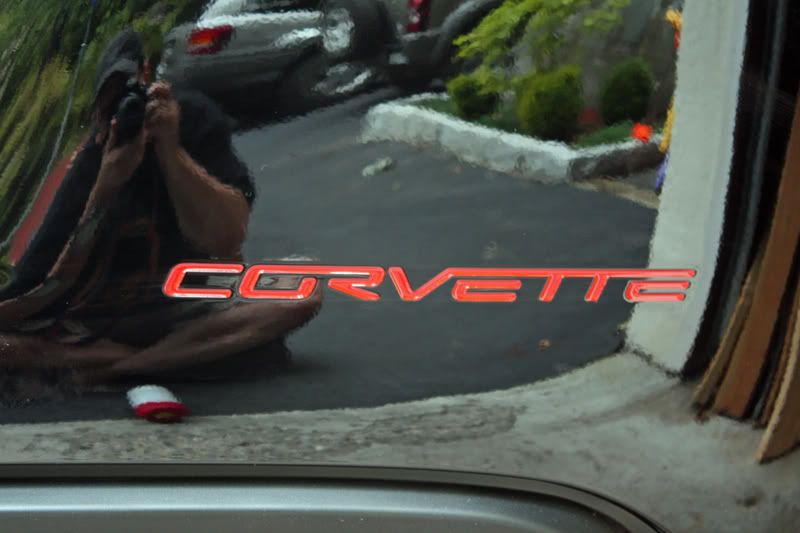
OK. Just did the project. Took no more than 10 minutes. Cleaned the letters with mineral spirits with cotton *****, tooth brush and Q-tips. I went slow, made sure to do even coats, starting off of the letters, spraying them and ending off of the letters carrying a fluid motion through...
I used Regal Red instead of a brighter red as I thought it would be a bit much having bright red, I think it looks good.
Great Idea and quite satisfying after completing....
Some pics of the finished product and my little helper.


I used Regal Red instead of a brighter red as I thought it would be a bit much having bright red, I think it looks good.
Great Idea and quite satisfying after completing....
Some pics of the finished product and my little helper.

The following users liked this post:
Spark2005C6 (06-24-2022)


 09-27-2008, 08:36 PM
#53
Melting Slicks


I just did gloss black on my machine silver. The wife says it is perfect but I think I am gonna have to redo it.. Actually, my first attempt was after using mineral spirits to clean very thoroughly. When I shot the first coat, it beaded nicely . I used acetone just inside the letter area which must have finally removed the zainos cause I had a different result the second time. I did use light strokes of mineral spirits to remove the access paint. I may try to buff it some with fusion to finish it off or like I said, stirp it and reshoot the thing. I love the technique though. Thanks. I looked for the reflective paint offered by rustoleum but Lowes didn't carry it. Suppose to be clear during the day but reflective at night.

. I used acetone just inside the letter area which must have finally removed the zainos cause I had a different result the second time. I did use light strokes of mineral spirits to remove the access paint. I may try to buff it some with fusion to finish it off or like I said, stirp it and reshoot the thing. I love the technique though. Thanks. I looked for the reflective paint offered by rustoleum but Lowes didn't carry it. Suppose to be clear during the day but reflective at night.
Last edited by Corpsvette; 09-28-2008 at 11:04 AM. Reason: Pics Added
09-27-2008, 09:21 PM
#54
Drifting

Thread Starter
Member Since: Sep 2007
Location: Hurst (Fort Worth area) Texas
Posts: 1,283
Likes: 0
Received 6 Likes
on
5 Posts
St. Jude Donor '09
I just did gloss black on my machine silver. The wife says it is perfect but I think I am gonna have to redo it.. Actually, my first attempt was after using mineral spirits to clean very thoroughly. When I shot the first coat, it beaded nicely. I used acetone just inside the letter area which must have finally removed the zainos cause I had a different result the second time. I did use light strokes of mineral spirits to remove the access paint. I may try to buff it some with fusion to finish it off or like I said, stirp it and reshoot the thing. I love the technique though. Thanks. I looked for the reflective paint offered by rustoleum but Lowes didn't carry it. Suppose to be clear during the day but reflective at night.
. I used acetone just inside the letter area which must have finally removed the zainos cause I had a different result the second time. I did use light strokes of mineral spirits to remove the access paint. I may try to buff it some with fusion to finish it off or like I said, stirp it and reshoot the thing. I love the technique though. Thanks. I looked for the reflective paint offered by rustoleum but Lowes didn't carry it. Suppose to be clear during the day but reflective at night.Mr. Kay... I sure don't want to 'butt in' here, but I would suggest that you might strongly consider 'going with' what your wife says!
Can you post a photo of your handiwork?
I guess that the thing that really concerns me is the use of ACETONE. I'm scared to death of that stuff... wouldn't let it near my car (that and lacquer thinner and numerous other really strong solvents).
Anyway, years ago (yes, I'm an old geezer), I found that many times a
'cure' can be worse than the 'problem' it was meant to correct.
OK... I'll butt out now!
Have a great what's-left-of-the-weekend!
Rob
09-28-2008, 11:09 AM
#55
Melting Slicks
RFP,
I hear your concerns about acetone. I only used it inside the letter grooves themselves using a Qtip. Not saying it wasn't harmful to the paint but that is covered by the black. I almost think I should have gone semi gloss or even flat. Maybe a charcoal would look better. I will let it go for a while before I attempt to fix it. Pic is posted above. Again, thanks for the awesome solution. I have been through several sticker sets and metal inserts before stumbling across your idea.
Jim K.
I hear your concerns about acetone. I only used it inside the letter grooves themselves using a Qtip. Not saying it wasn't harmful to the paint but that is covered by the black. I almost think I should have gone semi gloss or even flat. Maybe a charcoal would look better. I will let it go for a while before I attempt to fix it. Pic is posted above. Again, thanks for the awesome solution. I have been through several sticker sets and metal inserts before stumbling across your idea
.Jim K.


 Thanks for the thread !
 09-28-2008, 01:29 PM
#58
Melting Slicks
Okay, just stripped it down and repainted again. As mentioned above, the secret is LIGHT strokes with the MS. It takes a little longer but the results this time are perfect.
