

 02-19-2015, 06:46 PM
Last edit by: IB Advertising
See related guides and technical advice from our community experts:
Browse all: Exterior How-Tos
- How to Repair Your Rear Hatch Button
Step by step instructions for do-it-yourselfers.
Browse all: Exterior How-Tos

Rear Hatch button repair - DIY Many pictures
05-14-2009, 08:14 PM
#1
Team Owner


Thread Starter
The hatch button on the C6 is prone to fits of failure and intermittent operation. More often then not it is due to dirt and contamination getting inside the switch. The forum had a great DIY that Ed (pipedreams) had posted but we've lost the pictures. I thought that I would rebuild it for the forum as we head in to the driving season and people start trying to use the button again. While the switch is fairly inexpensive to replace (around $15.00) it is equally as easy to repair in most cases. You can do this in about 10 minutes.
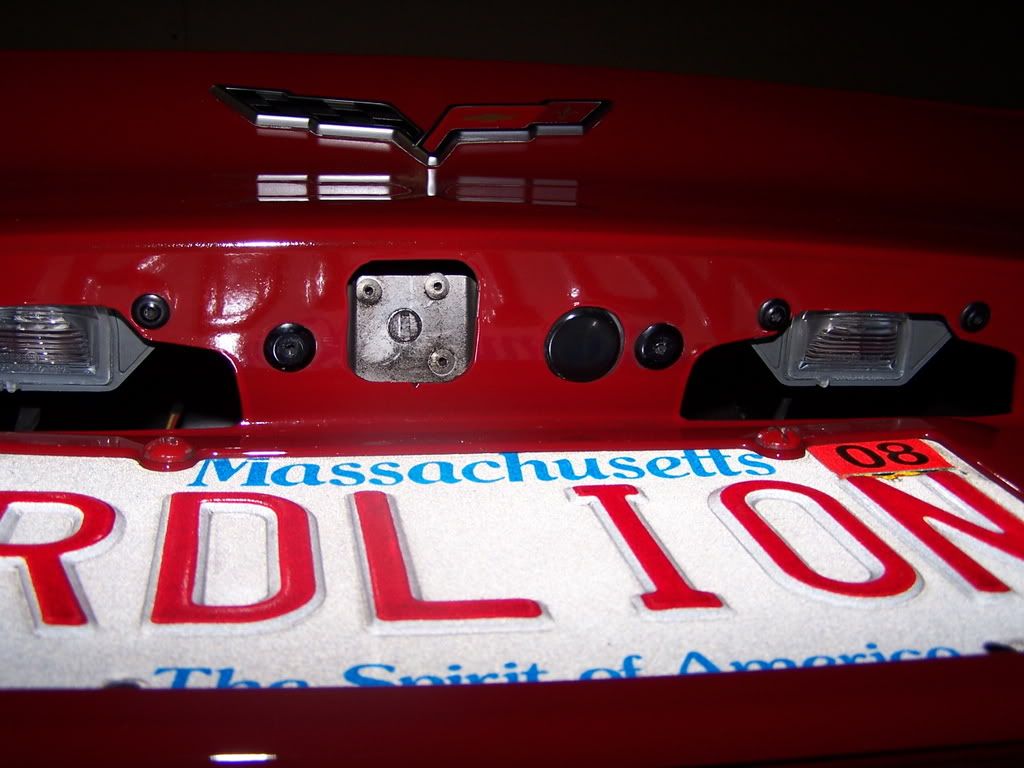
The switch is located above the license plate on the rear fascia.
It can be accessed by removing the passenger side inner most tail light.
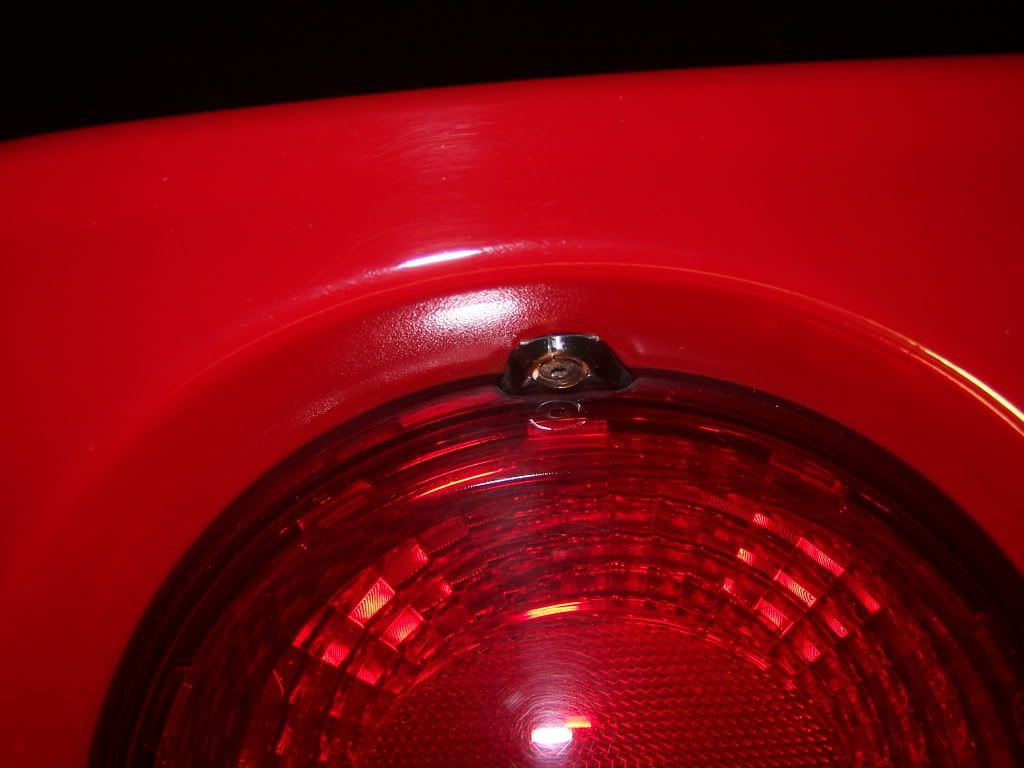
The light is held in place by one T15 Torx screw.

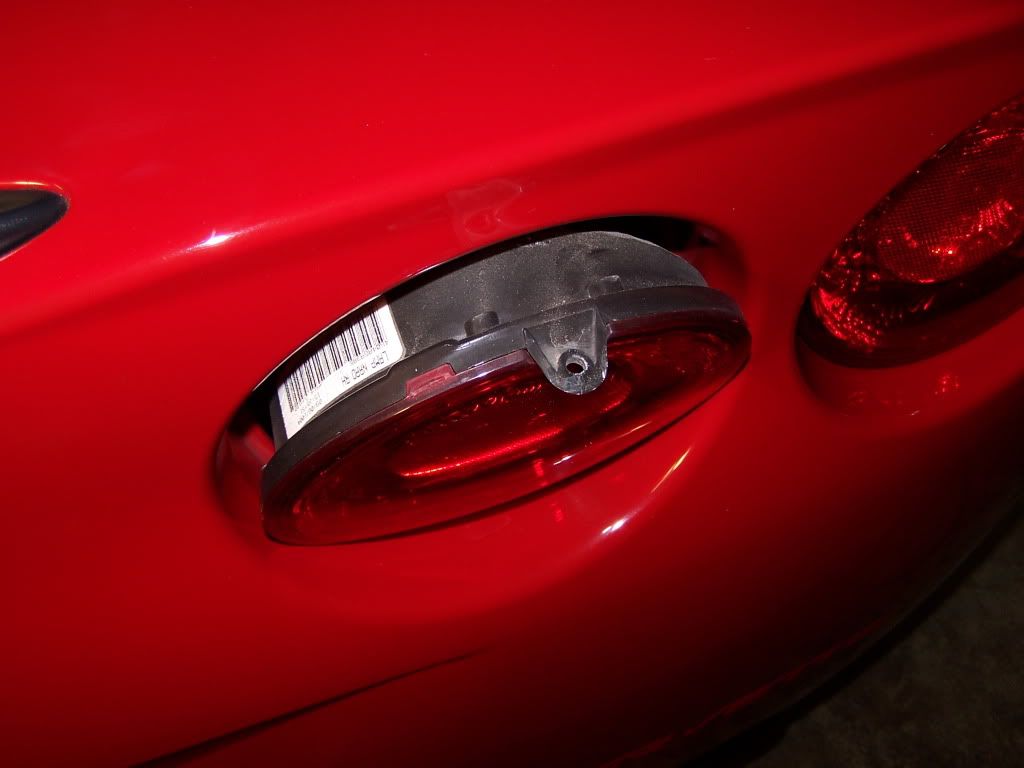
Once the screw is out, tip the tail light forward and remove it.
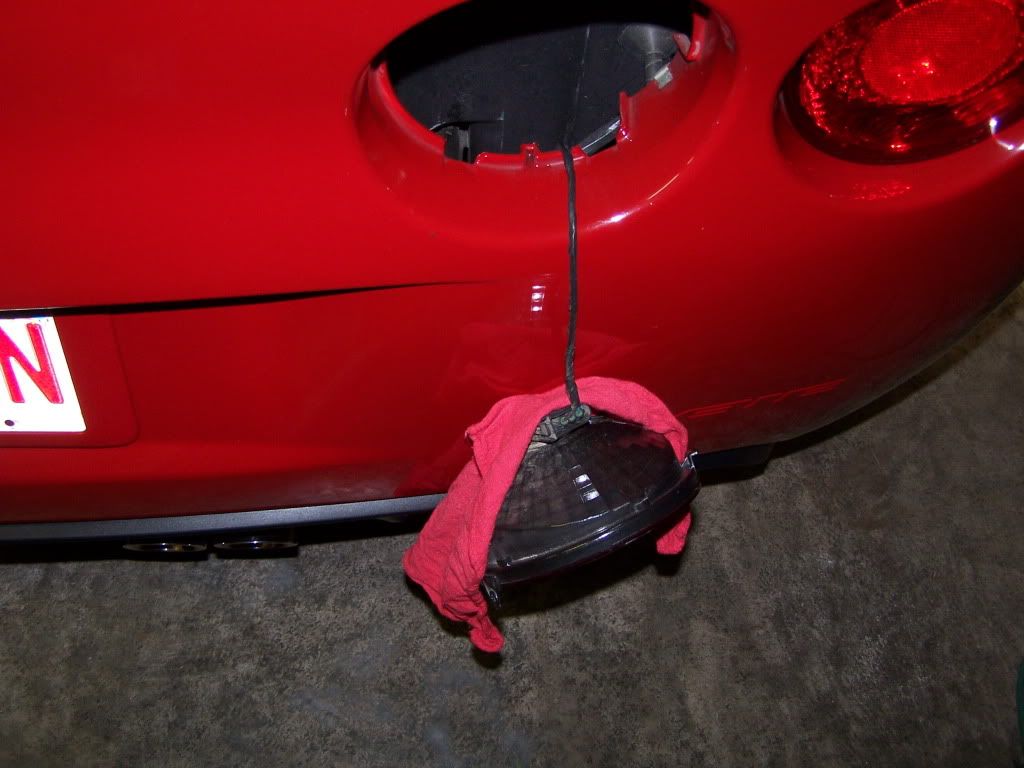
Let the tail light hang down by the harness. I prefer to drape a shop rag over the tail light and rest it against the rear fascia.
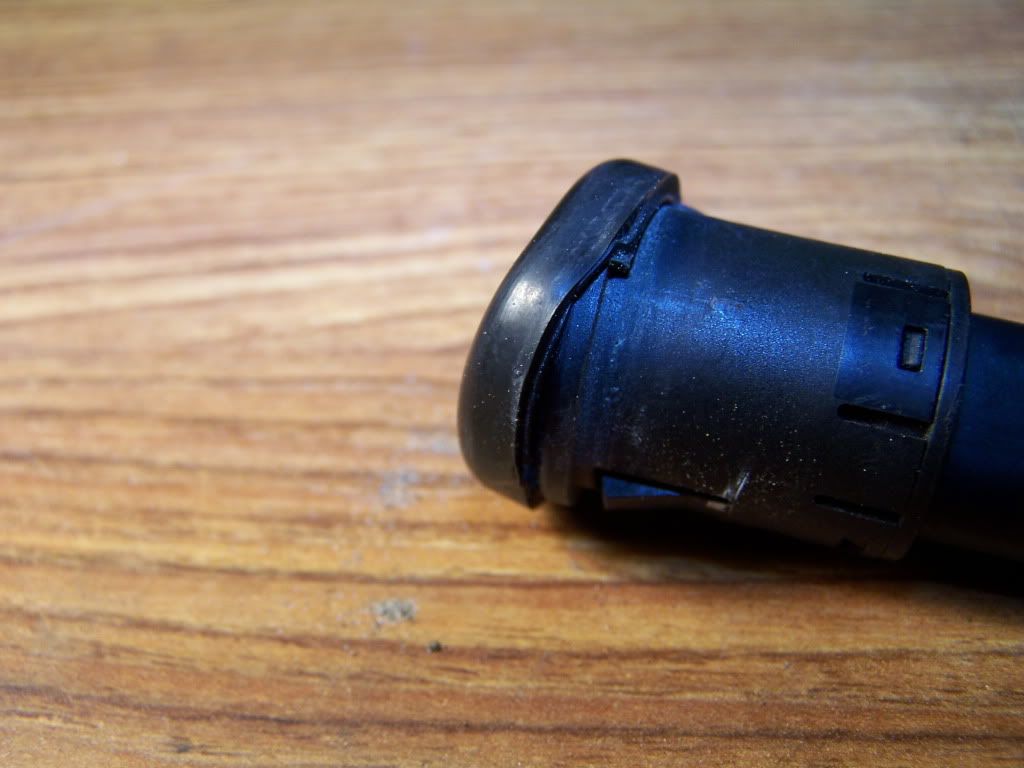
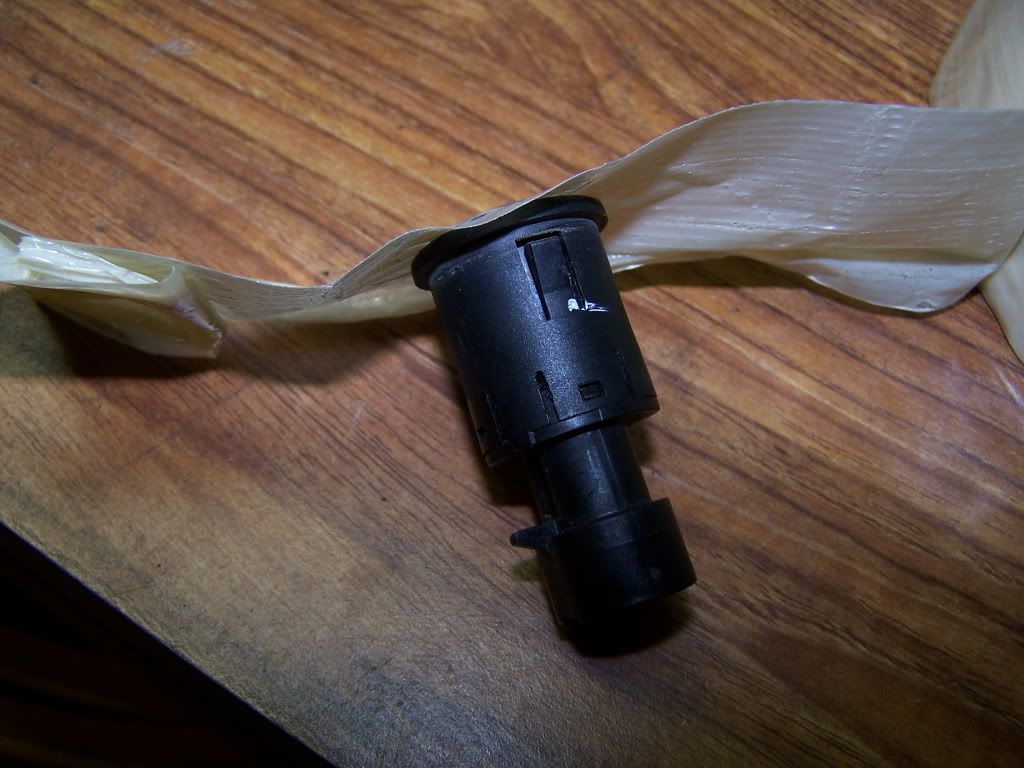
Reach in through the tail light opening and disconnect the wire harness connector from the top of the switch. There is a tab on the side of the connector that must be released to remove it from the switch. You can see the tab in this next photo and the mating detent on the switch housing in the following photo.
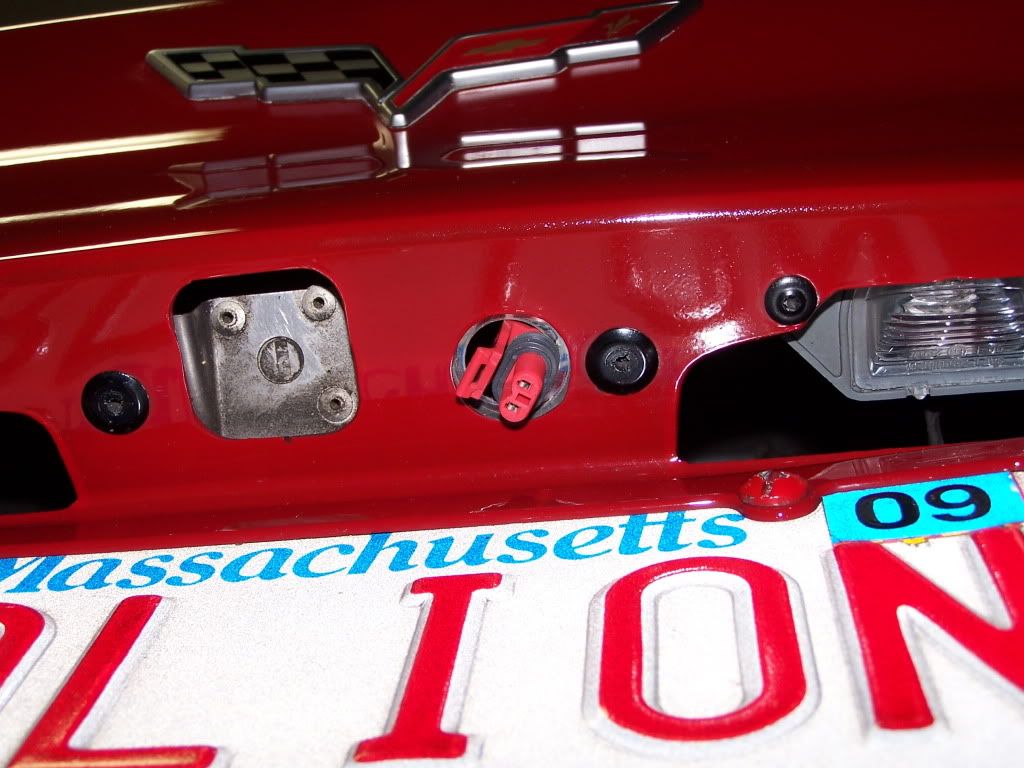
The connector will not fit through the switch opening so you must disconnect it to remove the switch. Once the connector is free there are two press tabs that lock the switch housing in place. You must press these in and the switch housing will drop down out of the rear fascia. You can see the detent in the following picture.
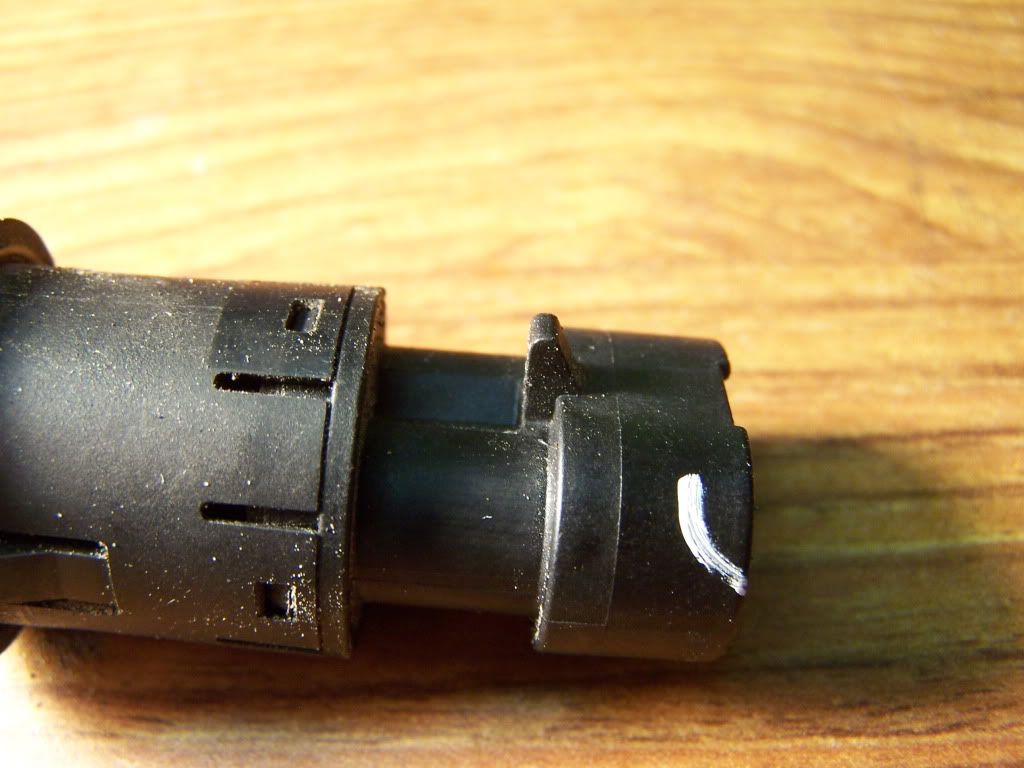
Once you have the switch out you can start the process of repairing it.
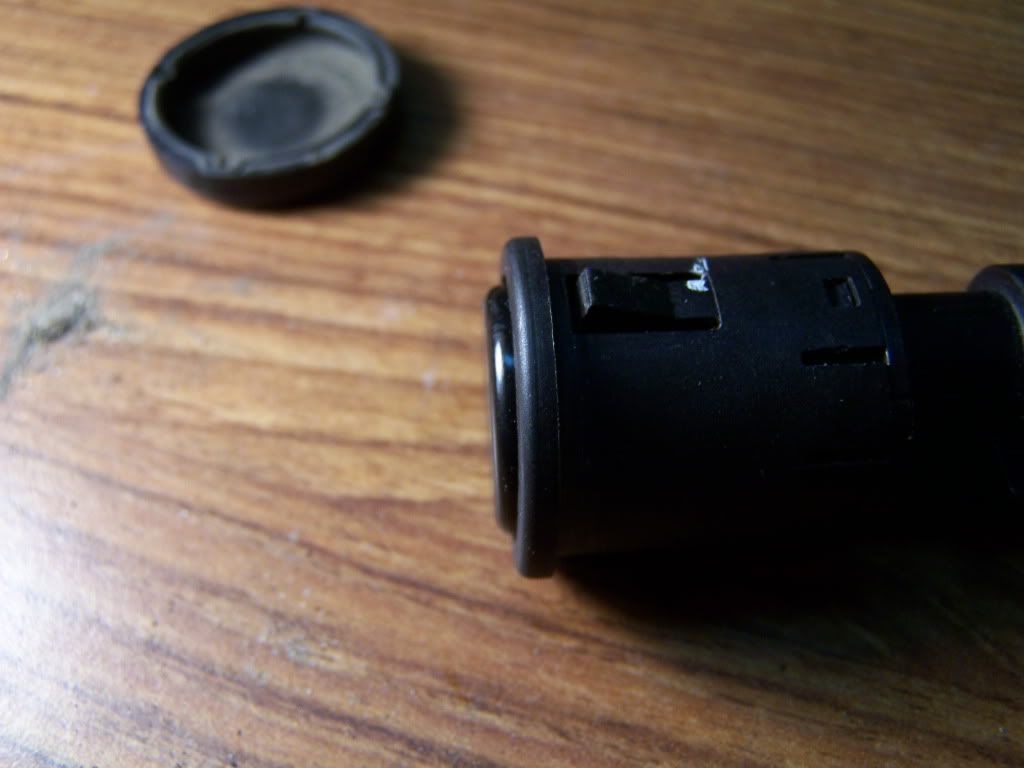
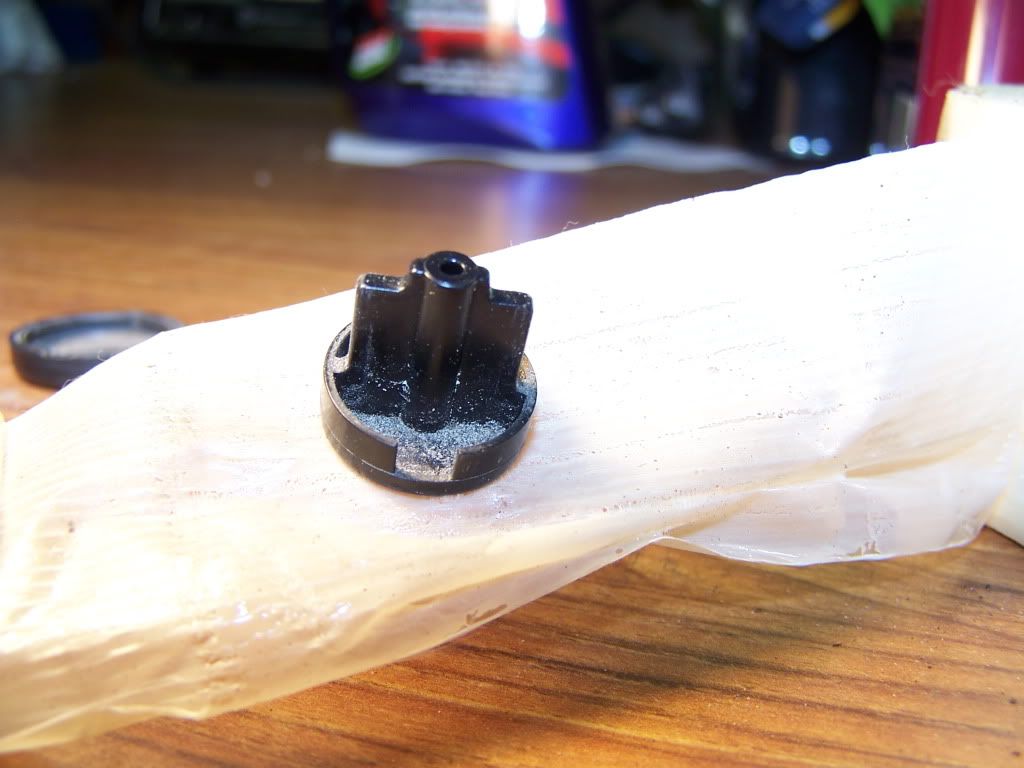
You must remove the rubber cover which is used as a protective cover for the switch. The rubber cover simply peels back.
This next picture is how a button should look that will function normally. The plunger should be raised above the switch housing and the plunger should move freely up and down.
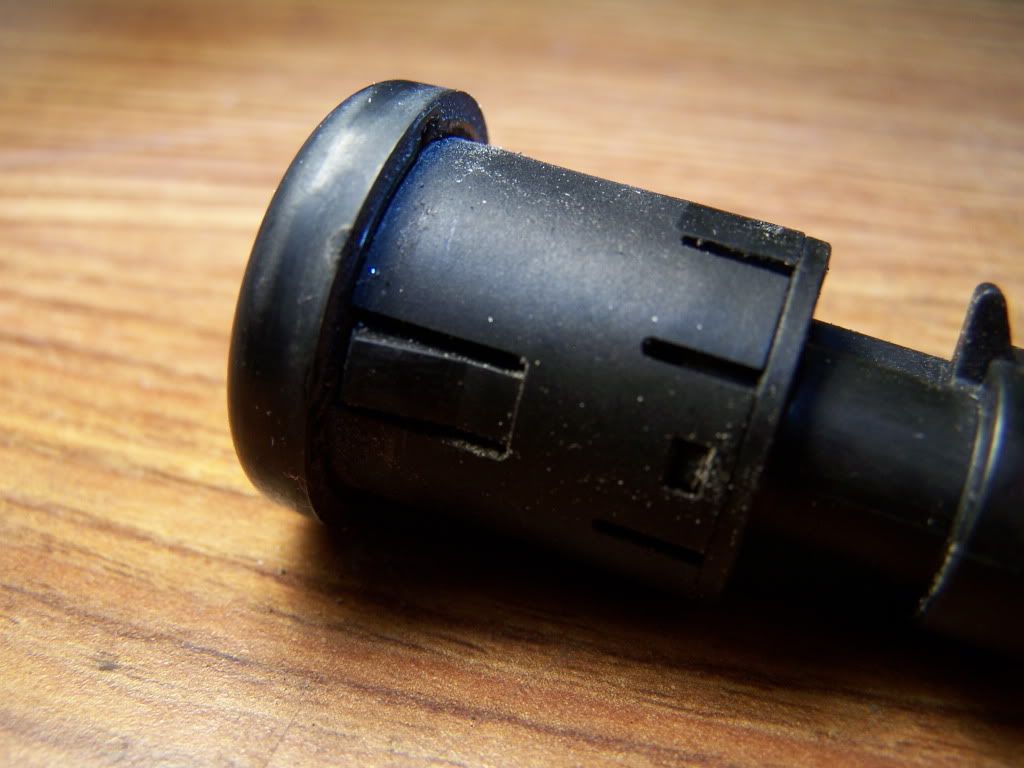
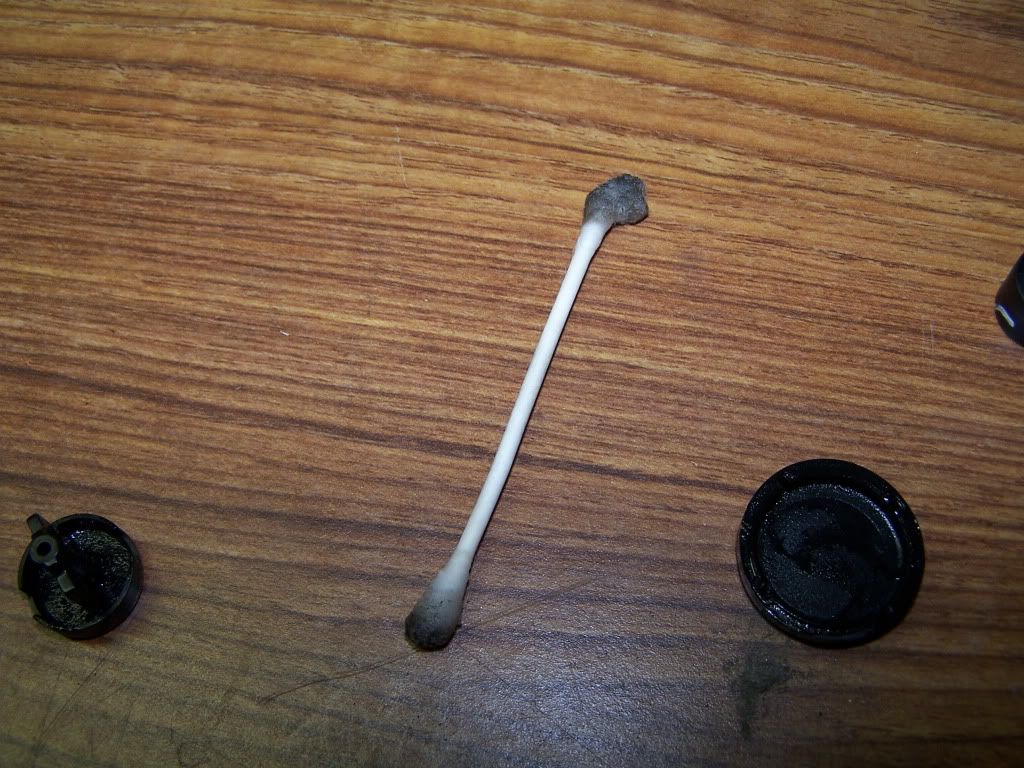
Take a look at what I found in my switch.
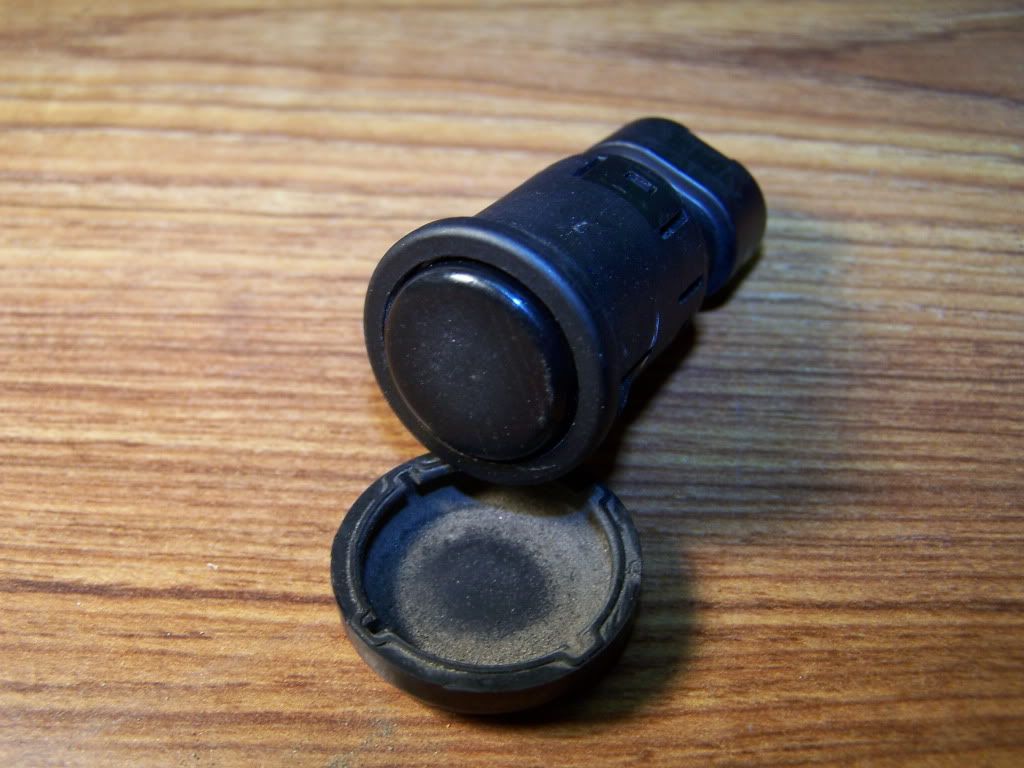
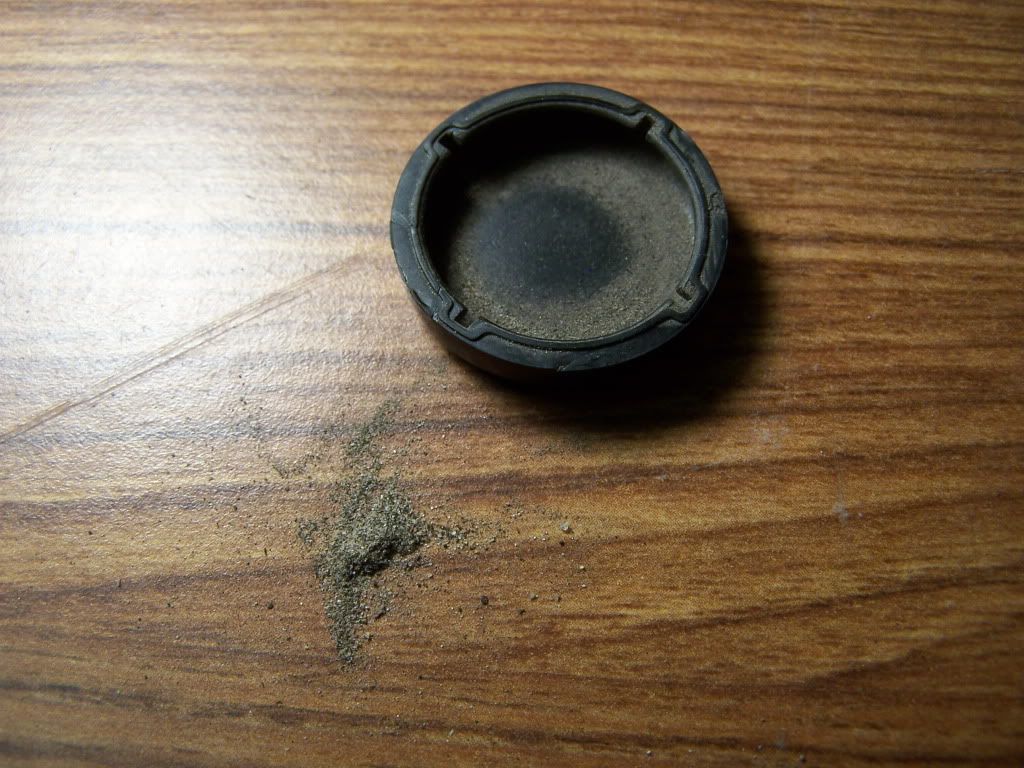
This sand and silt is the cause of your switch problems. This was just under the rubber cover. Expect to find more inside.
If your plunger is flush with the surface of the switch it is stuck in the down position and that will be a source of problems. This sand and silt can move around and cause the switch to work intermittently.
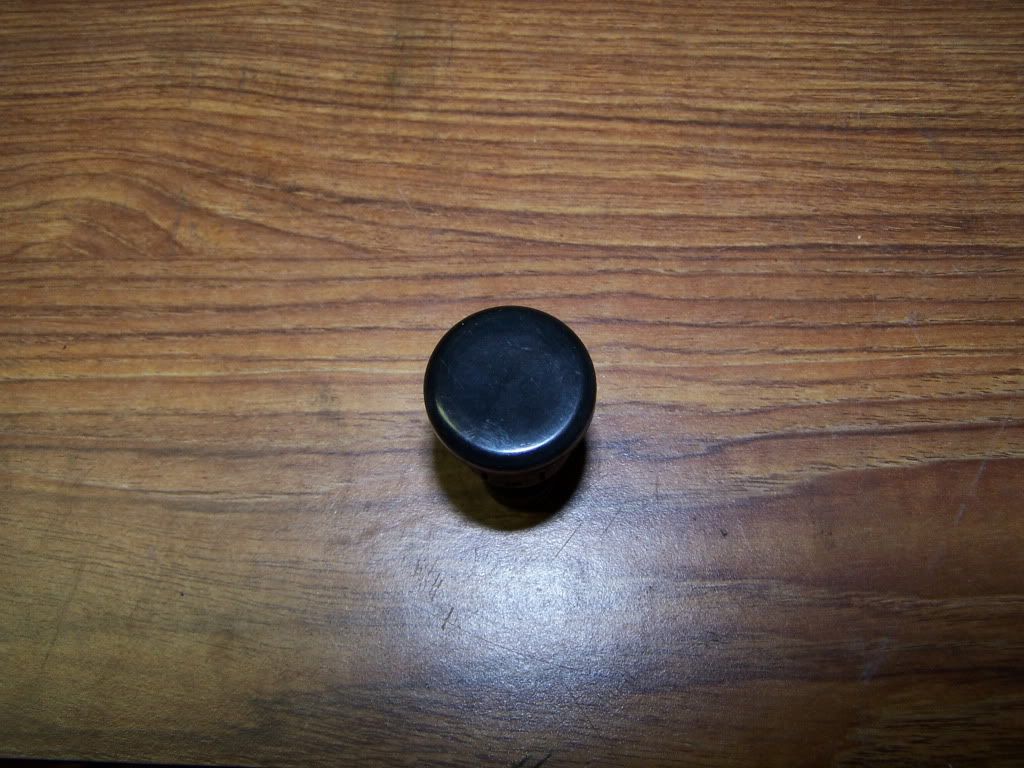
In order to get the plunger out, use a piece of strong tape like duct tape or packing tape. Press the plunger to the sticky side of the tape and pull up on the tape while holding the switch base. This will pull the plunger out of the switch housing which is only a press fit.
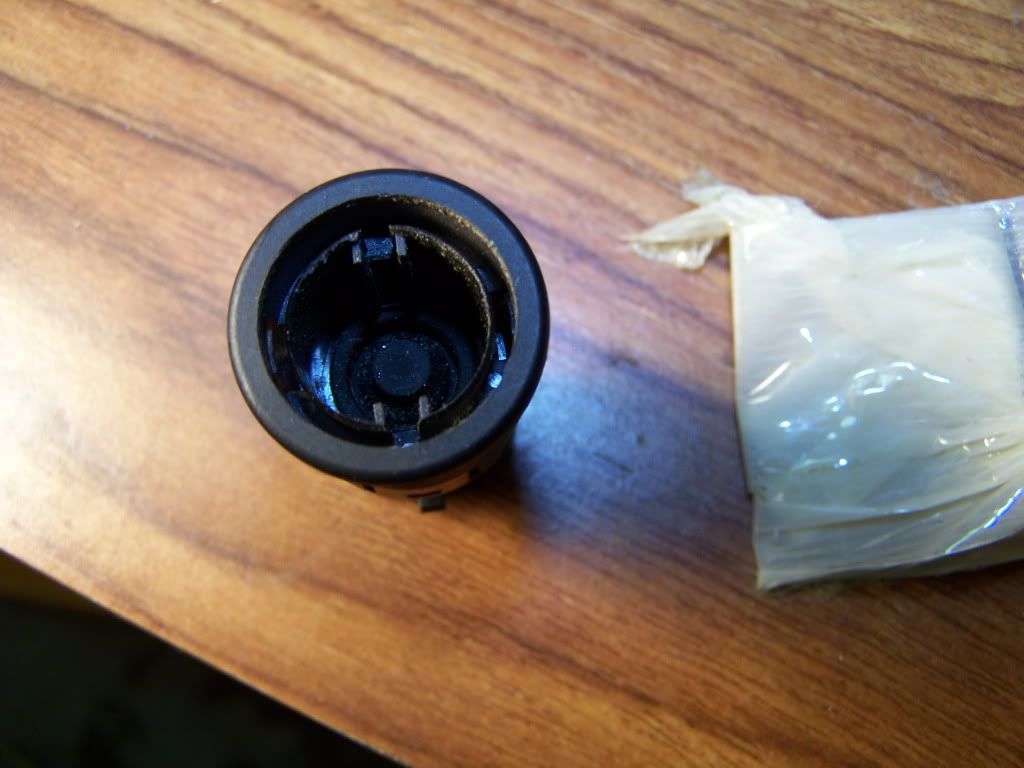
Clean out cover and the switch base. Use some compressed air or alcohol and a cotton swab to make sure you get all the sand and contaminants out.
The switch plunger travels in two channels and uses the rubber switch at the bottom as its return spring. It is a sealed switch and there is no need to remove any other components of the assembly. The problem will be the plunger if there is one.
Put everything back together by reversing the above steps and replace the switch in the fascia. Put the tail light back in and you should be good to go.
I'll get this put in to PDF and put it up on my website as well.
2014 Update: If you have completed these steps and your button is still not working. Please follow the link here to view an option for opening the bottom half of the switch (posted by forum member Dano523). This will get you to the lower contacts which may also be contaminated.
https://www.corvetteforum.com/forums...f-the-car.html
Post #12 in that thread contains the information to complete the next steps.
Enjoy,
Paul
The switch is located above the license plate on the rear fascia.
It can be accessed by removing the passenger side inner most tail light.
The light is held in place by one T15 Torx screw.
Once the screw is out, tip the tail light forward and remove it.
Let the tail light hang down by the harness. I prefer to drape a shop rag over the tail light and rest it against the rear fascia.
Reach in through the tail light opening and disconnect the wire harness connector from the top of the switch. There is a tab on the side of the connector that must be released to remove it from the switch. You can see the tab in this next photo and the mating detent on the switch housing in the following photo.
The connector will not fit through the switch opening so you must disconnect it to remove the switch. Once the connector is free there are two press tabs that lock the switch housing in place. You must press these in and the switch housing will drop down out of the rear fascia. You can see the detent in the following picture.
Once you have the switch out you can start the process of repairing it.
You must remove the rubber cover which is used as a protective cover for the switch. The rubber cover simply peels back.
This next picture is how a button should look that will function normally. The plunger should be raised above the switch housing and the plunger should move freely up and down.
Take a look at what I found in my switch.
This sand and silt is the cause of your switch problems. This was just under the rubber cover. Expect to find more inside.
If your plunger is flush with the surface of the switch it is stuck in the down position and that will be a source of problems. This sand and silt can move around and cause the switch to work intermittently.
In order to get the plunger out, use a piece of strong tape like duct tape or packing tape. Press the plunger to the sticky side of the tape and pull up on the tape while holding the switch base. This will pull the plunger out of the switch housing which is only a press fit.
Clean out cover and the switch base. Use some compressed air or alcohol and a cotton swab to make sure you get all the sand and contaminants out.
The switch plunger travels in two channels and uses the rubber switch at the bottom as its return spring. It is a sealed switch and there is no need to remove any other components of the assembly. The problem will be the plunger if there is one.
Put everything back together by reversing the above steps and replace the switch in the fascia. Put the tail light back in and you should be good to go.
I'll get this put in to PDF and put it up on my website as well.
2014 Update: If you have completed these steps and your button is still not working. Please follow the link here to view an option for opening the bottom half of the switch (posted by forum member Dano523). This will get you to the lower contacts which may also be contaminated.
https://www.corvetteforum.com/forums...f-the-car.html
Post #12 in that thread contains the information to complete the next steps.
Enjoy,
Paul
Last edited by talon90; 09-29-2014 at 04:10 PM.

The following 8 users liked this post by talon90:
719c6 (09-17-2019),
IRingTwyce (02-17-2017),
Itshakes (12-22-2016),
JerryGeil (03-10-2024),
ricarr (12-12-2015),
and 3 others liked this post.
05-14-2009, 08:29 PM
#2
Team Owner

Outstanding as usual Paul!!! Very well done. Thank you.
But I think you need to spend more time caring for your car. That amount of dirt is inexcusable.
But I think you need to spend more time caring for your car. That amount of dirt is inexcusable.
05-14-2009, 08:30 PM
#3
Instructor

Member Since: Apr 2006
Location: Orlando FL
Posts: 183
Likes: 0
Received 0 Likes
on
0 Posts

My switch has been silly since I purchased the car this past December. It came from the dealership on the fritz. I'll try your fix and hope for the best!
Thanks for the write-up!
Thanks for the write-up!


 for an Awsome write up, Nice job Man!
The following users liked this post:
Glass112 (02-25-2017)


 05-14-2009, 08:47 PM
#8
Drifting

I was about to bring mine to the dealership but will now try to fix it myself thanks to you.
05-14-2009, 10:31 PM
#10
Safety Car

Love the pic's,,,Its always nice for some guys to see pic's of a task before they attempt it. Kinda ease's the worry about it. My guess is the switch isnt as sealed as it could be and sitting in the upside down doesnt help either. Good work, wish my camera was that clear,,,,I think it's like a -1 minipixel

 05-15-2009, 08:22 AM
#17
Team Owner
Thread Starter
It was a shame when your photos were lost. I wanted to revive the project as there have been a couple of posts about it recently. I've also converted this to a pdf and it is up on the Tech Tips page on my website so you can send people the pdf if they ask as well.Paul
05-15-2009, 09:39 AM
#19
Team Owner
Thread Starter
 Nope, all C6 Corvettes. 2005-2010 so far and hopefully beyond have it. My car (used for the pictures is a 2005).