

 02-23-2015, 03:21 PM
Last edit by: IB Advertising
See related guides and technical advice from our community experts:
Browse all: Engine and Powertrain
- How to Install a Dual Mode Exhaust Switch
Step by step instructions for do-it-yourselfers.
Browse all: Engine and Powertrain

DIY Dual Mode Exhaust Switch
04-21-2011, 03:20 PM
#21
Advanced


Member Since: Feb 2011
Location: Portage IN
Posts: 77
Likes: 0
Received 0 Likes
on
0 Posts
 04-21-2011, 03:56 PM
#22
Le Mans Master


You are absolutely right and I have said the same in other posts. Its not rocket science to control the butterfly valves. In fact if you have any electrical design experience you would realize that even making it work from your visor without wires is not too difficult or costly.
04-21-2011, 04:23 PM
#23
Melting Slicks

I'm with the OP on this one....I'm very happy with my homemade solution, and it is not jury-rigged at all.
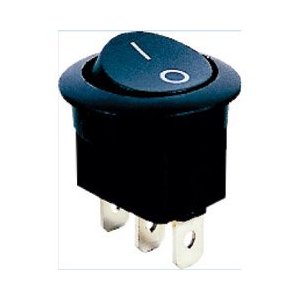
$1.98 Switch from Amazon:
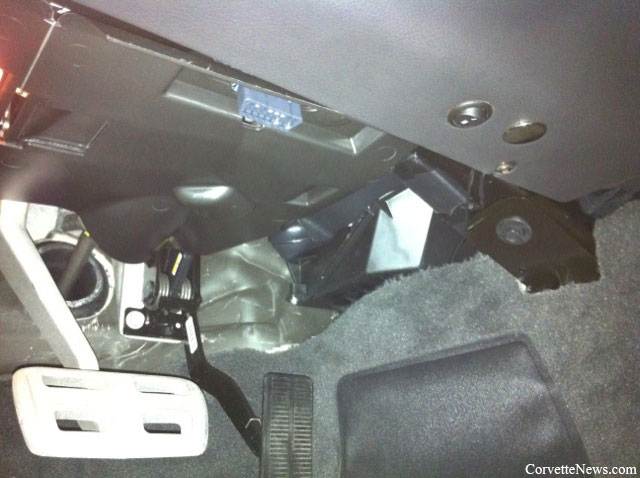
Stealthy location:
And another $10 for wire, crimp connectors, fuse tap and inline fuse holder (do not wire something like this in without making sure you're still using the original fuse for protection! )
)
The picture doesn't do the location justice. It's way under there...absolutely can not be seen without getting your head down on the floorboard and impossible to accidentally switch with your leg. Easy to reach while driving. Also, there's plenty of empty space above that switch within the dash to easily connect the switch (I used crimped on blade connectors on the end of the wires so that I can easily disconnect the switch if ever the dash is removed for some reason in the future).
I understand the appeal of the M2W with the remote. For me it was an issue of rock solid reliability (this switch will be there functioning just fine for the life of this car), stealth, and easy access (i.e. if a call comes in on the bluetooth, I can kill the drone in a heartbeat).
I know I'd never get out of the car with a remote to demo it to somebody. But I'll tell you, I leave mine on 99% of the time. When driving along with somebody who's new to the car and they're asking questions, it blows them away when you say: "And if I ever want to quiet the car down, I just flip this switch I made!" It "wows" them every time!
$1.98 Switch from Amazon:
Stealthy location:
And another $10 for wire, crimp connectors, fuse tap and inline fuse holder (do not wire something like this in without making sure you're still using the original fuse for protection!
)The picture doesn't do the location justice. It's way under there...absolutely can not be seen without getting your head down on the floorboard and impossible to accidentally switch with your leg. Easy to reach while driving. Also, there's plenty of empty space above that switch within the dash to easily connect the switch (I used crimped on blade connectors on the end of the wires so that I can easily disconnect the switch if ever the dash is removed for some reason in the future).
I understand the appeal of the M2W with the remote. For me it was an issue of rock solid reliability (this switch will be there functioning just fine for the life of this car), stealth, and easy access (i.e. if a call comes in on the bluetooth, I can kill the drone in a heartbeat).
I know I'd never get out of the car with a remote to demo it to somebody. But I'll tell you, I leave mine on 99% of the time. When driving along with somebody who's new to the car and they're asking questions, it blows them away when you say: "And if I ever want to quiet the car down, I just flip this switch I made!" It "wows" them every time!
04-21-2011, 04:31 PM
#24
Burning Brakes


Member Since: Sep 2009
Location: Central Florida Sunshine State
Posts: 762
Likes: 0
Received 0 Likes
on
0 Posts

1st thing I did to my 2010. All I had to buy was a $2 switch and 4$ fuse tap. Easy mod, total control over the NPP. Also used some small stainless hose clamps on the actuator rods to keep the valves open about 1/4" while in the "closed" postion, which gives it nice sound at cruising speeds without the drone of full open.
 04-21-2011, 08:16 PM
#27
Burning Brakes

Hit me up w/instructions. I know less than nothing when it comes wiring auto stuff & would like to do this. I have the m2w now but don't care for the romotes..... batteries always need replaced.
Thanks
jack@martinandmartin.biz
Thanks
jack@martinandmartin.biz
04-21-2011, 08:58 PM
#28
Yep. I have mine on the dead pedal, too.
For the electricallly...UNinclided, it really is quite easy. Here's how:
You will need a switch that is Push On - Push Off (ask the Radio Shack nerd for help) and a fuse tap and some 2 conductor wire. The 2 conductor wire is used for B and C.
Pull the fuse (see other descriptions).
Physically mount the switch in the deal pedal, somewhat high so you use your toe.
Use a wire (A) to connect one side of the pulled fuse location to the fuse tap.
Use a wire (B) to connect the remaining side of the fuse tap to one side of the switch.
Use a third wire (C) to connect the remaining side of the switch to the other side of pulled fuse location.
Put a fuse in the fuse tap.
Test and reassemble.
It truely is simple.
04-22-2011, 06:26 PM
#29
Advanced

Member Since: May 2010
Location: San Diego CA
Posts: 84
Likes: 0
Received 0 Likes
on
0 Posts
Didn't want to highjack the Official Mildy to Wildy Exhaust thread, but having a hard time understanding why my felllow Corvette brethren would shell out 90 clams for a mod you can do yourself for about $10 in parts and 10 minutes work. The dual mode exhaust function on C6 Corvettes with the NPP option is controlled by a 10amp fuse located in the fuse panel in the front of the passanger footbox. The way the system is set up the butterflies in the inside two exhaust ports open when the engine is turned off to prevent the butterflies from sticking closed during long periods of storage. That's why the Vettes with this feature sound AWESOME when they first start up, but soon after start up the butterflies close and then only open again above 3500 rpm's. Easiest way to keep the butterflies open all the time and keep that great sound is to simply pull the fuse (it's clearly marked in the fuse panel). This deactivates the sensor and keeps the butterflies fully open all the time and will not damage your car in any way. Only problem with this is it doesn't give you the option of toning the rumble down quickly and easily should the need arise (Cell phone calls [hands-free of course], slipping in or out late at night, cops, etc....) The $10 solution to this problem is to replace the 10 amp fuse with a mini add a circuit wired to a simple toggle switched installed where ever you like (I have mine in the glove box so its out of sight but can still be easily reached from behind the wheel). With the toggle switch in the off position the fuse is disabled just like its been pulled and the butterflies are fully open. flipping the toggle switch to the open position completes the circuit for the fuse and the system returns to full factory specs. Detailed instructions available for FREE if anyone is interested.

 04-22-2011, 10:12 PM
#32
Melting Slicks
04-23-2011, 09:23 AM
#33
Burning Brakes
Member Since: Sep 2007
Posts: 943
Likes: 0
Received 0 Likes
on
0 Posts
For people who pay 50-110 thousand for dollar car, 800-2400 for tires, and thousands on mods, I'm pretty sure 90 bucks is affordable to most of us. That's about (or a little more) than an oil change (depending where you go). In Southern California I'm almost paying that for a tank of gas right now. I've seen license plate frames that are over a hundred bucks for goodness sake. The list goes on...
M2W is a CLEAN mod that takes seconds to install and instantly gives you remote capability to control your exhaust at the push of a button. Is 90 bucks too impracticable for a mod like that, after paying 1200 for NPP or the price of a GS, Z06, or ZR1? Cmon...
M2W is a CLEAN mod that takes seconds to install and instantly gives you remote capability to control your exhaust at the push of a button. Is 90 bucks too impracticable for a mod like that, after paying 1200 for NPP or the price of a GS, Z06, or ZR1? Cmon...
04-23-2011, 10:25 AM
#34
Racer
Member Since: Apr 2011
Location: Texas Hill Country Texas
Posts: 273
Likes: 0
Received 0 Likes
on
0 Posts
04-23-2011, 10:26 AM
#35
Melting Slicks
Cost wasn't a factor at all in my decision to do my own. I wanted to have exactly what I built for myself as the end result. I specifically didn't want a remote to lose, break, slide around in a cup holder, or velcro someplace to hold it down (and I sure as heck didn't want to have to change batteries for something I considered an integral permanent part of the car). The visor/home remote controlled M2W version had a bit of merit to me, but after I thought about it, visor remotes just feel like garage door and gate openers.....not a place for an engine control.
I also considered the dead pedal option, but I often use my left foot and a whole lot of pressure on that area to brace myself during certain maneuvers (like tight turns, etc.). Also, an ashtray is an ashtray (no I don't smoke, and would never use it for trash, but it's still an ashtray to me). A glove box is a glove box and hard to reach while driving. Those locations didn't work for what I wanted.
To me, the exhaust controller switch "felt" like it belonged in the instrument cluster or next to the start button...but since I really didn't want to change anything from the stock look, my stealth location under the dash was perfect (for me!).
I'm sure other's that have fabricated (if you consider crimping a few wire connectors fabrication) their own had reasons for their locations and switch types that work for them. I bet that none of them would have changed what they did, and would have gladly paid $100 to have exactly what they wanted. The fact that home rolled solutions cost under $20 is just a plus. As for neat and clean...mine is completely stealth and to me feels like it's just part of the car as it should have came from the factory.
There's also a small benefit when sharing the switch with passengers. I tell them, "Yeah, I was found some instructions on how to do this on some Internet forum." Being in IT, I typically get a knowing nod like, "oh yeah, he's a computer guy...." Little do they know that it's just a bit of wire and a 2 dollar switch!
04-23-2011, 10:35 AM
#36
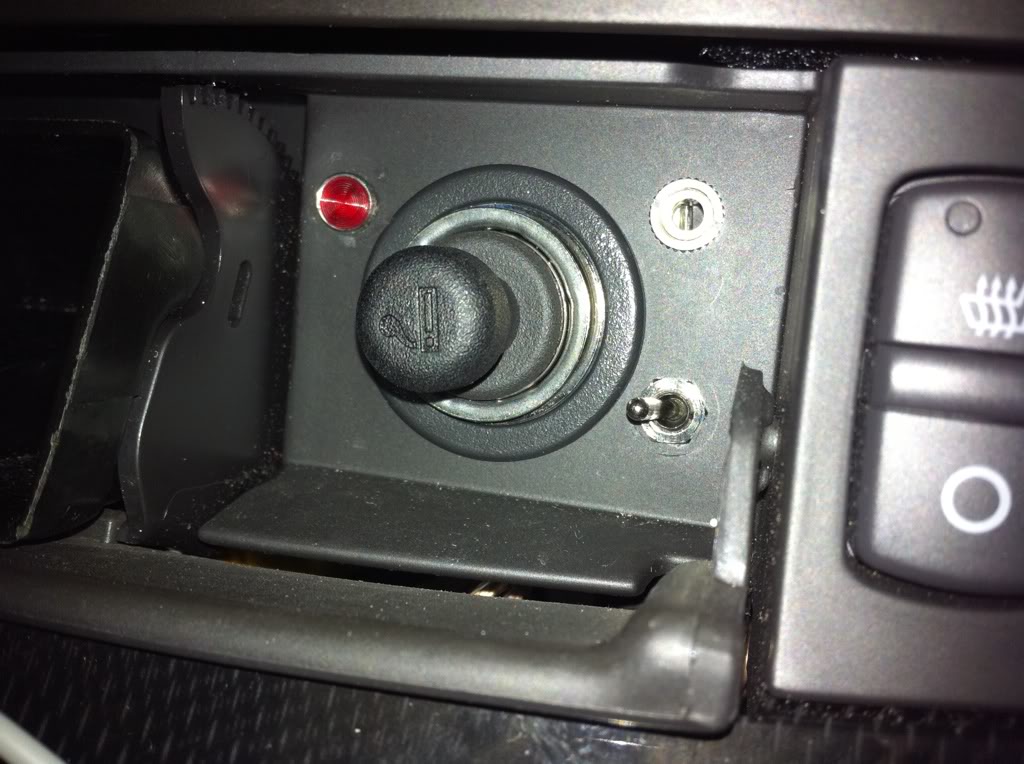
I had wireless m2w but decided to change to a dead pedal switch. I also added an LED indicator next to the cig lighter so I could tell what mode it is in when I start up the car in the morning ( I like to start in mild mode when I am going early in the morning, don't want to wake up the neighbors ). With wild mode the led is off , in mild mode the led is on.
Last edited by kev1n; 04-23-2011 at 10:51 AM.
04-29-2011, 10:27 AM
#37
Instructor

Member Since: Aug 2010
Location: St. Louis MO
Posts: 162
Likes: 0
Received 0 Likes
on
0 Posts
Did this mod a few days ago, and it works/looks perfect (switch on dead pedal). I love little projects like this. I mean, it's a very cool mod that doesn't cost a lot. What more could I want?
Thanks for posting this; much appreciated.
Stu
Thanks for posting this; much appreciated.
Stu
05-10-2011, 02:55 PM
#38
Heel & Toe

Member Since: Aug 2005
Location: Lake St. Louis Missouri
Posts: 23
Likes: 0
Received 0 Likes
on
0 Posts
I too would love to have the instructions! Thanks for the post. My e-mail address is jetjocky50@hotmail.com
07-10-2011, 07:07 AM
#39
Intermediate
Member Since: Apr 2011
Location: Northern California
Posts: 38
Likes: 0
Received 0 Likes
on
0 Posts
