

 02-19-2015, 06:34 PM
Last edit by: IB Advertising
See related guides and technical advice from our community experts:
Browse all: Exterior How-Tos
- How to Swap Out Your Exterior A-Pillars
Step by step instructions for do-it-yourselfers.
Browse all: Exterior How-Tos

Swapping out your exterior 'A' pillars - Detailed Instructions with PHOTOS
08-21-2011, 10:37 AM
#1
Tech Contributor

Thread Starter

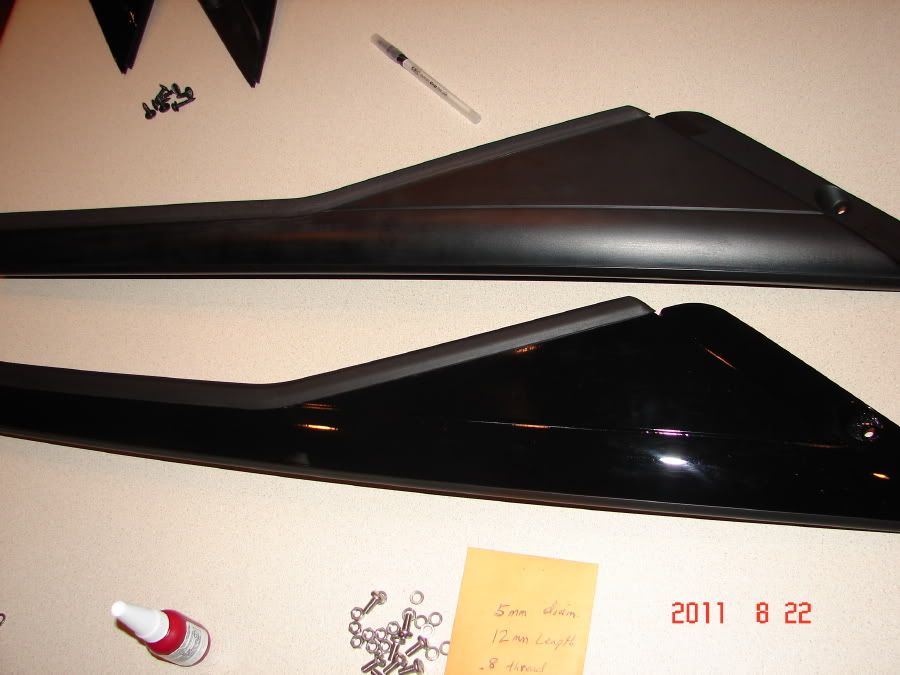
I know that more and more people are thinking of changing out their EXTERIOR 'A' pillars for either painted ones or carbon fiber ones.
I am in the process of doing this and thought I would post up some photos and instructions to help others who might want to do this.
I know others have already done this and posted detailed instructions that helped me a lot, I am just adding some photos to help out.
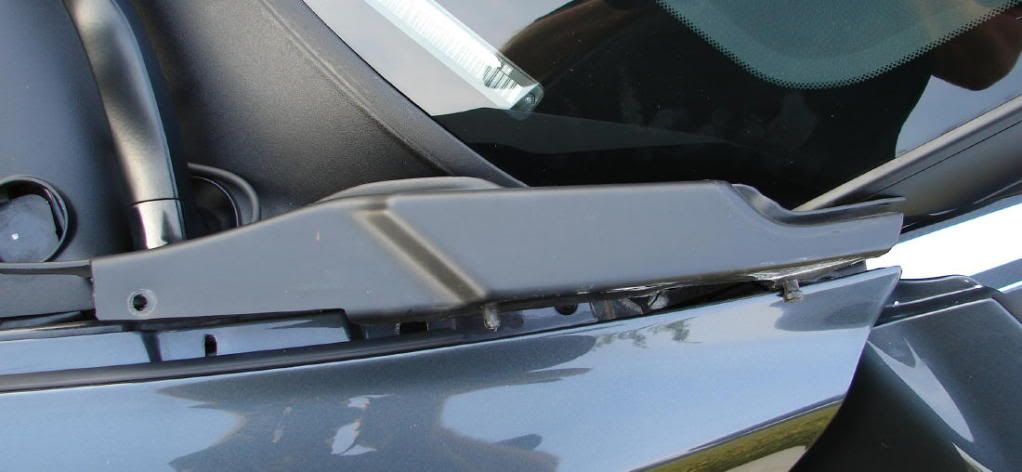
First the driver's side steps:
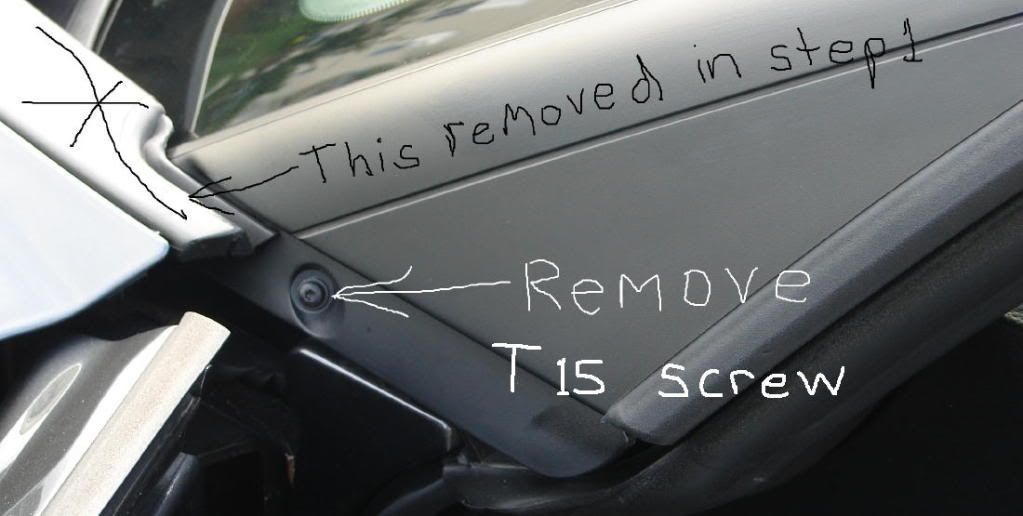
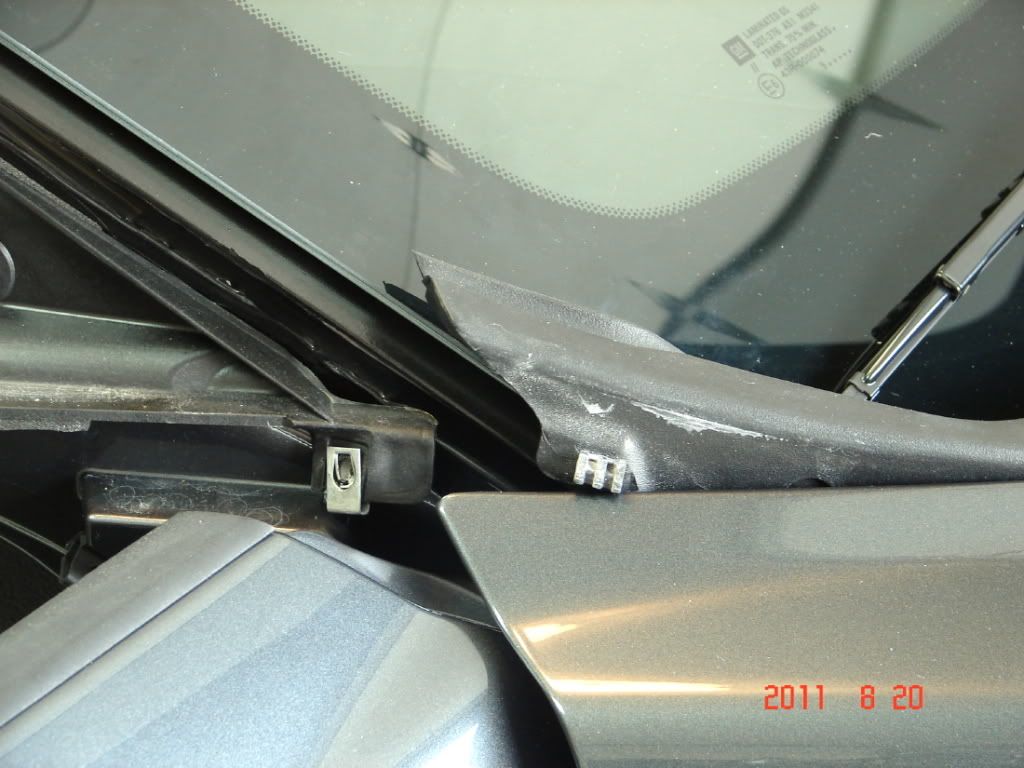
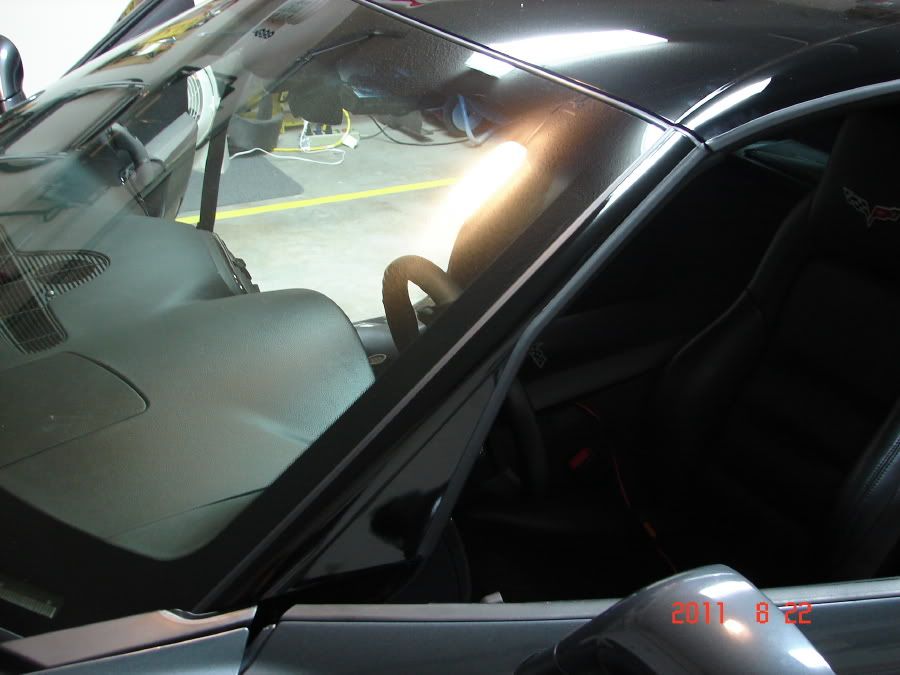
1. Open the hood. Once that is done you will need to remove a plastic cover on the driver's side near the base of the 'A' pillar by taking out one screw and sliding the part forward slightly and wiggling it loose.
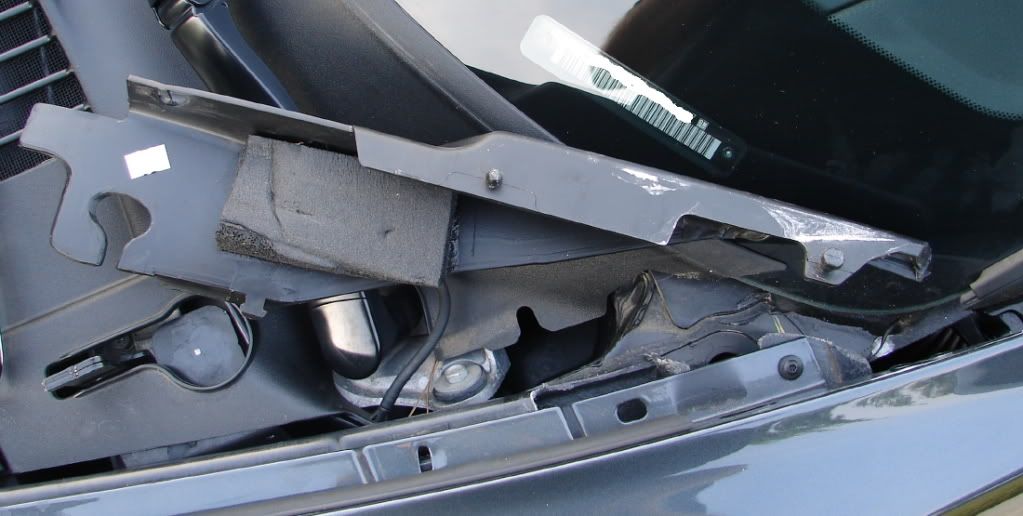
2. After you get that part removed, you will need to remove the screw at the base of the 'A' pillar.
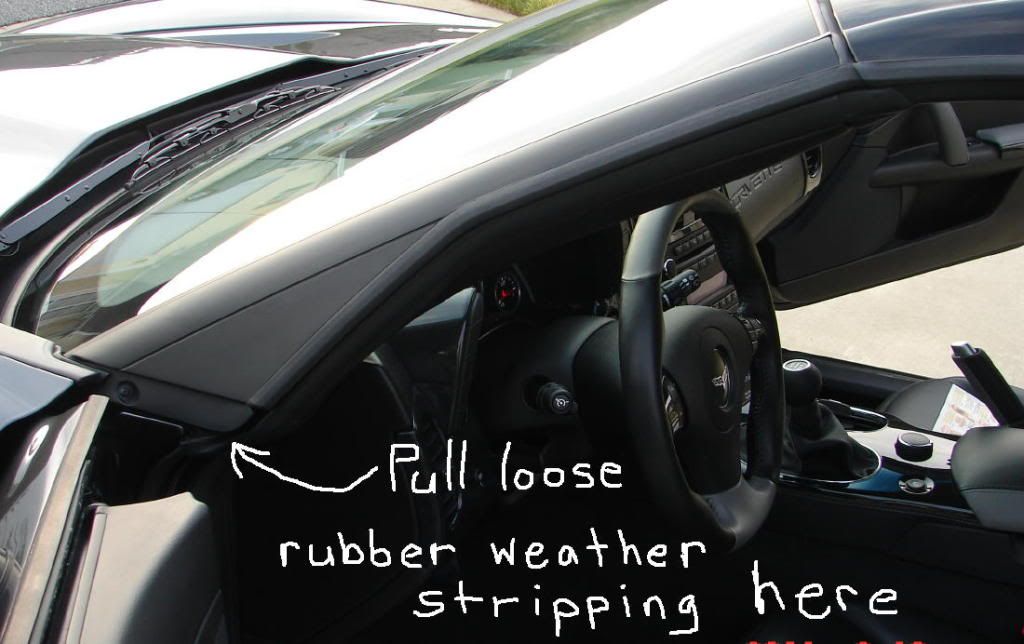
3. Next you need to pull the rubber weather stripping loose, starting right under the base of the 'A' pillar. It is held on by some sticky black automotive adhesive at the bottom, and the rest of it (up to the top) is in a groove that you can just pull it out of. Stop pulling it loose once you get to the top (don't go across the door).
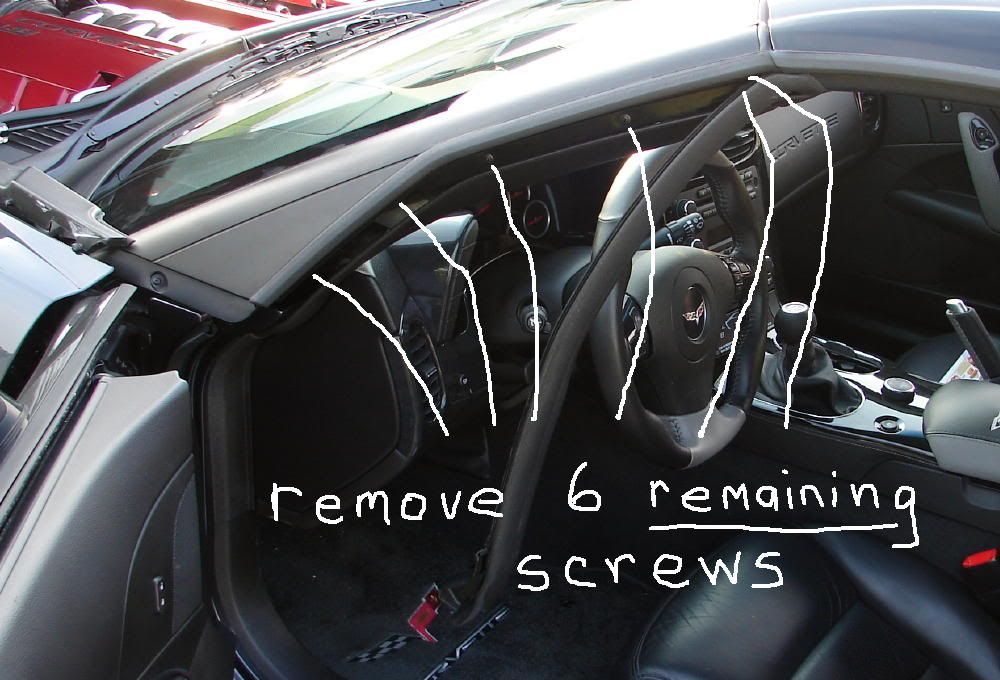
4. This will expose all of the screws that you will need to take out. They're are 6 MORE screws to remove. Once you take those out the 'A' pillar can be wiggled loose as you pull downward on it. CONGRATS, it's out.
5. Reinstall the new 'A' pillar by reversing this process. Once all of the screws are back in, you need to work the rubber weather strip back into the groove that holds it and 'restick' the bottom part. You may need to add some adhesive but I didn't. I'm sure that it can be picked up at any automotive parts place.
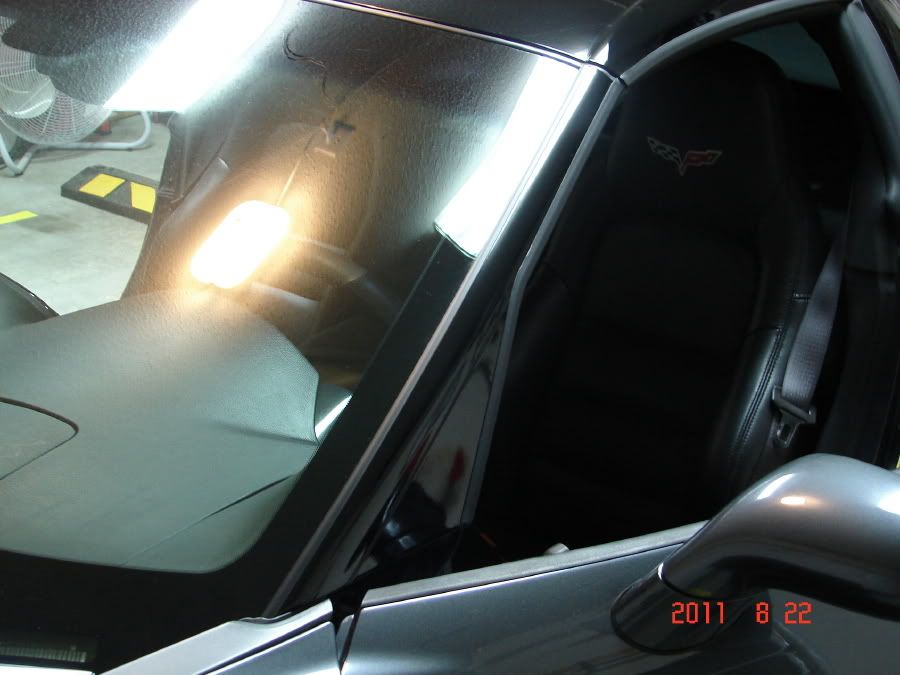
Doing the Passenger's side is exactly the same with one exception. You DO NOT have any plastic piece to remove at the bottom. Instead you just grasp the flexible molding and pull it loose and up a little. (See the photos)
Hope this helps some of you who are thinking of this project.
NOTE: This process is really very easy to do this AS LONG as the 'A' pillar that you are putting back on ALREADY has the metal weather strip part POP riveted to it. Otherwise that is another big step that I will add to this thread in a few days.

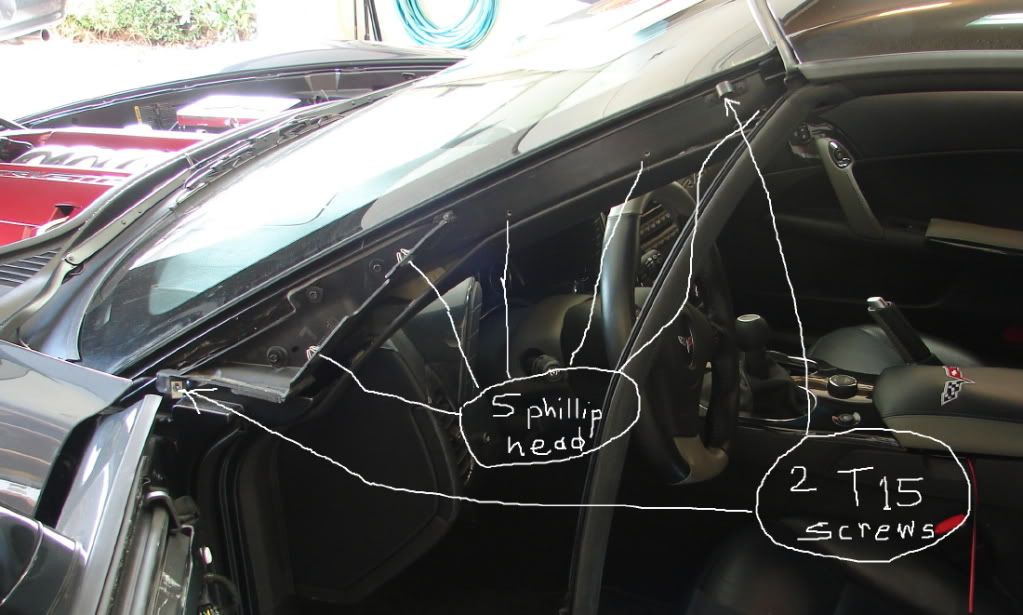
7 total screws removed from 'A' pillar itself. This doesn't count the screw that is in the extra plastic piece at the base of the driver's side 'A' pillar.

Passenger's side:

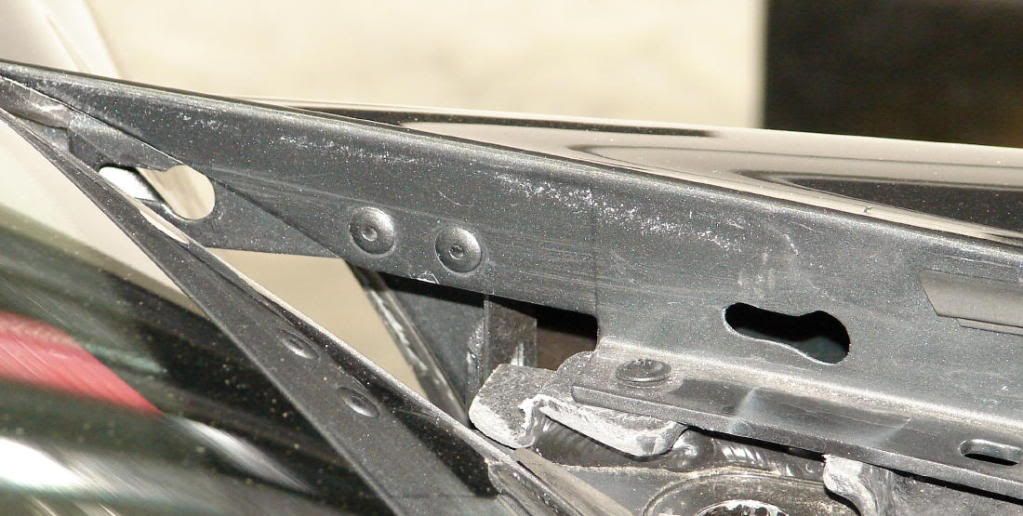
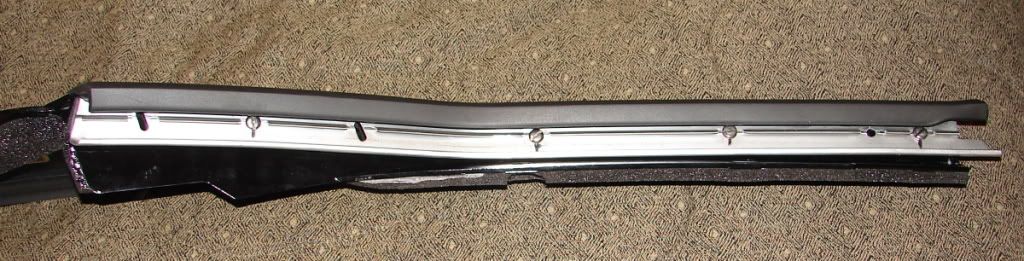
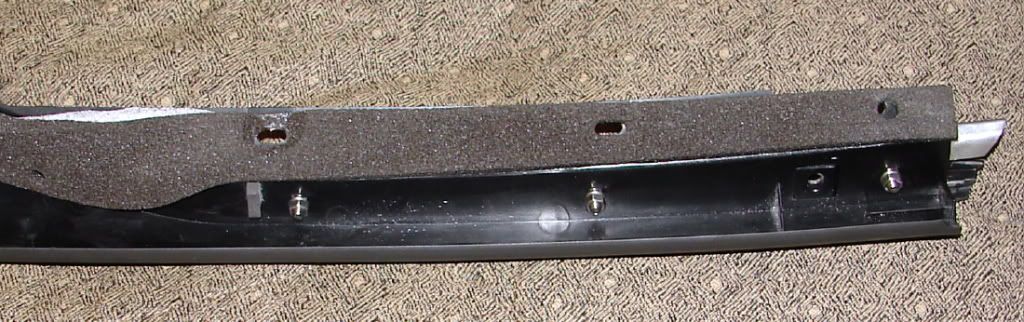
Just an extra photo showing what the metal weather stripping piece looks like that is pop riveted to the 'A' pillar looks like when separated.
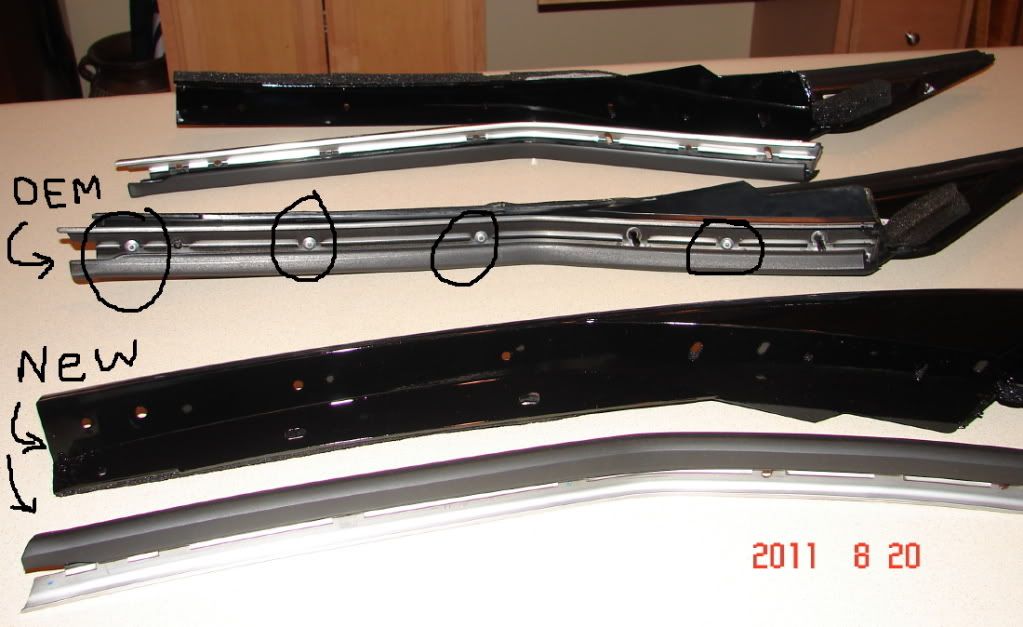
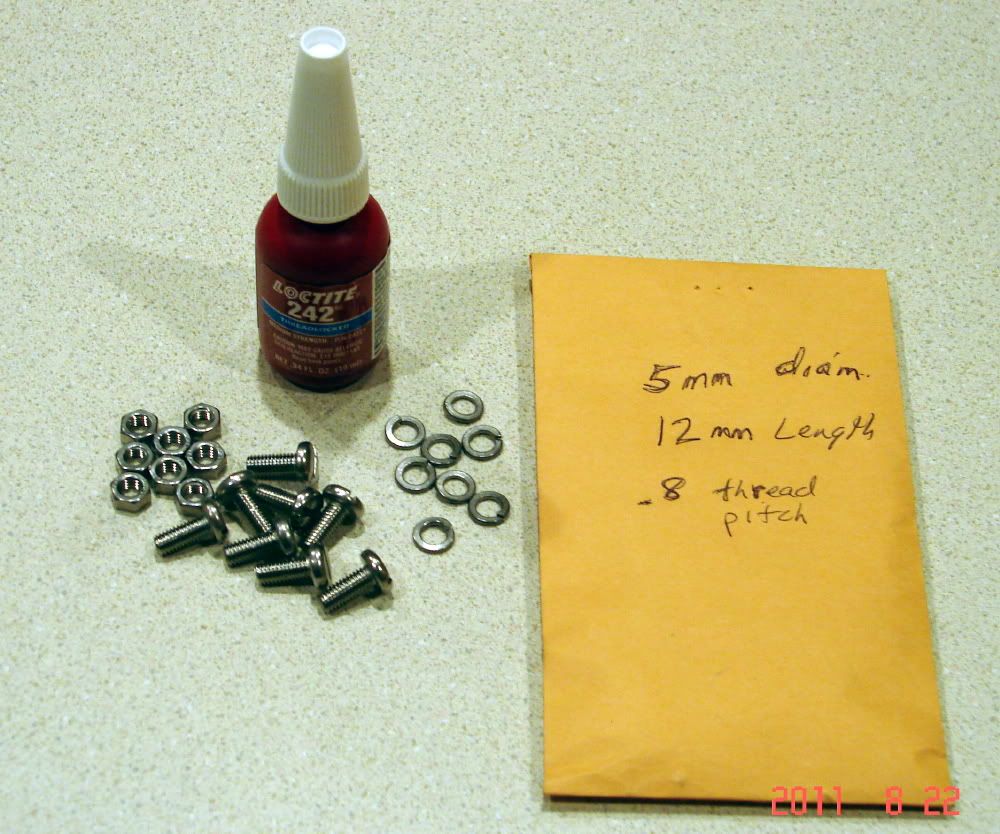
I USED STAINLESS STEEL BOLTS INSTEAD OF POP RIVETS!
I am in the process of doing this and thought I would post up some photos and instructions to help others who might want to do this.
I know others have already done this and posted detailed instructions that helped me a lot, I am just adding some photos to help out.
First the driver's side steps:
1. Open the hood. Once that is done you will need to remove a plastic cover on the driver's side near the base of the 'A' pillar by taking out one screw and sliding the part forward slightly and wiggling it loose.
2. After you get that part removed, you will need to remove the screw at the base of the 'A' pillar.
3. Next you need to pull the rubber weather stripping loose, starting right under the base of the 'A' pillar. It is held on by some sticky black automotive adhesive at the bottom, and the rest of it (up to the top) is in a groove that you can just pull it out of. Stop pulling it loose once you get to the top (don't go across the door).
4. This will expose all of the screws that you will need to take out. They're are 6 MORE screws to remove. Once you take those out the 'A' pillar can be wiggled loose as you pull downward on it. CONGRATS, it's out.
5. Reinstall the new 'A' pillar by reversing this process. Once all of the screws are back in, you need to work the rubber weather strip back into the groove that holds it and 'restick' the bottom part. You may need to add some adhesive but I didn't. I'm sure that it can be picked up at any automotive parts place.
Doing the Passenger's side is exactly the same with one exception. You DO NOT have any plastic piece to remove at the bottom. Instead you just grasp the flexible molding and pull it loose and up a little. (See the photos)
Hope this helps some of you who are thinking of this project.
NOTE: This process is really very easy to do this AS LONG as the 'A' pillar that you are putting back on ALREADY has the metal weather strip part POP riveted to it. Otherwise that is another big step that I will add to this thread in a few days.
7 total screws removed from 'A' pillar itself. This doesn't count the screw that is in the extra plastic piece at the base of the driver's side 'A' pillar.
Passenger's side:
Just an extra photo showing what the metal weather stripping piece looks like that is pop riveted to the 'A' pillar looks like when separated.
I USED STAINLESS STEEL BOLTS INSTEAD OF POP RIVETS!
Last edited by ncvette_1FUNRIDE; 08-22-2011 at 09:54 PM.

The following 2 users liked this post by ncvette_1FUNRIDE:
FLC6GS (06-17-2020),
Vet Interested (05-02-2017)


 08-21-2011, 11:03 AM
#3
Pro


Member Since: Jun 2009
Posts: 633
Likes: 0
Received 0 Likes
on
0 Posts
any pics of the finished result?? Love the pics with the scribbled instructions on them.. If all DIY instructions were like that it would be aweseome..
Makes it totally easy, even I can do it.. thanks!
Makes it totally easy, even I can do it.. thanks!
08-21-2011, 11:19 AM
#4
Tech Contributor
Thread Starter
Unfortunately the painted 'A' pillars that I ordered from RPI Designs came WITHOUT the metal weather strip that is POP riveted on, and is needed to mount them.
I am currently in the process of mounting the metal weather strips (purchased separately at extra cost) by way of POP rivets (like the OEM ones).
As soon as I get this done (hopefully in a few days) I will finish up and post the finished photos.


 08-21-2011, 12:14 PM
#7
Tech Contributor
Thread Starter
08-21-2011, 12:17 PM
#9
Tech Contributor
Thread Starter
08-21-2011, 12:55 PM
#10


NOTE: This process is really very easy to do this AS LONG as the 'A' pillar that you are putting back on ALREADY has the metal weather strip part POP riveted to it. Otherwise that is another big step that I will add to this thread in a few days.
So, for those of us who only know how to remove and replace screws, and not POP rivets, who makes A Pillars with the metal weather strip attached? Thanks.
So, for those of us who only know how to remove and replace screws, and not POP rivets, who makes A Pillars with the metal weather strip attached? Thanks.
08-21-2011, 01:04 PM
#11
Safety Car

wow i dont think you could have done any better than that. i been thinking about painting mine black as well.
has anyone seen real carbon fiber ones? i want to do sic motors cf roof and halo, so no imitation cf hydrocarbon.
has anyone seen real carbon fiber ones? i want to do sic motors cf roof and halo, so no imitation cf hydrocarbon.
08-21-2011, 01:57 PM
#12
Safety Car
Member Since: Aug 2007
Location: Rushsylvania Ohio
Posts: 4,836
Likes: 0
Received 6 Likes
on
6 Posts

Nice job on the right up! Only question I have is do you think it is truely necessary to remove the outer weatherstrip before taking out the screws? I can just roll it down a bit and see the screws right there.
08-21-2011, 02:01 PM
#13
Tech Contributor
Thread Starter
NOTE: This process is really very easy to do this AS LONG as the 'A' pillar that you are putting back on ALREADY has the metal weather strip part POP riveted to it. Otherwise that is another big step that I will add to this thread in a few days.
So, for those of us who only know how to remove and replace screws, and not POP rivets, who makes A Pillars with the metal weather strip attached? Thanks.
So, for those of us who only know how to remove and replace screws, and not POP rivets, who makes A Pillars with the metal weather strip attached? Thanks.
I think EmpireCorvettes makes a Hydro-Carbon 'A' pillar that has the metal weather strip already attached IF you specifically request it. It may cost more money.
08-21-2011, 02:01 PM
#14
Safety Car
Member Since: Aug 2007
Location: Rushsylvania Ohio
Posts: 4,836
Likes: 0
Received 6 Likes
on
6 Posts
Real carbon fiber or hydrocarbon, one issue I see is ordering from different vendors. Try to get all the parts from just one vendor as even though they might be advertised as the same, the patterns can vary from vendor to vendor and material to material. Put a whole plan together and check to see that you can get all the parts you want (even over time) from just one vendor. Only then order your first part. Just my suggestion.
 08-21-2011, 02:07 PM
#15
Tech Contributor
Thread Starter
Yes, there are a few screws that you cannot get to without pulling down the rubber weather strip, PLUS it is actually tucked into the 'A' pillar that you are removing.
08-21-2011, 02:28 PM
#16
Racer

Member Since: Aug 2006
Location: L.I. NY
Posts: 372
Likes: 0
Received 0 Likes
on
0 Posts
No one making them in real CF that I know of. And with that, only a few vendors offering them in hydrocarbon. I have a set on the way in the 05-07 finish.
Real carbon fiber or hydrocarbon, one issue I see is ordering from different vendors. Try to get all the parts from just one vendor as even though they might be advertised as the same, the patterns can vary from vendor to vendor and material to material. Put a whole plan together and check to see that you can get all the parts you want (even over time) from just one vendor. Only then order your first part. Just my suggestion.
Real carbon fiber or hydrocarbon, one issue I see is ordering from different vendors. Try to get all the parts from just one vendor as even though they might be advertised as the same, the patterns can vary from vendor to vendor and material to material. Put a whole plan together and check to see that you can get all the parts you want (even over time) from just one vendor. Only then order your first part. Just my suggestion.
08-22-2011, 09:49 PM
#18
Tech Contributor
Thread Starter
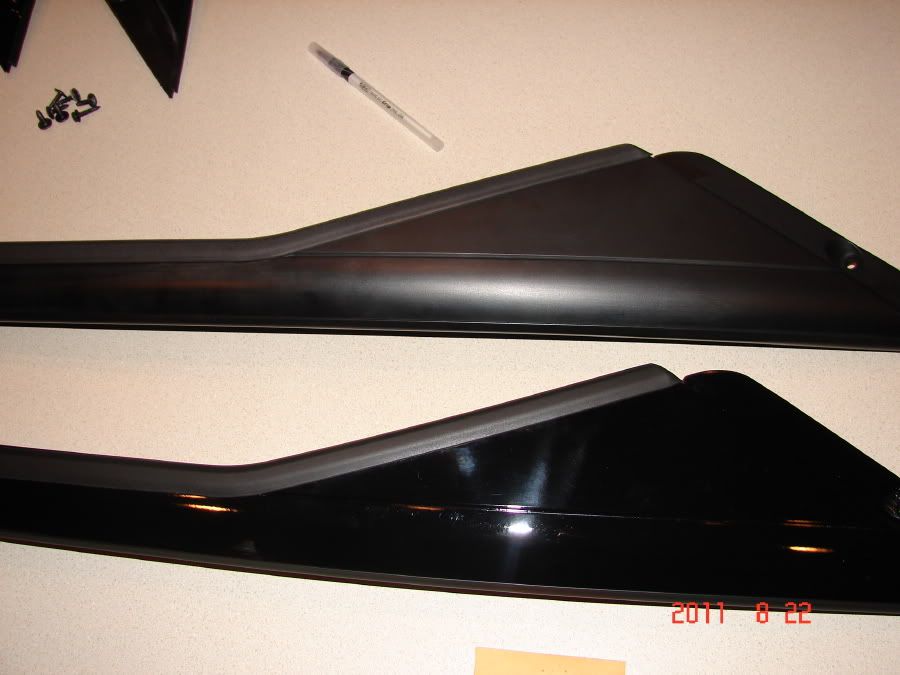
OK, I decided to use stainless steel bolts instead of pop rivets. Easy to get and easy to install and works great.
Here are some more photos:
I'll post more out in the daylight when I get the chance.
Here are some more photos:
I'll post more out in the daylight when I get the chance.
08-23-2011, 04:27 PM
#20
Tech Contributor
Thread Starter
