
Broken Trans Cable Leads to Installing New Long Tube Headers/Borlas
 03-13-2017, 09:00 PM
#1
Racer

Thread Starter
I recently had the tranny-side grommet of my shift cable disintegrate. Despite having an easy time changing the shift-side grommet a little over a year ago, the transmission side just didn't want to go in without me tearing up and braking the plastic part that holds it. What genius thought up using plastic and nylon parts where all that heat accumulates in constructing a trans cable?
Getting the trans cable out and replaced, meant removing the whole midsection of the exhaust and tunnel plate, so the silver lining in whole process for me was to finally install the long tube headers I had sitting on my shelf for over a year.
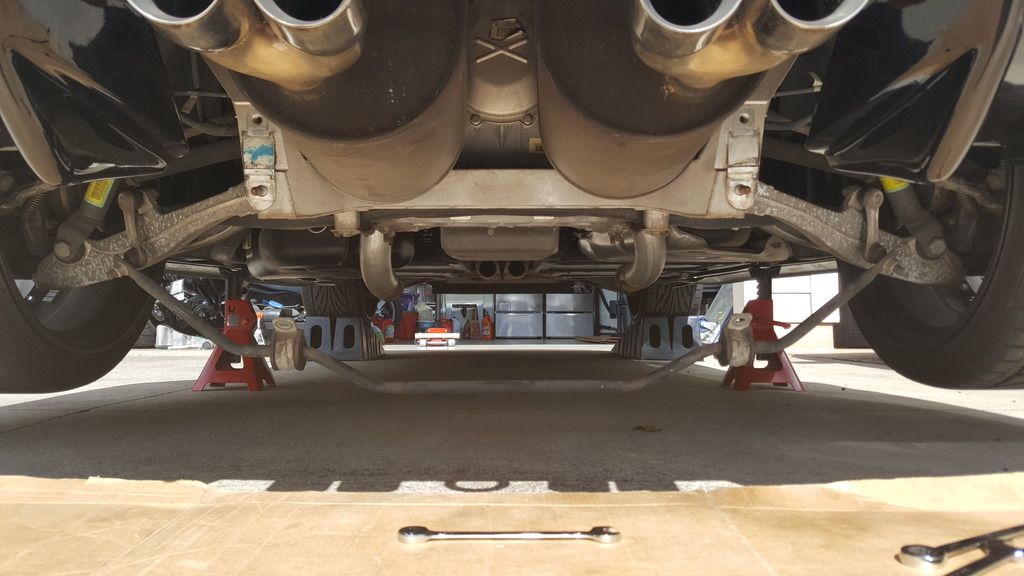
For those curious, I did this whole process on ramps and jack stands.
Here's the pics of the adventure:
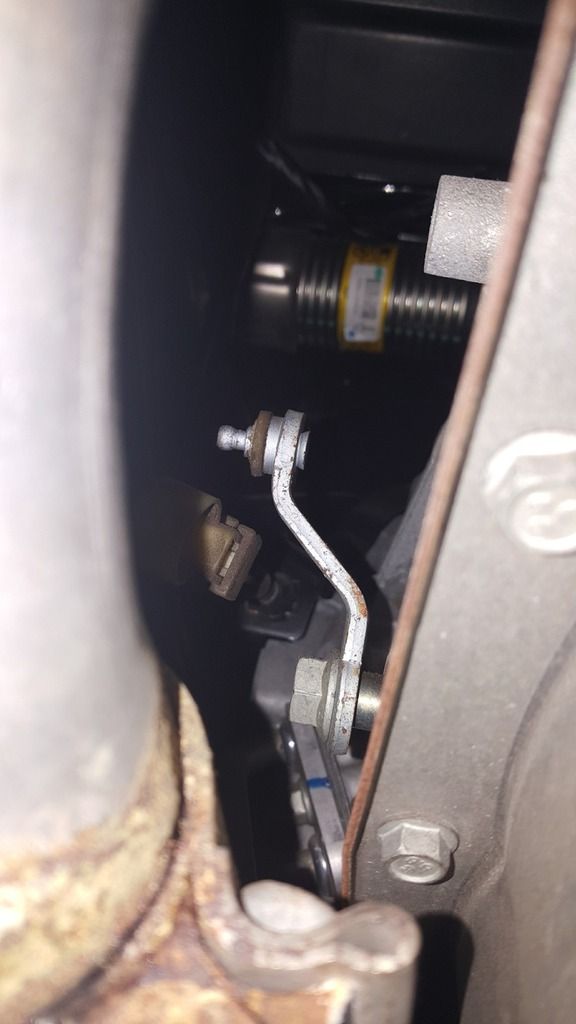
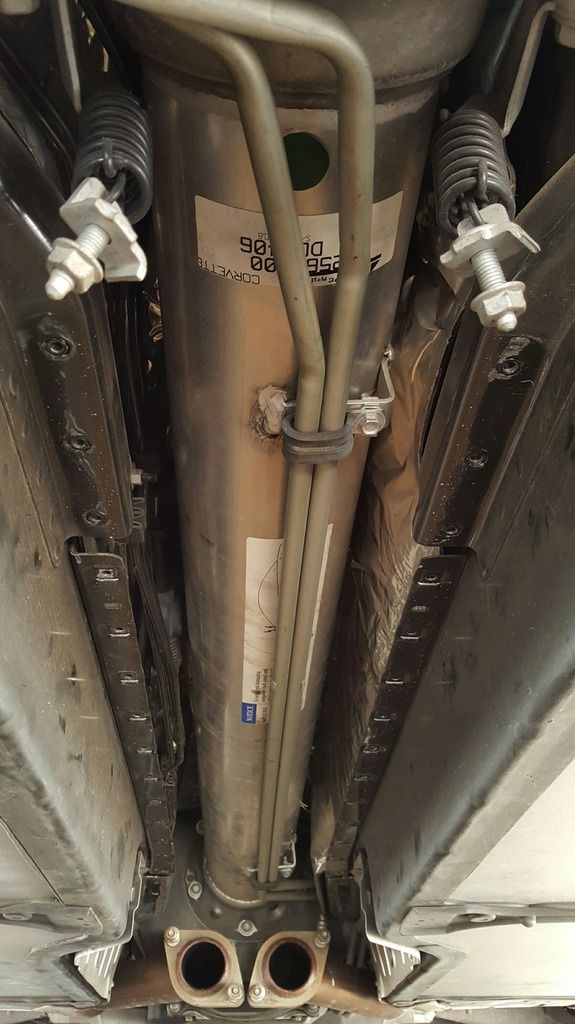
This is the shift linkage on the transmission. You can see part of the disintegrated grommet still attached to the stud on the lever.
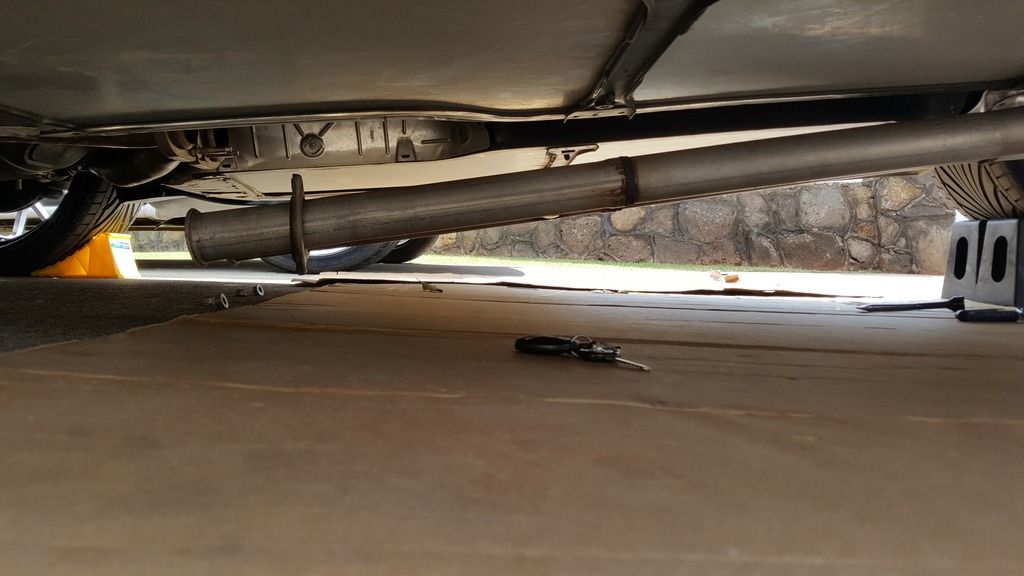
The process of removing the exhaust and tunnel plate took a little over an hour.

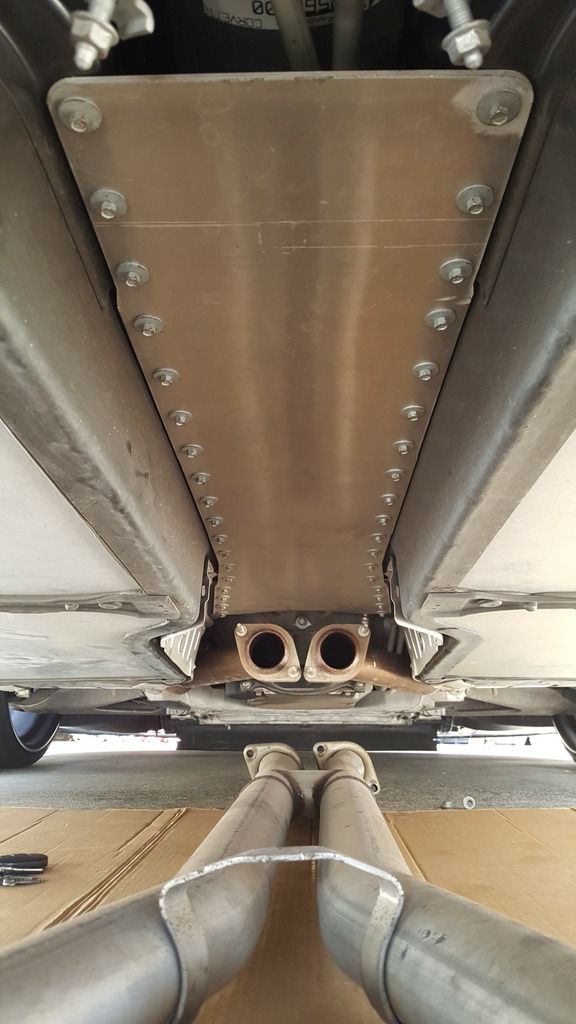
Exposed tunnel plate - Lots and lots of bolts
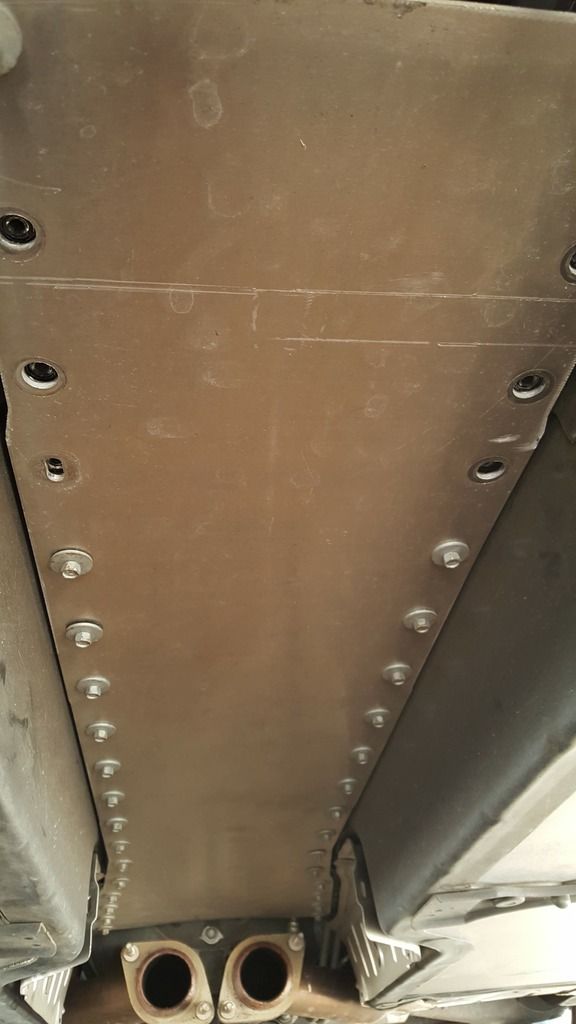
The trans tunnel exposed.
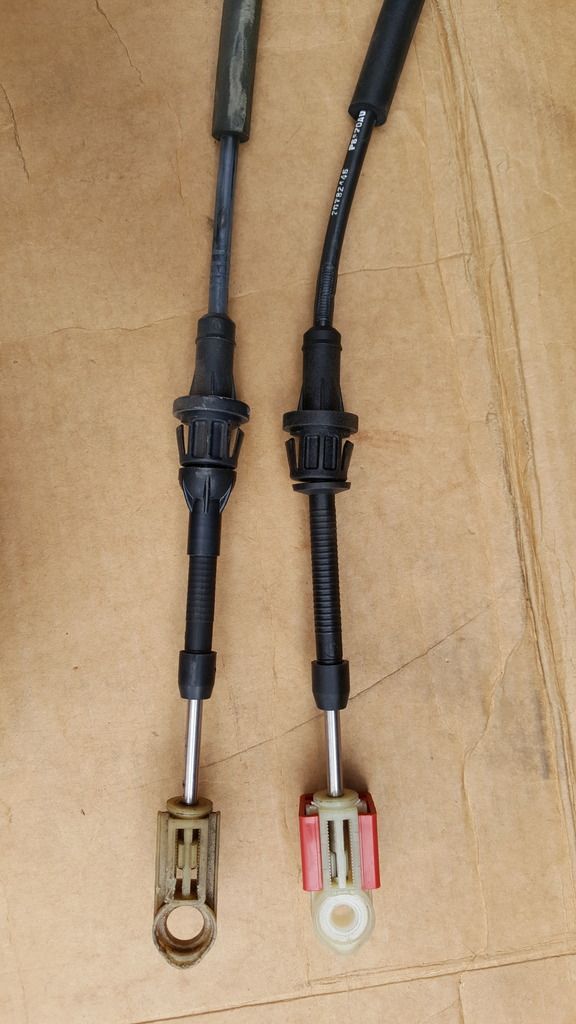
New vs. old trans cable
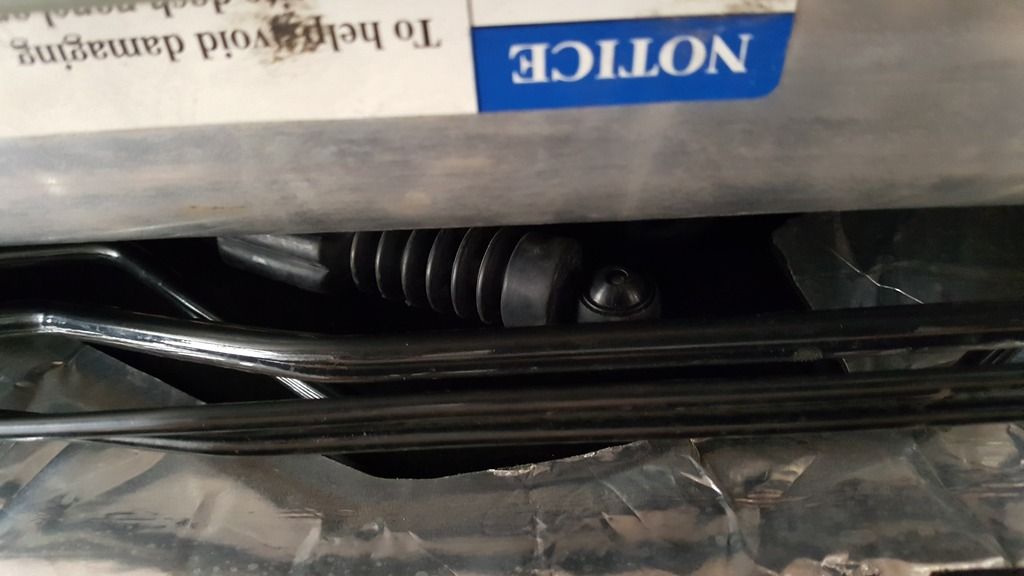
This is the shifter side of the cable. It's a tight fit, but manageable. Notice that where the grommet pops in is metal vs the rear side which is plastic or nylon.
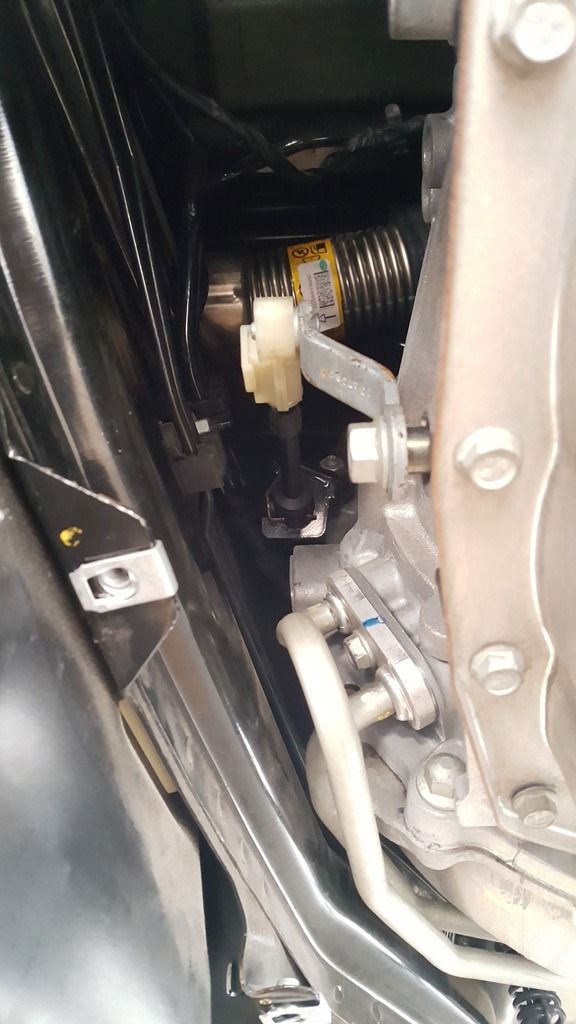
This is the tranny side connected. The whole cable snakes through fairly easily, with a couple of places where it latches on so it can't move.
Shoots, I'm running out of time so I'll finish posting pics of the exhaust install a little later.
Getting the trans cable out and replaced, meant removing the whole midsection of the exhaust and tunnel plate, so the silver lining in whole process for me was to finally install the long tube headers I had sitting on my shelf for over a year.
For those curious, I did this whole process on ramps and jack stands.
Here's the pics of the adventure:
This is the shift linkage on the transmission. You can see part of the disintegrated grommet still attached to the stud on the lever.

The process of removing the exhaust and tunnel plate took a little over an hour.


Exposed tunnel plate - Lots and lots of bolts


The trans tunnel exposed.

New vs. old trans cable

This is the shifter side of the cable. It's a tight fit, but manageable. Notice that where the grommet pops in is metal vs the rear side which is plastic or nylon.

This is the tranny side connected. The whole cable snakes through fairly easily, with a couple of places where it latches on so it can't move.

Shoots, I'm running out of time so I'll finish posting pics of the exhaust install a little later.
Last edited by Magik; 03-14-2017 at 01:27 PM.

The following 4 users liked this post by Magik:
03-13-2017, 09:47 PM
#2
Racer
Thread Starter
View of the back. Stock mufflers hanging, sway bar loosened.
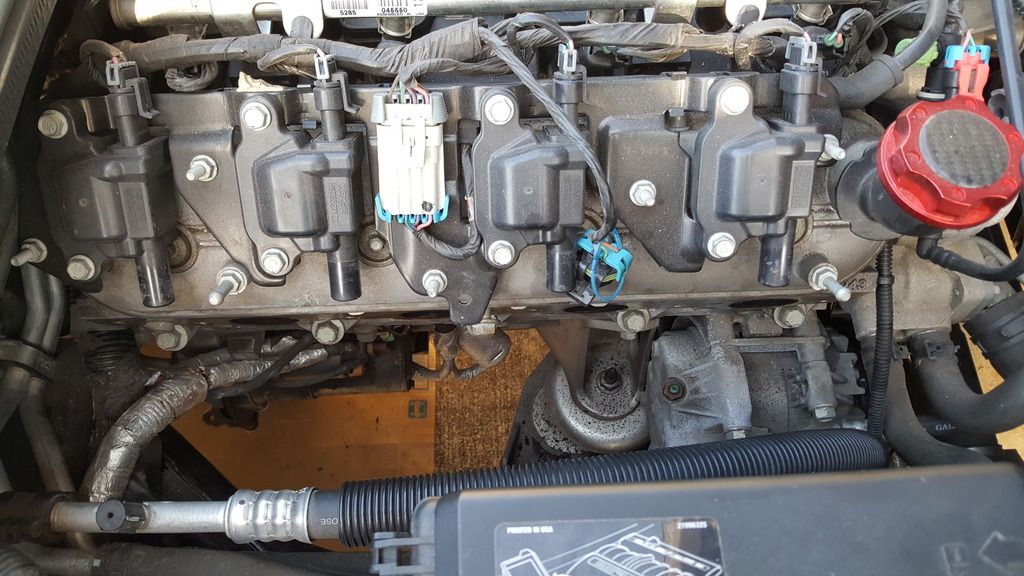
Old exhaust manifold, dipstick, spark plugs and wires removed! It took me forever trying to get the exhaust manifold to drop down. Finally, I loosened the starter and she dropped out free and clear.
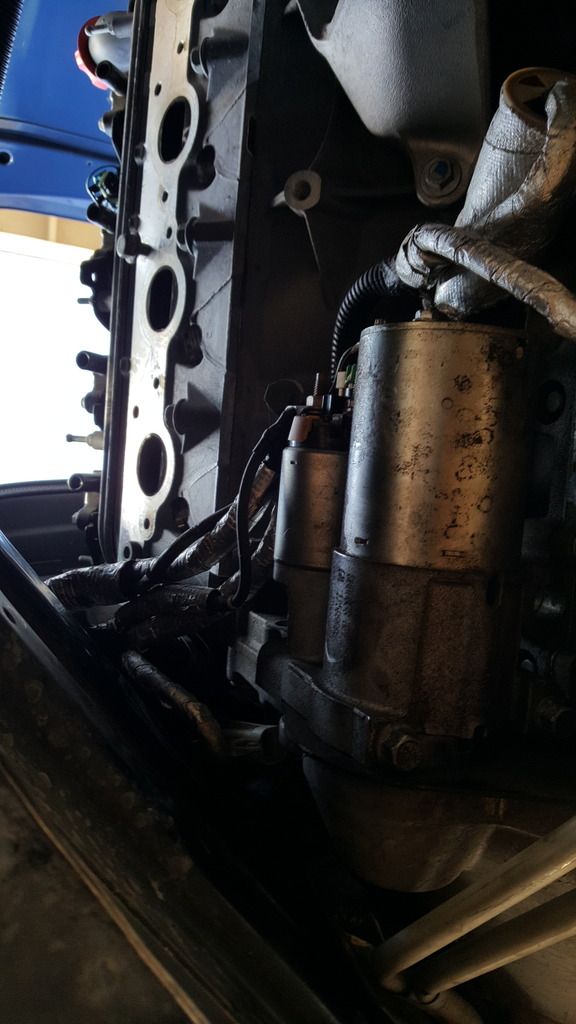
The driver's side manifold practically dropped right out when I loosened the last bolt. Super easy coming out.
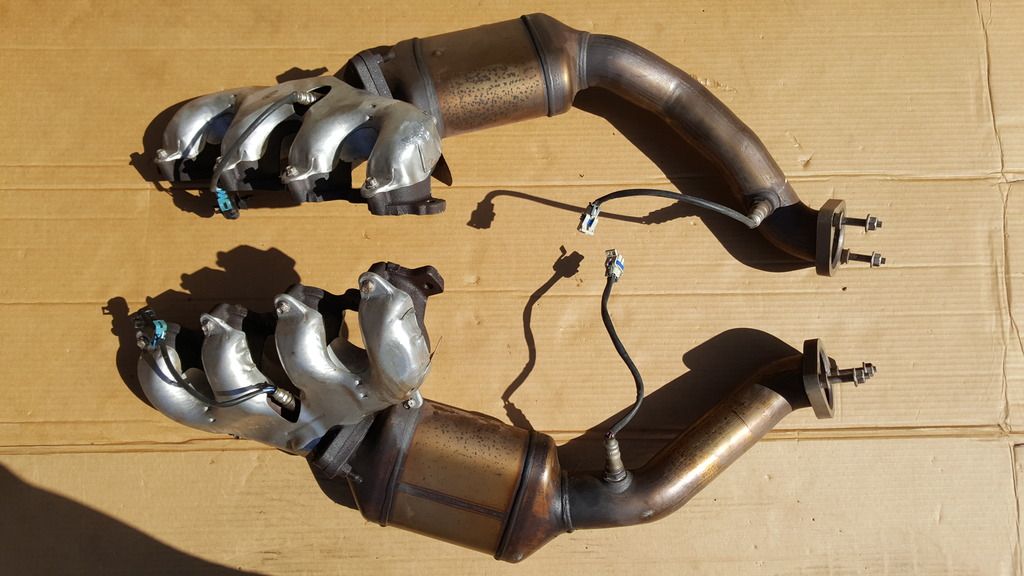
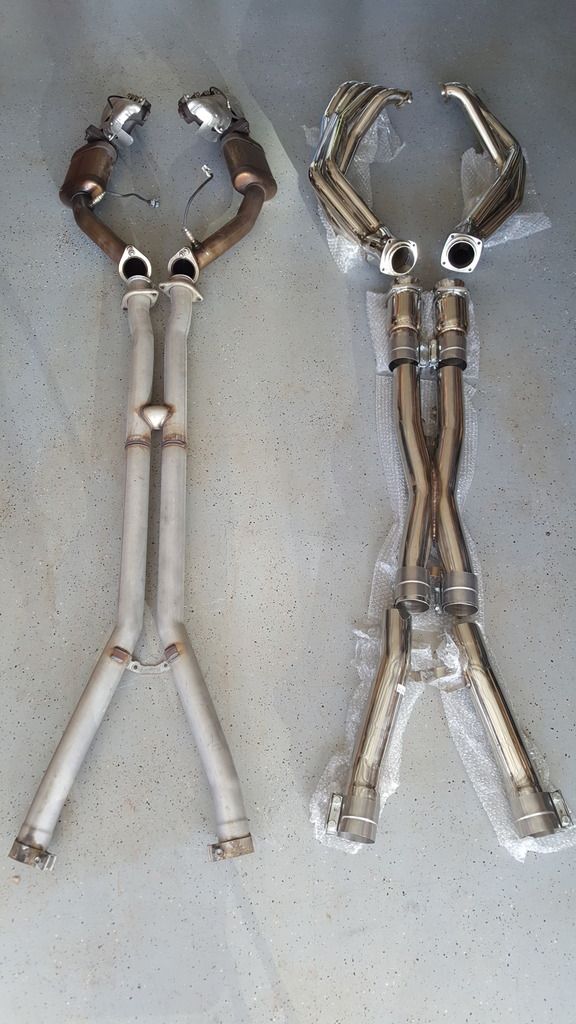
Old system vs. New system. OBX 1 7/8 primaries into 3" piping w/cats and x-pipe. $700 shipped to Hawaii. Pretty good!
Quick review of the OBX headers: They are top notch. The welds are beautiful and consistent, with no gaps to be seen (scrutinize the photos). The flanges were straight and true and sealed up to the block with no issues with FelPro gaskets. The fit was perfect. The passenger side went up and was on within 10 minutes. The driver's side took more maneuvering to get past the steering rod and placed properly against the block. Once everything was bolted up, the headers fit in perfectly. Close to some areas, but not hitting anything. I really wanted to go with LGs or Kooks, but just couldn't come up with the money for them. With shipping to Hawaii, I was getting quotes of $1800 - $2000. I just couldn't justify paying that much more. For those of you who want to squeeze out every ounce of hp at any cost, these may not be for you. I'm guessing the HP gains from one set to another will be within the +/- 5 hp range. I don't plan to dyno this car, but I know that once I move to forced induction (hopefully soon), these will make a huge difference. I guess the big question will be durability over time. My buddy has American Racing headers on his Camaro and based on looks alone, these look (IMHO) better (stronger, cleaner welds). Sorry, not trying to start anything here, but just giving soft/observational data. Whatever you decide, the install process will be similar, so good luck getting headers on your car. Don't wait if you're on the fence.
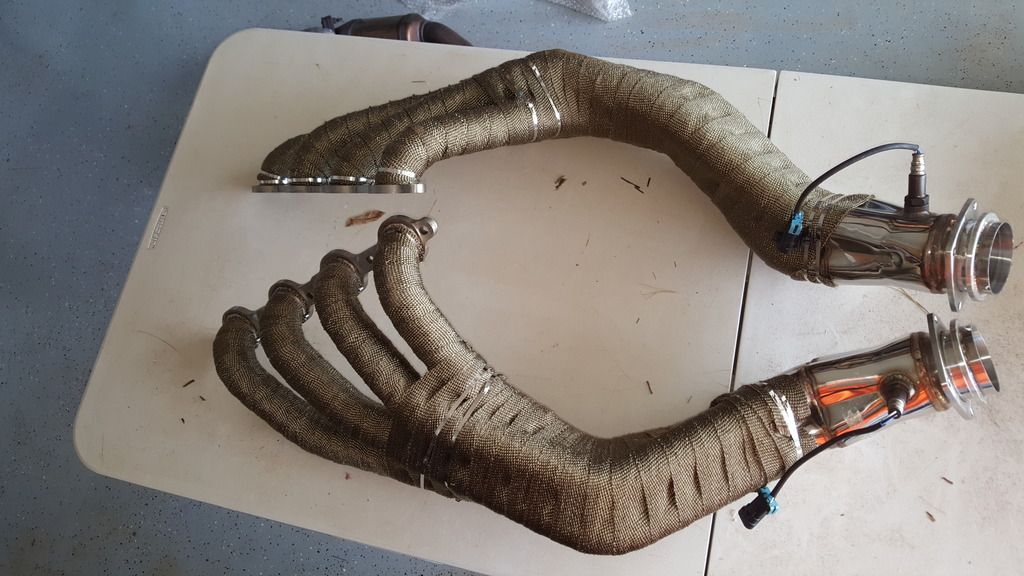
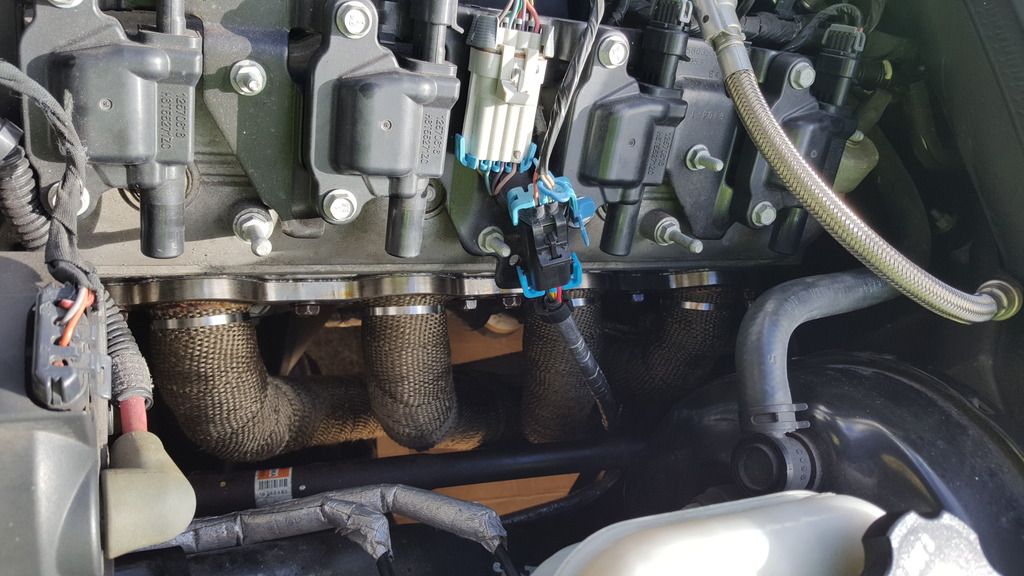
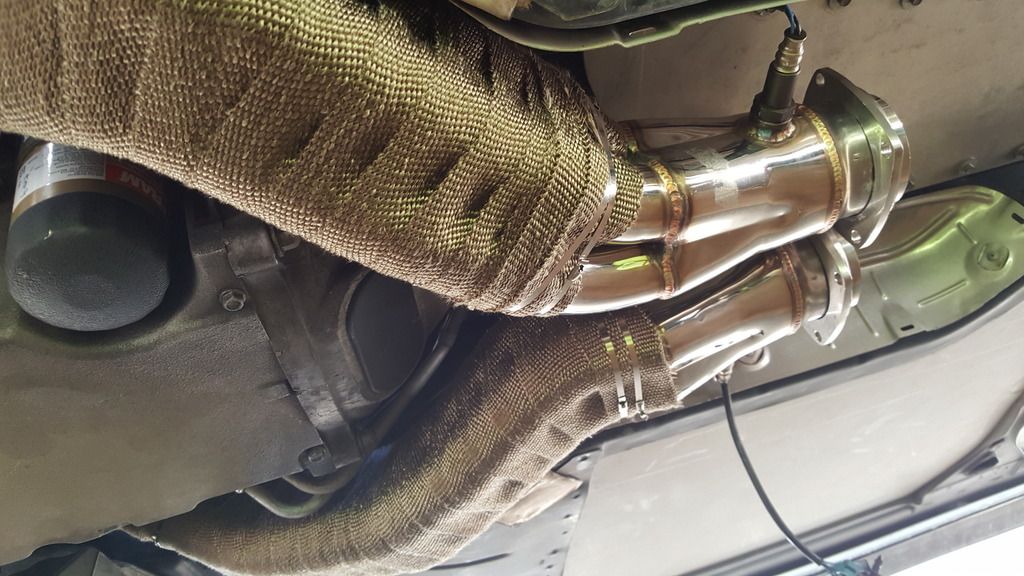
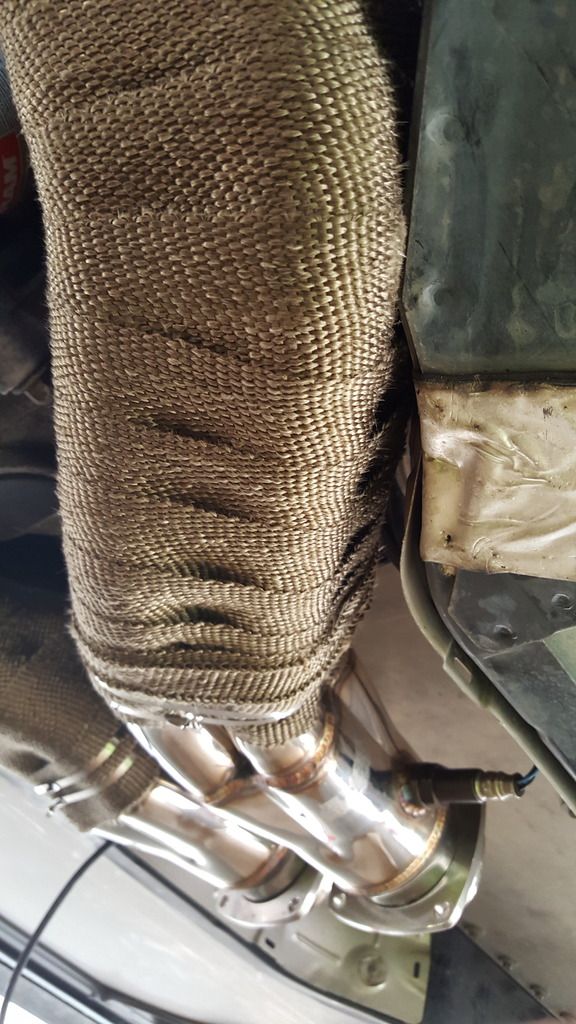
First attempt at wrapping headers with titanium wrap. I think they came out pretty well. I know there's a lot of debate about using wrap on headers, but I didn't want to be worrying about heat impacting parts in close proximity over time.
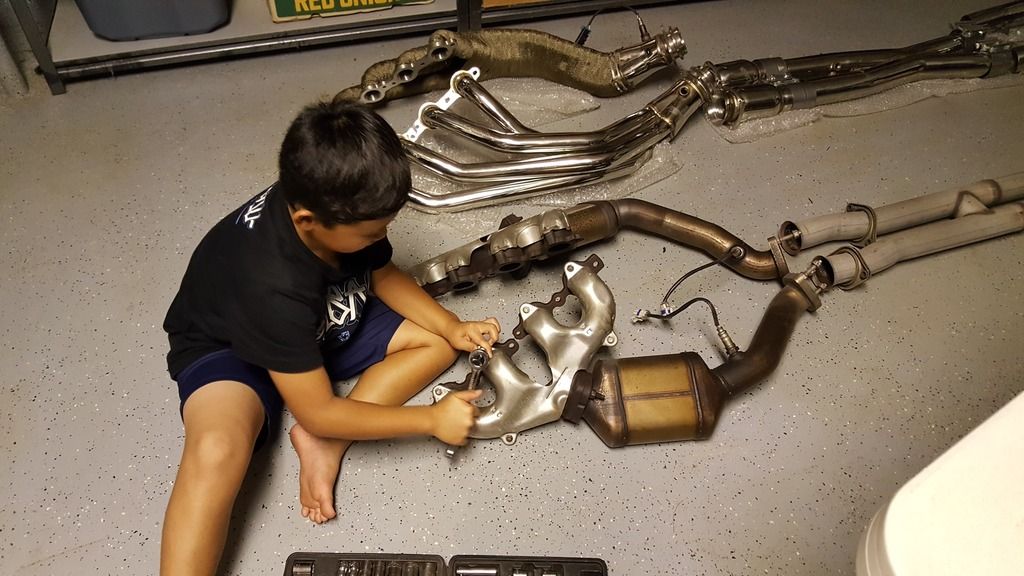
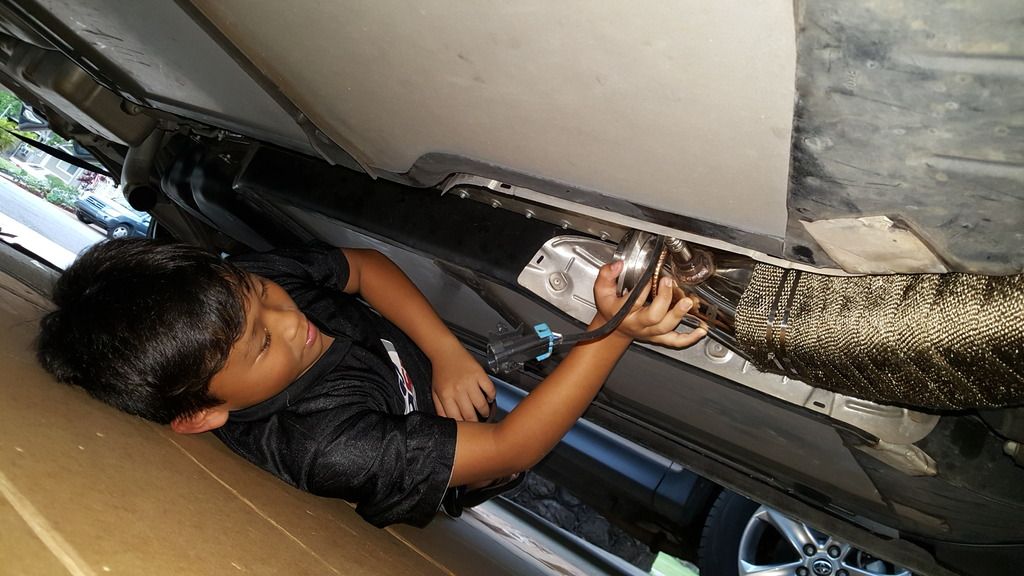
My little buddy helping me take off the o2 sensors and putting back the tunnel plate.
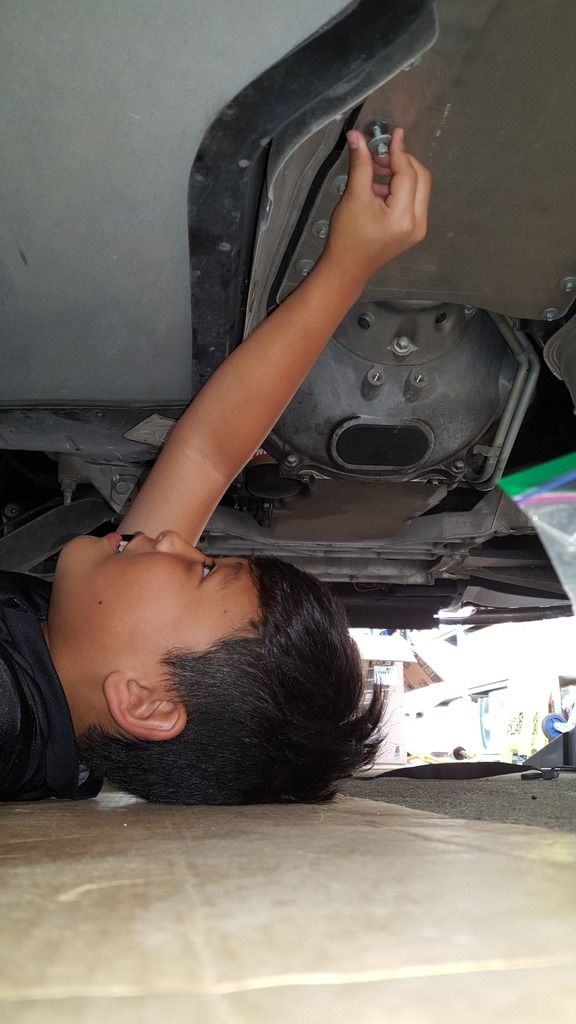
Headers went in with no problems. The fit was super close and tight, but everything fit. I did everything by myself, but had my son push up on the header while I held it and bolted it from the top.
More pics coming.

Old exhaust manifold, dipstick, spark plugs and wires removed! It took me forever trying to get the exhaust manifold to drop down. Finally, I loosened the starter and she dropped out free and clear.


The driver's side manifold practically dropped right out when I loosened the last bolt. Super easy coming out.

Old system vs. New system. OBX 1 7/8 primaries into 3" piping w/cats and x-pipe. $700 shipped to Hawaii. Pretty good!
Quick review of the OBX headers: They are top notch. The welds are beautiful and consistent, with no gaps to be seen (scrutinize the photos). The flanges were straight and true and sealed up to the block with no issues with FelPro gaskets. The fit was perfect. The passenger side went up and was on within 10 minutes. The driver's side took more maneuvering to get past the steering rod and placed properly against the block. Once everything was bolted up, the headers fit in perfectly. Close to some areas, but not hitting anything. I really wanted to go with LGs or Kooks, but just couldn't come up with the money for them. With shipping to Hawaii, I was getting quotes of $1800 - $2000. I just couldn't justify paying that much more. For those of you who want to squeeze out every ounce of hp at any cost, these may not be for you. I'm guessing the HP gains from one set to another will be within the +/- 5 hp range. I don't plan to dyno this car, but I know that once I move to forced induction (hopefully soon), these will make a huge difference. I guess the big question will be durability over time. My buddy has American Racing headers on his Camaro and based on looks alone, these look (IMHO) better (stronger, cleaner welds). Sorry, not trying to start anything here, but just giving soft/observational data. Whatever you decide, the install process will be similar, so good luck getting headers on your car. Don't wait if you're on the fence.

First attempt at wrapping headers with titanium wrap. I think they came out pretty well. I know there's a lot of debate about using wrap on headers, but I didn't want to be worrying about heat impacting parts in close proximity over time.

My little buddy helping me take off the o2 sensors and putting back the tunnel plate.


Headers went in with no problems. The fit was super close and tight, but everything fit. I did everything by myself, but had my son push up on the header while I held it and bolted it from the top.


More pics coming.
Last edited by Magik; 03-14-2017 at 02:24 PM.
The following 2 users liked this post by Magik:
Mad*Max (03-13-2017),
Vet Interested (03-13-2017)
03-13-2017, 11:00 PM
#3
Racer
Thread Starter
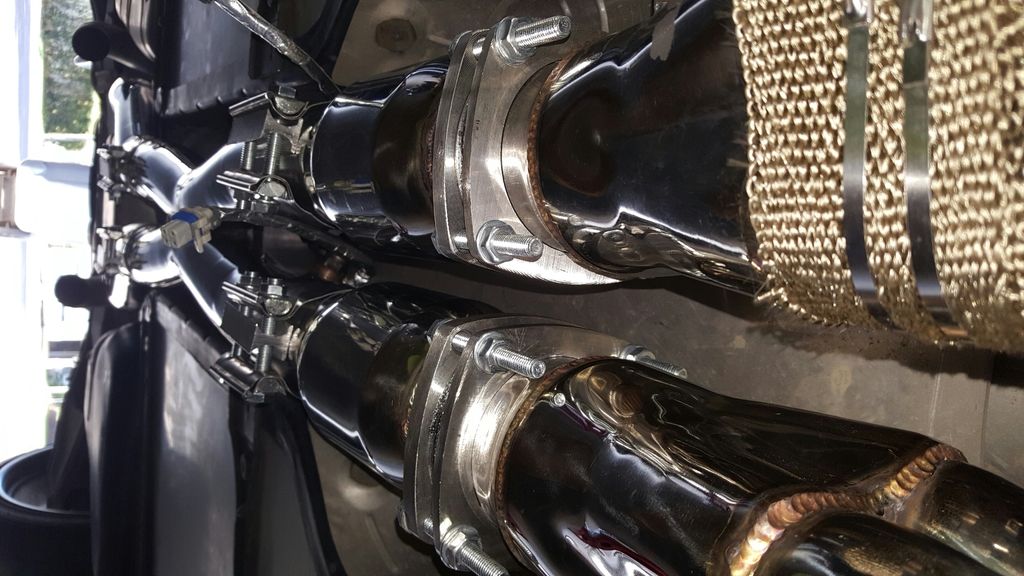
High flow cats loosely mounted.
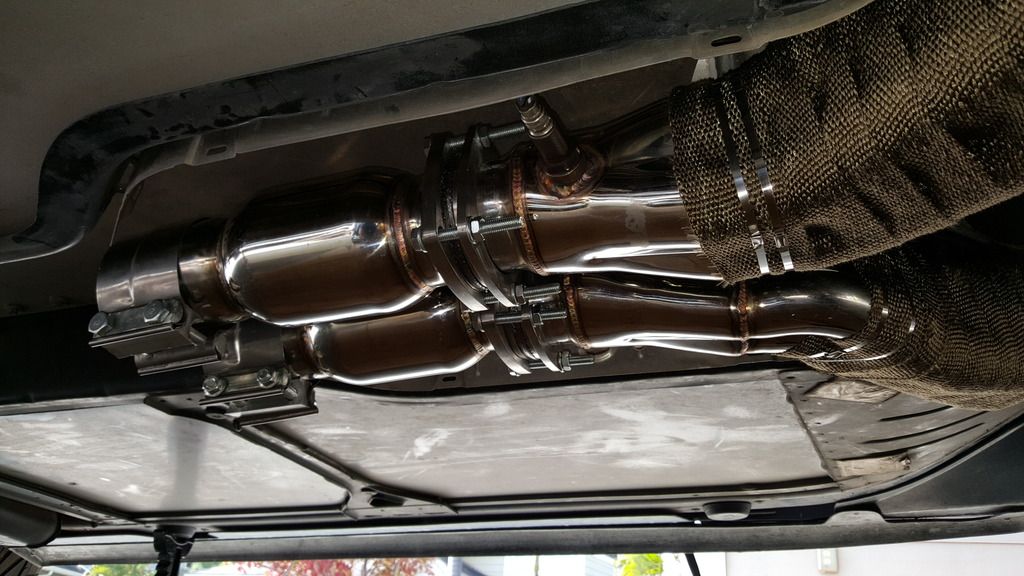
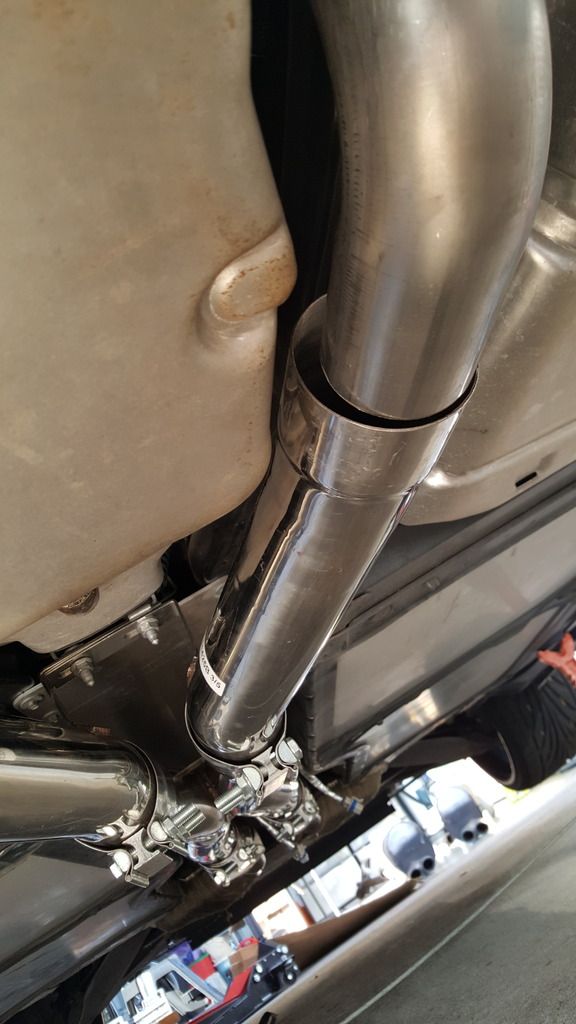
X-pipe loosely mounted. Did this job pretty much single handedly, so the jack stand works well as an extra helper.
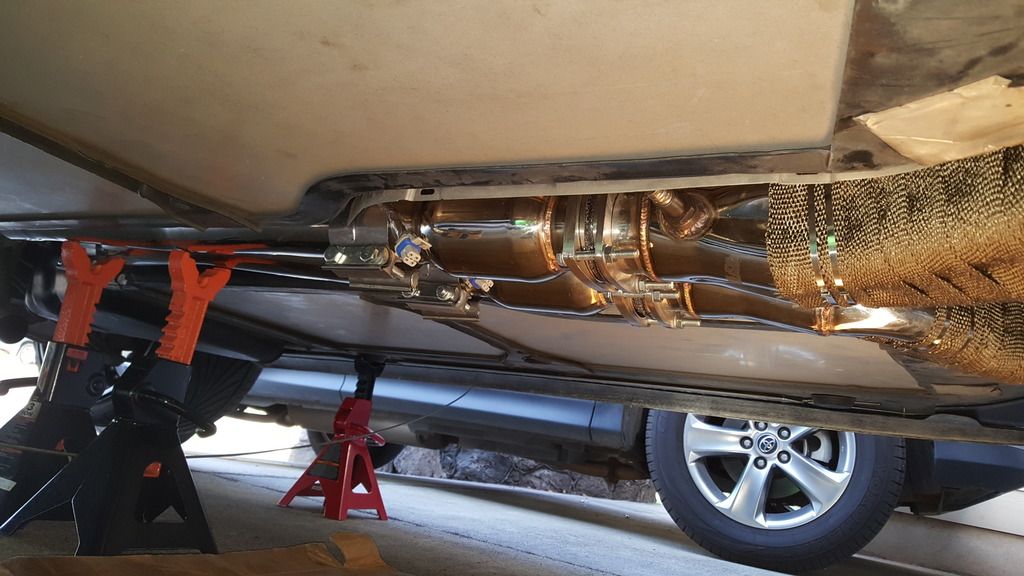
Everything loosely mounted up to where the mufflers connect.
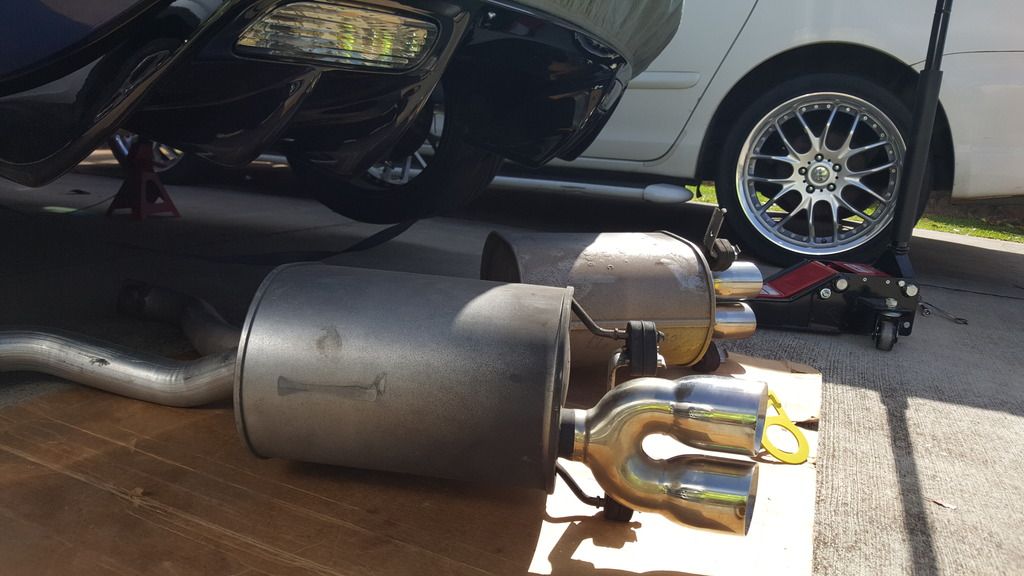
This is where I needed a muffler shop to weld a 3" to 2.5" step down adapter to connect it.
Stock cans are off.
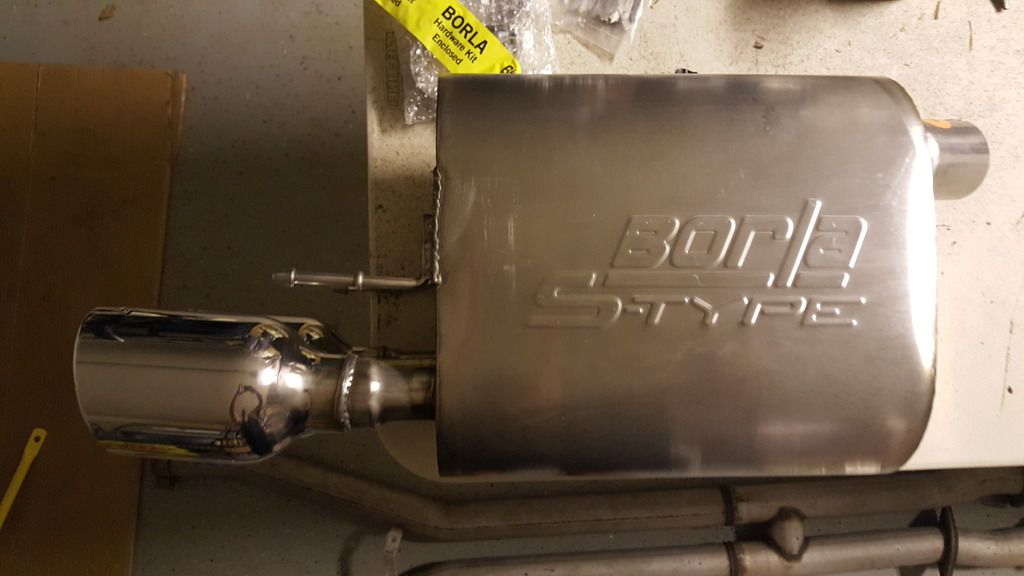
My Borla S-Type IIs are ready to be mounted.
I got a free Borla hat with my purchase! Woohoo!

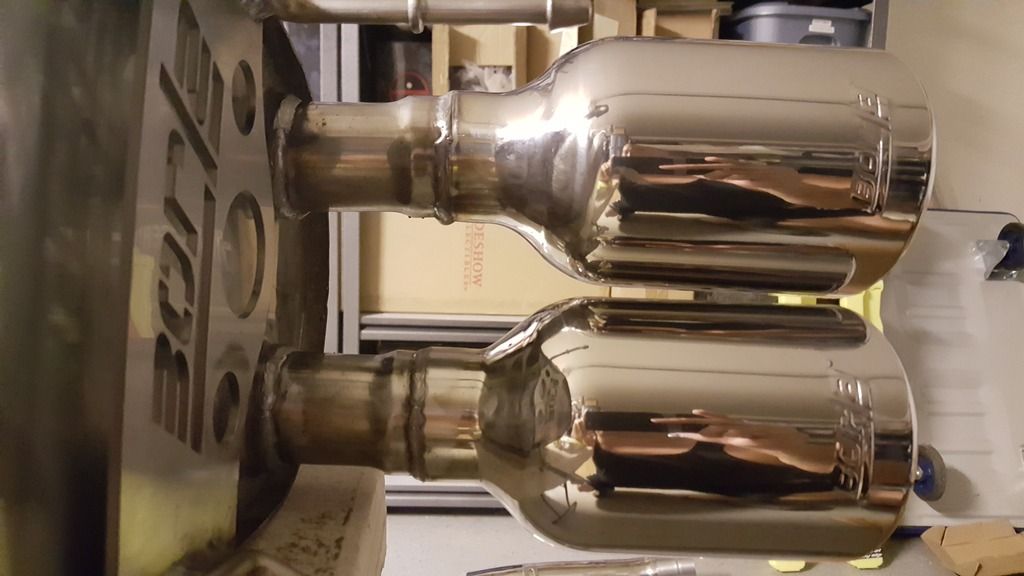
Here's the Borla S-Type IIs mounted. The angle makes them look off in the pic, but they look straight when looking at them. I was thinking of angling them for a different look, where on both sides, the outside tip sits .5 - 1 inch lower than the inside tips. Not quite sure if I'll like them or if everyone is going to tell me my tips are crooked if I do that. Just too lazy to loosen them up again.
And Yes, I did paint my sway bar yellow to match my tow hook.

Well that's it folks. I hope you enjoyed the pics or that they gave you some inspiration to start your exhaust mods. It can be done on jackstands if you're willing to do most of the work on your back. Have fun modding everyone!

X-pipe loosely mounted. Did this job pretty much single handedly, so the jack stand works well as an extra helper.


Everything loosely mounted up to where the mufflers connect.

This is where I needed a muffler shop to weld a 3" to 2.5" step down adapter to connect it.

Stock cans are off.

My Borla S-Type IIs are ready to be mounted.


I got a free Borla hat with my purchase! Woohoo!

Here's the Borla S-Type IIs mounted. The angle makes them look off in the pic, but they look straight when looking at them. I was thinking of angling them for a different look, where on both sides, the outside tip sits .5 - 1 inch lower than the inside tips. Not quite sure if I'll like them or if everyone is going to tell me my tips are crooked if I do that. Just too lazy to loosen them up again.
And Yes, I did paint my sway bar yellow to match my tow hook.

Well that's it folks. I hope you enjoyed the pics or that they gave you some inspiration to start your exhaust mods. It can be done on jackstands if you're willing to do most of the work on your back. Have fun modding everyone!
Last edited by Magik; 03-13-2017 at 11:12 PM.
The following users liked this post:
Vet Interested (03-13-2017)


The following users liked this post:
Magik (03-14-2017)
03-14-2017, 01:20 PM
#8
Racer
Thread Starter
03-14-2017, 03:16 PM
#10
Race Director

Member Since: Sep 2007
Location: Peoria/Phoenix AZ
Posts: 16,555
Received 2,060 Likes
on
1,505 Posts
C6 of Year Finalist (performance mods) 2019

Congrats and for the great photo/write-up too. 
It's always a good thing when you can turn a crisis into a positive result. It's especially good when you can include male bonding with your son.
It's always a good thing when you can turn a crisis into a positive result. It's especially good when you can include male bonding with your son.
The following users liked this post:
Magik (03-14-2017)

The following users liked this post:
Magik (03-14-2017)


 03-14-2017, 04:36 PM
#14
Le Mans Master

Member Since: Sep 2014
Location: lake havasu city arizona
Posts: 7,011
Received 982 Likes
on
711 Posts
DID IT ON JACK STANDS !!!!!!!!!!!!!!!!!!!!!!!!
 I salute you brah, just did my Kooks with a lift and can truthfully say no way would I attempt what you did, NO WAY .
Looks all proper and stuff, good job, wait till you drive it
How did you hang the rear o2 harness extensions, any photos. My buddy had some basic metal "C" cable clamps that we used with the tunnel plate bolts to hold them up out of harms way so I'd like to see what you did.
NSF
I salute you brah, just did my Kooks with a lift and can truthfully say no way would I attempt what you did, NO WAY .Looks all proper and stuff, good job, wait till you drive it
How did you hang the rear o2 harness extensions, any photos. My buddy had some basic metal "C" cable clamps that we used with the tunnel plate bolts to hold them up out of harms way so I'd like to see what you did.
NSF
The following users liked this post:
Magik (03-14-2017)
The following users liked this post:
Magik (03-14-2017)
03-14-2017, 05:20 PM
#16
Racer
Thread Starter
03-14-2017, 05:27 PM
#17
Racer
Thread Starter
DID IT ON JACK STANDS !!!!!!!!!!!!!!!!!!!!!!!!
I salute you brah, just did my Kooks with a lift and can truthfully say no way would I attempt what you did, NO WAY .
Looks all proper and stuff, good job, wait till you drive it
How did you hang the rear o2 harness extensions, any photos. My buddy had some basic metal "C" cable clamps that we used with the tunnel plate bolts to hold them up out of harms way so I'd like to see what you did.
NSF
I salute you brah, just did my Kooks with a lift and can truthfully say no way would I attempt what you did, NO WAY .Looks all proper and stuff, good job, wait till you drive it
How did you hang the rear o2 harness extensions, any photos. My buddy had some basic metal "C" cable clamps that we used with the tunnel plate bolts to hold them up out of harms way so I'd like to see what you did.
NSF
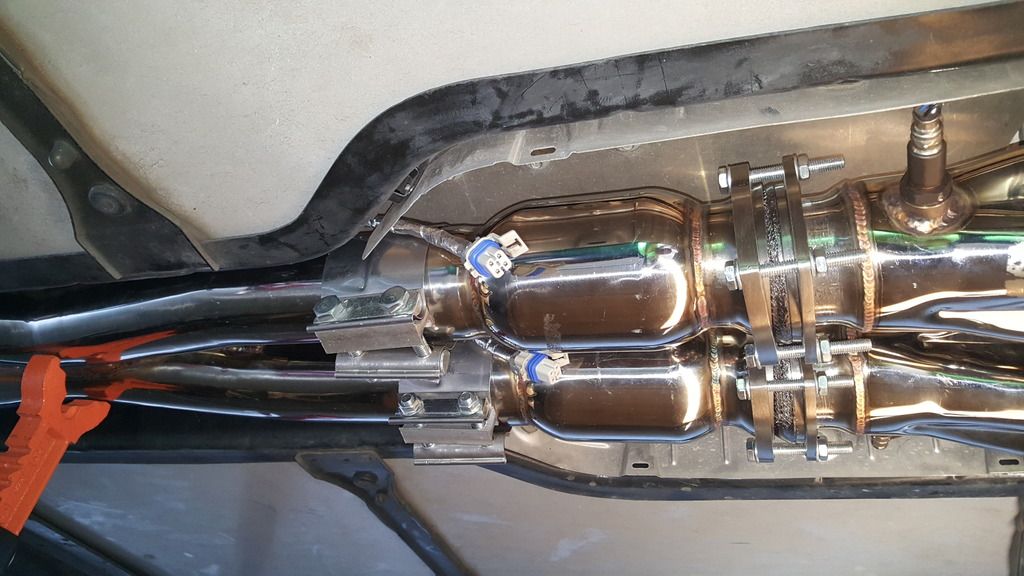
As for the o2 extensions, I first wrapped all of them with the stick on heat barrier. You can probably see it in the pics. I covered all of them as much as I could from top to bottom. Then when I ran them along the tunnel, I used the metal zip ties (I bought extra for my header wraps), to pull them against the aluminum that runs along the tunnel. There's holes every few inches that I was able to pull the ties through. Where there were no holes, I loosened a tunnel bolt and then tightened the bolt down on the metal tie to hold them in place where I wanted them. I hope that makes sense. I don't want to lift the car up again, but if I can get an arm under there and snap some shots, I'll do it later.
The following users liked this post:
Not So Fast (03-14-2017)
 03-14-2017, 06:06 PM
#19
Le Mans Master
Member Since: Sep 2014
Location: lake havasu city arizona
Posts: 7,011
Received 982 Likes
on
711 Posts
LOL! Yeah, was still limber enough to get up and down, under and out from the car. Not sure how much longer I'm going to be willing to do that, but that will be my son's job eventually, if he keeps being into cars.
As for the o2 extensions, I first wrapped all of them with the stick on heat barrier. You can probably see it in the pics. I covered all of them as much as I could from top to bottom. Then when I ran them along the tunnel, I used the metal zip ties (I bought extra for my header wraps), to pull them against the aluminum that runs along the tunnel. There's holes every few inches that I was able to pull the ties through. Where there were no holes, I loosened a tunnel bolt and then tightened the bolt down on the metal tie to hold them in place where I wanted them. I hope that makes sense. I don't want to lift the car up again, but if I can get an arm under there and snap some shots, I'll do it later.
As for the o2 extensions, I first wrapped all of them with the stick on heat barrier. You can probably see it in the pics. I covered all of them as much as I could from top to bottom. Then when I ran them along the tunnel, I used the metal zip ties (I bought extra for my header wraps), to pull them against the aluminum that runs along the tunnel. There's holes every few inches that I was able to pull the ties through. Where there were no holes, I loosened a tunnel bolt and then tightened the bolt down on the metal tie to hold them in place where I wanted them. I hope that makes sense. I don't want to lift the car up again, but if I can get an arm under there and snap some shots, I'll do it later.
Since thats where they were designed to be I would assume that they are pretty heat resistant to start with, I hope so anyways

As far as limberness that little tidbit left some 15 years ago at age 60

Thanks
NSF PS ordered some heat barrier form Cool it Thermo-tec, should be here Thursday, it will put my mind at ease after wrapping it around the wires and connections
Last edited by Not So Fast; 03-14-2017 at 09:41 PM.
03-15-2017, 04:13 AM
#20
Racer
Thread Starter