When you click on links to various merchants on this site and make a purchase, this can result in this site earning a commission. Affiliate programs and affiliations include, but are not limited to, the eBay Partner Network.
First thing is you need to determine whether the ballast is the problem. If both headlights are out it could either be the ground wire issue (covered by a recall), a bad switch, a blown fuse or a bad relay. If it's only one lamp out (as it was in my case) chances are it's a bad bulb or a bad ballast. To determine is it's the bulb, you can remove the bulb and try it on the other side which is what I did. If the bulb works on the other side, chances are you have a bad ballast which was my case. You could try the ballast from the other side to ensure that's the issue, but I was 99% sure it was the problem, so didn't go to that extent myself as it would have involved twice the work.
Here's my write up on how to replace your C6 low beam headlight ballast. As with any electrical work on a vehicle, prior to starting make sure you disconnect the negative battery cable. Now for the disclaimer. These ballasts and HID bulbs can contain high voltages that if improperly handled can cause injury or death. I'm not responsible for any injuries or deaths caused by someone using these instructions, so proceed at your own risk.
Tools needed:
9/32" (or 7mm) socket with extensions and ratchet
10 mm socket
Pliers (which is what I use to pull the push pins)
1) Jack up the front of the car per the lifting points shown in the owners manual, and properly support the car using jack stands (never rely on a jack alone for support), then remove the tire on the side ballast is needing replacement.
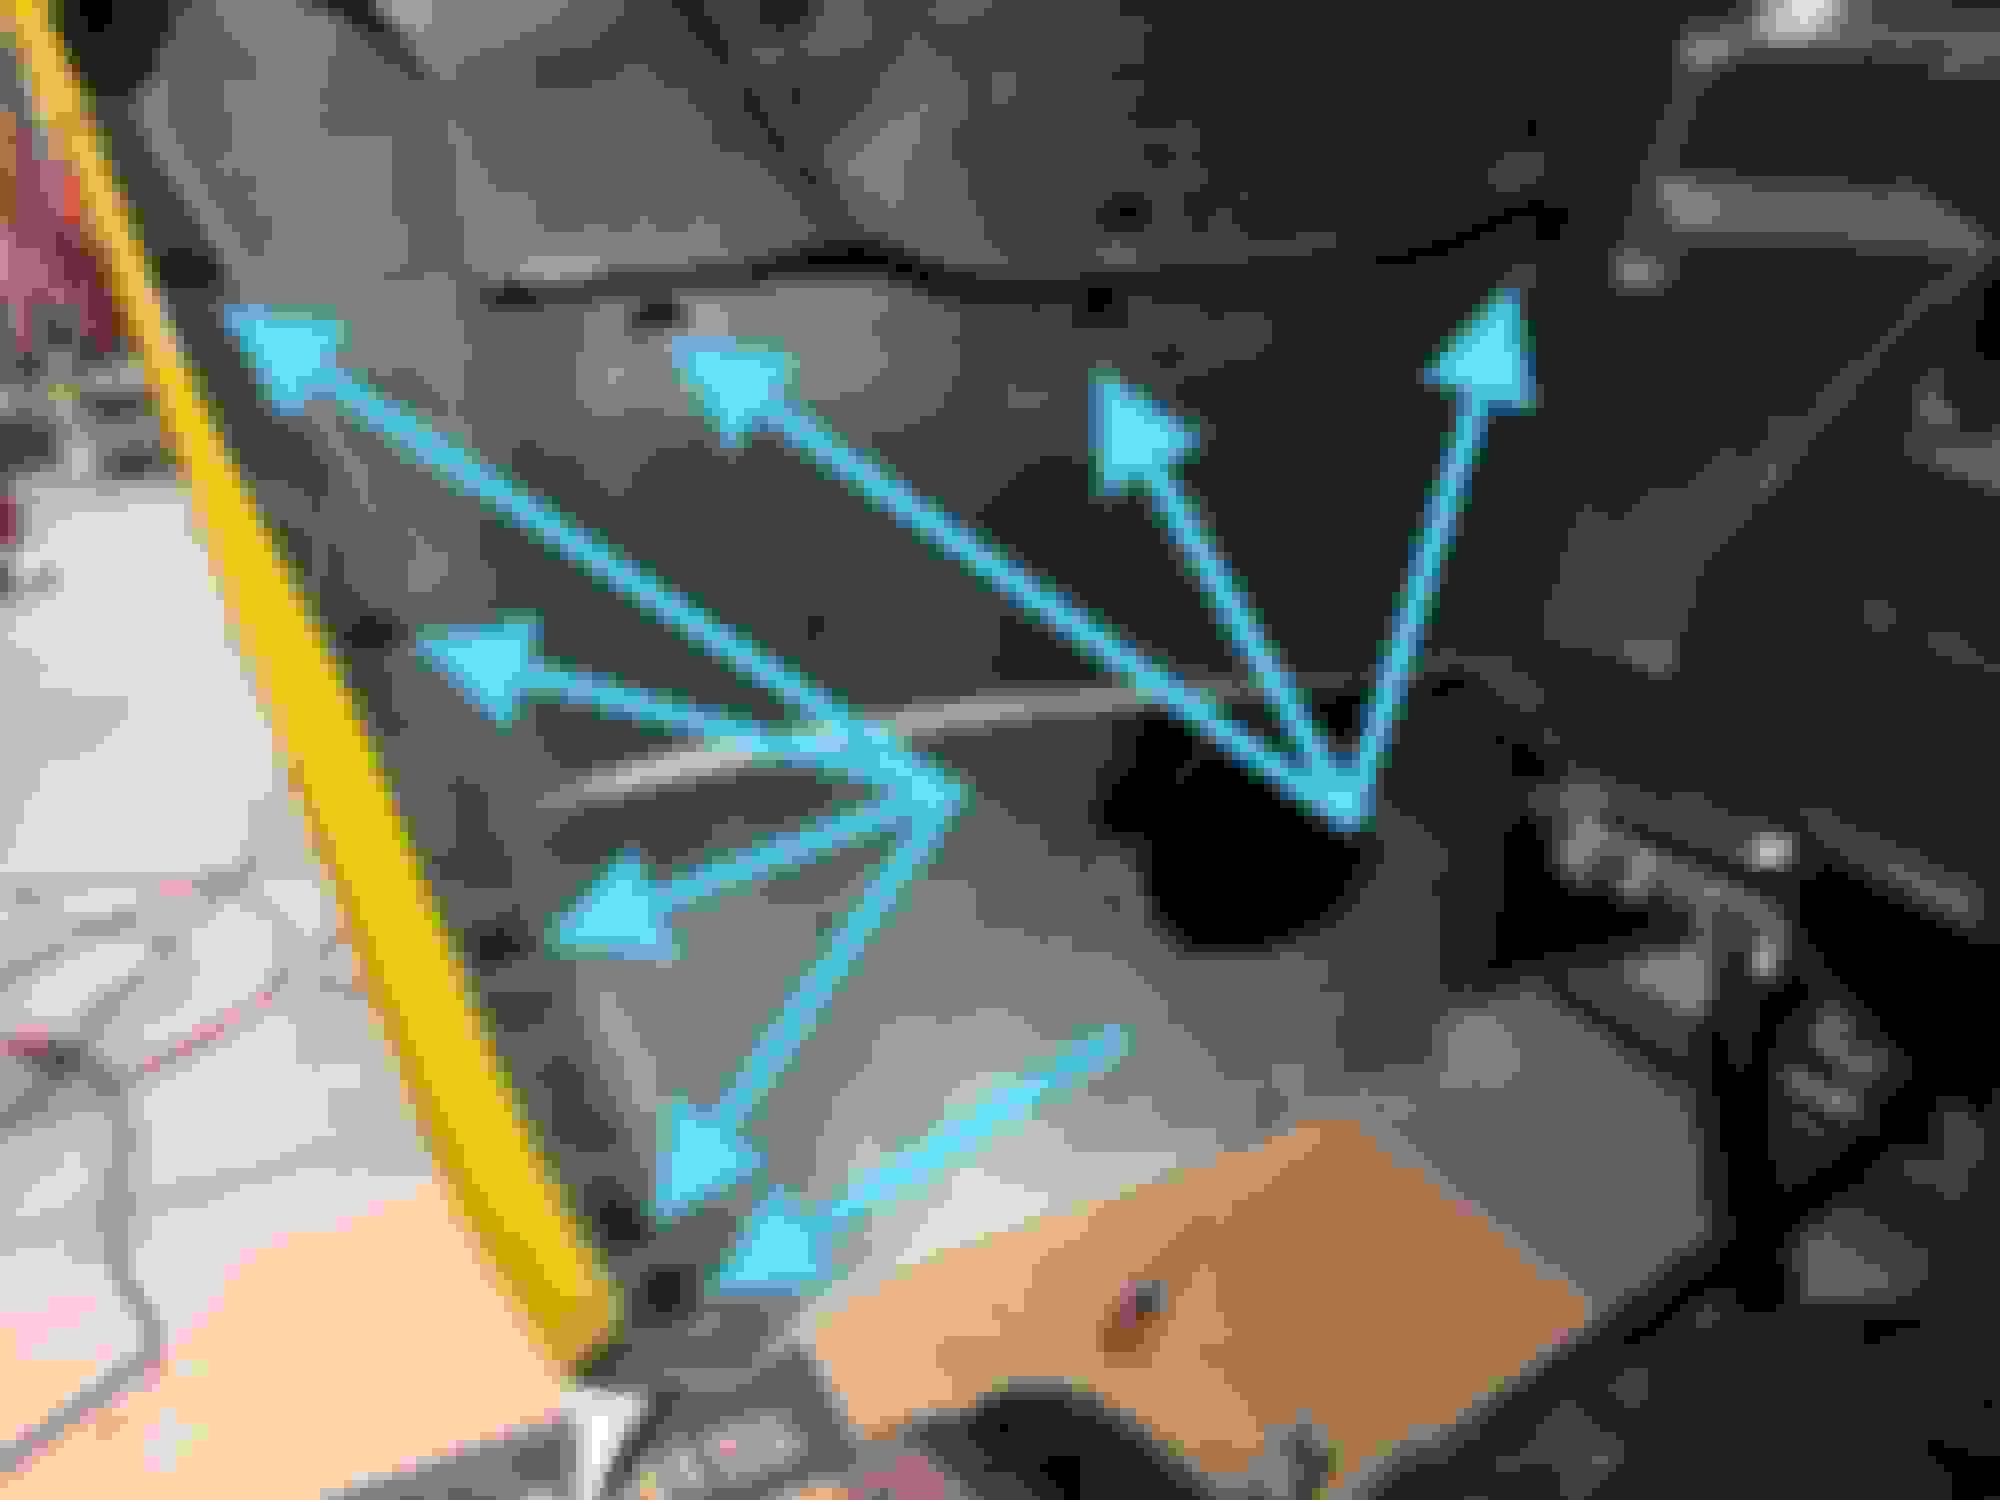
2) Once the tire has been removed, pull the 8 push pins on the front fender skirt shown in the following photo.
3) Then using a 9/32" socket, remove the three screws shown in the following photo holding on the side of the air dam, there's also a plastic pin (shown in red) holding it on but this can be left in place and the air dam will just swing down out of the way.
4) Again using the 9/32" socket, remove the two screws, and then using a 10 mm socket remove the bolt shown in the following photo (note: these screws are shorter than the other ones removed).
5) At this point the fender skirt can be removed. There's also be a brake cooling duct that'll come out with it.
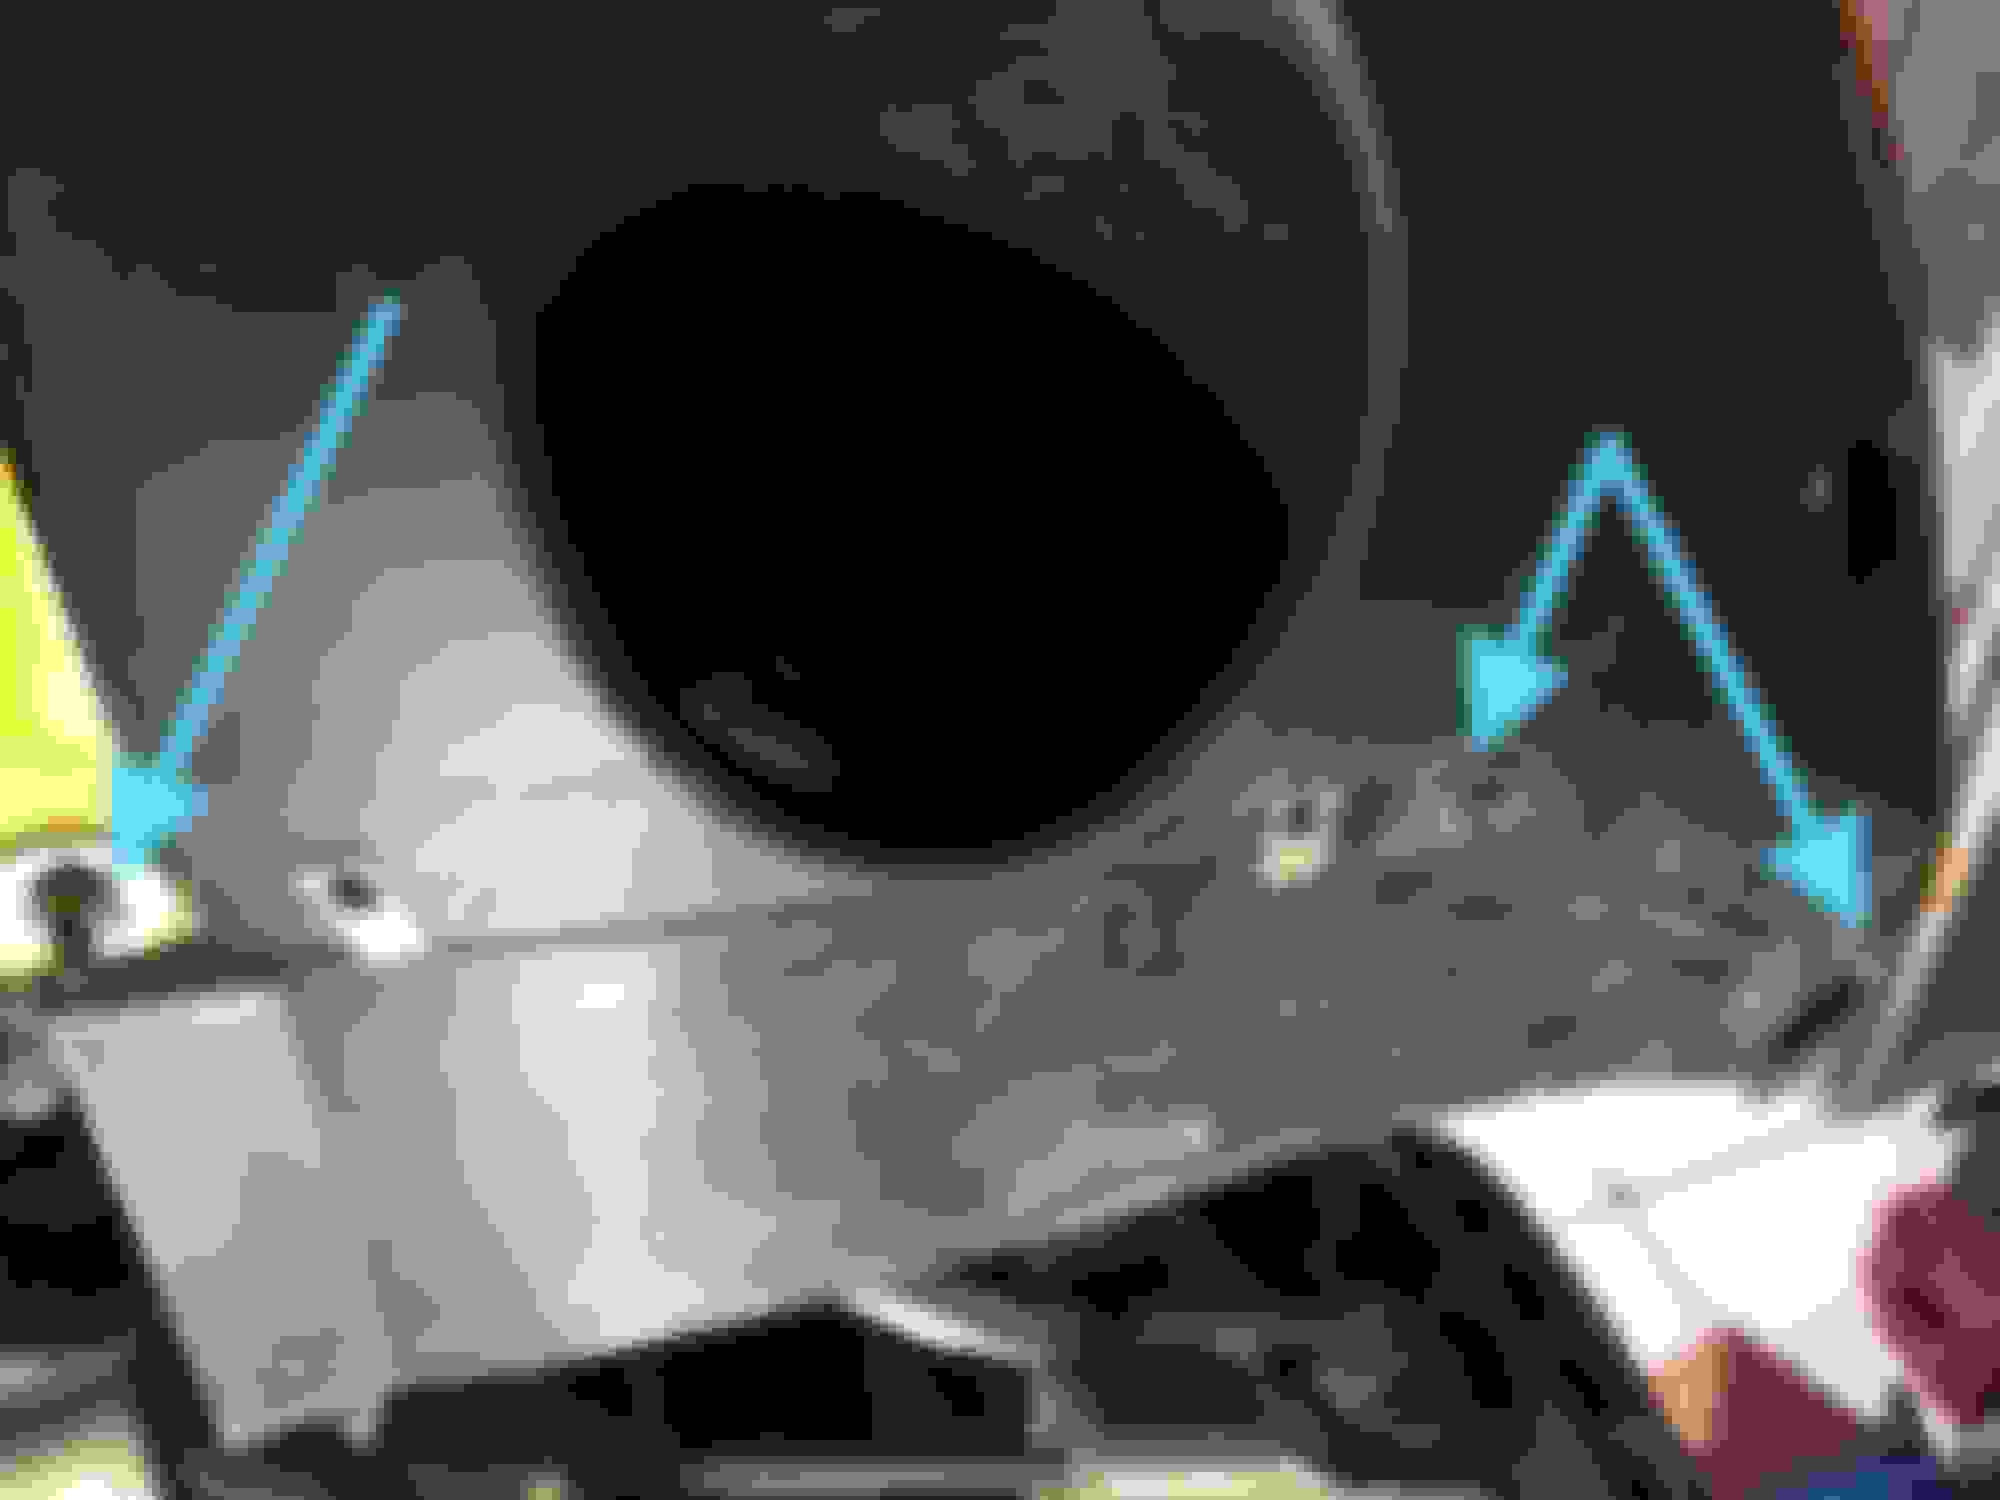
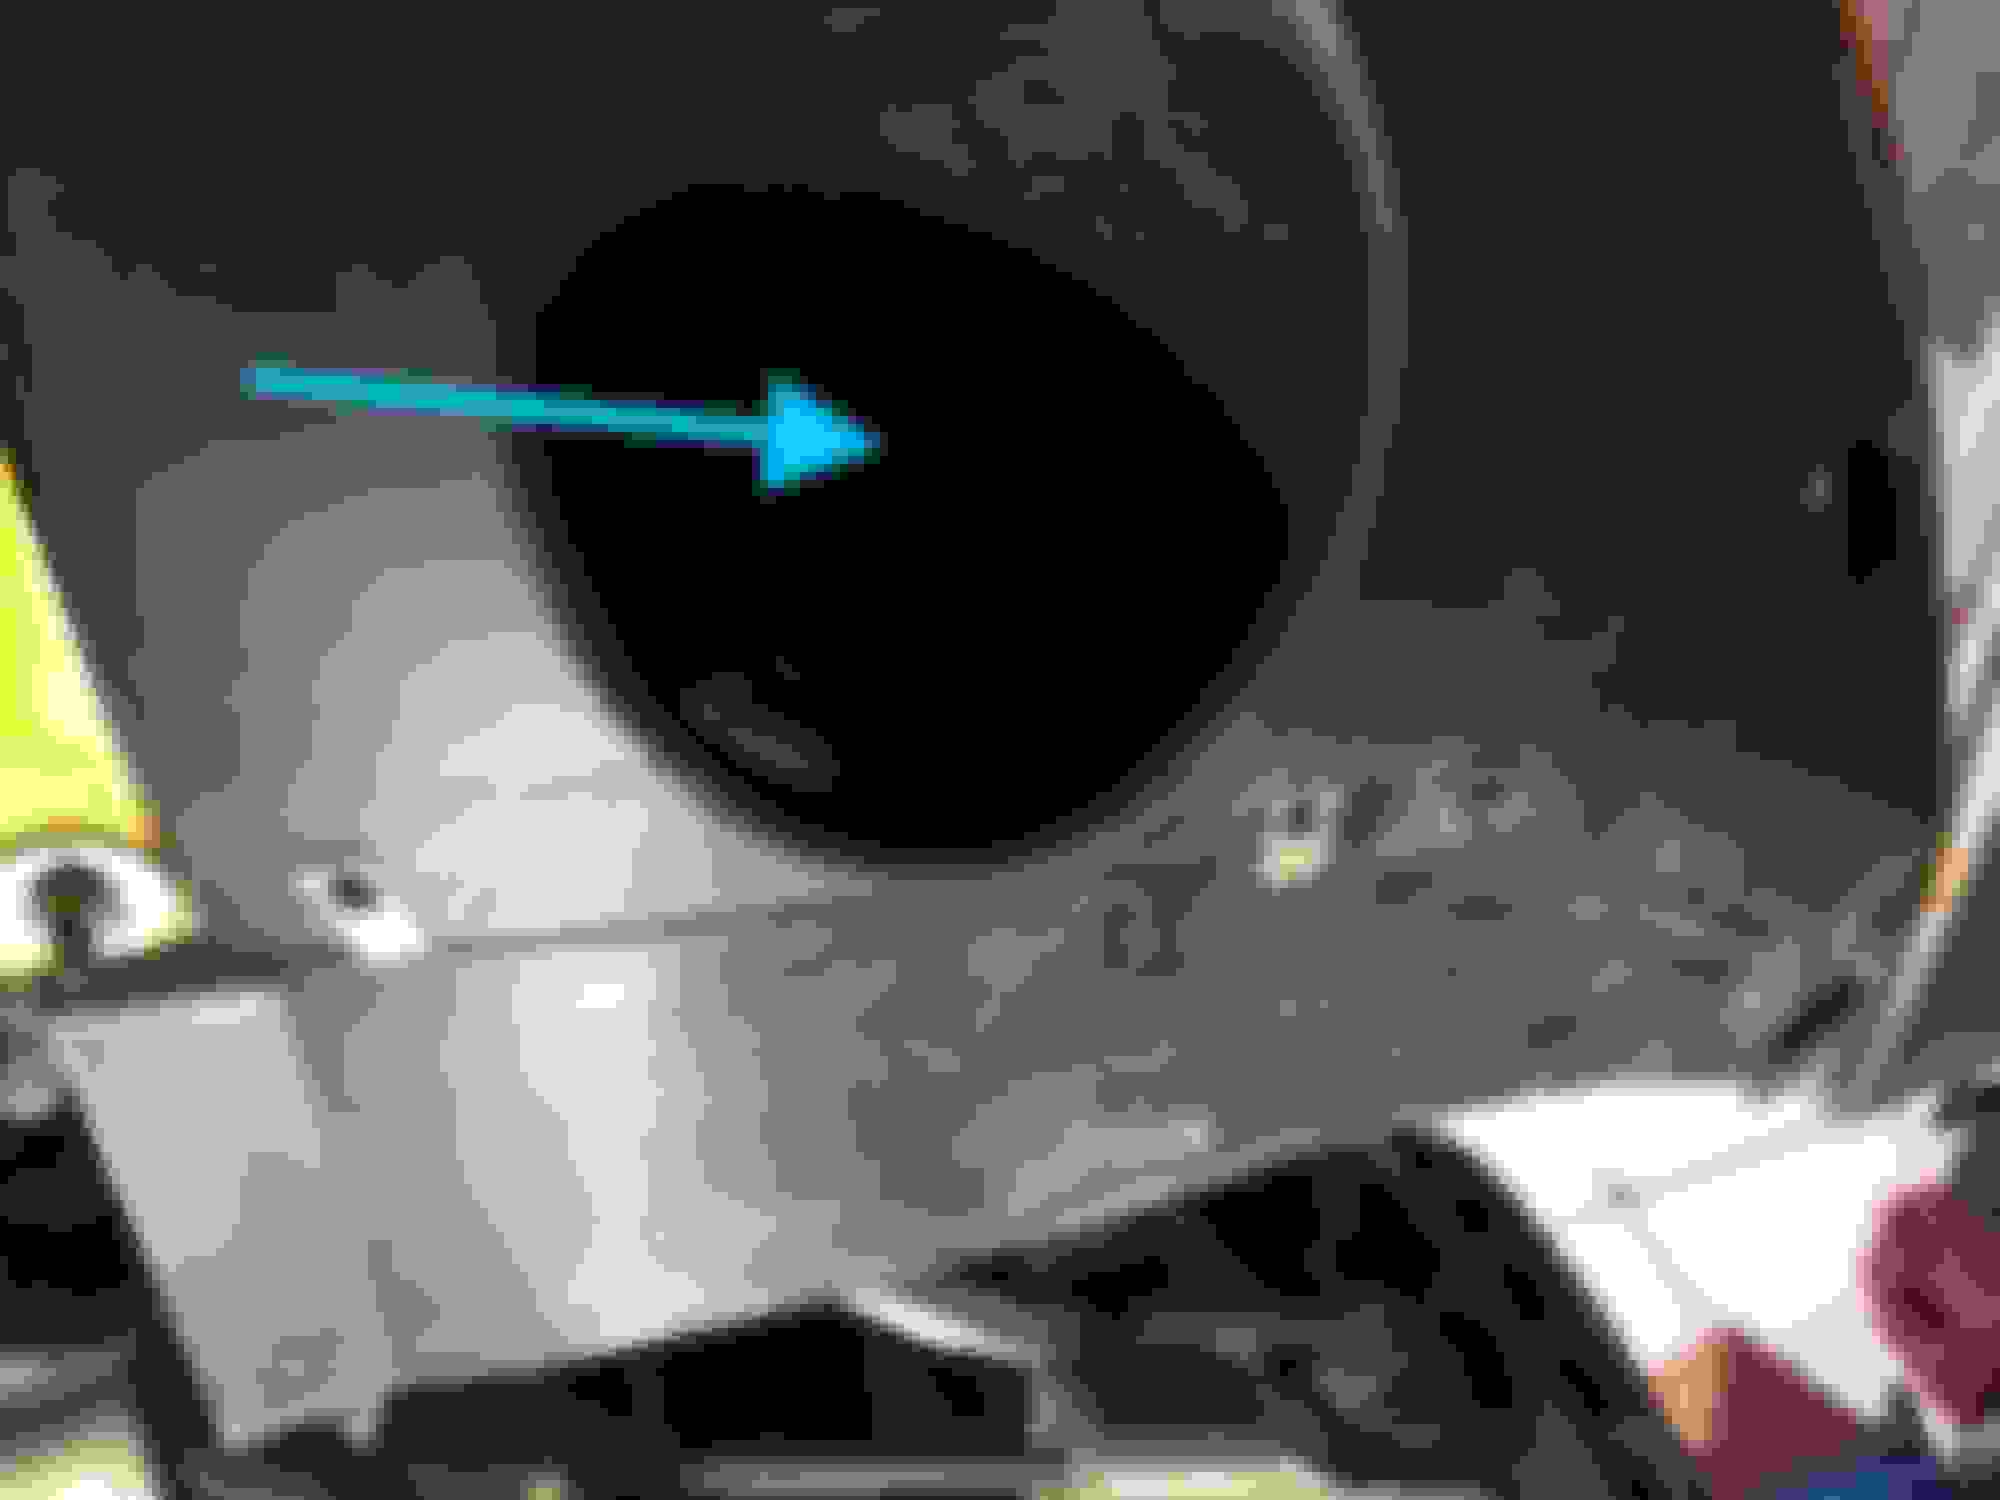
6) Once the fender skirt has been removed, you can look up underneath up to the bottom of the headlight housing and see the housing for the ballast. Again using a 9/32" socket, remove the four screws shown in the following photo securing the housing.
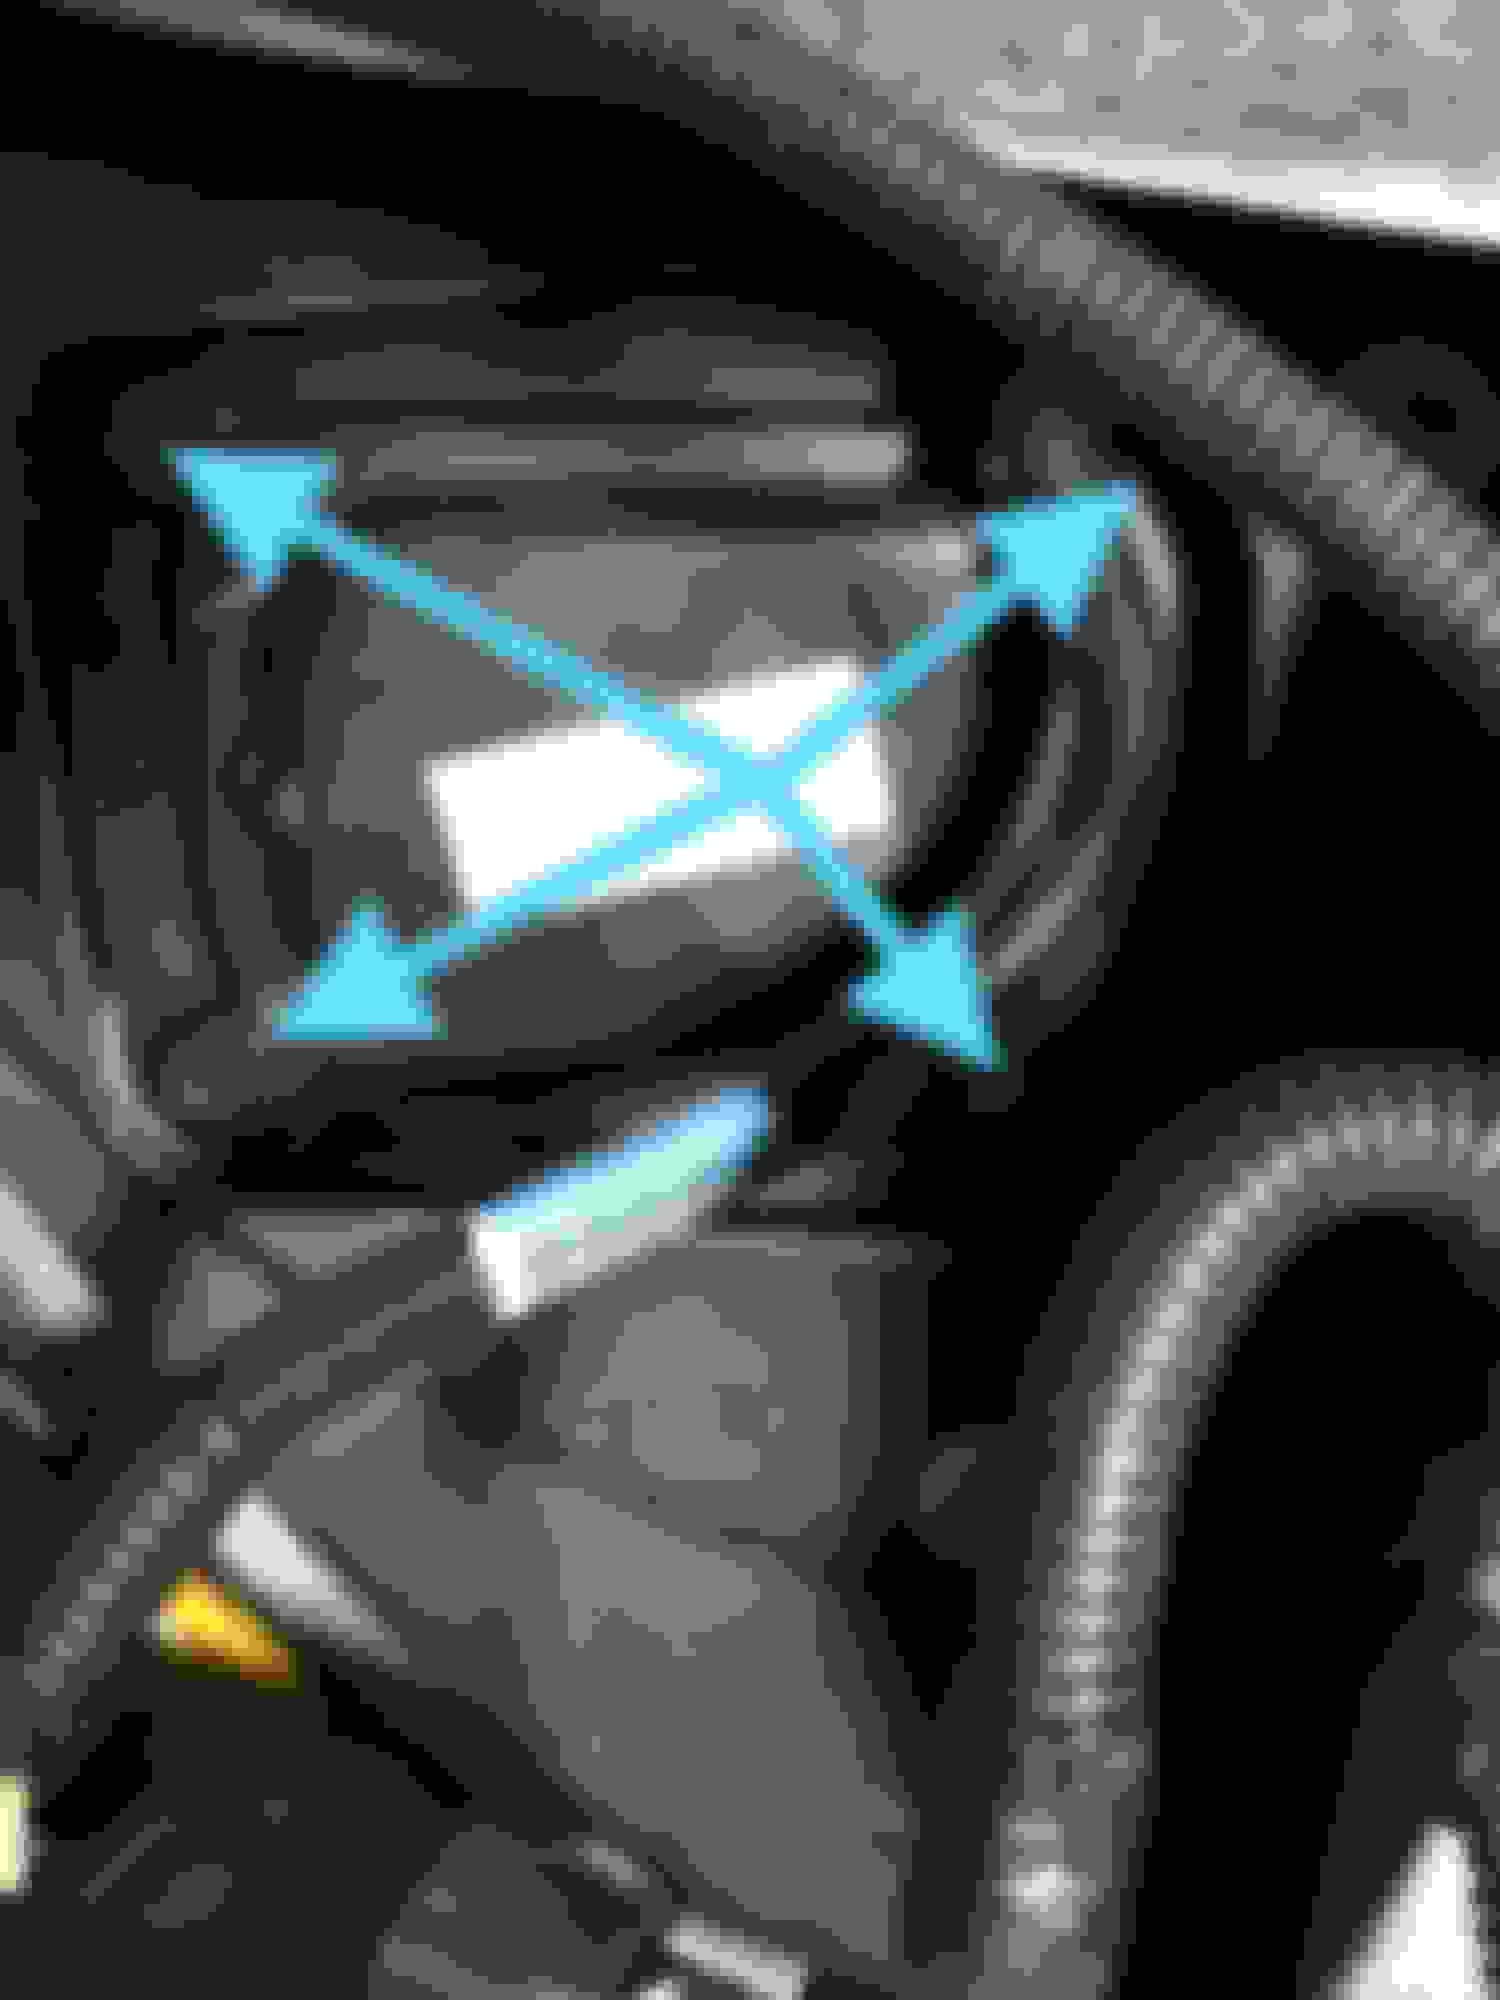
7) Once the screws have been removed, the housing can be pulled down exposing the ballast. Using caution, remove the two electrical connectors from the ballast shown in the following photo, once removed ensure you do not touch any of the exposed leads on the ballast or connectors.
8) Once the electrical connectors have been removed, the housing can then be pulled out. Once the housing has been pulled out again using a 9/32" socket remove the three screws holding the ballast to the housing, again use caution not to contact the electrical contacts of the ballast (shown in red) in the following photo.
9) Once the screws have been removed the ballast can be removed from the housing.
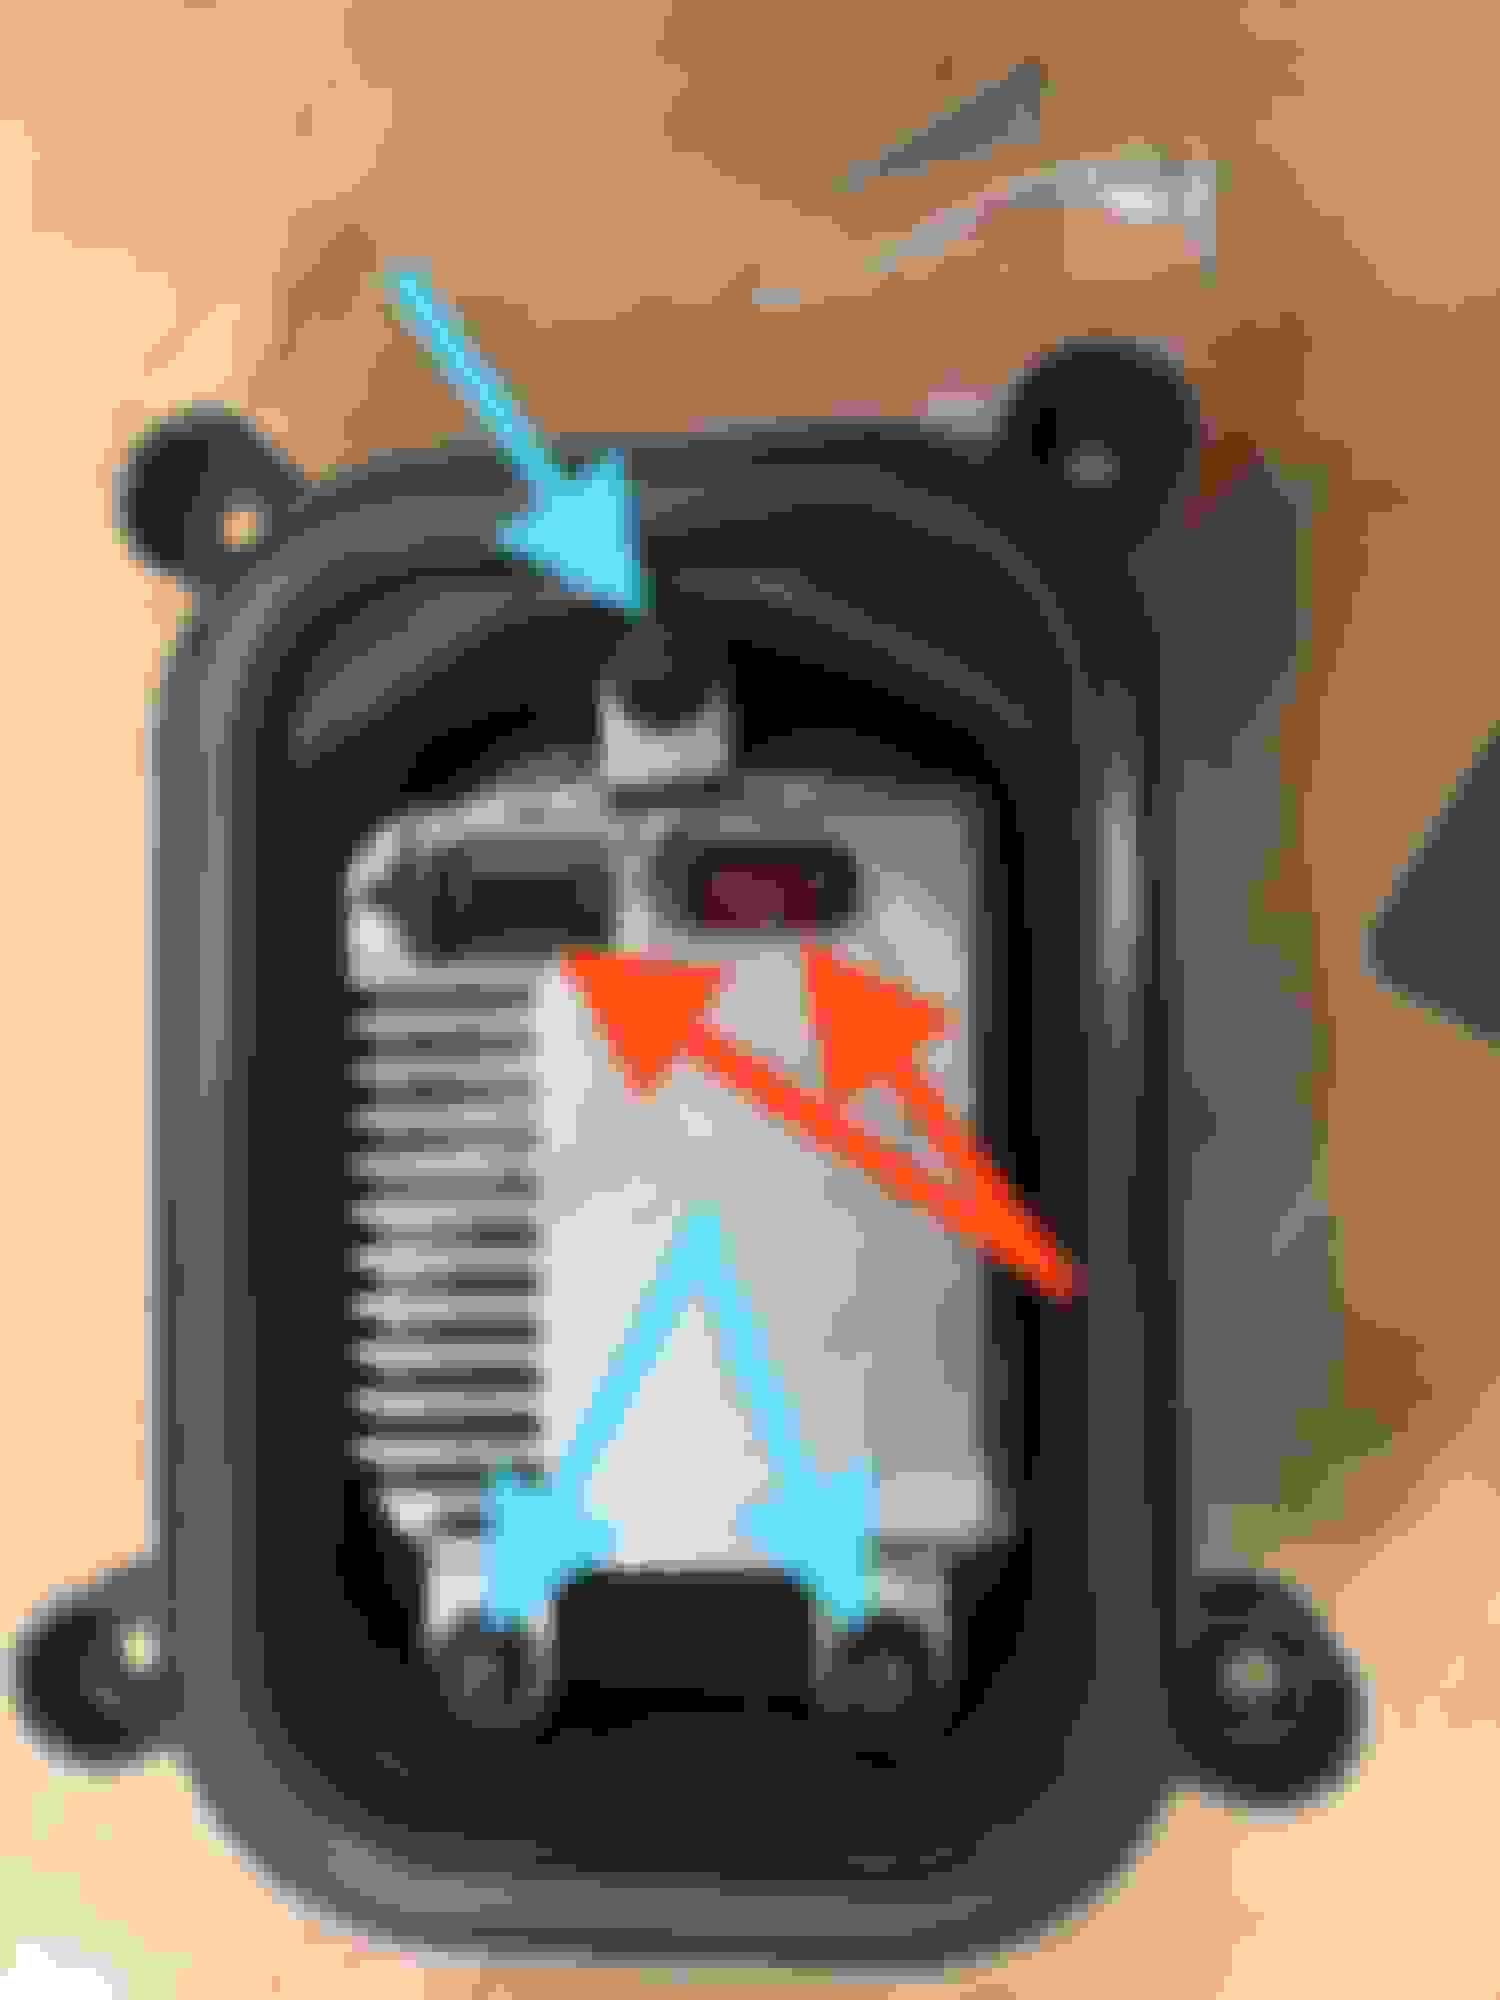
10) Then just reinstall everything in the reverse order. Ensure the seal of the ballast housing (shown in the following photo) is free of dirt prior to reinstallation. Once everything has been connected and the housing has been screwed back into place you can try out the lights by reconnecting the battery and turning on the headlight switch, if they work then you've succeeded in repairing your lights and can finish the reinstallation. If they don't work then you have other issues such as bad wiring.
11) Also when reinstalling ensure the duct for the brake cooling is properly fitted to the opening on the bumper. The following photo shows the front side of the opening, you can reach up inside this opening to help guide it in place.
Properly fitted duct.
12) Now enjoy your properly working headlights.
Last edited by madsonp; 12-06-2017 at 11:07 PM.
Reason: Spelling and other corrections
One other note. Grand Sport , Z06, and ZR1 will be slightly different in that 5 (the vertical ones) of 8 push pins to remove the skirt/duct are screws on the widebody cars.
The 3 horizontal ones are still push pins. I use an "interior removal tool" to remove those push pins. Less likely to break them vs. pliers, though not a necessity.
Last edited by Grimlock13; 12-07-2017 at 12:48 AM.
One other note. Grand Sport , Z06, and ZR1 will be slightly different in that 5 (the vertical ones) of 8 push pins to remove the skirt/duct are screws on the widebody cars.
One other note. Grand Sport , Z06, and ZR1 will be slightly different in that 5 (the vertical ones) of 8 push pins to remove the skirt/duct are screws on the widebody cars.
Good to know, also wondering if there're any ballast foot print differences.
Bought a ballast, planned on having it installed this Spring.
Ballast I bought looks slightly different than one shown, more square w/ attachment tabs at corners.
Hope I get lucky, bought ballast months ago so at this point it's mine. Supposedly the correct one for an '08 Z06 according to eBay, anyway.
Shouldn't be such a PITA or expensive to replace a headlight.
WTH is GM thinking w/ this design?
the ballast shown in the OP's pics is an '05... '06 and up use a different ballast and they're not interchangable with an '05.
Good to know, also wondering if there're any ballast foot print differences.
Bought a ballast, planned on having it installed this Spring.
Ballast I bought looks slightly different than one shown, more square w/ attachment tabs at corners.
Hope I get lucky, bought ballast months ago so at this point it's mine. Supposedly the correct one for an '08 Z06 according to eBay, anyway.
Shouldn't be such a PITA or expensive to replace a headlight.
WTH is GM thinking w/ this design?
Keep in mind I did this write up from what I encountered with my 05. There could very well be some differences in ballasts through out the years for the C6 that I'm unaware of. A funny thing, for my 05 they show two different ballast types on eBay, the square one you mentioned (which obviously wouldn't work in my case) and the three tab one I installed. I would think however the basic steps of accessing and removing the ballasts would be close to being the same. What you might be able to do is look it up on a Corvette parts Microfiche to see if you purchased the correct one or not.
The main thing I wanted to point out with my write up is that it isn't all that difficult to do. I agree with you that it is still a PITA to replace and expensive for any of the components compared to vehicles of the past, but what do you expect......It's a Corvette, and you have to admit, it could be worse. When I first started looking into the steps involved in doing this, it sounded like you had to pull the whole headlight housing which involved pulling the bumper and fenders half off which, thankfully, I was able to determine isn't the case. There were no write ups at all on ballast replacement for these cars that I was able to find, hence the reason for me doing my write up....to make it easier for those who follow behind me. My hope this thread will further develop from the input of others (including yourself) who replace their ballasts to cover any differences that were encountered from my write up of the C6's that have been made over the years to make this as easy and understandable as possible for all.
Upon further investigation it appears to me that there are 3 different ballasts that could of been used on the C6 Corvettes over the years. If anyone knows otherwise please add to this thread. There's 3 tab one that I had in my car that sounds like it's specific to the 05's, which are meant to be used with D1S and D1R type HID bulbs, then there's the square 4 tab ones which are also meant to be used with the D1S and D1R HID bulbs. There's also a square 4 tab one shown that requires it be used with the D3S and D3R HID bulbs, and I've even seen a square 4 tab one that says it can be used with all 4 different type HID lamps. What the specific differences are in the bulbs, I don't know, perhaps someone knowing the differences can speak up here. The info on the lamp type requirements can be found on the label on the ballast itself, or you can look at the label of the lamp you currently have installed and order accordingly. So, before you order one of the 4 tab ones make sure you get the right one.
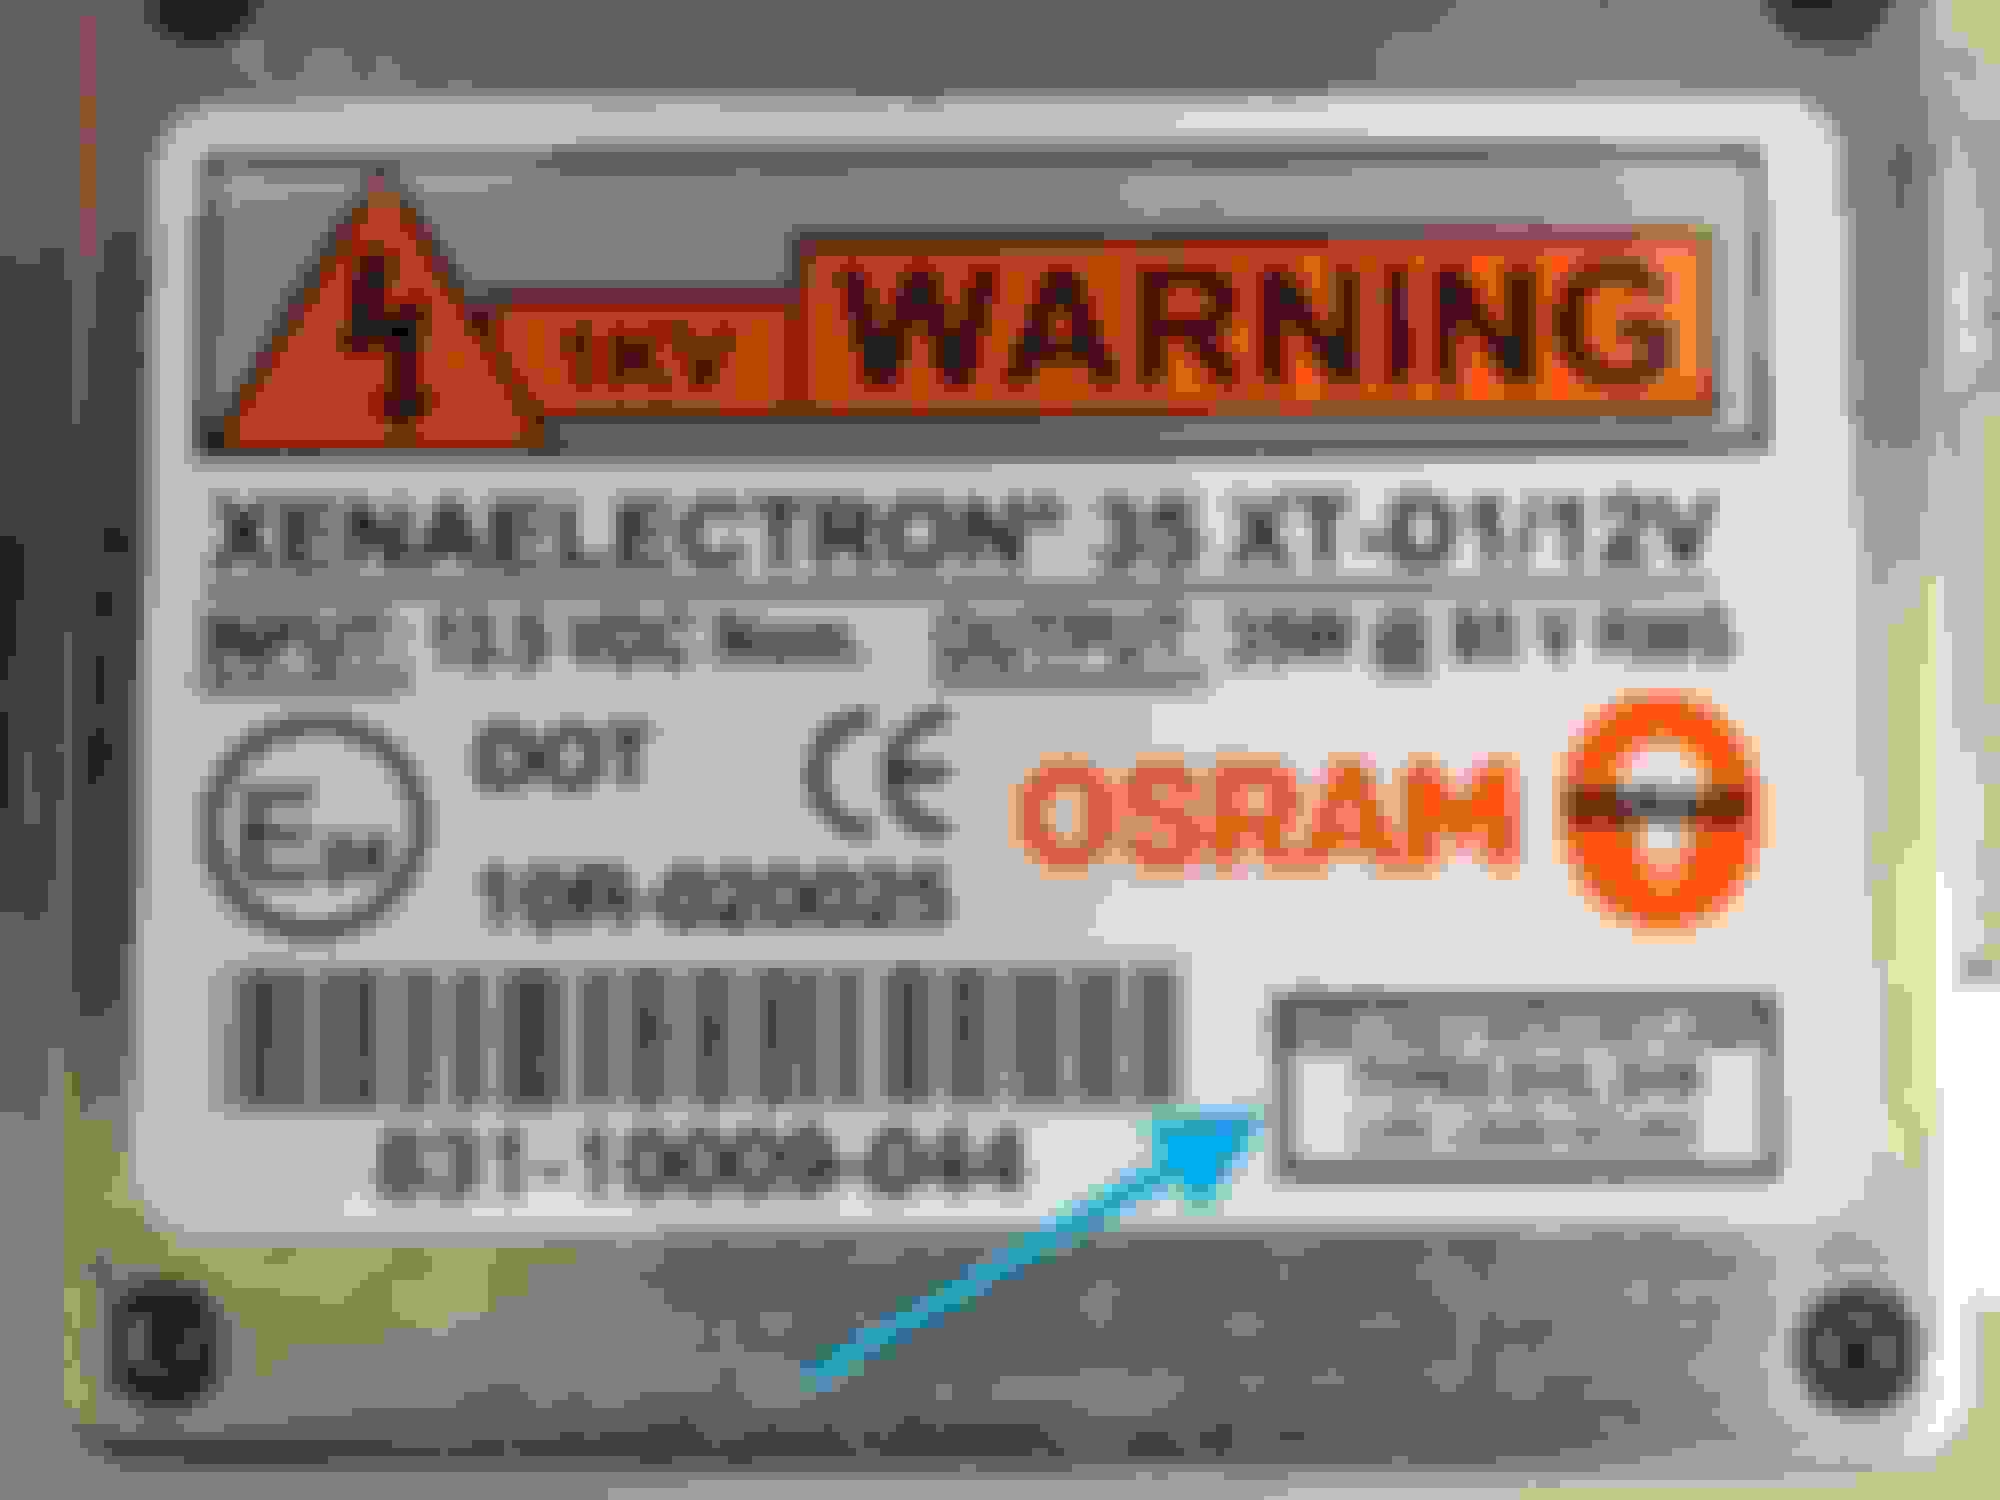
Below are some photos of the labels, the first is from my old ballast, you can see the bulb requirements in the lower right hand corner.
Next is the label of the lamp (this particular one is the one used in mine).
To access the bulb you remove the push pins off the cover shown in the next picture (the 3 shown and the others that are out of the picture) then there's a rubber seal behind that you remove and that will expose the label on the bulb.
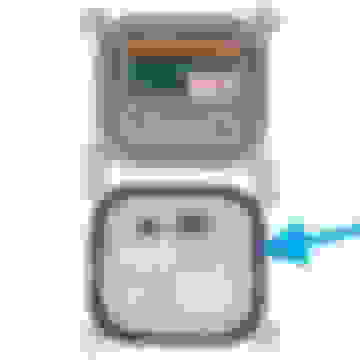
UP-DATE: I just saw a picture of the underside of a headlight from a newer C6 that uses the square ballast. It appears that it doesn't have the housing the the ballast mounts into like my 05 has, instead it looks like the ballast itself just bolts directly onto the headlight housing itself. It looks like the ballast has a seal on it (see photo) that would eliminate the need for the housing that my 05 has.
It appears that these square ballasts would not work on an 05 however because the bolt pattern is different on the 05 as you can see from this photo from my write up the ballast housing is more rectangular on the 05.
The good news is that it looks like the steps are basically the same for all years of the C6 where as it's all accessible by just removing the wheel fender skirt.
I also came across a drawing of the headlight assembly that shows everything pretty good. This one would be for what the 05 looks like as it shows the ballast housing.
UP-DATE: I just saw a picture of the underside of a headlight from a newer C6 that uses the square ballast. It appears that it doesn't have the housing the the ballast mounts into like my 05 has, instead it looks like the ballast itself just bolts directly onto the headlight housing itself. It looks like the ballast has a seal on it (see photo) that would eliminate the need for the housing that my 05 has.
It appears that these square ballasts would not work on an 05 however because the bolt pattern is different on the 05 as you can see from this photo from my write up the ballast housing is more rectangular on the 05.
The good news is that it looks like the steps are basically the same for all years of the C6 where as it's all accessible by just removing the wheel fender skirt.
the '06 and later square ballast WILL NOT mount on an '05 headlight assembly.

 12-06-2017, 07:54 PM