
[Z06] DRM Installation writeup inside
 06-12-2010, 04:10 PM
#1
Former Vendor
Thread Starter

nstallation instructions. There is a million different way to do the same job. This is how our guys do it.
1. Support car on jack stands, please refer to your owners manual on the proper way of doing this.
2. remove the rear wheels and it should look something like this. If not please stop drinking, put the tire back on your wife's car and go to bed.
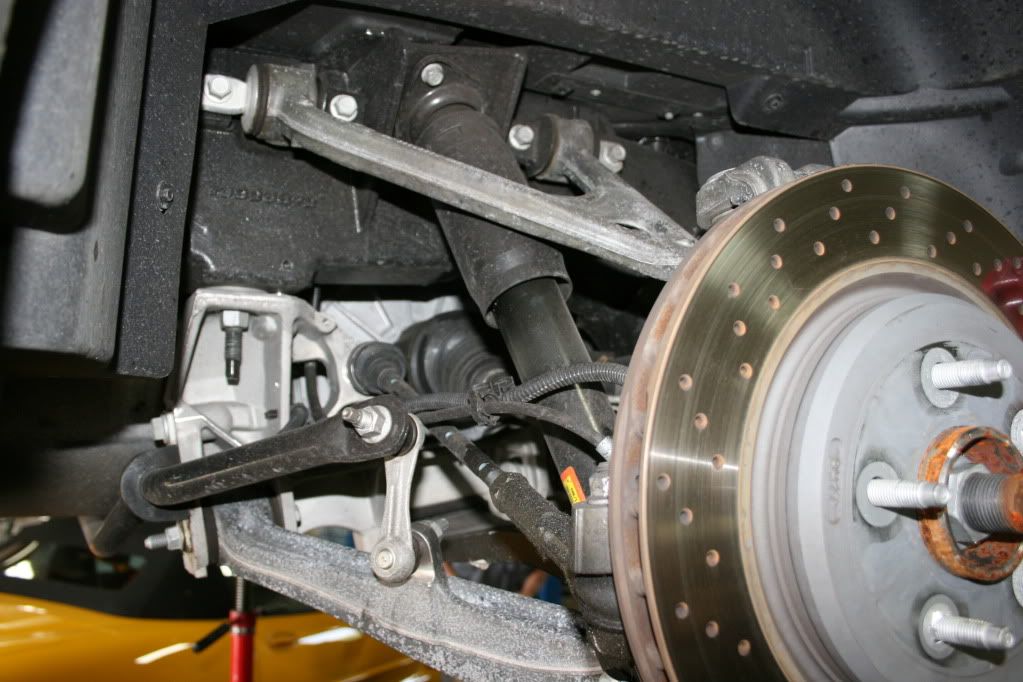
3. You must support the lower ball joint, we use "poll jacks" But a standard automotive jack will do the job just fine. Put a very small amount of pressure on the lower ball joint-control arm so the spring has no tension.
4. We choose to remove the outer tie rod end to gain a few inches of working space. It's a 18mm and either a socket or wrench will work for removal.
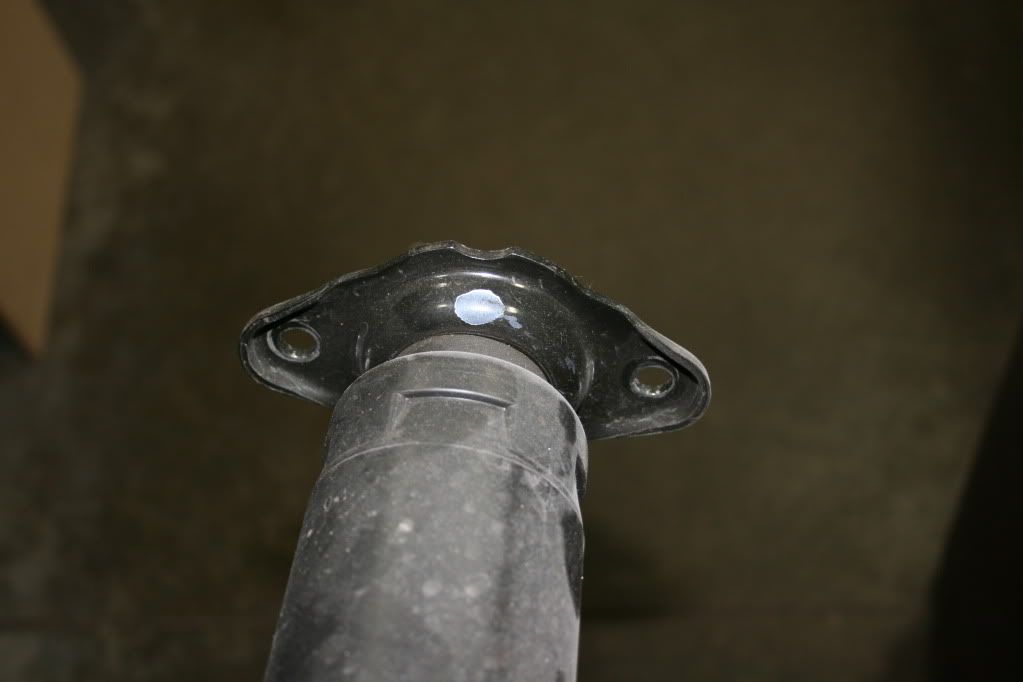
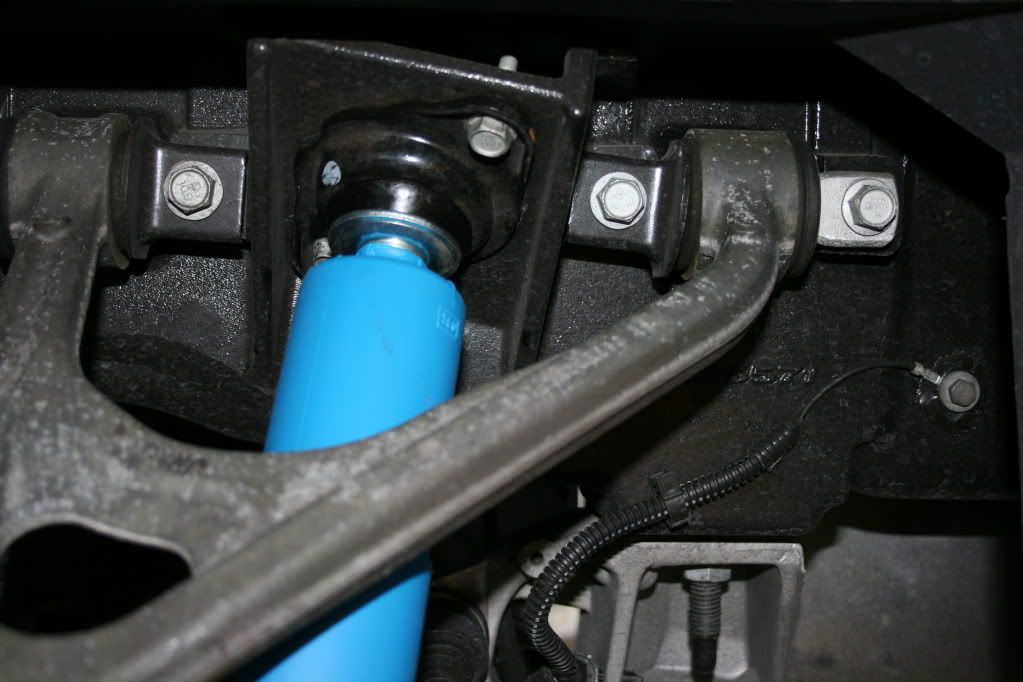
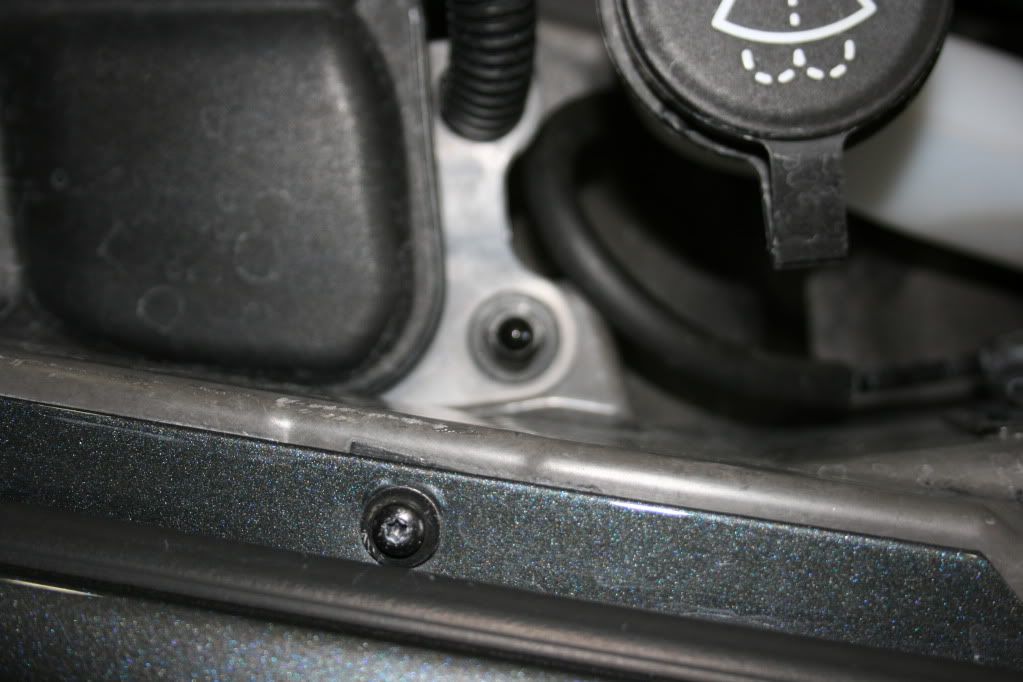
5. This step is to remove the upper bolts on the football shaped upper rear mount. They are 13MM, we use a swivel socket but a wrench will work also. You can see the one bolt in the first picture above. Below is a picture of the football shaped upper mount.
6. The lower mount I didn't get a picture of . But it is a 24mm or 15/16 on both sides. Yes it is a large bolt. Remove the nut and bolt and the shock will slide out towards the back.
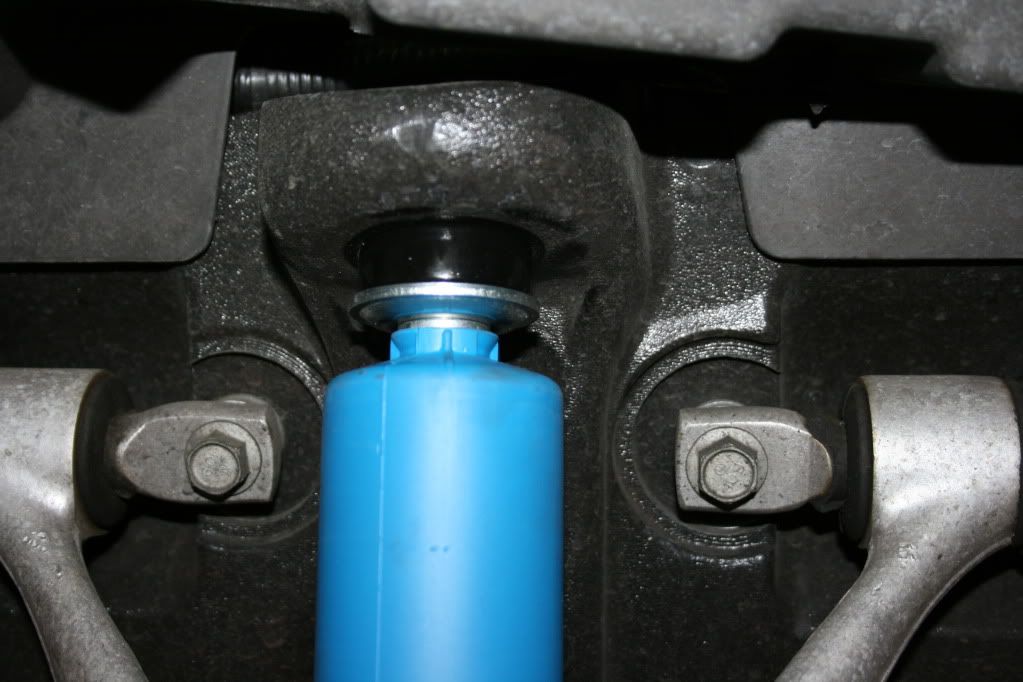
7. Transfer the upper mount to the Bilstein shock using either the Bilstein supplied bushings or DRM aftermarket ones. Please note the amount of bushing squeeze the factory shock has on it. Your new one should be very close in appearance.
8.Below is a picture of the top mount.
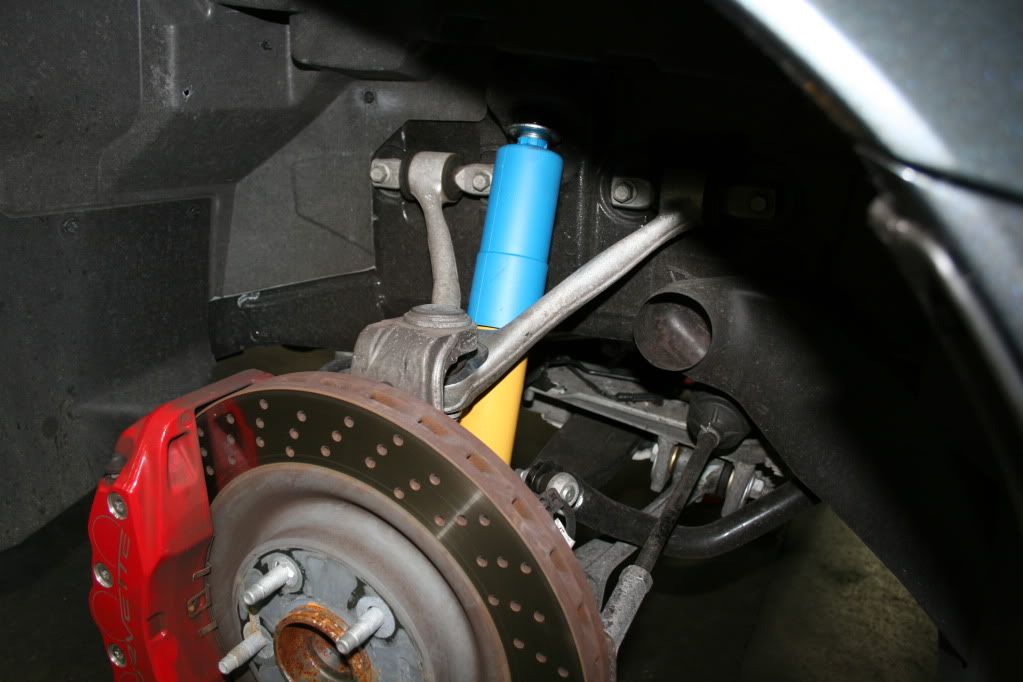
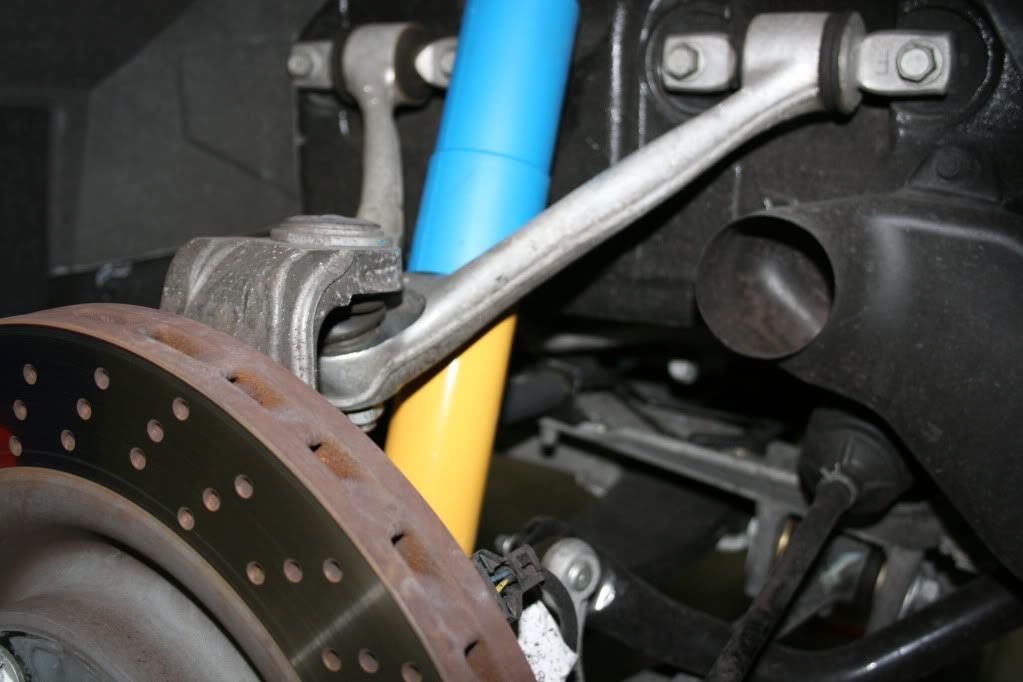
9. Reinstall the Bilstein shock exactly how you removed the stock one.
The only headaches will be the tie-rod end. You have to either put upward pressure on it with a jack or a channel lock pillars. This operation will allow you to install the nut without the tie-rod spinning around. There is also a allen wrench that you can use to hold the shaft from spinning, but you must use a wrench to tighten the tie-rod end. Make sure you check wheel torque after 50 miles!!!

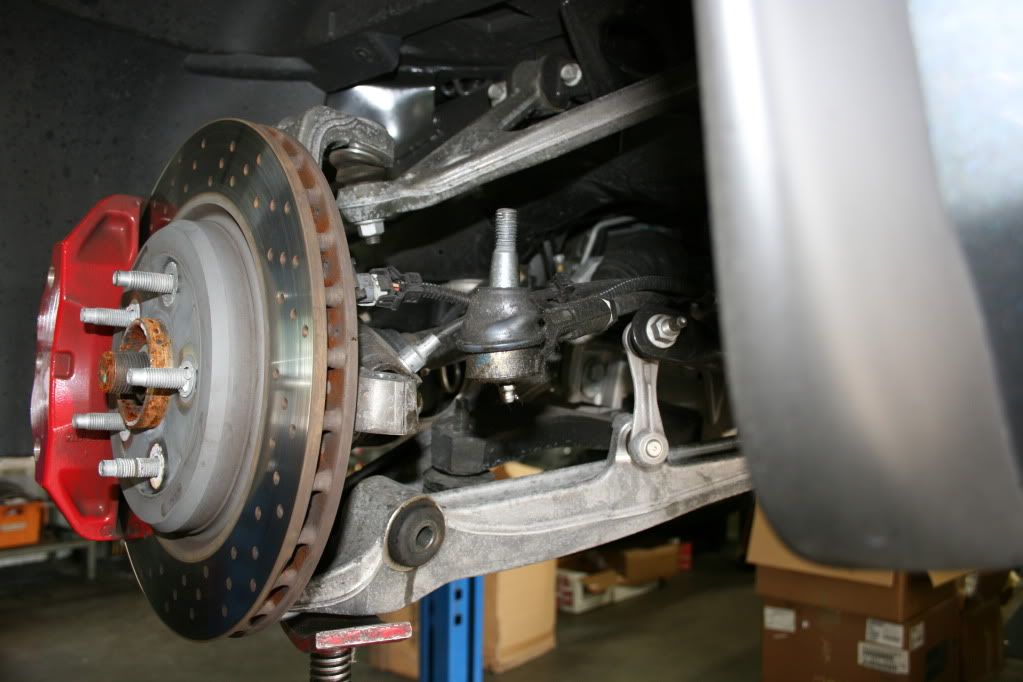
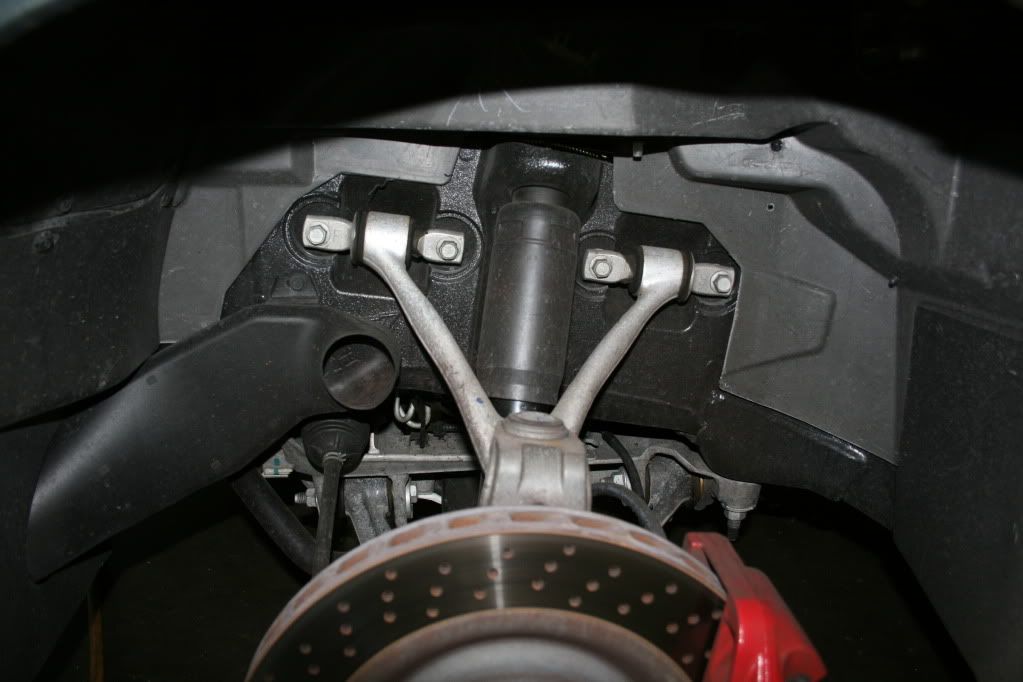
10. Now on to the fronts. This is what it should look like, if not, start drinking. Call and see if the local shop makes house calls.
11A. This is a bit more difficult for some, and easier for others. If the rear tie-rod end went ok, we would suggest doing it this way.
Remove the tie-rod end, the same way as the rear setup. Please let me know if you have any questions on this part of it.
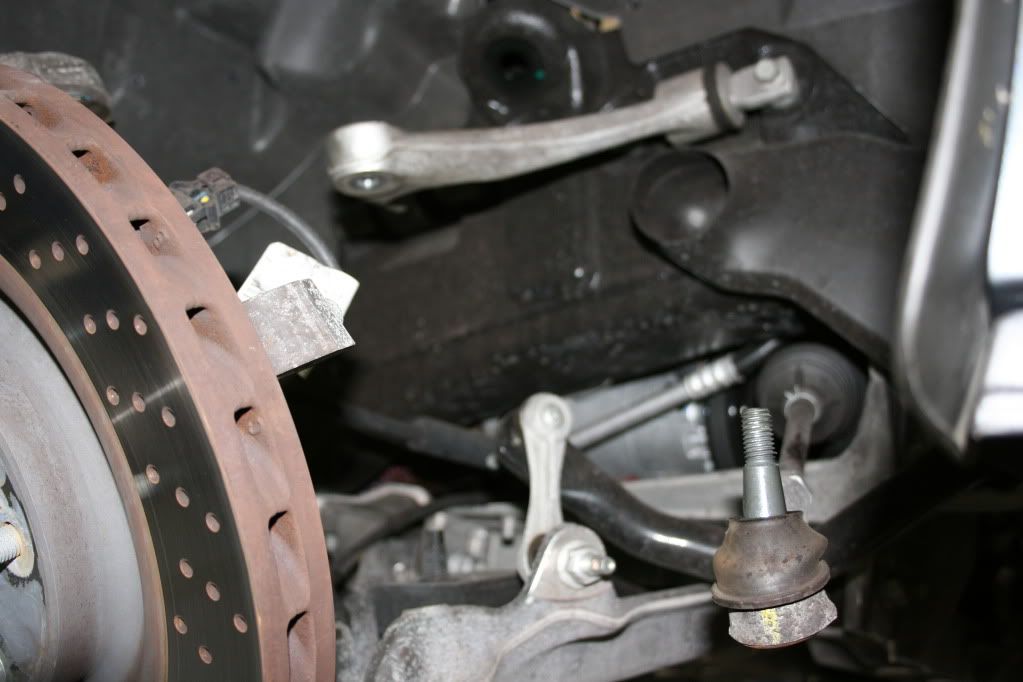
11B. The other method is to remove the upper control arm mounts and let that drop out of the way. You must support the lower ball joint-control arm during this step.
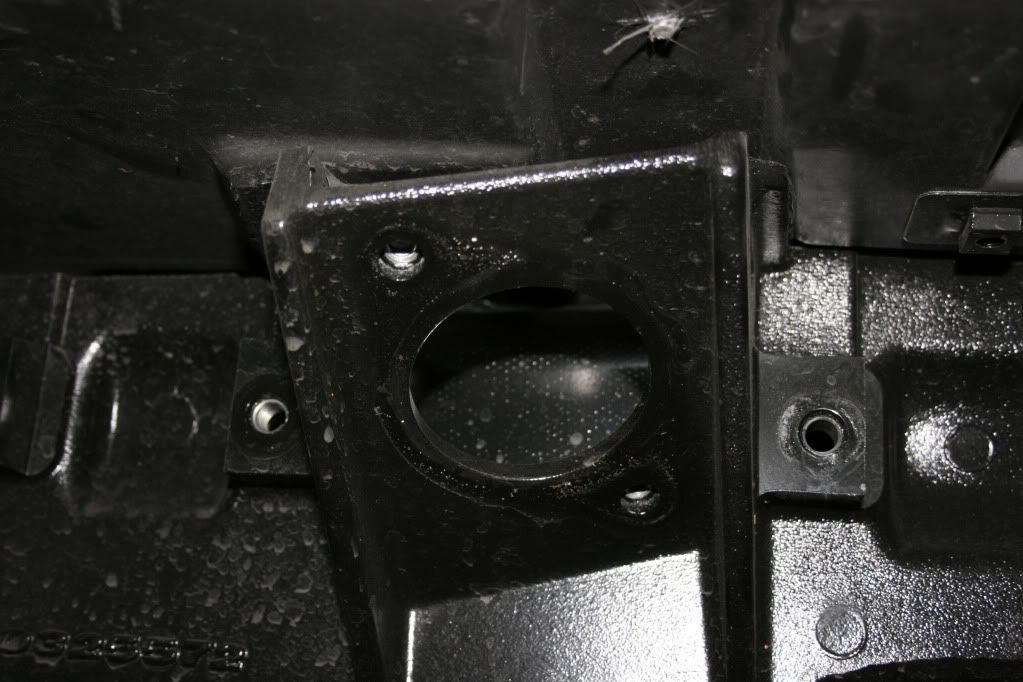
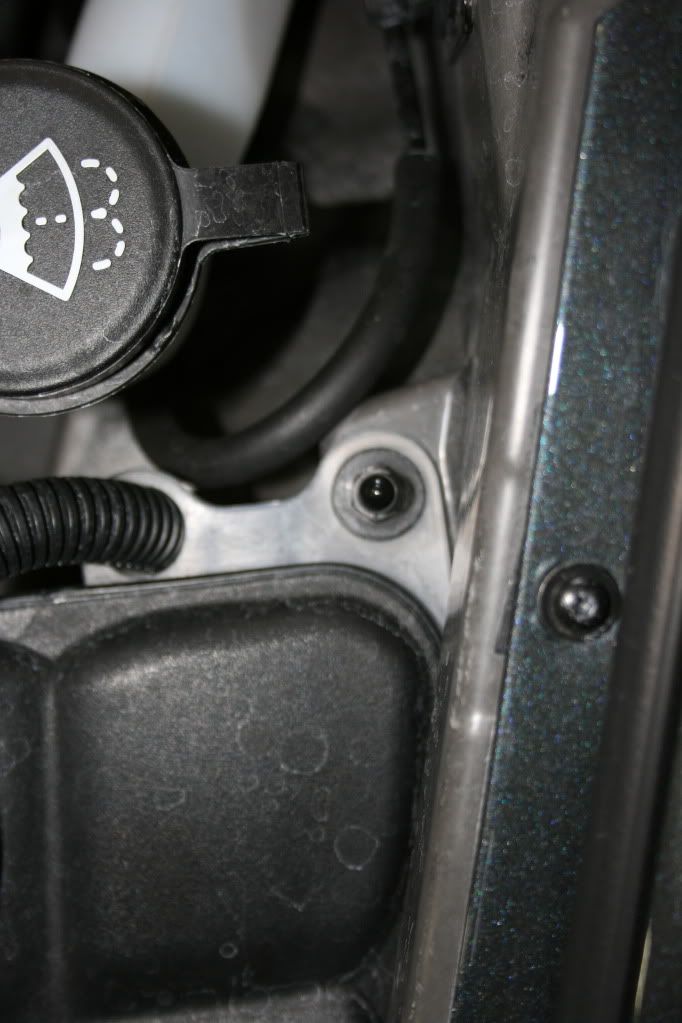
12. To get the top right front shock lose from the chassis you must remove the coolant tank. 10mm Bolts and a socket works just fine.
13. This is what the top mount looks like. There is a few ways of removing it. First off you can blast it off with a impact. It's kinda hard on the shock if the shaft turns a million rpm, but 95 percent of the time a quick blast and it's off without turning the shaft. You can also use a friend's hand to hold the shock shaft. The other method of doing this is to use a shock socket, ours is a snap on, but the way it looks there is other companies that sell them also. Or you can use a small wrench, or even a vise grip. The Stock shock top nut uses a 15mm and the Bilstein uses a 17mm.
14. The bottom mount I don't have a picture of either . It's a very simple t-bar setup with a 13mm bolt and 13mm nut. Simply remove them and the shock will fall out of the way.
15. Put everything back together the same way it came apart and enjoy a smoother, more planted ride

Thanks guys
Randy
PS if anyone has stuff to add, take away or anything else to the install please let me know. Personally I'm ok at a ton of things, but not a expert in install writeups
1. Support car on jack stands, please refer to your owners manual on the proper way of doing this.
2. remove the rear wheels and it should look something like this. If not please stop drinking, put the tire back on your wife's car and go to bed.
3. You must support the lower ball joint, we use "poll jacks" But a standard automotive jack will do the job just fine. Put a very small amount of pressure on the lower ball joint-control arm so the spring has no tension.
4. We choose to remove the outer tie rod end to gain a few inches of working space. It's a 18mm and either a socket or wrench will work for removal.
5. This step is to remove the upper bolts on the football shaped upper rear mount. They are 13MM, we use a swivel socket but a wrench will work also. You can see the one bolt in the first picture above. Below is a picture of the football shaped upper mount.
6. The lower mount I didn't get a picture of
. But it is a 24mm or 15/16 on both sides. Yes it is a large bolt. Remove the nut and bolt and the shock will slide out towards the back.7. Transfer the upper mount to the Bilstein shock using either the Bilstein supplied bushings or DRM aftermarket ones. Please note the amount of bushing squeeze the factory shock has on it. Your new one should be very close in appearance.
8.Below is a picture of the top mount.
9. Reinstall the Bilstein shock exactly how you removed the stock one.
The only headaches will be the tie-rod end. You have to either put upward pressure on it with a jack or a channel lock pillars. This operation will allow you to install the nut without the tie-rod spinning around. There is also a allen wrench that you can use to hold the shaft from spinning, but you must use a wrench to tighten the tie-rod end. Make sure you check wheel torque after 50 miles!!!
10. Now on to the fronts. This is what it should look like, if not, start drinking. Call and see if the local shop makes house calls.
11A. This is a bit more difficult for some, and easier for others. If the rear tie-rod end went ok, we would suggest doing it this way.
Remove the tie-rod end, the same way as the rear setup. Please let me know if you have any questions on this part of it.
11B. The other method is to remove the upper control arm mounts and let that drop out of the way. You must support the lower ball joint-control arm during this step.
12. To get the top right front shock lose from the chassis you must remove the coolant tank. 10mm Bolts and a socket works just fine.
13. This is what the top mount looks like. There is a few ways of removing it. First off you can blast it off with a impact. It's kinda hard on the shock if the shaft turns a million rpm, but 95 percent of the time a quick blast and it's off without turning the shaft. You can also use a friend's hand to hold the shock shaft. The other method of doing this is to use a shock socket, ours is a snap on, but the way it looks there is other companies that sell them also. Or you can use a small wrench, or even a vise grip. The Stock shock top nut uses a 15mm and the Bilstein uses a 17mm.
14. The bottom mount I don't have a picture of either
. It's a very simple t-bar setup with a 13mm bolt and 13mm nut. Simply remove them and the shock will fall out of the way.15. Put everything back together the same way it came apart and enjoy a smoother, more planted ride
Thanks guys
Randy
PS if anyone has stuff to add, take away or anything else to the install please let me know. Personally I'm ok at a ton of things, but not a expert in install writeups

The following users liked this post:
2k Cobra (08-16-2016)
06-12-2010, 09:25 PM
#2
Melting Slicks


I put Randy's installation information in PDF format for easy printing.
BilsteinInstallInstructions.pdf
BilsteinInstallInstructions.pdf


 06-13-2010, 12:13 PM
#6
Burning Brakes

06-13-2010, 06:11 PM
#8
Race Director


By popular (1 person) demand, I videotaped me going through the passenger side R+R on my car. Or at least the R part.
1 video is uploading, 1 video is encoding. It's all 1080p, this is a real "grassroots" effort, so don't expect SpikeTV quality narrating or video, but I hope it's enough to give you guys an idea of what's going on. I'll start a new thread with the video links when they're all done.
1 video is uploading, 1 video is encoding. It's all 1080p, this is a real "grassroots" effort, so don't expect SpikeTV quality narrating or video, but I hope it's enough to give you guys an idea of what's going on. I'll start a new thread with the video links when they're all done.
06-14-2010, 10:11 AM
#9
Burning Brakes
Here is a post I made a while back with a couple of slide show attachments
To R&R Shocks without removing the Upper Control Arms or Ball Joints, just compress the Shock and secure it in the colapsed length with a piece of wire. Takes about 1 minute to wire the Shock up, much easier than removing The Upper Controll Arms from the Frame, and you won't throw the alignment off. This way the shortened Shock has plenty of clearace for removal and replacement.

Here is a link to a slide show of step by step Shock Removal
http://s116.photobucket.com/albums/o...view=slideshow
Here is a link to a slide show for step by step Shock Replacement
http://s116.photobucket.com/albums/o...view=slideshow
Front shocks R&R the same way, the mounting bolts are just a little different.
Tighten lower mounting nuts to 21 ft lbs
To R&R Shocks without removing the Upper Control Arms or Ball Joints, just compress the Shock and secure it in the colapsed length with a piece of wire. Takes about 1 minute to wire the Shock up, much easier than removing The Upper Controll Arms from the Frame, and you won't throw the alignment off. This way the shortened Shock has plenty of clearace for removal and replacement.
Here is a link to a slide show of step by step Shock Removal
http://s116.photobucket.com/albums/o...view=slideshow
Here is a link to a slide show for step by step Shock Replacement
http://s116.photobucket.com/albums/o...view=slideshow
Front shocks R&R the same way, the mounting bolts are just a little different.
Tighten lower mounting nuts to 21 ft lbs
05-08-2012, 07:09 PM
#10

I'm in the middle of installing these. Seeing how it's impossible to read torque on the upper front bolt using an allen wrench and end wrench, how do you know when enough is enough when using the DRM bushings? How much compression on the upper bushing do you want to see?
05-08-2012, 11:44 PM
#11
Team Owner


Thanks for the write ups and the vids. I can't wait to get mine and get them installed. Do we have an update for the shipping on the GP yet?
 05-09-2012, 11:20 AM
#14
Former Vendor
Thread Starter
I'm in the middle of installing these. Seeing how it's impossible to read torque on the upper front bolt using an allen wrench and end wrench, how do you know when enough is enough when using the DRM bushings? How much compression on the upper bushing do you want to see?
Randy
05-09-2012, 11:38 AM
#15
01-05-2015, 05:54 AM
#17
Burning Brakes
01-05-2015, 07:48 AM
#18
Le Mans Master

Here is a post I made a while back with a couple of slide show attachments
To R&R Shocks without removing the Upper Control Arms or Ball Joints, just compress the Shock and secure it in the colapsed length with a piece of wire. Takes about 1 minute to wire the Shock up, much easier than removing The Upper Controll Arms from the Frame, and you won't throw the alignment off. This way the shortened Shock has plenty of clearace for removal and replacement.
Here is a link to a slide show of step by step Shock Removal
http://s116.photobucket.com/albums/o...view=slideshow
Here is a link to a slide show for step by step Shock Replacement
http://s116.photobucket.com/albums/o...view=slideshow
Front shocks R&R the same way, the mounting bolts are just a little different.
Tighten lower mounting nuts to 21 ft lbs

I just did this install a couple of months ago on my 10 Z06. I compressed the shocks by hand and used cable ties to hold the compression. I did not remove any suspension components for the installation.

I removed the front shocks and installed the DRM Bilsteins on the front drivers side without moving the coolant tank as well.
09-19-2015, 09:54 PM
#19


I just did this install a couple of months ago on my 10 Z06. I compressed the shocks by hand and used cable ties to hold the compression. I did not remove any suspension components for the installation.
I removed the front shocks and installed the DRM Bilsteins on the front drivers side without moving the coolant tank as well.
Bob
08-16-2016, 08:25 AM
#20

Bringing this thread back from the grave since these shocks are back in stock so I'm sure many members are searching this up anyway.
Just wanted to share a tip that I didn't see included anywhere:
For installing the front Bilsteins, I wasn't able to get the 13mm bolts through because of the difference in angles between the lower A arm and the bolt holes on the T bar end of the shock. If you look at the oem shock, you'll see the bolt holes on the T bar end are angled at about 30* (don't quote me!) to horizontal, which lets them sit flush against the A arm and the bolts slide through easily.
The Bilstein bushing sits with the bolt holes at 0* to horizontal, which made it very hard for me to insert the 13mm bolts due to the difference in angle between the shock end's bolt holes and those of the A arm. So I put one end (the shock's T bar end) in a vice and holding only the yellow steel shock body, just pushed the shock body to the side to make the bushing turn and have the bolt holes mimic the angle of the oem shock's.
This let the 13mm bolts pop right in with no fighting them/forcing anything.
Hope this helps; PM me if unclear.