When you click on links to various merchants on this site and make a purchase, this can result in this site earning a commission. Affiliate programs and affiliations include, but are not limited to, the eBay Partner Network.
C6 Corvette ZR1 & Z06General info about GM’s Corvette Supercar, LS9 Corvette Technical Info, Performance Upgrades, Suspension Setup for Street or Track
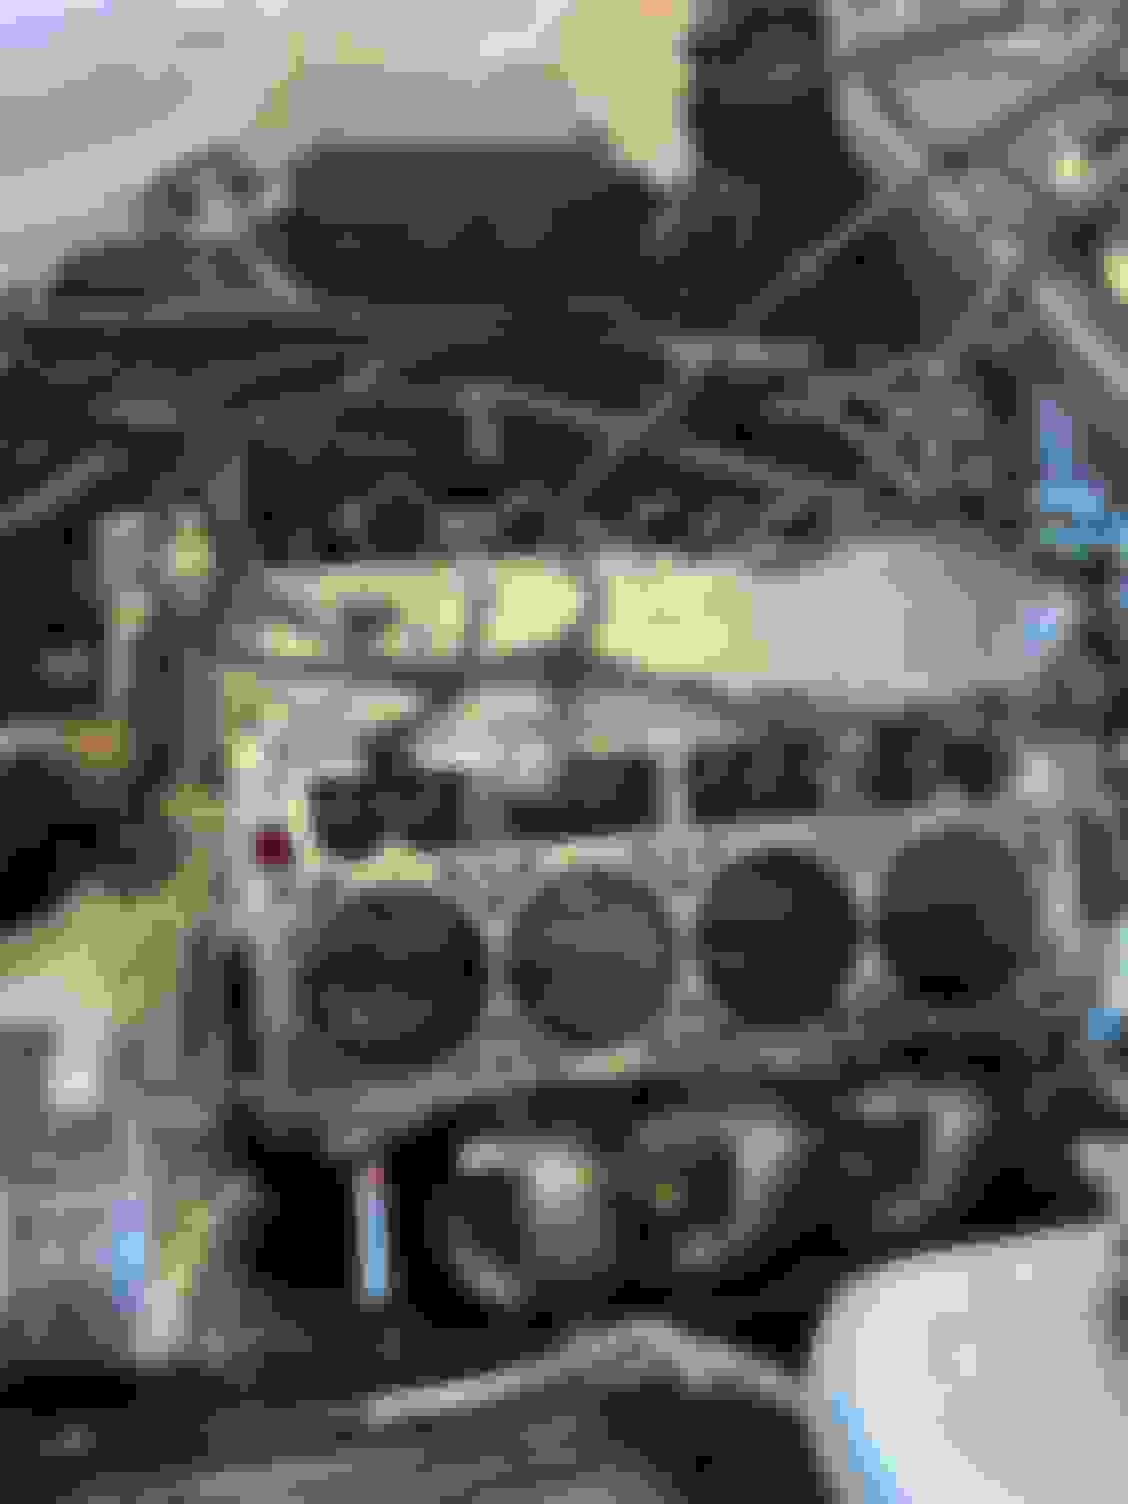
This is what got got back regarding my heads. My car is a 2006 Z06 with just 20k miles. My #2 Intake and #4 Exhaust valves were out of spec. It looks like the #4, 6 and 8 Intake valves were next in line to fall out of spec. I feel very good about being proactive. This car will be open-tracked, auto-crossed and (hopefully) see a couple of flying mile events — and I won’t be worried about this issue when she running close to, or at, redline.
I've pulled my second set of heads using this DIY and I wanted to update that it is possible to separate the alternator bracket from the head without removing the PS pump and PS bracket from it. You can also skip removing the fans and taking the ABS block loose. I will post a couple of pics when I reassemble but here are the important bits:
There are four 15mm bolts that hold the alternator bracket to the head. You can get to three of these fairly easily. The nasty one is the lower inside one, nearest the lower idler pulley. At first glance, you'd think you could get to it through the cutouts in the pulley, but you can't. I got to this one using a 15mm crows foot on a short extension and a ratchet. Once you break it loose you can get your left hand in there to unscrew it. You cannot remove three of the four screws from the bracket, you'll have to leave them in there but you can get them unscrewed from the head and set the entire alternator bracket assembly over to the left several inches, which leaves plenty of room to remove the head. This saved me quite a bit of time.
Great thread and a lot of useful information but.......... I would not use sand paper or any kind of scotchbrite when cleaning the deck surfaces. You would be introducing abrasive silicon carbide debris and it is difficult to contain. I was able to clean the decks with plain white paper towels folded into a pad and acetone. Two or three applications using light pressure to minimize shredding the paper towel is all it took to remove the black gasket residue. You can shop vacuum as you go and suck up the paper towel fibers.
Great thread and a lot of useful information but.......... I would not use sand paper or any kind of scotchbrite when cleaning the deck surfaces. You would be introducing abrasive silicon carbide debris and it is difficult to contain. I was able to clean the decks with plain white paper towels folded into a pad and acetone. Two or three applications using light pressure to minimize shredding the paper towel is all it took to remove the black gasket residue. You can shop vacuum as you go and suck up the paper towel fibers.
I used razor blades, those blue scotch paper towels with lacquer thinner and then alcohol. I've seen bearings fail in a short time in engines that had scotch brite rotary pads used to clean the deck surface. I'd only use them on a bare block that was going to be thoroughly washed.
I would suggest using plastic razor blades to avoid potentially scratching the deck surface. Amazon sells a scraper and 100 plastic blades for 13 bucks.
I thought I'd add some info here as several people have suggested this works earlier in the thread, but didn't provide the secret
This is my second head swap using this excellent thread and this time around I didn't remove the fans or mess with the ABS unit. I also left the power steering pump and its associated sub-bracket attached to the alternator bracket. This saved a lot of time on both the disassembly and re-assembly sides. The only thing I had to get under the car for was to drain the radiator and unbolt the exhaust manifold collectors from the pipes.
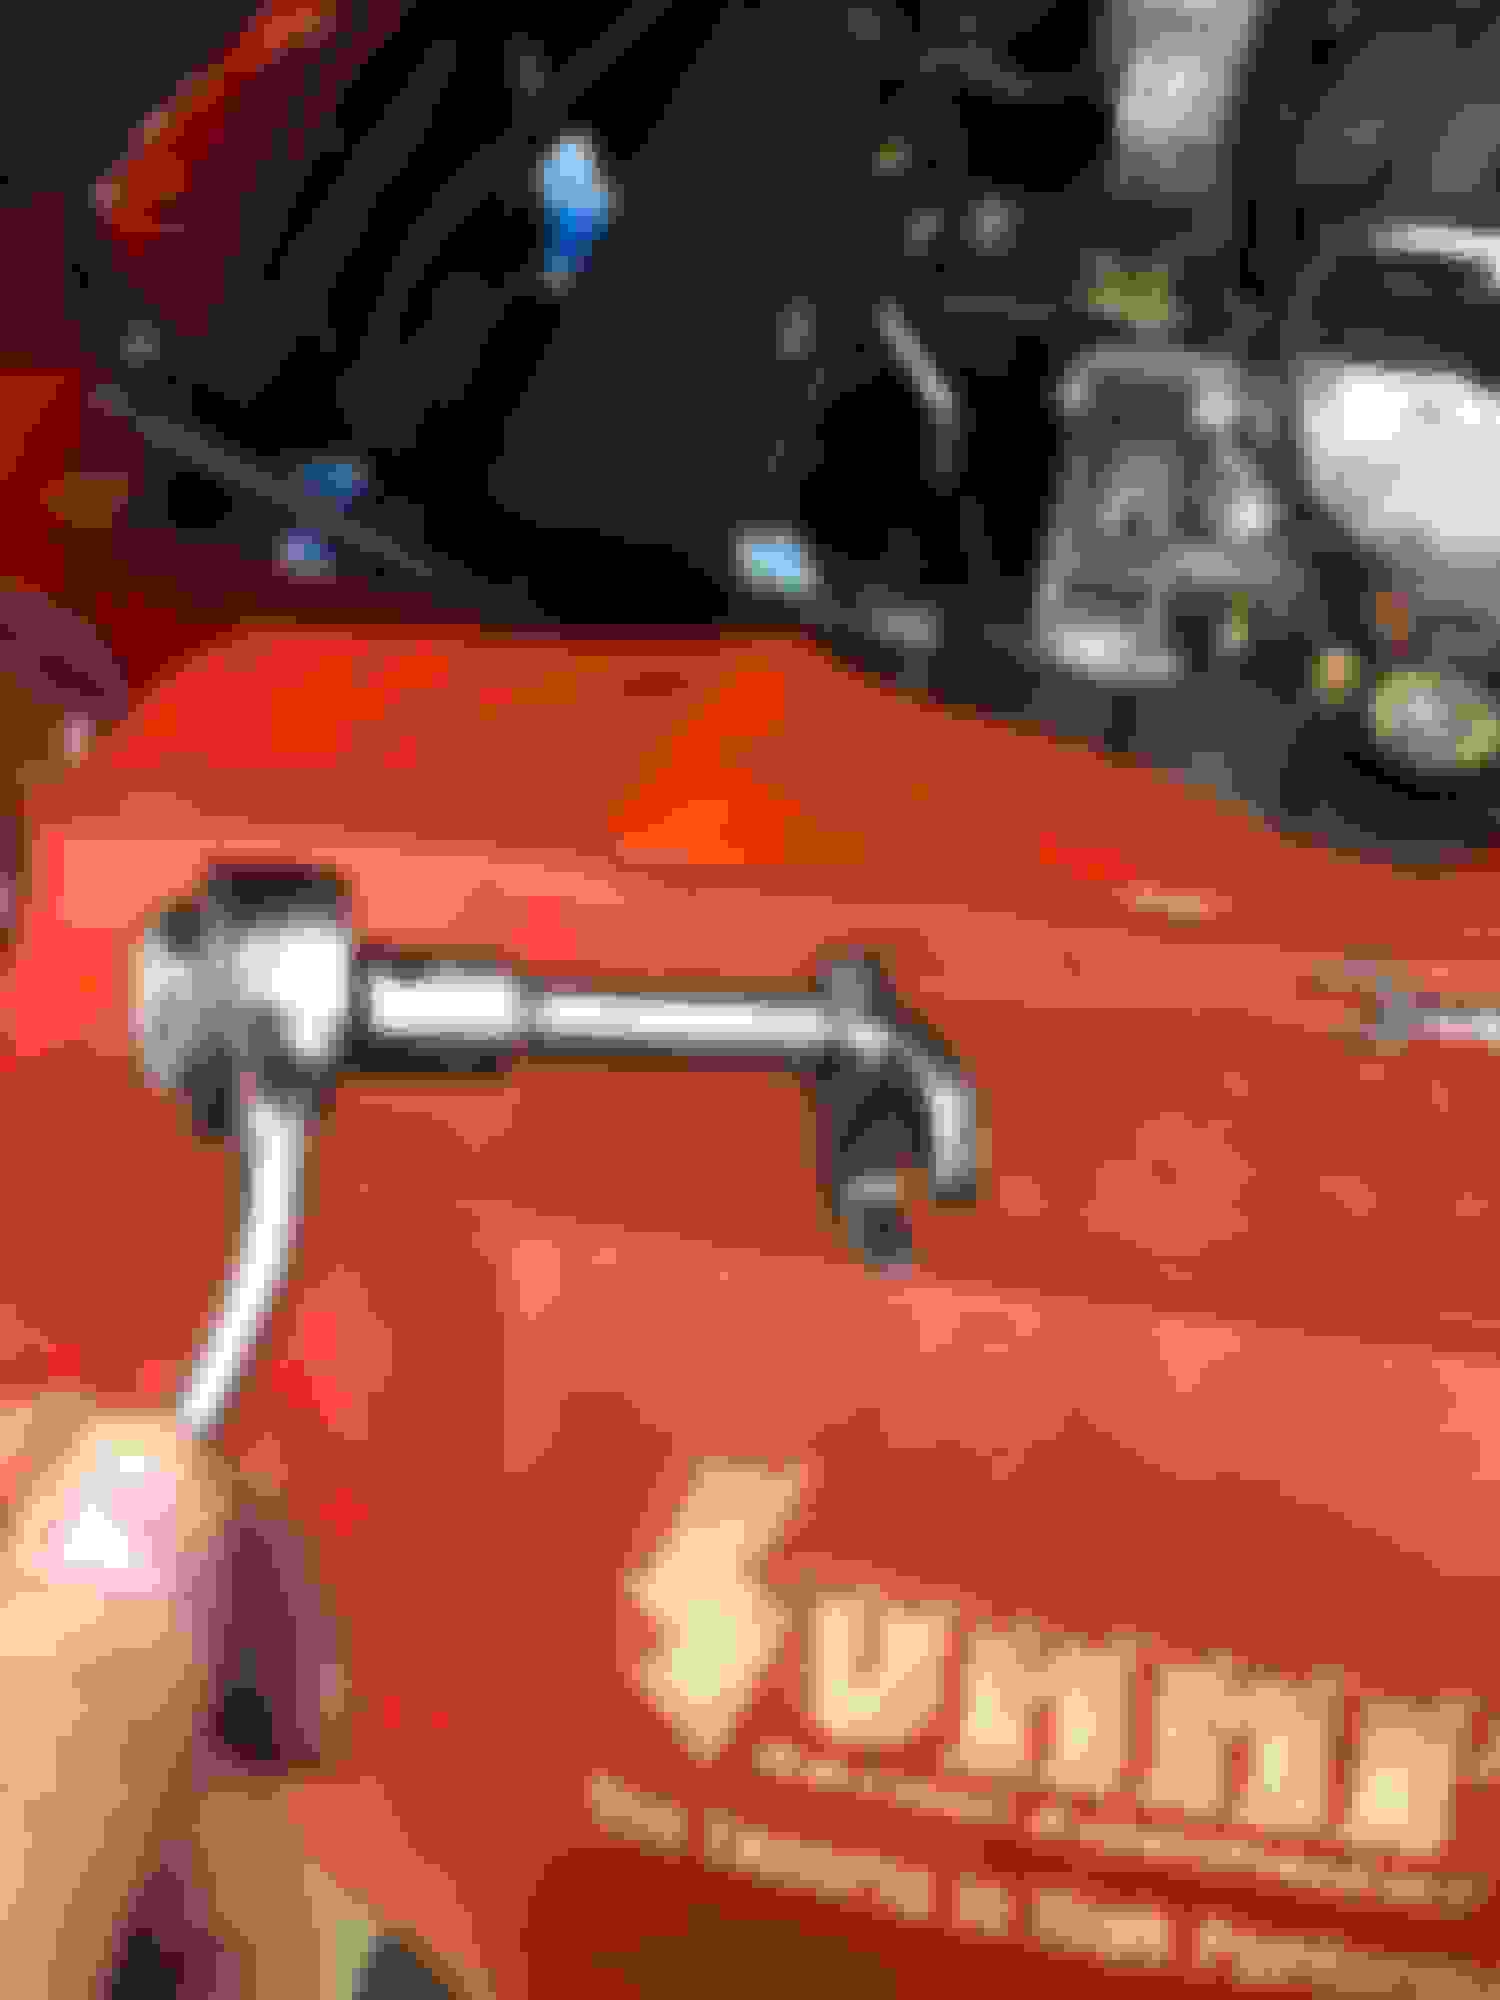
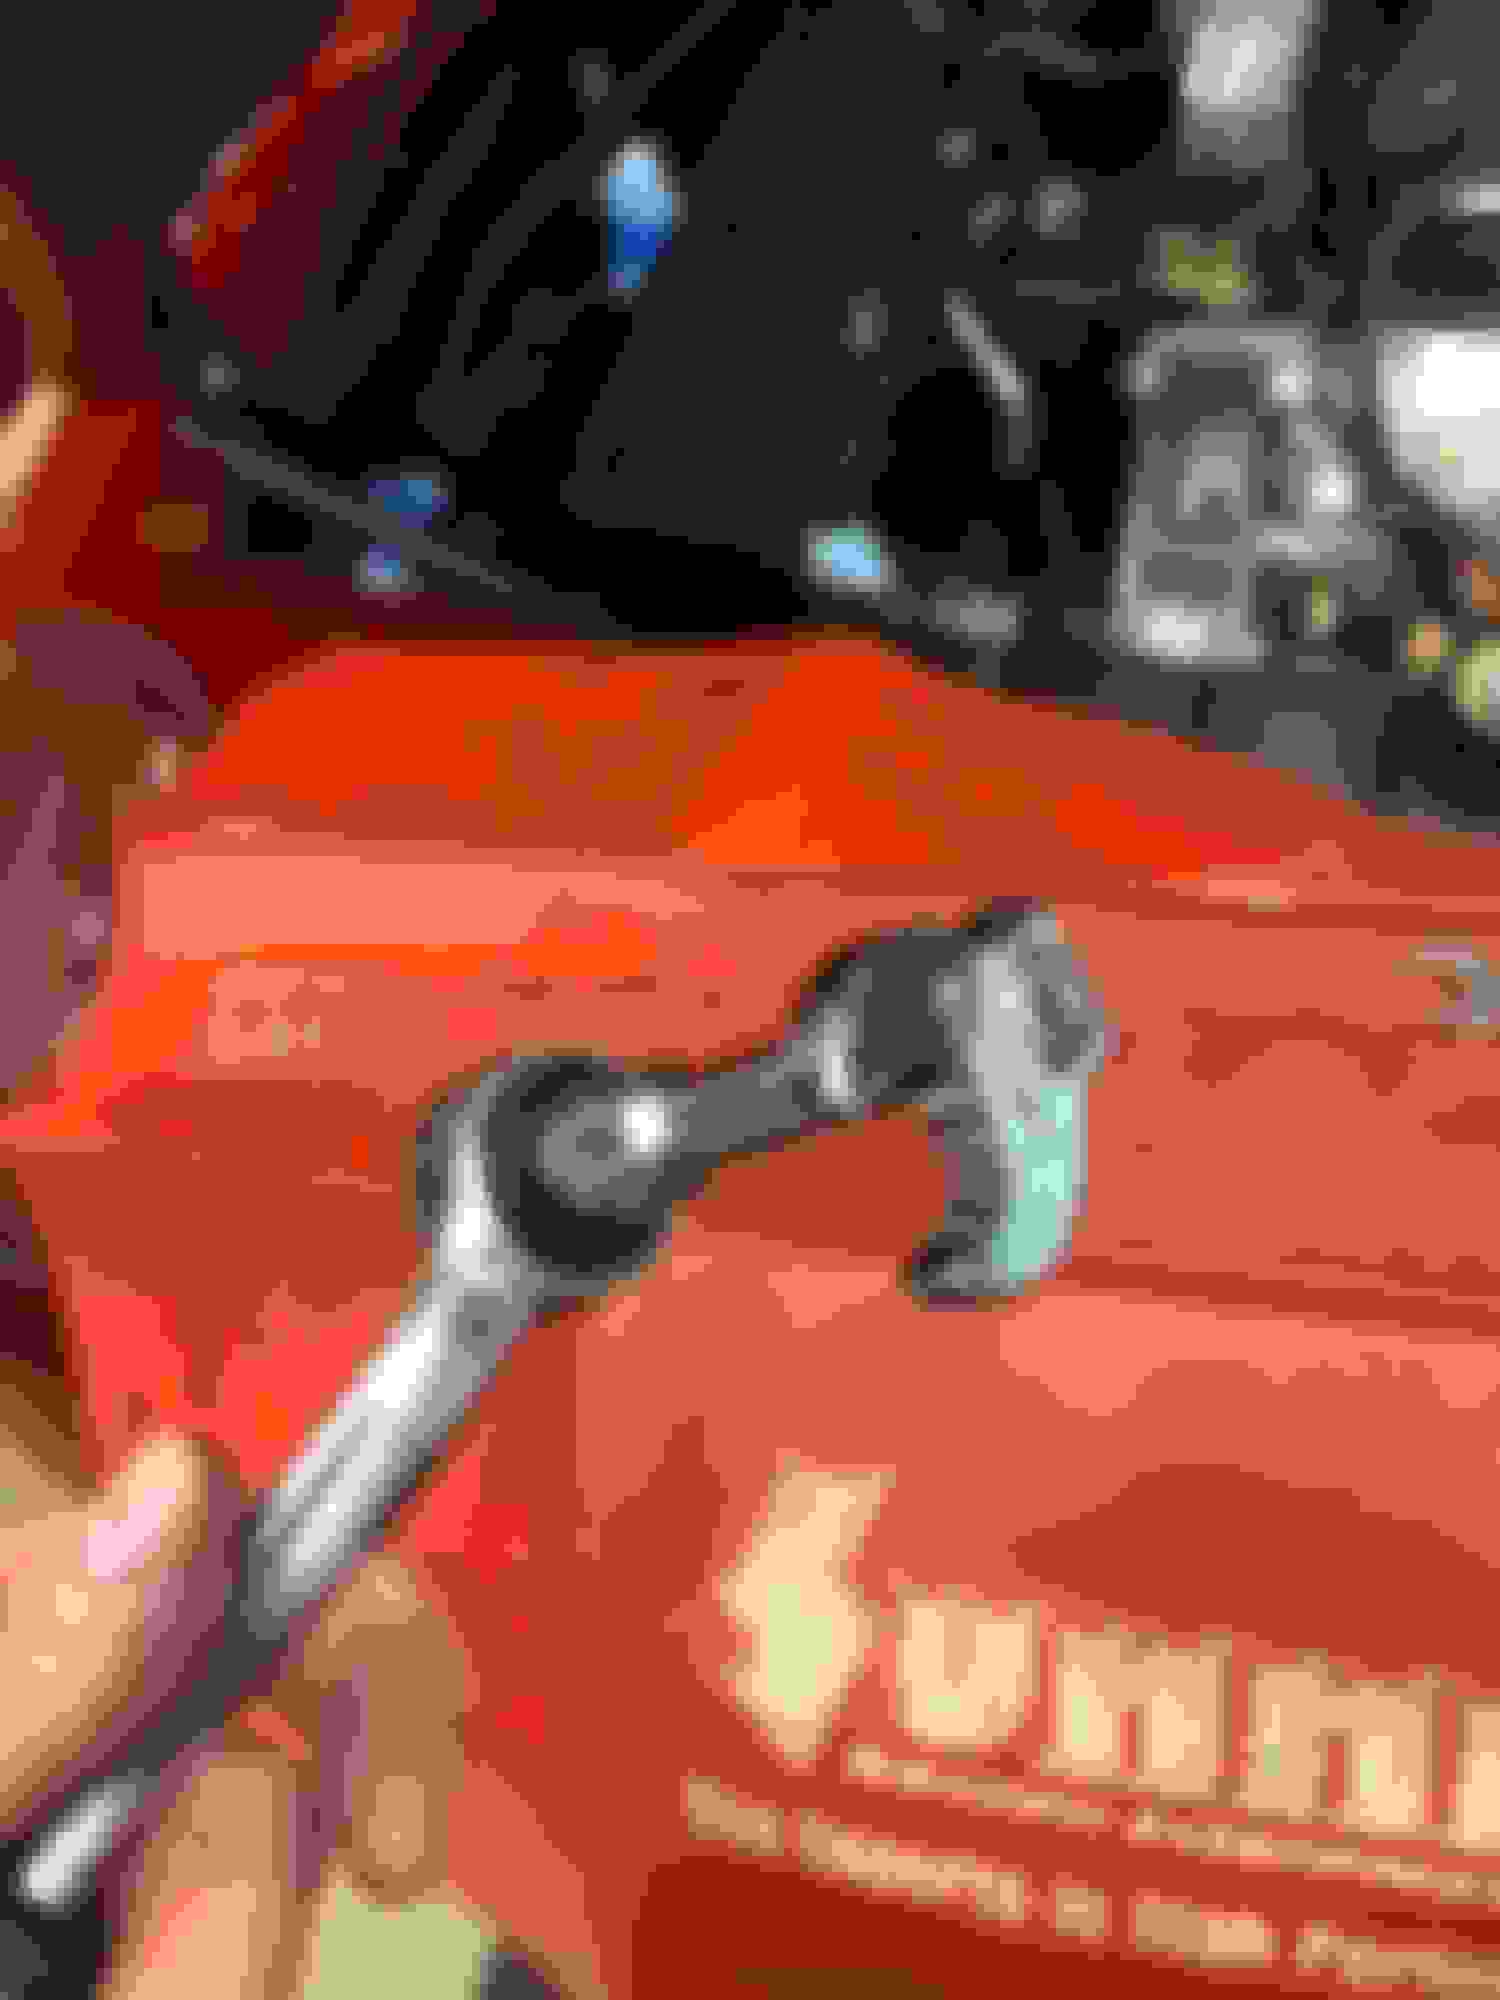
The trick here for me, that no-one explained earlier was loosening the lower inside bolt on the alternator bracket. You can't get to it with an open end wrench. It looks like you should be able to go through the slot in the PS pulley with a socket but the bolt is just offset enough that it wouldn't work for me, even trying a swivel socket. What ended up working great was a 15mm crow's foot on a short 3/8 extension (see pics). Fortunately once I broke the bolt loose it behaved nicely and I was able to loosen it the rest of the way with my fingers (your left hand can get to it fine).
Go ahead and remove the one bolt that will come all the way out of the bracket (its bore is circled in blue). The other three bolts (circled in red) have to stay in the bracket. You can get to the other two with a regular open end wrench. Break them loose and then unscrew them all a half inch or so at a time until the bracket is detached from the head. Then just push the whole alternator-bracket-power-steering-pump assembly towards the front of the car and then you have plenty of room to R&R the head. The bracket never got in my way afterwards.
When re-installing, I put some anti-seize on the ends of the bolts protruding from the bracket and then started all the bolts and wiggled the bracket around until I got all of them screwed all the way in. Then I used the crow's foot and open-ended wrench to tighten them fully. There is no way to get at these with a torque wrench, but I don't see as it matters on this bracket.
Make sure the crow's foot and open-end wrenches you are using are of decent quality and fit the bolt heads tightly. Sloppy loose tools may round them off as you're hitting some of them at a little bit of an angle. Yes, my crow's foot is cheap Chinese, but it happened to fit well.
This was a major time saver and removed a lot of hassle. The last time I did it by removing the PS pump from the bracket and I remember that getting that little sub-bracket back in there and the whole process was much more frustrating.
Thanks to all who contributed to this thread! I used a lot of the tips and tricks when I pulled my heads a week or so ago. For me the two worst parts were that one bad alternator bracket bolt (I used the crow's foot ...thank you disney7!...on a ratchet to break it loose and just used the crow's foot and short extension in my hand without the ratchet to back the bolt out, went quickly once I realized that) and the other was the brake booster hose clamp on the back of the intake...I actually broke a tab off on one side trying to open the clamp with pliers! No idea why it was on so tight, but I got it eventually.
I would echo what others have said regarding the difficulty of this procedure...if you have tools, space and average mechanical aptitude, it is a straight forward and basically easy process to complete.
I’m starting my head swap today. So far your diy tutorial has helped immensely. I’ve got everything I need for the swap and thanks to your post, I have all the info.
thankyou so much for taking the time to post. Truly the best post on this forum.
Glad to see this is still a value to the community and I recently heard, someone was adapting this write up for the Z/28 LS7 guys on Camaro5 where I'm known as Sakudog. Thank you to everyone who has helped improve the thread and the feedback from those who have used it and found it helpful. It is by no means perfect but it was a good start. Enjoy those trouble free LS7s !!!
Ok so someone educate me here. I'm old school chevrolet where we just torqued the heads to 65ftbs for aluminum heads. But what I'm reading here is the heads are torqued to 22 ftbs, untorqued one turn then retoqued to 22 twice once at 90 degrees and the other at 70 degrees? I need some splaning here....
Ohhhhhhhh mannnnnnn. Lmfao. "I need some splaning here" I FEEL YOU MY BROTHER. I FEEL YOU. THAT WAS SOME FUNNY ****. WE FROM THE SOUTH DOWN HERE AND WWE GO WAYYYYY BACK TO THE 70s WHEN TUNNELRAMS AND HOLLEYS WERE THE **** , DON'T WE MY BROTHER
This write up has been a HUGE help, as I'm in the middle of my head swap on my '13 427 convert. The crow's foot procedure is absolutely priceless!! I never work on any Corvette that I've owned without doing a quick bit of research here on the forum. Last year it was rehabbing the optispark on my '96 LT4, this year LS7 heads...
Whatever you need to do when turning a wrench on a "vette, it's all here!! Thanks to ALL that contributed to making fellow Vette owner's life better!! MUCHO Gracias!!
I've used this thread extensively doing a head swap on my 2013 427 convertible in the past several weeks. What a write up!! Tons of great tips and info....
But my only two digressions are 1) there's really no need to touch/ move the ABS pump module from the fan, there's enough ( barely ) to do what needs to be done.
2) the "crow's foot" short cut is not needed at all if you remove the water pump, and at 8 yrs old or better, xxxx number of miles, changing the water pump isn't a bad idea, and it's easy and cheap. That horrible p/s and alternator bracket is no fun, but with the water pump removed, it gets way easier. Other than that, job is pretty straight forward. Yes, wrestling with the headers is terrible, and my head bolts must have gotten plenty of thread sealer, as they were very hard to remove. I made sure to chase all the threads with the ARP thread cleaning tap, and assembly went smoothly.. I was meticulous about checking/ measuring push rod length because I am installing Brodix BR7 heads. They measured out exactly 7.6'', so I ordered 7.675'' push rods to give me close to mid lifter preload. I'll report more as I get closer to completion.
I just used this writeup to install AHP fixed and ported heads. I had never done anything more than simple bolt-on mods before this project. This write-up walked me through everything. Glad I decided to tackle this project. Learned a ton about the car.
I just used this writeup to install AHP fixed and ported heads. I had never done anything more than simple bolt-on mods before this project. This write-up walked me through everything. Glad I decided to tackle this project. Learned a ton about the car.
Nice to see guys doing their own head swaps on the LS7! Its actually one of the easiest head swaps you will ever do on any car. There are no smog devices to get in the way like on other models, no big battery or thick wiring harness to get in the way. The LS7 head swap is actually a very enjoyable head swap and capable by anyone who is capable of paying attention.
Hardest part is the power steering bracket bolts but other than that its pretty strait forward. Just to be sure you reinstall your lash caps on the intake valve stems.
The lash caps go on the intake valve stems not the exhaust, DO NOT FORGET TO INSTALL THE INTAKE VALVE LASH CAPS!
Cheers!
I also swapped my heads last month. I’d say it’s on par with a timing belt job.
The most difficult part (requires patience) is the alternator bracket…just go for the 4 bolts and be done. It’s not worth moving the abs unit or even the power steering pump.
The most tedious parts are torquing the rocker arms with the pistons at TDC, along with cleaning all the head gasket material off the block.
Exhaust manifolds are a little bit cumbersome without a second set of hands.
Don’t forget the lash caps, and also don’t forget the crossover coolant tube that goes UNDER the intake manifold. I made this mistake, but was somehow able to get it through without re-pulling the intake…I’m really glad I did too, because I had just gotten the pcv hoses and wiring harness back into place when I realized it. Also, my coolant temp sensor sheared completely off with NO torque when reinstalling it. It may be best not to reuse the sensor.
Again, if anyone has done a timing belt job this is similar in difficulty. It’s a longer job, but just as critical. Take pictures of harness routing, pcv routing, Evap hose routing, and stay organized.
There is no better sound than that engine lighting back up for the first time after being under anesthesia for a month.
I replaced all the exhaust valves. This engine has 3800 miles on it and was already starting to smear the exhaust valves. I have video of the guide wear but cannot upload it.
[QUOTE=I replaced all the exhaust valves. This engine has 3800 miles on it and was already starting to smear the exhaust valves. I have video of the guide wear but cannot upload it.[/QUOTE]
Pretty sure your oil ingestion is probably coming thru your intake, just saying.

 01-30-2018, 09:38 PM


 I used razor blades, those blue scotch paper towels with lacquer thinner and then alcohol. I've seen bearings fail in a short time in engines that had scotch brite rotary pads used to clean the deck surface. I'd only use them on a bare block that was going to be thoroughly washed.