
[Z06] Changing Clutch Fluid With The Tick Remote Clutch Bleeder
 05-26-2013, 04:56 PM
#1
Team Owner

Thread Starter


Some of you guys will be installing new clutches in the near future, and as such, you might want to consider a remote clutch bleeder. A couple of vendors in here offer them, and they make changing out your clutch fluid a lot easier.
First off I want to say, that the way I am doing this, is the "hard way" as the Tick Remote Clutch Bleeder does come with a Speed Bleeder attached to it, making this an easier job, and a one man job.
That said, I have heard of Speed Bleeders failing, and elected to go this route, which is also useful should you have a remote bleeder which does not have a Speed Bleeder on the end of it.
The Tick Remote Clutch Bleeder can be purchased here
http://www.hinsonsupercars.com/p-130...08-c6-z06.aspx
http://www.tickperformance.com/tick-...6-04-07-cts-v/
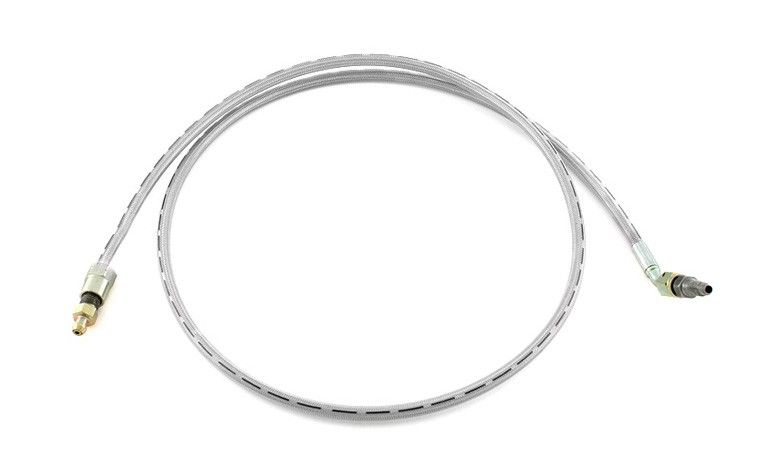
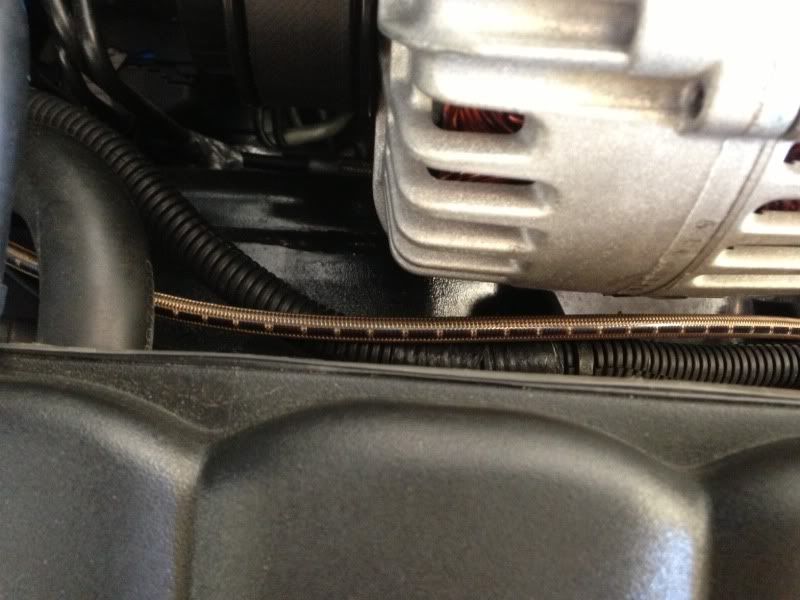
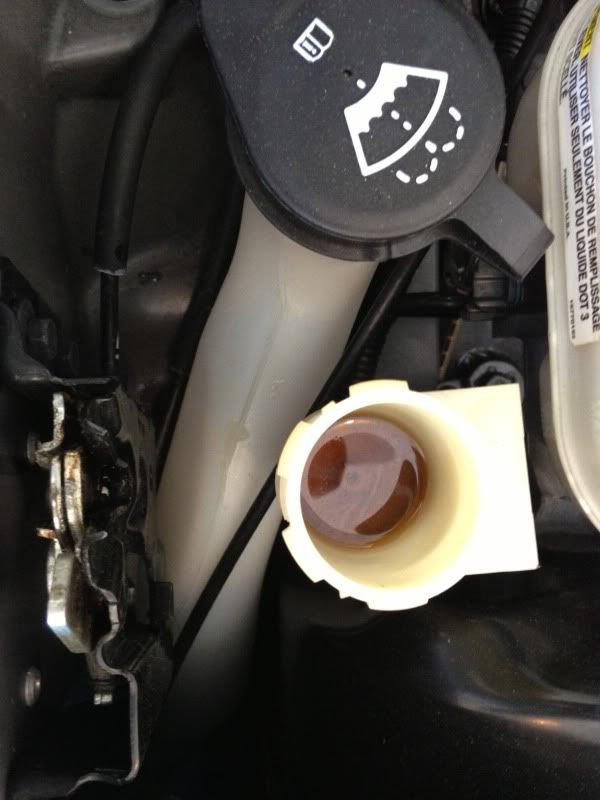
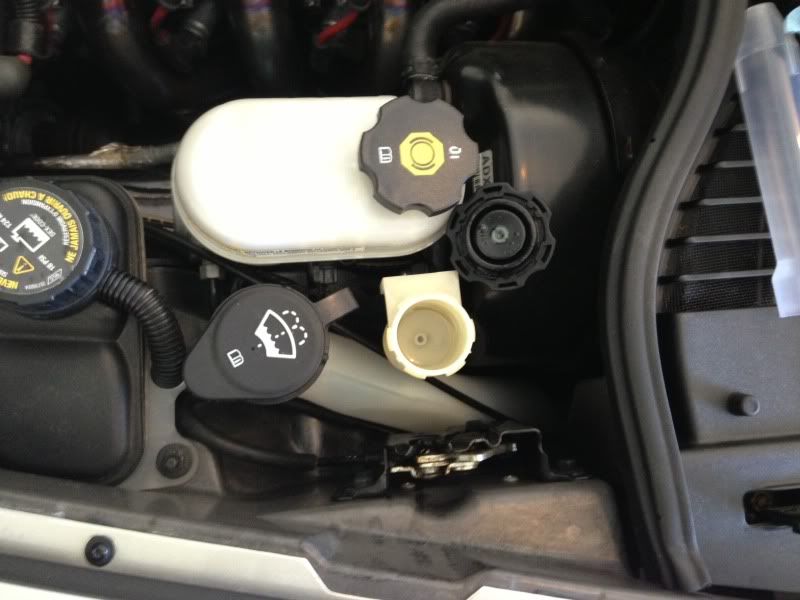
It has a 45� angle attachment which goes into the slave cylinder. Mine was run along the back of the firewall and forward as shown in the pics below.

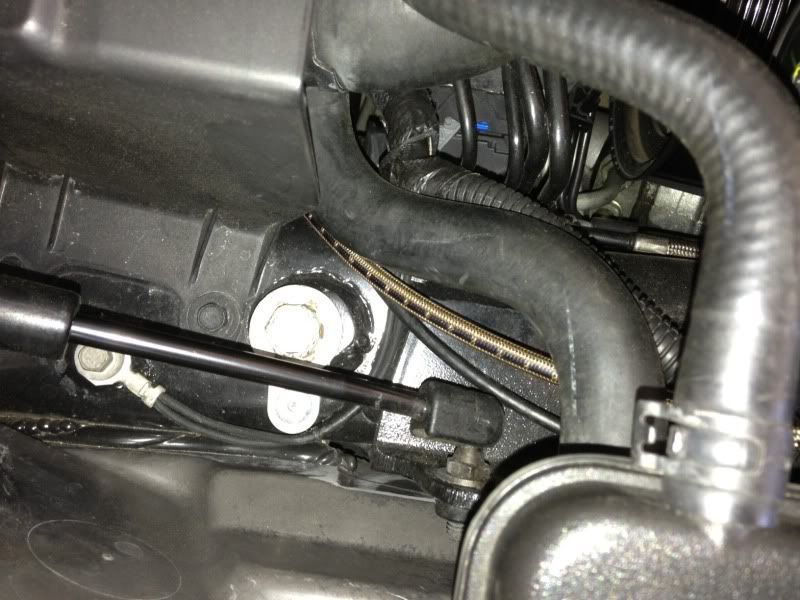
Zip ties are used to keep it away from hot items like your alternator and your exhaust manifolds or headers
Tucked out of the way.
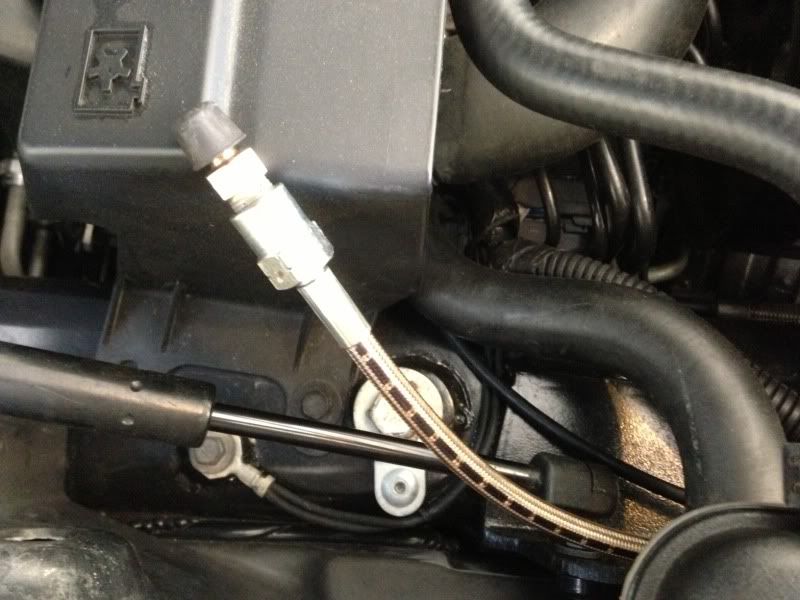
And using the stock dust cover cap over the Speed Bleeder.
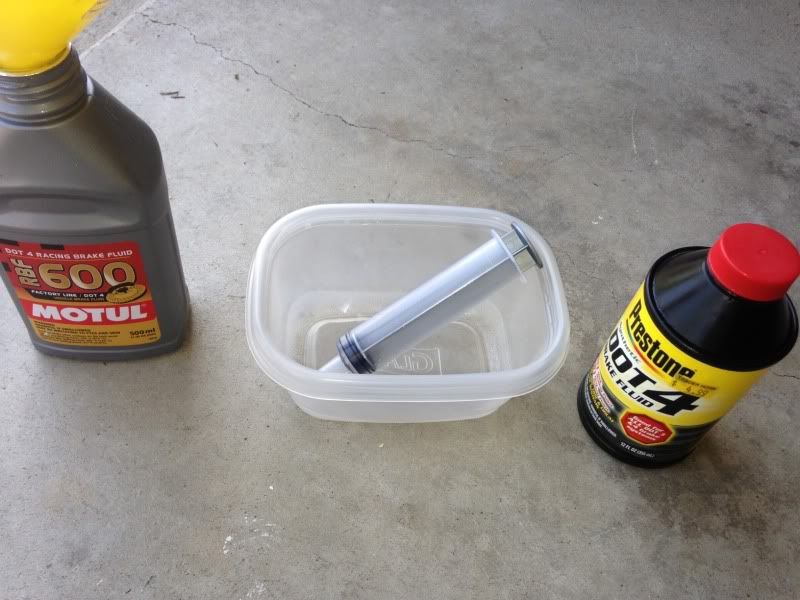
These were the items I used. Some left over clutch fluid from a part used bottle for the Glad basin, and my old syringe I used during the days when I used the Ranger method, and a new bottle of clutch fluid.
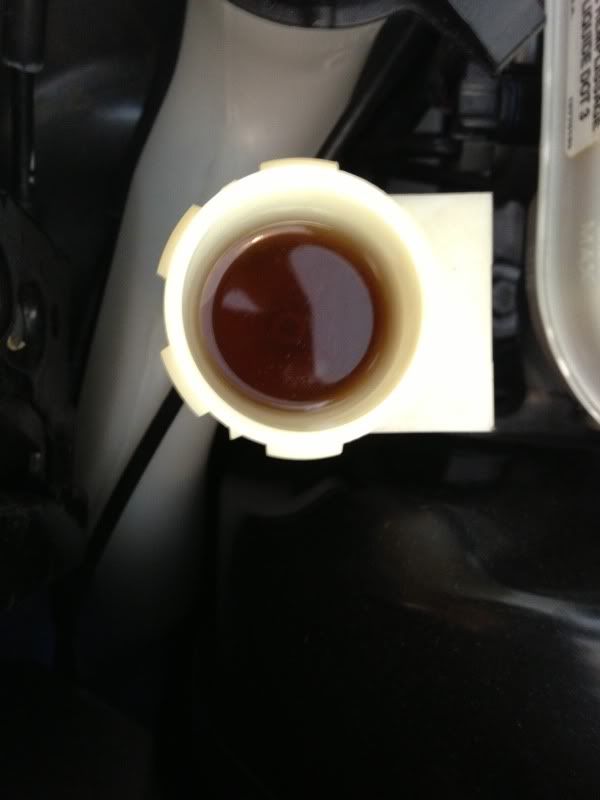
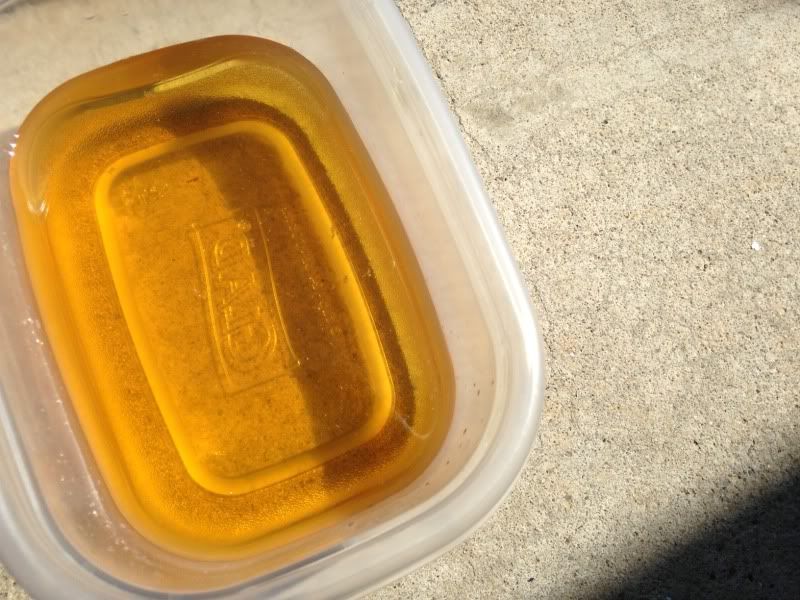
This is what the fluid looked like, before I changed it. I've seen worse, but no need to let this get any worse.
I put the catch basin in a secure area and estimated how much clutch fluid I would need to keep the end of the bleeder submerged in clutch fluid so that if the Speed Bleeder failed, that I wouldn't end up sucking air into the system.
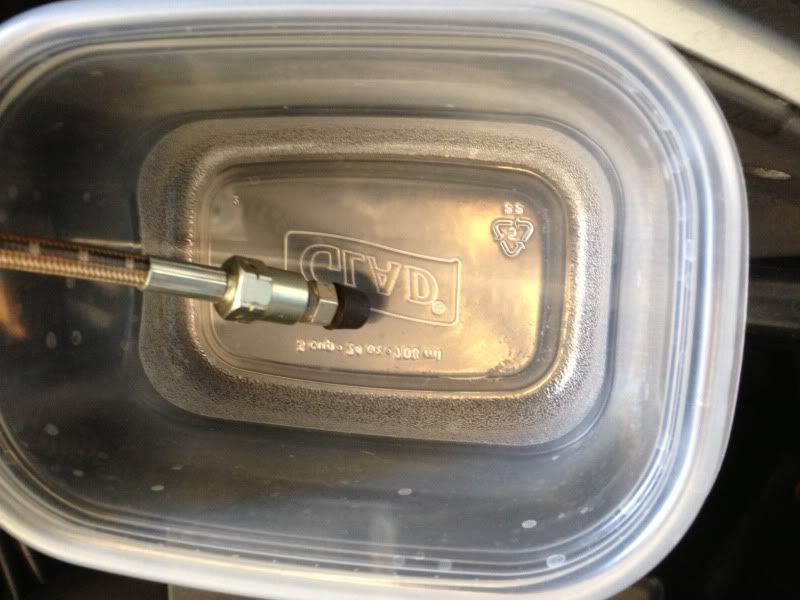
And then added a little clutch fluid to the basin.
Then I loosened the connection while it was still submerged and pushed in the clutch pedal.
It goes to the floor with little effort, and when it does, the old clutch fluid goes into the basin. You can see it as it pushes through.
The trick here, is to never let the reservoir go dry, and keep the end of your bleeder submerged to prevent the possibility of sucking in air into the line.
You'll have to slowly lift the pedal off the floor so as to prevent splatter from the reservoir, while the lid is off, and push it to the floor again.
It is during this lifting the pedal off the floor, that you don't want to introduce air into the system, and is the reason for submerging the end of the bleeder into the basin of clutch fluid.
Then without letting the well go dry, start adding your new clutch fluid.
When this mixes with the remaining clutch fluid in the well and you reach the full mark on it, slowly depress your pedal again a couple of times, to chase out more of the old fluid, which will now start to mix with your new fluid.
As your old fluid starts to mix with the new fluid in the basin, you can take your syringe and draw some of it out, if you need to, in order to prevent the basin overflowing.

You repeat this process a few times, depressing and lifting the pedal a couple of times before you add more fluid to the reservoir, and never letting the reservoir go dry, and eventually, things clean up and all that you are running through, is clean clutch fluid. Which is what you see in the reservoir now.
When you get it all clear, lift the pedal and tighten your remote bleeder connection. Still submerged. Clean the cap up, and put the cap back onto the reservoir to close off the system, and pump the clutch a few times back up to where it was when you started.
If you are successful, you will have gotten no air into the system, and your pedal should be right where it was when you started.
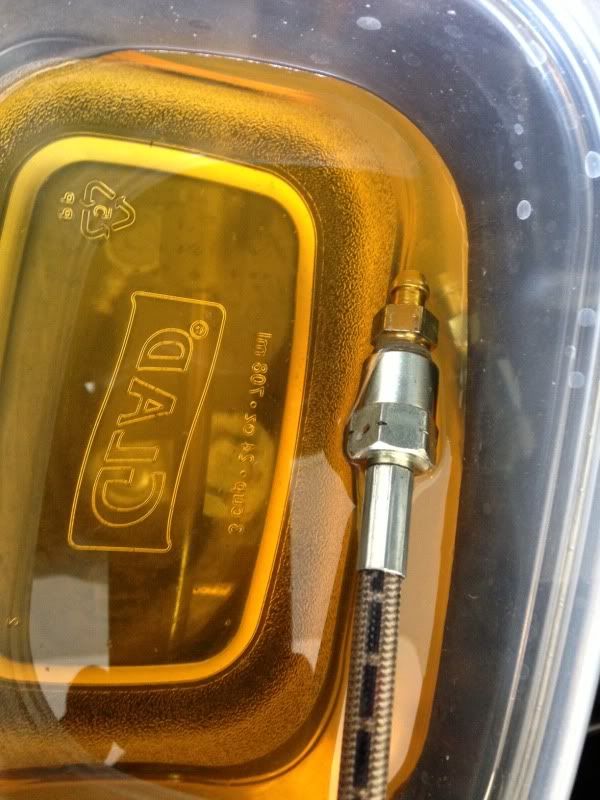
This is what the old stuff looked like when mixed with the new fluid I put into the basin before starting.
First off I want to say, that the way I am doing this, is the "hard way" as the Tick Remote Clutch Bleeder does come with a Speed Bleeder attached to it, making this an easier job, and a one man job.
That said, I have heard of Speed Bleeders failing, and elected to go this route, which is also useful should you have a remote bleeder which does not have a Speed Bleeder on the end of it.
The Tick Remote Clutch Bleeder can be purchased here
http://www.hinsonsupercars.com/p-130...08-c6-z06.aspx
http://www.tickperformance.com/tick-...6-04-07-cts-v/
It has a 45� angle attachment which goes into the slave cylinder. Mine was run along the back of the firewall and forward as shown in the pics below.
Zip ties are used to keep it away from hot items like your alternator and your exhaust manifolds or headers
Tucked out of the way.
And using the stock dust cover cap over the Speed Bleeder.
These were the items I used. Some left over clutch fluid from a part used bottle for the Glad basin, and my old syringe I used during the days when I used the Ranger method, and a new bottle of clutch fluid.
This is what the fluid looked like, before I changed it. I've seen worse, but no need to let this get any worse.
I put the catch basin in a secure area and estimated how much clutch fluid I would need to keep the end of the bleeder submerged in clutch fluid so that if the Speed Bleeder failed, that I wouldn't end up sucking air into the system.
And then added a little clutch fluid to the basin.
Then I loosened the connection while it was still submerged and pushed in the clutch pedal.
It goes to the floor with little effort, and when it does, the old clutch fluid goes into the basin. You can see it as it pushes through.
The trick here, is to never let the reservoir go dry, and keep the end of your bleeder submerged to prevent the possibility of sucking in air into the line.
You'll have to slowly lift the pedal off the floor so as to prevent splatter from the reservoir, while the lid is off, and push it to the floor again.
It is during this lifting the pedal off the floor, that you don't want to introduce air into the system, and is the reason for submerging the end of the bleeder into the basin of clutch fluid.
Then without letting the well go dry, start adding your new clutch fluid.
When this mixes with the remaining clutch fluid in the well and you reach the full mark on it, slowly depress your pedal again a couple of times, to chase out more of the old fluid, which will now start to mix with your new fluid.
As your old fluid starts to mix with the new fluid in the basin, you can take your syringe and draw some of it out, if you need to, in order to prevent the basin overflowing.
You repeat this process a few times, depressing and lifting the pedal a couple of times before you add more fluid to the reservoir, and never letting the reservoir go dry, and eventually, things clean up and all that you are running through, is clean clutch fluid. Which is what you see in the reservoir now.
When you get it all clear, lift the pedal and tighten your remote bleeder connection. Still submerged. Clean the cap up, and put the cap back onto the reservoir to close off the system, and pump the clutch a few times back up to where it was when you started.
If you are successful, you will have gotten no air into the system, and your pedal should be right where it was when you started.
This is what the old stuff looked like when mixed with the new fluid I put into the basin before starting.
Last edited by '06 Quicksilver Z06; 05-26-2013 at 07:03 PM.
 05-26-2013, 05:20 PM
#3
Team Owner
Thread Starter
Thanks Chad.
This makes matters a lot easier for the guys who will be installing new clutches.
And like I say, if you trust Speed Bleeders, then you don't have to go to the trouble of submerging the end of the bleeder hose into clutch fluid.
This makes matters a lot easier for the guys who will be installing new clutches.
And like I say, if you trust Speed Bleeders, then you don't have to go to the trouble of submerging the end of the bleeder hose into clutch fluid.
05-27-2013, 08:32 AM
#4
Team Owner
I swapped from tick to katech after the tick failed twice.
05-27-2013, 10:08 AM
#5
Team Owner
Thread Starter
Where did it fail? Did it hit the tunnel housing?
I had heard of some of the older ones, made by another company without the 45� angle on them failing, but never the Tick.
The one in this illustration wasn't a Tick, and is a bit larger.
http://forums.corvetteforum.com/c6-t...e-bleeder.html
I had heard of some of the older ones, made by another company without the 45� angle on them failing, but never the Tick.
The one in this illustration wasn't a Tick, and is a bit larger.
http://forums.corvetteforum.com/c6-t...e-bleeder.html
Last edited by '06 Quicksilver Z06; 05-27-2013 at 10:17 AM.
05-27-2013, 11:41 AM
#6
Tech Contributor
Member Since: Oct 1999
Location: Charlotte, NC (formerly Endicott, NY)
Posts: 40,089
Received 8,928 Likes
on
5,333 Posts

The easiest way to do it is to use a vacuum brake bleeding tool either hand or air powered. I have the Vacula which has a built in reservoir for waste fluid so all I do is hook up the air line, attach the Vacula hose to the brake bleeder, open the bleeder and squeeze the handle on the Vacula while adding fresh fluid to the clutch reservoir. If I don't add the fluid at the same time it is easy to suck air into the system in a matter of seconds. When the fluid coming out of the bleeder runs clear I adjust the level of fluid in the reservoir and disconnect everything. Doesn't take more than a few minutes to flush the clutch fluid. I like doing it this way since it is definitely a one person job with less chance of brake fluid accidentally getting on any paint.
Bill
Bill
05-27-2013, 11:55 AM
#7
Team Owner
Thread Starter
The easiest way to do it is to use a vacuum brake bleeding tool either hand or air powered. I have the Vacula which has a built in reservoir for waste fluid so all I do is hook up the air line, attach the Vacula hose to the brake bleeder, open the bleeder and squeeze the handle on the Vacula while adding fresh fluid to the clutch reservoir. If I don't add the fluid at the same time it is easy to suck air into the system in a matter of seconds. When the fluid coming out of the bleeder runs clear I adjust the level of fluid in the reservoir and disconnect everything. Doesn't take more than a few minutes to flush the clutch fluid. I like doing it this way since it is definitely a one person job with less chance of brake fluid accidentally getting on any paint.
Bill
Bill
So it sucks the old fluid through the bleeder hose as you squeeze the handle, and you add new fluid as you squeeze the handle to keep the reservoir from running dry?
05-27-2013, 04:04 PM
#8
Team Owner
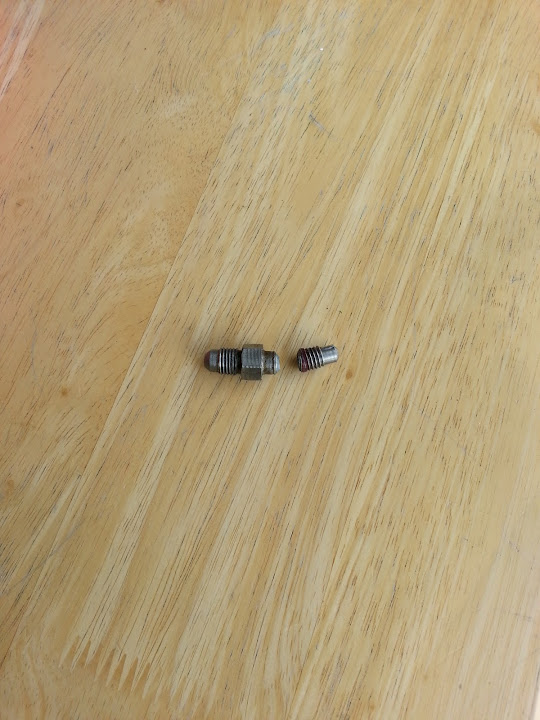
Yes it was a tick. First time the end going to the adapter by the fitting had a burr causing a leak. 2nd time that fitting just cracked in 1/2. I didn't want to do it again so I ordered the katech. It is a much nicer line. Better fittings, and isn't super long and big which makes bleeding and routing it even easier.
05-27-2013, 04:10 PM
#9
Team Owner
Thread Starter
Yes it was a tick. First time the end going to the adapter by the fitting had a burr causing a leak. 2nd time that fitting just cracked in 1/2. I didn't want to do it again so I ordered the katech. It is a much nicer line. Better fittings, and isn't super long and big which makes bleeding and routing it even easier.
Looks like the straight fitting before you get to the angle, broke.
FWIW, I had a Katech bleeder and got rid of it.
Much smaller at the neck, and didn't have the speed bleeder on it if I recall, but then I didn't use it anyway.
Last edited by '06 Quicksilver Z06; 05-27-2013 at 04:15 PM.
12-16-2015, 06:23 PM
#10
Drifting

Member Since: Jul 2011
Location: Boise, ID
Posts: 1,589
Received 377 Likes
on
187 Posts
2022 C5 of the Year Finalist - Modified
2021 C5 of the Year Finalist - Modified
C5 of Year Finalist (appearance mods) 2019

Thanks for this post, just bleed my clutch with the tick remote bleeder, good to go.