
My UPP Twin Turbo thread
 08-07-2011, 04:42 PM
#61
Safety Car

Thread Starter
Member Since: Feb 2008
Location: TEXOMA
Posts: 3,712
Likes: 0
Received 3 Likes
on
3 Posts
St. Jude Donor '08-'09

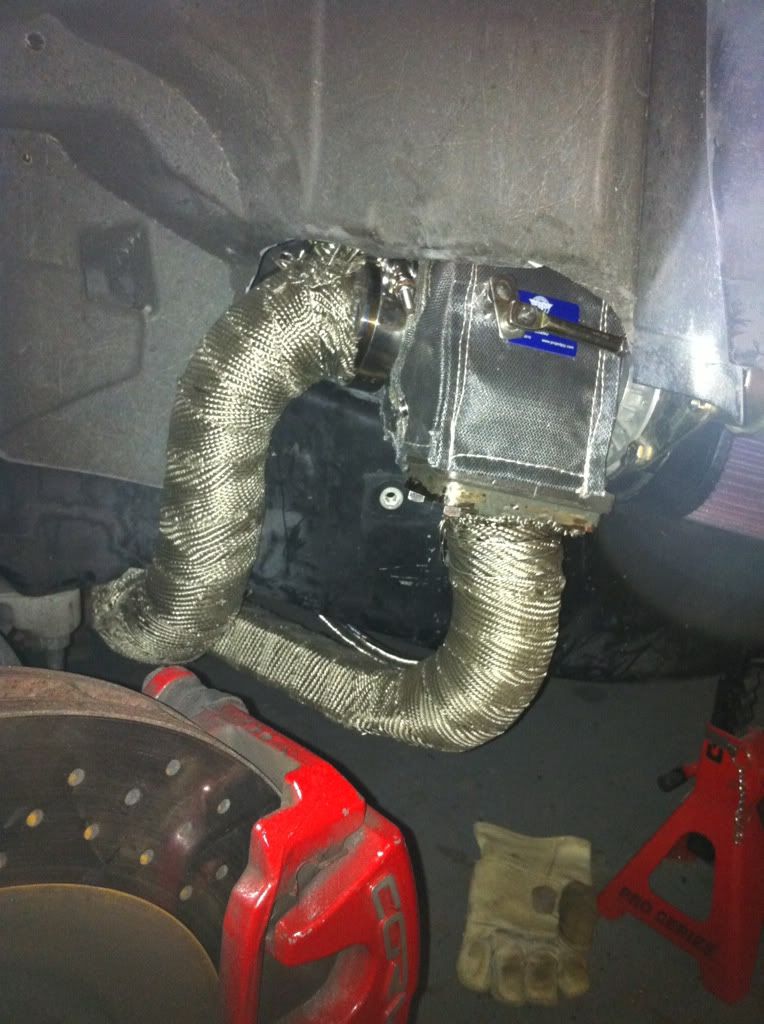
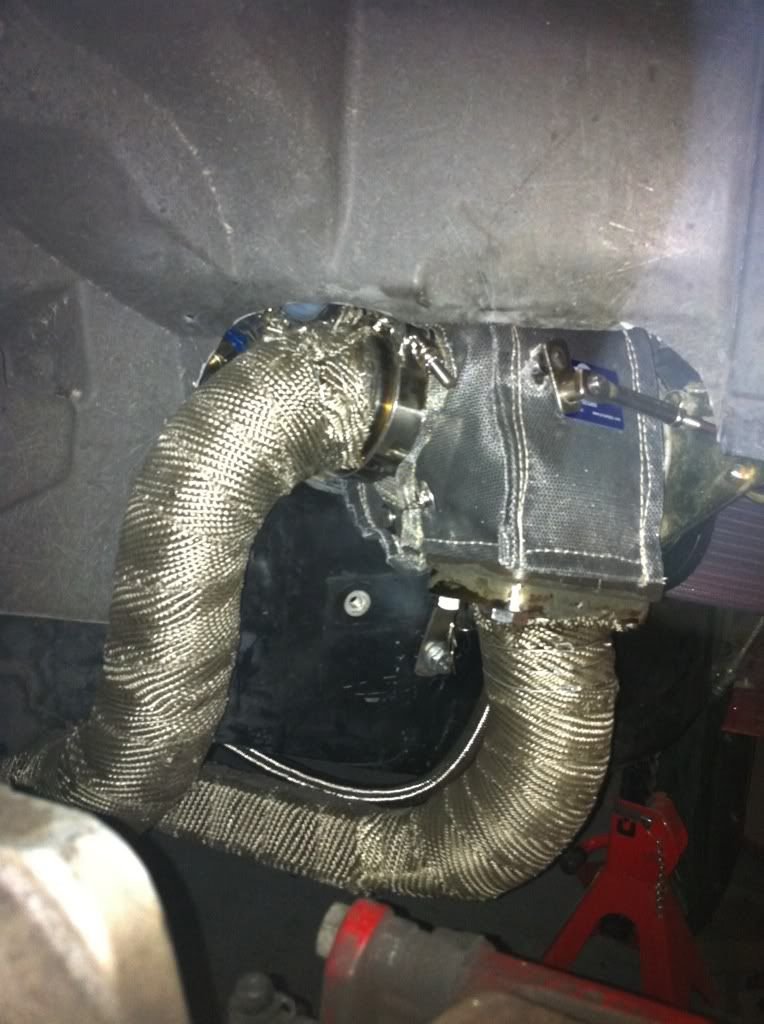
well, i sealed up the flanges on the passenger side. and installed a PTP turbo blanket, at first i didn't want one, but i got a real good deal on two of them. now im trying to figure out how the fender is supposed to fit with the air filter attached, i dont see how without cutting out the scope attached the the fender.
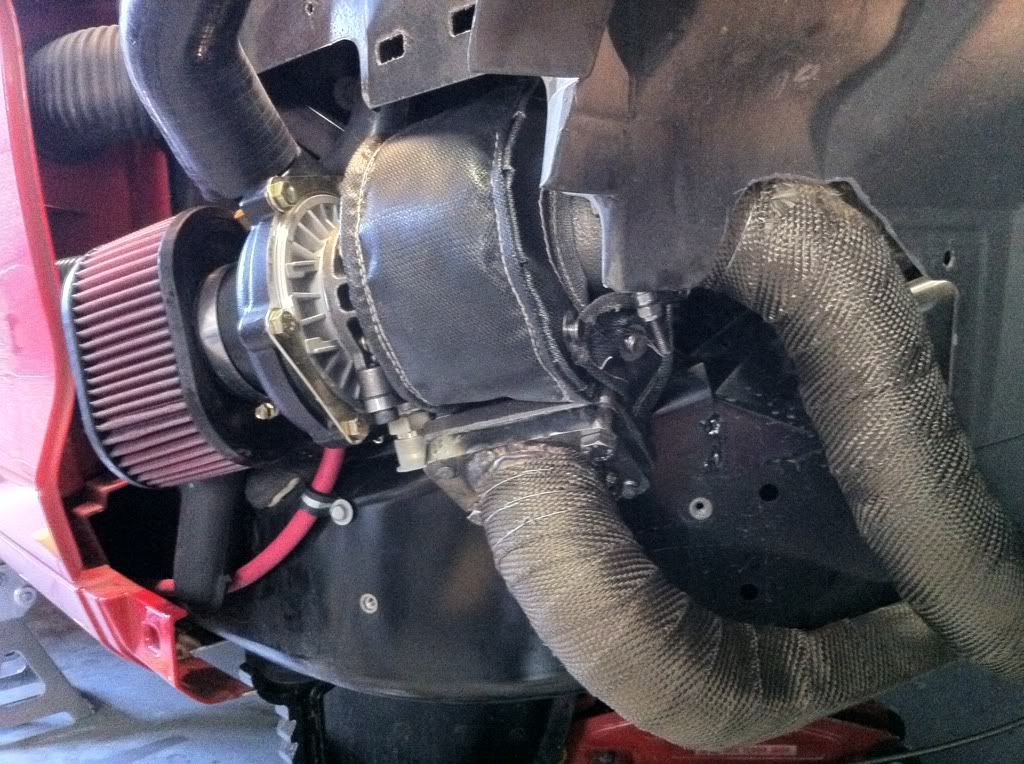

but im going to press on and get the intercooler piping installed until CK replies about the fender scope needing removal or not.
-Carl
but im going to press on and get the intercooler piping installed until CK replies about the fender scope needing removal or not.
-Carl
 08-07-2011, 05:48 PM
#62
Burning Brakes


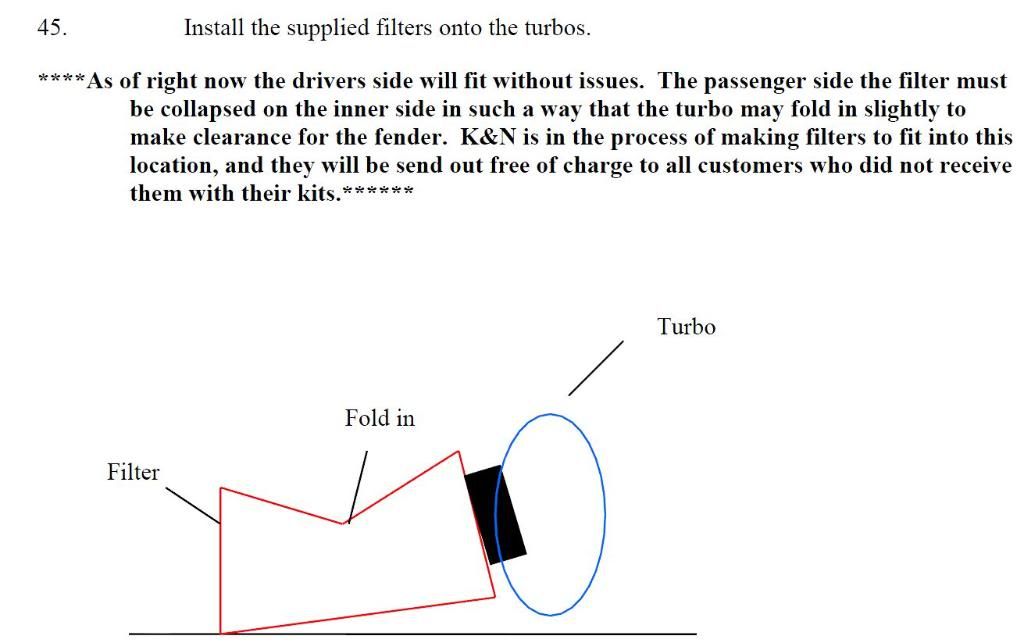
Carl, I think in the instructions and somewhere they posted that you have basically bend the filter so it will go around that part. Looks like that is backwards but i dunno.
08-08-2011, 02:18 AM
#64
Le Mans Master

I thought I remember reading that you had to remove the plastic piece that is attached to the inside of the fender scoop.
Keep at it.
Keep at it.

 08-08-2011, 09:23 AM
#67
Le Mans Master
Yea really thats what you want to do (remove the inner liners) regardless of whether it's mentioned in the 'structions to get the filter some more air.
Have you starte/driven it yet? Seems like the fenders would be the last thing to go on.
Have you starte/driven it yet? Seems like the fenders would be the last thing to go on.
08-08-2011, 06:00 PM
#69
Former Vendor

Hey Carl,
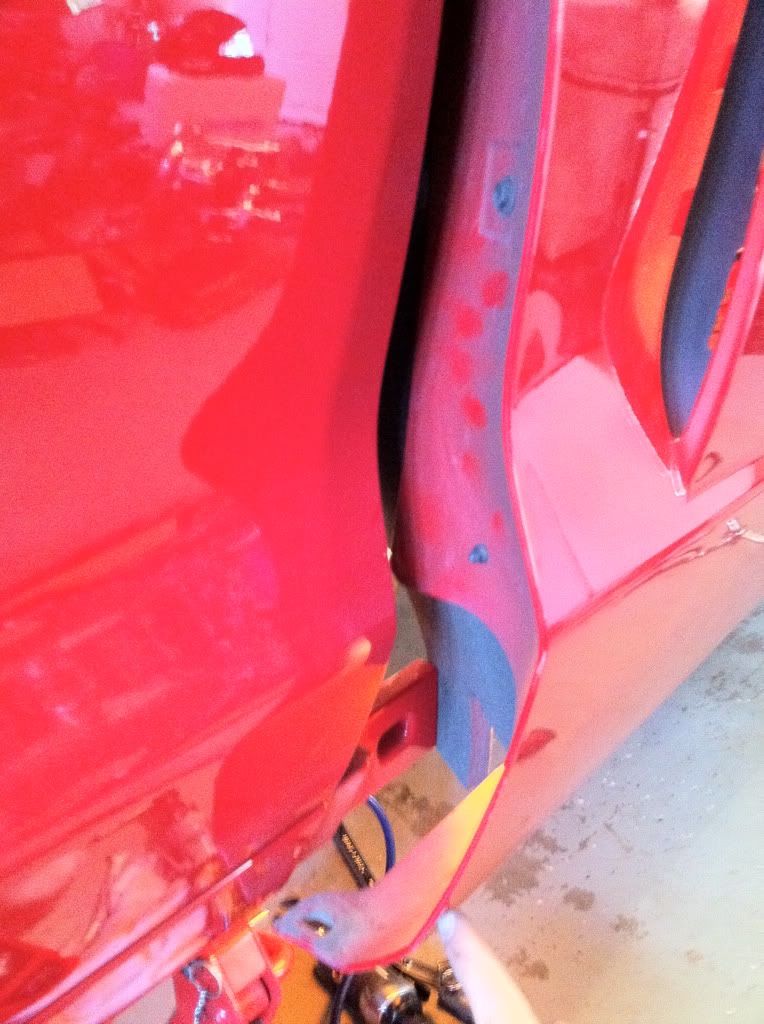
Sorry about the slow response. Yea, on both fenders you'll need to remove the plastic sheilding that goes around the scoop, as 5Liter said, this will give it better airflow anyways, and I believe they just pop off. As far as the diagram with modifying the filter, that's with the old filters, and it is no longer required, the new filters are shorter and should fit without any mods. On one fender (and I believe it was the pass side), you do have to trim out the back edge to clear the fitler a bit because of the way it scoops forward. I'll attach a pic.
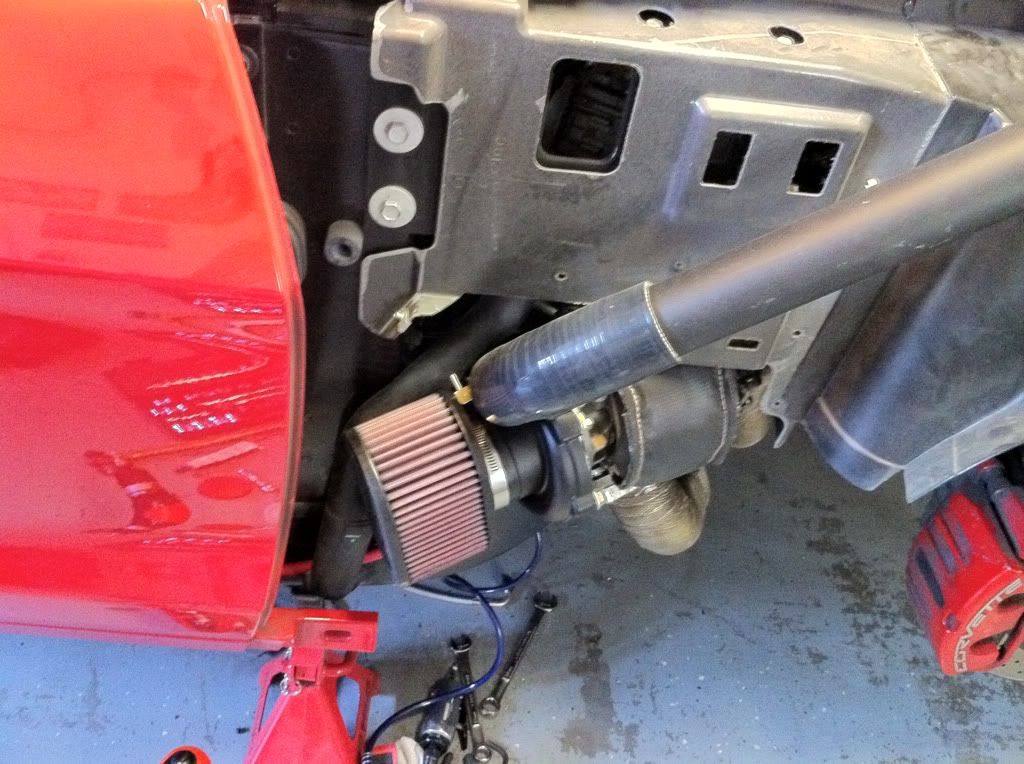
Looks like you're comming along. If you could post up a couple pics of the IC piping going behind the headlamp housing and in the wheel well, I want to make sure you've got the positioning correct so you don't run into any problems like Tin is. The C6's the piping has to be as far forward against the head lamp as possible, and if you're flattening the piping, you have to be careful not to change the angle of the 90.
CK
Sorry about the slow response. Yea, on both fenders you'll need to remove the plastic sheilding that goes around the scoop, as 5Liter said, this will give it better airflow anyways, and I believe they just pop off. As far as the diagram with modifying the filter, that's with the old filters, and it is no longer required, the new filters are shorter and should fit without any mods. On one fender (and I believe it was the pass side), you do have to trim out the back edge to clear the fitler a bit because of the way it scoops forward. I'll attach a pic.
Looks like you're comming along. If you could post up a couple pics of the IC piping going behind the headlamp housing and in the wheel well, I want to make sure you've got the positioning correct so you don't run into any problems like Tin is. The C6's the piping has to be as far forward against the head lamp as possible, and if you're flattening the piping, you have to be careful not to change the angle of the 90.
CK
08-08-2011, 06:08 PM
#70
Safety Car
Thread Starter
Member Since: Feb 2008
Location: TEXOMA
Posts: 3,712
Likes: 0
Received 3 Likes
on
3 Posts
St. Jude Donor '08-'09
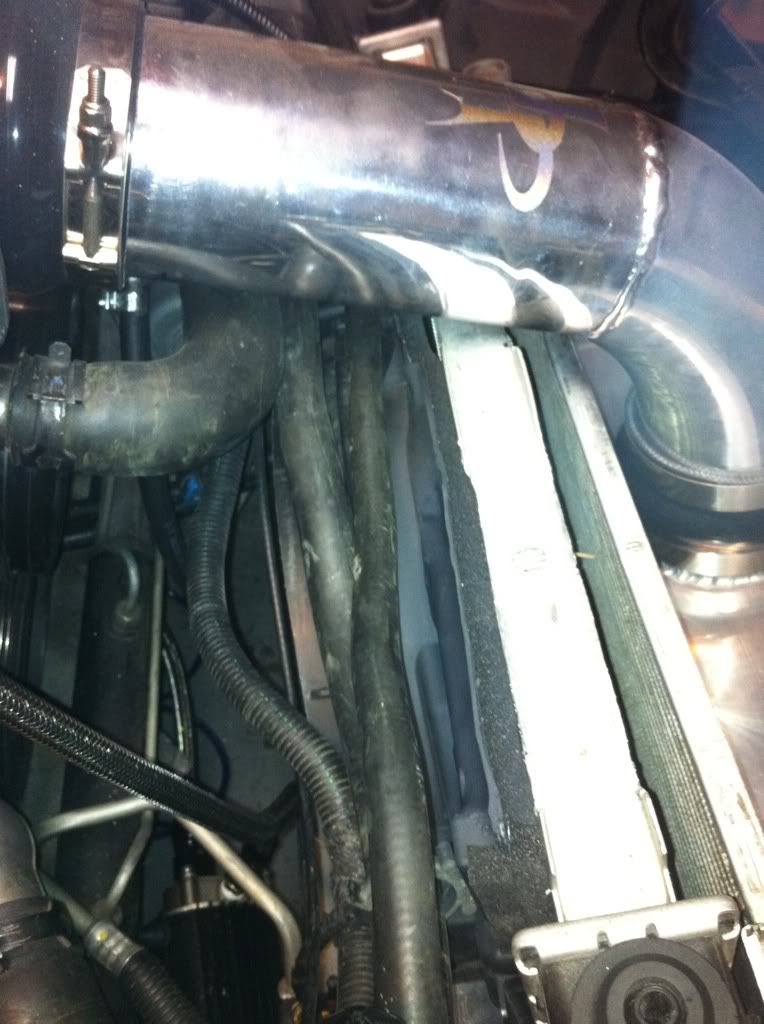
thanks ck, i know the shop isn't open sun-mon, so i wasn't sweating it. here are the pics
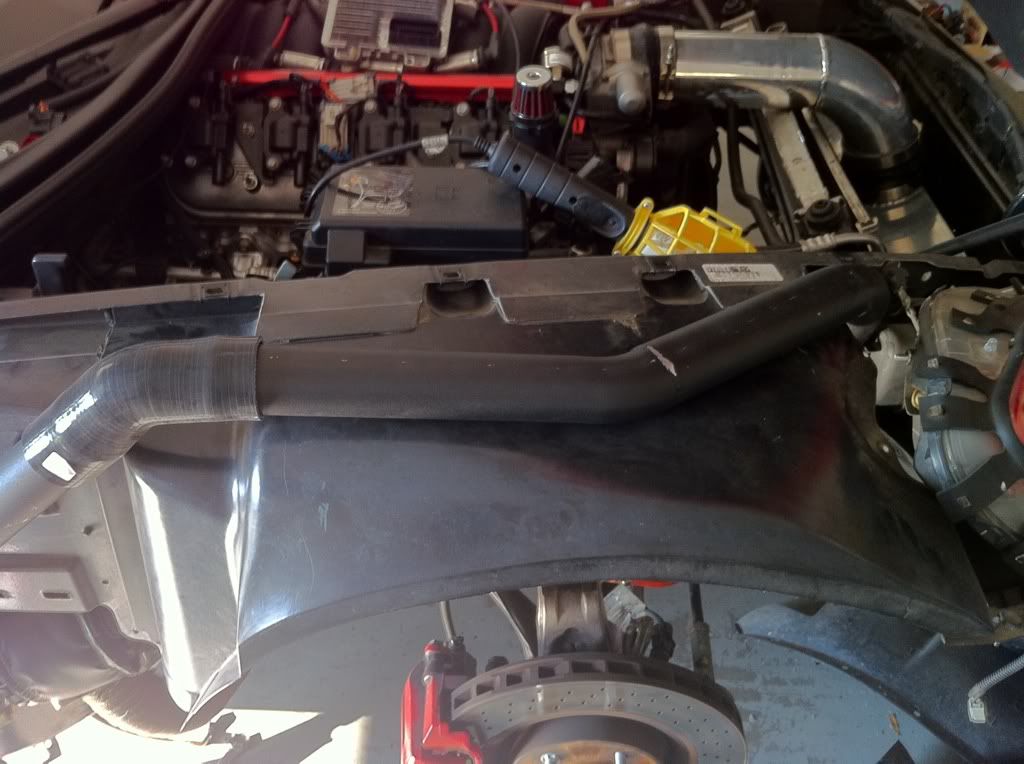
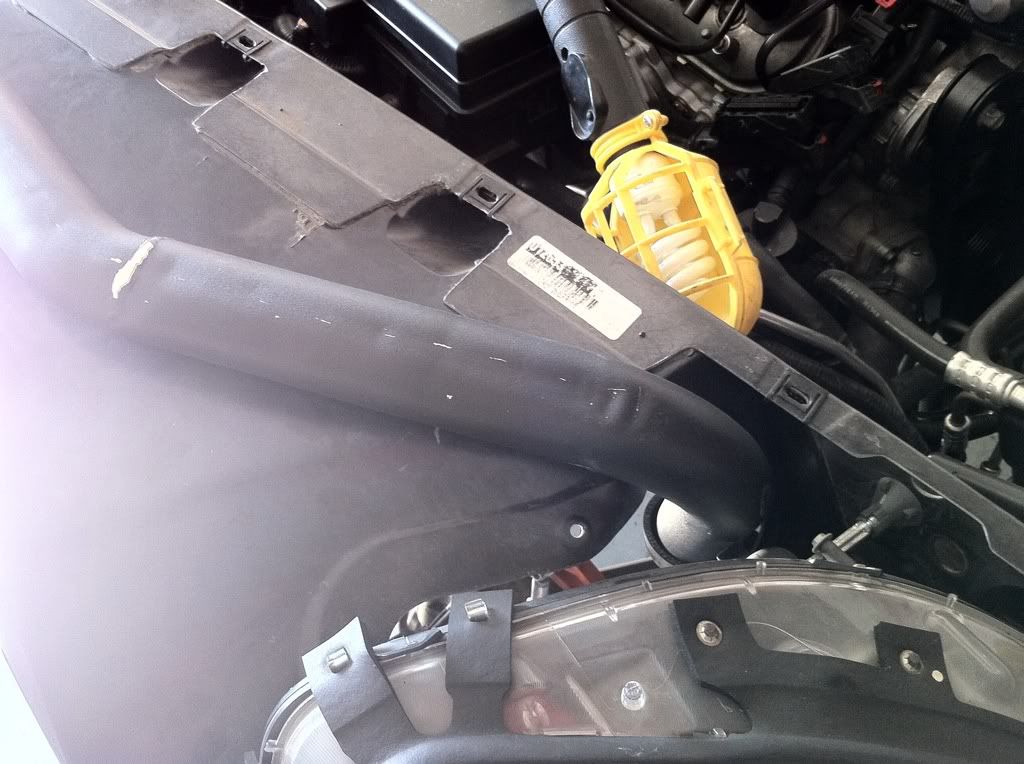
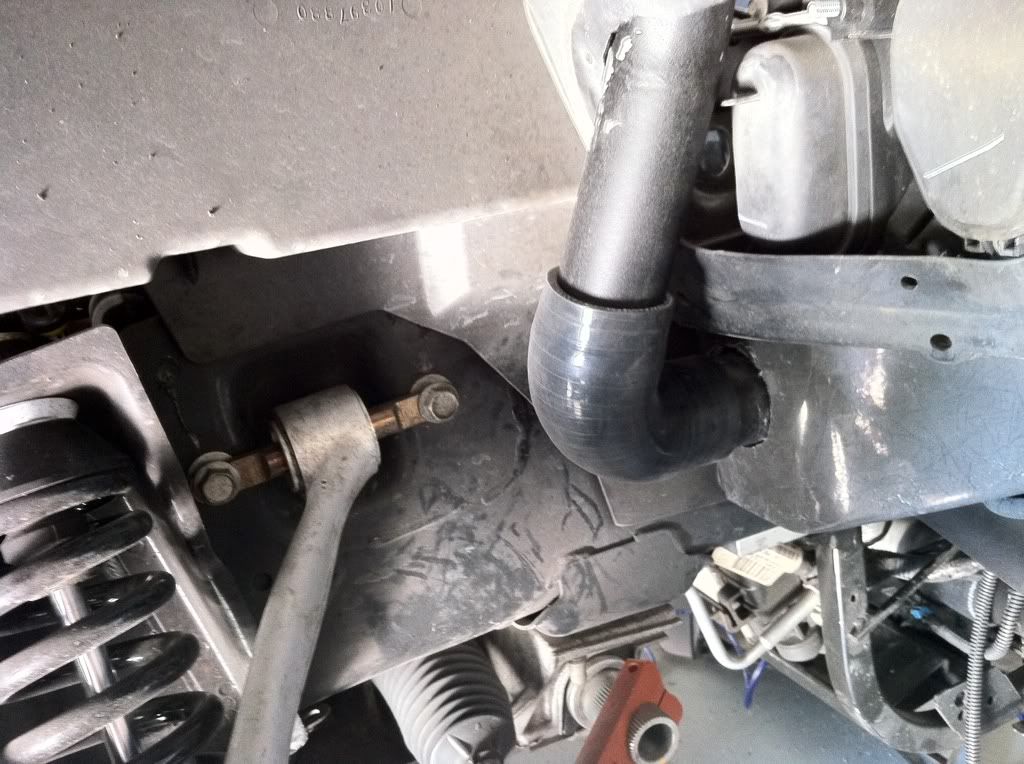
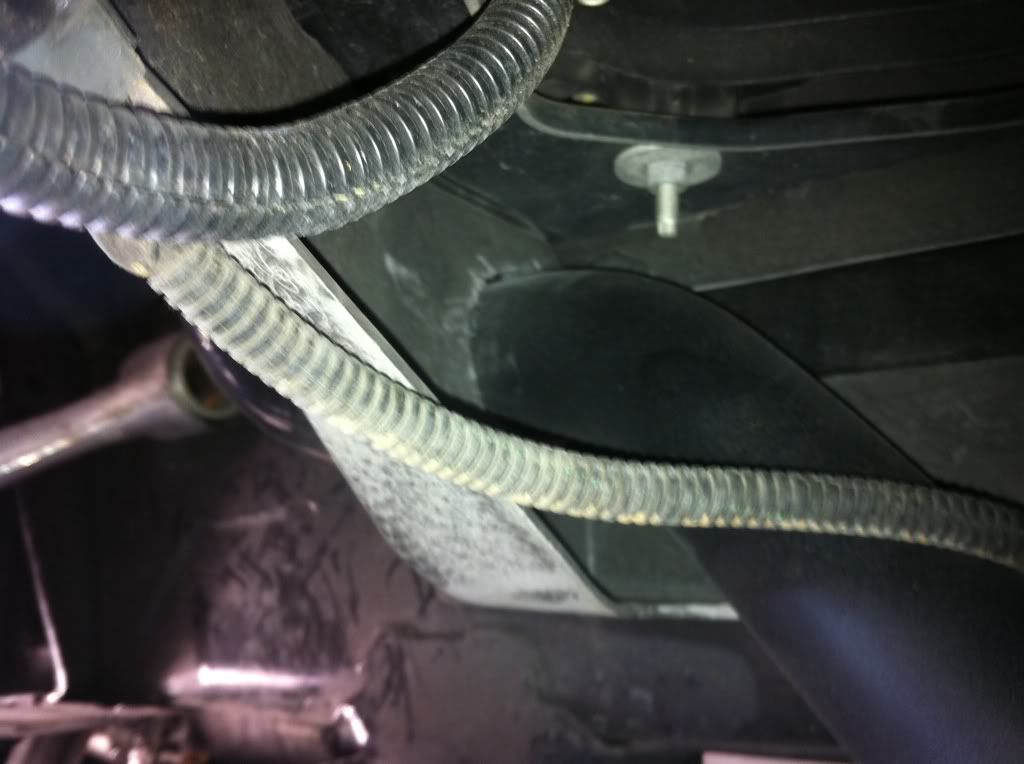
how much do i need to crush the pipes? so far they are down to 1.6" using calipers, and the fender is still a little tight and need some muscling to line up the bolt holes..
-Carl
how much do i need to crush the pipes? so far they are down to 1.6" using calipers, and the fender is still a little tight and need some muscling to line up the bolt holes..
-Carl
08-08-2011, 09:07 PM
#71
Safety Car
Thread Starter
Member Since: Feb 2008
Location: TEXOMA
Posts: 3,712
Likes: 0
Received 3 Likes
on
3 Posts
St. Jude Donor '08-'09
I've decided to get a new passenger pipe sent to me and ill just cut into the fender, ive compressed the pipe beyond 1.5"'s and the fender still doesn't fit right.
I honestly didn't think i would have to compress it that much, but for my goal of 800 i should of just cut into the fender anyways, would of taken two minutes with my 4" cutting wheel.
oh well, lots going on, besides the car is what is killing me, softball playoffs after work for the next two weeks and my college semester starts monday.
Im so close but so far away. the funny thing is if i wasn't so ****, i could just drive it around with no fenders, but its been fun driving the TBSS for a change.
-Carl
08-09-2011, 04:39 PM
#72
Former Vendor
I'll have the guys start fabing one now, I'll try to have it shipped by tomorrow.
As soon as I get a free second, I'll edit your pics, and show you what needs to happen.
CK
As soon as I get a free second, I'll edit your pics, and show you what needs to happen.
CK
08-09-2011, 05:12 PM
#73
Safety Car
Thread Starter
Member Since: Feb 2008
Location: TEXOMA
Posts: 3,712
Likes: 0
Received 3 Likes
on
3 Posts
St. Jude Donor '08-'09
Thanks CK,
going to seal up the drivers side after my softball game.
Im also swapping out the nipple on the turbo cover to a 1/4" to match the port on the wastegate, i also purchased some metal Tee's for my boost controller and some 6mm High temp silicone line.
one question, how can i tell if the turbos need the WG adjusted when im tuning? what did you guys experence? compressor surge/stall?
-Carl
08-10-2011, 08:17 PM
#74
Former Vendor
Thanks CK,
going to seal up the drivers side after my softball game.
Im also swapping out the nipple on the turbo cover to a 1/4" to match the port on the wastegate, i also purchased some metal Tee's for my boost controller and some 6mm High temp silicone line.
one question, how can i tell if the turbos need the WG adjusted when im tuning? what did you guys experence? compressor surge/stall?
-Carl
going to seal up the drivers side after my softball game.
Im also swapping out the nipple on the turbo cover to a 1/4" to match the port on the wastegate, i also purchased some metal Tee's for my boost controller and some 6mm High temp silicone line.
one question, how can i tell if the turbos need the WG adjusted when im tuning? what did you guys experence? compressor surge/stall?
-Carl
As far as the turbos, it's best to sync them as close as humainly possible before you attempt to dyno it. Just connect a regulator from an air compressor and "T" it to the w/g. Slowly turn up the pressure until they open, then adjust them so they open at the same time. Boost usually becomes unstable, or falls off, because one turbo "thinks" it's got enough boost and opens the w/g, the other see's the drop in pressure from the first one opening, and spools harder. So you end up with one turbo working, and the other with the w/g open. One turbo won't support what you're looking to do, so you'll see increased IAT's and power/boost falling off.
CK

 08-18-2011, 08:50 PM
#77
Melting Slicks

Member Since: Mar 2007
Location: Santa Barbara CA
Posts: 2,391
Likes: 0
Received 23 Likes
on
23 Posts

Thanks CK,
going to seal up the drivers side after my softball game.
Im also swapping out the nipple on the turbo cover to a 1/4" to match the port on the wastegate, i also purchased some metal Tee's for my boost controller and some 6mm High temp silicone line.
one question, how can i tell if the turbos need the WG adjusted when im tuning? what did you guys experence? compressor surge/stall?
-Carl
going to seal up the drivers side after my softball game.
Im also swapping out the nipple on the turbo cover to a 1/4" to match the port on the wastegate, i also purchased some metal Tee's for my boost controller and some 6mm High temp silicone line.
one question, how can i tell if the turbos need the WG adjusted when im tuning? what did you guys experence? compressor surge/stall?
-Carl
Just a suggestion, but you might want to check out your local BMW dealer for some shielded vacuum hose (part number 11727545323) for your wastegate control lines. This is what they use for the wastegate control system on the N54 twin turbo motors in the 335i, 135i, etc.
It's basically rubber hose with a heavy duty braided type cover. Very durable and good for high temperature areas.
08-18-2011, 10:39 PM
#78
Safety Car
Thread Starter
Member Since: Feb 2008
Location: TEXOMA
Posts: 3,712
Likes: 0
Received 3 Likes
on
3 Posts
St. Jude Donor '08-'09
hey guys, sorry about the lack of updates, been super busy. but i did get it started last night, open downpipes. sweet e85 exhaust filled the garage. mmmmmm..
Just got the new pipe in today. will put in some good hours tomorrow on the car, had a long day at work then class for 5 hours.
enjoy the pics.
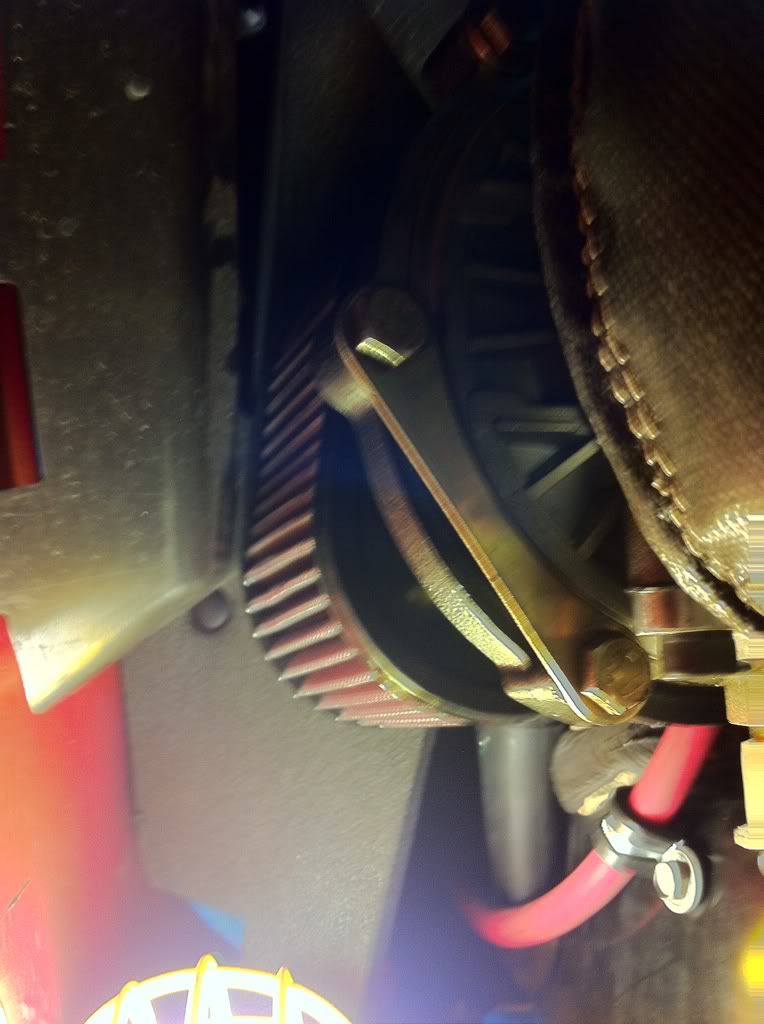
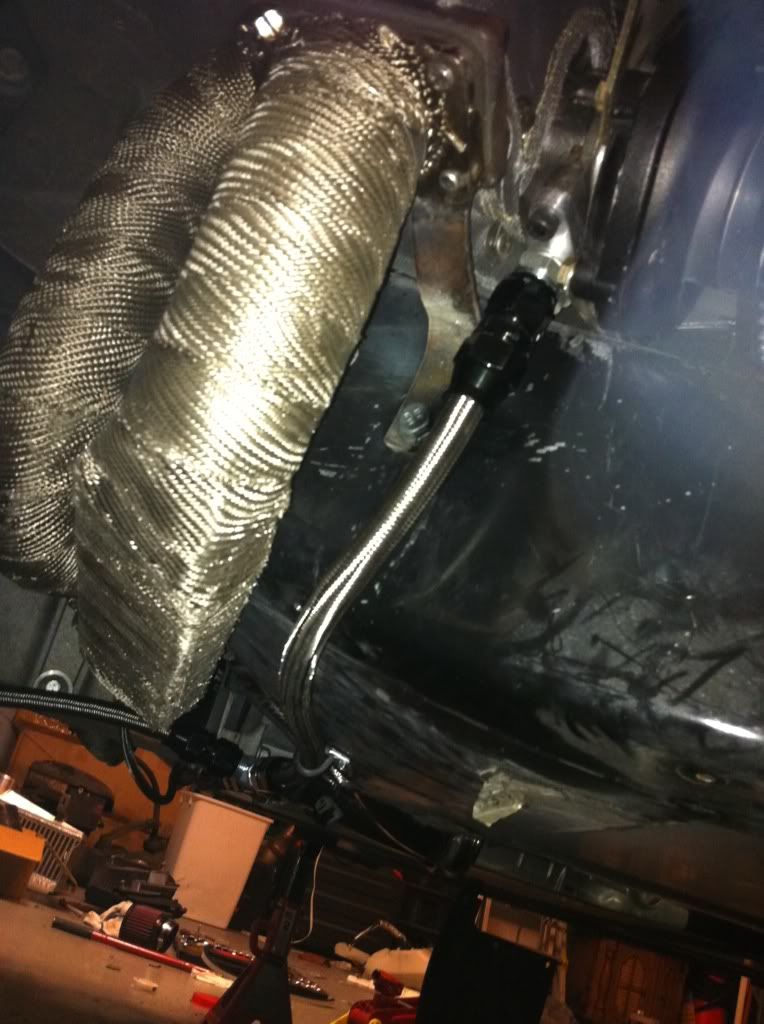
Driver side turbo mounted, i striped the bolt so i welded on side of the bracket,
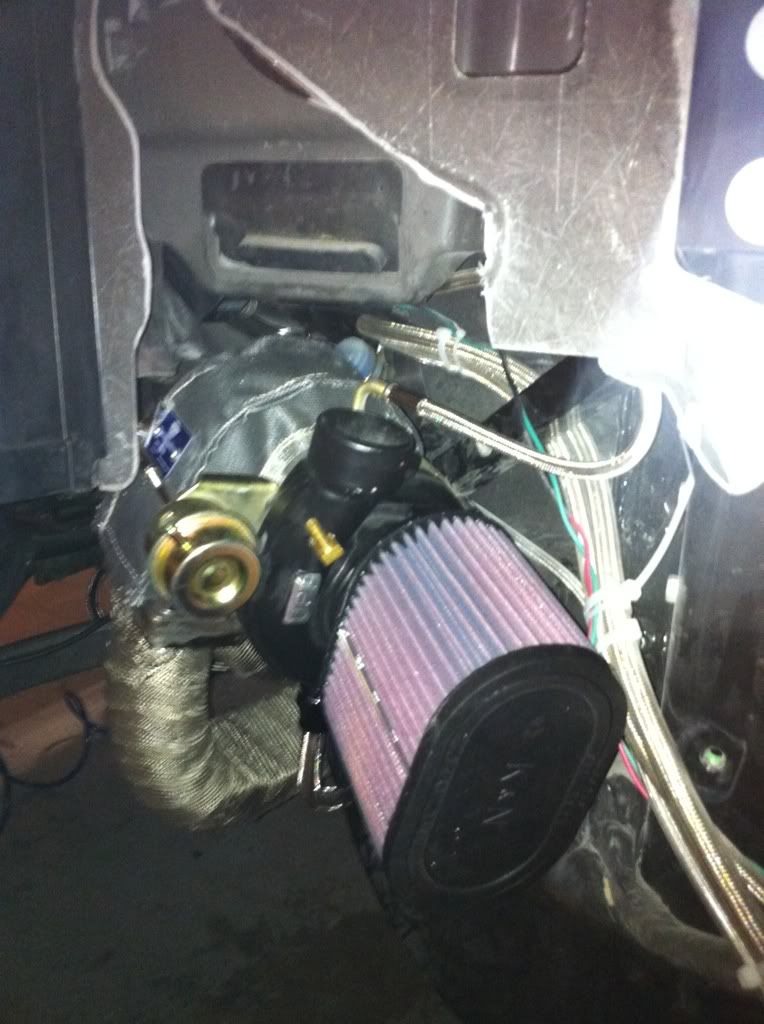
Oil return lines installed, I am NOT going to run it over the subframe, there was enough slack in the lines to run it to the side, I dont have a transverse spring in the way. so now its all downhill from the turbos to the scavenge pump. and i bought some more adel clamps to keep it tucked up, i wont leave it like that.
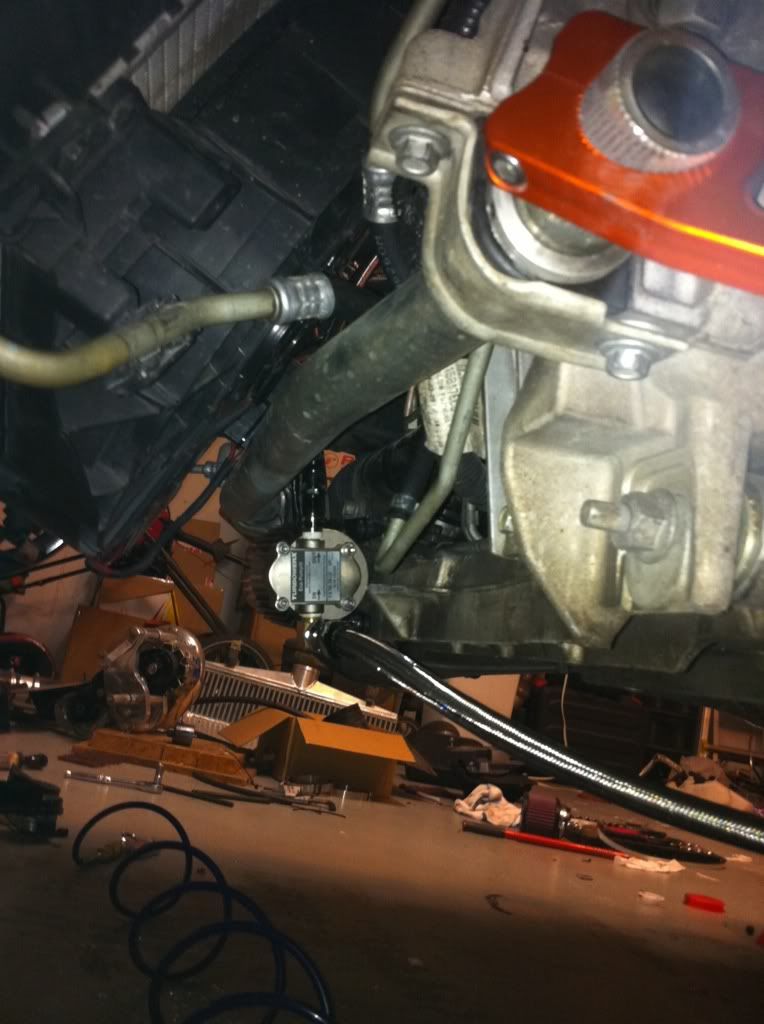
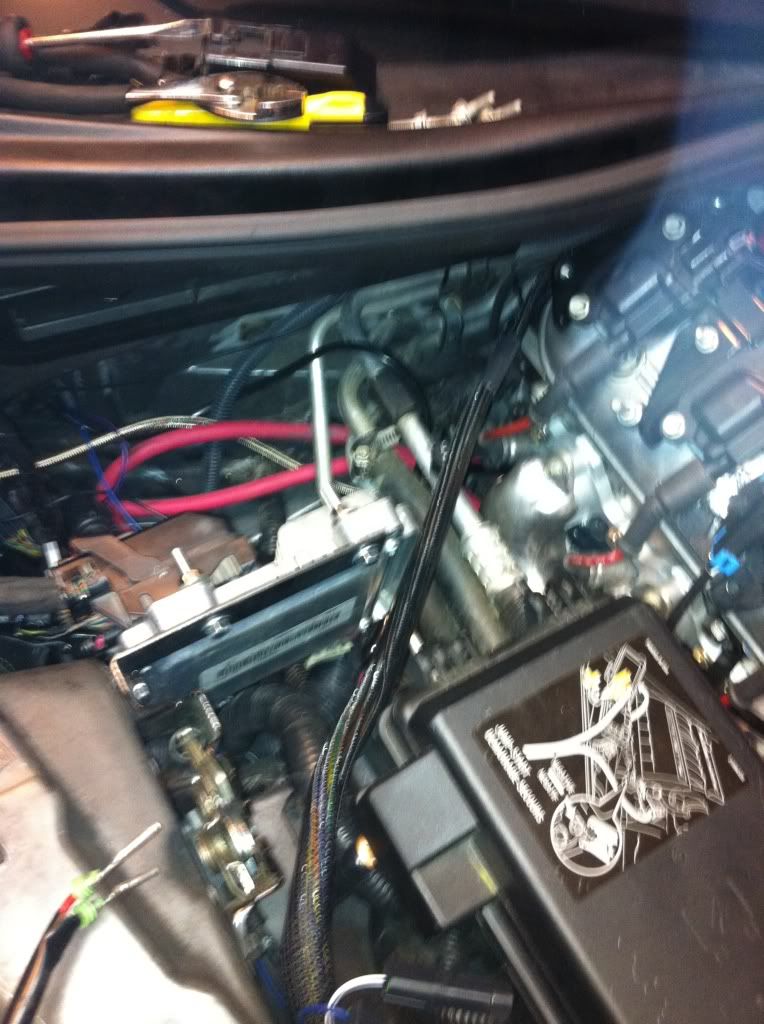
Got the ECM mounted and I tapped into pin 50 (fuel pump relay control) on J1, to power the scavenge pump via relay.
Since i have an airbreather and catch can already installed from my A&A kit, i decided to send the oil from the scavenge pump to the pcv nipple that i had capped.
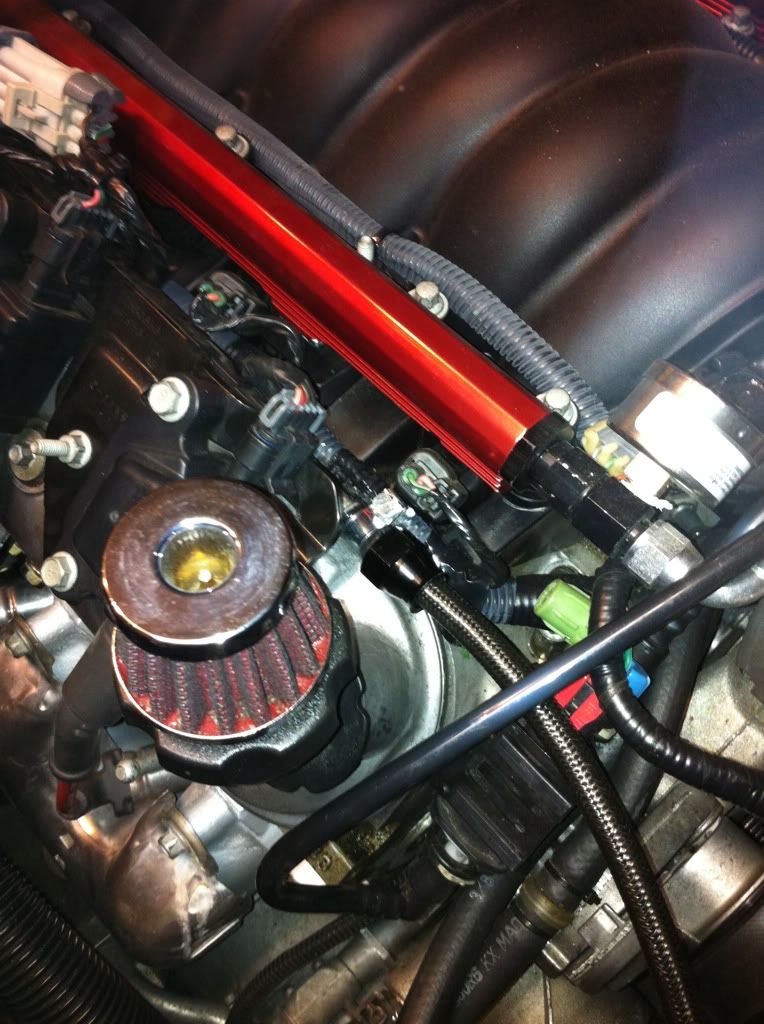
reinstalled the fan with the foam i added, fits very nice now.
anyways, hope to finish this weekend so i can give 100% towards my classes.
-Carl
Just got the new pipe in today. will put in some good hours tomorrow on the car, had a long day at work then class for 5 hours.
enjoy the pics.
Driver side turbo mounted, i striped the bolt so i welded on side of the bracket,
Oil return lines installed, I am NOT going to run it over the subframe, there was enough slack in the lines to run it to the side, I dont have a transverse spring in the way. so now its all downhill from the turbos to the scavenge pump. and i bought some more adel clamps to keep it tucked up, i wont leave it like that.
Got the ECM mounted and I tapped into pin 50 (fuel pump relay control) on J1, to power the scavenge pump via relay.
Since i have an airbreather and catch can already installed from my A&A kit, i decided to send the oil from the scavenge pump to the pcv nipple that i had capped.
reinstalled the fan with the foam i added, fits very nice now.
anyways, hope to finish this weekend so i can give 100% towards my classes.
-Carl
Last edited by carlrx7; 08-18-2011 at 10:43 PM.
08-21-2011, 02:49 AM
#79
Safety Car
Thread Starter
Member Since: Feb 2008
Location: TEXOMA
Posts: 3,712
Likes: 0
Received 3 Likes
on
3 Posts
St. Jude Donor '08-'09
started the car up again today, after letting it warm up i gave it some revs. unfortunately the drivers side turbo pukes oil out of the compressor when i give it revs. Im hoping that its just because the oil scavenge line wasn't tucked up yet. so i shut it off and worked on the little things.
extended the ww wiring and mounted the ww tank. tucked up the oil scavenge lines. i did alot, but just more little stuff i can't remember, just little tweaks here and there. oh yeah, changed the oil as well.
tomorrow, i will install the z06 h pipe then start it up again and see if it is still puking oil.
if no oil, i will cut into the fenders and install the intercooler pipes, then re-fiberglass to keep the strength in the fenders.
then i will install and mount the boost controller. hopefully the fiber glass will be dry and ill be able to perm install the fenders and get it off these jackstands after 6 long weeks.
-Carl
