
Edelbrock E-Force DIY Install
 11-29-2013, 09:30 PM
#1
Instructor

Thread Starter
Member Since: May 2007
Location: Wetumpka
Posts: 202
Likes: 0
Received 0 Likes
on
0 Posts

Received my E-Force SuperCharger a couple of days ago and I thought I would pass on some information to help others. I do have a MaxJax lift and I do not know if I could have done the install without it. I suppose you can put the car on jack stands and accomplish the same but to me the MaxJax has paid for itself many times. My main comment is on the pinning of the crank. The procedures according to the Edelbrock instructions are straight forward up to the crank pinning. The only mistake I noticed is they say the fuel line needs a 5/8" fuel line remover. The fuel line in MY 2008 C6 is 3/8". So I cut the cap of a sharpie pen and made a slit in it to slide over the line, the line came right off. I decided to use MagnaChargers procedure for pinning the crank. If you download their instructions at Magnusons website you could see their process. It takes about 75% less time. I basically removed the front stabilizer bar...easy. Then loosen the sub-frame bolts 4 total about 3/4" and remove the engine mount bolts 2 total. Then I used a pry bar to lower the subframe off the frame to insert a couple of 1/2" spacers in the front two. I also removed the rubber inspection cover in the automatics bell housing. I used a large pipe wrench to hold onto the square mount on the drivetrain so it would not spin when removing or tightening the crank bolt. I then placed a floor jack with a small board under the oil pan. With the oil pressure switch disconnected, I raised the engine an inch or so. This allows you to get to the crank bolt without removing the steering assembly. Once it was raised I was able to drill the crank without even removing the power steering line that is directly in front of the bolt. My biggest problem was breaking the drill bit that came with the kit and then breaking 3 more. It is probably due to the weird angle and the hardness of the metals plus my poor technique causing the bits to break. Fortunately I had 5 drill bits and able to finish the hole. I would recommend a top quality carbide 15/64" bit. Reaming it was no problem, the pin with loctite slid in and then the new crank bolt goes on next. The instructions say to torque the bolt to 37 ft/lbs then another 140 degrees. I wish they would just say 100 ft/lbs because I had to guesstimate the 140 additional degrees. I basically just snugged it till my eyes popped out. Once done with the new bolt, dropped the floor jack putting the engine back in its normal place. Put the 2 engine mount nuts on, remove the front spacers, tightened the 4 subframe bolts, then torqued them to specs. Removed the pipe wrench and replaced the rubber cover. Then replaced the front stabilizer bar...and the crank pinning was done. If it hadn't been for the crappy drill bits breaking it would have taken about 2 hours. I am not sure why Edelbrock does not use this procedure versus theirs...maybe it's a liability issue. Bottom-line: it is a thousand times easier and I don't think I would ever recommend someone doing it their way. Anyway, I am going to pick up where Edelbrocks instruction start after their long crank pinning procedure. Hopefully, I will have it installed by Sunday.
Al
Al
 11-29-2013, 10:12 PM
#2


Retired pilot I see. Ever fly the Phantom F4 back in 1976 to 1980? If so chances are I kept your radar working. I have a lot of respect for pilots! Didn't retire in the AF but I did put the GI bill to good use.
Did you get your belt on?
Do you have HP Tuners?
Did you get your belt on?
Do you have HP Tuners?
11-29-2013, 10:22 PM
#3
Instructor
Thread Starter
Member Since: May 2007
Location: Wetumpka
Posts: 202
Likes: 0
Received 0 Likes
on
0 Posts
I entered pilot training in 1986 at Reese AFB then flew till I retired in 2011. The GI Bill is a dream come true, I have 2 kids in college. I have not put the belt on yet but will do it as soon as I install the new tensioner. I had read where it was smart to do it sooner than later. In the instructions it says for 2008 models that I need to remove the upper radiator hose to install the belt. I don't see why that is necessary unless the belt goes around the hose...which doesn't seem possible. I don't have a HP Tuner. I am using the supplied Edelbrock SCT tuner with their canned tune. I do have the diablosport trinity but am not sure I will use it for monitoring (only). I plan on installing a fuel pressure and boost gauge in the A-Pillar. By the way, I have a lot of respect for the maintainers...they kept my butt safe allowing me to return to base.
11-29-2013, 10:49 PM
#4
I entered pilot training in 1986 at Reese AFB then flew till I retired in 2011. The GI Bill is a dream come true, I have 2 kids in college. I have not put the belt on yet but will do it as soon as I install the new tensioner. I had read where it was smart to do it sooner than later. In the instructions it says for 2008 models that I need to remove the upper radiator hose to install the belt. I don't see why that is necessary unless the belt goes around the hose...which doesn't seem possible. I don't have a HP Tuner. I am using the supplied Edelbrock SCT tuner with their canned tune. I do have the diablosport trinity but am not sure I will use it for monitoring (only). I plan on installing a fuel pressure and boost gauge in the A-Pillar. By the way, I have a lot of respect for the maintainers...they kept my butt safe allowing me to return to base.
Just a recommendation I would seriously consider getting a copy of HP Tuners. The E-force base tune is a good place to start but you need to either retune it yourself or take it to a top notch tuner. For me playing with the tune is just about as much fun burning the back tires off but then I might be sadistic.
11-29-2013, 11:16 PM
#5

 Either way, a big
  to you sir!
11-30-2013, 08:46 AM
to you sir!
11-30-2013, 08:46 AM
#7
Race Director

My kit was installed last January. In February Edelbrock replaced the tensioner with a newer stronger and slightly different angle tensioner pulley placement to cure belt slip. I have just got the newer style tensioner kit, but it didn't include any different installation instructions. Do your instructions say anything special about that or does it look like a simple bolt it on deal? Thanks, David
11-30-2013, 08:47 AM
#8
Race Director
11-30-2013, 02:52 PM
#9
Le Mans Master

My kit was installed last January. In February Edelbrock replaced the tensioner with a newer stronger and slightly different angle tensioner pulley placement to cure belt slip. I have just got the newer style tensioner kit, but it didn't include any different installation instructions. Do your instructions say anything special about that or does it look like a simple bolt it on deal? Thanks, David
11-30-2013, 07:14 PM
#10
Racer

Al,
Where are you located? I'll let you improve your crank-pinning skills on my C6
Thanks for the info. Let us know how the rest of the install goes.
Ron
Where are you located? I'll let you improve your crank-pinning skills on my C6
Thanks for the info. Let us know how the rest of the install goes.
Ron
11-30-2013, 07:30 PM
#11
Race Director
11-30-2013, 08:41 PM
#12
When I installed mine there were a few of oh chit moments.
The first one was just getting the crate delivered to the house and into the garage. I live in the mountains on a one lane road. I had to get it transferred to a small truck that could turn around in our driveway.
The second moment was trying to accurately cut the holes for the intercooler and pump. I got them out perfectly with a hole cutter but later finding out they were off about 1/2-inch.
The third moment was sitting the blower on the engine by myself. I ended up getting a hoist and frankly I recommend doing that even if you have an army of people helping.
The forth and biggest moment was driving the car for the first time. To make a long story short my SCT programmer was defective and it let me load a corrupt tune into the ECM. The Vette ran like crap! I had to buy HP Tuners to get it figured out. Edelbrock corrected the tune via a spread sheet as they do not use HP Tuners and basically provided me a starting point for tuning. Their tune is limited by what I would call a low octane tune and all the factor torque control.
Pinning the crank sounds scary but is quite simple if you do it the OP way as I did also. All I had to do was cut either the drill bit or the reamer (don't remember which) off a little so I could get the drill into position.
Putting the belt on can be tough. I said a few four littler words. I ended up starting at the alternator and looping the belt over the blower and tensioner but just letting it dangle in front of the smooth pulley between the blower and tensioner. I then moved the tensioner and slid the belt under the smooth pulley - easy as pie.
Anyway, it's all done now and a dream to drive. I wouldn't trade it for anything.
11-30-2013, 08:53 PM
#13
Instructor
Thread Starter
Member Since: May 2007
Location: Wetumpka
Posts: 202
Likes: 0
Received 0 Likes
on
0 Posts
When I installed mine there were a few of oh chit moments.
The first one was just getting the crate delivered to the house and into the garage. I live in the mountains on a one lane road. I had to get it transferred to a small truck that could turn around in our driveway.
The second moment was trying to accurately cut the holes for the intercooler and pump. I got them out perfectly with a hole cutter but later finding out they were off about 1/2-inch.
The third moment was sitting the blower on the engine by myself. I ended up getting a hoist and frankly I recommend doing that even if you have an army of people helping.
The forth and biggest moment was driving the car for the first time. To make a long story short my SCT programmer was defective and it let me load a corrupt tune into the ECM. The Vette ran like crap! I had to buy HP Tuners to get it figured out. Edelbrock corrected the tune via a spread sheet as they do not use HP Tuners and basically provided me a starting point for tuning. Their tune is limited by what I would call a low octane tune and all the factor torque control.
Pinning the crank sounds scary but is quite simple if you do it the OP way as I did also. All I had to do was cut either the drill bit or the reamer (don't remember which) off a little so I could get the drill into position.
Putting the belt on can be tough. I said a few four littler words. I ended up starting at the alternator and looping the belt over the blower and tensioner but just letting it dangle in front of the smooth pulley between the blower and tensioner. I then moved the tensioner and slid the belt under the smooth pulley - easy as pie.
Anyway, it's all done now and a dream to drive. I wouldn't trade it for anything.
The first one was just getting the crate delivered to the house and into the garage. I live in the mountains on a one lane road. I had to get it transferred to a small truck that could turn around in our driveway.
The second moment was trying to accurately cut the holes for the intercooler and pump. I got them out perfectly with a hole cutter but later finding out they were off about 1/2-inch.
The third moment was sitting the blower on the engine by myself. I ended up getting a hoist and frankly I recommend doing that even if you have an army of people helping.
The forth and biggest moment was driving the car for the first time. To make a long story short my SCT programmer was defective and it let me load a corrupt tune into the ECM. The Vette ran like crap! I had to buy HP Tuners to get it figured out. Edelbrock corrected the tune via a spread sheet as they do not use HP Tuners and basically provided me a starting point for tuning. Their tune is limited by what I would call a low octane tune and all the factor torque control.
Pinning the crank sounds scary but is quite simple if you do it the OP way as I did also. All I had to do was cut either the drill bit or the reamer (don't remember which) off a little so I could get the drill into position.
Putting the belt on can be tough. I said a few four littler words. I ended up starting at the alternator and looping the belt over the blower and tensioner but just letting it dangle in front of the smooth pulley between the blower and tensioner. I then moved the tensioner and slid the belt under the smooth pulley - easy as pie.
Anyway, it's all done now and a dream to drive. I wouldn't trade it for anything.
11-30-2013, 09:09 PM
#14
Instructor
Thread Starter
Member Since: May 2007
Location: Wetumpka
Posts: 202
Likes: 0
Received 0 Likes
on
0 Posts
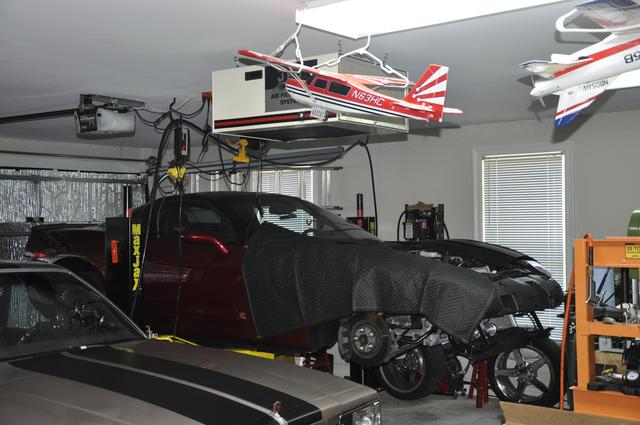
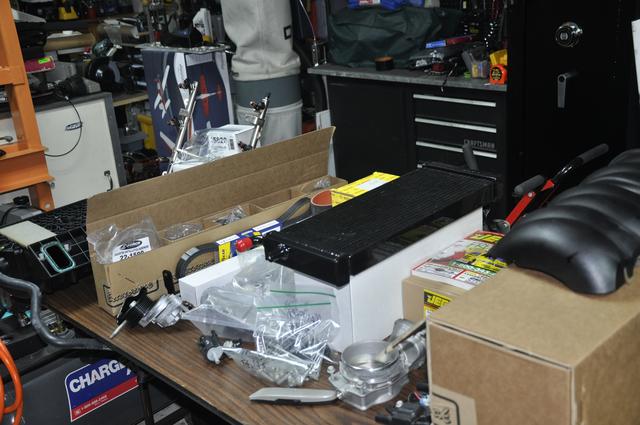
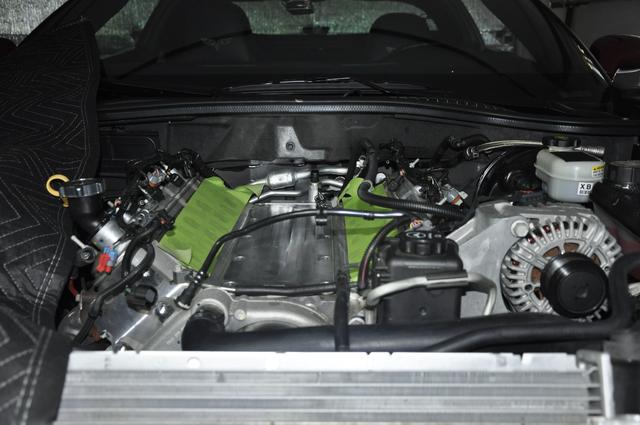
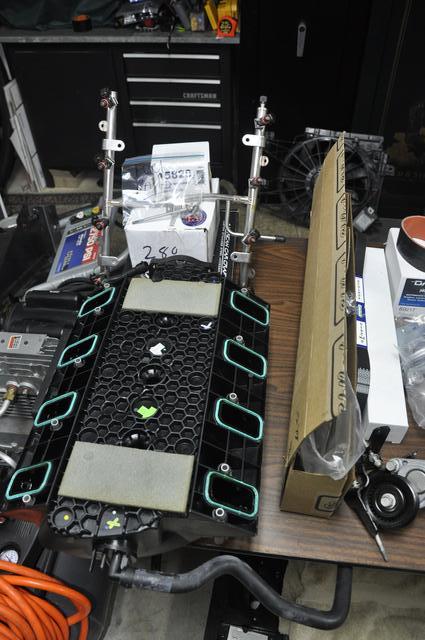
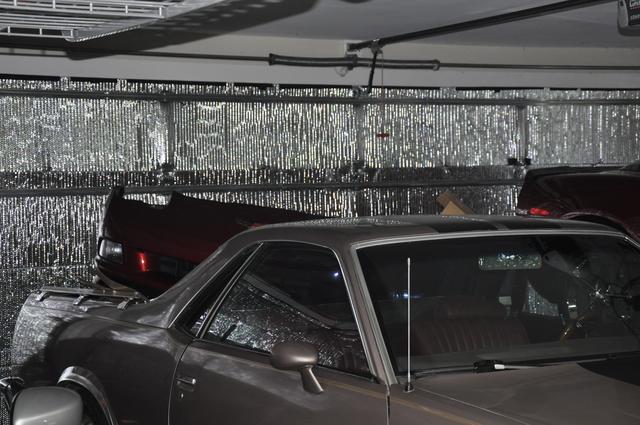
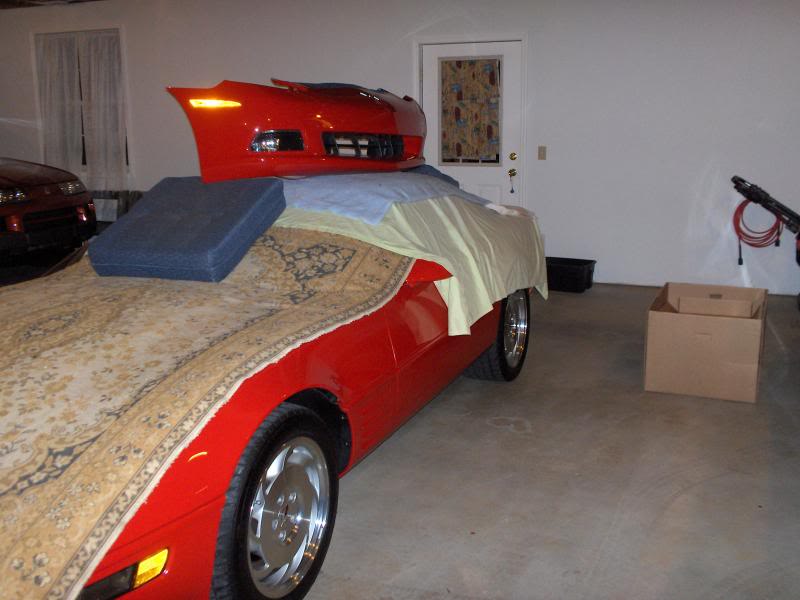
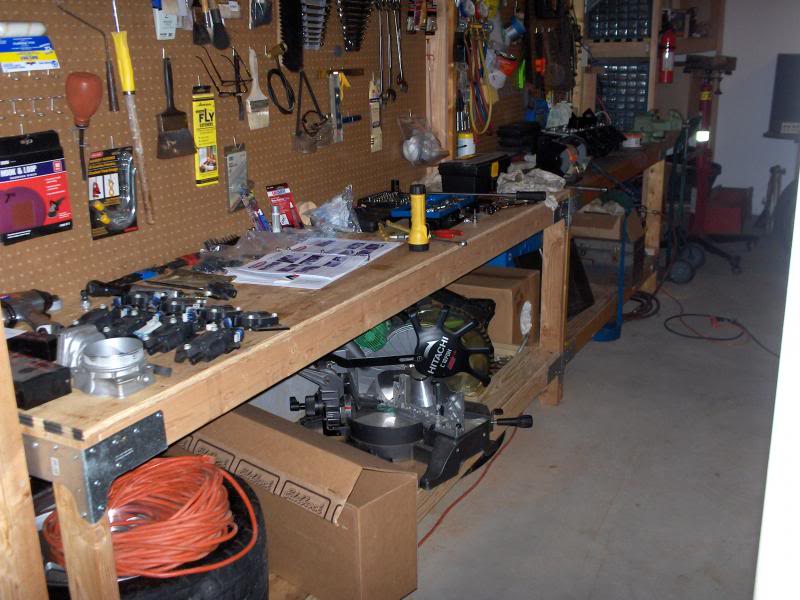
I still need help with the question on the bolts (in a separate post). So while I waited I thought I would post some pictures.

11-30-2013, 10:41 PM
#15
good pictures!
Here are some of mine
Typical picture with the front bumper off.
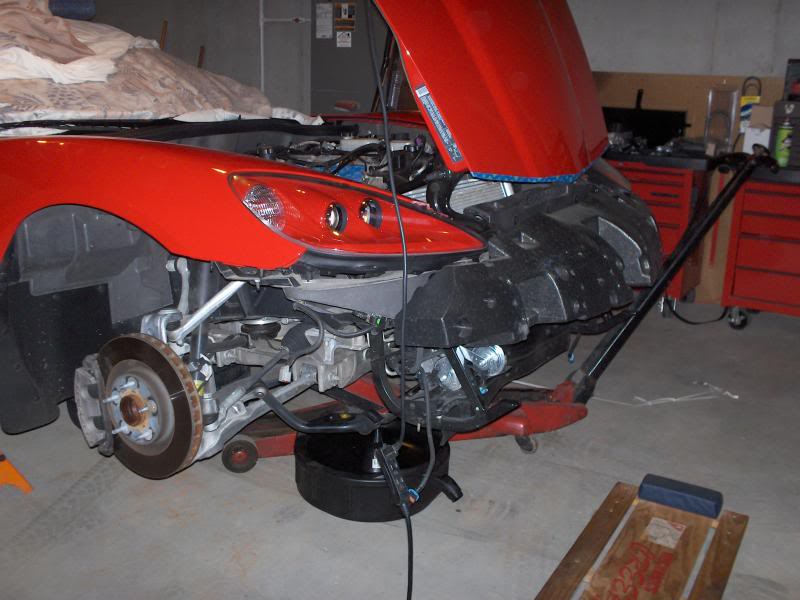
I used the pipe wrench to hold the HB to get the bolt out.

This is the table I stored my bumper on
An excellent workbench to work from
Here are some of mine
Typical picture with the front bumper off.

I used the pipe wrench to hold the HB to get the bolt out.

This is the table I stored my bumper on

An excellent workbench to work from
 11-30-2013, 10:59 PM
#16
Instructor
Thread Starter
Member Since: May 2007
Location: Wetumpka
Posts: 202
Likes: 0
Received 0 Likes
on
0 Posts
You have more space then I do and more organized as well. Good pictures too. Even though the installation is long and somewhat difficult...I can't imagine not doing it myself.
12-01-2013, 08:59 AM
#17


Hi guys, I don't visit the forum much these days and as I read through this thread I realized that a lot of what you guys are visiting for the first time I also went through with my first Edelbrock install back in Feb 2010. Here are some links to a host of old posts I put up back in the day that deal with many of the same issues you guys are now experiencing. There area quite a few photos here that may be of some help. Hopefully you'll find them useful.
Holding the crank while loosening the balancer bolt wrench method for auto trans cars....
http://forums.corvetteforum.com/1572611007-post16.html
Detailed fuel pump install with lots of photos...
http://forums.corvetteforum.com/c6-t...fuel-pump.html
My first Edelbrock install back in Feb 2010...really starts around post #111
http://forums.corvetteforum.com/c6-f...e-force-6.html
Second install with photos...
http://forums.corvetteforum.com/c6-f...ll-for-me.html
Discussion on pinning the crank using the drop the cradle method starts on post #37
http://forums.corvetteforum.com/1575847339-post37.html
Magnacharger instructions with photos of dropping the cradle...starts around step #56
http://www.superchargersonline.com/i...ntercooled.pdf
Last edited by Motorhead-47; 12-01-2013 at 09:16 AM.
12-01-2013, 10:37 AM
#18
Instructor
Thread Starter
Member Since: May 2007
Location: Wetumpka
Posts: 202
Likes: 0
Received 0 Likes
on
0 Posts
Thanks Mot�rhead for all the links to your hard work, especially with them all in one place. The week before I received the pallet of goodies, I searched and studied all of your posts several times. So a BIG thank you for providing your experiences and guidance. I would not have attempted the install without your posts. I'm still perplexed over the supplied intake manifold bolts that Edelbrock put in the kit (separate thread).
12-01-2013, 10:39 AM
#19
Instructor
Thread Starter
Member Since: May 2007
Location: Wetumpka
Posts: 202
Likes: 0
Received 0 Likes
on
0 Posts
12-01-2013, 10:46 AM
#20
Thanks Mot�rhead for all the links to your hard work, especially with them all in one place. The week before I received the pallet of goodies, I searched and studied all of your posts several times. So a BIG thank you for providing your experiences and guidance. I would not have attempted the install without your posts. I'm still perplexed over the supplied intake manifold bolts that Edelbrock put in the kit (separate thread).