
Well, I finally did it.. (ECS /FSP)
 12-06-2014, 04:05 PM
#41
Race Director

Thread Starter
Member Since: May 2004
Location: Raleigh, NC
Posts: 16,664
Received 1,194 Likes
on
1,053 Posts
St. Jude Donor '15

What are the details on your setup?
 12-07-2014, 09:00 AM
#42
Le Mans Master


No meth...it's as basic as it can get. Stock cam and all.
Just an LS3, PFADT headers (full length), and the ECS kit. I kept the factory NPP muffler so I can go from loud to quiet. Maybe some day soon I'll record a video with it open versus closed. Closed it feels/sounds like a Tesla going down the highway
Just an LS3, PFADT headers (full length), and the ECS kit. I kept the factory NPP muffler so I can go from loud to quiet. Maybe some day soon I'll record a video with it open versus closed. Closed it feels/sounds like a Tesla going down the highway
12-07-2014, 09:51 AM
#43
Race Director
Thread Starter
Member Since: May 2004
Location: Raleigh, NC
Posts: 16,664
Received 1,194 Likes
on
1,053 Posts
St. Jude Donor '15
No meth...it's as basic as it can get. Stock cam and all. Just an LS3, PFADT headers (full length), and the ECS kit. I kept the factory NPP muffler so I can go from loud to quiet. Maybe some day soon I'll record a video with it open versus closed. Closed it feels/sounds like a Tesla going down the highway
I watched your videos on YouTube yesterday. Sounds great.. Like a freight train in a few parts. I love the air rushing sound
Starting install on my ECS kit today
12-07-2014, 02:24 PM
#44
Race Director
Thread Starter
Member Since: May 2004
Location: Raleigh, NC
Posts: 16,664
Received 1,194 Likes
on
1,053 Posts
St. Jude Donor '15
Crank is pinned!
Putting it back together then calling it a day. Will post some pictures later
Putting it back together then calling it a day. Will post some pictures later
12-07-2014, 03:17 PM
#45
Drifting

No meth...it's as basic as it can get. Stock cam and all.
Just an LS3, PFADT headers (full length), and the ECS kit. I kept the factory NPP muffler so I can go from loud to quiet. Maybe some day soon I'll record a video with it open versus closed. Closed it feels/sounds like a Tesla going down the highway
Just an LS3, PFADT headers (full length), and the ECS kit. I kept the factory NPP muffler so I can go from loud to quiet. Maybe some day soon I'll record a video with it open versus closed. Closed it feels/sounds like a Tesla going down the highway
Funny about NPP, at A&A they said my car sounds like a freight train or a Prius.
BTW, I like adding things like meth incrementally, so I can enjoy each step up, something to look forward too, instead of going for max HP all at once. YMMV.
12-07-2014, 09:09 PM
#46
Race Director
Thread Starter
Member Since: May 2004
Location: Raleigh, NC
Posts: 16,664
Received 1,194 Likes
on
1,053 Posts
St. Jude Donor '15
Picture time!
Maybe I'm late to the game, but I've never seen a good set of pictures that shows how an ECS kit comes to the average DIY'er. So, here goes..
Took me a good 30 minutes to get this thing unpackaged.. It came in 3 boxes, very very well packaged. If they ever need to save some money.. they could probably cut $100 off if they didn't have to package all this stuff up
I got side tracked after getting these pictures and didn't finish taking pics of everything.. I know I at least missed taking one of the radiator / air inlet cover thing. Ah well, I'll get it later
3 boxes....
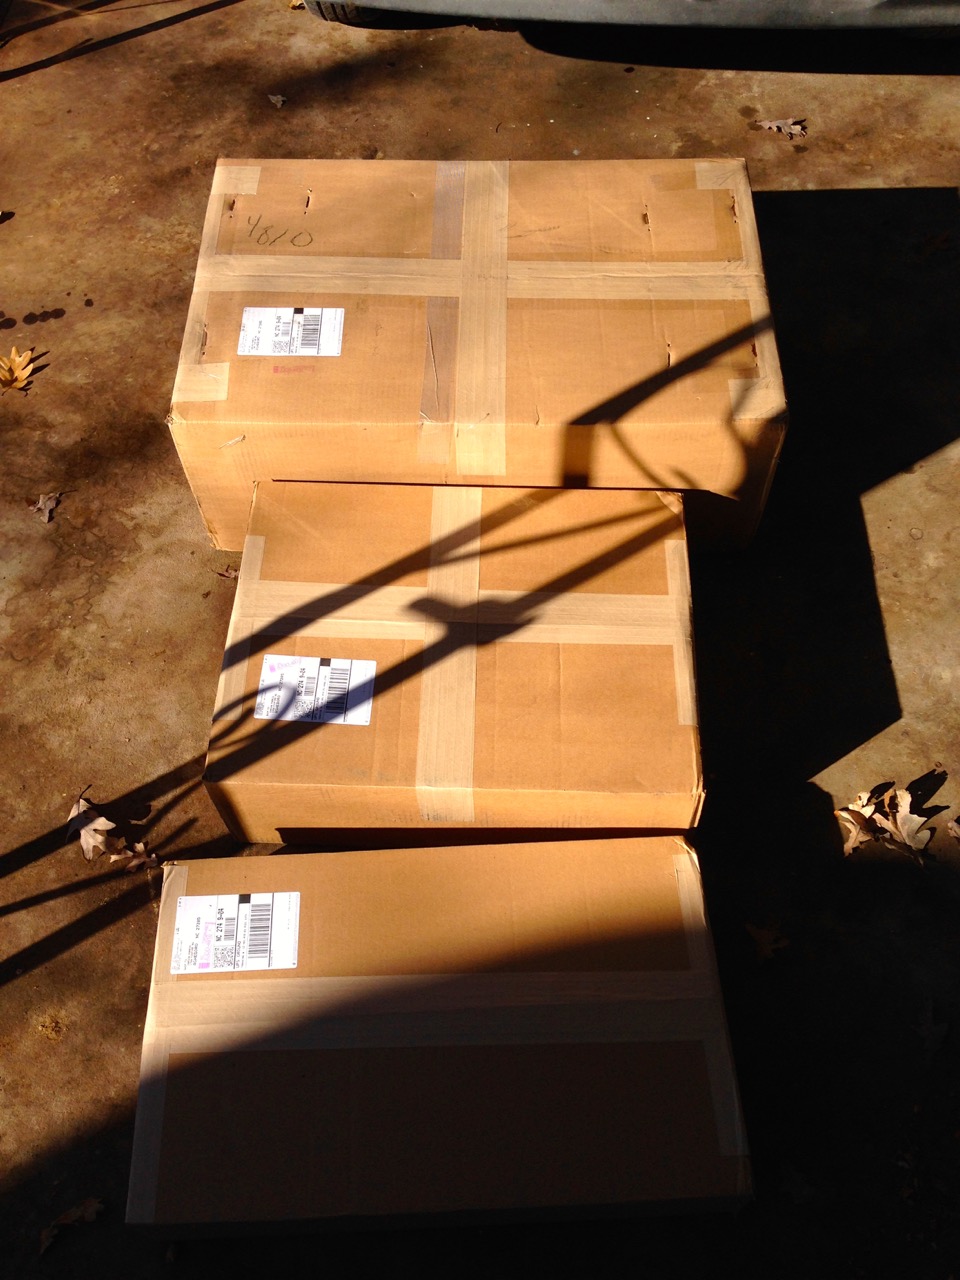
Box #1. Supercharger, some piping and some other small parts in the other boxes
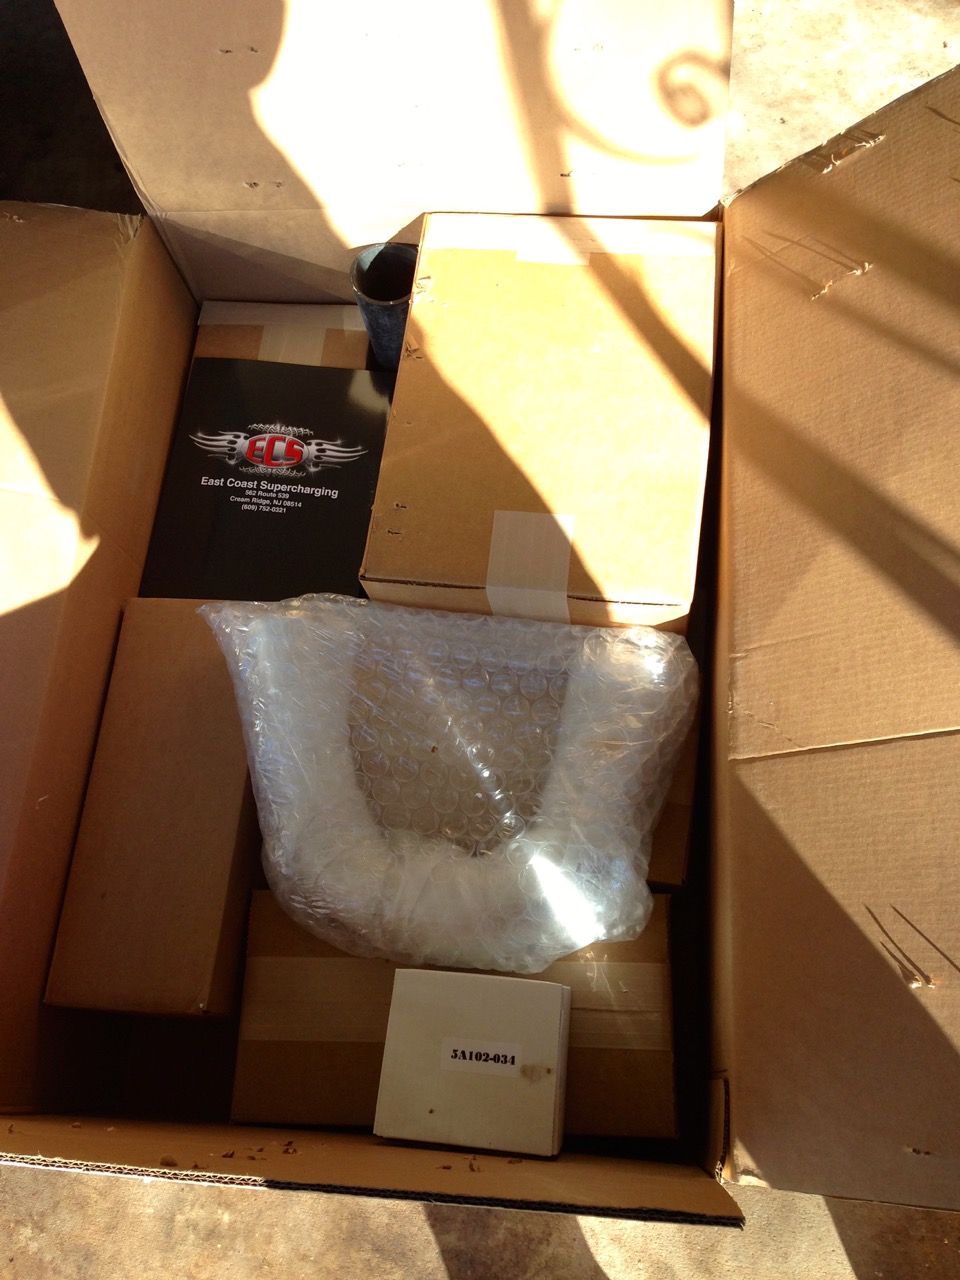
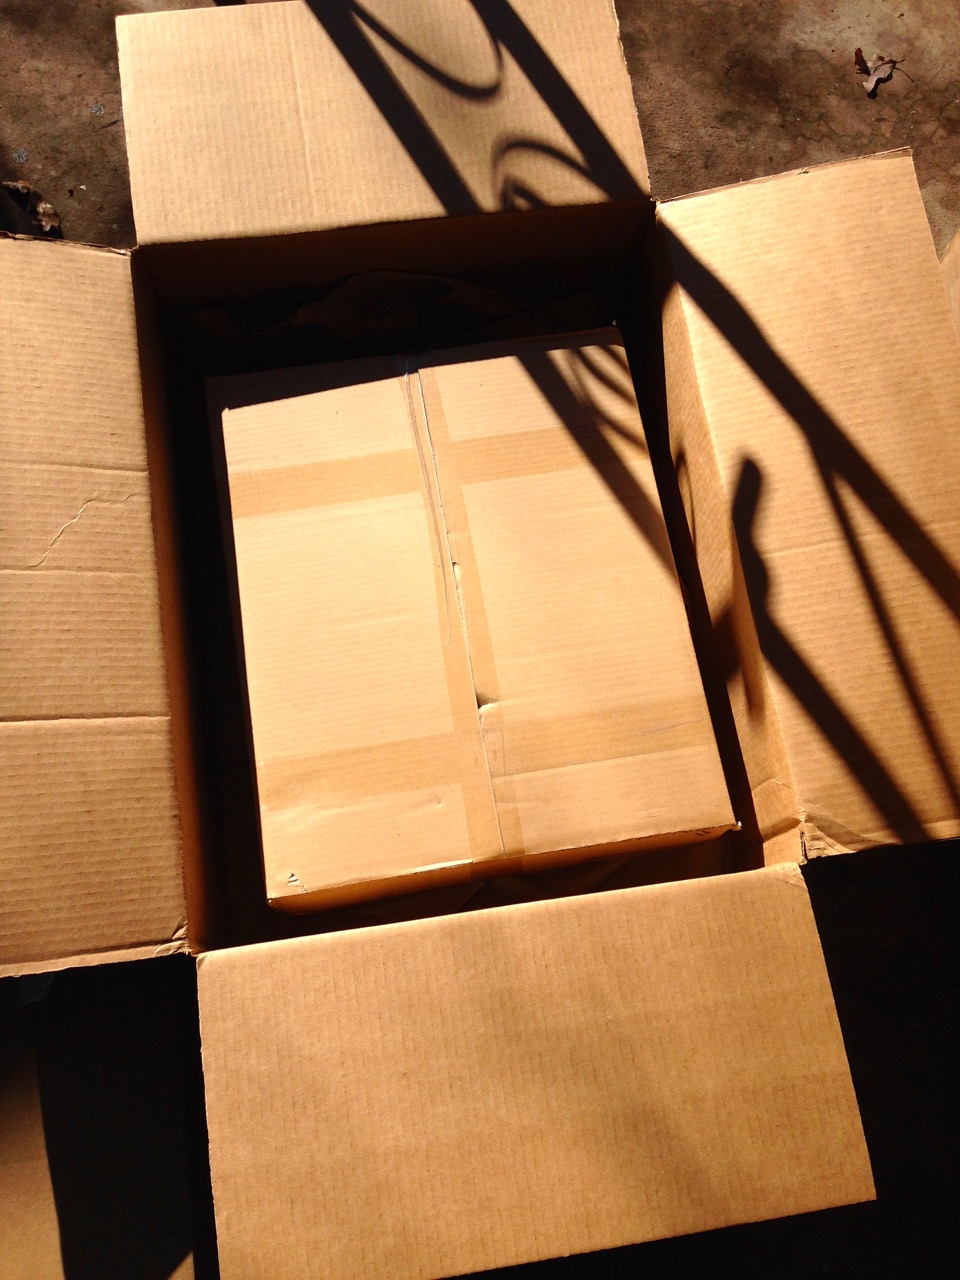
Box #2.. which has another box in it.
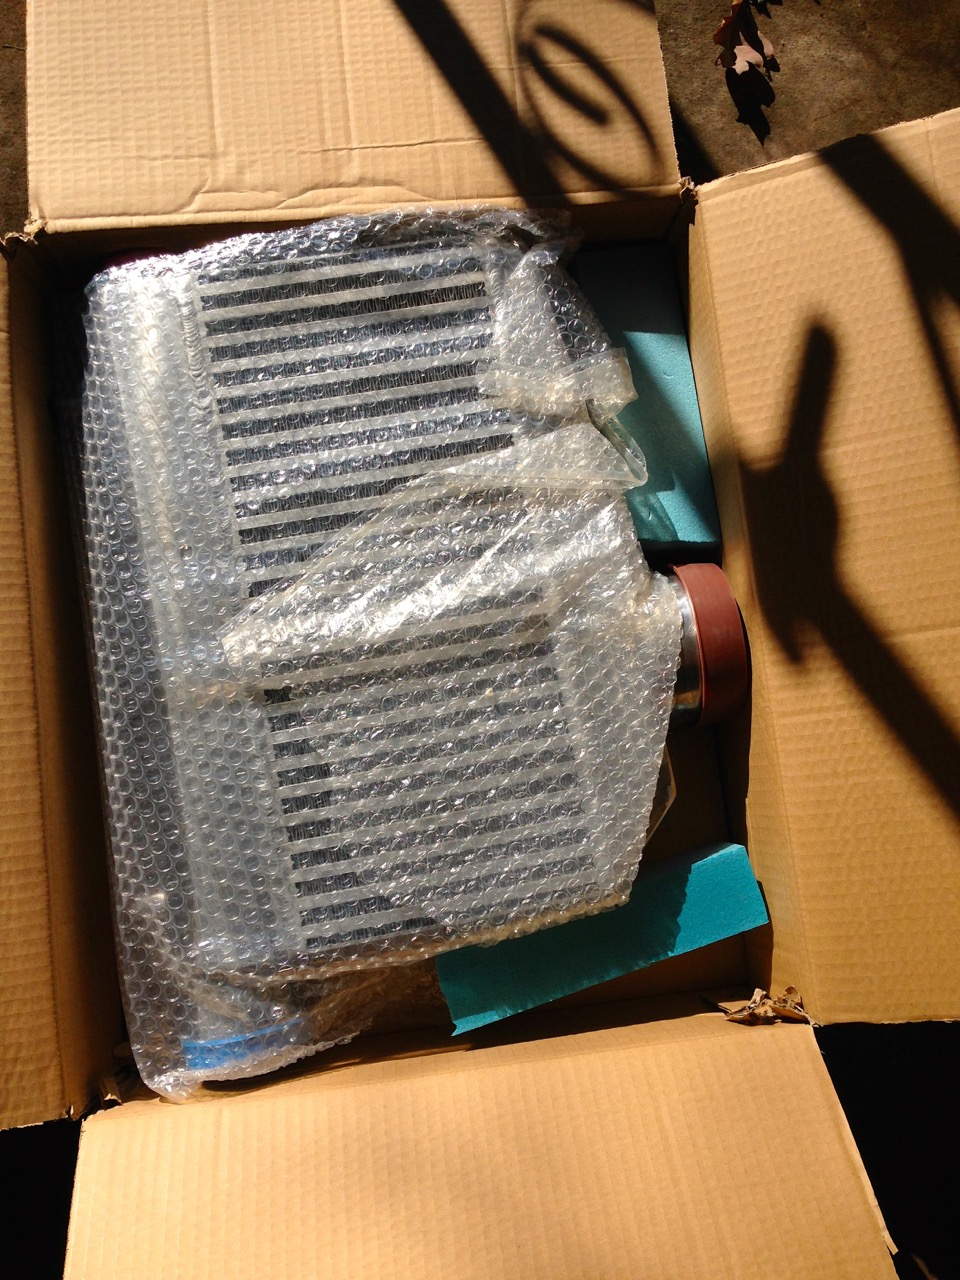
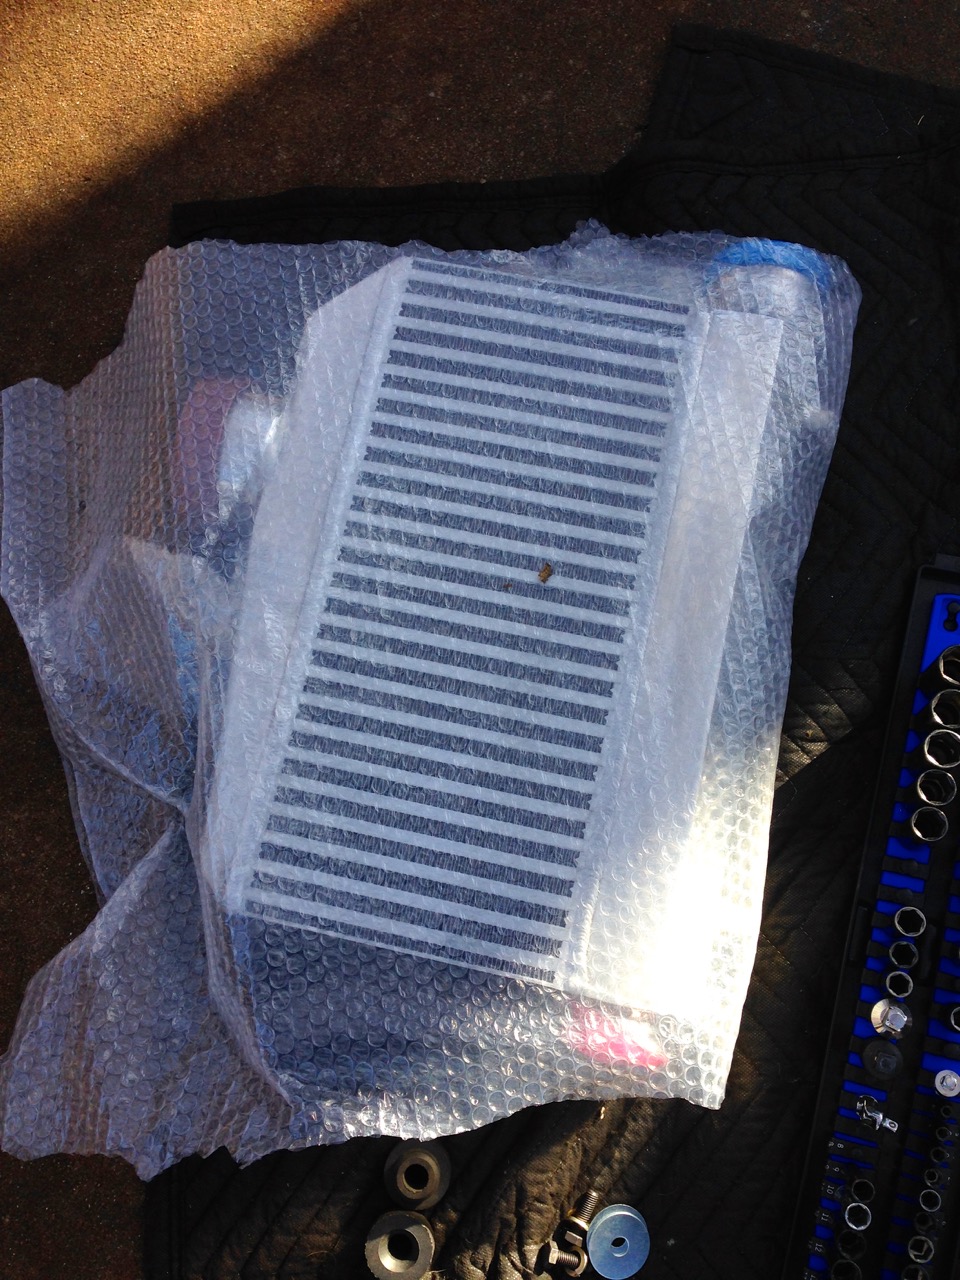
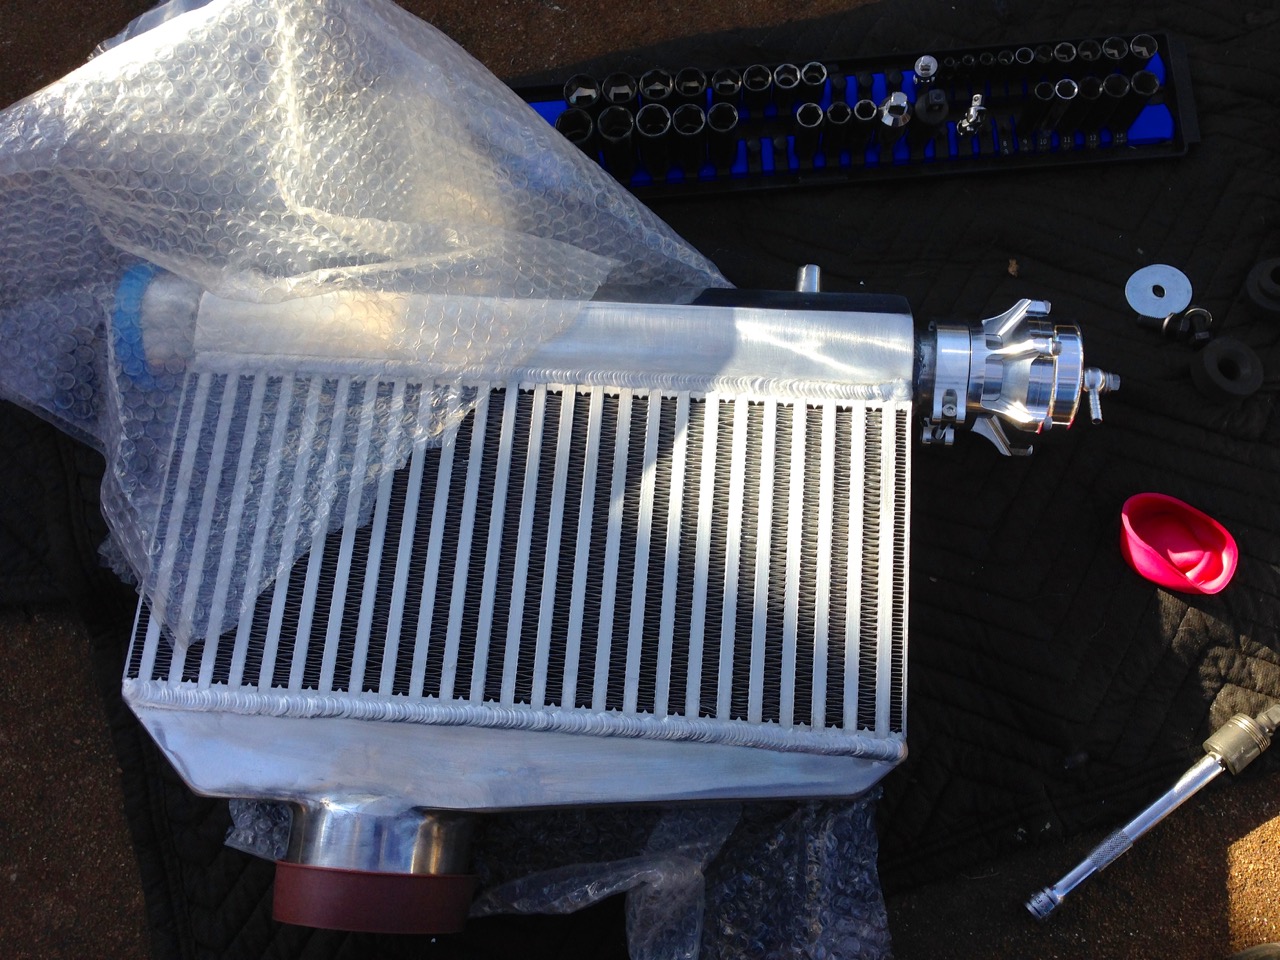
Box #2b.. intercooler! This thing is thick and heavy. Very nice looking
Belt, filter, clamps and something else I think that I can't see in the picture
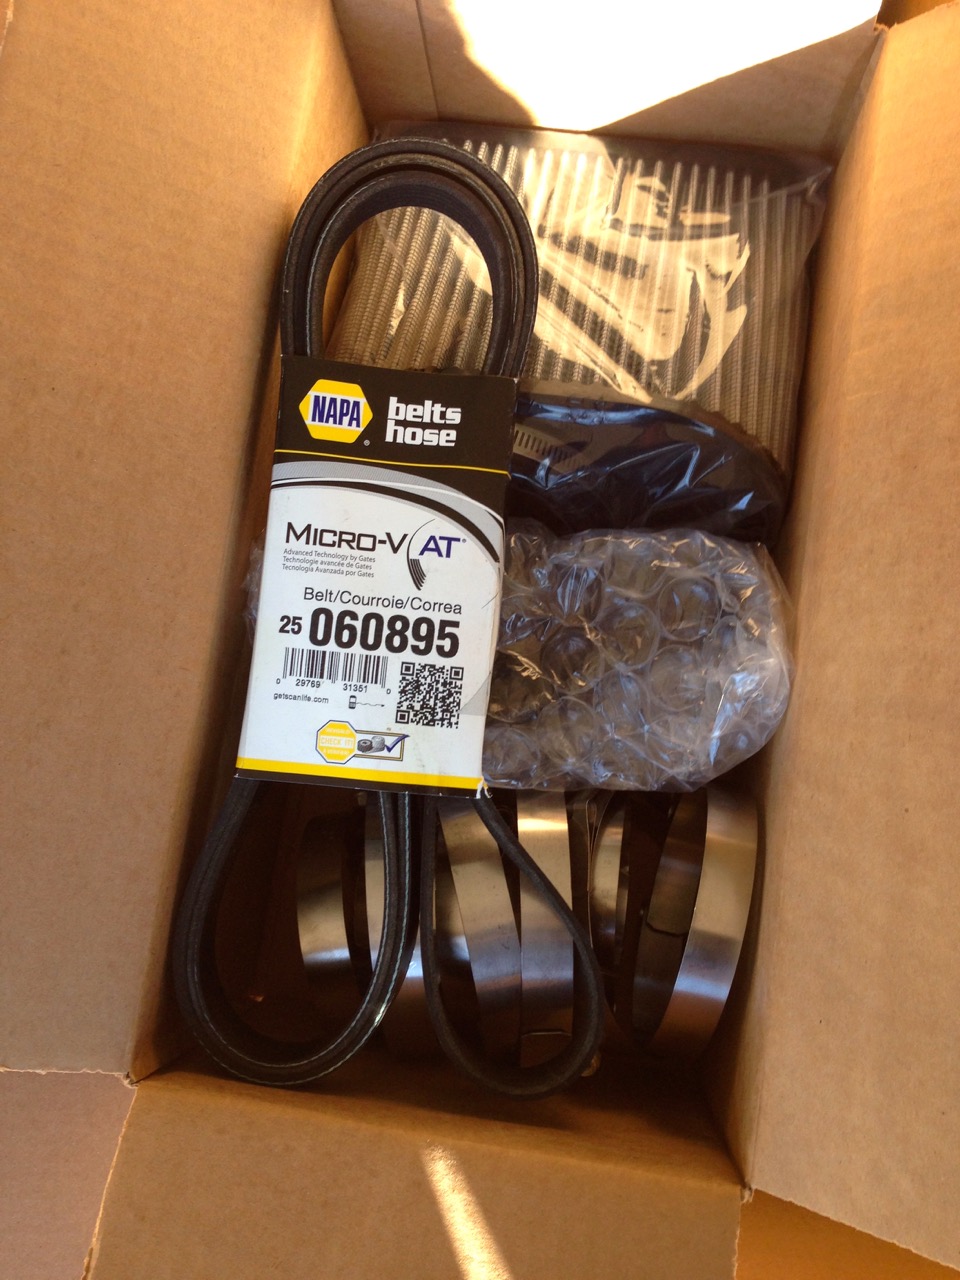
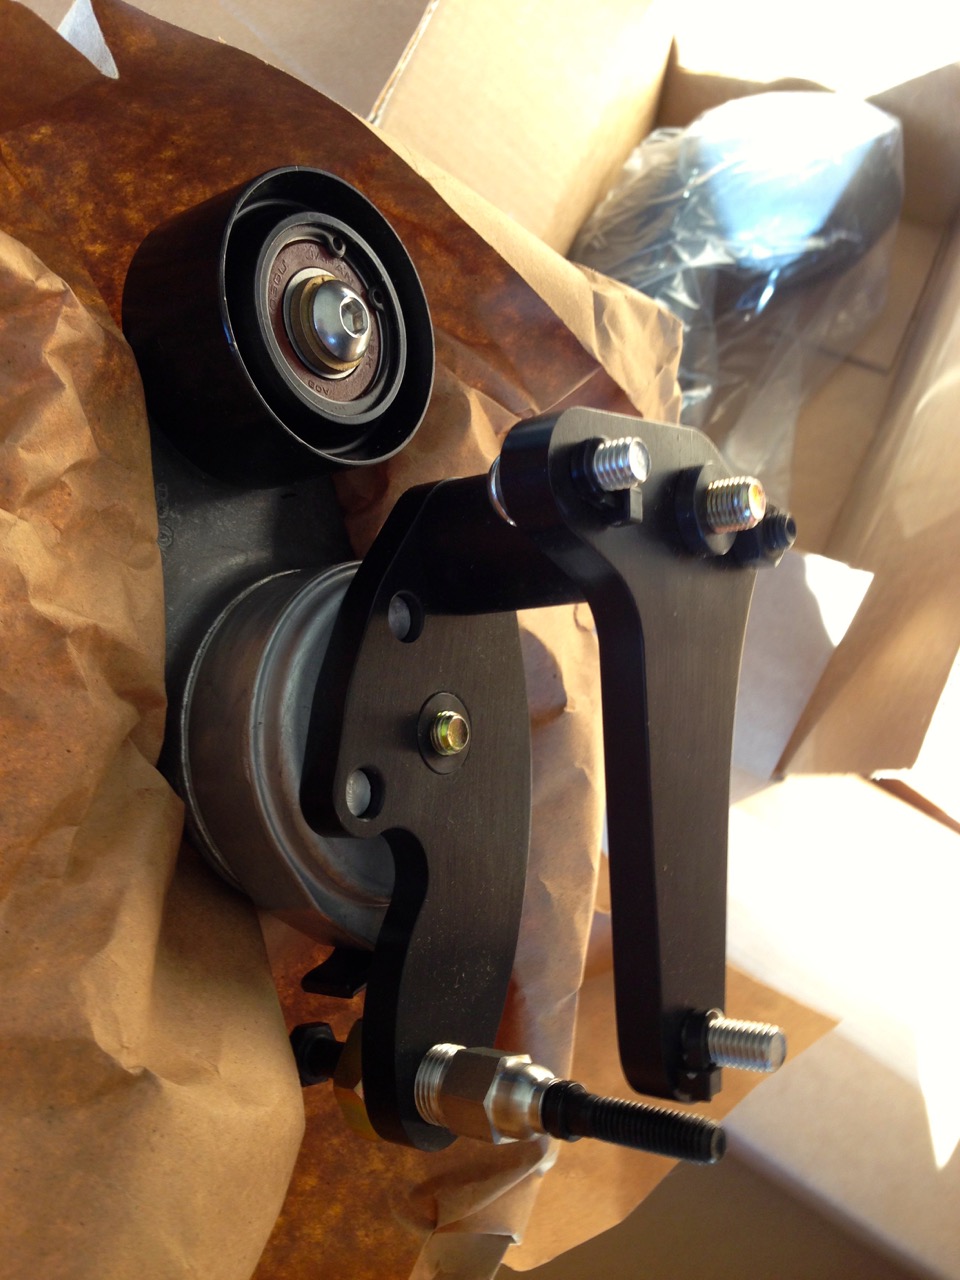
Heavy duty pulley... This thing looks super nice in person. I also really like how they zip tied all the bolts/washer in the right places. Makes it a lot easier to understand where everything is supposed to go
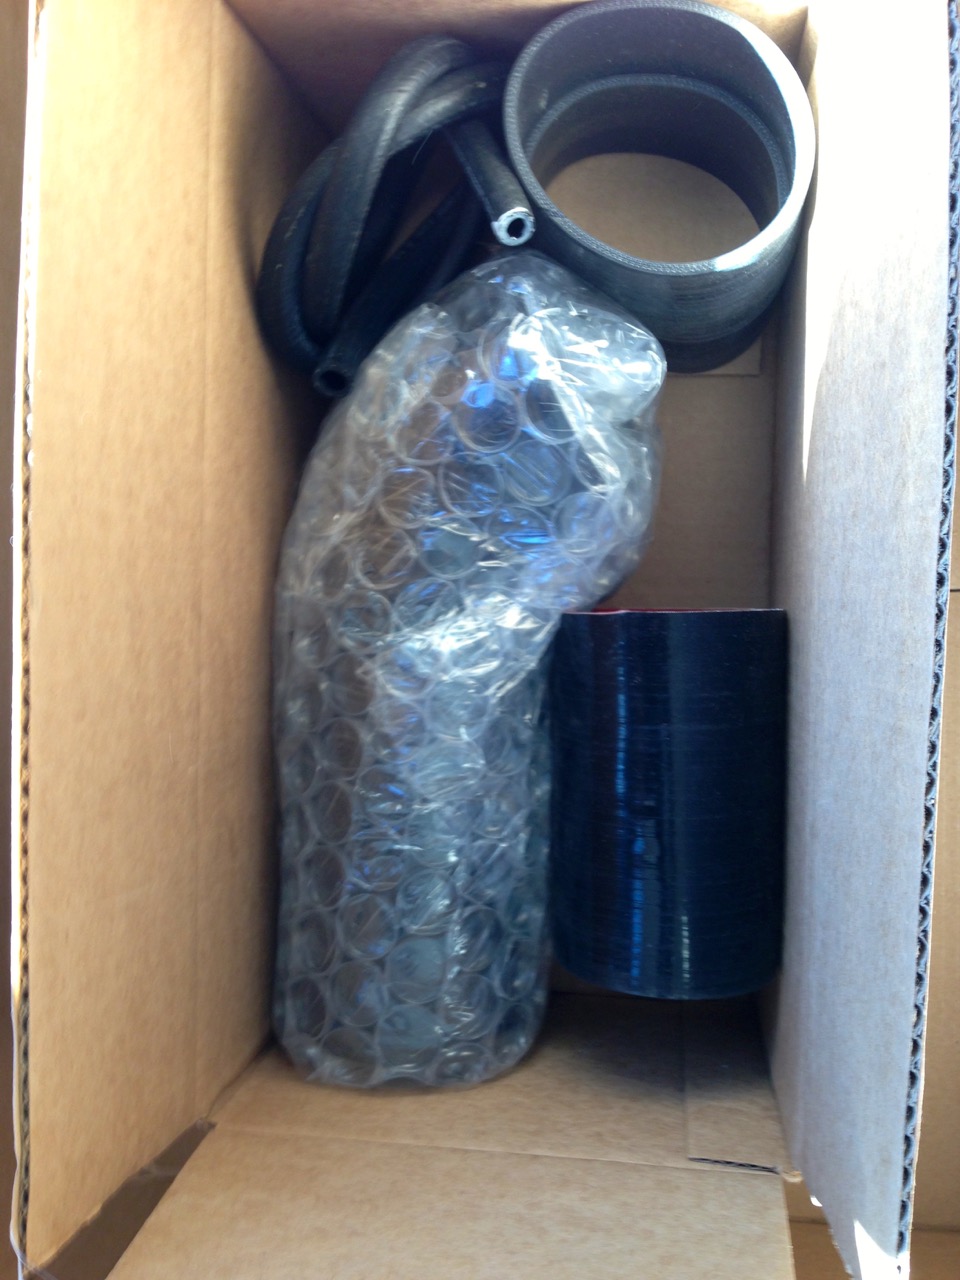
Another box. Hoses
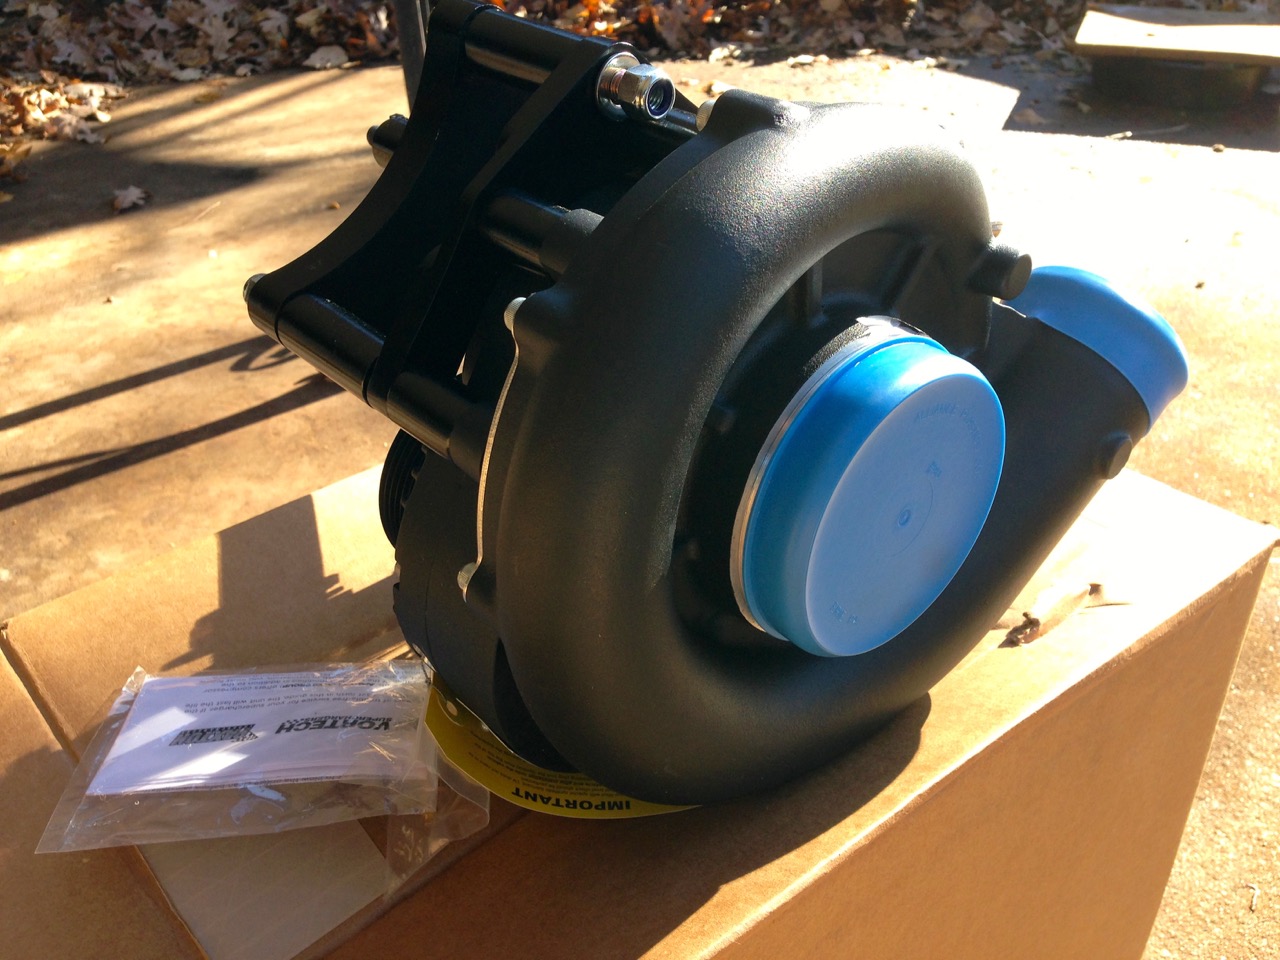
And the fun stuff. Supercharger!
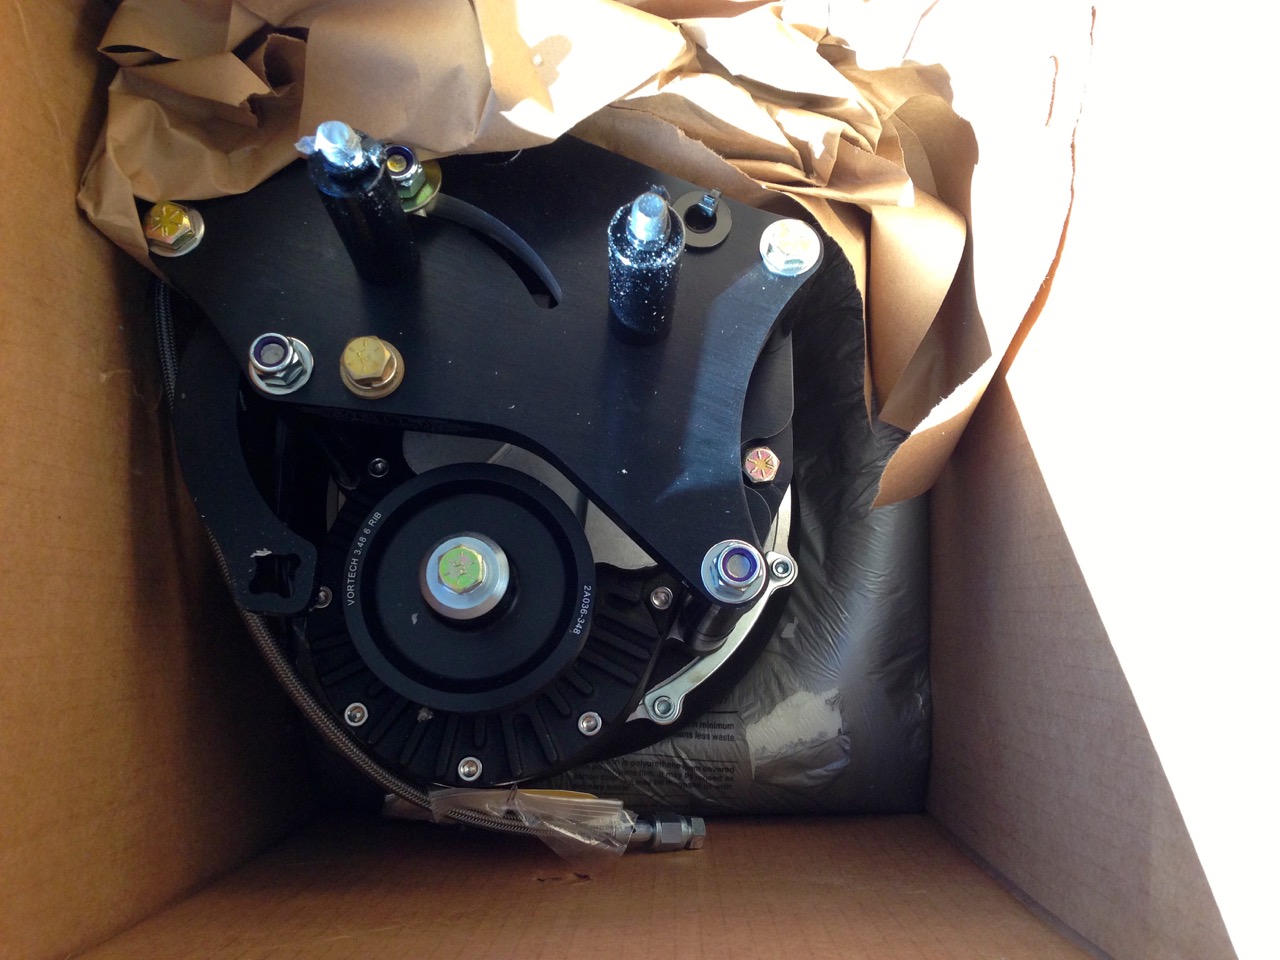
Supercharger out of the box.. man that black looks nice. I'm glad I got that instead of polished. Too bad it has to get put on a dirty engine
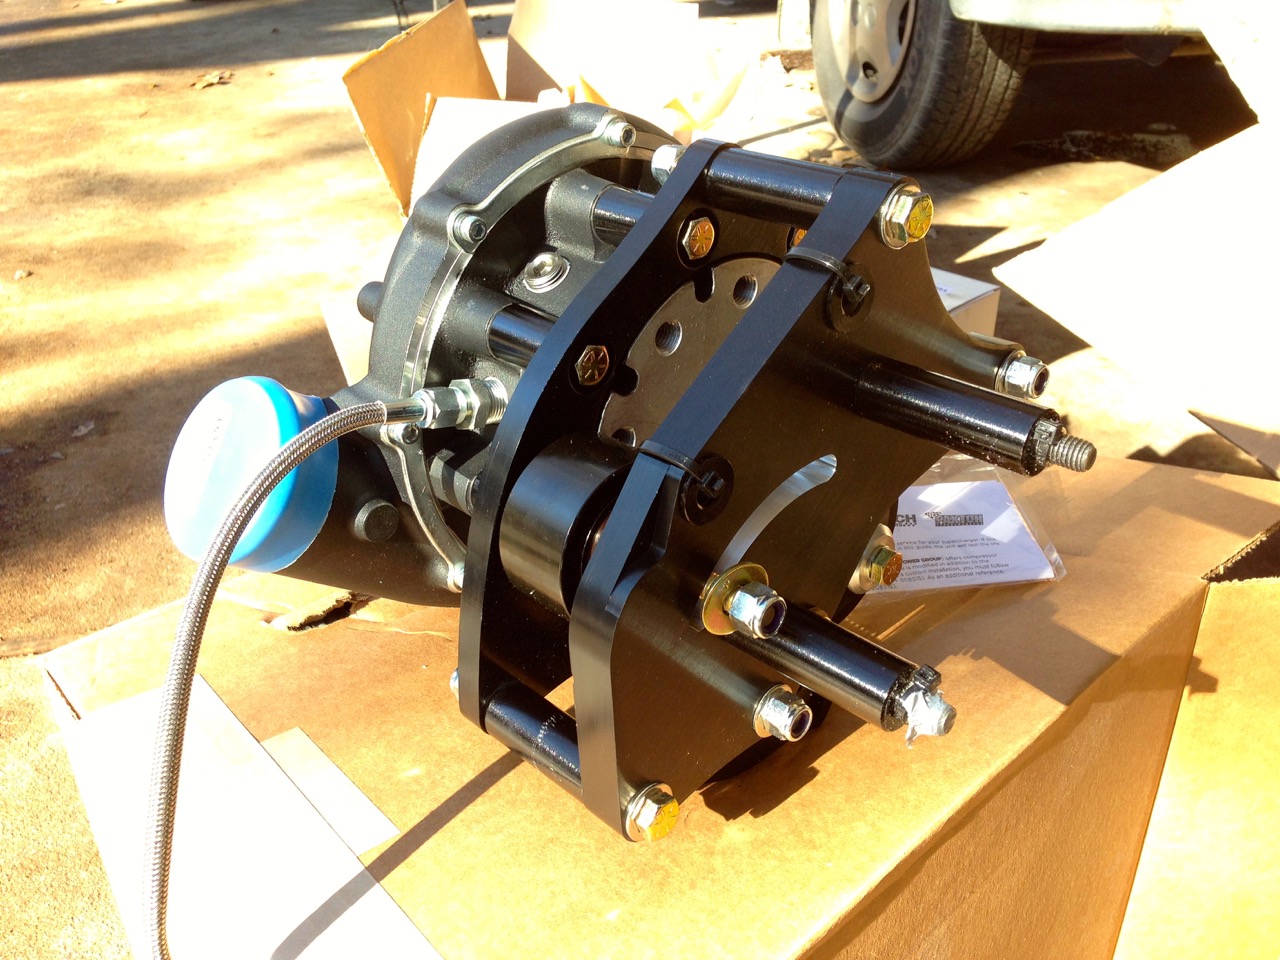
More SC look
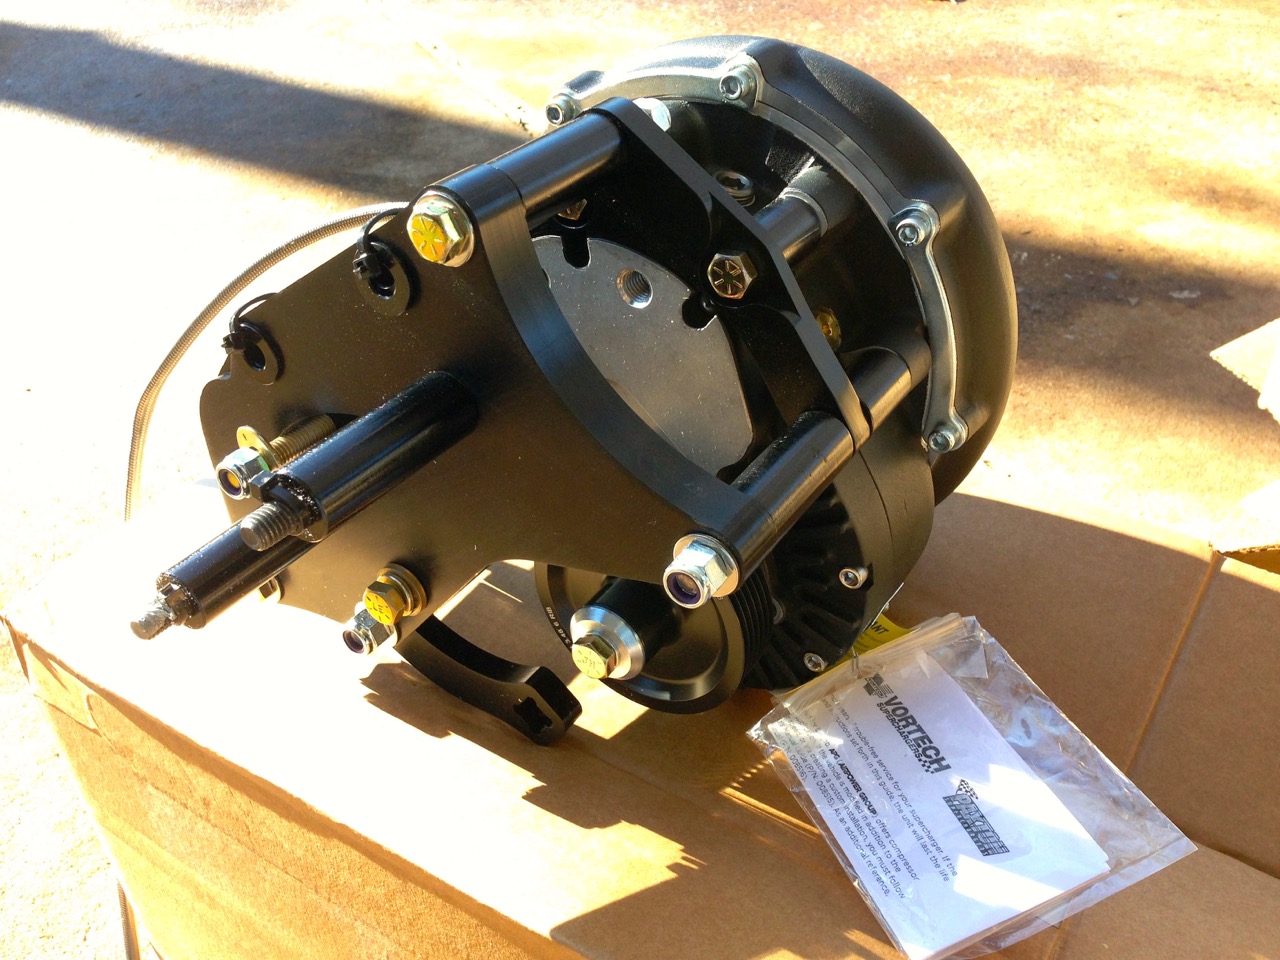
More SC
Misc part, plugs, etc.
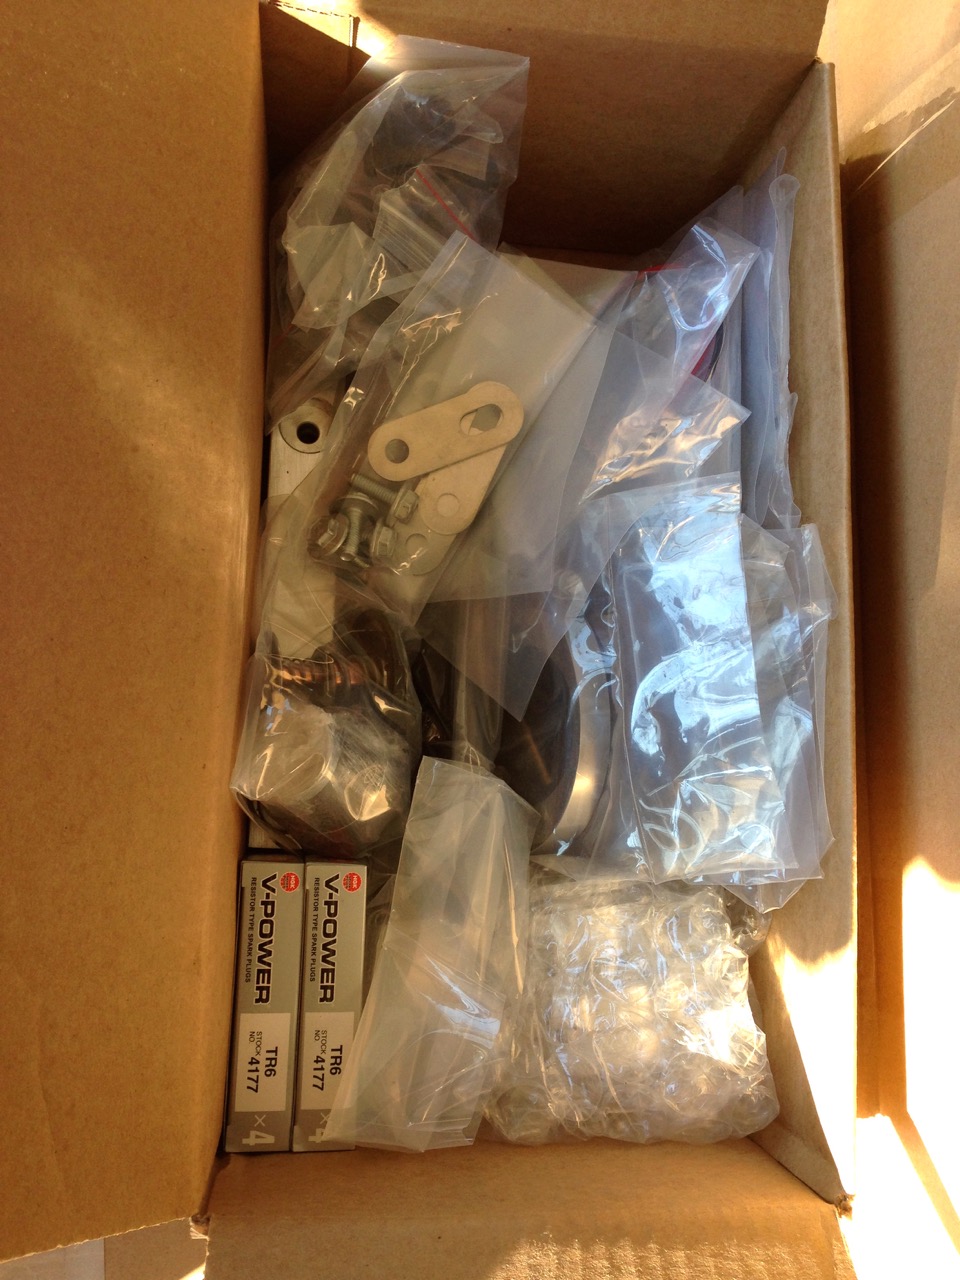
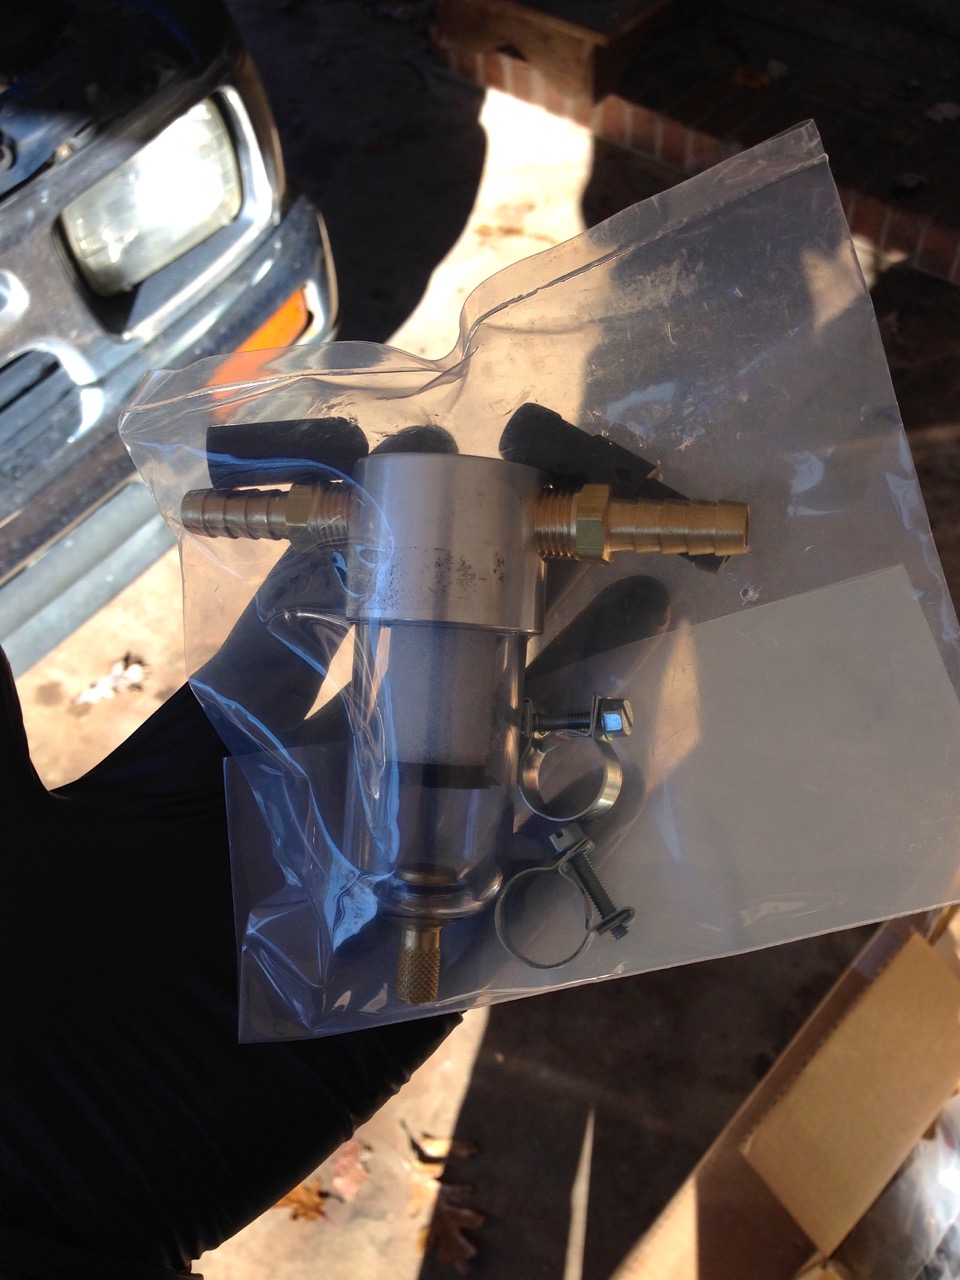
And oil catch.. so glad they are including this one and not the one that is shown in the directions, lol (looked like something from Harbor Freight for an air compressor)
Maybe I'm late to the game, but I've never seen a good set of pictures that shows how an ECS kit comes to the average DIY'er. So, here goes..
Took me a good 30 minutes to get this thing unpackaged.. It came in 3 boxes, very very well packaged. If they ever need to save some money.. they could probably cut $100 off if they didn't have to package all this stuff up
I got side tracked after getting these pictures and didn't finish taking pics of everything.. I know I at least missed taking one of the radiator / air inlet cover thing. Ah well, I'll get it later
3 boxes....

Box #1. Supercharger, some piping and some other small parts in the other boxes

Box #2.. which has another box in it.

Box #2b.. intercooler! This thing is thick and heavy. Very nice looking

Belt, filter, clamps and something else I think that I can't see in the picture

Heavy duty pulley... This thing looks super nice in person. I also really like how they zip tied all the bolts/washer in the right places. Makes it a lot easier to understand where everything is supposed to go

Another box. Hoses

And the fun stuff. Supercharger!

Supercharger out of the box.. man that black looks nice. I'm glad I got that instead of polished. Too bad it has to get put on a dirty engine

More SC look

More SC

Misc part, plugs, etc.

And oil catch.. so glad they are including this one and not the one that is shown in the directions, lol (looked like something from Harbor Freight for an air compressor)

Last edited by schpenxel; 12-07-2014 at 09:15 PM.
 12-07-2014, 09:24 PM
#48
Race Director
Thread Starter
Member Since: May 2004
Location: Raleigh, NC
Posts: 16,664
Received 1,194 Likes
on
1,053 Posts
St. Jude Donor '15
And a few pictures of pinning the crank. Sorry, I was limited on time today so I had to work and not take pictures
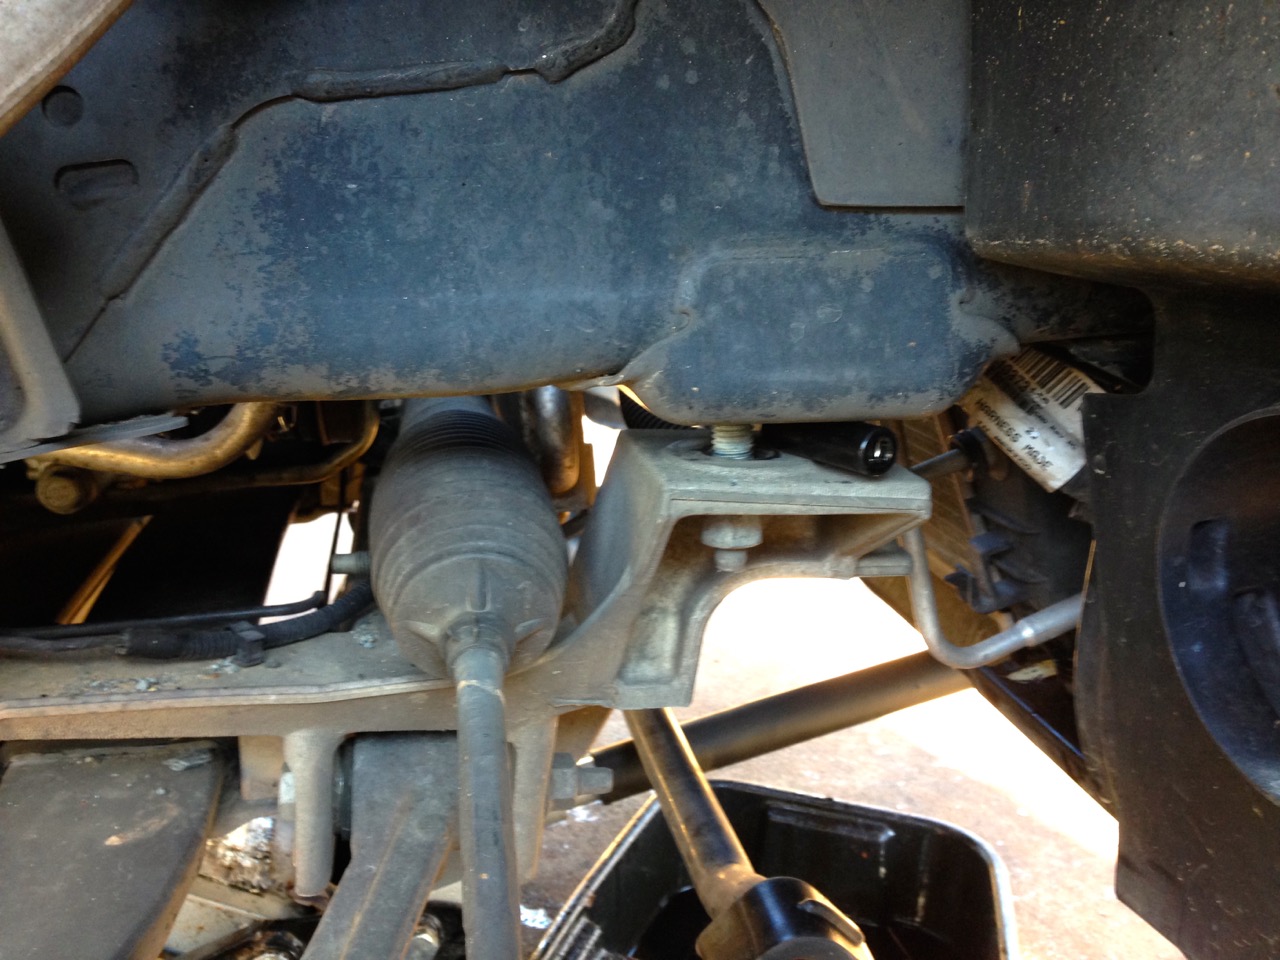
I decided to use the "Magnacharger" method of pinning the crank. With this method the steering rack STAYS IN PLACE. You lower the cradle as far as you can while leaving the bolts in place, and then loosen the engine mounts from underneath and pick the engine up. This basically drops the steering rack down a little bit and raises the crank a little bit, allowing just barely enough room for access
The cradle doesn't like to fall down for some reason.. so you have to wedge something in there to hold it. Sockets work well
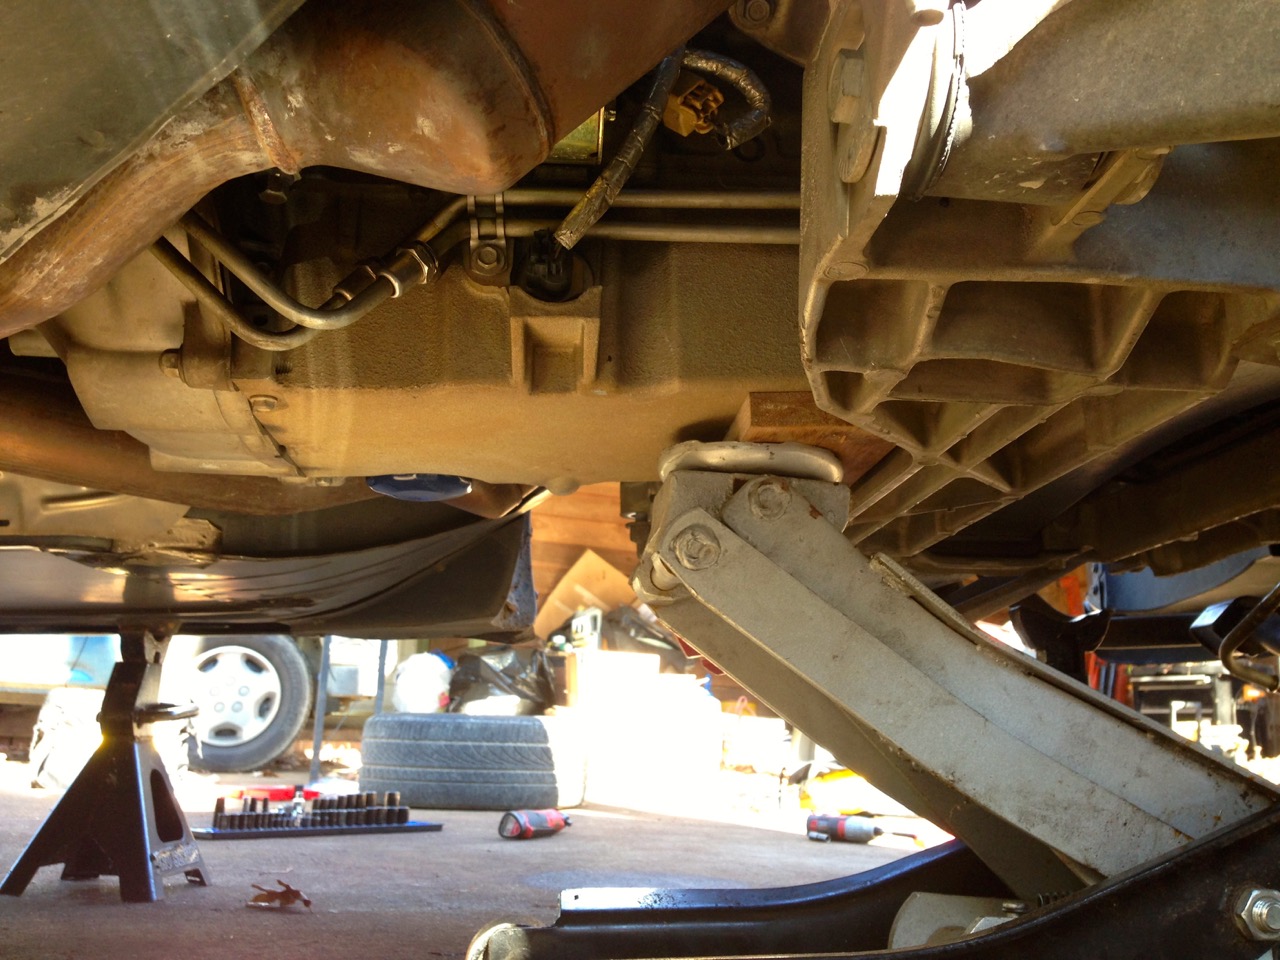
Lifting engine up. It's so weird having a car that DOESN'T leak oil. My last car was a BMW and that thing might as well have had a hole in the side of the engine. It leaked no matter what I did
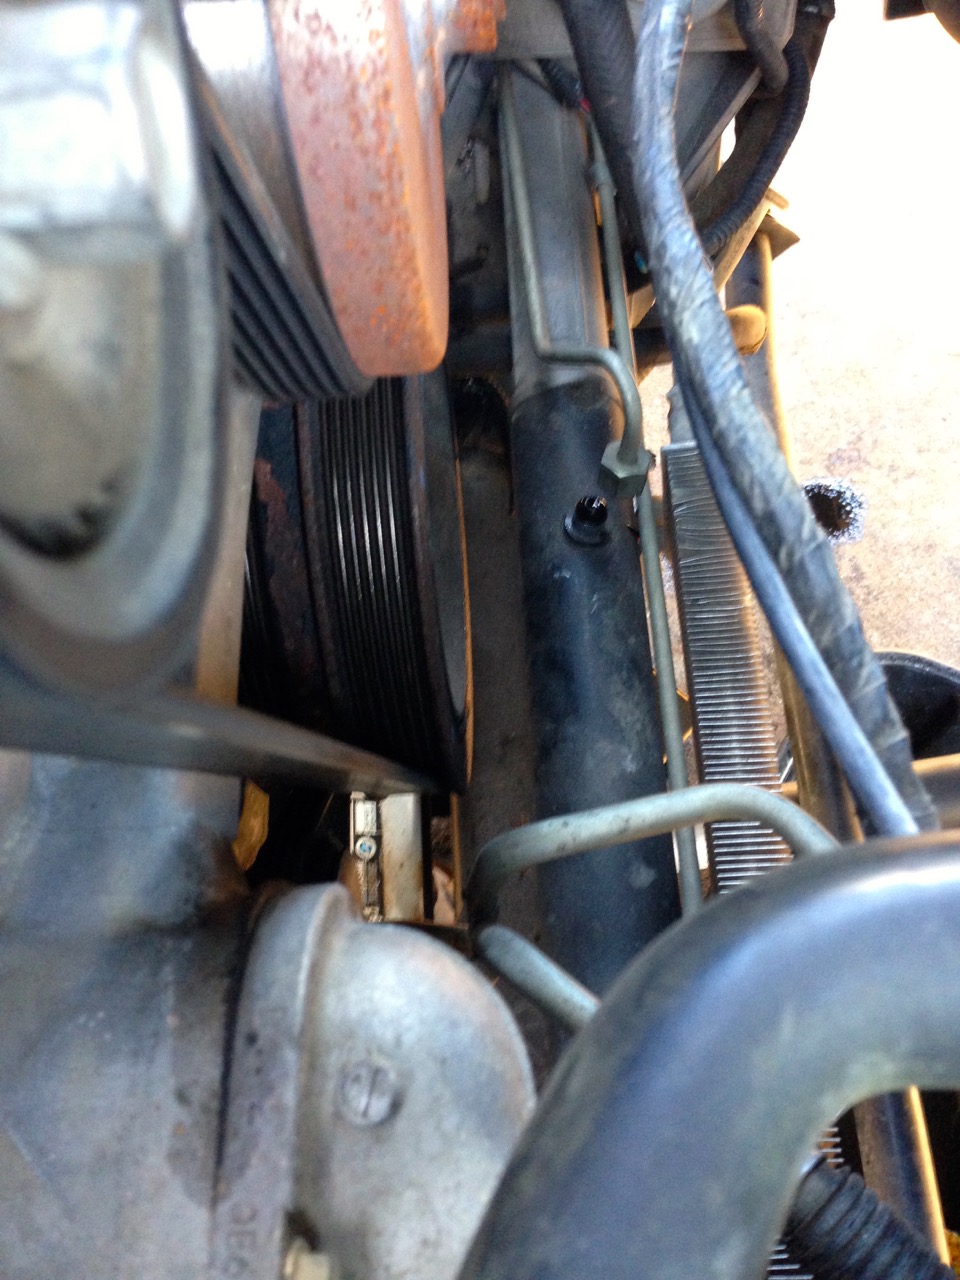
Hard to see.. but I THINK this was after I had just enough space to get a breaker bar in there and get the crank bolt off. That was a BITCH. 4' iron pipe + breaker bar + me making some loud noises were required. First bolt my impact hasn't taken out
Crank bolt, breaker bar, cheater pipe
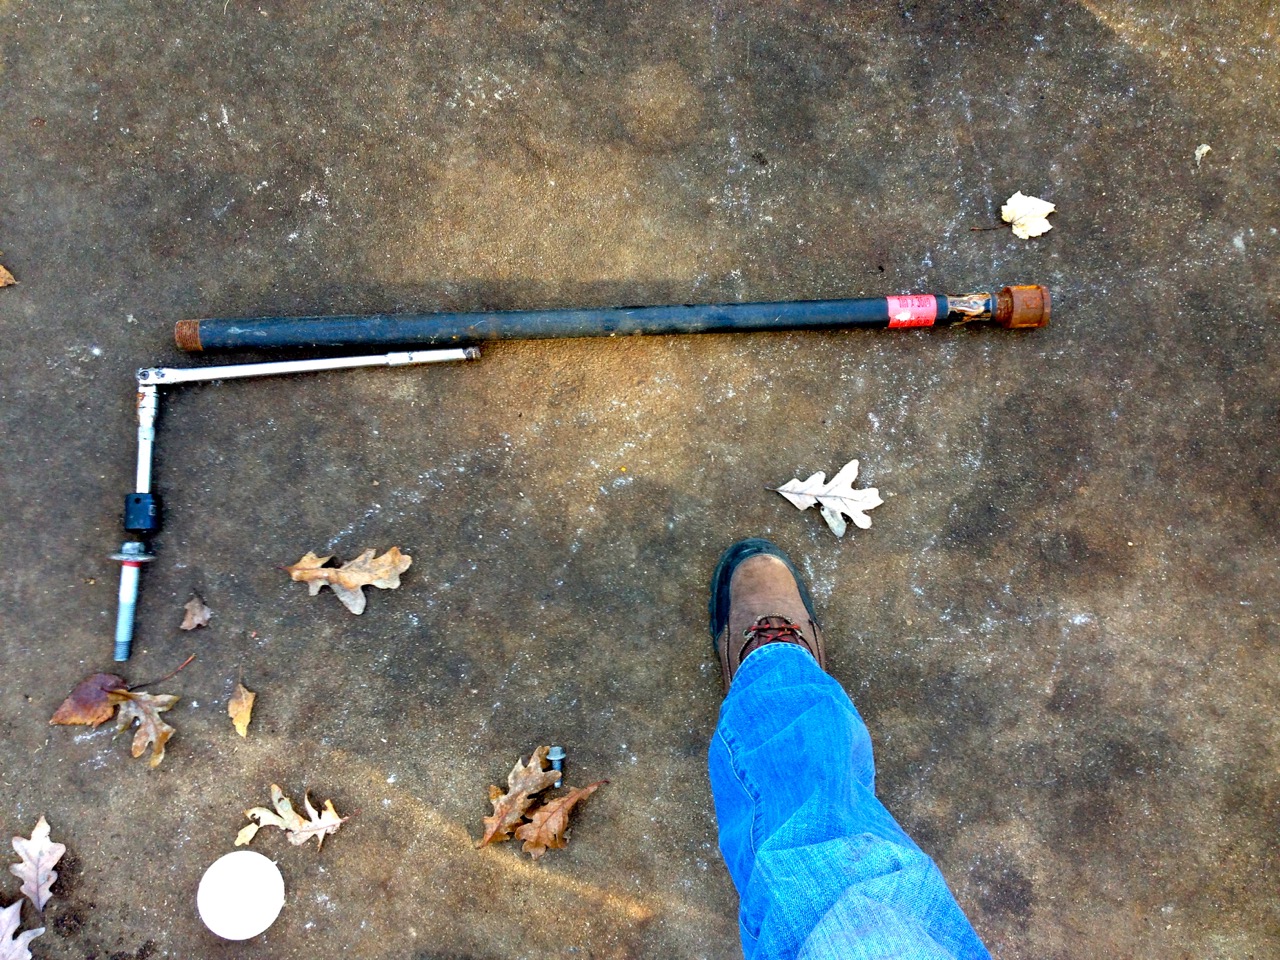
After this, I installed the pinning fixture (included+bit) and used a small right angled pneumatic drill (not included, thanks Harbor Freight) to to drill deep enough for the pin to go in. This took quite a while but I finally got it. It was a VERY awkward angle to get enough pressure on the drill to do anything, but I finally got it.
After that I tapped the pin into place, tightened the crank to 50Nm + 140* and called that part of the job done.
I didn't plan on having to drive this car to work tomorrow, but stuff happens, so I had to put it back together.
Next weekend I hope to get the SC installed. Doesn't look too terrible of a job but we shall see.
I decided to use the "Magnacharger" method of pinning the crank. With this method the steering rack STAYS IN PLACE. You lower the cradle as far as you can while leaving the bolts in place, and then loosen the engine mounts from underneath and pick the engine up. This basically drops the steering rack down a little bit and raises the crank a little bit, allowing just barely enough room for access
The cradle doesn't like to fall down for some reason.. so you have to wedge something in there to hold it. Sockets work well

Lifting engine up. It's so weird having a car that DOESN'T leak oil. My last car was a BMW and that thing might as well have had a hole in the side of the engine. It leaked no matter what I did

Hard to see.. but I THINK this was after I had just enough space to get a breaker bar in there and get the crank bolt off. That was a BITCH. 4' iron pipe + breaker bar + me making some loud noises were required. First bolt my impact hasn't taken out

Crank bolt, breaker bar, cheater pipe

After this, I installed the pinning fixture (included+bit) and used a small right angled pneumatic drill (not included, thanks Harbor Freight) to to drill deep enough for the pin to go in. This took quite a while but I finally got it. It was a VERY awkward angle to get enough pressure on the drill to do anything, but I finally got it.
After that I tapped the pin into place, tightened the crank to 50Nm + 140* and called that part of the job done.
I didn't plan on having to drive this car to work tomorrow, but stuff happens, so I had to put it back together.
Next weekend I hope to get the SC installed. Doesn't look too terrible of a job but we shall see.
12-07-2014, 09:34 PM
#49
Race Director
Thread Starter
Member Since: May 2004
Location: Raleigh, NC
Posts: 16,664
Received 1,194 Likes
on
1,053 Posts
St. Jude Donor '15
I was originally thinking of going that route, but when I factor in how much I drive + the cost of all the supporting hardware to do a decent sized cam + I've read that valve springs have to be replaced every year or two if you drive a lot with a big cam that I just couldn't warm up to the idea. It was too much money for that when I compared it to what I could get out of a SC..
 12-08-2014, 12:53 PM
#52
Race Director
Thread Starter
Member Since: May 2004
Location: Raleigh, NC
Posts: 16,664
Received 1,194 Likes
on
1,053 Posts
St. Jude Donor '15
No problem.. Hopefully I have more time during the actual SC install so I can take more of it going in.
I've been wanting to put a SC on a Corvette for the better part of a decade, so I'm very excited it's finally happening. I had a C5 at the time, sold it, then finally got a C6 about 6 months ago and have been eyeing this kit every since..
I took off some extra days during the holidays to devote towards installing this, but hopefully I'll be done before then and not need them.
Actually, I'll probably need them for a clutch install instead, lol
12-08-2014, 01:21 PM
#53
Le Mans Master
haha..it's cool! No problem on the pictures.
No problem.. Hopefully I have more time during the actual SC install so I can take more of it going in.
I've been wanting to put a SC on a Corvette for the better part of a decade, so I'm very excited it's finally happening. I had a C5 at the time, sold it, then finally got a C6 about 6 months ago and have been eyeing this kit every since..
I took off some extra days during the holidays to devote towards installing this, but hopefully I'll be done before then and not need them.
Actually, I'll probably need them for a clutch install instead, lol
 My installer (FSP) took photos along the way. I won't pollute your thread with them. You'll love boost once you fire the car up and go for a ride after it's tuned. It's a BEAST and the way I pictured a Corvette with a V8 to really rip down the road.
  12-13-2014, 05:52 PM
#54
Race Director
Thread Starter
Member Since: May 2004
Location: Raleigh, NC
Posts: 16,664
Received 1,194 Likes
on
1,053 Posts
St. Jude Donor '15
Well today was a long day of feeling like I got precisely jack done.
Got HD AC mount installed. Thought I had intercooler installed, then realized I measured from the wrong side of the radiator cradle, so now I need more rivnuts.
Speaking of rivet nuts. ANYONE installing an ECS kit should just break down and buy the right tool for setting rivnuts. They are a bastard without that tool (which I don't). After I finally got them all to seat I realized the intercooler was too far towards the passenger side, so I was pretty much screwed.
Doubt I can find more rivet nuts locally but going to try tonight
Also got horn wiring extended and radiator hose extended.
Really disappointed about the misunderstanding on where I was supposed to put the intercooler mounts. ECS really needs to update the instructions also fir several points.. Ton of small things weren't clear. Matt was a huge help but I would been screwed without him.
I was on track to get intercooler + most of the piping in today then that would leave the bracket and head unit tomorrow. Oh well, will post pictures later. Headed back home now
Haven't decided whether to work on it tomorrow or not.
Last edited by schpenxel; 12-13-2014 at 10:25 PM.
12-13-2014, 10:58 PM
#55
Race Director
Thread Starter
Member Since: May 2004
Location: Raleigh, NC
Posts: 16,664
Received 1,194 Likes
on
1,053 Posts
St. Jude Donor '15
Alrighty.. here are the pictures from today. This isn't by any means meant to be a step by step guide.. it's just some pictures I took along the way
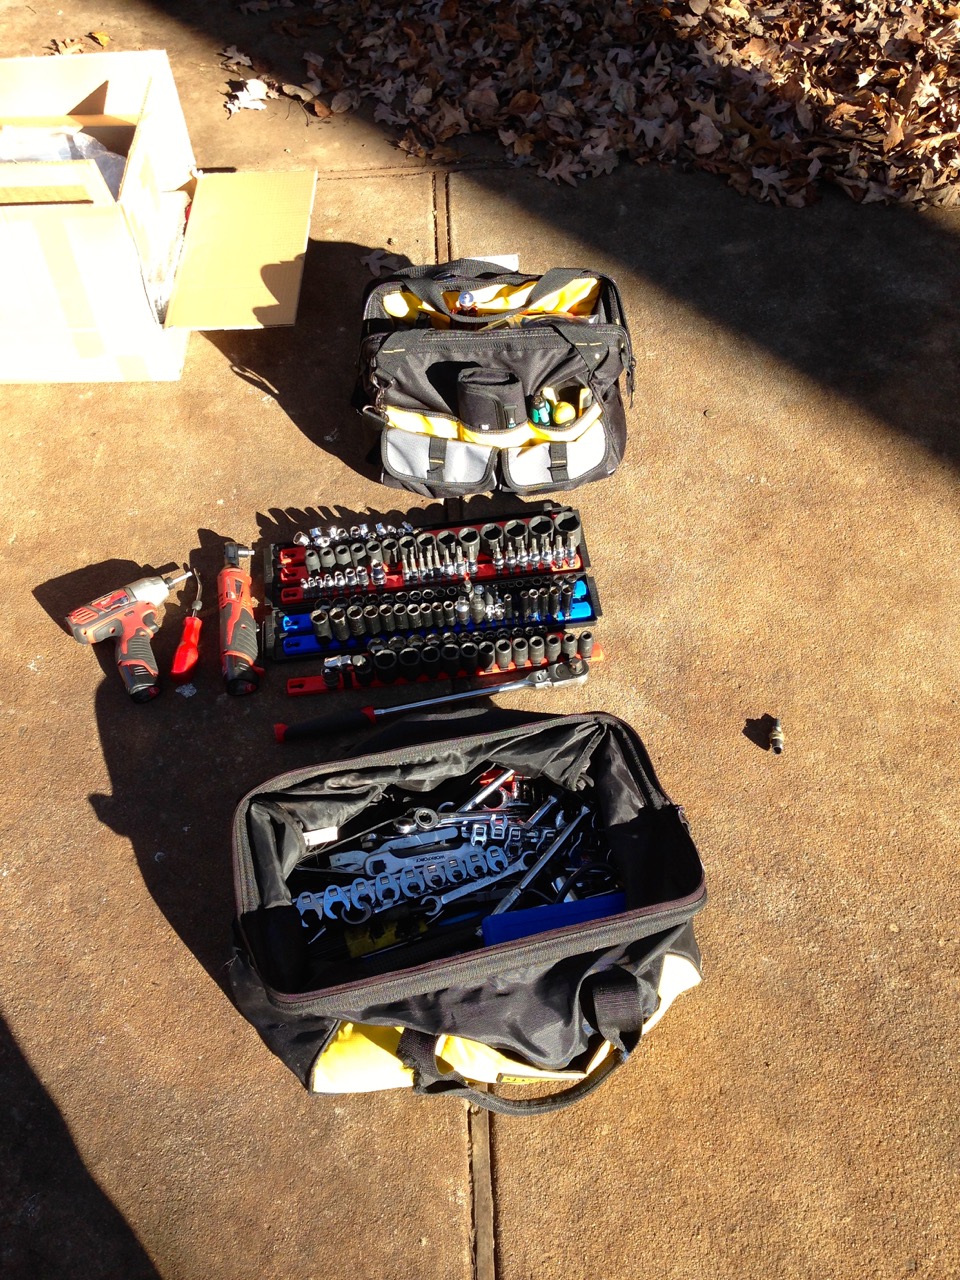
Tools for the day. Love the Ernst twist lock socket rails..
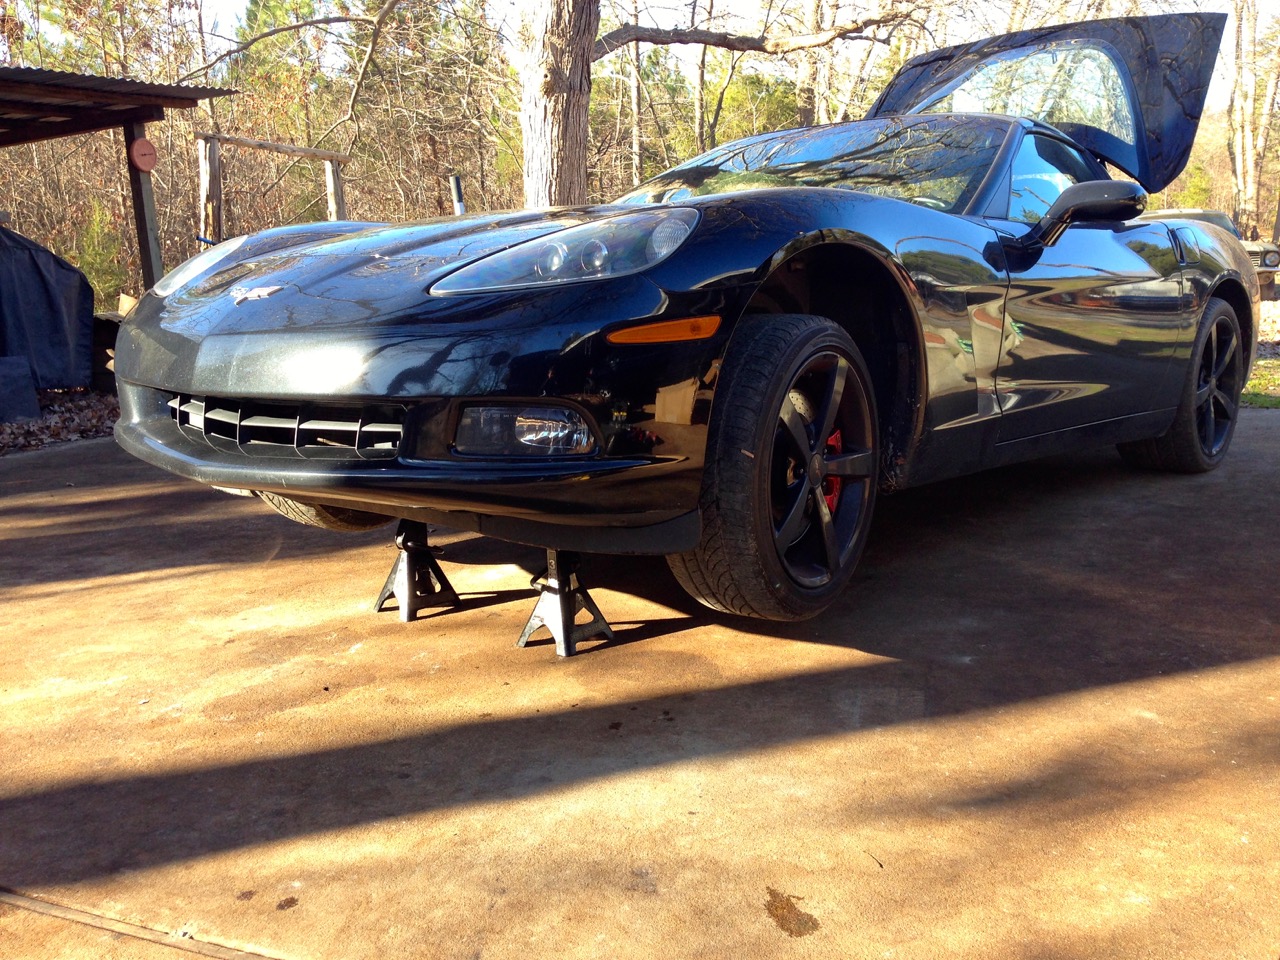
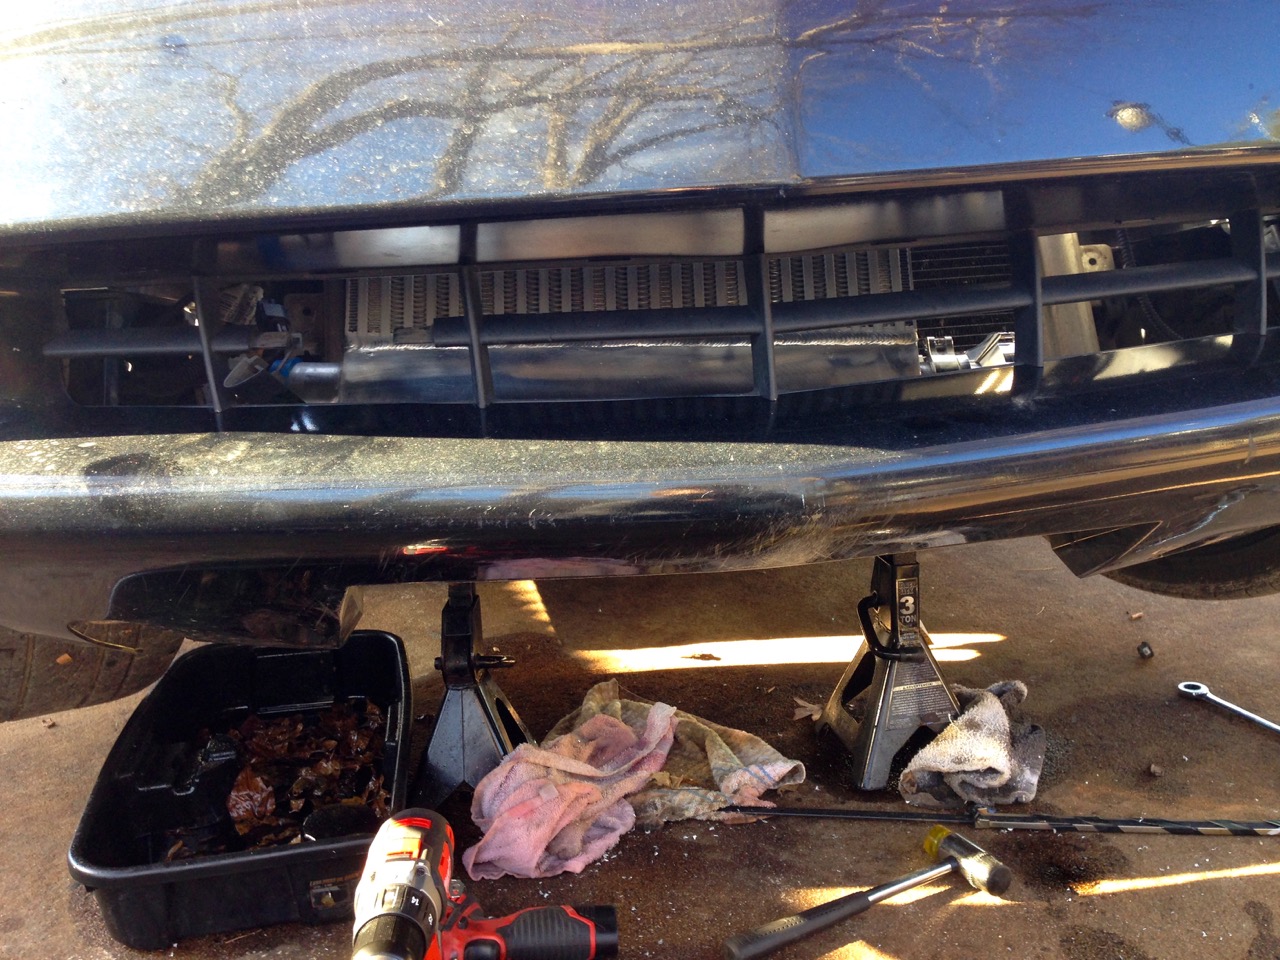
Front end up
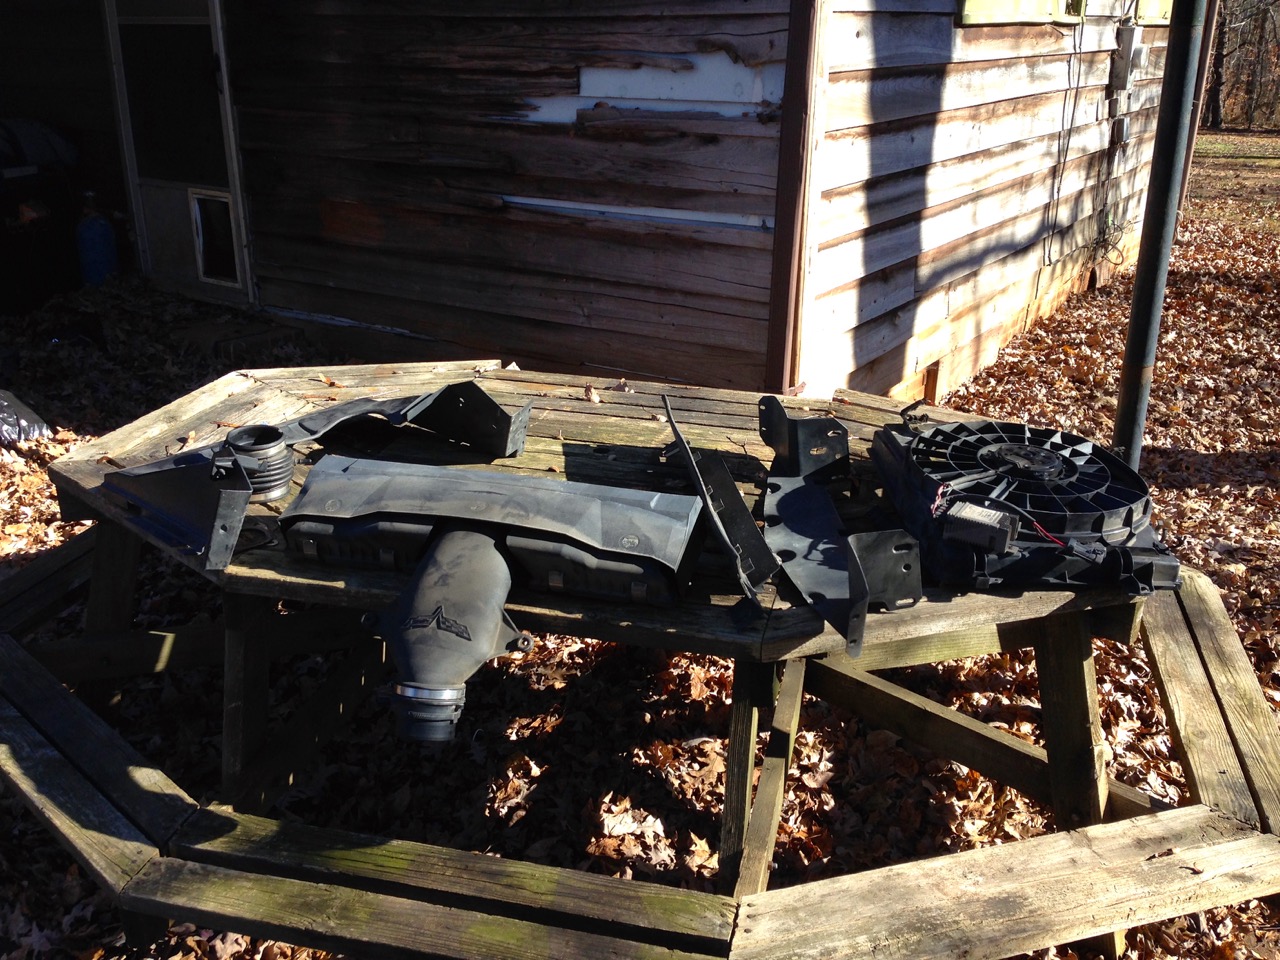
Pile of plastic stuff out of the way..
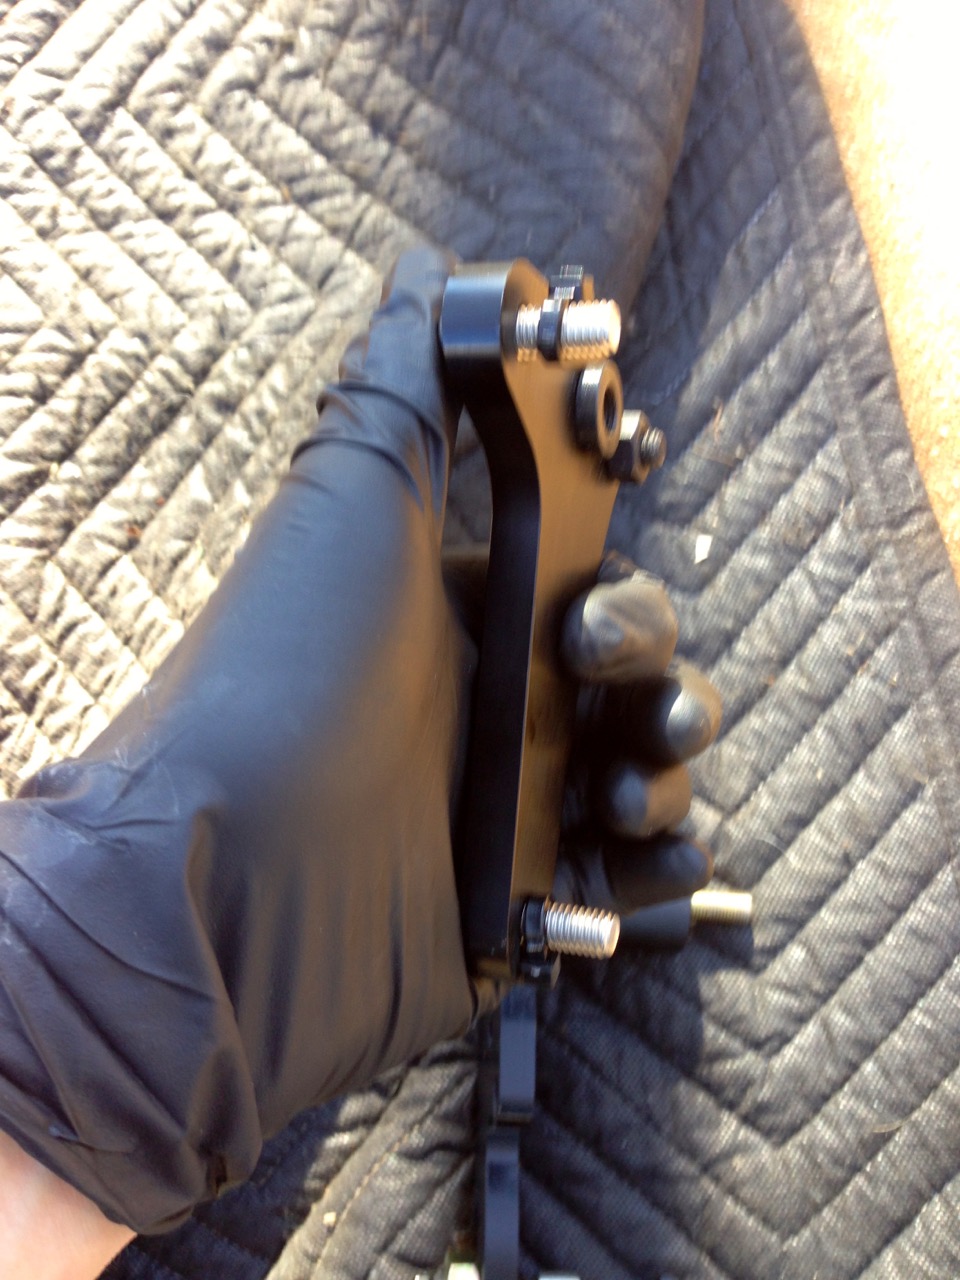
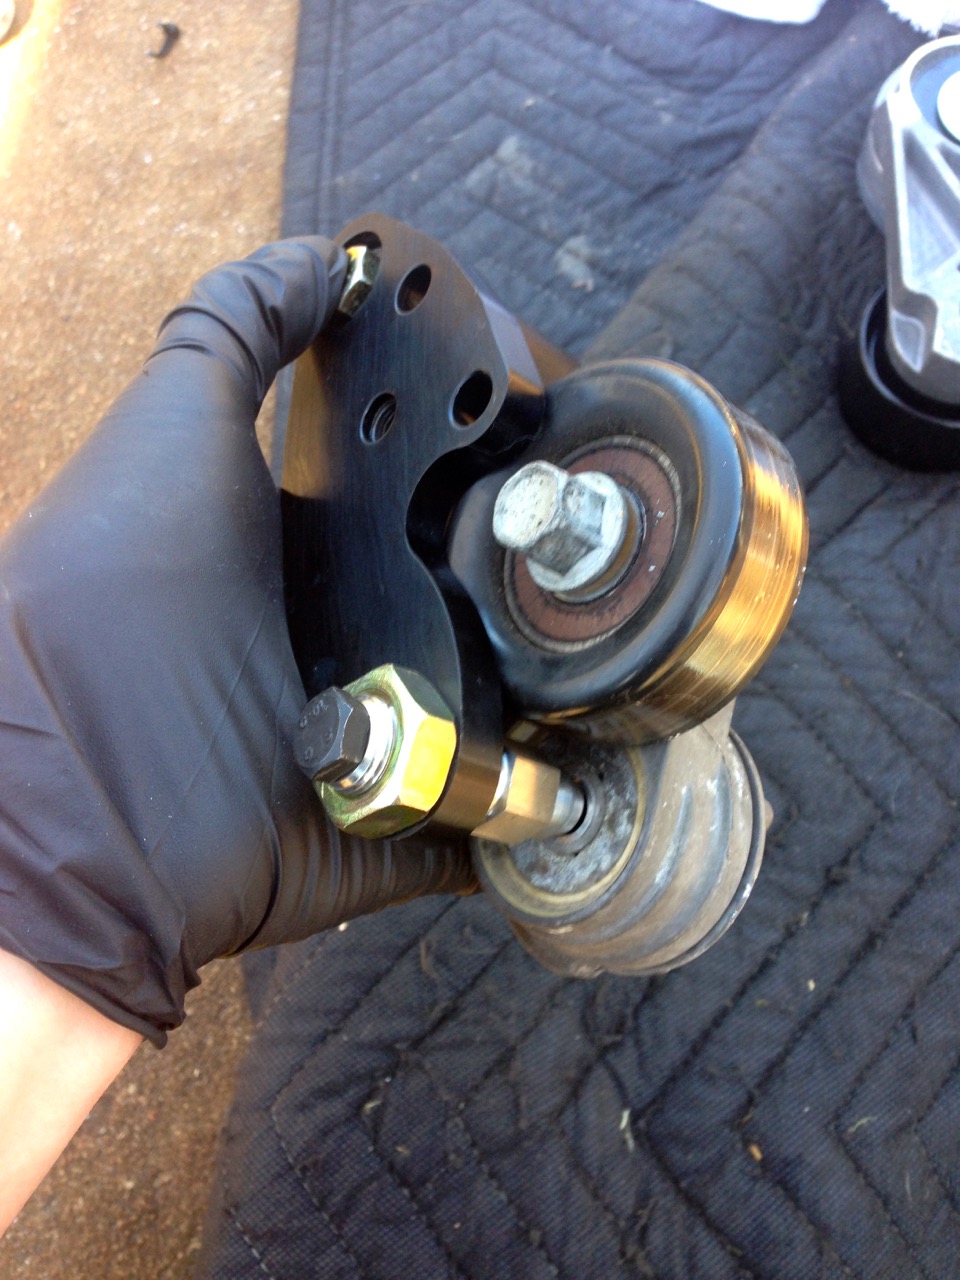
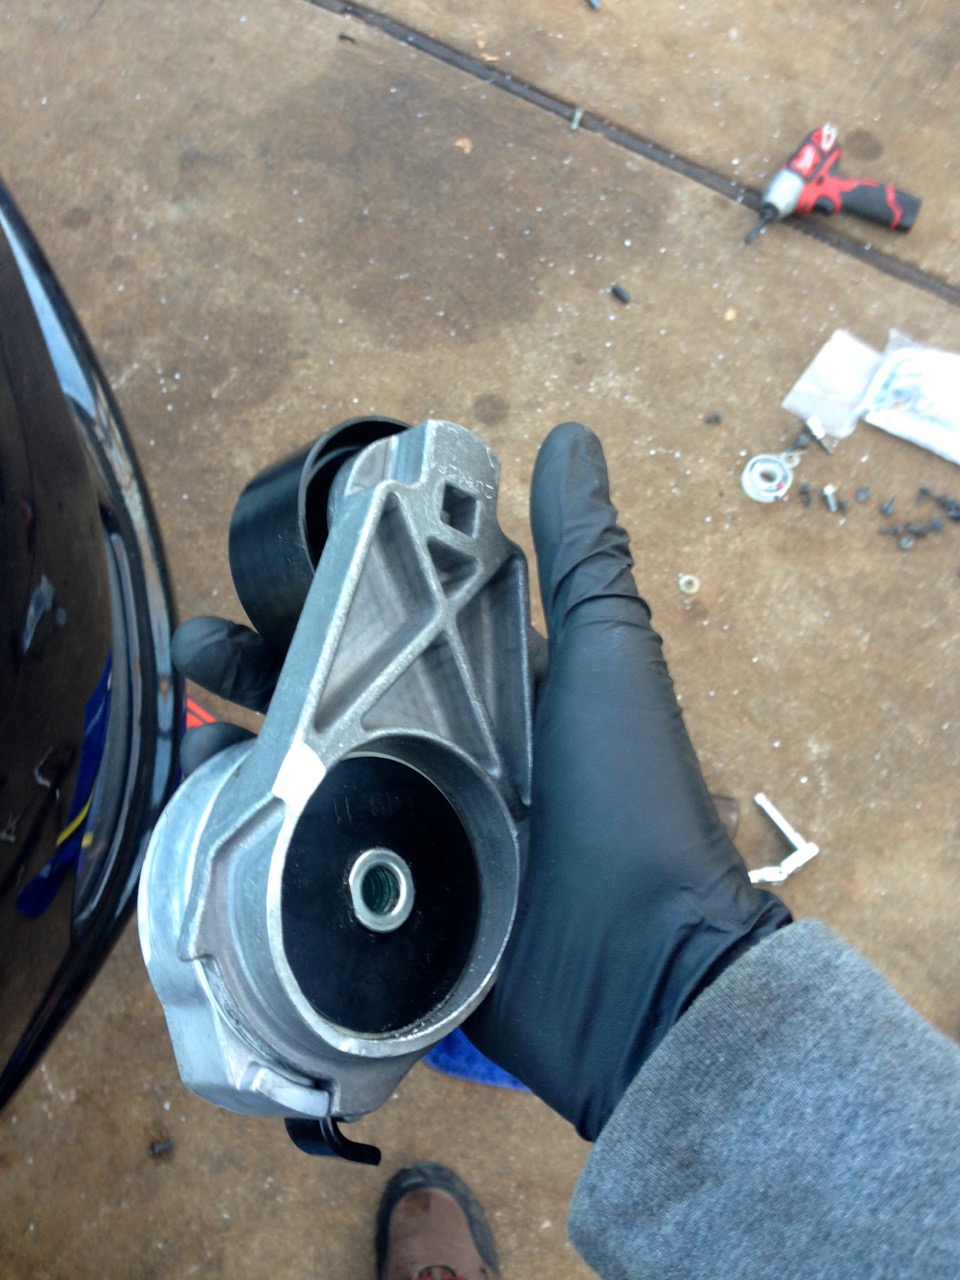
Heavy duty bracket.. the part closest to the concrete goes on first and mounts to two front cover holes. Then you add the original tensioner + the top piece shown.. then the AC part is complete. After that you can add the real big tensioner that ultimately keeps the SC belt tight
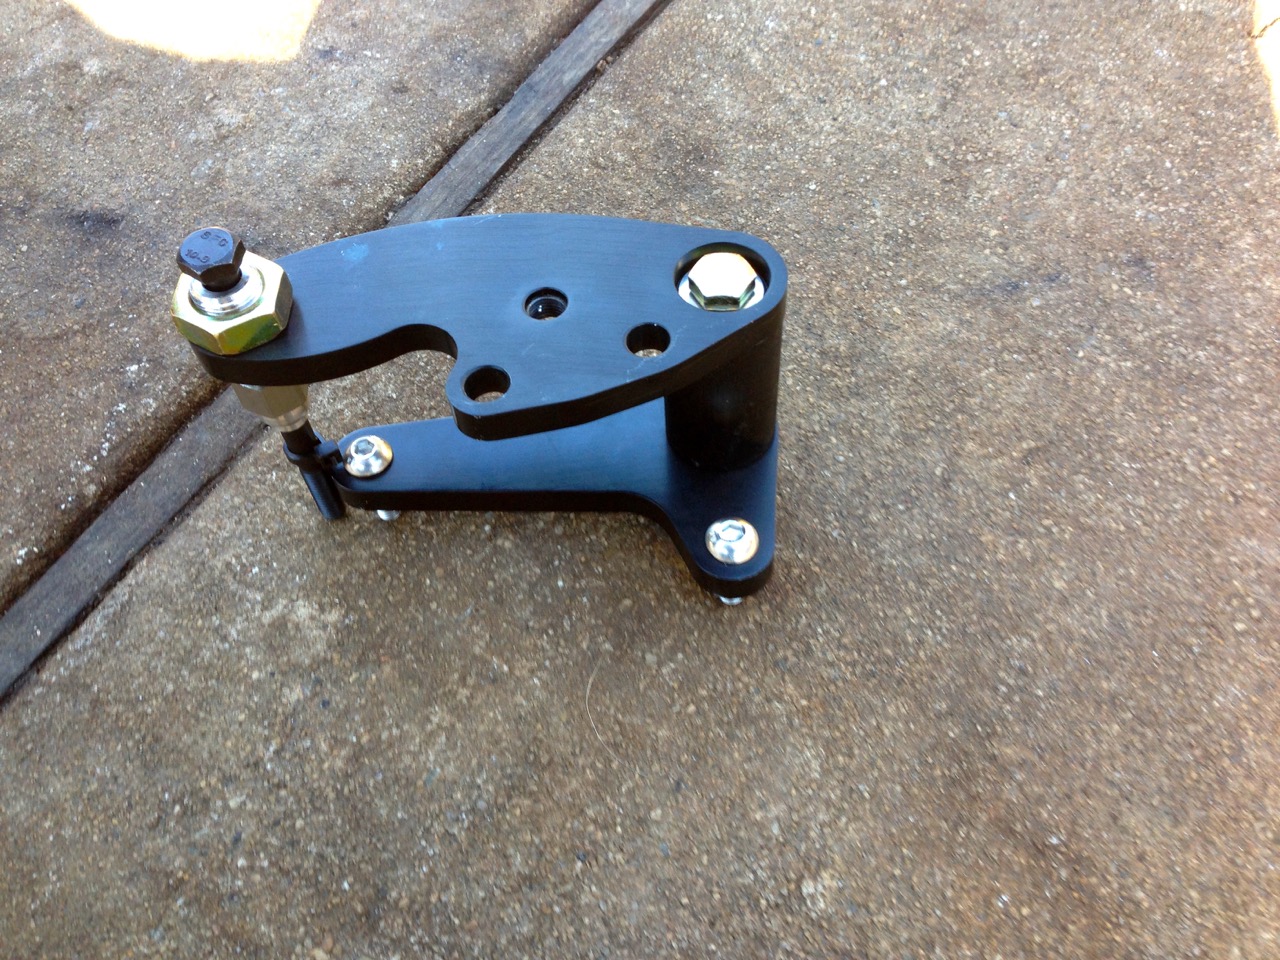
Here's the two bolts you have to take out to install the mount
More of the same
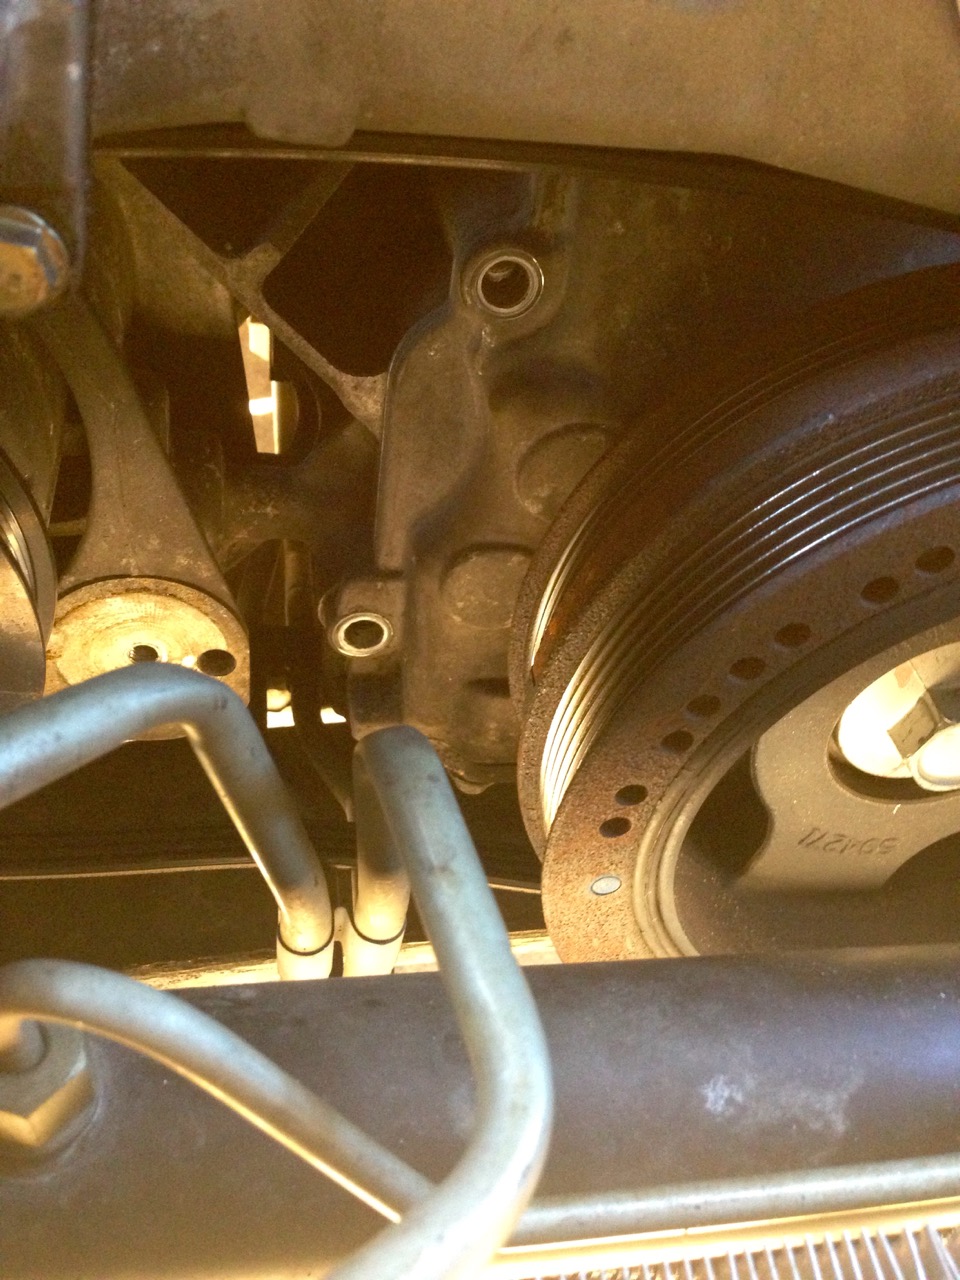
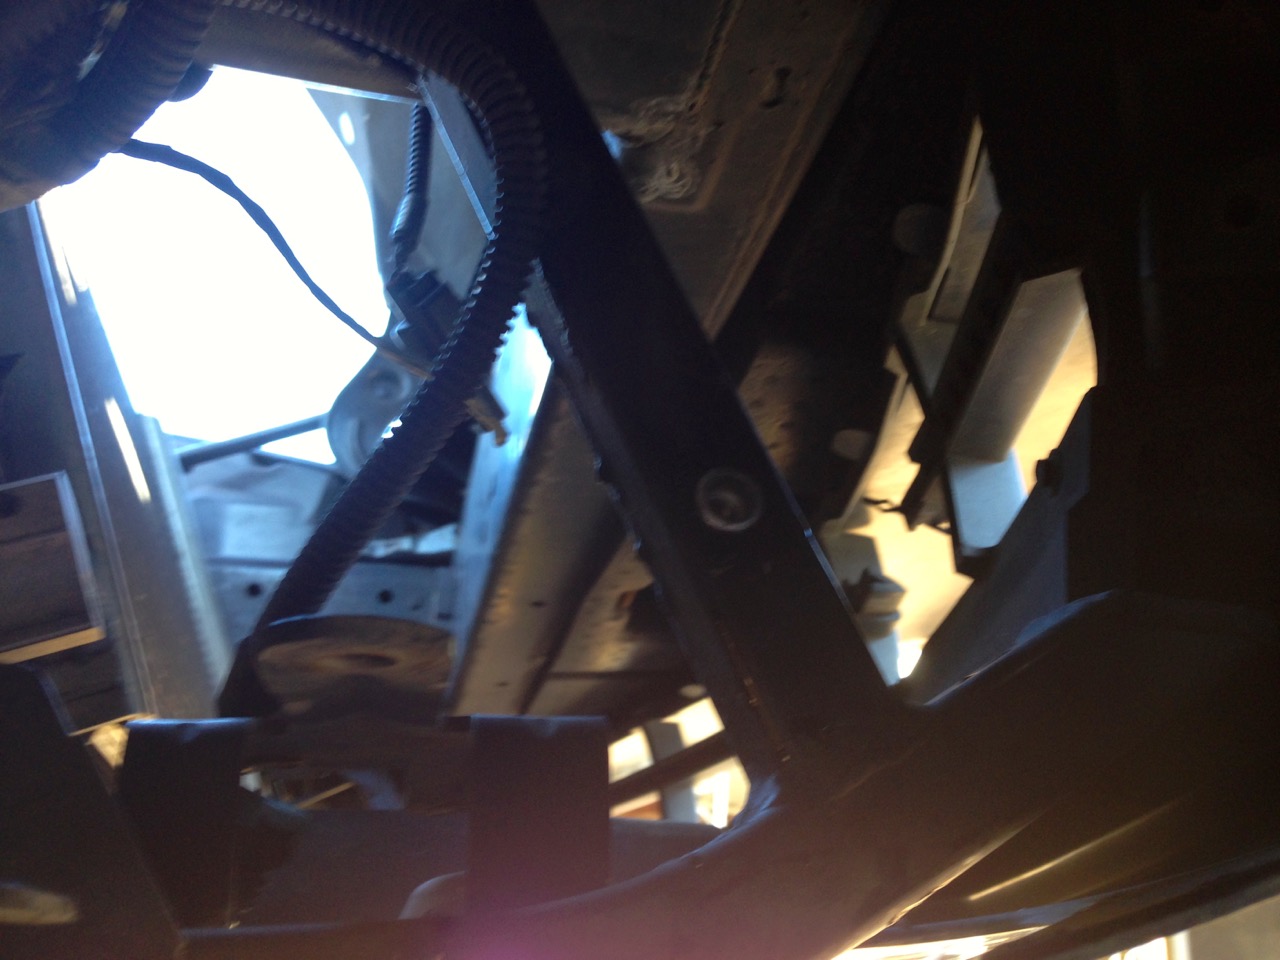
When I first started trying to wedge this in there I was afraid I was going to need to pull the steering rack just to get enough room to wedge it in.. but I barely got it to fit. If I didn't have skinny fingers there's no way it would have went on
Here's the front half of the mount with the old AC tensioner added. NOTE: You must remove the dust shield from the original AC pulley (trust me, it won't fit, ask me how I know..). ECS includes a thick washer to take up the space the dust cover used to occupy. If you look real close you can see it in this picture
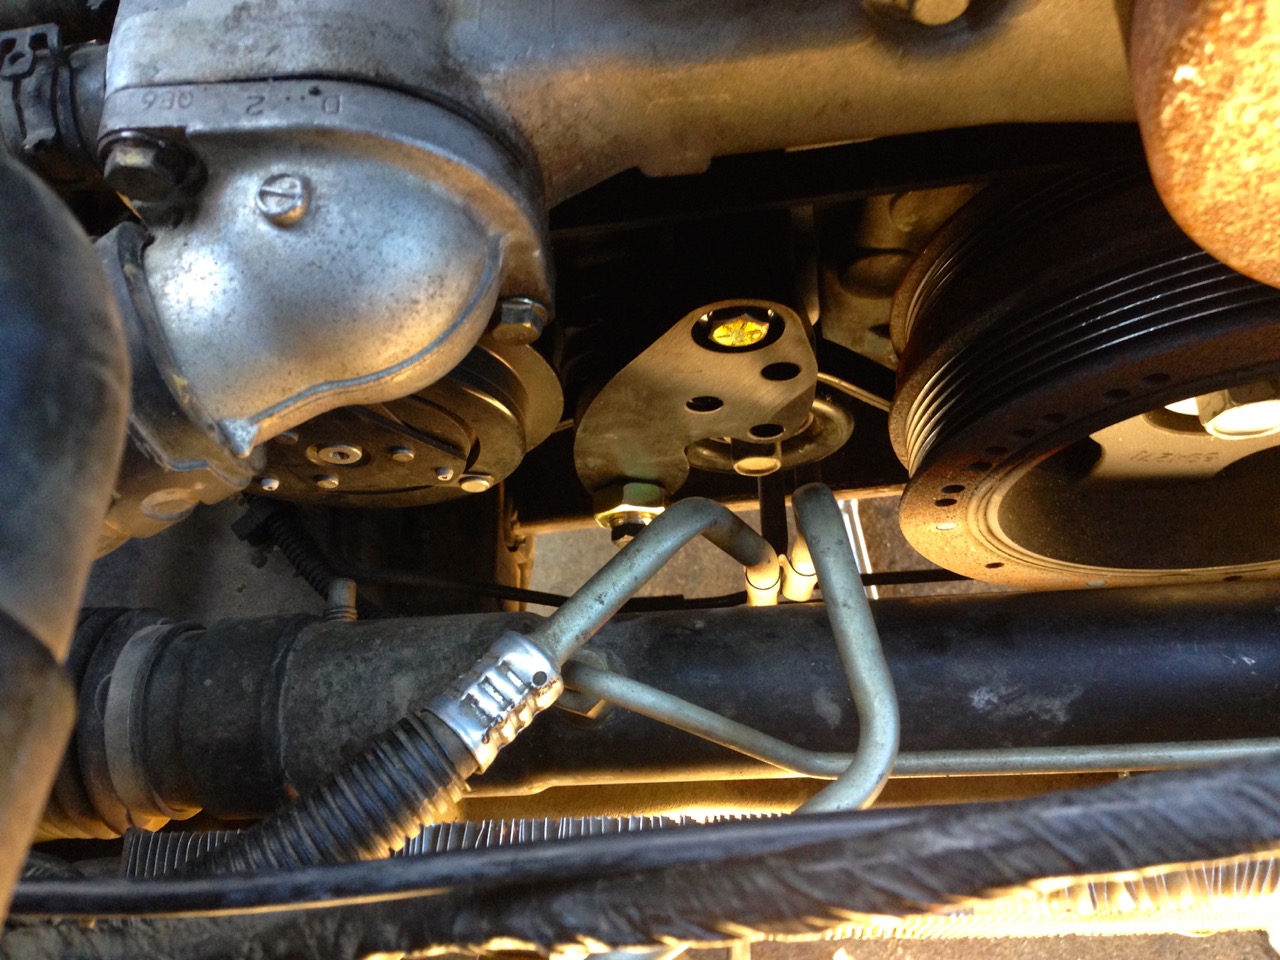
And after a lot of bad words I manage to get this on.. and get the AC belt reinstalled. It was not easy. I think in hindsight I could have pulled the steering rack faster and it would have ended in a lot less frustration.. if I was doing it over again, that is what I would do. It looks pretty open in this picture, but trust me, there is NO room in that area. This is the best view of this area that I got
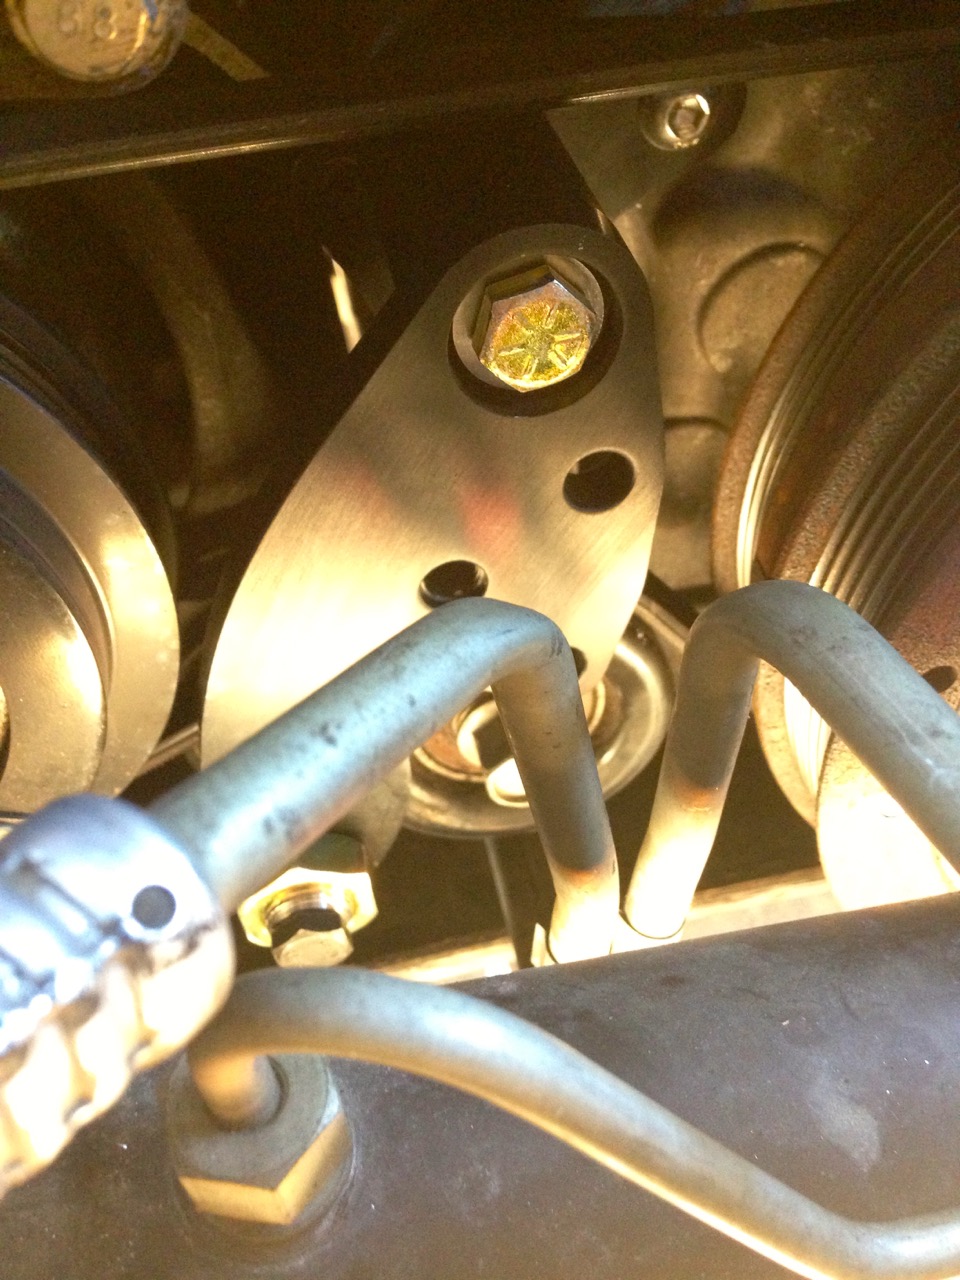
Same, closer up
First rivnut (horn gets remounted here). I had a hell of a time figuring out where the instructions were saying to drill the hole for this but finally figured it out (I hope anyways)
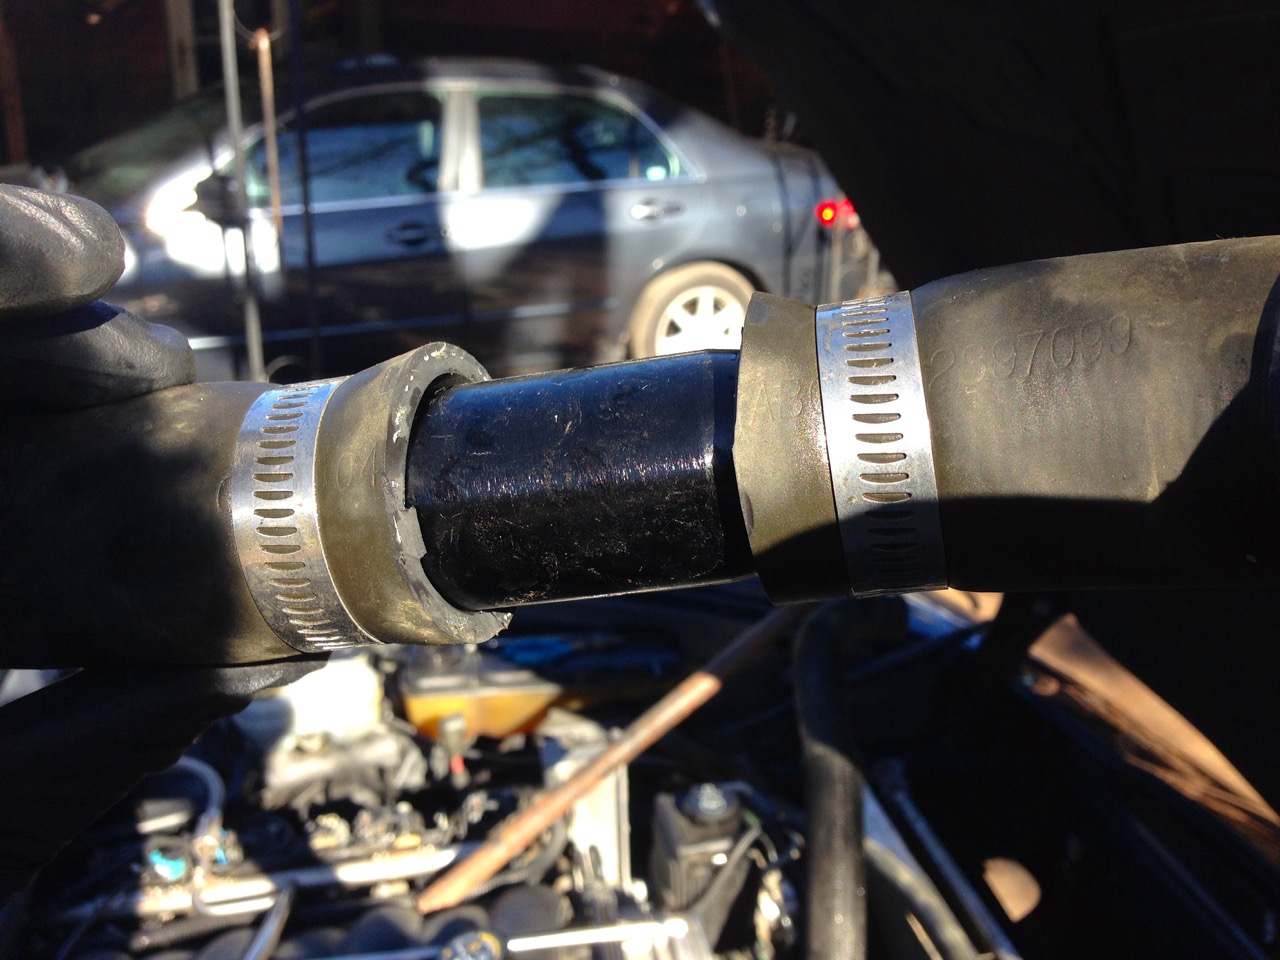
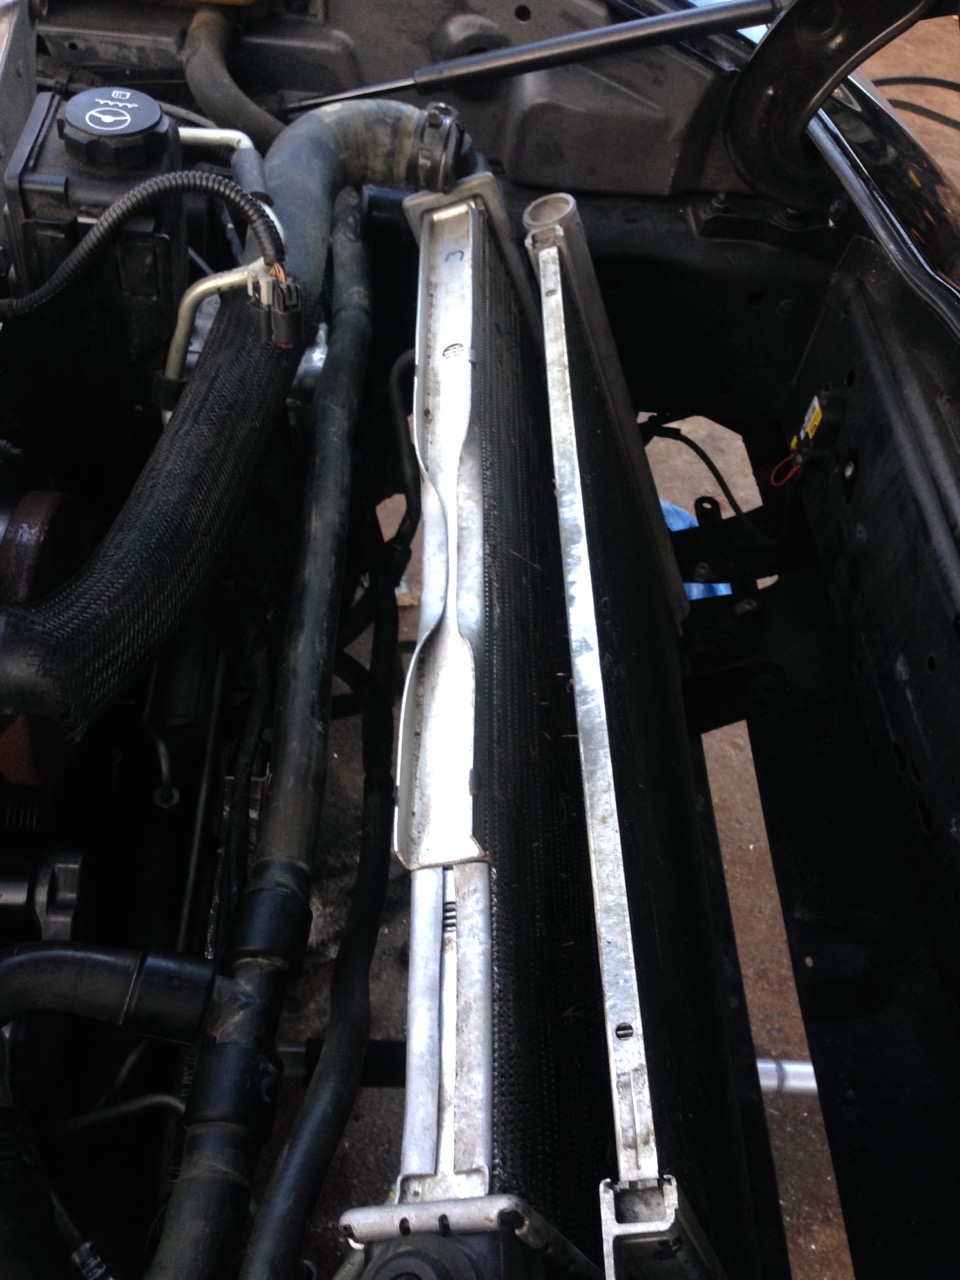
Lower radiator hose has to be extended. I was not impressed with the fit of the extender pipe thing. It was quite a bit smaller than my radiator hose. Not sure if this is from my hoses being bigger than normal or if that's just how it fits.. but it should work fine regardless
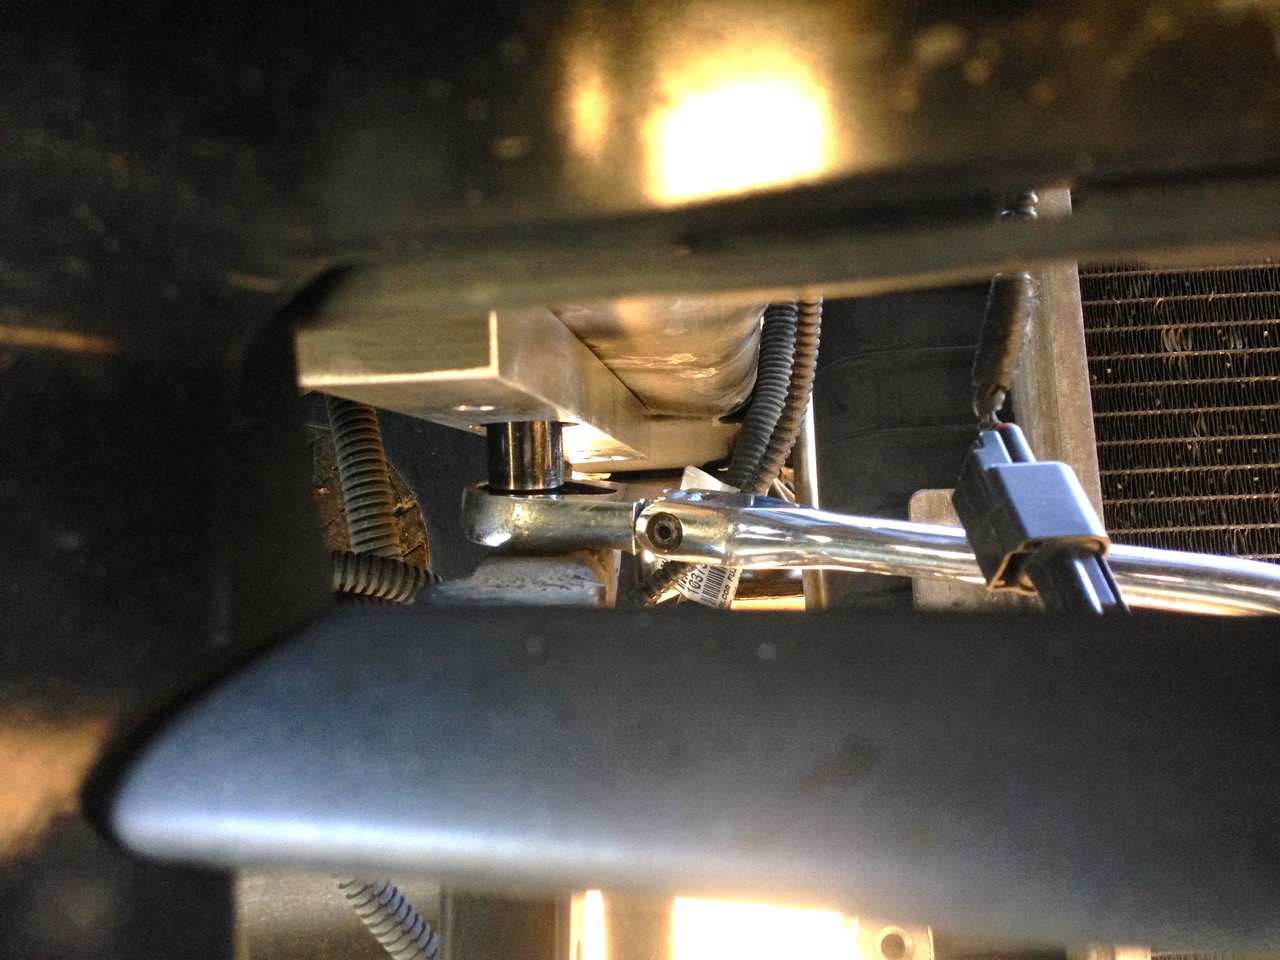
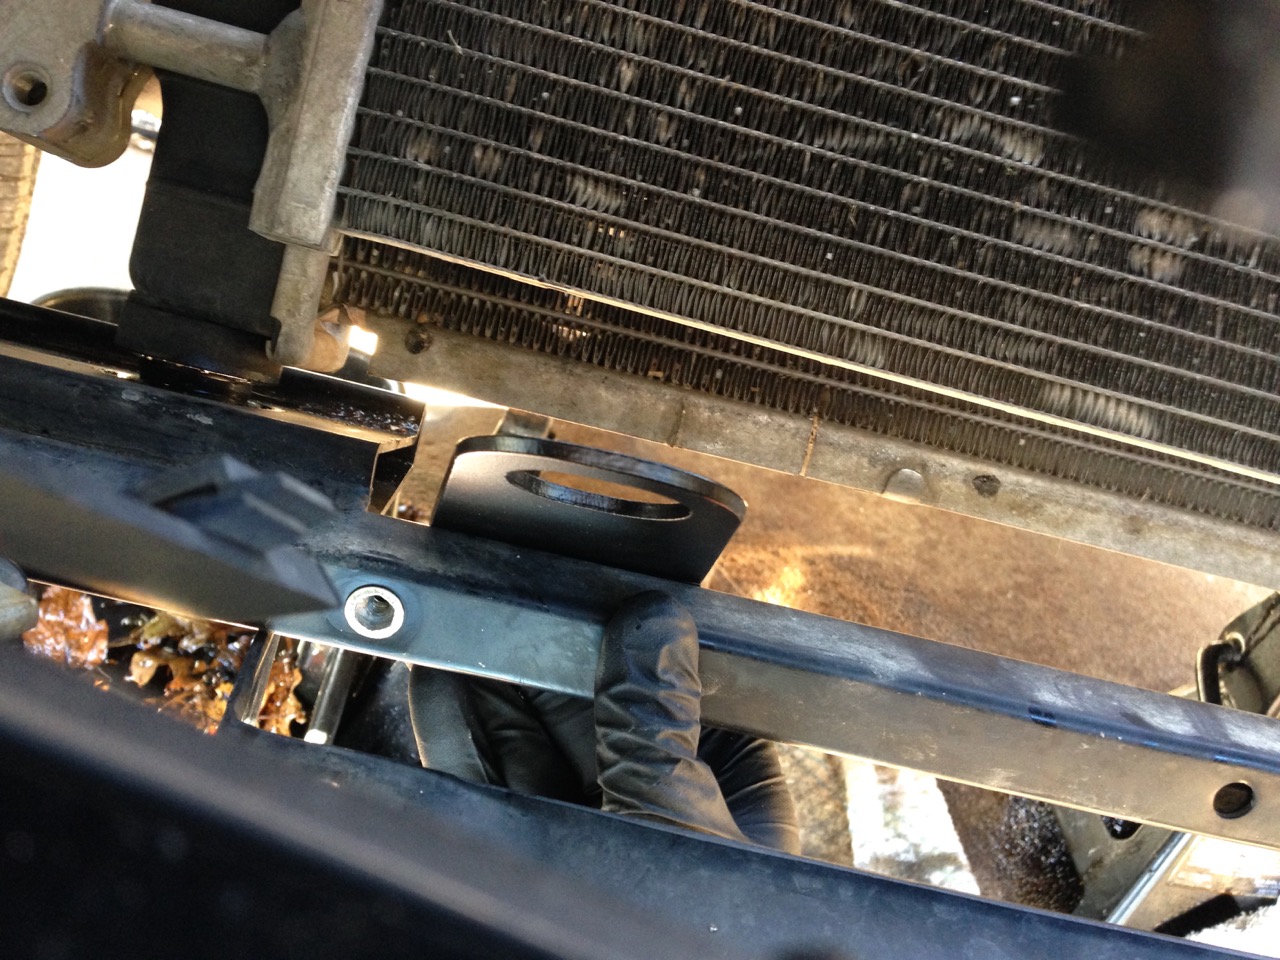
Radiator spacer/relocate bracket thing going in. Overall not too bad, although I wish the bolts had been labeled together. The instructions state the size so I ended up going around measuring bolts until I found the ones that made the most sense (these ended up being very similar to the factory ones, so in hindsight maybe I was being dense)
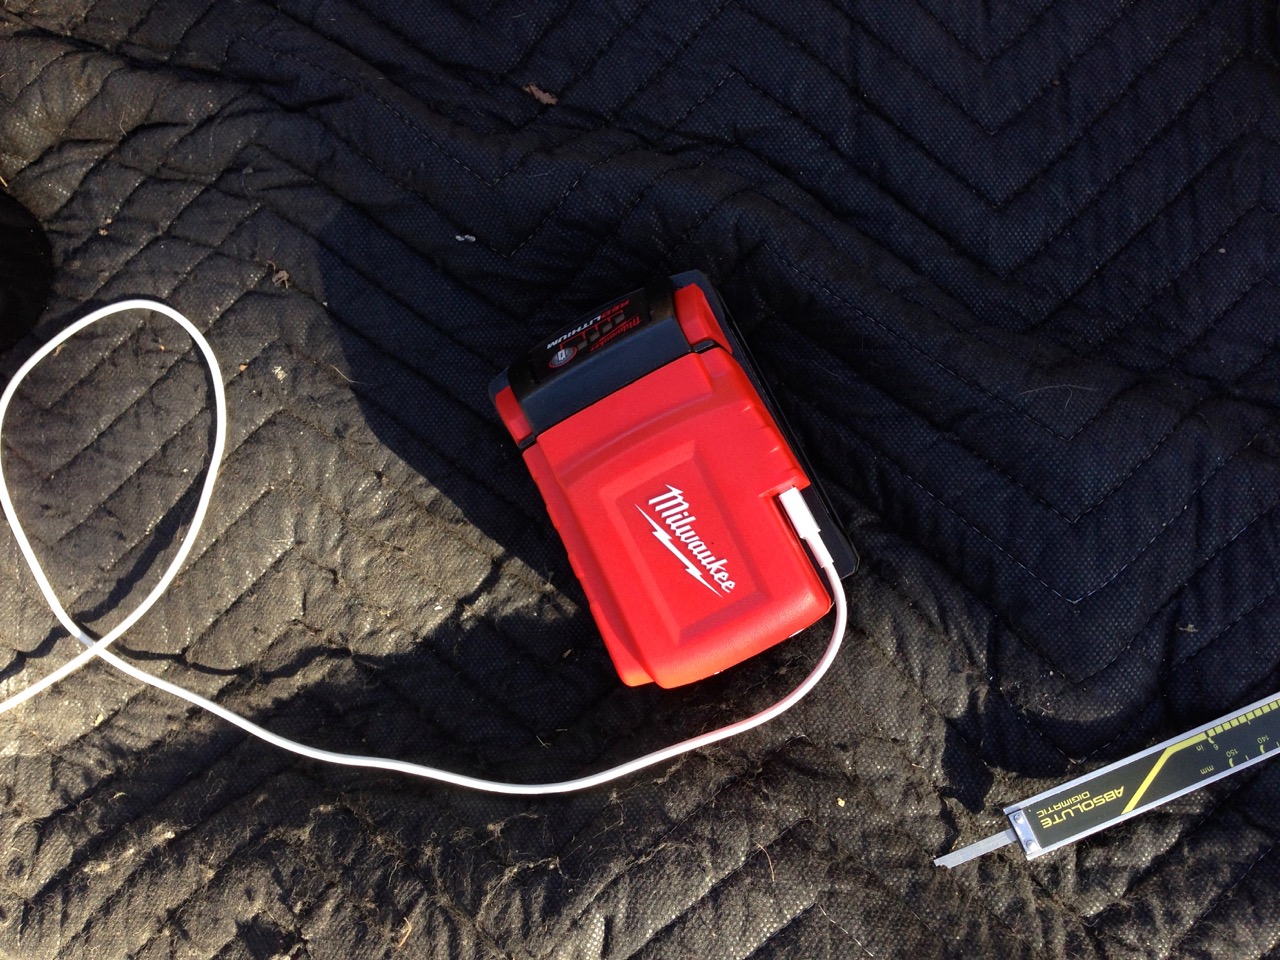
Oh yeah, coolest thing ever. Turns Milwaukee M18 battery into a USB port to keep my phone charged. Worked great
Pic after the radiator cradle relocation bars were in place. Not much to see here
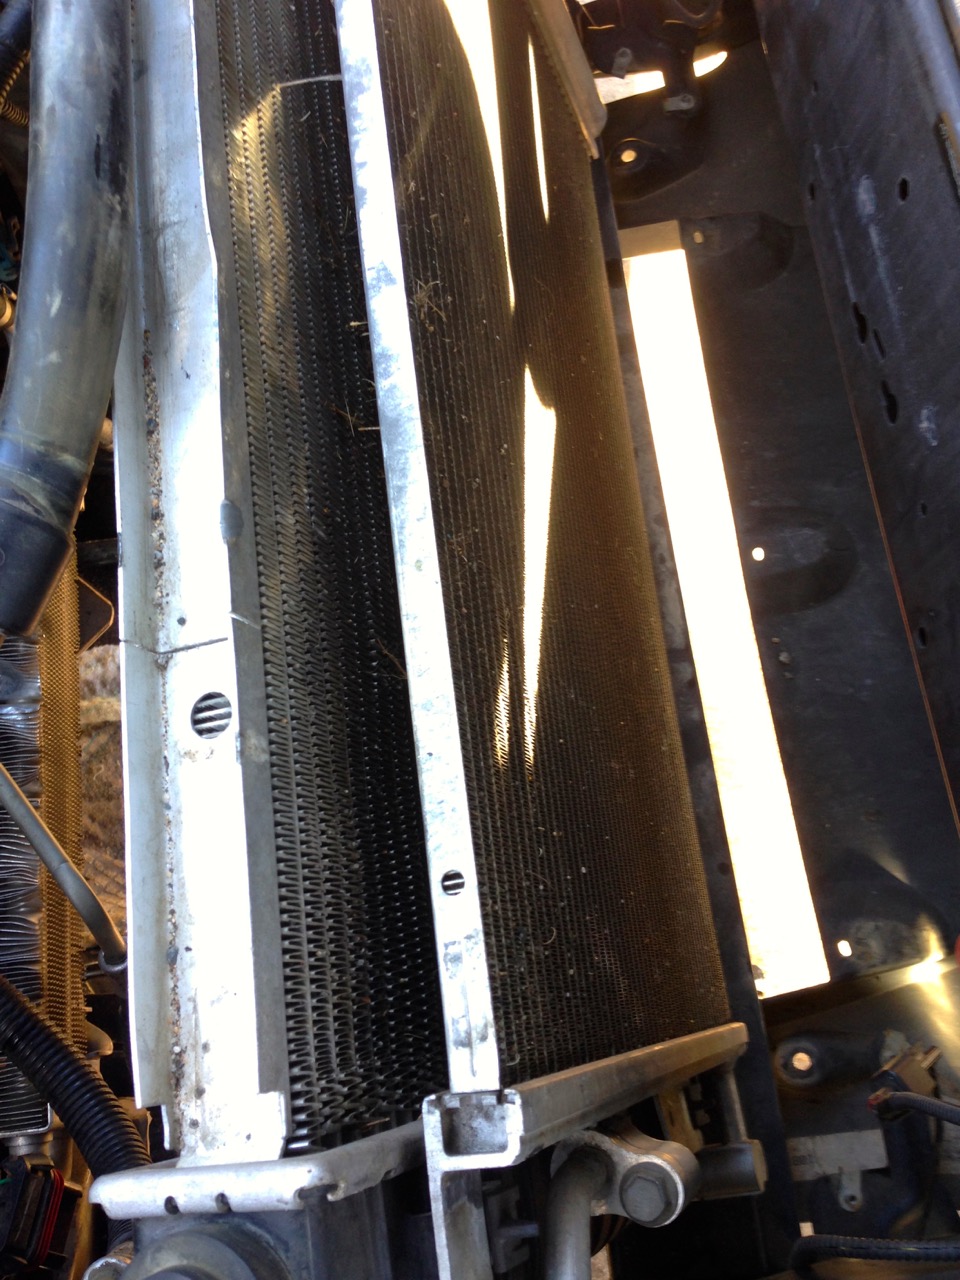
In order to get the radiator/condensor to sit down in the cradle properly I did have to remove this line from the holder thing. I'll probably remove the mount altogether. You'd never know it was missing if you didn't know it was supposed to be there..
Working on the intercooler support brackets. NOTE: THIS IS THE WRONG PLACE FOR THEM!!! The instructions say to measure 1/2" from the radiator support thing.. I assumed it was 1/2" on the passenger side, but this was wrong. It's 1/2" from the drivers side (opposite of what I did basically). So, this was the beginning of the bad part of my day
Prettttty
BOV installed. I am going to re-clock the clamp a little bit for easier access, just in case. There is an o-ring that has to be installed between the BOV and intercooler. Not the easiest thing to get together but overall not bad. The clamp in particular I was very impressed with. Very nice. Also installed the banjo bolt at the end of the BOV
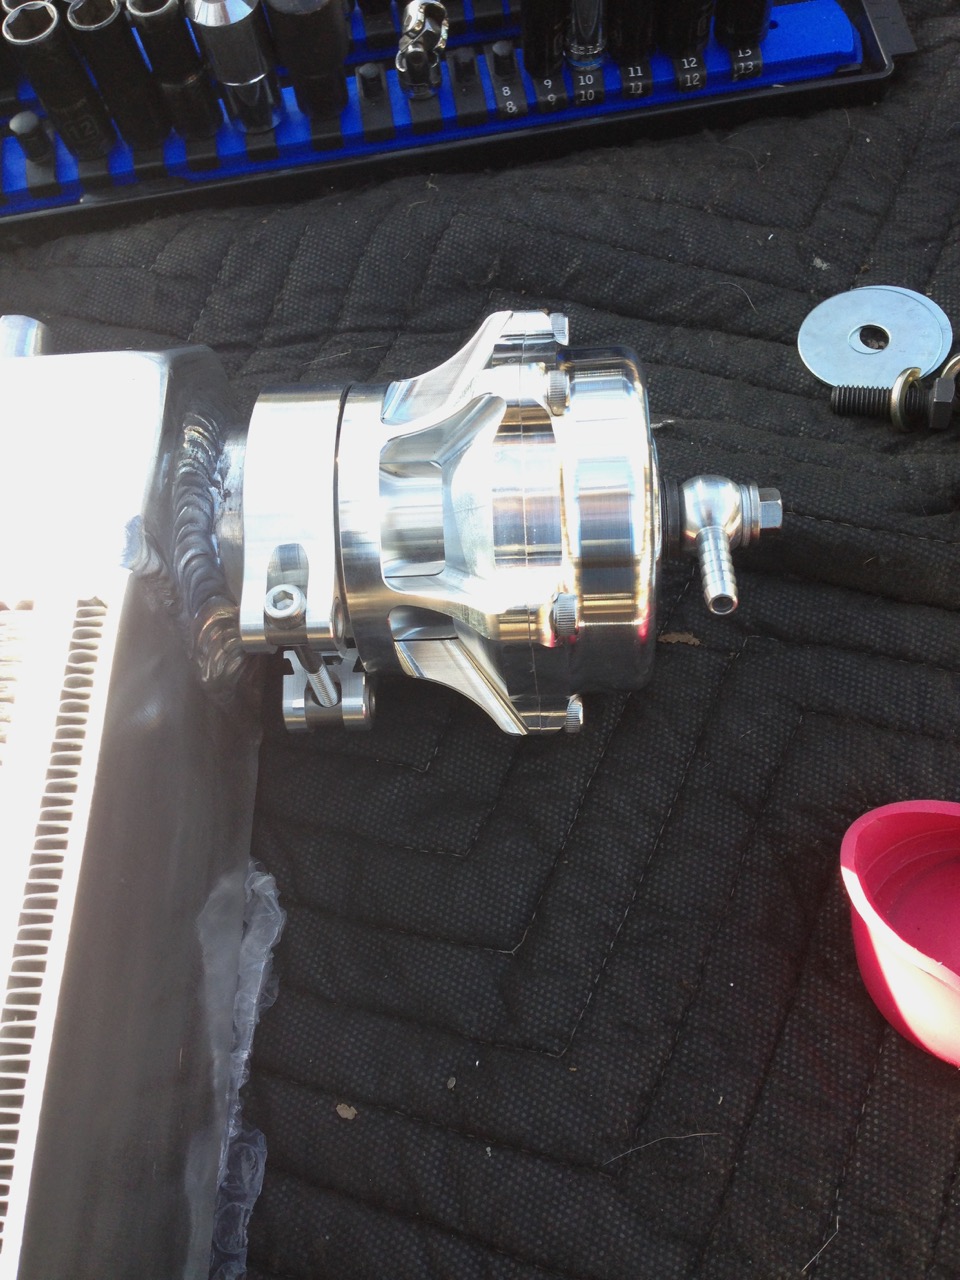
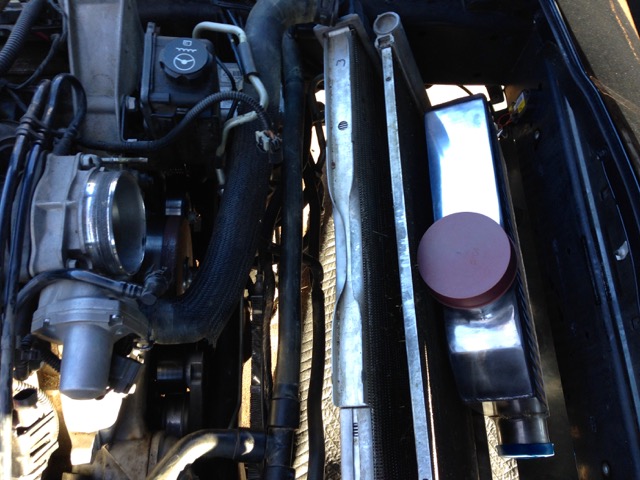
And an overall picture of it after BOV installed. I can't get over how heavy this thing is.. for some reason I always thought they were thinner/lighter duty
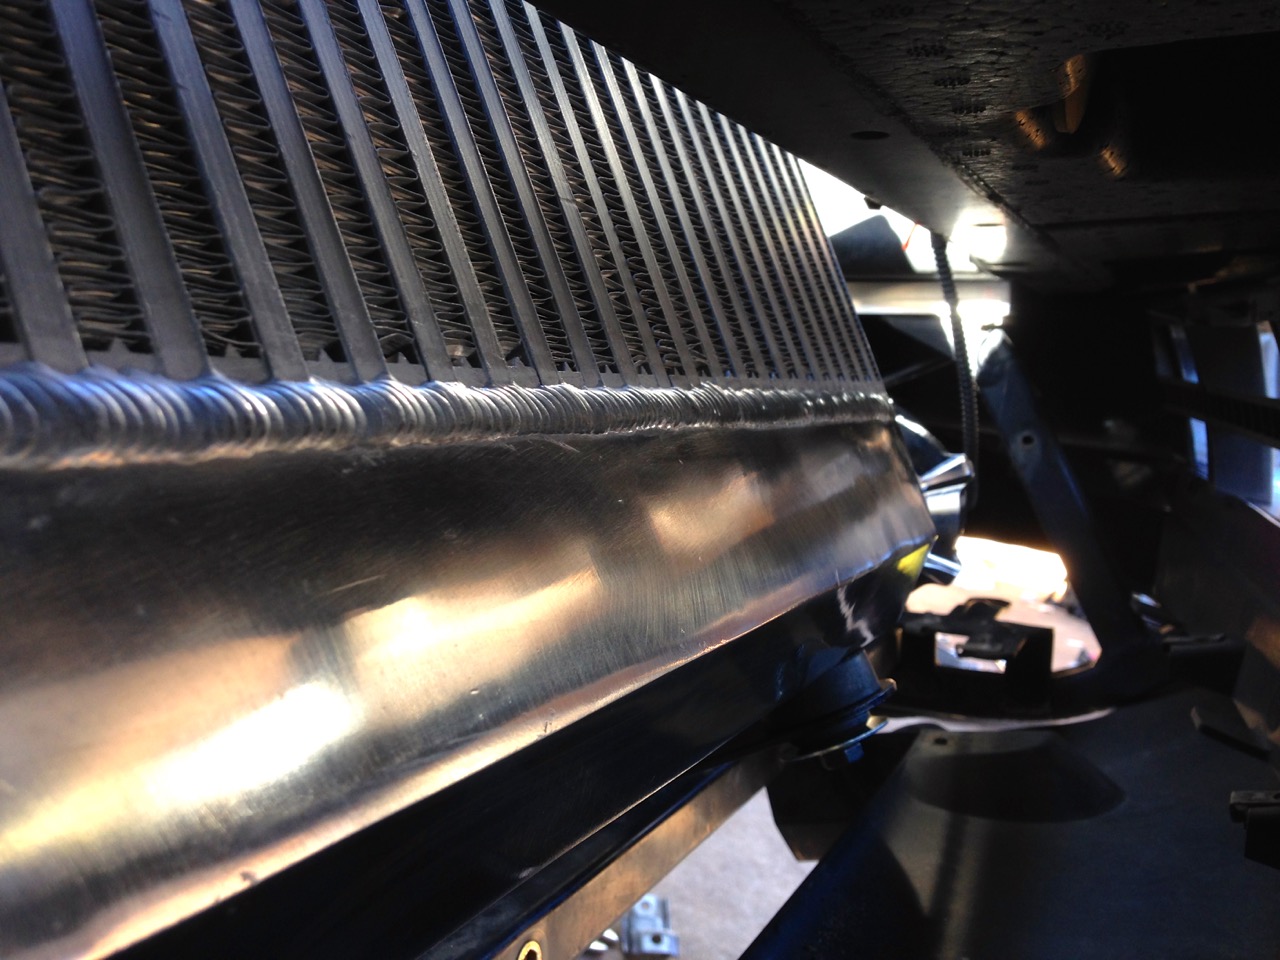
Intercooler installed.. at this point I started wondering why the outlet wasn't lining up with the throttle body...

I do have to say it looks awesome.. just in the wrong place
Sweeeeet
Next was bolting the SC belt tensioner to the HD AC bracket thing we installed earlier.
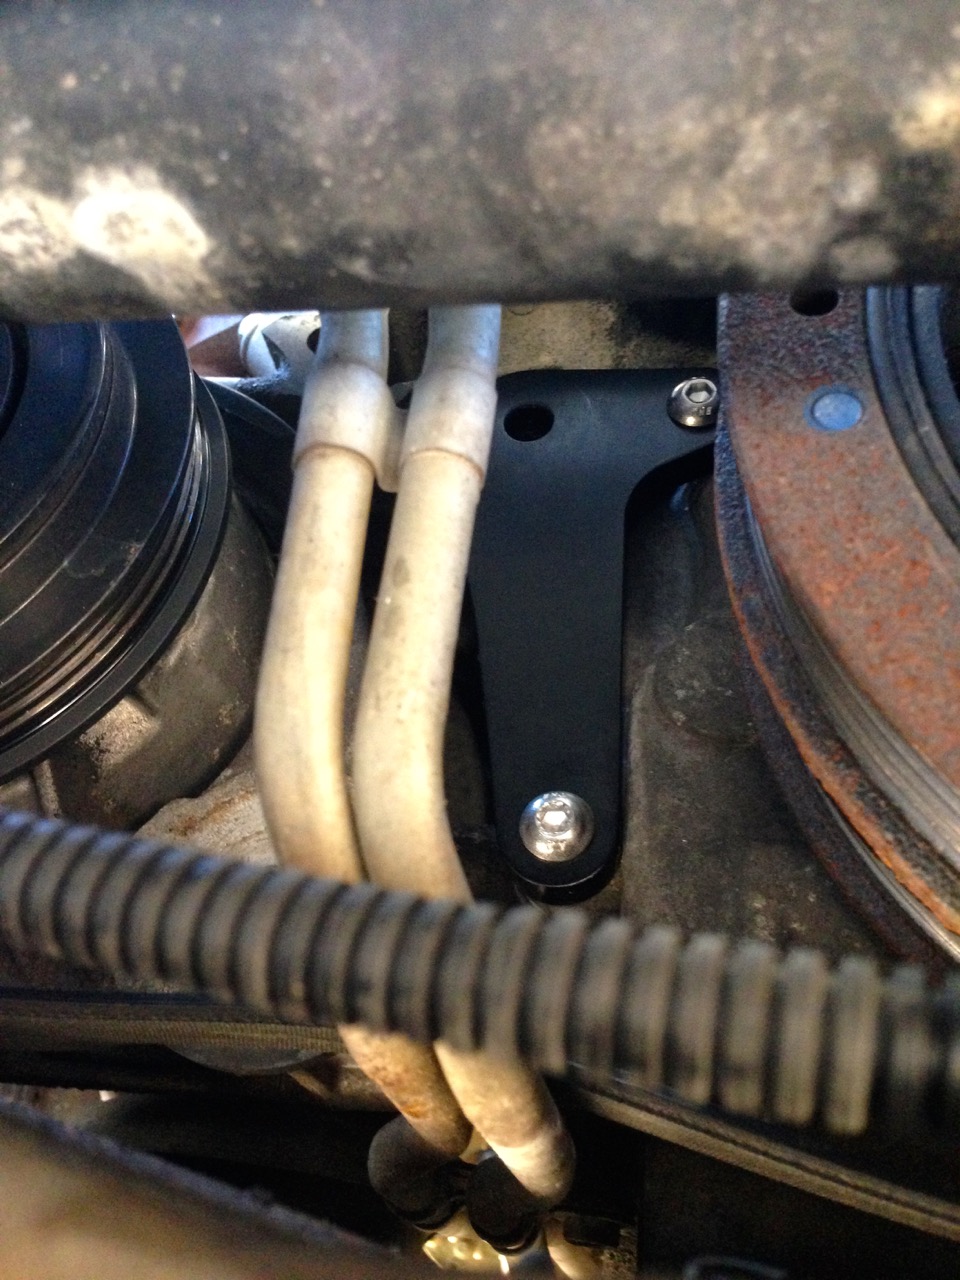
This was literally like trying to fit a round peg in a square hole. There was no way this was going in there with the transmission cooler lines (did you guys know the manuals in Z51 cars have transmission coolers too?? I didn't until recently)
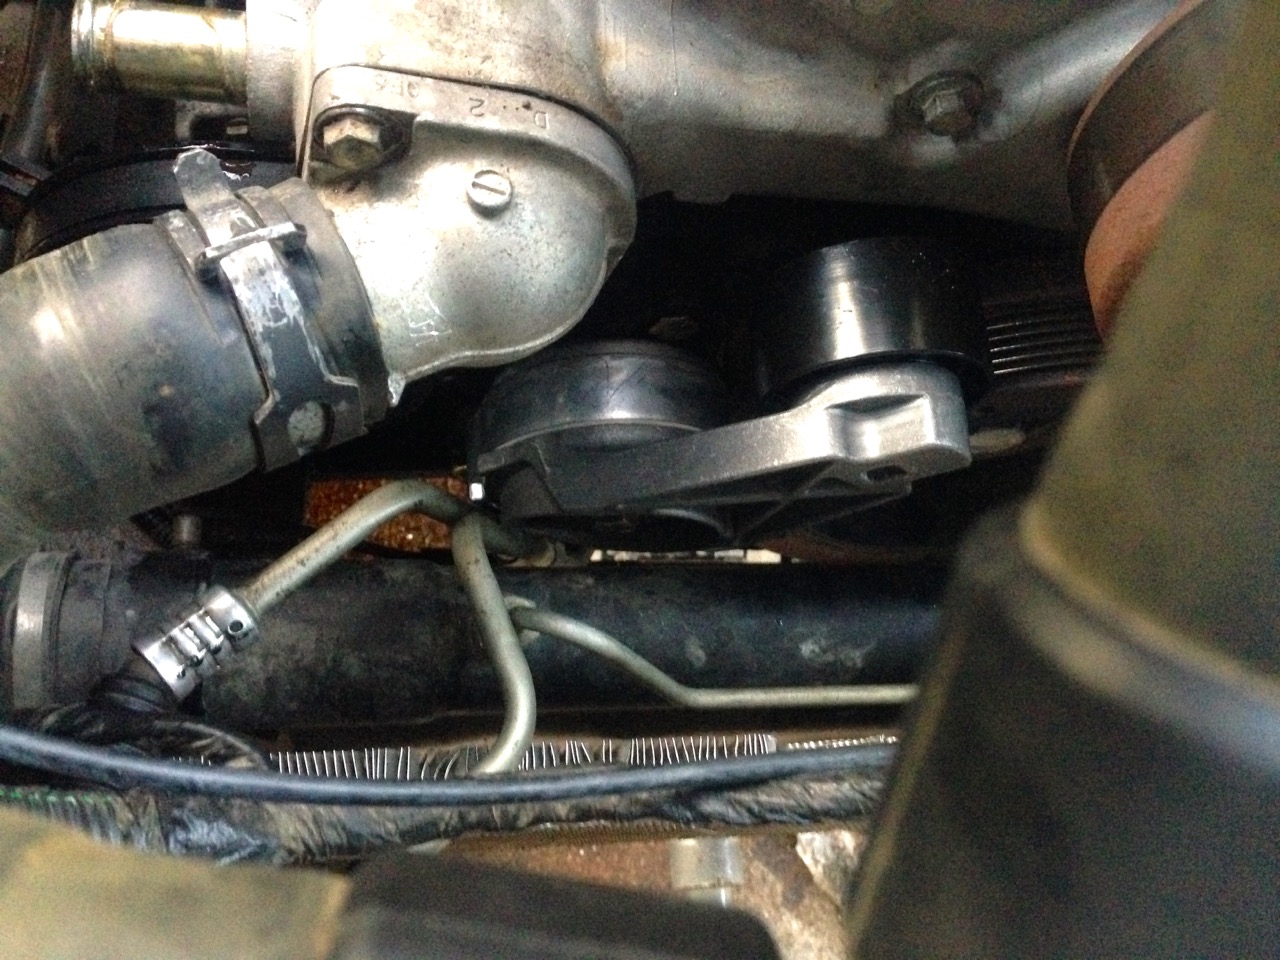
SO, I ended up unbolting the engine mounts from underneath and raising the engine. I also tweaked the transmission cooler lines a bit. These two things got me enough clearance to get the tensioner on and tightened down. The power steering cooler has seen better day, but I suppose it'll have to do for now. I may try to straighten some fins out after all the rest is done
And since I was pretty frustrated at this point, I thought this would be a good time to take a hammer to the radiator fin things to help in getting enough clearance for the tubing later
Welp. that was it for today. I also extended the wiring harness for the horn. It's a shame that thing is hidden, I did a hell of a job with it.. soldered, heat shrinked and friction taped it.. looks factory in the end.
In hindsight this looks like about an hour or two worth of work, but I spent a ton of time fighting with the rive nuts. The ECS instructions show a hardened black allen head bolt that was supposed to be included and used to set the rivnuts. I did not have this.. I eventually found the best way to set them was to leave a tiny bit of material left when I was drilling so that the had a really tight fit, then clamp the intercooler bracket on top of them with large locking pliers. Then, I used a small 1/4" impact driver to drive in the bolts. The friction between the tight fit and mount clamped down on the top of the rivnuts was enough to hold them still while the impact driver "squashed" them into place.
Of course I figured this out BEFORE I figured out the holes were in the wrong place.. I went ahead and drilled holes in the correct locations and set the intercooler back in place to make sure the brackets and all lined up properly, which it did.. I just didn't have any way to really sure the brackets into place
I went to Tractor Supply earlier and bought a ton of different lag bolts, regular bolts, nuts, spacers, etc. so that I can get by without the rivnuts. I haven't been able to find any locally and I really need to get this thing installed tomorrow, so I'll have to make do. My radiator cradle is pretty well screwed at this point anyways (several sets of holes drilled) + one of the mounting points was cracked anyways, so at some point I'll replace that and do it the way ECS prescribes.
Anyways.. so, that's about where I am for the time being. I started to mess with the head unit mounting bracket but it was getting dark on me so I had to stop. I'll probably work on that first tomorrow (if I can manage to get back down there without the girlfriend killing me, I'm doing all this work at my parents BTW, no garage or concrete patio at our place..). Then I'll finish up the intercooler mounting, trim the lower plastic cover it the wheel well where intercooler intake pipe runs and go from there.
Tools for the day. Love the Ernst twist lock socket rails..

Front end up

Pile of plastic stuff out of the way..

Heavy duty bracket.. the part closest to the concrete goes on first and mounts to two front cover holes. Then you add the original tensioner + the top piece shown.. then the AC part is complete. After that you can add the real big tensioner that ultimately keeps the SC belt tight

Here's the two bolts you have to take out to install the mount

More of the same

When I first started trying to wedge this in there I was afraid I was going to need to pull the steering rack just to get enough room to wedge it in.. but I barely got it to fit. If I didn't have skinny fingers there's no way it would have went on

Here's the front half of the mount with the old AC tensioner added. NOTE: You must remove the dust shield from the original AC pulley (trust me, it won't fit, ask me how I know..). ECS includes a thick washer to take up the space the dust cover used to occupy. If you look real close you can see it in this picture

And after a lot of bad words I manage to get this on.. and get the AC belt reinstalled. It was not easy. I think in hindsight I could have pulled the steering rack faster and it would have ended in a lot less frustration.. if I was doing it over again, that is what I would do. It looks pretty open in this picture, but trust me, there is NO room in that area. This is the best view of this area that I got

Same, closer up

First rivnut (horn gets remounted here). I had a hell of a time figuring out where the instructions were saying to drill the hole for this but finally figured it out (I hope anyways)

Lower radiator hose has to be extended. I was not impressed with the fit of the extender pipe thing. It was quite a bit smaller than my radiator hose. Not sure if this is from my hoses being bigger than normal or if that's just how it fits.. but it should work fine regardless

Radiator spacer/relocate bracket thing going in. Overall not too bad, although I wish the bolts had been labeled together. The instructions state the size so I ended up going around measuring bolts until I found the ones that made the most sense (these ended up being very similar to the factory ones, so in hindsight maybe I was being dense)

Oh yeah, coolest thing ever. Turns Milwaukee M18 battery into a USB port to keep my phone charged. Worked great

Pic after the radiator cradle relocation bars were in place. Not much to see here

In order to get the radiator/condensor to sit down in the cradle properly I did have to remove this line from the holder thing. I'll probably remove the mount altogether. You'd never know it was missing if you didn't know it was supposed to be there..

Working on the intercooler support brackets. NOTE: THIS IS THE WRONG PLACE FOR THEM!!! The instructions say to measure 1/2" from the radiator support thing.. I assumed it was 1/2" on the passenger side, but this was wrong. It's 1/2" from the drivers side (opposite of what I did basically). So, this was the beginning of the bad part of my day

Prettttty

BOV installed. I am going to re-clock the clamp a little bit for easier access, just in case. There is an o-ring that has to be installed between the BOV and intercooler. Not the easiest thing to get together but overall not bad. The clamp in particular I was very impressed with. Very nice. Also installed the banjo bolt at the end of the BOV

And an overall picture of it after BOV installed. I can't get over how heavy this thing is.. for some reason I always thought they were thinner/lighter duty

Intercooler installed.. at this point I started wondering why the outlet wasn't lining up with the throttle body...

I do have to say it looks awesome.. just in the wrong place

Sweeeeet

Next was bolting the SC belt tensioner to the HD AC bracket thing we installed earlier.

This was literally like trying to fit a round peg in a square hole. There was no way this was going in there with the transmission cooler lines (did you guys know the manuals in Z51 cars have transmission coolers too?? I didn't until recently)

SO, I ended up unbolting the engine mounts from underneath and raising the engine. I also tweaked the transmission cooler lines a bit. These two things got me enough clearance to get the tensioner on and tightened down. The power steering cooler has seen better day, but I suppose it'll have to do for now. I may try to straighten some fins out after all the rest is done

And since I was pretty frustrated at this point, I thought this would be a good time to take a hammer to the radiator fin things to help in getting enough clearance for the tubing later

Welp. that was it for today. I also extended the wiring harness for the horn. It's a shame that thing is hidden, I did a hell of a job with it.. soldered, heat shrinked and friction taped it.. looks factory in the end.
In hindsight this looks like about an hour or two worth of work, but I spent a ton of time fighting with the rive nuts. The ECS instructions show a hardened black allen head bolt that was supposed to be included and used to set the rivnuts. I did not have this.. I eventually found the best way to set them was to leave a tiny bit of material left when I was drilling so that the had a really tight fit, then clamp the intercooler bracket on top of them with large locking pliers. Then, I used a small 1/4" impact driver to drive in the bolts. The friction between the tight fit and mount clamped down on the top of the rivnuts was enough to hold them still while the impact driver "squashed" them into place.
Of course I figured this out BEFORE I figured out the holes were in the wrong place.. I went ahead and drilled holes in the correct locations and set the intercooler back in place to make sure the brackets and all lined up properly, which it did.. I just didn't have any way to really sure the brackets into place
I went to Tractor Supply earlier and bought a ton of different lag bolts, regular bolts, nuts, spacers, etc. so that I can get by without the rivnuts. I haven't been able to find any locally and I really need to get this thing installed tomorrow, so I'll have to make do. My radiator cradle is pretty well screwed at this point anyways (several sets of holes drilled) + one of the mounting points was cracked anyways, so at some point I'll replace that and do it the way ECS prescribes.
Anyways.. so, that's about where I am for the time being. I started to mess with the head unit mounting bracket but it was getting dark on me so I had to stop. I'll probably work on that first tomorrow (if I can manage to get back down there without the girlfriend killing me, I'm doing all this work at my parents BTW, no garage or concrete patio at our place..). Then I'll finish up the intercooler mounting, trim the lower plastic cover it the wheel well where intercooler intake pipe runs and go from there.
12-14-2014, 09:28 PM
#56
Race Director
Thread Starter
Member Since: May 2004
Location: Raleigh, NC
Posts: 16,664
Received 1,194 Likes
on
1,053 Posts
St. Jude Donor '15
Update for today.
Got the SC in and car started up.. but managed to go ballistic after fighting with one of the coolant hoses earlier in the day and broke a fitting on a coolant hose.. so I couldn't really do much more than just start it for a second and turn it back off. Sounded good.. tiny bit of whistle but nothing crazy. Ran OK on old tune (haven't changed injectors yet..)
Still have to do the catch can tubing and some other stuff I'm probably forgetting
Getting the belt on was ridiculous. I ended up having to take out the lower alternator bolt so it would tilt down and get me a few extra mm's. I finally got it on but it fought me the whole way. A belt that was about 2 or 3mm longer would have made a world of difference. I noticed that after the belt had tension on it for about an hour it did loosen up a bit, so I assume that's why they send one that is that tight.
Anyways, pictures:
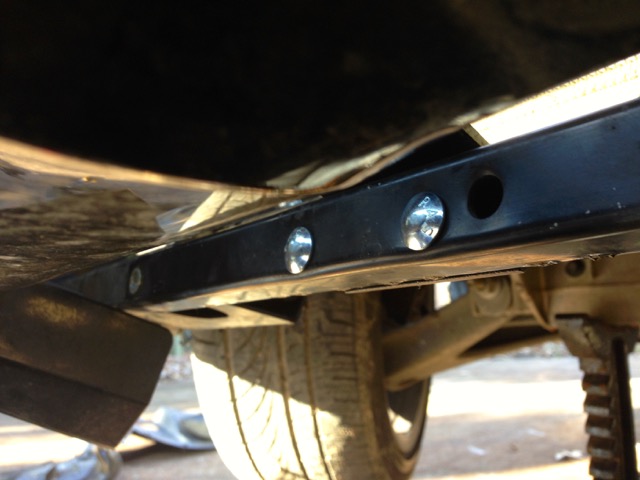
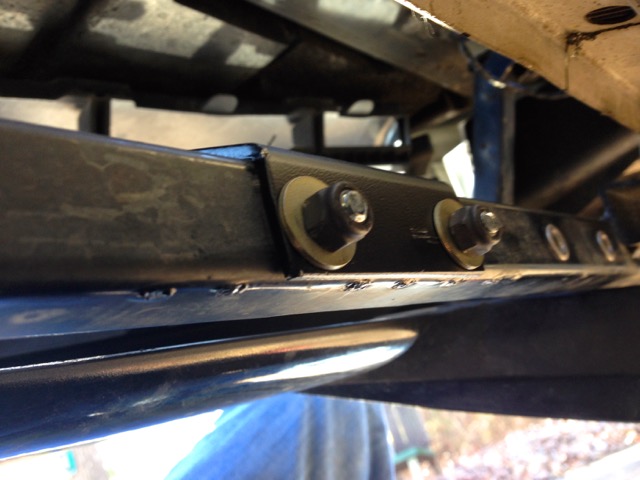
Couldn't find any rivet nuts locally so I used these lag bolt type things instead. Worked really well and isn't all that visible once everything is back together. I may replace the radiator cradle at some point and use the rivnuts instead but for now, this'll have to do
Same, from the back side.. You can see my beautiful original job on the right side.. (in the wrong place)
After intercooler was finally in and in the RIGHT spot. This part went pretty well/quick
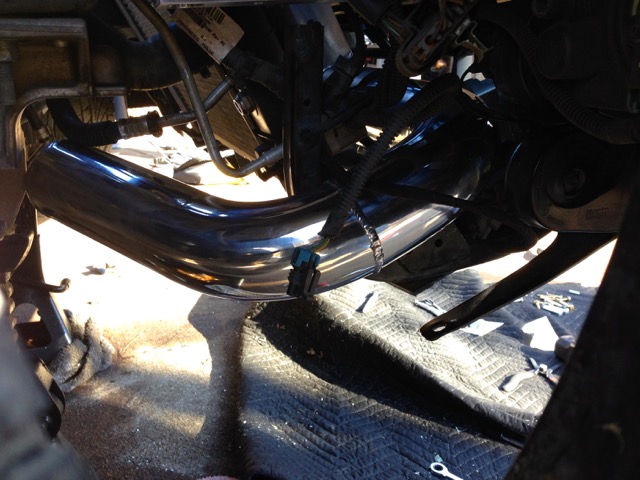
Hard piping from supercharger to intercooler. I ended up having to take the couplers on and off a time or two and man those things are tough to get back off.. Hopefully I don't ever have to take them off again
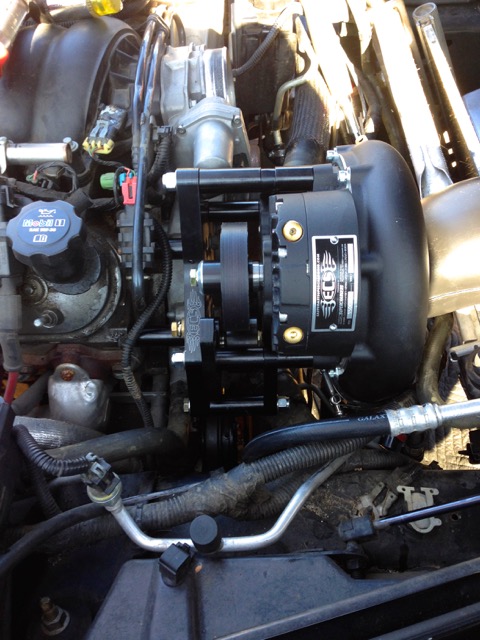
Supercharger as it comes.. took a picture to remember where everything went
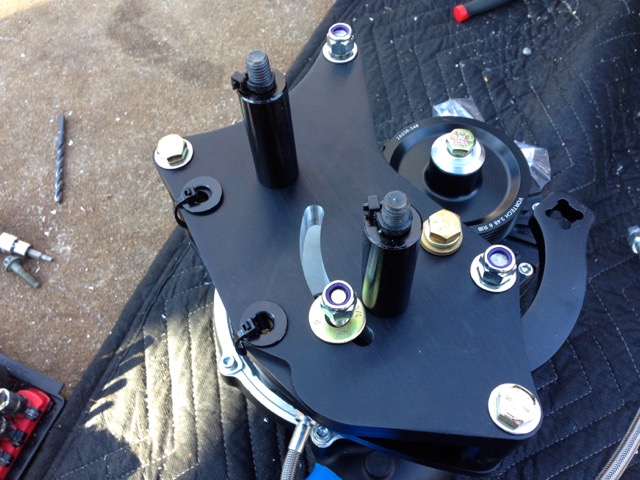
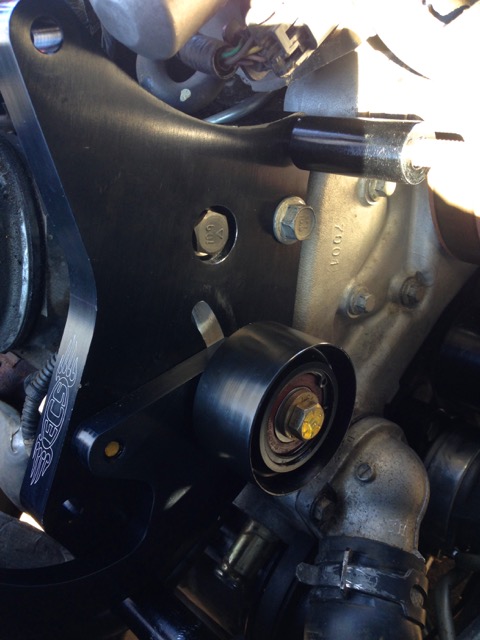
Bracket on.. there was 2 or 3 bolts into the head then two in the water pump. Then you put the secondary tensioner thing on
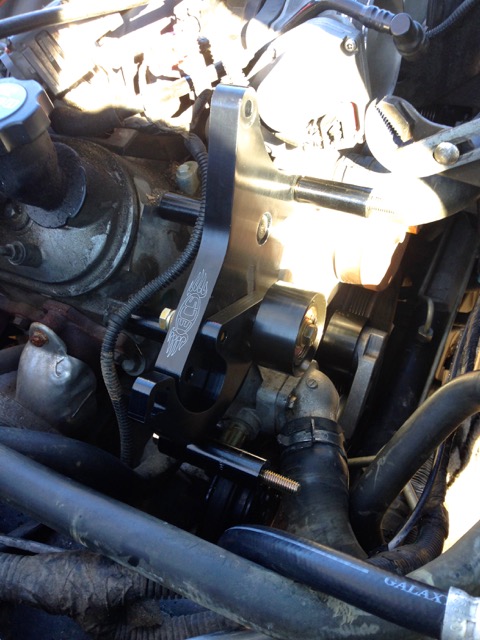
Another view with the bolts.. there are two washers that go between the bracket and water pump. Don't forget them
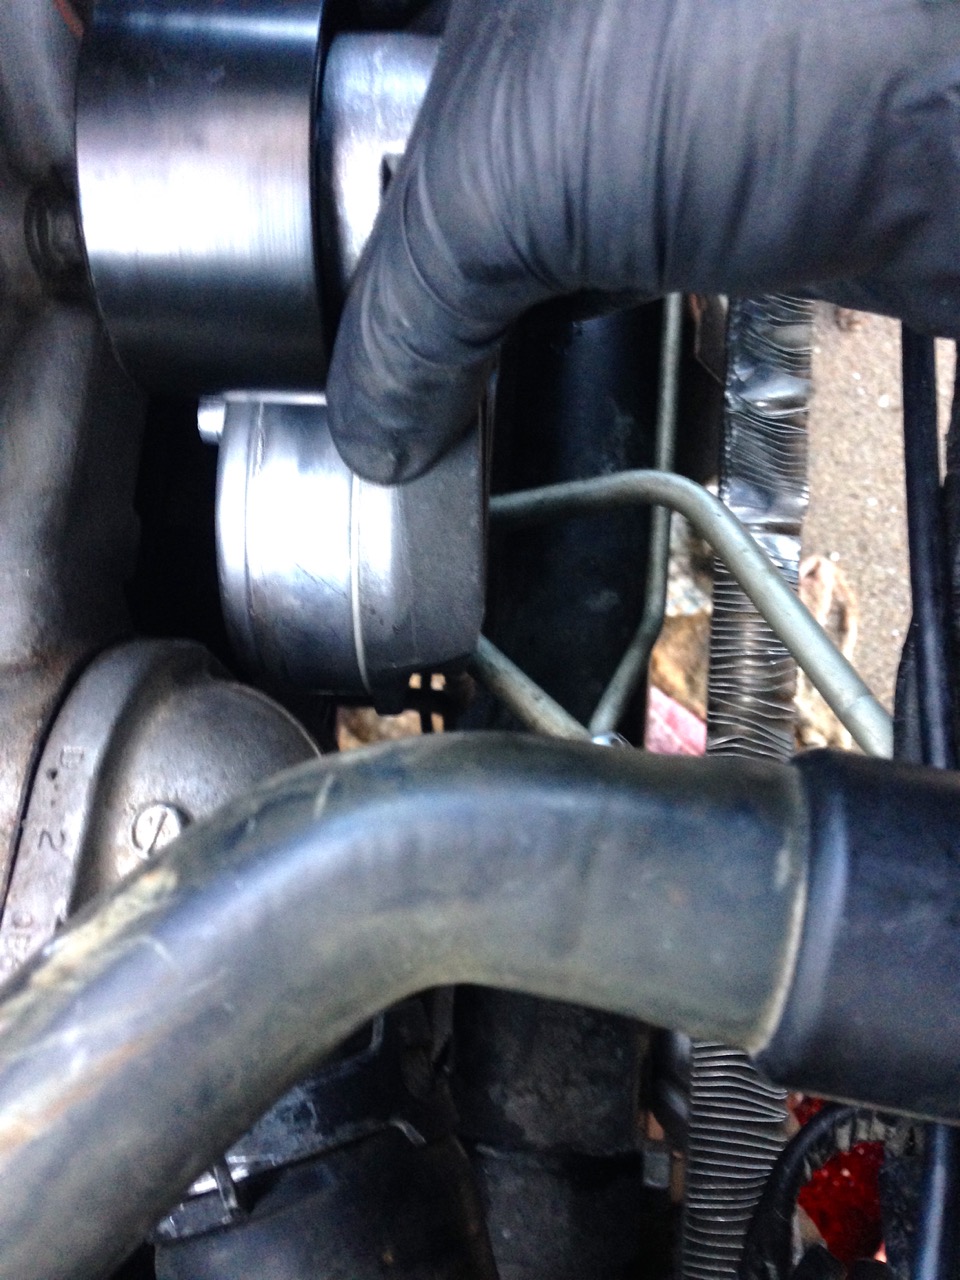
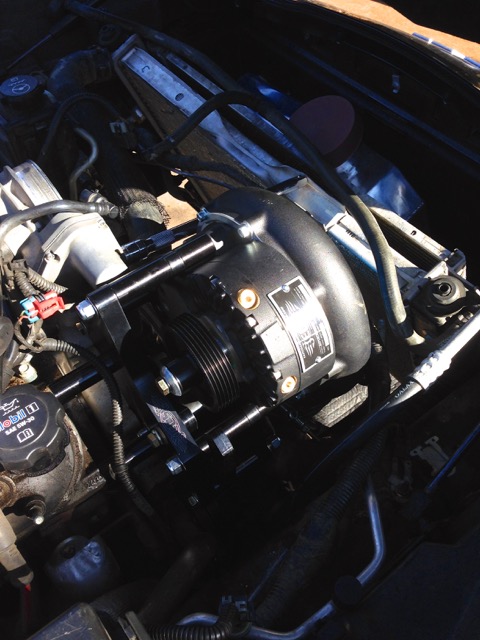
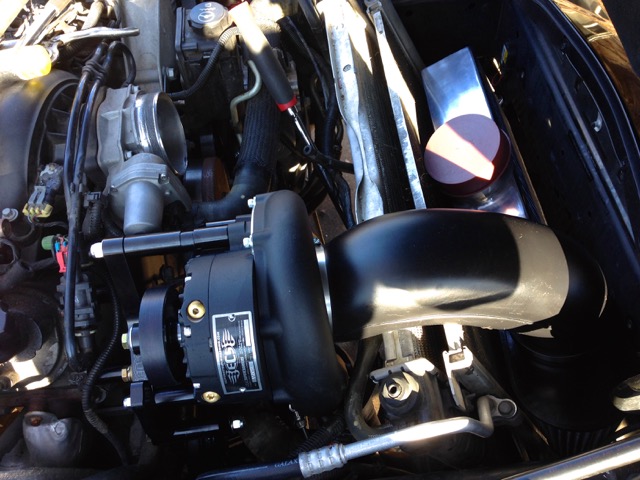
And head unit is halfway on there, kind of. The hose you can see towards the bottom ended up being my nemesis today. I literally fought with that damn thing for at least an hour trying to get it positioned where it didn't hit anything and would reach to where it goes (side of water pump)
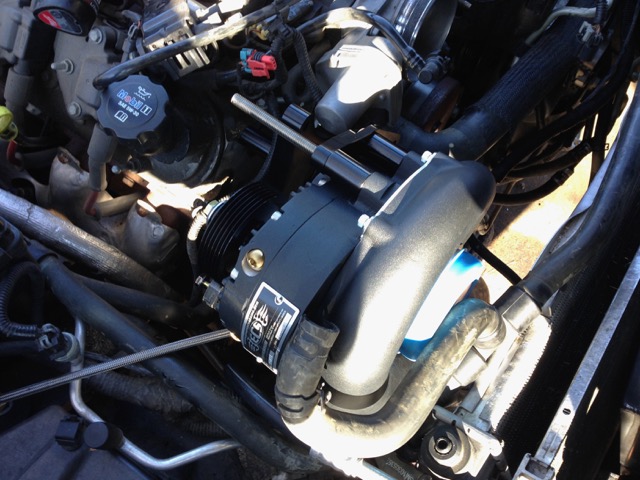
Head unit "more" installed with spacers, nuts, etc. Used an extension to push the radiator as far out of the way as possible
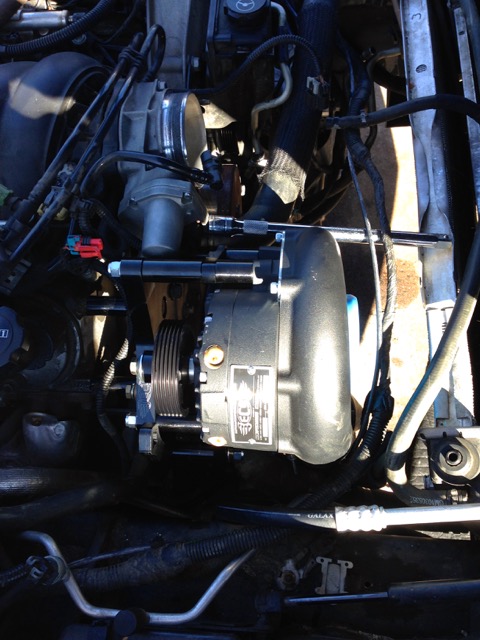
Same, another view
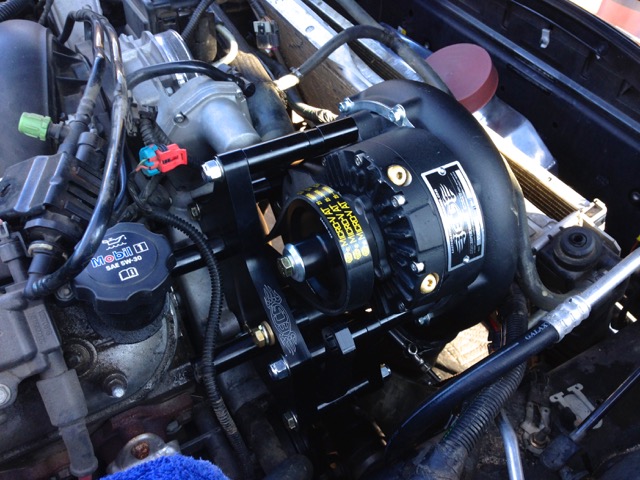
The pulley was NOT tightened down on the supercharger when I received it. Tightened it later once I had the belt on
Beginning of the mess that was getting the belt to go on. I'm not sure if I was doing something wrong or what, but I could not get that thing on to begin with. I ended up having to basically clamp it to one end of the alternator pulley and then rotate the engine a few degrees.. move clamp, rotate engine again. It finally popped on
Just another of the belt
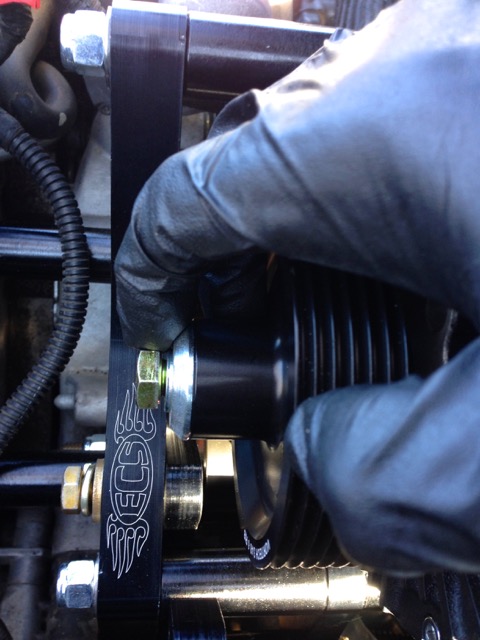
After belt is on.. one thing that worries me (perhaps it shouldn't?) is I'm RIGHT on the very left (towards rear of car) edge of both the supercharger pullies (manual and spring loaded one). I guess as long as I'm not hanging over it's fine, but it's damn close. On the spring loaded one the belt may actually be touching the back edge. I looked to make sure it the tensioner was seated on the mount all the way, and it was, so I'm going with it for now.
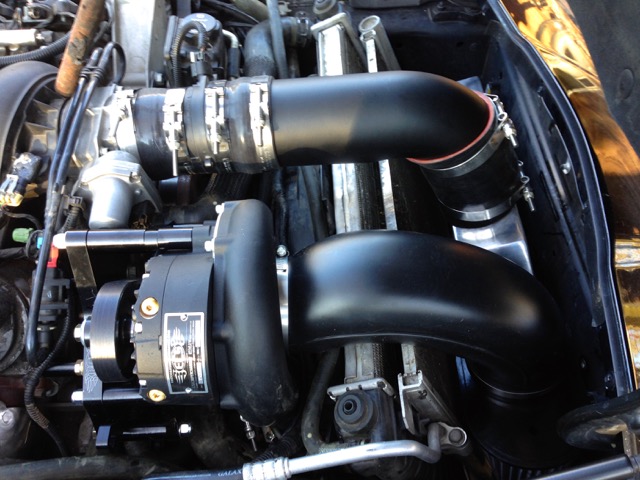
This is after belt is on, intake/air filter are on and I think the manual tensioner was tightened at this point too
And here it is after I got the piping on. I think the coupler between the intercooler and charge pipe is too long.. I don't think I could even shut th hood here and you can see the pipe is pushed pretty far into the coupler. I think it will work better with a slight trimming. The intercooler is also being leaned forward because of the whole charge pipe being a little too long.. so I'll probably shorten that coupler to make it work a little better
Also changed spark plugs today and cut the edges of the underside of the bumper off (where it meets up against the radiator cradle underneath. Moving the cradle forward interferes with the bumper, so you have to trim it
Also installed some little mount extender things to mount the underneath portions of the bumper to. This holds the underside of the bumper in place. It was too dark at that point to take any pictures unfortunately
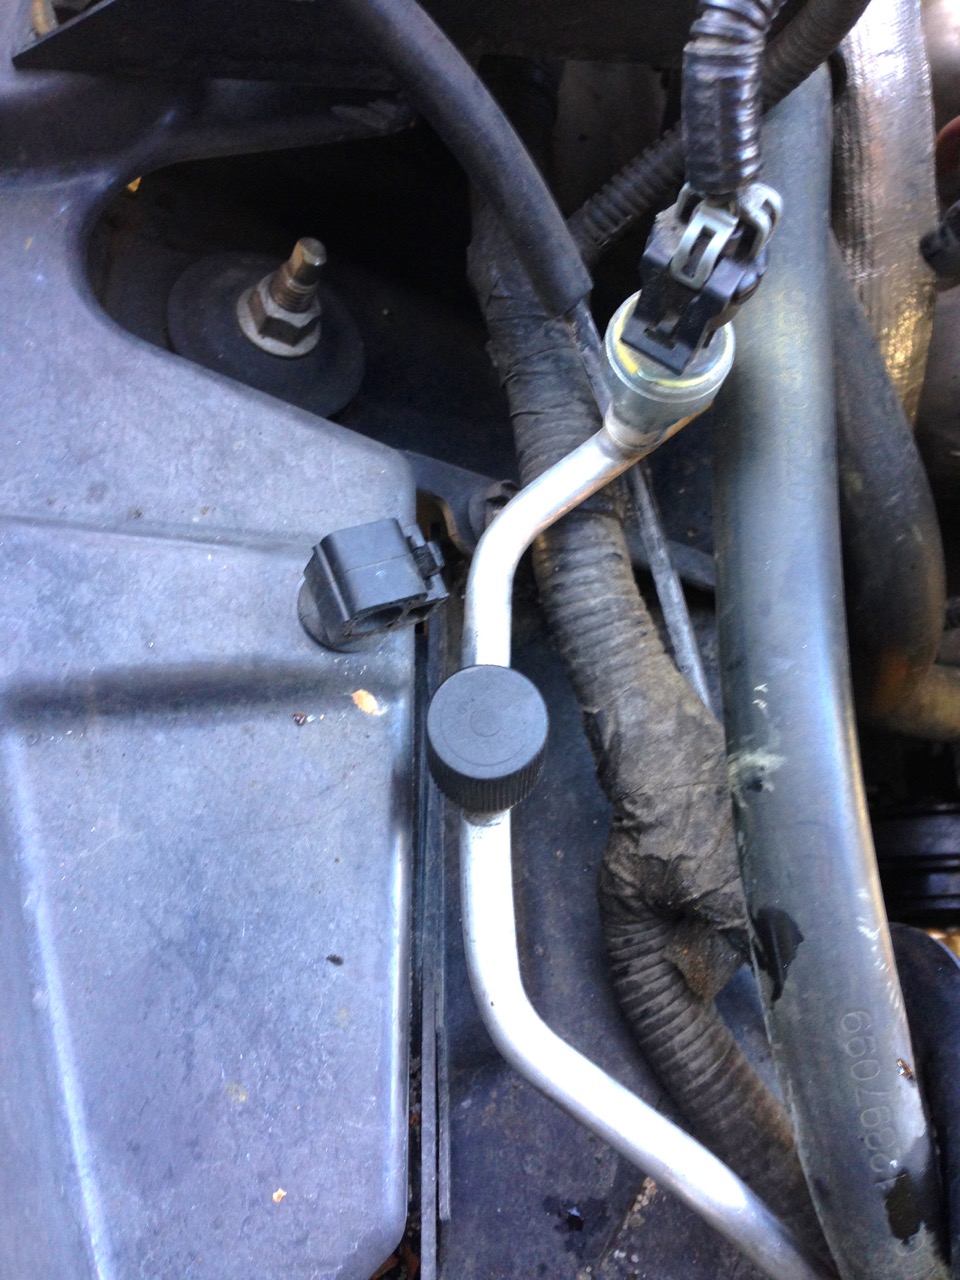
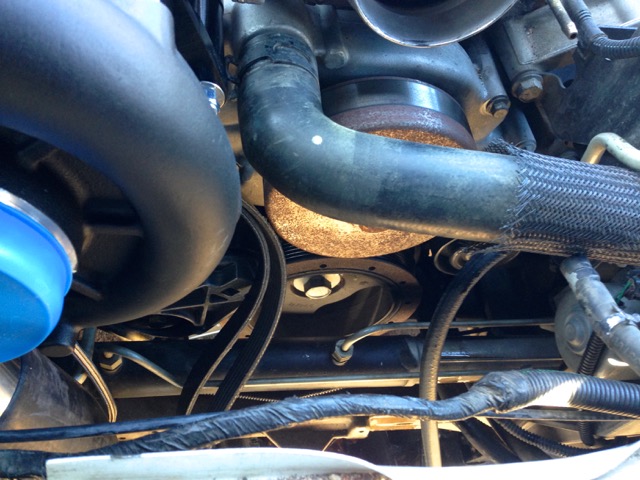
I'm going to order some new hose/fittings to make a new hose for the one that goes heater-->water pump-->coolant reservoir so I'll feel better about it. The current one is just so wedged into a tight space that I'm afraid it'll hit something and eventually wear through.. plus one of the hoses already have a little notch wearing into them, so it needs to be replaced anyways. A longer contraption of hoses will make routing much easier.
Also trying to find a 3/8" to 1/4" to 3/8" tee to replace one I broke into pieces. May just make a new hose there as well so I can route it a little neater. Also I ran the hose for blow off valve today.
So. Left to do: check spring loaded tensioner to make sure it's on right and isn't going to shred any belts, replace heater hose, replace steam vent to radiator to reservoir hose, figure out hoses for venting/catch can, etc. Wire boost a pump + racetronix harness, then put the factory plastic stuff back in. Have to change injectors too. I may be missing something but I think that's most of what is left
Got the SC in and car started up.. but managed to go ballistic after fighting with one of the coolant hoses earlier in the day and broke a fitting on a coolant hose.. so I couldn't really do much more than just start it for a second and turn it back off. Sounded good.. tiny bit of whistle but nothing crazy. Ran OK on old tune (haven't changed injectors yet..)
Still have to do the catch can tubing and some other stuff I'm probably forgetting
Getting the belt on was ridiculous. I ended up having to take out the lower alternator bolt so it would tilt down and get me a few extra mm's. I finally got it on but it fought me the whole way. A belt that was about 2 or 3mm longer would have made a world of difference. I noticed that after the belt had tension on it for about an hour it did loosen up a bit, so I assume that's why they send one that is that tight.
Anyways, pictures:
Couldn't find any rivet nuts locally so I used these lag bolt type things instead. Worked really well and isn't all that visible once everything is back together. I may replace the radiator cradle at some point and use the rivnuts instead but for now, this'll have to do

Same, from the back side.. You can see my beautiful original job on the right side.. (in the wrong place)

After intercooler was finally in and in the RIGHT spot. This part went pretty well/quick

Hard piping from supercharger to intercooler. I ended up having to take the couplers on and off a time or two and man those things are tough to get back off.. Hopefully I don't ever have to take them off again

Supercharger as it comes.. took a picture to remember where everything went

Bracket on.. there was 2 or 3 bolts into the head then two in the water pump. Then you put the secondary tensioner thing on

Another view with the bolts.. there are two washers that go between the bracket and water pump. Don't forget them

And head unit is halfway on there, kind of. The hose you can see towards the bottom ended up being my nemesis today. I literally fought with that damn thing for at least an hour trying to get it positioned where it didn't hit anything and would reach to where it goes (side of water pump)

Head unit "more" installed with spacers, nuts, etc. Used an extension to push the radiator as far out of the way as possible

Same, another view

The pulley was NOT tightened down on the supercharger when I received it. Tightened it later once I had the belt on

Beginning of the mess that was getting the belt to go on. I'm not sure if I was doing something wrong or what, but I could not get that thing on to begin with. I ended up having to basically clamp it to one end of the alternator pulley and then rotate the engine a few degrees.. move clamp, rotate engine again. It finally popped on

Just another of the belt

After belt is on.. one thing that worries me (perhaps it shouldn't?) is I'm RIGHT on the very left (towards rear of car) edge of both the supercharger pullies (manual and spring loaded one). I guess as long as I'm not hanging over it's fine, but it's damn close. On the spring loaded one the belt may actually be touching the back edge. I looked to make sure it the tensioner was seated on the mount all the way, and it was, so I'm going with it for now.

This is after belt is on, intake/air filter are on and I think the manual tensioner was tightened at this point too

And here it is after I got the piping on. I think the coupler between the intercooler and charge pipe is too long.. I don't think I could even shut th hood here and you can see the pipe is pushed pretty far into the coupler. I think it will work better with a slight trimming. The intercooler is also being leaned forward because of the whole charge pipe being a little too long.. so I'll probably shorten that coupler to make it work a little better

Also changed spark plugs today and cut the edges of the underside of the bumper off (where it meets up against the radiator cradle underneath. Moving the cradle forward interferes with the bumper, so you have to trim it
Also installed some little mount extender things to mount the underneath portions of the bumper to. This holds the underside of the bumper in place. It was too dark at that point to take any pictures unfortunately
I'm going to order some new hose/fittings to make a new hose for the one that goes heater-->water pump-->coolant reservoir so I'll feel better about it. The current one is just so wedged into a tight space that I'm afraid it'll hit something and eventually wear through.. plus one of the hoses already have a little notch wearing into them, so it needs to be replaced anyways. A longer contraption of hoses will make routing much easier.
Also trying to find a 3/8" to 1/4" to 3/8" tee to replace one I broke into pieces. May just make a new hose there as well so I can route it a little neater. Also I ran the hose for blow off valve today.
So. Left to do: check spring loaded tensioner to make sure it's on right and isn't going to shred any belts, replace heater hose, replace steam vent to radiator to reservoir hose, figure out hoses for venting/catch can, etc. Wire boost a pump + racetronix harness, then put the factory plastic stuff back in. Have to change injectors too. I may be missing something but I think that's most of what is left
Last edited by schpenxel; 12-14-2014 at 10:24 PM.
12-14-2014, 11:08 PM
#57
Drifting
Reading through and just remind me that experienced mostly the exact same "issues", except for the rivet nuts confusion. I wholeheartedly agree with you that the instructions need to be updated. Once everything is done and running you will forget about those hiccups.
I bet you cant wait to get it all tuned out and lay on that gas pedal.
I bet you cant wait to get it all tuned out and lay on that gas pedal.
12-14-2014, 11:41 PM
#58
Race Director
Thread Starter
Member Since: May 2004
Location: Raleigh, NC
Posts: 16,664
Received 1,194 Likes
on
1,053 Posts
St. Jude Donor '15
Reading through and just remind me that experienced mostly the exact same "issues", except for the rivet nuts confusion. I wholeheartedly agree with you that the instructions need to be updated. Once everything is done and running you will forget about those hiccups.
I bet you cant wait to get it all tuned out and lay on that gas pedal.
I bet you cant wait to get it all tuned out and lay on that gas pedal.
I also had a few missing parts (or I threw a box away on accident or something..) so that didn't help. Mostly small stuff, but was missing all washers for 1/4" bolts, was missing the spacer for the horn, missing the long bolt for the horn, missing wire ties and I think there was something else I'm forgetting. Nothing major, but frustrating nonetheless. I spent a whopping $5 at Tractor Supply to replace that + the rivet nut mistake, so not a huge deal in the end. I'm sure ECS/FSP would overnight me anything I was missing, but didn't really want to wait
The instructions really REALLY need to be updated. It wouldn't take more than a few hours to make them really good. There are parts in my kit that literally aren't even mentioned in the instructions.. The assembly of the AC bracket that I posted pictures of wasn't shown at all.. just "install preassembled bracket". It ain't preassembled.. There's a washer that came with the kit that is labeled "for AC bracket" that can go in at least two places on that thing and without Matt's help, I would have guessed the wrong place. Regardless, not trying to bash ECS by any means.. I still think it's the best kit out there and I would purchase it again if I were doing it over. Just some frustrations.
The only real concern I have with the install is with that spring loaded SC tensioner. I need to look closer but I'm afraid the belt is going to be hanging off the back of it ever so slightly and I don't imagine that'd be a good thing. It would be by like 0.5mm at most, but I'll get a better look at it sometime this week.
The instructions for the BAP aren't even close.. wires are completely different colors and no relay was included in what I received (don't think it's needed due to newer design of BAP, but still.. update the instructions!!)
The instructions on the crank case venting are pretty poor. I THINK you have to cap off one of the vacuum ports on the TB and then connect to the one on the intake right in front of the TB, but there's not even a mention of capping anything off.. but there's a cap in the kit, so I'm guessing that's where it goes? I'll call Matt on that one tomorrow. It doesn't even show where one of the lines is ran. Or maybe I'm blind.
I wish I had made a list while I was working so I could make some suggestions from a "first timer's" point of view, but unfortunately I didn't. All of these things are easy after you've done it once
Yes.. I think you are right and I'll forget all about these little things once it's all up and running
 I can't wait. It sounded awesome when I started it tonight.. I didn't have much coolant in it so I couldn't let it run long at all, but there was just a little whistle and it was a little louder than it used to be.. which is exactly what I wanted.
Sorry for the long posts. Bedtime!
Last edited by schpenxel; 12-14-2014 at 11:44 PM.

 12-15-2014, 08:35 AM
#60
Race Director
Thread Starter
Member Since: May 2004
Location: Raleigh, NC
Posts: 16,664
Received 1,194 Likes
on
1,053 Posts
St. Jude Donor '15
I would recommend getting a rivnut install tool if you can find one cheap. I saw them on amazon for like $40. Most agree they don't last long at that price point, but you only need it to work 5 or 6 times
Also personally I would plan on making (or at least extending) the hose that goes from heater core to water pump to coolant reservoir. It looks like there's a way to make the stock one work based on pictures I've found of other installed kits, but if I were doing it over again I'd just buy some hose and route it out of the way to make things easy on myself. I THINK it's 5/8" hose connecting to the heater core pipe then 3/4" on the other two connections but I need to check that. I had a heck of a time fighting with that hose.
Also, if I were doing it over again I WOULD pull the steering rack. HOWEVER, make sure to install ALL of the AC tensioner components AND the big 'ol HD supercharger spring loaded tensioner too before putting it back in. There is very very little room in that area with the rack in place. I had to lift my engine up to get enough clearance to get the big tensioner on... the steering rack was in the way otherwise. If you do it with the rack out you can also make sure it's seated flush, etc. without a bunch of stuff in the way
And lastly, I don't think I mentioned it, but I finally just ditched the power steering cooler. I couldn't take fighting with that thing in the way anymore so I just pulled it off. Cleared up a lot of space and should be fine (I don't autox or anything). If my car hadn't had a transmission cooler (mine is a M6 which I find even more strange..) or power steering cooler this whole thing would have been a lot easier.
Last edited by schpenxel; 12-15-2014 at 11:40 AM.