Dewitt's radiator and Brushless fan kit install
#1
Racer


Thread Starter
Member Since: Nov 2013
Location: Fort Walton Beach Florida
Posts: 438
Likes: 0
Received 4 Likes
on
3 Posts
So I installed both items in the car today. The rad went in relatively easy but the fan was another story...
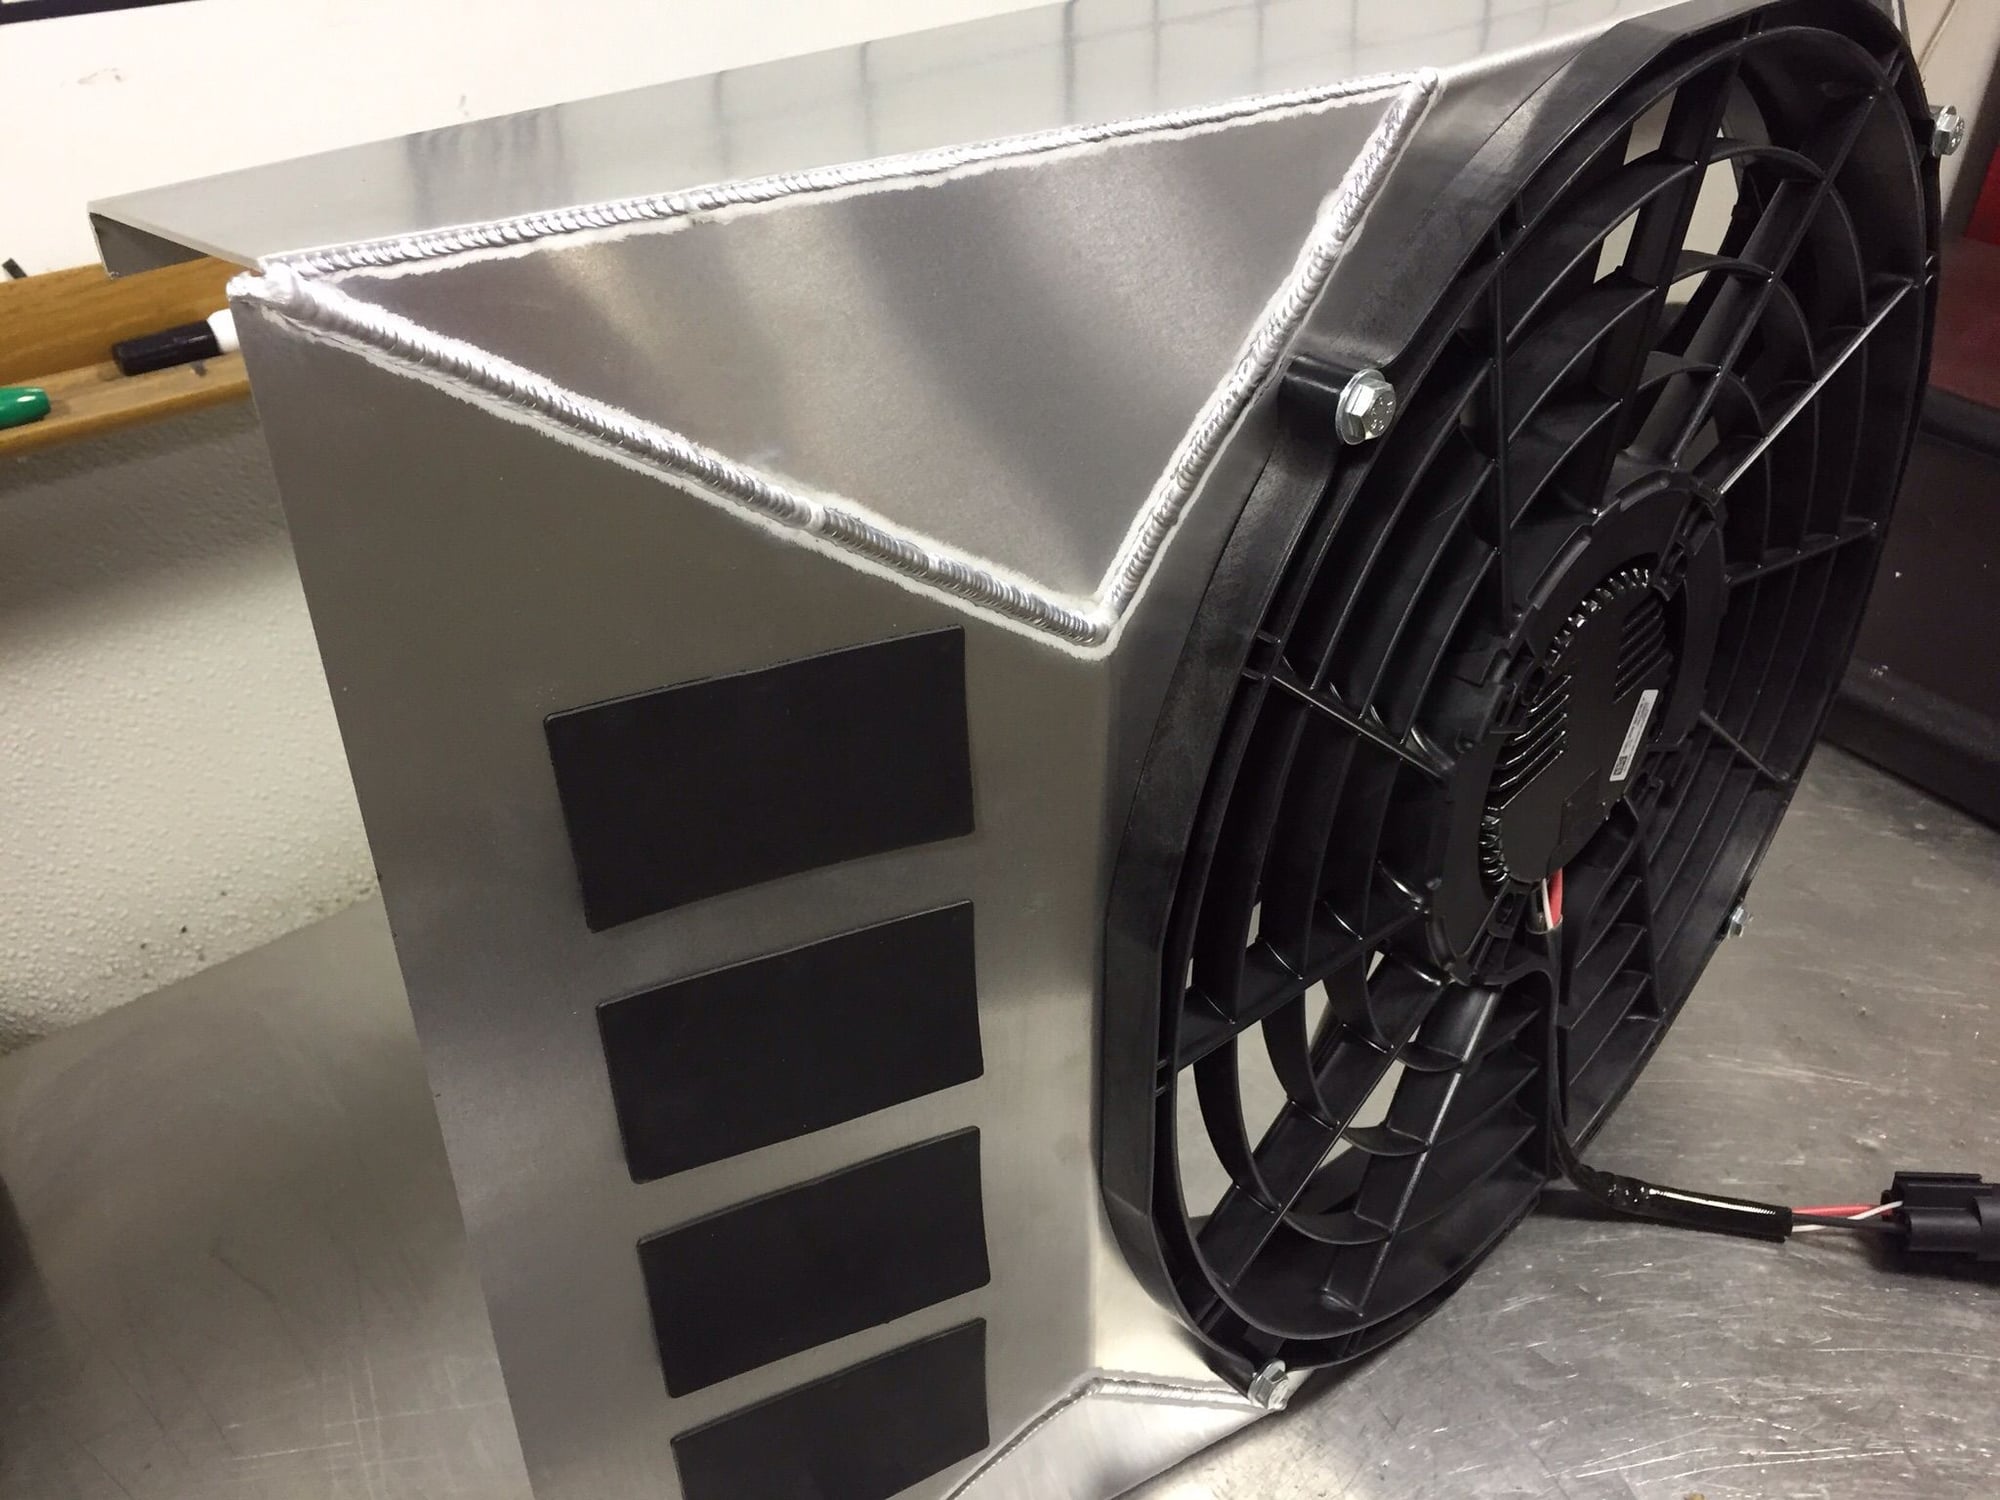
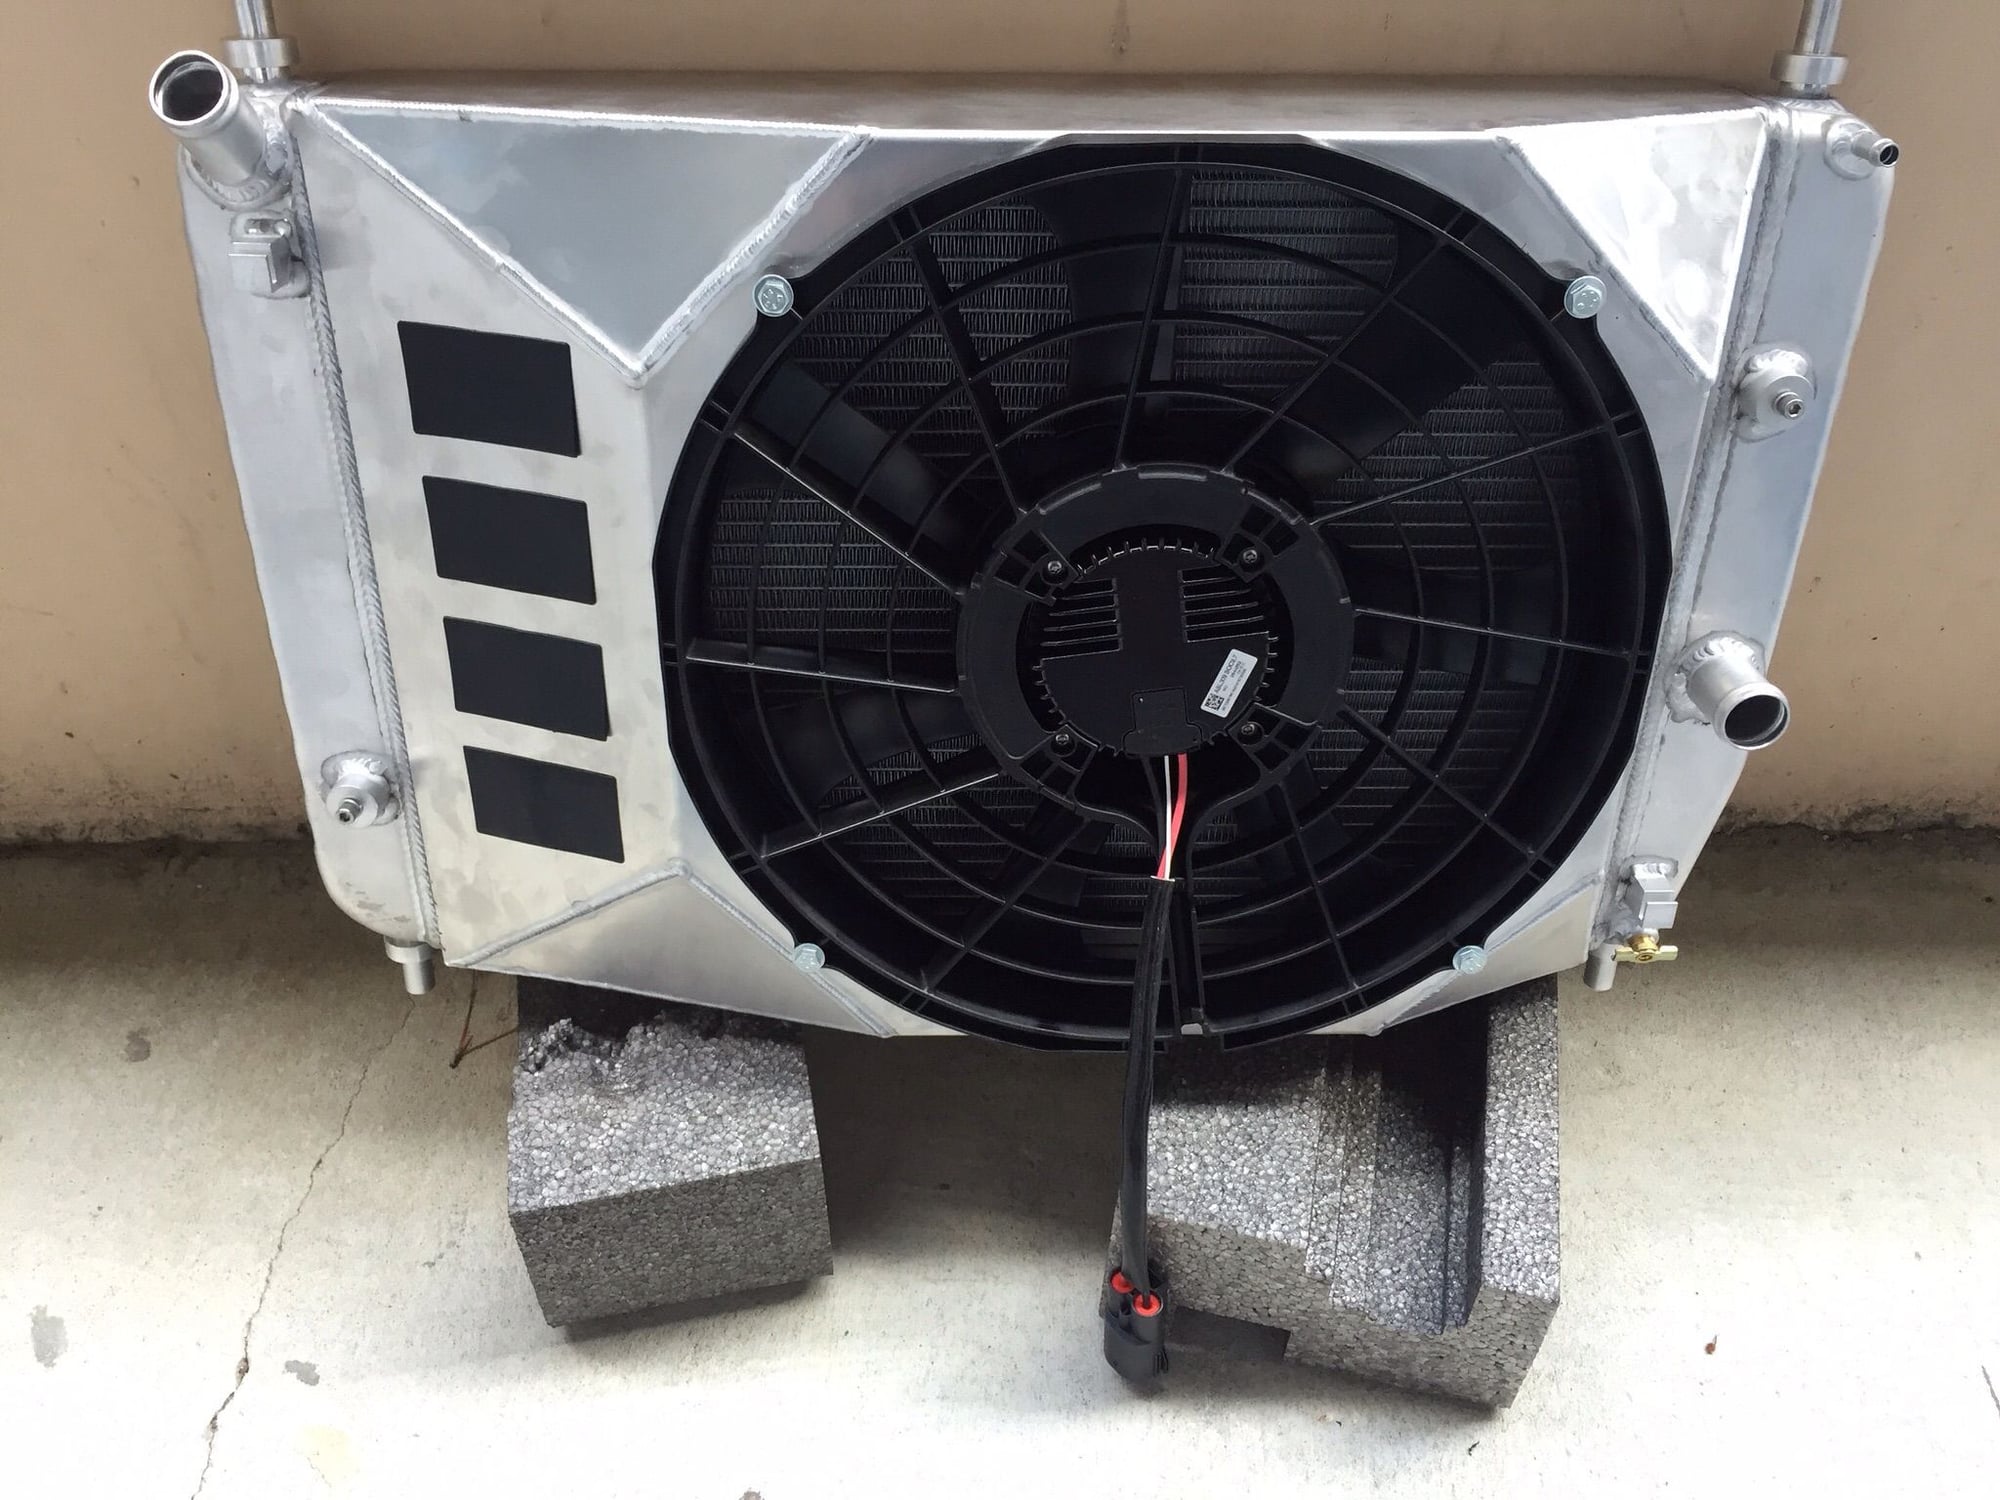
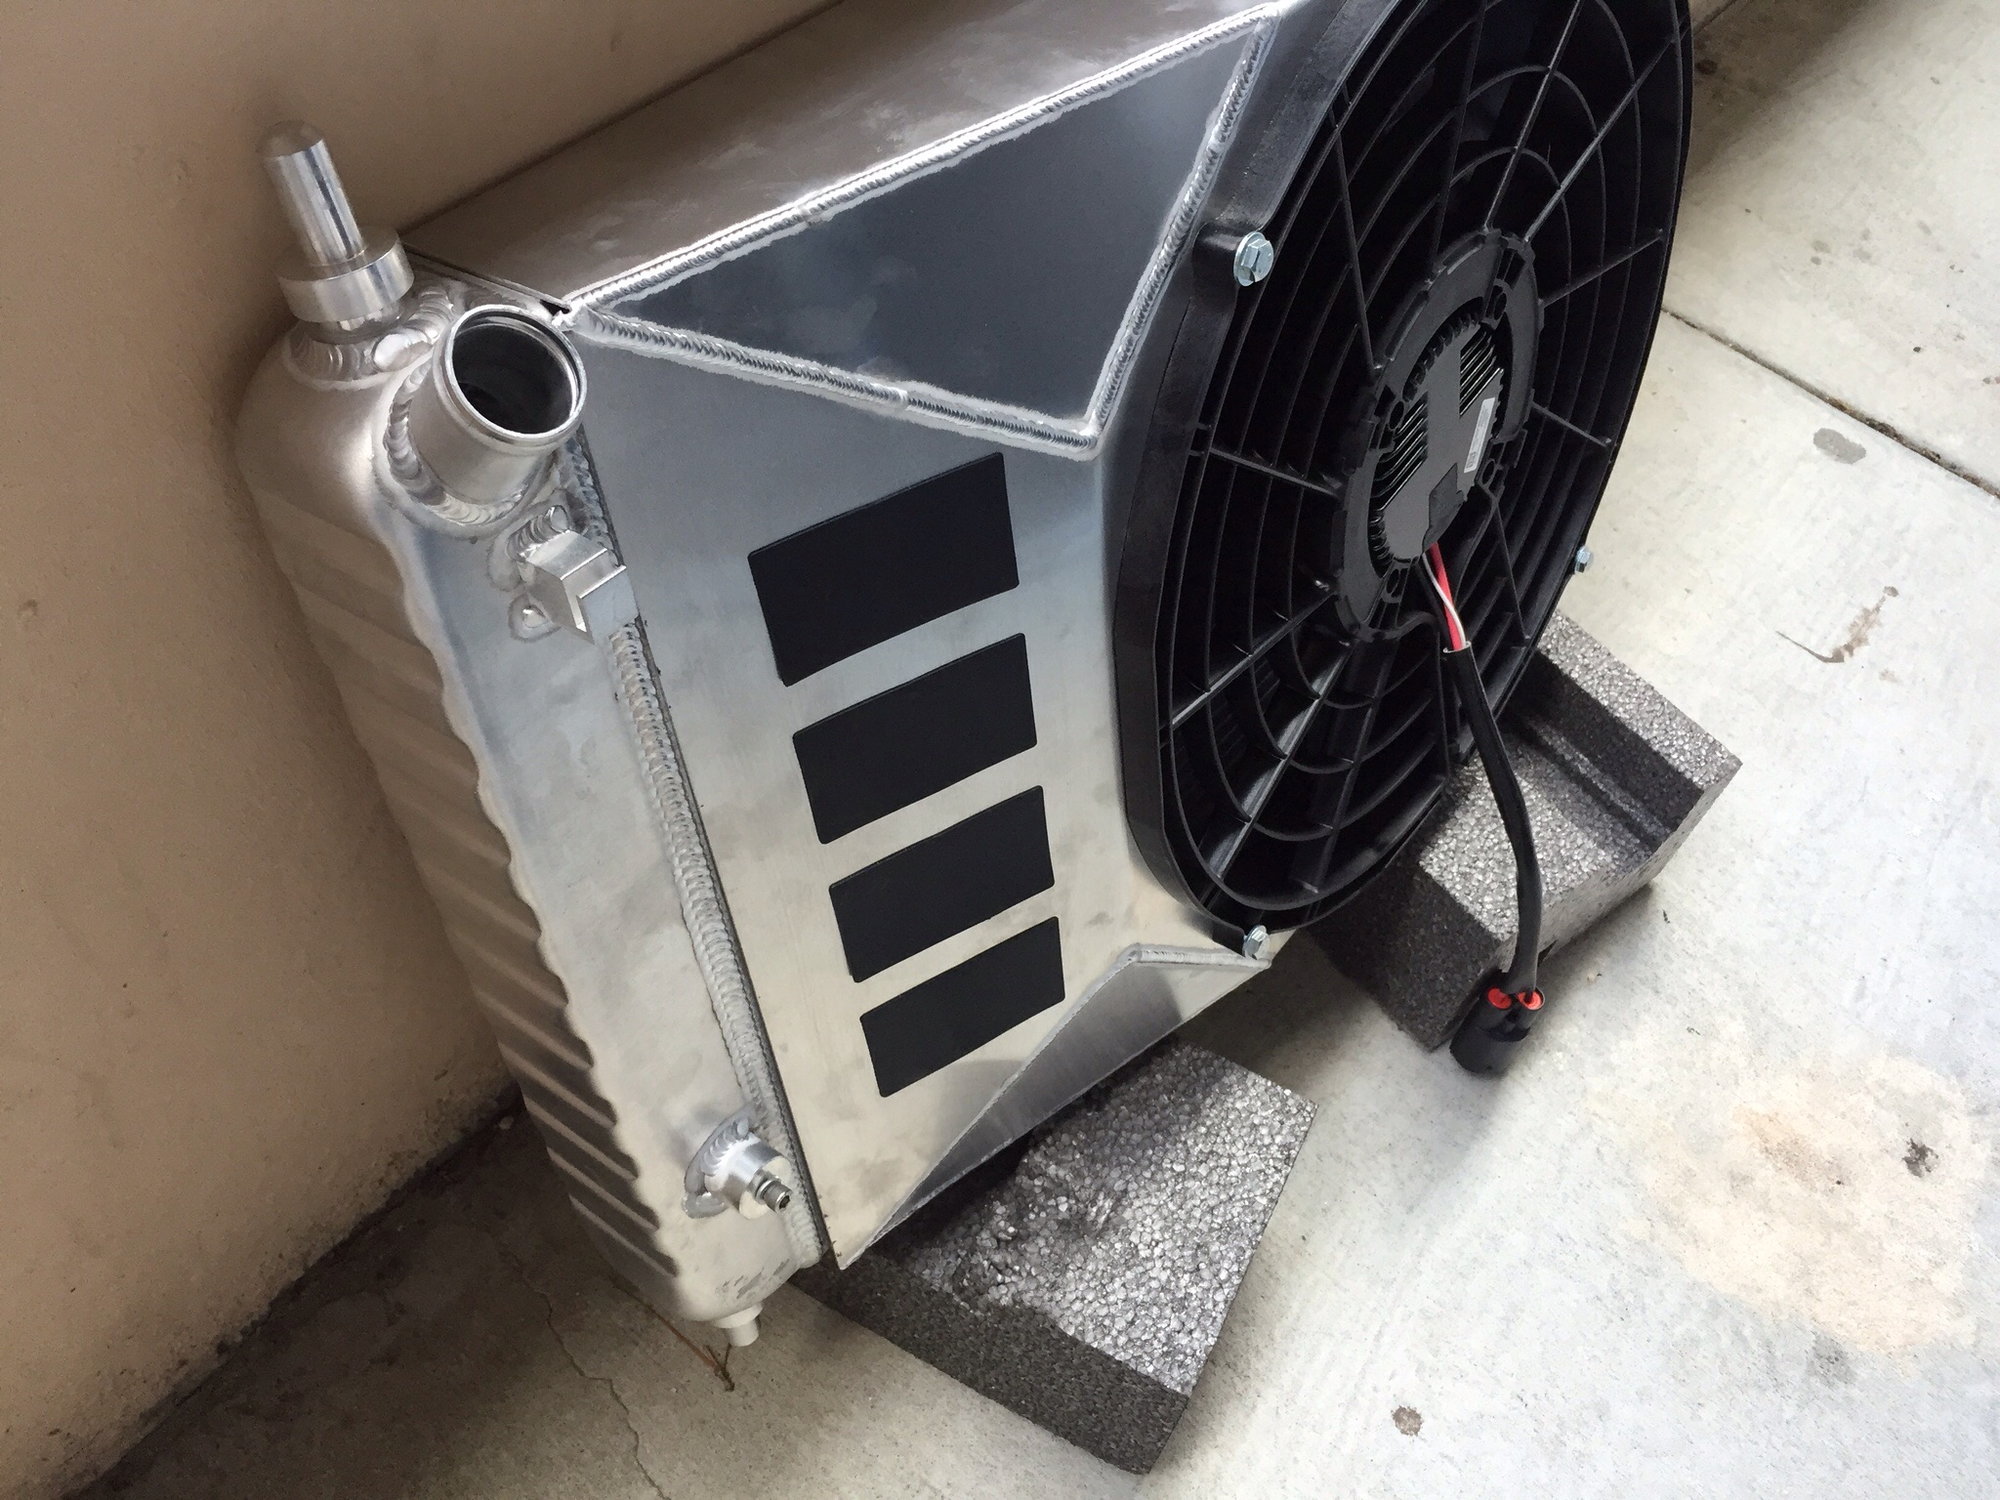
First off the brushless fan kit made Dewitt's would not fit with my ecs blower. I honestly figured it wouldn't and I was right. Dewitt's never told me it would so It was a guessing game. What I did was cut off the driver side vents on the shroud and just simply moved it over and it fit well enough. My ecs oil cooler even still fit with the relocation brackets they include with the blower kit. Making a custom shroud may be a better way to go if possible.
I wanted to install the coolant temp sensor in the head like factory but it was too big so I had to splice it into the upper rad hose.
I can't give any impressions on temps because I could not get the fan to come on. I followed the diagram supplied by Dewitt's and it won't come on. After flushing the coolant I let the car warm up to 200* and the fan didn't come on. All of my connections are good. I'm scratching my head at this point. Any suggestions would be helpful. I'm also wondering if the fan is bad though I highly doubt it.
Link to wiring diagram
http://http://cdn.shopify.com/s/files/1/0164/0230/files/Nuova.pdf?874
I didn't know what to do with the yellow analog wire since it doesn't say anything about it. I also just left the blue wire alone since I didn't install a switch. Were there anyother connections I needed to make?
Connections I made
Fan harness
. Red wire - connected to lug on fuse box
. Black wire - connected to chassis ground on passenger frame rail
. White wire - connected to white wire from sensor harness
. Yellow wire - not connected to anything
Sensor harness
. Red wire - connected to fuel pump circuit in fuse box (switched power)
. Black wire - connected to chassis ground on passenger frame rail
. White wire - connected to white wire on fan harness
. Blue wire - not connected since I'm not running an override switch
I will add pictures when I get everything running properly
If anyone has advise is appreciate it
Last edited by Ultrasport05; 06-07-2015 at 06:23 PM.
#2
Drifting


The temp at the head is going to be more accurate than the radiator hose. In fact the radiator hose may be colder than the engine. I looked at the diagram and it looks like you have everything correct. Personally I would use an adapter and put the sensor in the head.
If you had an infrared thermometer you can test my theory lol. I've been there thought with an engine swap I did in the past.
If you had an infrared thermometer you can test my theory lol. I've been there thought with an engine swap I did in the past.
#4
Instructor


So I installed both items in the car today. The rad went in relatively easy but the fan was another story...
First off the brushless fan kit made Dewitt's would not fit with my ecs blower. I honestly figured it wouldn't and I was right. Dewitt's never told me it would so It was a guessing game. What I did was cut off the driver side vents on the shroud and just simply moved it over and it fit well enough. My ecs oil cooler even still fit with the relocation brackets they include with the blower kit. Making a custom shroud may be a better way to go if possible.
I wanted to install the coolant temp sensor in the head like factory but it was too big so I had to splice it into the upper rad hose.
I can't give any impressions on temps because I could not get the fan to come on. I followed the diagram supplied by Dewitt's and it won't come on. After flushing the coolant I let the car warm up to 200* and the fan didn't come on. All of my connections are good. I'm scratching my head at this point. Any suggestions would be helpful. I'm also wondering if the fan is bad though I highly doubt it.
Link to wiring diagram
http://http://cdn.shopify.com/s/files/1/0164/0230/files/Nuova.pdf?874
I didn't know what to do with the yellow analog wire since it doesn't say anything about it. I also just left the blue wire alone since I didn't install a switch. We're there anyother connections I needed to make?
Connections I made
Fan harness
. Red wire - connected to lug on fuse box
. Black wire - connected to chassis ground on passenger frame rail
. White wire - connected to white wire from sensor harness
. Yellow wire - not connected to anything
Sensor harness
. Red wire - connected to fuel pump circuit in fuse box (switched power)
. Black wire - connected to chassis ground on passenger frame rail
. White wire - connected to white wire on fan harness
. Blue wire - not connected since I'm not running an override switch
I will add pictures when I get everything running properly
If anyone has advise is appreciate it
the sensor harness to the #16 windshield washer spot inside of the fuse box, since my windshield washer tank is used for meth I have no need for the washer, I cut down the sides of a mini-add-a-fuse, put in a 10 amp fuse and plugged it into #16 and it works fine. Try another switched location and I bet fan will work. Yellow wire is not used in our set-up.
Please post info on the adapter when you get it because I will probably relocate my sensor when I figure out the proper adaptor.
#5
Racer


Thread Starter
Member Since: Nov 2013
Location: Fort Walton Beach Florida
Posts: 438
Likes: 0
Received 4 Likes
on
3 Posts
I wired mine the same as yours except I connected the red wire from
the sensor harness to the #16 windshield washer spot inside of the fuse box, since my windshield washer tank is used for meth I have no need for the washer, I cut down the sides of a mini-add-a-fuse, put in a 10 amp fuse and plugged it into #16 and it works fine. Try another switched location and I bet fan will work. Yellow wire is not used in our set-up.
Please post info on the adapter when you get it because I will probably relocate my sensor when I figure out the proper adaptor.
I also use my washer tank for meth so that'll be a good route for me if it works.
#6
Racer


Thread Starter
Member Since: Nov 2013
Location: Fort Walton Beach Florida
Posts: 438
Likes: 0
Received 4 Likes
on
3 Posts
So #16 in my fuse box is for the even injectors. #17 is for the washer. Only problem is the washer relay is in the way for me to use the add a circuit. Since I'm not using my washer pump can I just remove the relay for it to make room for the add a circuit? Or would this cause other problems?
#8
Melting Slicks


You might want to try and see if the fan works with 12v applied to the override (blue) wire. If not you may have a ground or problem not related to power.
#10
Racer


Thread Starter
Member Since: Nov 2013
Location: Fort Walton Beach Florida
Posts: 438
Likes: 0
Received 4 Likes
on
3 Posts
I already did. Thank you though. I wasn't sure if anything else was tied in with it..
So I was just letting the car idle in the parking lot and the temps leveled off around 205-210 so that's about where they used to sit while I was driving. I'm guessing the fan is working but I'll know more tomorrow night. I'm going to go to the shop and get under the car and verify that it's spinning.
Also I was speaking with Dewitt's today and they think I might have the 195-210* switch and that a problem since the sensor isn't in the head so I'm guessing the motor itself is running warmer. Again I'll verify tomorrow which sensor I have and if I do have the higher one I'll order the 160-185* one.
#11
Instructor


So #16 in my fuse box is for the even injectors. #17 is for the washer. Only problem is the washer relay is in the way for me to use the add a circuit. Since I'm not using my washer pump can I just remove the relay for it to make room for the add a circuit? Or would this cause other problems?
#12
Melting Slicks


I know you mentioned that the shroud didn't fit very well with your shortened radiator, but how well did the fan fit in the shroud?
I'm considering switching to one of these, and it would be great if the fan itself would be a easy swap with the old one.
I'm considering switching to one of these, and it would be great if the fan itself would be a easy swap with the old one.
#13
Team Owner


Shroud is completely different.
I believe he has the full size replacement, not the cut down since they don't make one for a cut down.
You should easily be able to hear it kick on.
I believe he has the full size replacement, not the cut down since they don't make one for a cut down.
You should easily be able to hear it kick on.
#14
Racer


Thread Starter
Member Since: Nov 2013
Location: Fort Walton Beach Florida
Posts: 438
Likes: 0
Received 4 Likes
on
3 Posts
I'm going to try and make some more progress either tomorrow or Wednesday on this. I'll keep everyone updated
Some pictures below. I basically had to cut the little vents off almost right at where the bend is next to the fan body. This gave me plenty of room to slide the fan over towards the drivers side and clear the blower


Last edited by Ultrasport05; 06-08-2015 at 09:10 PM.
#15
Team Owner


What about mounting it upside down? That seems like it would have worked.
#16
Racer


Thread Starter
Member Since: Nov 2013
Location: Fort Walton Beach Florida
Posts: 438
Likes: 0
Received 4 Likes
on
3 Posts
I thought about that but only the top bracket has the lip that holds it to the rad. The bottom just slides over the bottom of the core and just sits there. It may have worked but I don't think it would have. There really isn't mush room between the compressor housing and the rad so I just decided to cut the shroud. It served my purpose well enough. Will it cool as well as it would have with a full shroud? Probably not but it'll work well enough.
#17
Team Owner


My dual fan shroud had the parts like the top on both sides that go around the radiator.
Ohh well, if I ever do the single 17" I'll do a custom shroud anyways. Been too busy with other toys to mess with vette. Jeep is way more fun for now.
Ohh well, if I ever do the single 17" I'll do a custom shroud anyways. Been too busy with other toys to mess with vette. Jeep is way more fun for now.
#18
Racer


Thread Starter
Member Since: Nov 2013
Location: Fort Walton Beach Florida
Posts: 438
Likes: 0
Received 4 Likes
on
3 Posts
If you have the means to have a custom shroud made that would be the way to go. You can tailor it to your exact specs. I don't have fab shop nor am I skilled enough to make one myself so I just bought theirs and made it work. It's not ideal but it'll do for now.
I agree about the jeep. Wish I had one
#19
OP, any pics on the rad install? Wanna see how difficult this was to tackle.. Tks!
#20
Drifting


