
Ported Intake and Vararam Install Notes & Track Results
 07-03-2006, 10:29 AM
#1
Tech Contributor
Thread Starter

Saturday I installed a Ported Intake I received from CHarris85Vette and a new improved Vararam from Corvettes of Houston.
Vendor Support
First, support where support is due. CHarris85Vette was prompt with response to PM's, emails, shipping, everything. First rate. Upon opening the box, I thought there wasn't much done, UNTIL I compared the ported intake to my stock intake. Cory did a lot of work - the ports were all wider, and importantly, consistent. I measured stock ports at approx. 7/8" and ported were 1-1/8. He took more off one side than the other, so it looks like he's done his homework doing this. A fair amount of work was done behind the throttle body too, it's amazing how much casting flash was in there.
Corvettes of Houston, and Vararam Industries were very good to 2 day ship my long-ordered Vararam so I could have them in time for a shop install - unfortunately, the headers didn't arrive so no tune or dyno for me yet.
Installation Notes
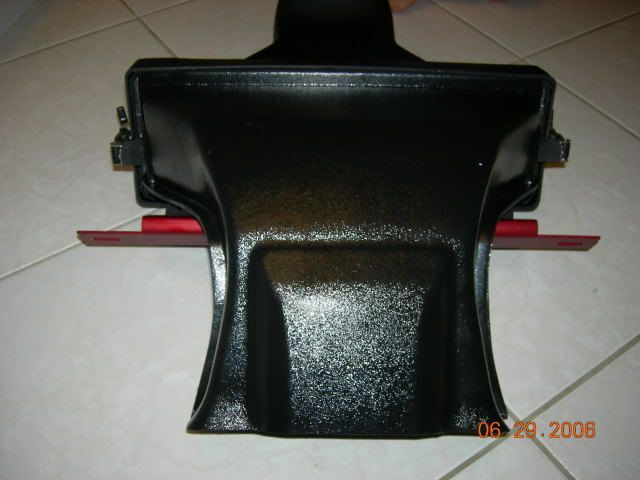
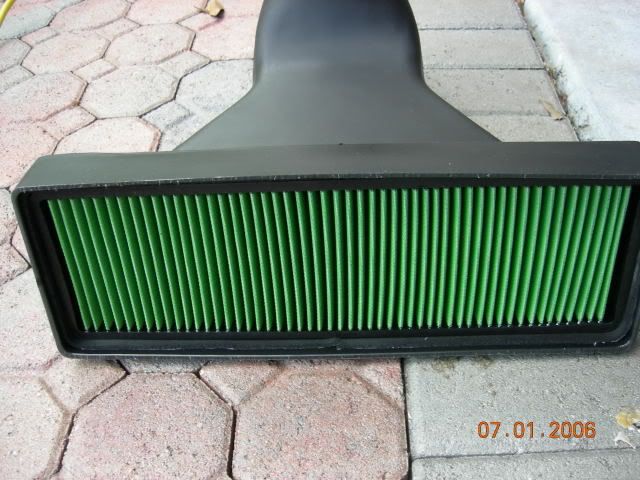
I installed the Vararam in 30 minutes precisely. Cutting the shroud was a piece of cake - the new template was perfect. I used ShockerRacing's post on the forum for instructions and a plain blade knife, it cuts like butter and just don't extend the blade fully when cutting the top. The Vararam unit is high quality, the filter is first rate and the two sides of the unit fit together precisely inside each other with no leaks. It looks and feels like a quality unit you are proud to have on your car.
Installing the intake took me 2 hours but next time it would take only an hour. I used JmX's instructions on LS1howto.com. It really is a piece of cake - here are some specific things I noted for the LS2 C6 that might save someone else time:
1. You don't need to unhook the fuel lines. Just remove the wires from the injectors, take out the 4 bolts that hold the fuel rails and remove the four back intake bolts (they can't come out until you remove the intake), pop the fuel injectors out and flip the fuel rail with the injectors attached back onto the windshield (after you put down a pad of some sort).
2. Don't bother taking the vacuum line off the booster. You can take it off the back of the manifold after the bolts are all out by moving the manifold forward. The LS2 doesn't have another small line to worry about like the LS1/6 did.
3. When reinstalling, be sure and put the back 4 bolts (and the fuel rail brackets) on the manifold before you set the manifold.
4. Put the fuel rails back in the manifold BEFORE you torque the manifold. That was my mistake. Once the back 4 bolts are tight, you can't put the fuel rails in because the bracket helps hold the fuel rails down.
The ported intake is a really easy install. No fluids were leaked and I literally didn't get my hands dirty (although my car is pretty new and the engine is clean). I am not a mechanic but I did work in a shop in college so I know my way around a car. There are really no tricks to this install other than those posted above.
Track Results
I race in the Moroso Corvette Challenge http://www.corvettechallengemmp.com/home.php. Thanks to Ranger, I keep a spreadsheet of all my measured results. I use ET Streets that are quite tall, thus explaining my low trap speeds. DA was essentially the same at all events, between 2500 and 2800 (it's hot and humid here in the summer even though we're 7 feet above sea level!). Prior to the Ported Intake and Vararam my results averaged 13.10 @ 107.5 (9 runs over 2 events excluding bracket runs where I braked at the end). After the Ported Intake and Vararam my results averaged 12.74 @ 110.8 (5 runs excluding bracket runs with braking). I posted a new best of 12.66 at 111.6 too. That's an improvement of 3.6 tenths and 3.3 MPH on average.
Overall I'm thrilled with the improvement I received, the quality of the products, the ease of install and the low cost for these improvements. Next mod is headers & tune so I'll have dyno numbers after that.
Vendor Support
First, support where support is due. CHarris85Vette was prompt with response to PM's, emails, shipping, everything. First rate. Upon opening the box, I thought there wasn't much done, UNTIL I compared the ported intake to my stock intake. Cory did a lot of work - the ports were all wider, and importantly, consistent. I measured stock ports at approx. 7/8" and ported were 1-1/8. He took more off one side than the other, so it looks like he's done his homework doing this. A fair amount of work was done behind the throttle body too, it's amazing how much casting flash was in there.
Corvettes of Houston, and Vararam Industries were very good to 2 day ship my long-ordered Vararam so I could have them in time for a shop install - unfortunately, the headers didn't arrive so no tune or dyno for me yet.
Installation Notes
I installed the Vararam in 30 minutes precisely. Cutting the shroud was a piece of cake - the new template was perfect. I used ShockerRacing's post on the forum for instructions and a plain blade knife, it cuts like butter and just don't extend the blade fully when cutting the top. The Vararam unit is high quality, the filter is first rate and the two sides of the unit fit together precisely inside each other with no leaks. It looks and feels like a quality unit you are proud to have on your car.
Installing the intake took me 2 hours but next time it would take only an hour. I used JmX's instructions on LS1howto.com. It really is a piece of cake - here are some specific things I noted for the LS2 C6 that might save someone else time:
1. You don't need to unhook the fuel lines. Just remove the wires from the injectors, take out the 4 bolts that hold the fuel rails and remove the four back intake bolts (they can't come out until you remove the intake), pop the fuel injectors out and flip the fuel rail with the injectors attached back onto the windshield (after you put down a pad of some sort).
2. Don't bother taking the vacuum line off the booster. You can take it off the back of the manifold after the bolts are all out by moving the manifold forward. The LS2 doesn't have another small line to worry about like the LS1/6 did.
3. When reinstalling, be sure and put the back 4 bolts (and the fuel rail brackets) on the manifold before you set the manifold.
4. Put the fuel rails back in the manifold BEFORE you torque the manifold. That was my mistake. Once the back 4 bolts are tight, you can't put the fuel rails in because the bracket helps hold the fuel rails down.
The ported intake is a really easy install. No fluids were leaked and I literally didn't get my hands dirty (although my car is pretty new and the engine is clean). I am not a mechanic but I did work in a shop in college so I know my way around a car. There are really no tricks to this install other than those posted above.
Track Results
I race in the Moroso Corvette Challenge http://www.corvettechallengemmp.com/home.php. Thanks to Ranger, I keep a spreadsheet of all my measured results. I use ET Streets that are quite tall, thus explaining my low trap speeds. DA was essentially the same at all events, between 2500 and 2800 (it's hot and humid here in the summer even though we're 7 feet above sea level!). Prior to the Ported Intake and Vararam my results averaged 13.10 @ 107.5 (9 runs over 2 events excluding bracket runs where I braked at the end). After the Ported Intake and Vararam my results averaged 12.74 @ 110.8 (5 runs excluding bracket runs with braking). I posted a new best of 12.66 at 111.6 too. That's an improvement of 3.6 tenths and 3.3 MPH on average.
Overall I'm thrilled with the improvement I received, the quality of the products, the ease of install and the low cost for these improvements. Next mod is headers & tune so I'll have dyno numbers after that.
 07-03-2006, 11:43 AM
#2
Drifting


Member Since: Jul 2000
Location: Bremerton WA
Posts: 1,861
Likes: 0
Received 0 Likes
on
0 Posts
St. Jude Donor '09
Thanks for the kind words, Joe. I'm glad you're happy and I look forward to seeing your results after the headers and tune. I think your combo will be surprising for as simple as it is. Gotta love these 6 liters they seem to love airflow 
07-03-2006, 01:39 PM
#3


Originally Posted by Joe_G
Saturday I installed a Ported Intake I received from CHarris85Vette and a new improved Vararam from Corvettes of Houston............Installing the intake took me 2 hours but next time it would take only an hour.
 07-03-2006, 02:04 PM
#4
Tech Contributor
Thread Starter
Originally Posted by cmb13
I'll keep that in mind.
 We COULD literally do it at the track, but perhaps it would be better if you drove down and we could have a beer and a chat while we put it on.
07-03-2006, 02:12 PM
We COULD literally do it at the track, but perhaps it would be better if you drove down and we could have a beer and a chat while we put it on.
07-03-2006, 02:12 PM
#5
Melting Slicks


I have one of these intakes, and believe me, they work! I posted my before and after dyno results. Increased HP and Torque all the way up the power curve.
Incidently, I swapped mine at the dyno in 14 minutes. I think thats a world record. (We wanted to test it before the car cooled down, some of the other porters allow the car to cool between pulls and report false claims)
Incidently, I swapped mine at the dyno in 14 minutes. I think thats a world record. (We wanted to test it before the car cooled down, some of the other porters allow the car to cool between pulls and report false claims)
07-03-2006, 05:01 PM
#6
Drifting
Member Since: Jul 2000
Location: Bremerton WA
Posts: 1,861
Likes: 0
Received 0 Likes
on
0 Posts
St. Jude Donor '09
Originally Posted by CYA-Vett
I have one of these intakes, and believe me, they work! I posted my before and after dyno results. Increased HP and Torque all the way up the power curve.
Incidently, I swapped mine at the dyno in 14 minutes. I think thats a world record. (We wanted to test it before the car cooled down, some of the other porters allow the car to cool between pulls and report false claims)
Incidently, I swapped mine at the dyno in 14 minutes. I think thats a world record. (We wanted to test it before the car cooled down, some of the other porters allow the car to cool between pulls and report false claims)
You are the undisputed champion
 07-03-2006, 05:09 PM
#7
Drifting
Hmmm, I didn't make any changes to the intake in the TB area.
Maybe I'll take a look-see next time it is off for a H/C install.
Maybe I'll take a look-see next time it is off for a H/C install.
07-05-2006, 11:44 AM
#8
Tech Contributor
Thread Starter
I've got pics of the install if anyone's interested. If not I'm not going to bother to figure out how to post them.
07-05-2006, 12:04 PM
#9
Somba master


Originally Posted by Joe_G
I've got pics of the install if anyone's interested. If not I'm not going to bother to figure out how to post them.
I'm beginnig to think I might be able to do this ( with some help).
Pictures of the different steps would really help me, as I'm really visually oriented.
Thanks,
GM
PS If you can't figure out how to post, you can PM them to me.
 07-05-2006, 12:05 PM
#10
Melting Slicks

Member Since: Oct 2005
Location: Goleta California
Posts: 2,516
Likes: 0
Received 2 Likes
on
2 Posts
Originally Posted by Joe_G
I've got pics of the install if anyone's interested. If not I'm not going to bother to figure out how to post them.
07-05-2006, 12:12 PM
#11
Tech Contributor
Thread Starter
Pics sent to GMoller, who will post. Thanks!
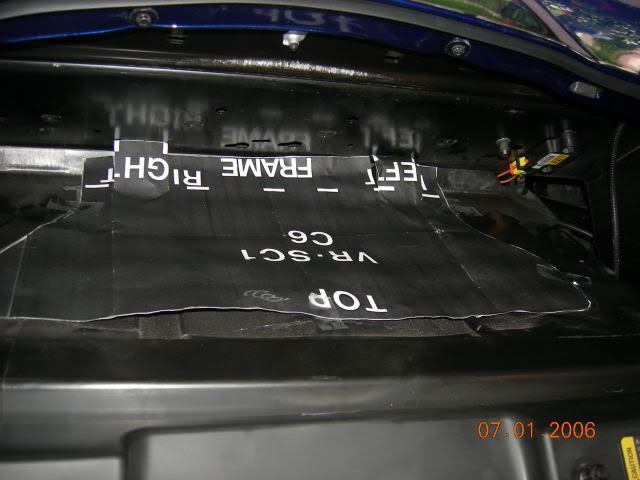
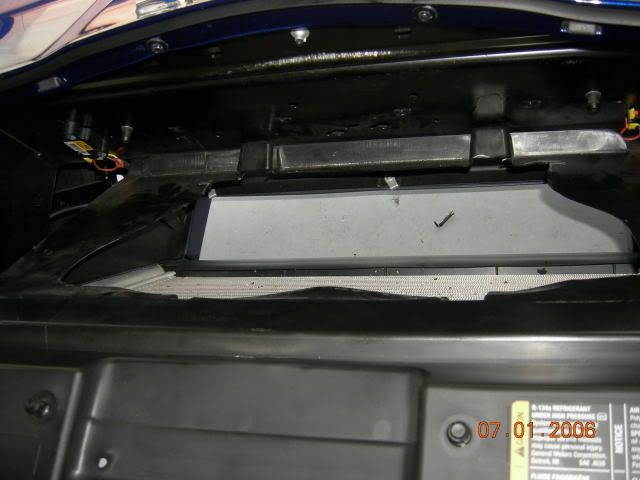
Gmoller, it's really easy to do. Other than the tricks above, be sure and cut the template around the "nubs" on the bottom of the radiator cover to that the part marked "frame" is really up against the frame. You can see what I mean in the pic I've taken.
Gmoller, it's really easy to do. Other than the tricks above, be sure and cut the template around the "nubs" on the bottom of the radiator cover to that the part marked "frame" is really up against the frame. You can see what I mean in the pic I've taken.
Last edited by Joe_G; 07-05-2006 at 12:58 PM.

 07-07-2006, 02:06 AM
#14
Drifting
Member Since: Jul 2000
Location: Bremerton WA
Posts: 1,861
Likes: 0
Received 0 Likes
on
0 Posts
St. Jude Donor '09
Those pics look good, Joe.
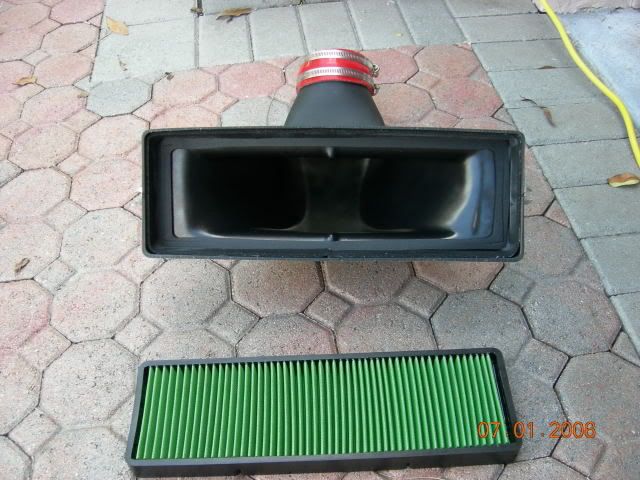
If I see it right, a guy who lives in a wet environment could run the ram air bottom in the dry season and perhaps make a simple frame to hold the filter tight with no ram air bottom in the wet season. That way the filter is far back in the cavity and still gets partial benefit even in the wet season. Would you agree?
If I see it right, a guy who lives in a wet environment could run the ram air bottom in the dry season and perhaps make a simple frame to hold the filter tight with no ram air bottom in the wet season. That way the filter is far back in the cavity and still gets partial benefit even in the wet season. Would you agree?
07-07-2006, 05:33 AM
#15
Tech Contributor
Thread Starter
Originally Posted by CHarris85Vette
Those pics look good, Joe.
If I see it right, a guy who lives in a wet environment could run the ram air bottom in the dry season and perhaps make a simple frame to hold the filter tight with no ram air bottom in the wet season. That way the filter is far back in the cavity and still gets partial benefit even in the wet season. Would you agree?
If I see it right, a guy who lives in a wet environment could run the ram air bottom in the dry season and perhaps make a simple frame to hold the filter tight with no ram air bottom in the wet season. That way the filter is far back in the cavity and still gets partial benefit even in the wet season. Would you agree?